HOLIDAY DONATION DRIVE - SUPPORT MSW - DO YOUR PART TO KEEP THIS GREAT FORUM GOING! (89 donations so far out of 49,000 members - C'mon guys!)
×


TBlack
-
Posts
1,309 -
Joined
-
Last visited
Content Type
Profiles
Forums
Gallery
Events
Everything posted by TBlack
-
 Brian, A 0.5 mm drill is, what, about a #75 or 76? You can get carbide or steel bits. The carbide will be sharper, but more brittle and break easily. The steel are more flexible and forgiving. The latter are available in packs of 5 from Micro-Mark for not too much (certainly not $300, that's ridiculous). Drill Bit City sells the carbide bits, again in sets of 5. I use a pin vice for what you are trying to do. Hope that's helpful. Tom
 -
Tying stays and shrouds to foremast top
TBlack replied to Scotty W's topic in Masting, rigging and sails
Scotty, You got it. The mast actually flairs out at that point, creating a shoulder for the stays to rest on. You can see the continuation of the shoulder indicated by the horizontal line on the mast to the left of where your 25 mm dimension stops. At this point, if you glue a couple of wedge shaped pieces on either side of the mast, you should be good to go. Tom -
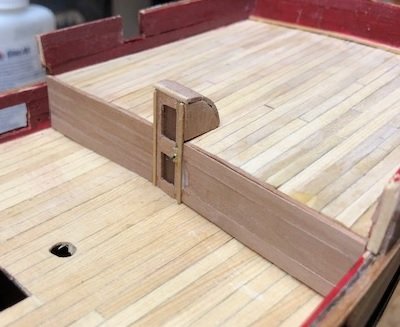
OK. Two ladders, now two balustrades to finish it off. These will be hand made with some stylist form, so may not exactly match. We'll see.
- 341 replies
-
- 12
-

-
- Sophie
- Vanguard Models
- (and 1 more)
-
Chuck, You once mentioned that the carved pieces will be available in 1:48 scale as well as your 3/8 scale. Is that still the case? Tom
-
I've made a ladder. Now my question is, should there be another one on the other side of the companionway to keep the symmetry?
- 341 replies
-
- 9
-
-
- Sophie
- Vanguard Models
- (and 1 more)
-
John, You got a nice finish on those ventilators; Kudos! Tom
-
Mark, I had envisioned that below the quarterdeck would look like this: The center area of the bulkhead is where the ladder and companionway will go. Im going to put the companionway in the center (I've already cut the pieces for that), and the ladder will go to the side. Tom
- 341 replies
-
- 6
-
-
- Sophie
- Vanguard Models
- (and 1 more)
-
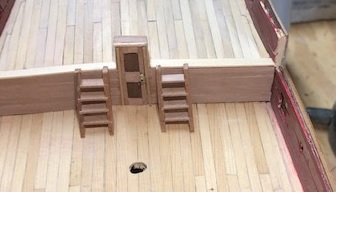
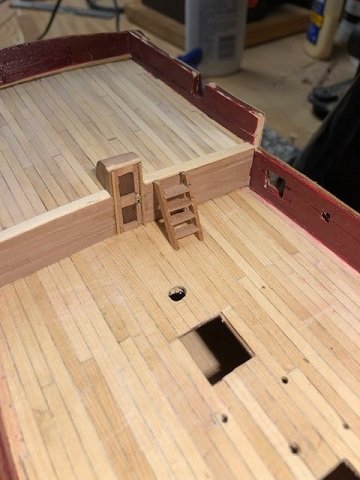
I can't use Speedwell as an example for ladder placement. Not enough room, so the center area will have to suffice for a ladder and a companionway. So that means I only have to make one ladder, but I'll have to make two railings. Tom
- 341 replies
-
- 5
-
-
- Sophie
- Vanguard Models
- (and 1 more)
-
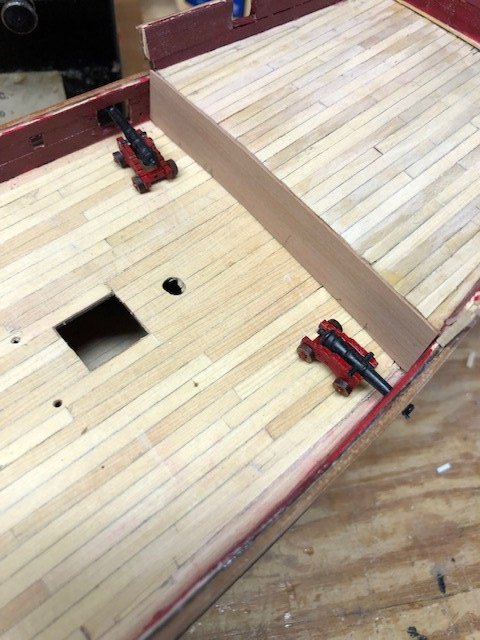
Mark, Not a race, right! But it is a question of quality and trying to measure up. Besides, according to NRG standards, this model shouldn't be built (being fictional), so I wonder if my membership will be revoked! With Jim's endorsement I'll go with a centered companionway. Notice Speedwell"s arrangement here: Notice the ladders come down right at the cannon placement. I want to do the same thing.
- 341 replies
-
- 2
-
-
- Sophie
- Vanguard Models
- (and 1 more)
-
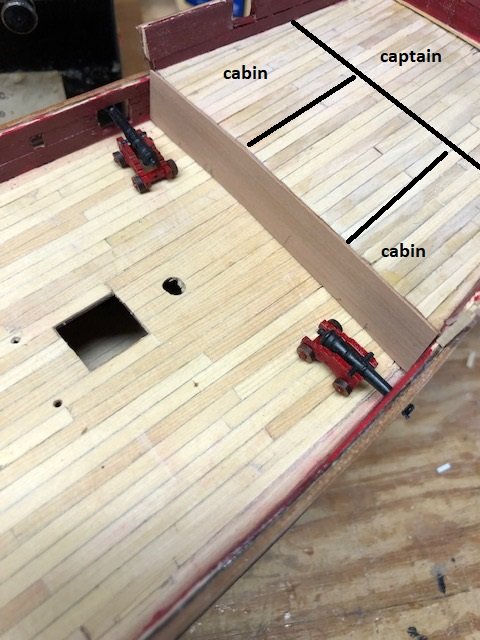
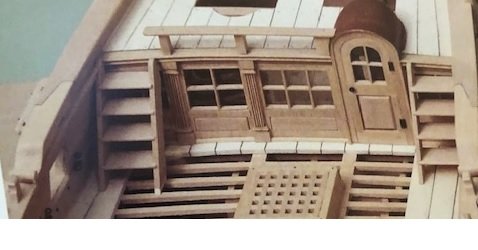
Next up is to make this bulkhead with companionway. My only references to companionways are Speedwell and Fair American. Speedwell seems a little too fancy for this craft. If anyone has an idea, let me know. I'm thinking that the companionway goes in the center which allows for two cabins on either side (Maturin, 1st Lieutenant) before the captain's cabin at the rear. I want to thank so many of you who are following this modest attempt. As I look at what you are accomplishing, I'm in awe and hope I can keep up. Tom

- 341 replies
-
- 4
-
-
- Sophie
- Vanguard Models
- (and 1 more)
-
I've got a couple of thoughts. they depend on whether you are going to paint over the affected area. If you're not painting, try collecting some sawdust from the wood in that area and mixing it with PVA glue and applying it to the area needing filling. If the area is going to be painted, then use a spackling compound to fill the gaps. Tom
-
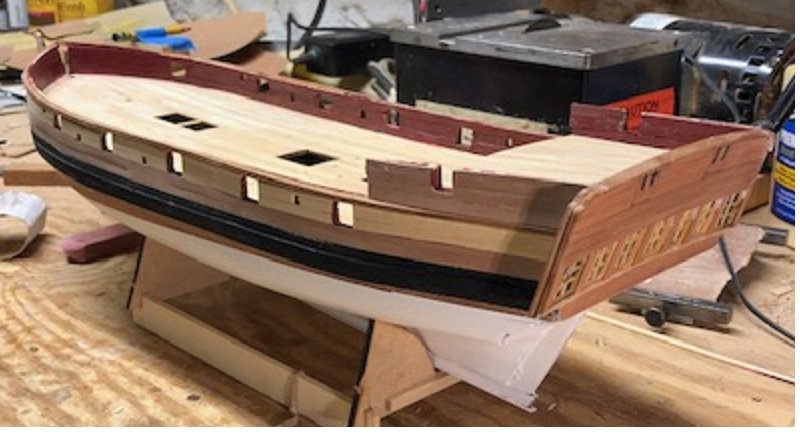
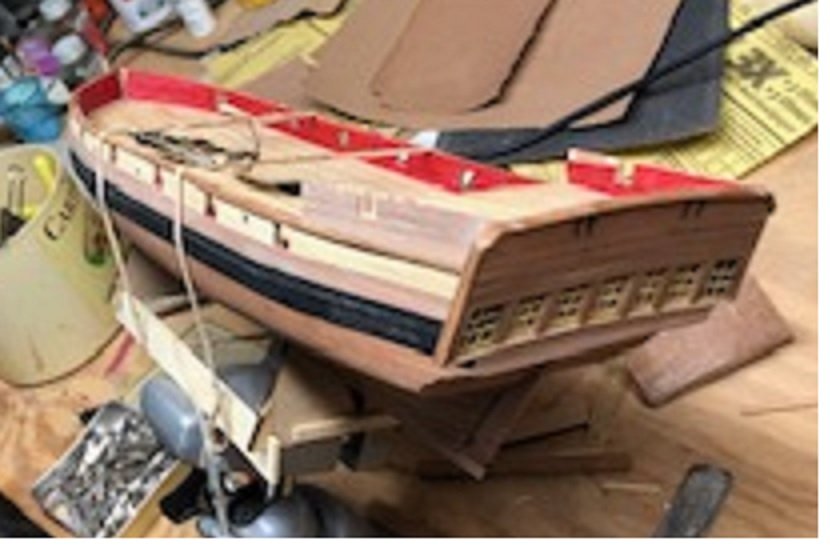
OK, now I've gotten the red toned down, and applied the below waterline paint. I've elected not to use the copper plates that come with the kit. There is no reference in the book about the bottom of the ship, and because she is described as being a plain and lumbering craft, I thought copper would be too fancy for her. Besides, it saves a lot of time to paint.
- 341 replies
-
- 11
-
-
- Sophie
- Vanguard Models
- (and 1 more)
-
The mizzen has no shrouds? Hard to believe. Tom
-
Yes and you gotta be in shape to do it! Tom
-
Yes, the cowls and trunks are too small on the model. Away with them! Besides in reality, there are 2 small ones up front, not one in the middle. Otherwise, you've got a beautiful looking model. TB
-
It looks like they cap them when underway, so no obstructions. Therefore, how will the model be displayed; underway or stationary? Tom
-
Yes, but you didn't need to do that, did you! You nailed it again! Confidence, my friend, confidence. TB
-
Keith says: That was a bit too close for comfort - about 3/8" I say: Looks like you nailed it! BTW, I don't understand why eccentric rings rather than smaller "centric" ones? Tom
-
Actually, Steve, the photo makes the new color lighter than in reality. As you say, beauty is in the eyes of the beholder! Tom
- 341 replies
-
- 2
-
-
- Sophie
- Vanguard Models
- (and 1 more)
-
Steve, Thanks for your research and diligence. I think, however, that I need to make the red darker, rather than lighter. I've added some brown to the red and gotten a shade that I can accept. Tom
- 341 replies
-
- 4
-
-
- Sophie
- Vanguard Models
- (and 1 more)
-
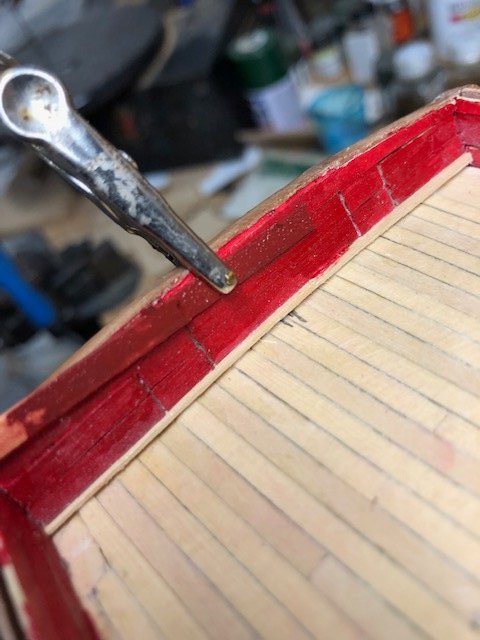
Thank you all for your thoughts. I've mixed a little brown into the red and come up with this that I think will work:
- 341 replies
-
- 5
-
-
- Sophie
- Vanguard Models
- (and 1 more)
-
So now I'm rethinking the red. Perhaps a little too bright. It's splotchy and needs a second coat anyway, so maybe tone it down a little. If I were Chuck P., I'd know just the right mix of paint to make it happen, but I'm not so stay tuned!
- 341 replies
-
- 4
-
-
- Sophie
- Vanguard Models
- (and 1 more)
-
OK, so you're threading the ratline thru a shroud at 1:96. The shroud is, therefore, mighty thin. How do you keep from sticking your finger with the needle? TB
-
OK, how about turnouts?