-
Posts
1,285 -
Joined
-
Last visited
Content Type
Profiles
Forums
Gallery
Events
Everything posted by TBlack
-
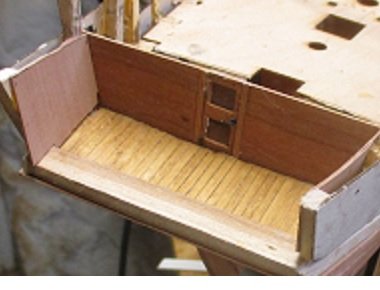
At this point in construction the instructions have you placing the lazer etched deck in place. I can't use it because the deck is wider aft than the Speedy. So I'm laying the deck with individual planks. Chris suggests putting in the bottom spirketting plank (painted) first which necessitates my adding the margin plank. Now I can either finish up the spirket planks, or do the deck, depending on my mood. I'm using yellow cedar for the deck. Chris wants me to use the pear planking for the spirketting, but, being the cheap Yankee that I am, and that it gets painted anyway, I'm using basswood for that planking.
- 326 replies
-
- Sophie
- Vanguard Models
-
(and 1 more)
Tagged with:
-
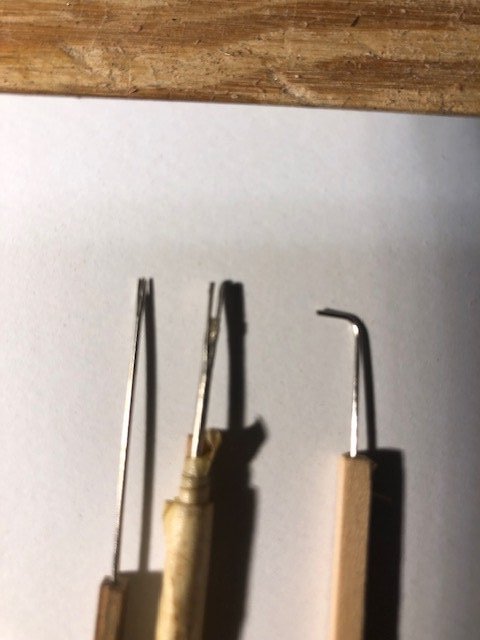
Ron, thanks for the tip on the nozzle cleaner. Most useful. Also, I suspect that real sails weren’t uniform in color either. More realism! Tom
- 542 replies
-
- Sphinx
- Vanguard Models
-
(and 3 more)
Tagged with:
-
I've done all I want to do with the "great cabin". I had to spend some time doing design work to make sure the quarterdeck beams were of the proper size and placement. I'm in the process of making those now, there will be 4.
- 326 replies
-
- Sophie
- Vanguard Models
-
(and 1 more)
Tagged with:
-
Getting the upper ones shaped around the hull is challenging; looks like you got it, though. Tom
- 200 replies
-
- Whaling Bark
- Charles W Morgan
-
(and 1 more)
Tagged with:
-
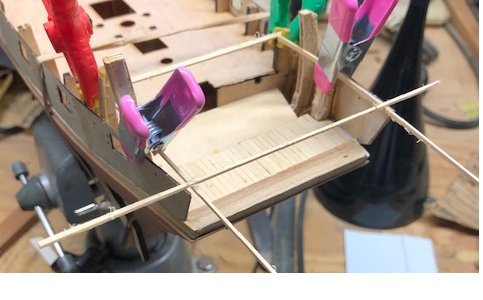
Great cabin deck planked. The crazy arrangement of sticks in the picture is verifying that everything is square and that there is about 5'7'' headroom between quarterdeck beams. We know from the book that Aubrey could only stand fully up between the beams. Also the sticks are telling me that the quarterdeck will, in fact, hit the transom just as I had designed it. This is all working out much better that I could have expected. I thought about what kind of treatment for the cabin deck, and was inspired by Greg Herbert's treatment of the deck in Speedwell which, with its multiple carvings, is a much snappier craft than humble Sophie. Tom
- 326 replies
-
- Sophie
- Vanguard Models
-
(and 1 more)
Tagged with:
-
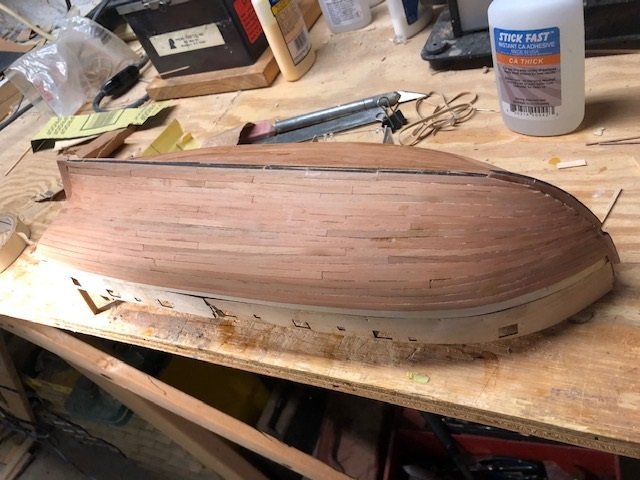
Bit of an up-date: Second planking installed, albeit slowly. Not my favorite part of the construction.: Having done that, I think I'm going to work on the captain's cabin next. It would be nice to see the other side of this vessel for a while. Tom
- 326 replies
-
- Sophie
- Vanguard Models
-
(and 1 more)
Tagged with:
-
Keith, Shouldn't "toffs" be capitalized? In any event, the way you tell the real sailors is look at their shoes. Wellies work well; on this side of the pond we do topsiders. Tom
-
Tom, I'm following you closely on this, as I have to do it with my HMS Sophie build (for the first time) Tom
- 200 replies
-
- Whaling Bark
- Charles W Morgan
-
(and 1 more)
Tagged with:
-
- 3,560 replies
-
- clipper
- hull model
-
(and 2 more)
Tagged with:
-
Tom, What kind of wood did you use to prevent crumbling at that small size?
- 200 replies
-
- Whaling Bark
- Charles W Morgan
-
(and 1 more)
Tagged with:
-
Tom, the reinforcements around the chock holes are particularly neat and uniform. What's the trick? Tom
- 200 replies
-
- Whaling Bark
- Charles W Morgan
-
(and 1 more)
Tagged with:
-
I know, but gives such insight to the author.
- 3,560 replies
-
- clipper
- hull model
-
(and 2 more)
Tagged with:
-
I don't even want to think about why a surgeon would need an 18" clamp.
- 3,560 replies
-
- clipper
- hull model
-
(and 2 more)
Tagged with:
-
Whoa! Looks fantastic! Very crisp. Tom
- 200 replies
-
- Whaling Bark
- Charles W Morgan
-
(and 1 more)
Tagged with:
-
Keith, I'm reminded of the 3 test rule: 10' away, 3' away, right up close. From your photos, it looks like "right up close"; still looks good! Tom
-
David, Did you notice that Vanguard (Chris) now sells a hull, completely formed, with ribs, so all you have to do is add the interior? In my Sophie build, which is based on Speedy, I'm tempted to just buy the hull. Yours turned out exceptionally well, but it's a bugger to get just right. BTW, That mouse turned out really well. Gotta try it! Tom
- 91 replies
-
- Speedy
- Vanguard Models
-
(and 1 more)
Tagged with:
-
Looks pretty good to me. Also, the deck color came out well. Making good progress! Tom
- 200 replies
-
- Whaling Bark
- Charles W Morgan
-
(and 1 more)
Tagged with:
-
Kev, I'm not sure what you mean by "seized twice". Do you mean is the shroud wrapped around the deadeye and then seized just at the deadeye and then farther up the shroud? And, of course, there are no shrouds at the bowsprit, just stays and no deadeyes. Tom
About us
Modelshipworld - Advancing Ship Modeling through Research
SSL Secured
Your security is important for us so this Website is SSL-Secured
NRG Mailing Address
Nautical Research Guild
237 South Lincoln Street
Westmont IL, 60559-1917
Model Ship World ® and the MSW logo are Registered Trademarks, and belong to the Nautical Research Guild (United States Patent and Trademark Office: No. 6,929,264 & No. 6,929,274, registered Dec. 20, 2022)
Helpful Links
About the NRG
If you enjoy building ship models that are historically accurate as well as beautiful, then The Nautical Research Guild (NRG) is just right for you.
The Guild is a non-profit educational organization whose mission is to “Advance Ship Modeling Through Research”. We provide support to our members in their efforts to raise the quality of their model ships.
The Nautical Research Guild has published our world-renowned quarterly magazine, The Nautical Research Journal, since 1955. The pages of the Journal are full of articles by accomplished ship modelers who show you how they create those exquisite details on their models, and by maritime historians who show you the correct details to build. The Journal is available in both print and digital editions. Go to the NRG web site (www.thenrg.org) to download a complimentary digital copy of the Journal. The NRG also publishes plan sets, books and compilations of back issues of the Journal and the former Ships in Scale and Model Ship Builder magazines.


