ChrisLBren
-
Posts
769 -
Joined
-
Last visited
Content Type
Profiles
Forums
Gallery
Events
Everything posted by ChrisLBren
-
 Looks wonderful Gaetan !
 -
Narrowing down the field for first ship model
ChrisLBren replied to Bill Hime's topic in Wood ship model kits
I will say this Bill - both Confederacy and Syren have some of the most comprehensive instructions you will find today and are excellent/accurate designs by Chuck Passaro - who generously offers tech support. I'd go with these over the Mamoli or Corel kits. But then again, build what you passionate about. Look forward to seeing a build log ! Best, Chris -
Narrowing down the field for first ship model
ChrisLBren replied to Bill Hime's topic in Wood ship model kits
Hi Bill, I'm currently scratch building the Confederacy using Chucks plans and instructions. I have built lets see Latinas Harvey, HMS Bounty, Panarts Royal Caroline, Corels Wappen Von Hamburg (unfinished) and Bob Hunts Fair American (also unfinished). With basic woodworking skills - all of these models are in the same range as far as difficulty - the main difference being length of build which can be a bear. Continued enthusiasm, dedication and effort towards a modeling subject in my opinion are the biggest challenges as far as ship modeling is concerned. Thats why there are so many unfinished builds (including two of my own staring at me in my office) Confederacy is clocking in as my longest build (4 years next month) - but then again I'm scratching it. As a kit should take less than half this amount of time. Hope this helps - good luck in your selection, Chris -
Really cool Rusty !
-
Hey Joe, I'm buying Volume 2 sooner rather than later and possibly the Le Gros Ventre plans enlarged to 1/36 for my next build. Chris
-
I'm blown away by this book (and overwhelmed). This book totally helps me decipher the set of Boudriots 74 Gun Ship Plans in French I bought last year on this site. In conjunction with my recent purchases of the "Le Gros Ventre" and the "Commerce De Marseille" monographs (and the rumored purchase of Frolichs "Art of Ship Modeling" by my wife for my Bday next week) - I'm well on my way!
-
Miniature Spindle Sander
ChrisLBren replied to ChrisLBren's topic in Modeling tools and Workshop Equipment
Yeah thats also an option - I dont own a drill press and probably should. -
Miniature Spindle Sander
ChrisLBren replied to ChrisLBren's topic in Modeling tools and Workshop Equipment
Actually looking at the Shop Fox Spindle Sander on Amazon - sells for around 140 dollars. Anyone use this one ? I think between a spindle and a Byrnes Sander should make assembling frames easier. (especially with my crappy scroll sawing skills) -
Hey Group, I want to pick up one of these - think it will come in handy when sanding the inside of frames - but am wondering if they are too powerful for this sort of use. Does one exist (maybe be another great tool for Jim Byrnes to develop) that would work for my purposes ? I also want to use this to sand/shape my headrails on Confederacy. Would I be better off just picking up on Ebay one of the Dremel drill press attachments for my variable speed Dremel and clamping it to my work bench ? Thanks, Chris
-
Nice work G - Ill be following this one - hoping to get to the "Big Belly" next year
-
ebonizing boxwood
ChrisLBren replied to Kurt Johnson's topic in Painting, finishing and weathering products and techniques
Pear bends very easily - on my Confederacy - I built the wales and dyed them on the model - using a demarcation line and Tamiya tape - I was successful not having it bleed onto the stem. I then planked the rest of my model afterwards. -
Looks sweet Ben !
-
ebonizing boxwood
ChrisLBren replied to Kurt Johnson's topic in Painting, finishing and weathering products and techniques
Go with Fiebings Black Shoe dye on Swiss Pear for your wales - it takes the dye better than boxwood. I use 4 coats - they dry instantly then buff with an old t shirt. I then top coat with Watcos Danish Oil. -
Hi Clare Im interested in the first three books - please send me a PM Chris
-
Congrats John - shes a beauty !!!!
-
Unless your name is Chuck - I wouldn't attempt these with anything other than a hardwood
- 290 replies
-
- 4
-

-
- confederacy
- frigate
- (and 1 more)
-
Nice work Toni !
-
Thanks guys - actually this is the third one on this side - the other side I'm on number two ! Good thing I'm in no hurry to finish...
-
I would think so Aldo - if i get some time ill run an experiment for you with a spare 1/8 by 1/16 strip soaking and using a jig Chris
-
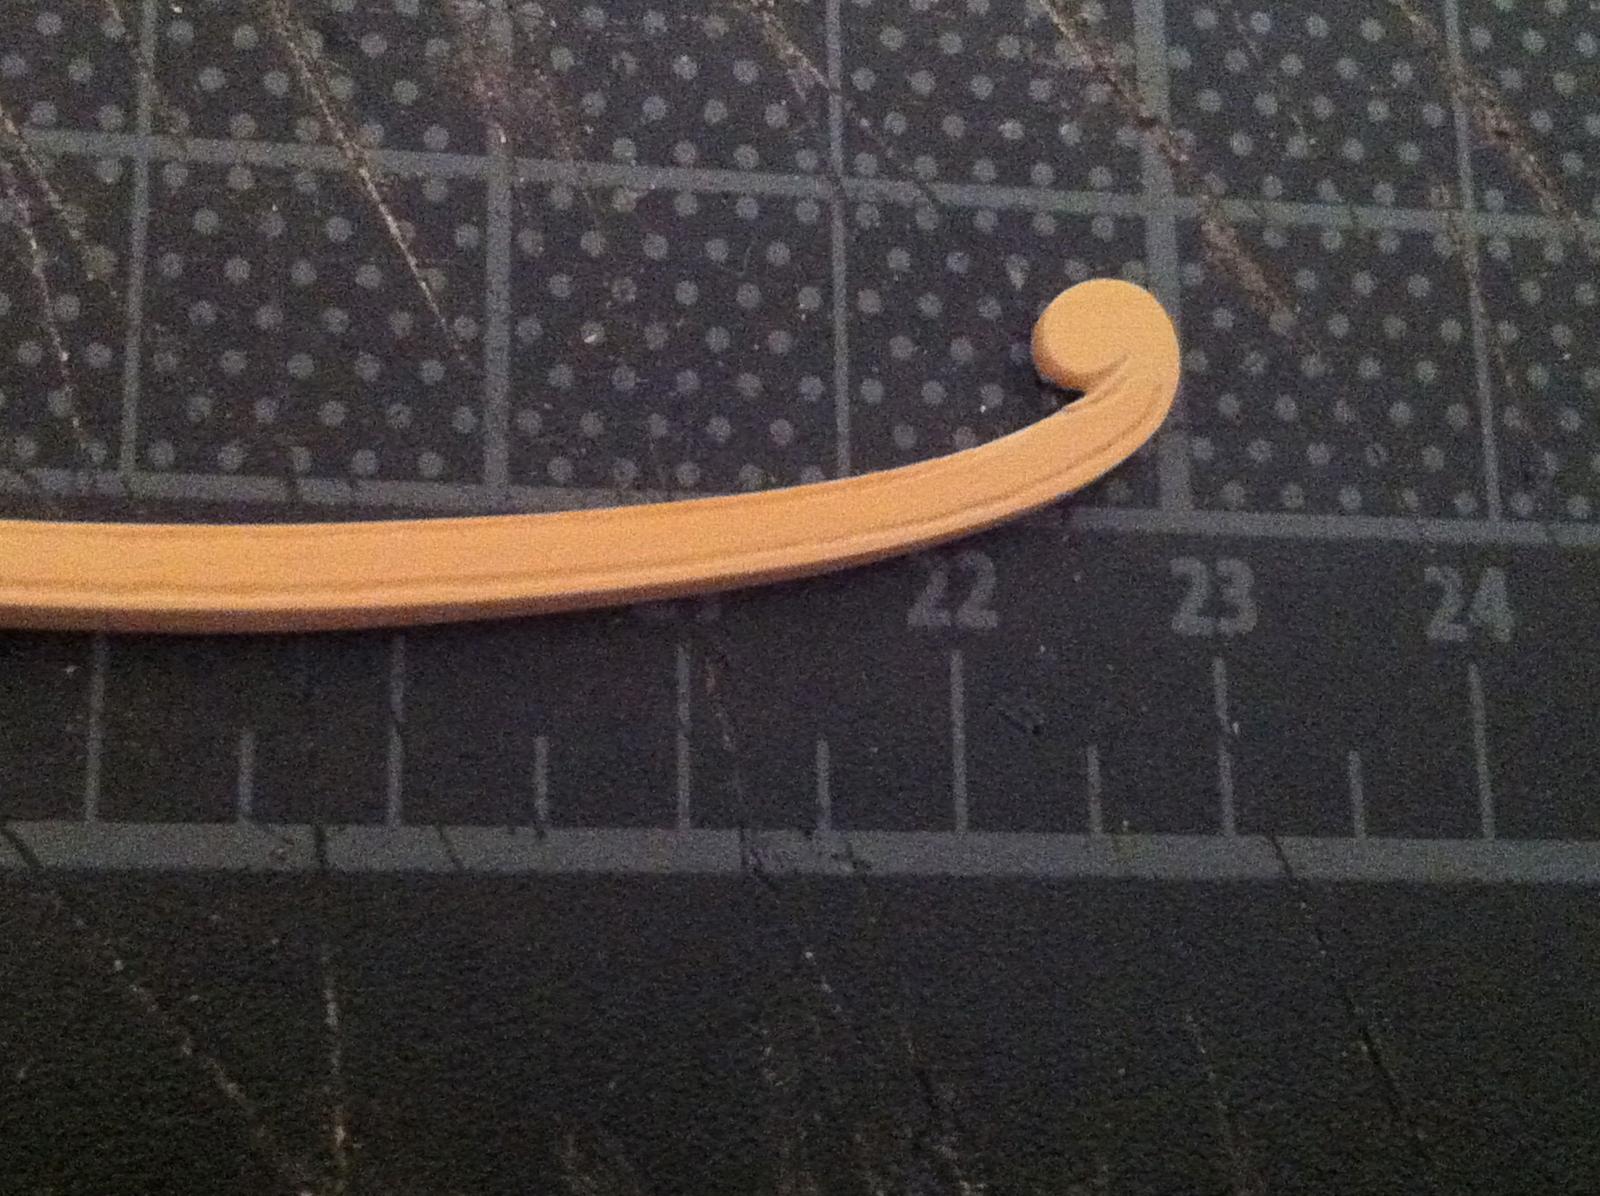
This phase is taking forever (then again my time in the shop is limited). It takes a good amount of time to cut out and sand a rail that fits your model to spec and then this happens - the boxwood crumbles as you are carving the molding. And im using a hard wood... The scrap box is growing......

- 290 replies
-
- 3
-
-
- confederacy
- frigate
- (and 1 more)
-
I dunno Aldo - if it were me I would use Boxwood exclusively. In my opinion its so much easier to work with hardwoods and Costello can easily be edge bent if you use a jig, soak the planks and let them dry.
-
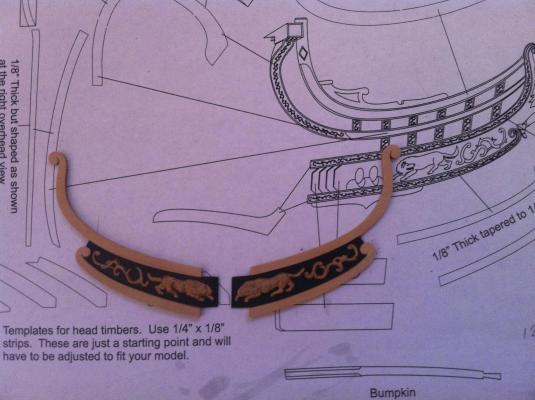
Thanks Mark ! The rails are my carving - the wolves and the filagree are Chucks resin copies painted to look like boxwood. I cut them out of his resin trailboards and added them to my trailboards I cut to spec out of 1/32nd swiss pear on my model - then dyed with Fiebings. Again nice to be able to rely on Chucks beautiful carvings for this part of the build.
- 290 replies
-
- 2
-
-
- confederacy
- frigate
- (and 1 more)
-
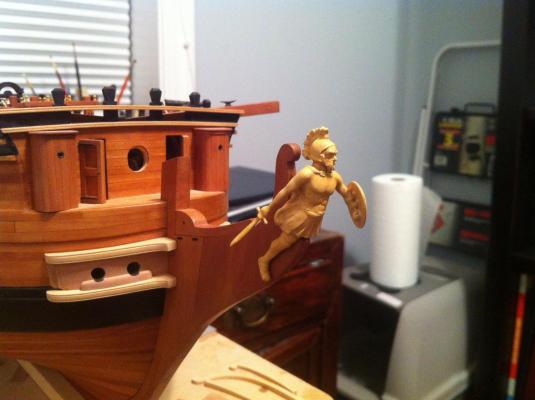
Thanks ! Trail boards are built - need to finish the rails with their grooves/moldings
- 290 replies
-
- 8
-
-
- confederacy
- frigate
- (and 1 more)
-
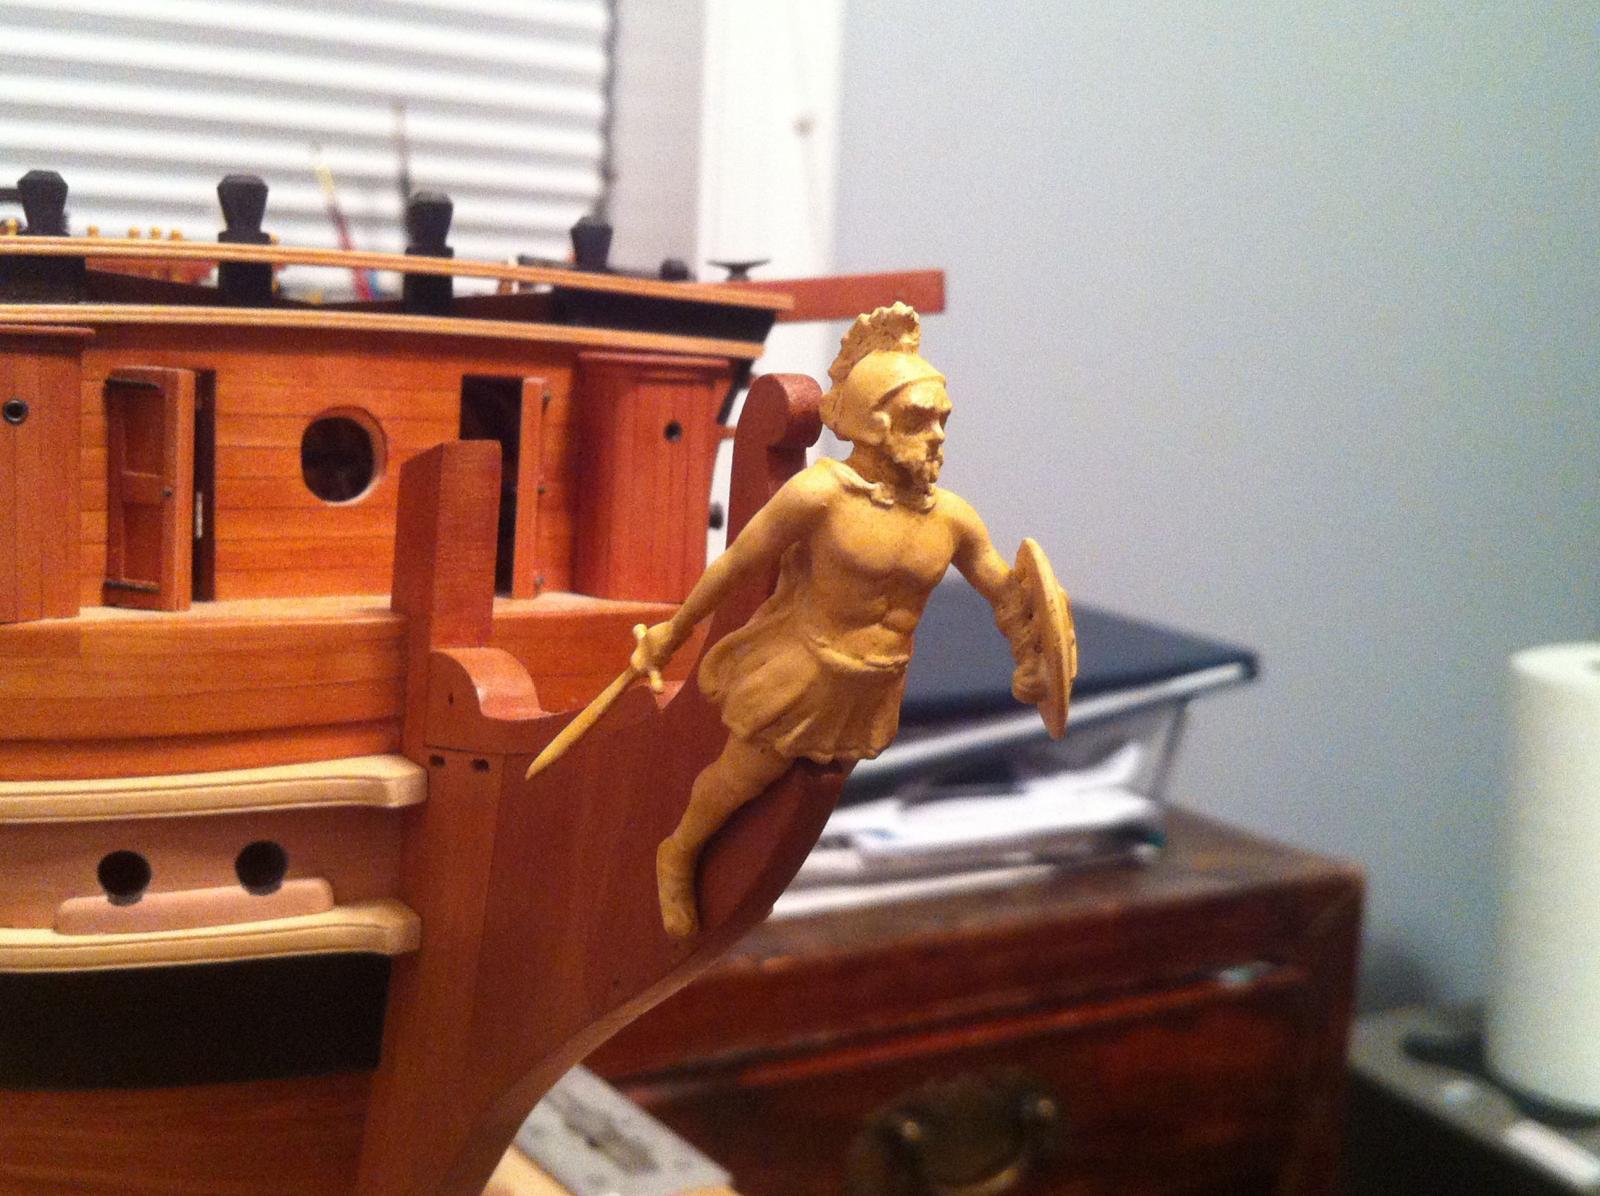
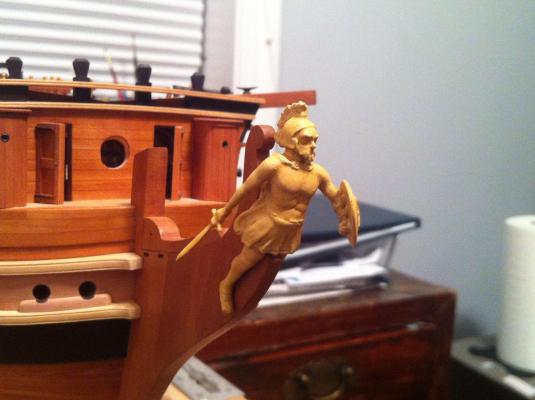
No Rob (I wish) I used Chucks resin copy painted to resemble boxwood. I wont have this luxury on my next builds....
-
With some care - Chucks Figurehead paints up nicely. I'm hoping to get the rails and trailboards finally installed by the end of next week.
- 290 replies
-
- 9
-
-
- confederacy
- frigate
- (and 1 more)