HOLIDAY DONATION DRIVE - SUPPORT MSW - DO YOUR PART TO KEEP THIS GREAT FORUM GOING! (Only 66 donations so far out of 49,000 members - Can we at least get100? C'mon guys!)
×


ChrisLBren
-
Posts
781 -
Joined
-
Last visited
Content Type
Profiles
Forums
Gallery
Events
Everything posted by ChrisLBren
-
 Looking good - I don't mind the sheen - Im sure the flash from your camera is enhancing it ! Brings back memories from my build three years ago when I was at that stage ! Chris
 -
Hey Kevin, We are all our own worse critics - trust me - I almost gave up on my Confederacy build a half dozen times - mostly because it wasn't meeting my own perception of "perfection" Stick with the build - again I admire anyone who can build like you with plastic - lord knows I can't….. Happy holidays, Chris
-
Looks great Rusty - i can't tell from the photo - do you have a top finish on it or not ? Ive seen the dyed used with or without - personally i like a bit of glow on my dyed wales so in my case Danish OIl Worked well as does Tung Oil. Im sure Wipe On Poly wood have a similar effect.
-
Hi Rusty, Good luck with the Fiebings - love this stuff - just make sure to mask everything - it splatters easily. Chris
-
Nice work Bob ! I know how tricky building those lights can be from my experience on Confederacy. Really well done
-
Love it !!!!! The use of one wood - Pear - and iron fittings - looks spectacular !
-
Thanks Alexandru - Ive got the Commerce de Marseille Monograph - another 3 decker - and am thinking about building her in 1/48th. Enjoying watching your build, Chris
-
Hi Alexandru, I'm admire your work immensely - curious - how long long ago did you start your build and when do you foresee finishing ? Also will you mast and rig ? Thanks, Chris
-
Thanks man - I'm merely imitating Bernard Frolich's approach - using boxwood, swiss pear and dyed swiss pear to resemble Ebony - all woods sourced from Hobby Mill - which I can not recommend highly enough.
- 290 replies
-
- 1
-

-
- confederacy
- frigate
- (and 1 more)
-
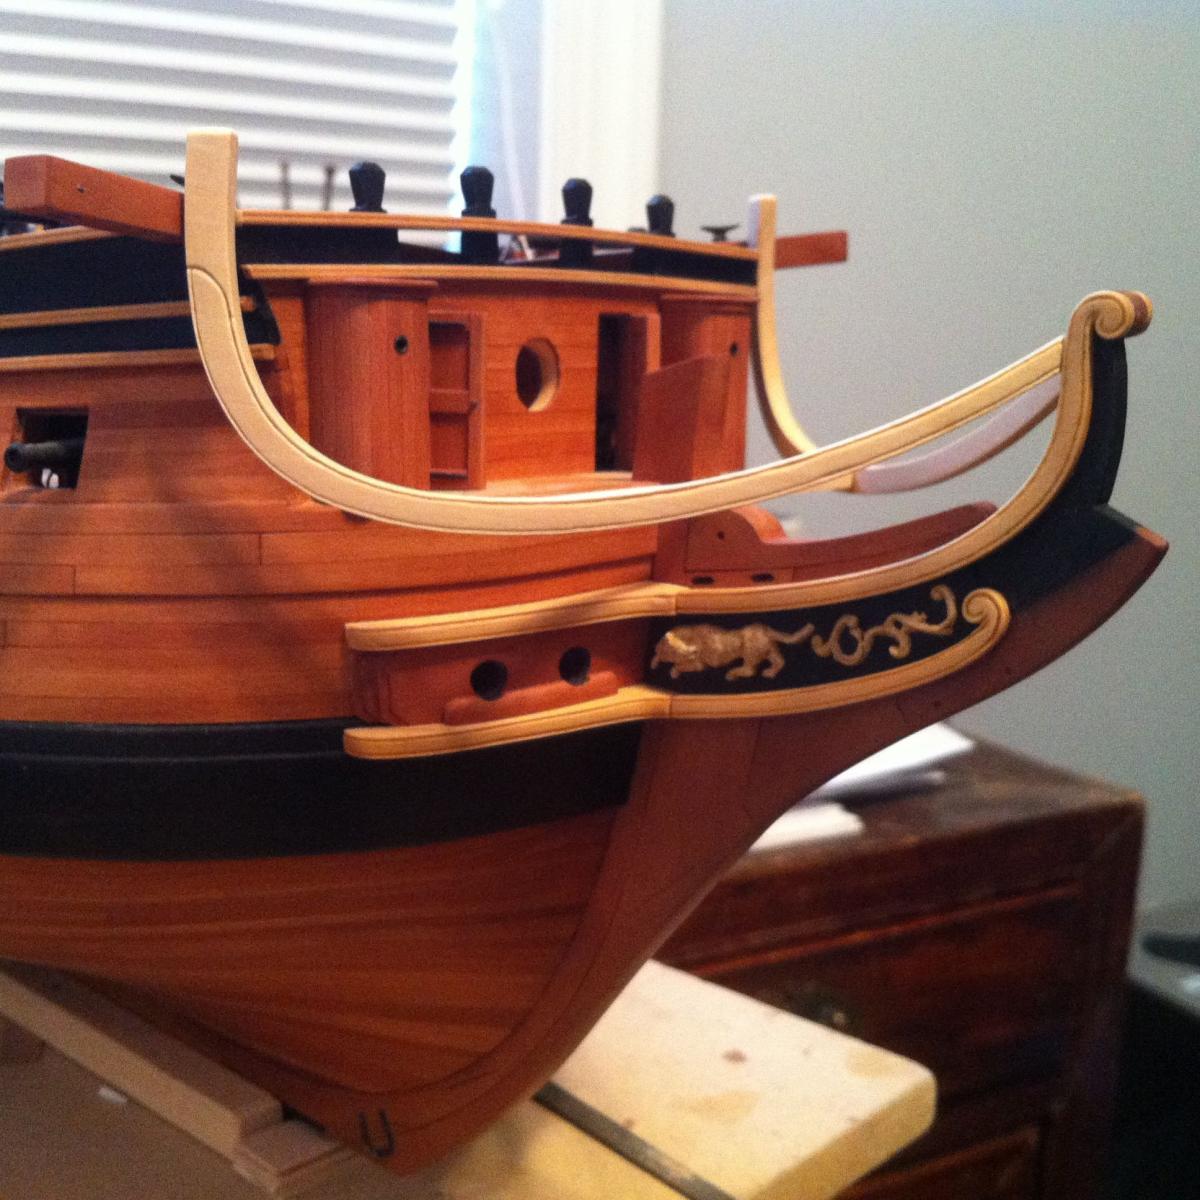
Thanks guys - next up the head timbers - which should be fun/challenging. I've got plenty of 1/8 costello boxwood! Then its really all down hill from there to finish her up.
- 290 replies
-
- 1
-
-
- confederacy
- frigate
- (and 1 more)
-
Rail construction continues… And everything is lining up - unbelievable !!!


- 290 replies
-
- 11
-
-
- confederacy
- frigate
- (and 1 more)
-
Looks gorgeous - I don't have the patience to bend Ebony - nice work !
-
Incredible !!!
-
Congrats Remco - looks gorgeous !!!
-
Beautiful carving Sherry - I would suggest simply using whatever finish you are using on the rest of your model. On my Confederacy build Im using 100 percent Tung Oil, Danish Oil and Sanding Sealer - the Tung finish gives the most glow out of the three.
-
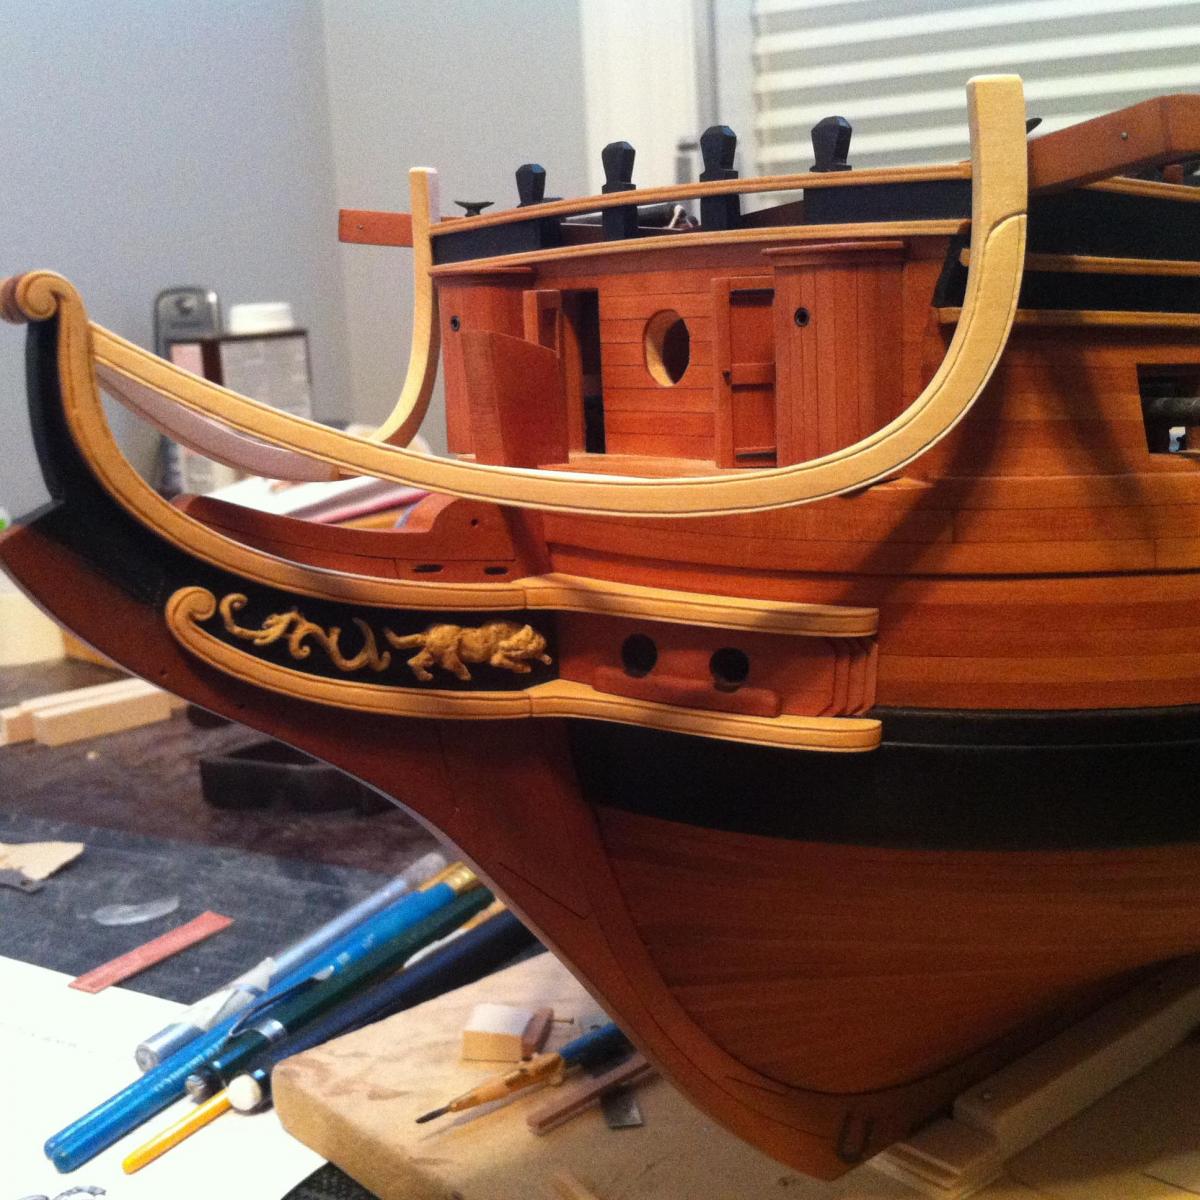
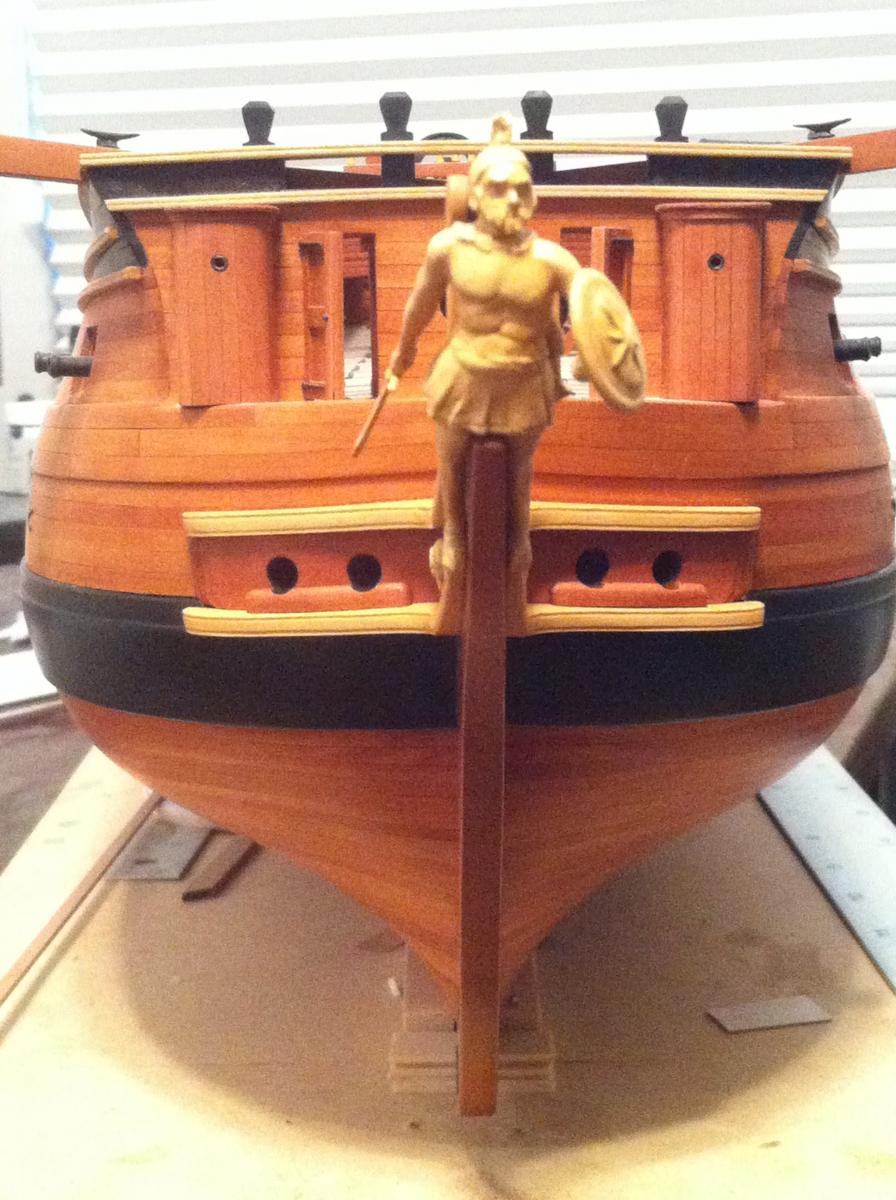
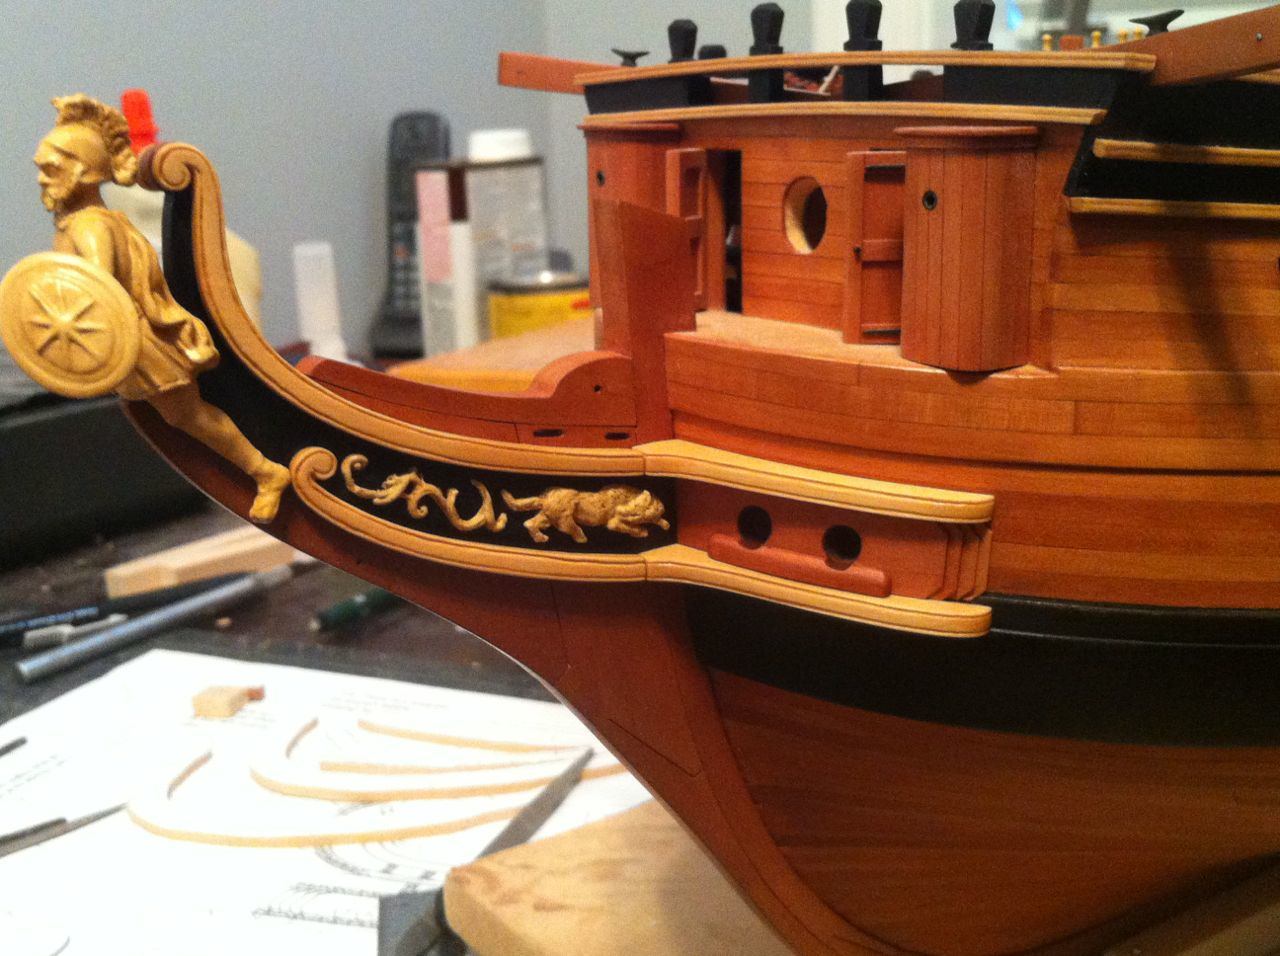
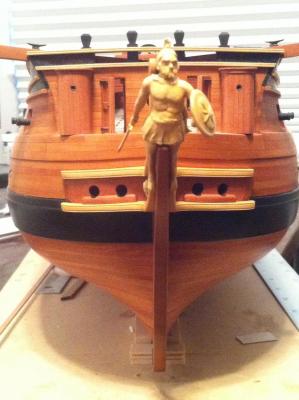
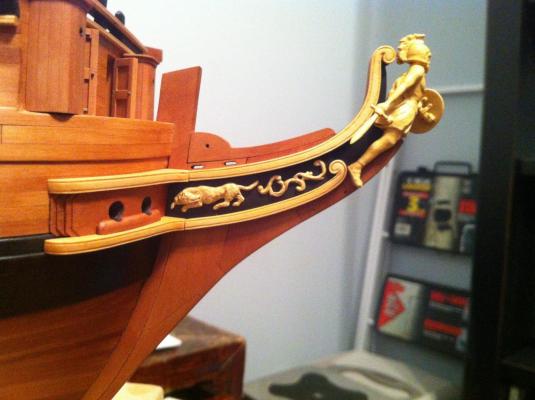
Thanks Chuck and Mark ! Trail board is dyed swiss pear and the humanity - thanks to you Chuck - are your resin copies painted to resemble boxwood. Now if one day I can carve as half as good as Chucks sculptures…..
-
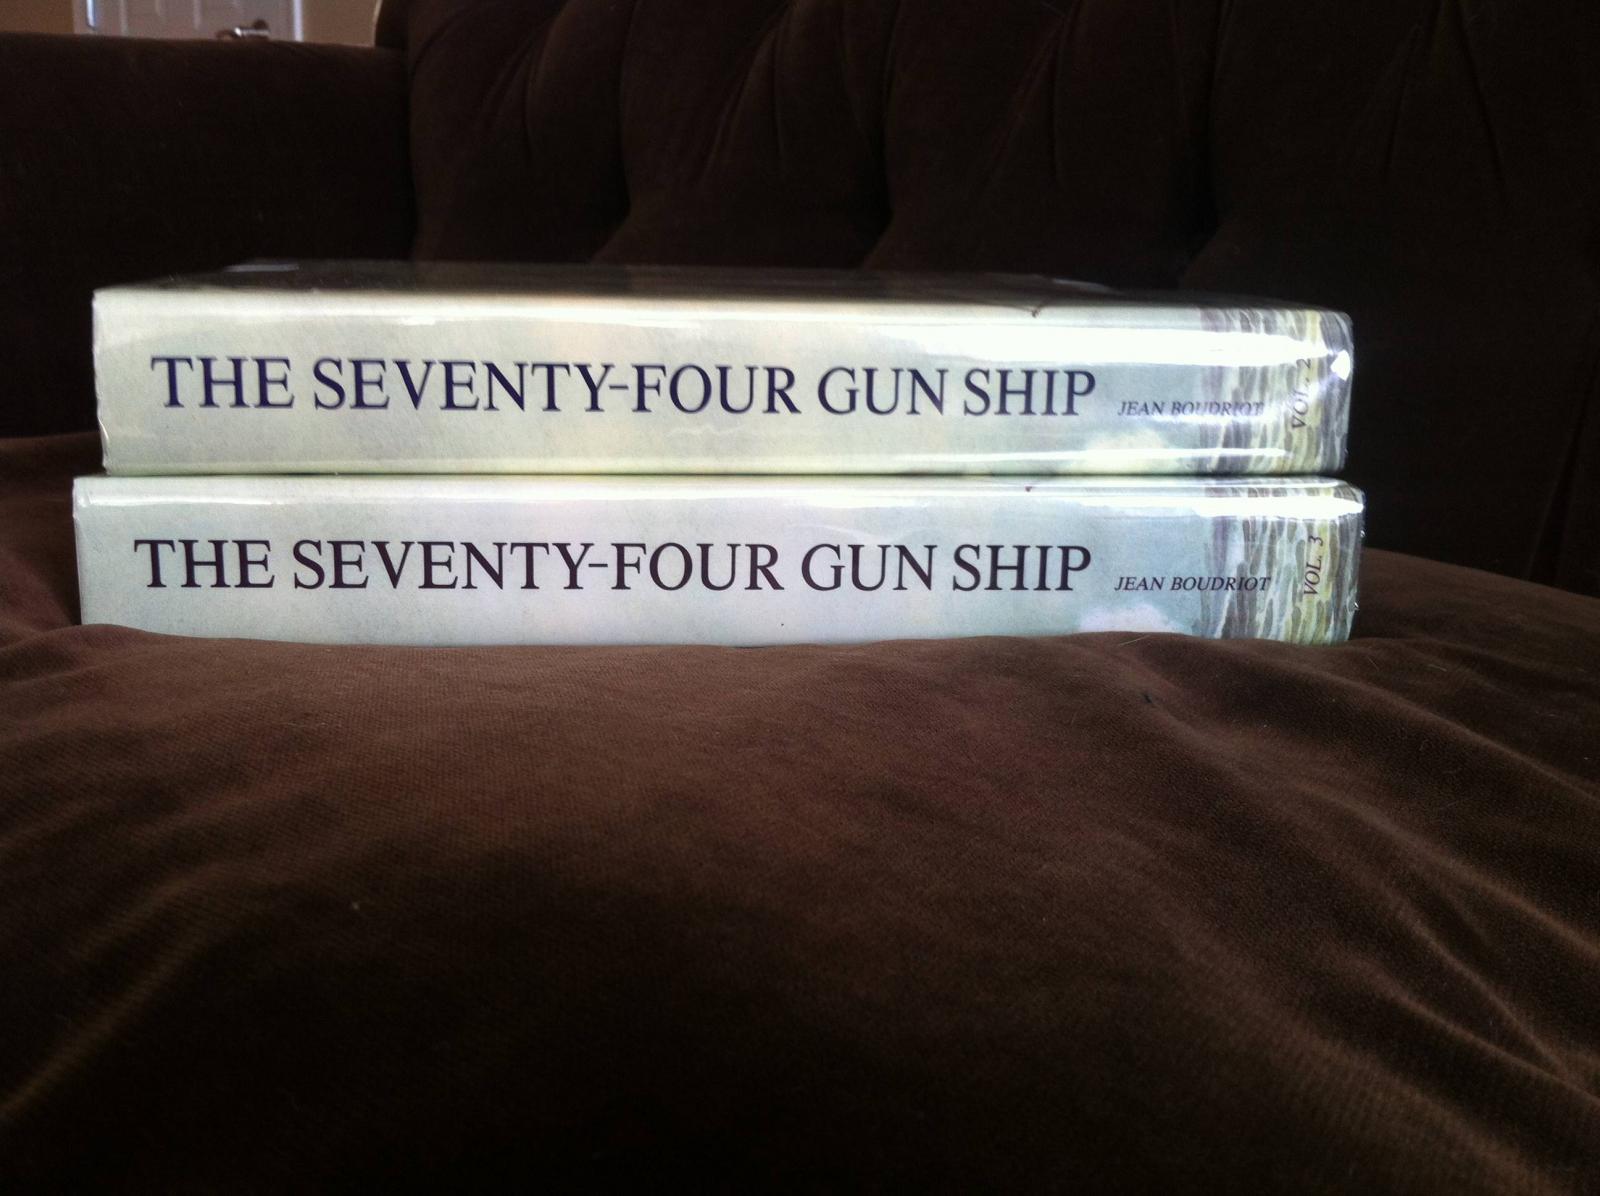
They arrived today - Volumes 2 and 3….. Now I can become an expert on French Naval Architecture thanks to Mr Boudriot!

- 290 replies
-
- 3
-
-
- confederacy
- frigate
- (and 1 more)
-
Thanks Bob ! Appreciate you checking in - I've always admired your work - and watching your progress on Essex.
-
Thanks Ben - was just editing a better photo when you sent your reply. Honestly i think carving is the most important skill for scratch building - making frames and repetitive assemblies doesn't scare me with a full frame build - its being able to do justice to these gorgeous vessels with sculpture - which is what draws the eye - thats the artistry. Im feeling semi OK with carving rails/filargee - next is being able to carve humanity and not relying on Chucks beautiful resin copies painted to resemble wood.
- 290 replies
-
- 2
-
-
- confederacy
- frigate
- (and 1 more)
-
Not perfect - but the cheeks are carved and installed...

- 290 replies
-
- 17
-
-
- confederacy
- frigate
- (and 1 more)
-
Hey Kevin, Enjoying watching this build - I'm horrible at plastic models - in admiration. Growing up every weekend my Dad would take me to the hobby shop to buy a Tamiya or Hasegawa kit that I would trash. Most recently I destroyed a Pocher Monza back in 09. Damn - sticking with wood... Chris
-
Hey Ben, Looks great - perfect proof of concept - now the big question is - are you completing Confederacy or jumping to the Pegasus ? Congrats! Chris
-
ancre Le Commerce de Marseille by Zbigniew
ChrisLBren replied to Zbigniew's topic in - Build logs for subjects built 1751 - 1800
Wow - beautiful work !!! I recently purchased this monograph - I'll be following your log closely, Chris