usedtosail
-
Posts
2,424 -
Joined
-
Last visited
Content Type
Profiles
Forums
Gallery
Events
Everything posted by usedtosail
-
 That's a good idea. I plan to leave the main hatch will be open without any gratings, but a boat will be placed on top of the beams. I could make the boat removable though. I'll have to think on that one.
- 1,354 replies
-
- 1
-

-
- constitution
- model shipways
- (and 1 more)
-
It may be flea surgery, but you seem to have mastered it. That rudder and hardware look great.
- 1,756 replies
-
- 1
-
-
- constitution
- constructo
- (and 1 more)
-
Thanks alde, I agree. Getting everything to fit together correctly over the course of many months, if not years, is a real trick and it scares the crap out of me sometimes, trying to anticipate it all. Thanks Steve. I just hope some of this will be visible when it is all put together. Even if not, the practice is invaluable and will help on future builds.
-
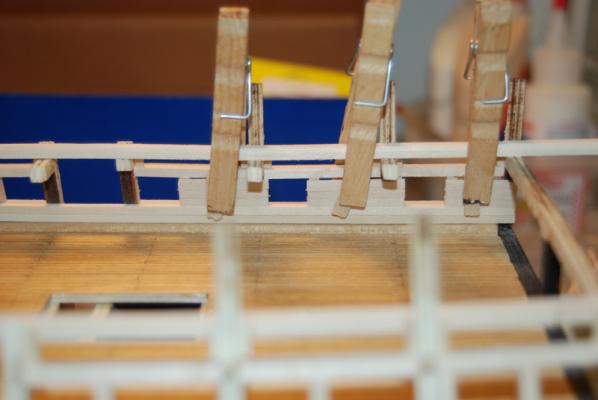
Thanks Rich. They work great for many things, don't they? And since they are wood they don't make marks like metal clamps can do.
-
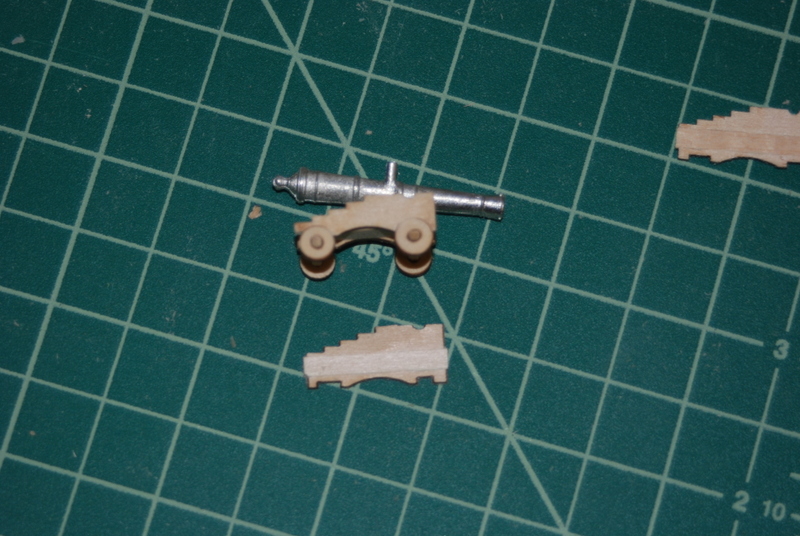
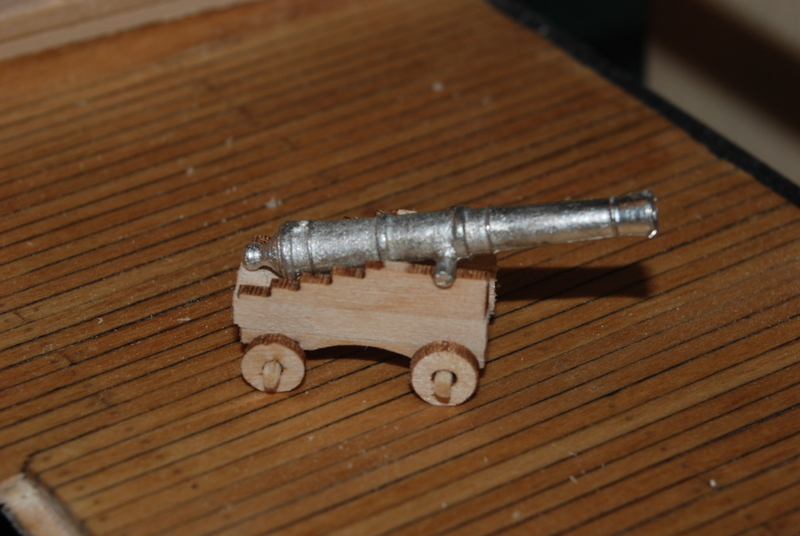
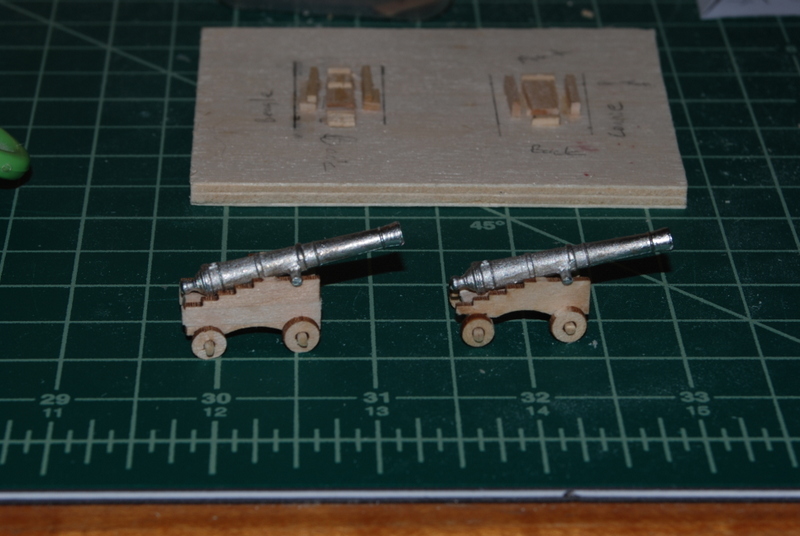
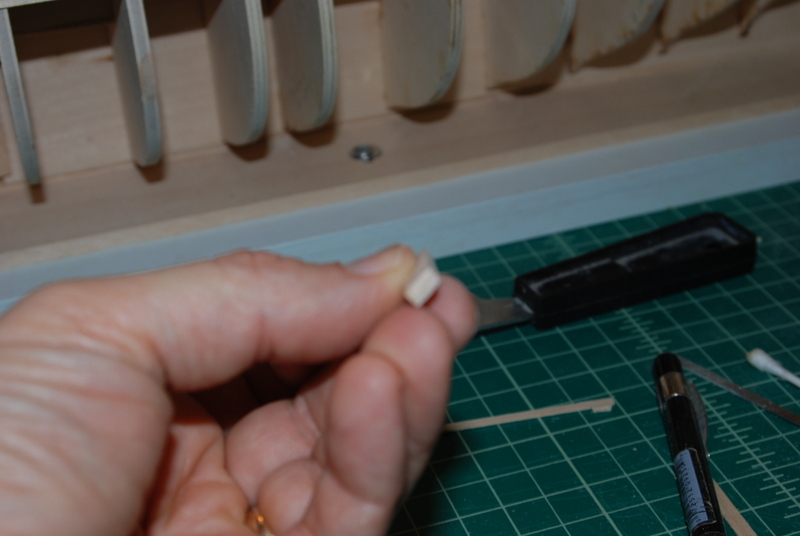
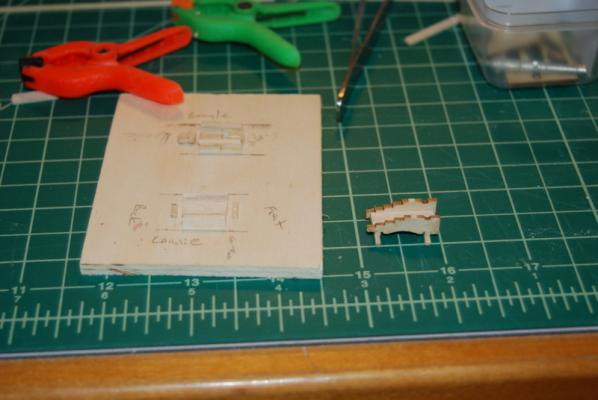
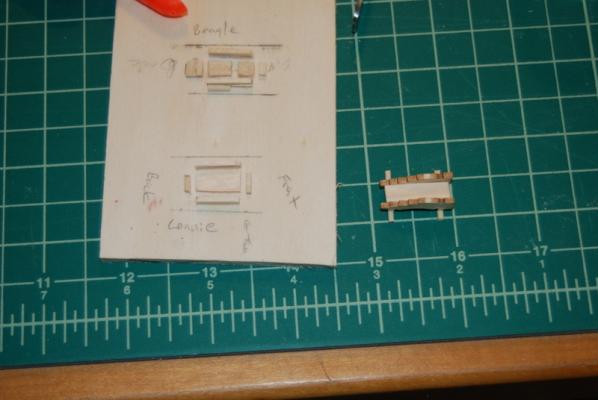
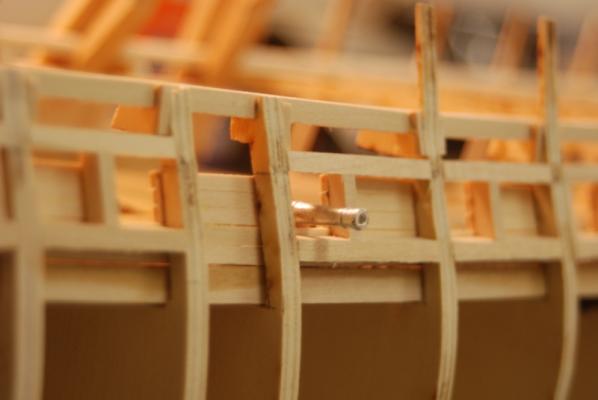
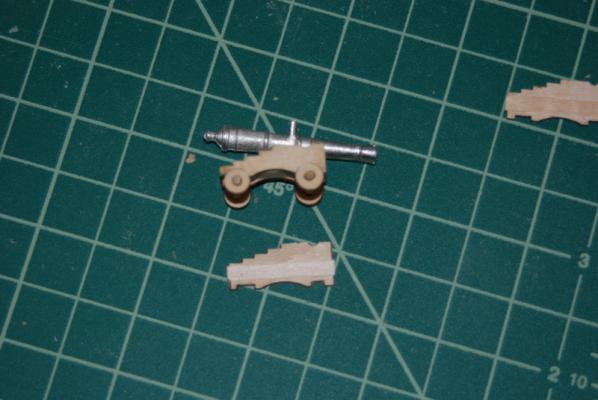
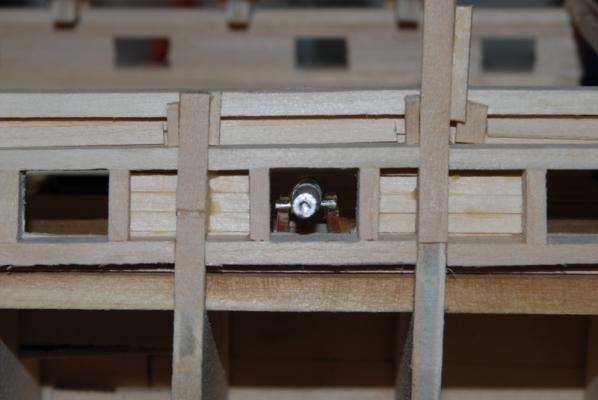
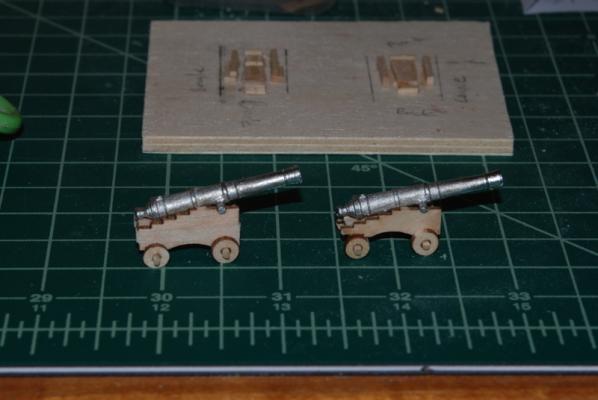
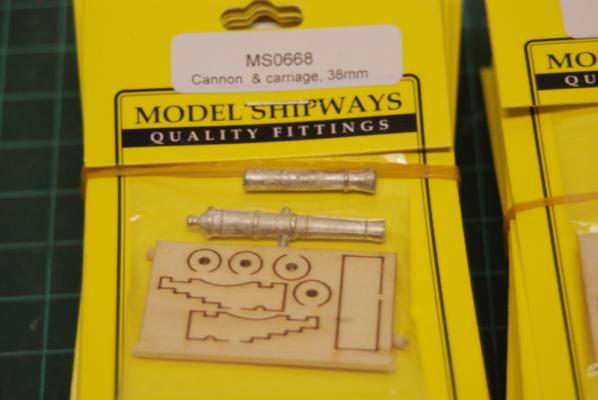
I wanted to test fit the cannons I bought from Model Expo to make sure they fit in the gun ports, so I assembled one of them and did a quick test. These did not come with instructions, so I basically just fit a support piece between the two side pieces for this test cannon, but the real ones will have a small tapered piece and a front support piece instead. I also just used some 1/16" square wood for the axles, but will use wider pieces of wood in the final version. I made a jig to hold the side pieces up while I glued them to the axles. Here is the test cannon from the jig: I rounded the axles to fit the wheels and just slid the wheels onto them for now: When I put this cannon onto the gun deck I could see that it was about 1/8" too low. This made sense to me given that the bulkheads as supplied by ME are at the height of the gun deck after planking, but I had reduced the height of the bulkheads by 1/8" to account for the 1/16" of the gun deck support piece and the 1/16" deck planks. If I had just planked the deck without lowering the bulkheads, these cannons would fit fine or be close. My first idea was to add more height to the axles, but that would only get me another 1/16" or so without looking awful. I then looked at the supplied gun carriage sides and realised that I could cut them in half without hitting any of the notches, then I could add a 1/18" by 1/16" piece to make up the height difference. I did this for two sides and after sanding them they looked fine. I glued them up with the axles and support piece, added the wheels and this is how it came out: And here it is in one of the gun ports. It fits nicely and more importantly, the barrel comes out straight so I can (hopefully) line them up with the dummy cannons that will be in the other gun ports. Here is a comparison of the stock cannon (right) and the modified version (left): I was lucky to have some extra cannons to experiment with. At some point I will make up the 16 cannons that will be rigged on the gun deck, but I have a lot more work to do to get to that point.


- 1,354 replies
-
- 8
-
-
- constitution
- model shipways
- (and 1 more)
-
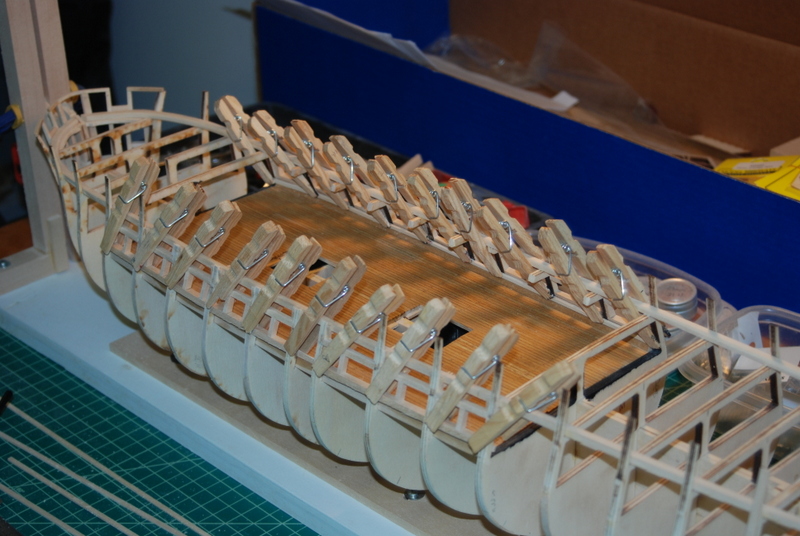
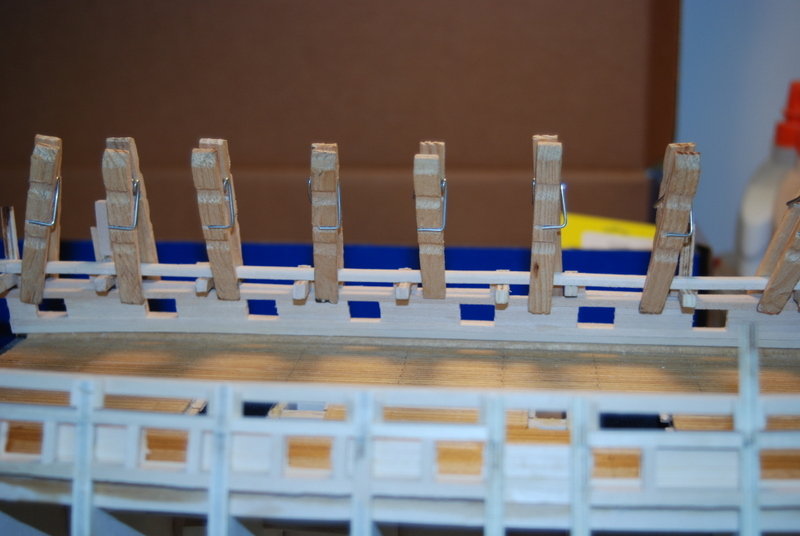
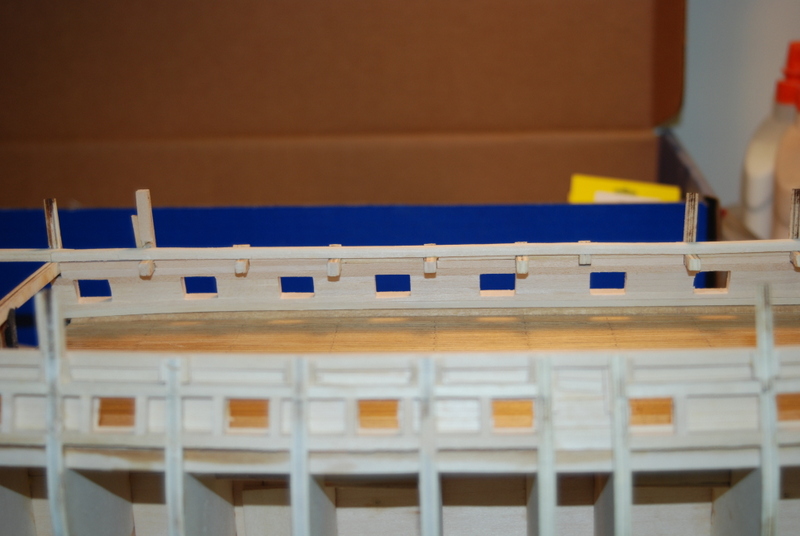
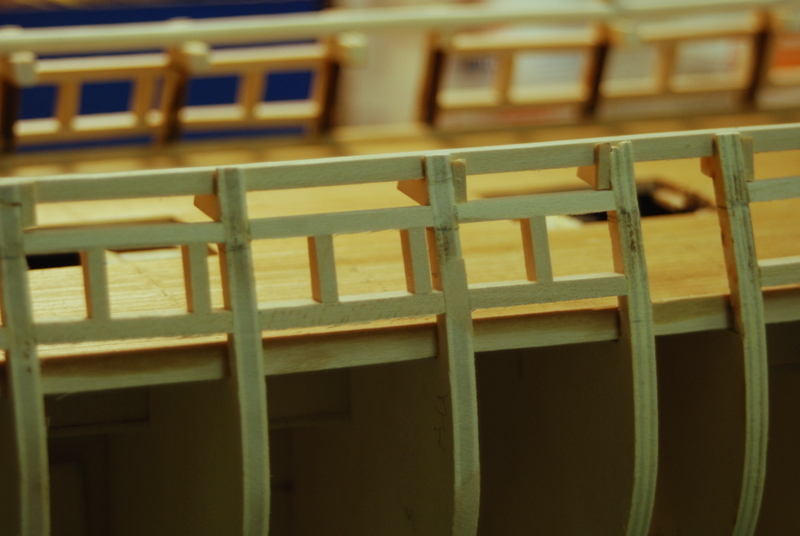
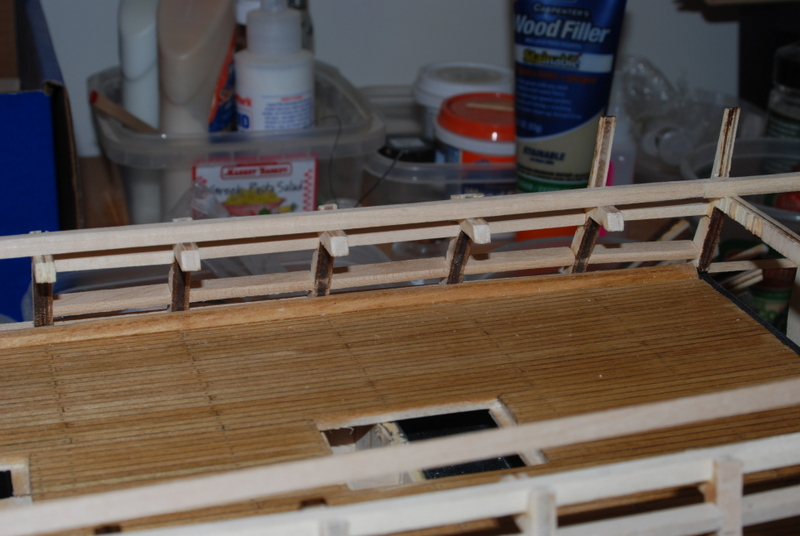
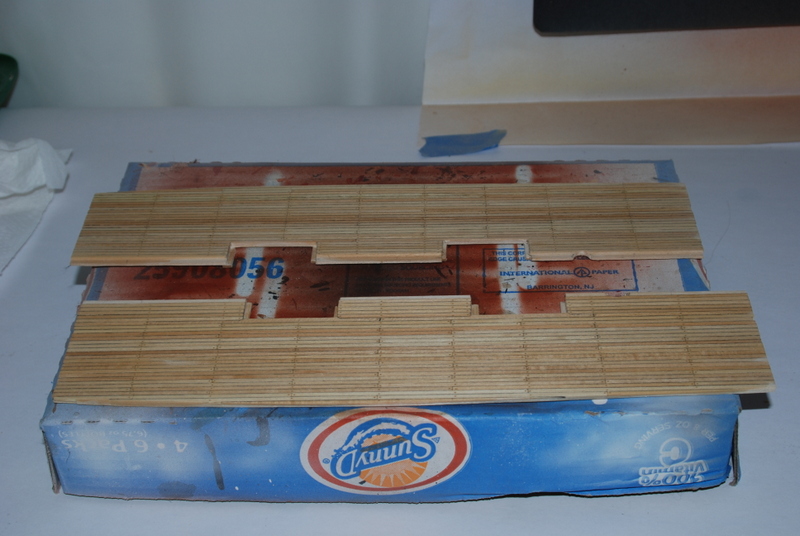
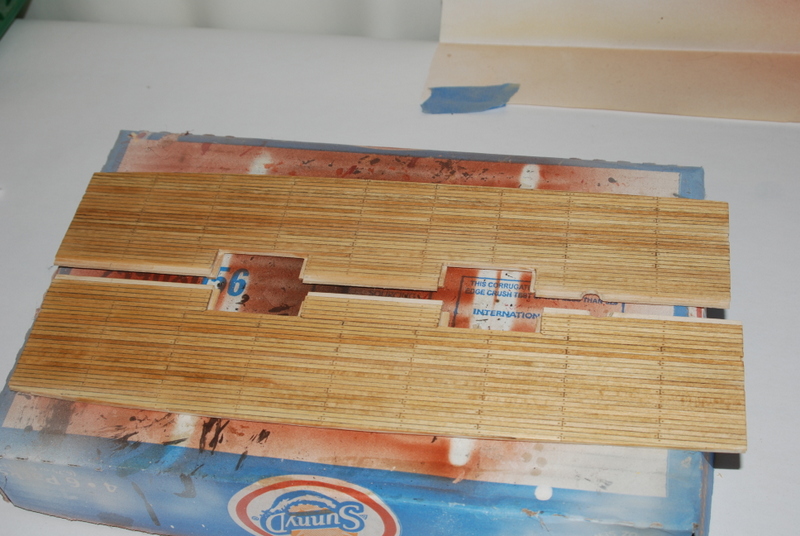
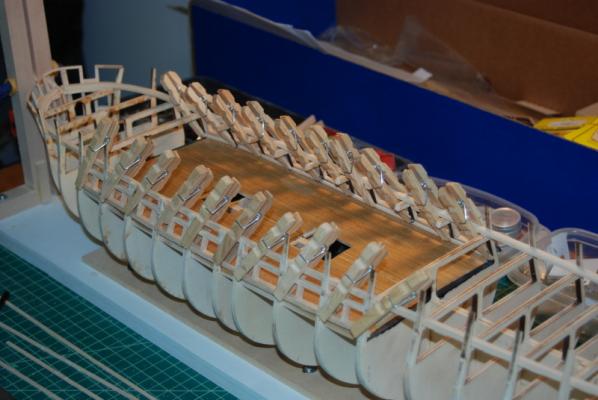
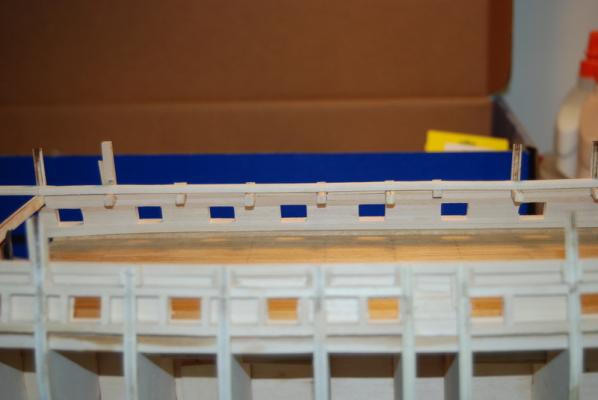
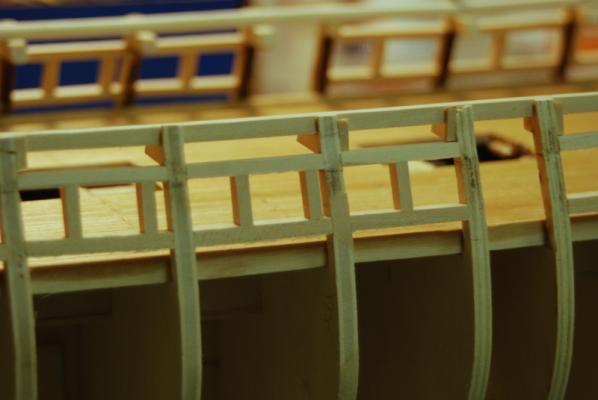
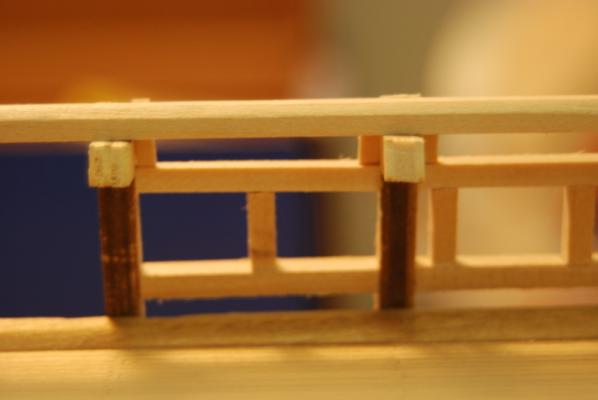
Here are a couple of updates. I'll show the interior wall planking of the gun deck in this one and the experiments with the gun deck cannons in the next one. I planked the insides of the gun deck walls using the same 1/8" by 1/16" planks that I used for the deck planking. I started with two full length planks at the bottom of each side. I mixed up some off white paint and painted the bottom planks before installing them, although the color looks very similar to the basswood itself. Those clothes pins held the planks very nicely in place while the glue dried. I then cut three short planks for between each of the gun ports and glued them in. I made them slightly longer than the span between the gun ports and will clean up the gun port openings later. These plank ends will be flush with the gun port openings, where as the outside hull planks will leave a slight gap for the gun port lids to fit in. The next plank up was a full length plank, then I had to make shorter planks with either notches for the deck beam ends or cut to fit between the deck beam ends. I ended up gluing the upper planks directly to the edges of the planks below. I really did not need the little supports I added for these planks before, as they really didn't support them. I did add a thin strip from the outside onto these upper planks to tie the top three together to give them a little more strength. These strips will be hidden when the outer hull planking is added. I cleaned up the gun port openings from the outside using some small diamond files, after cutting some of the excess plank ends with an X-Acto knife. I still have a little more cleaning to do from the inside to get the corners more crisp. I only had to do a little sanding of the interior planks, which I did with a riffler file first, then taped some sandpaper to the end of it and used that for the final sanding. Here is how the starboard side interior looks so far.


- 1,354 replies
-
- 6
-
-
- constitution
- model shipways
- (and 1 more)
-
Great job Christi. She came out wonderfully.
-
Wow, I just read through your whole build. That is one sweet looking boat. I might have to add this one to the futures list. I really like your use of decals for the fine details. I noticed you were having trouble with the images for your decals. I recently came across a free program that works like Adobe Illustrator that lets you go from images to vectors and back to images, so you can make changes to the patterns like your circles. It is called Inkscape - I don't have the link in front of me but a google search should bring it up. Thanks for the great build log.
-
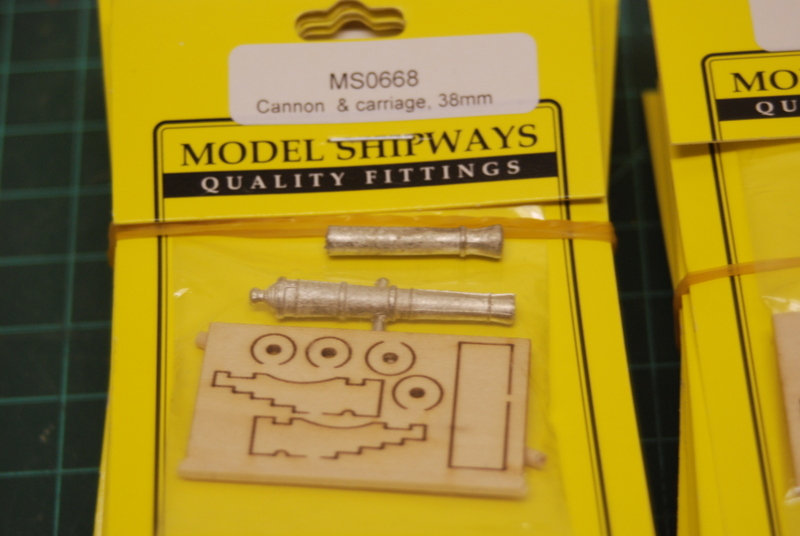
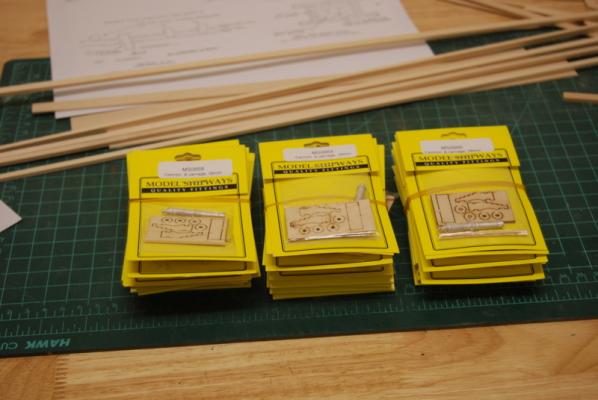
Patrick - yes they do look to be good quality. I am going to put one together this weekend to check the fit in the gun ports, so I'll see how good the wood is and how well the carriages fit together. Steve - ha ha. I was lucky to get third. Those other entries were all awesome. I am just glad it was a photo contest.
- 1,354 replies
-
- 1
-
-
- constitution
- model shipways
- (and 1 more)
-
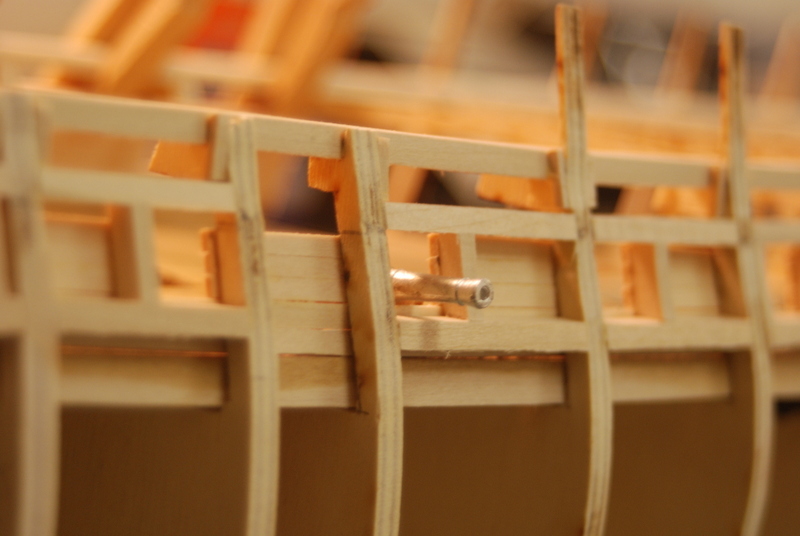
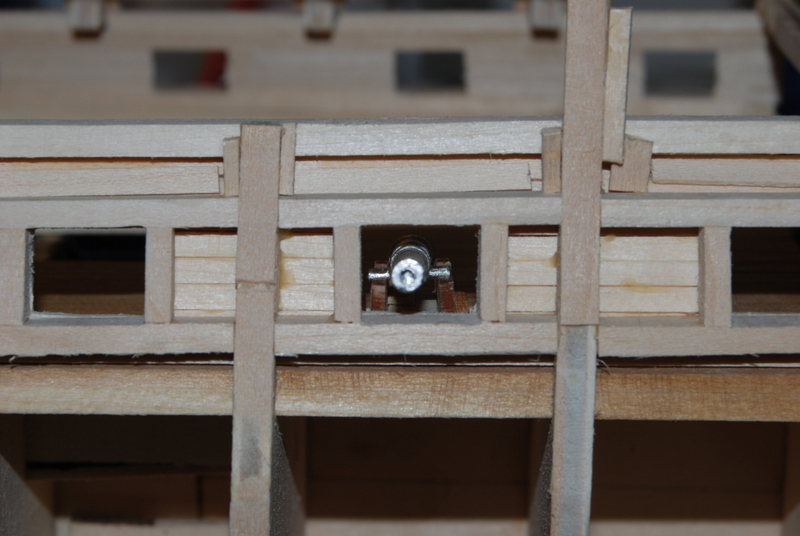
I ordered the cannon package from Model Expo for the gun deck cannons and they came in this week. I only need 16 real cannons for the piece of gun deck I am adding, but the whole package was cheaper than ordering 16 individual cannons, by a lot. Plus, I had two $10 gift certificates from the shipmodeling.net competition (2 third places). I figure I can use the extras for future models, maybe even a scratch build. Here is a comparison of the barrels with the dummy cannons for the other gun ports. They are close but not exactly the same. I have the option of turning the extra real barrels into dummy barrels, but I haven't made that decision yet. What do you think? I completed the gun ports for the real cannons on both sides and sanded the outsides flush with the bulkheads. I also did a little filing on the inside using a riffler file to make sure everything is flush for the inner planks. While doing that inside work, I realized I had a problem with the top of the inside walls, between the deck beams. There was no support for the planks that need to fit between the beams to close off the tops of the walls. After some thinking (probably too much) I came up with this solution, to glue small pieces of wood along each beam side that can support the ends of the planks. In this picture you can see them on the gun port on the right, and not the two on the left. Here is a view from the inside that shows how they will work. They are flush with the insides of the gun port frame at the bottom and with the outside of the spar deck waterway at the top. I am not sure if this is the exact angle they should be, but they are going to be very hard to see, if at all, and I could probably get away with just leaving this area unplanked, but what's the sport in that. Finally, I had to mix some paint for the insides of the gun deck walls and gun ports. I am using an off white that I mixed up from ME's Warm White and Cream. It is almost the same color as the basswood itself, but it adds a different texture to the wood. Here are the first planks for each side, which I pre-painted so I don't get paint on the waterway later. Next is to plank the inside walls of the gun deck.


- 1,354 replies
-
- 3
-
-
- constitution
- model shipways
- (and 1 more)
-
Ok. I'll just sit here in the corner and wait. I am very patient.
- 1,616 replies
-
- 2
-
-
- caldercraft
- agamemnon
- (and 1 more)
-
That planking looks great Sjors. I'll pull up a seat for the rest of this build, for sure.
- 1,616 replies
-
- 1
-
-
- caldercraft
- agamemnon
- (and 1 more)
-
I didn't add stealers, but my shutter plank was too narrow. I made a new one from a sheet of basswood of the same thickness.
- 625 replies
-
- 1
-
-
- bounty launch
- model shipways
- (and 1 more)
-
Contour duplicator
usedtosail replied to Captain Al's topic in Modeling tools and Workshop Equipment
I have seen them used to get the hull curvature of the bottom to make cradles. I bought one for that purpose but have not used it yet. If it was big enough it should work for getting the curve to bend the planks too. -
Thanks Evan. I noticed yours was one of the build logs that did not add the waterway across the stern. I guess I should have gone that way to begin with, but it is already added, so I am going to stick with what I have. I'll just add it to the list of the -ish parts of the 1812-ish version.
-
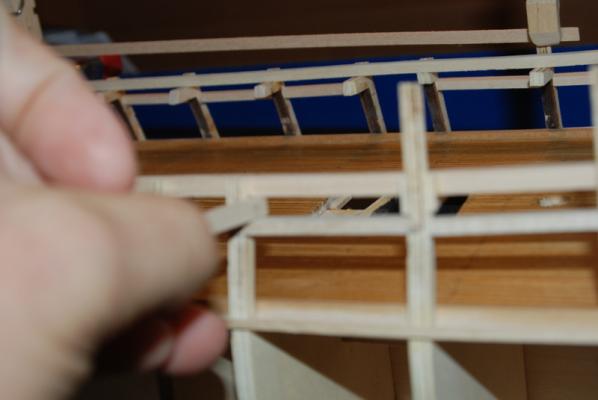
Thanks Patrick. Outside hull planking is a little ways off yet. The next planking will be the inside walls of the gun deck section, which will be right after these gun ports are framed.
-
Very nice, Patrick. I can't wait to see what a full gun deck will look like.
-
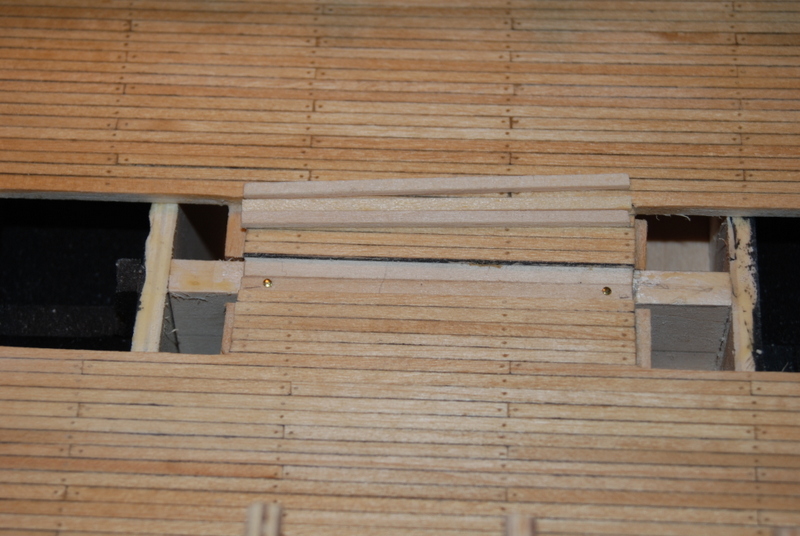
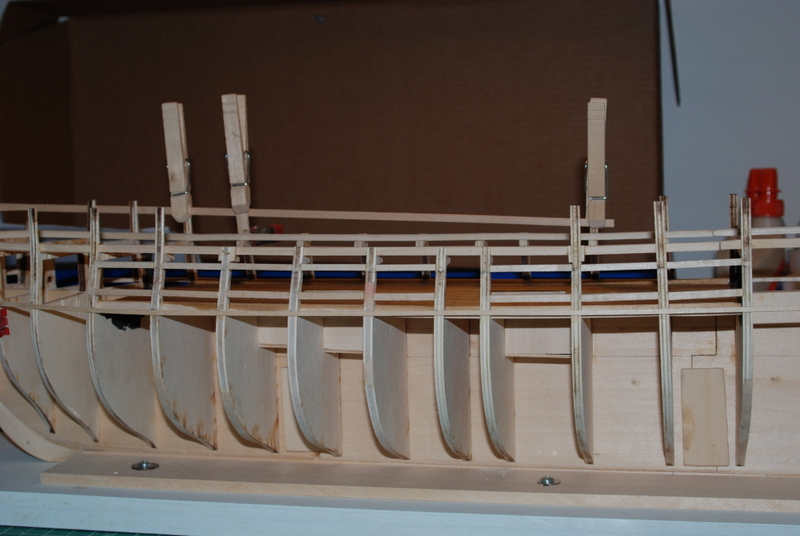
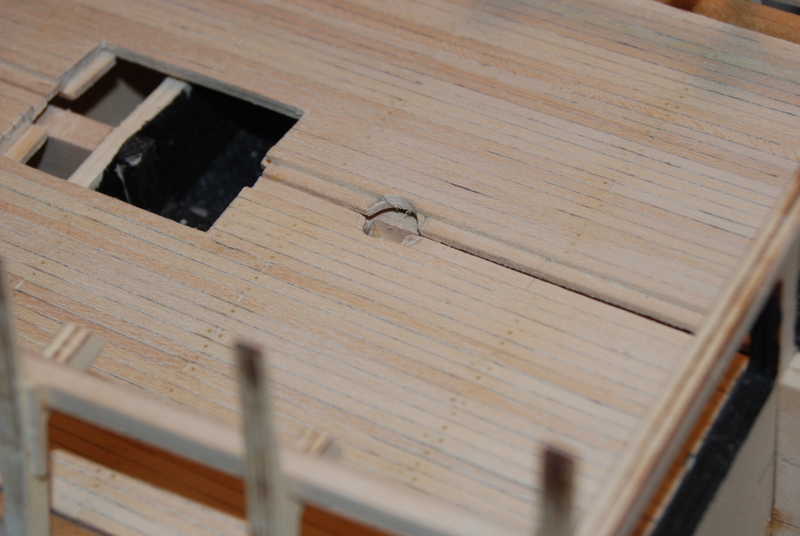
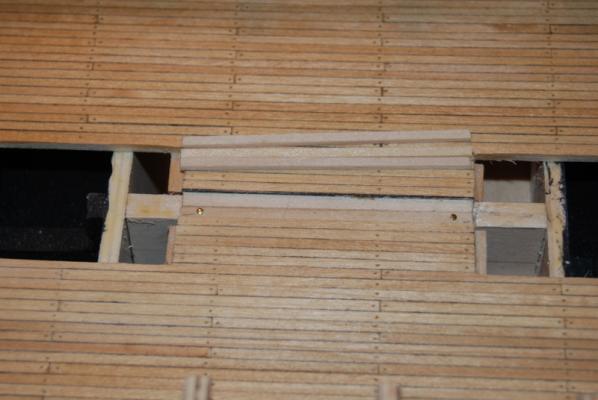
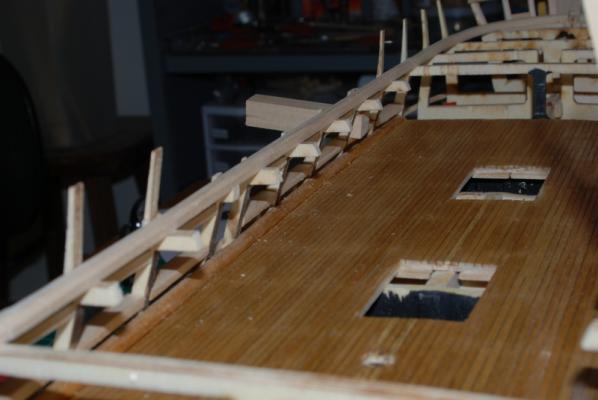
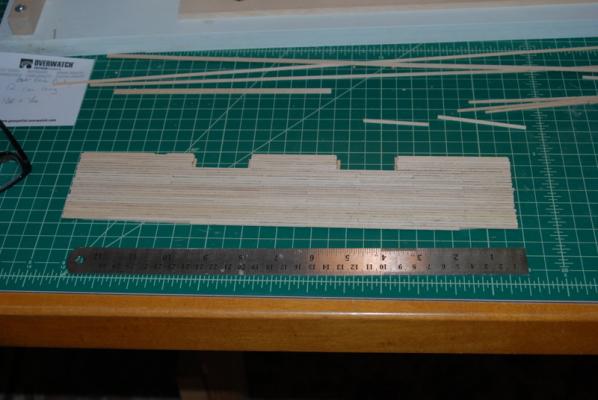
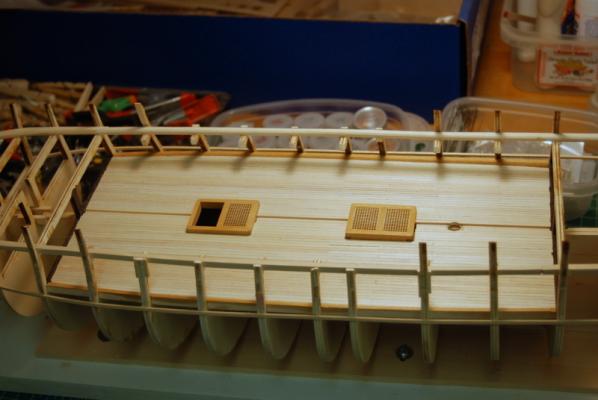
After I took the weights off the deck pieces, one side was sticking up a little at the center line, so I fixed it by drilling some holes through the false deck into the center keel and pushing in some small nails. These will be hidden by the center deck planks. Once I had the deck pieces flush, I cut the remaining deck planks to fill the center gap. I sanded the three pieces in each gap until they fit in the space. My hunch was right to make the gap three pieces instead of just one, as the widths all looked consistent this way. If I had to sand just one plank, it would probably have looked too thin. I marked the edges of these planks with the Sharpie and glued them in. After they dried, I sanded them down flush with the rest of the deck, drilled and filled holes for their treenails, gave them a final sanding, and stained them. I then gave the whole deck another coat of stain to blend it all in. Here they are before I sanded them down flush. The finished deck can be seen in later pictures in this post. I started cutting the boards that will make up the tops of the gun ports with the real cannons on the gun deck. I am using the bottom of the waterway as a reference and measured down from it to find the locations of the bottoms of the top boards, using a strip of wood of the correct height as a measuring device. I also used a wood strip to measure down from the waterway to the top of the board. I cut out the boards, sanded them to fit, then used the smaller wood strip measuring device to position them the correct distance from the waterway. For the bottoms of the gun ports, I need to have the inside and outside beveled to match the angle of the bulkheads. The outside I can sand in later, but there is no way to get to the inside, so I beveled the inside edges of these pieces before I glued them in. I used a block of wood that I made to the shape of the gun ports to distance the bottom pieces from the top. Here you can see how the bottom pieces are flush with the inside bulkheads: Wow, there is already a lot of dust on the deck. Sorry for the out of focus pictures. I need more practice taking pictures with one hand. Here is one side of top and bottom gun port framing. I have to wait to finish the other side as you can see that I broke off one of the bulwark supports (again!). I almost lost this one, but found it later on the floor. I am reinforcing them as I glue them back in, probably to no avail. I will be offline for a few days so no updates until next week.


- 1,354 replies
-
- 5
-
-
- constitution
- model shipways
- (and 1 more)
-
Yes Steve, thanks for the tutorial on the wet palette technique. I have filed that one away for later.
-
You don't see too much lilac wood used in these models. I am impressed.
-
Thanks Steve. I hope someone will find this useful. I have to say I have almost as much enjoyment writing about what I have done as I do doing it. It helps me remember what I did when I have to do it again, or in some cases what not to do or what to do better. I am getting to the point in life that I have to write down everything anyway just to remember it. I actually keep a more detailed build log for my builds in a Word document that I refer back to often.
-
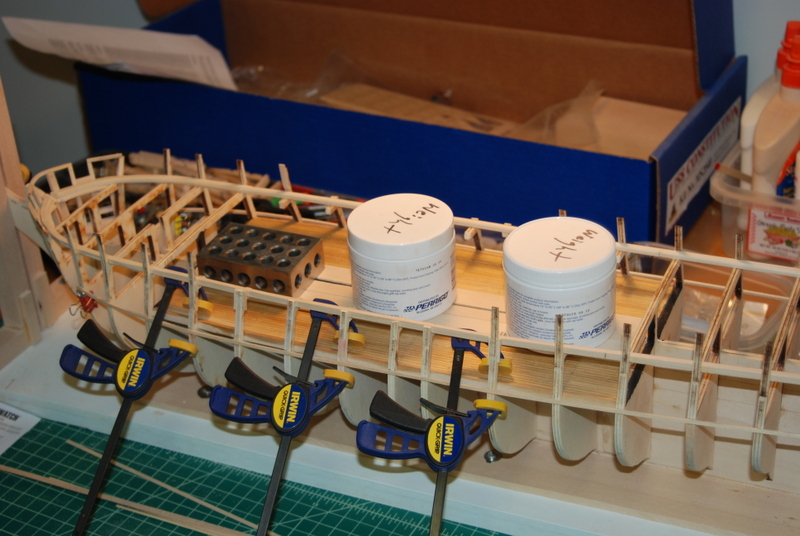
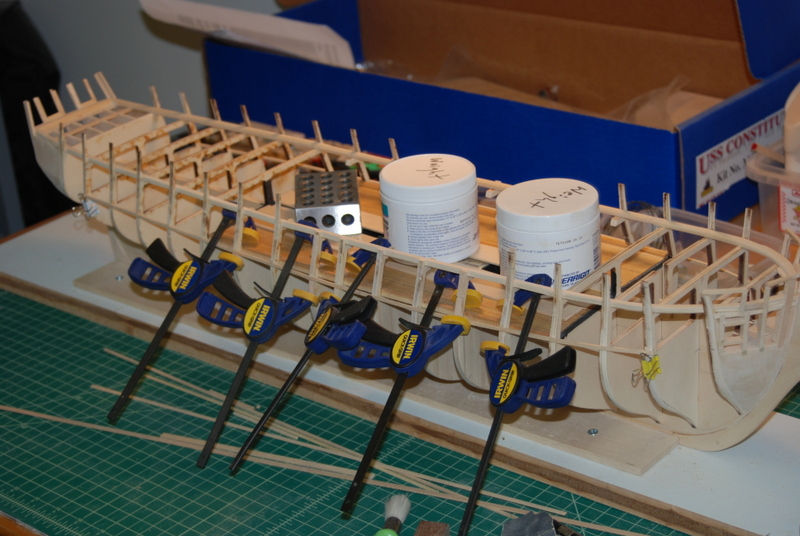
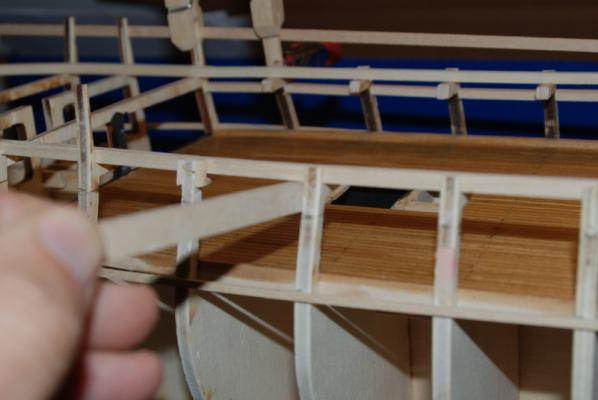
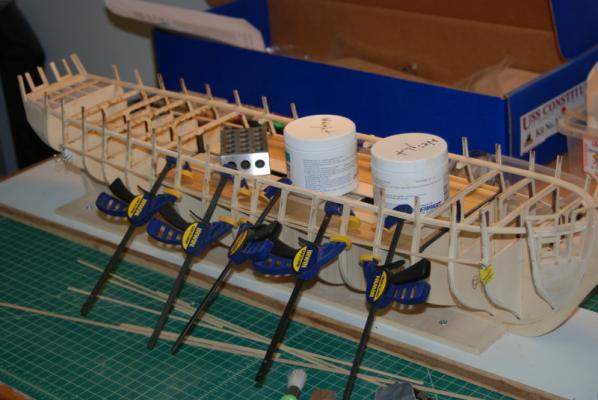
Thanks Patrick and Alde. I glued the two deck sections into the hull tonight. I was able to wedge some clamps along the outside edge to hold it down and used weights along the centerline to get the decks to follow the slight curve of the gun deck roundup from side to side. I glued the port piece first, then after a few hours I glued the starboard piece. I had to use a few more clamps on the starboard side. I put some wood strips under the weights so I wouldn't scratch the finish. Those jars are filled with lead flashing. Tomorrow I will fill in the center planks, then it is off to frame the gun ports. I will have 8 real guns and 8 dummy guns on each side.

- 1,354 replies
-
- 3
-
-
- constitution
- model shipways
- (and 1 more)
-
God luck with your new project Jay. It looks very interesting. I will enjoy following along, as I am with your Constitution.
-
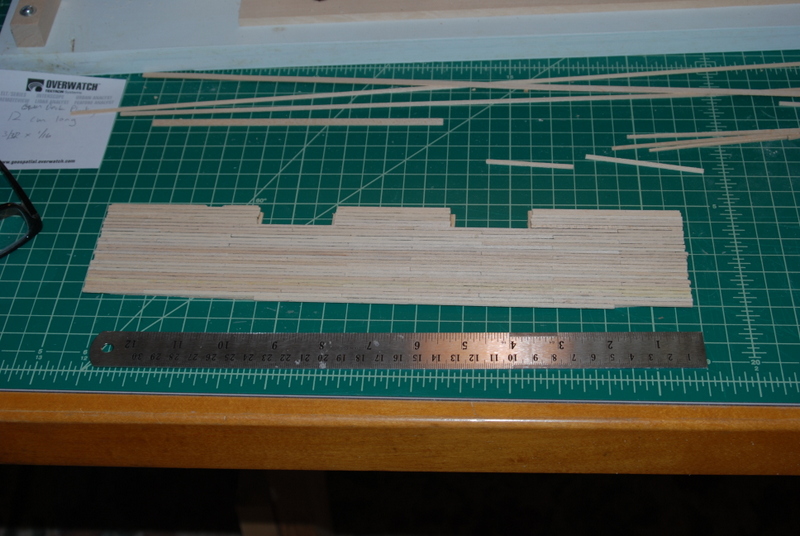
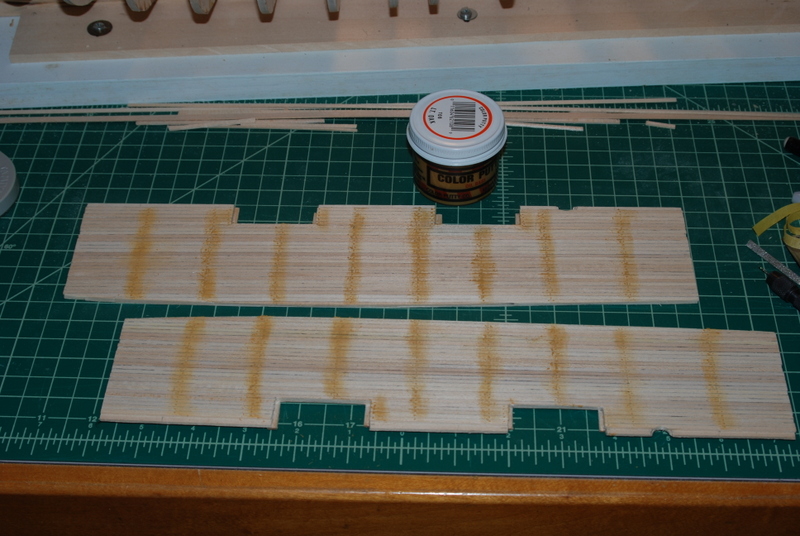
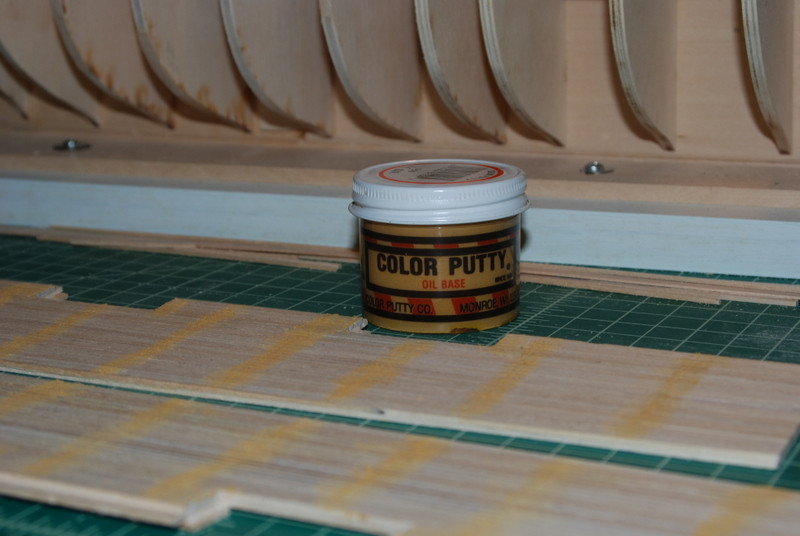
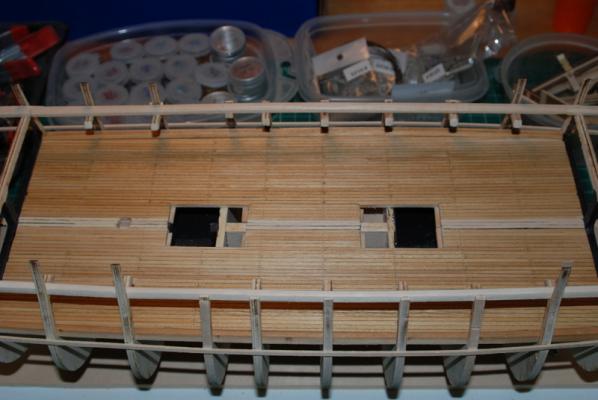
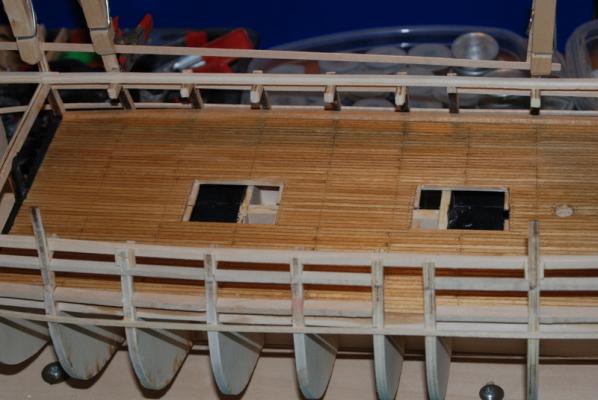
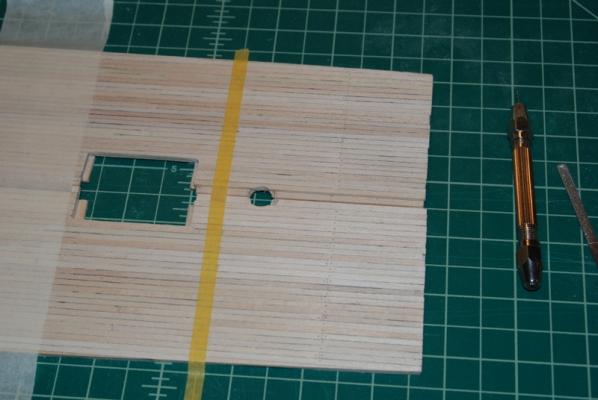
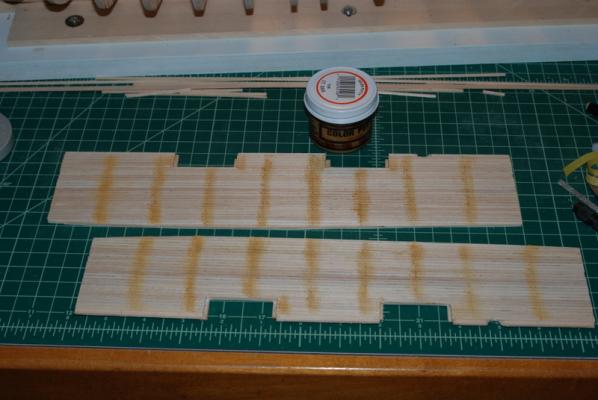
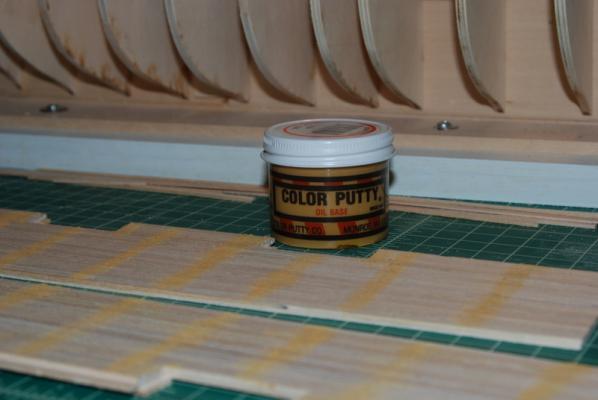
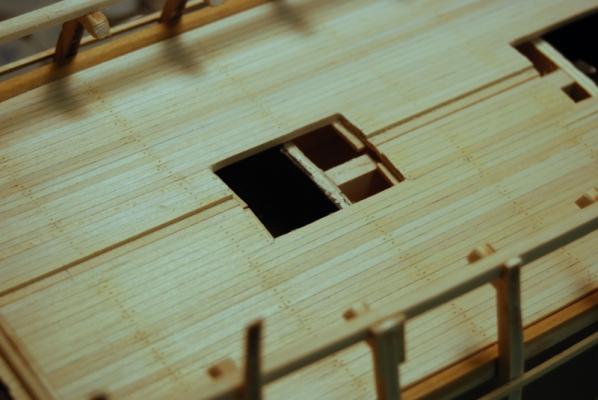
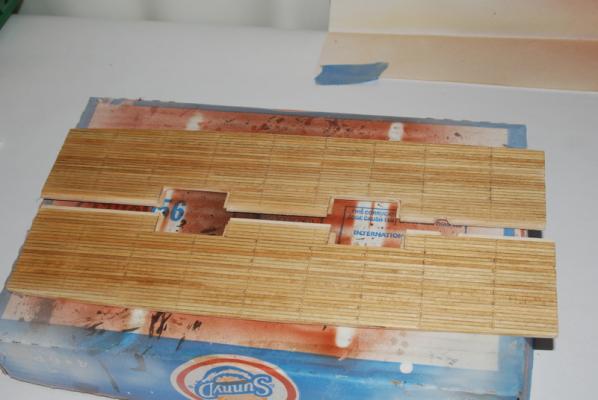
Thanks Tim for your very kind words. I finished up the bulk of the gun deck planking last night, except for the three planks that will go down the center over the seam of the two pieces. First, here is the starboard side piece after planking and a first scraping/sanding, but before trimming the edges. After the edges were trimmed and it fit into the hull, here is the two pieces together, after filing out the hatch openings to fit the finished coamings. Now for the treenails. I taped the two sides down on the work table. I had added alignment marks so I could get them to line up outside of the hull. I then used some masking tape to mark each line of butt joints, and drilled one #74 hole in the planks that did not have a joint at that beam. I then took the tape off and drill two holes at each butt joint, one on each side of the joint. I also drilled holes at the ends of the planks at the hatch openings. I did not drill holes at the plank ends on the edges of the deck pieces, as the beam locations at each end are actually just off the pieces. When all the holes were drilled, I filled them with oak putty, which is different than wood filler. It is more oily and stays pliable. It looks horrible when it first goes on though: Here is the putty I am using: I then scraped and sanded the excess putty off. I don't leave it sit on the wood too long, as I think it might stain it after a while. The putty stays in the holes nicely though, which is why I like it better than filler. I then gave the decks a final sanding with medium then fine sandpaper. The first picture is with flash and the second is natural lighting which shows a little more detail: I then pre-stained the decks, after wiping them with a tack cloth. Here is how they look with just the pre-stain: After 15 minutes, I wiped off the excess pre-stain and gave them a coat of oak stain: I am happy with the way they came out, and will use this same finish on the spar deck when I plank that.


- 1,354 replies
-
- 9
-
-
- constitution
- model shipways
- (and 1 more)