JPett
-
Posts
881 -
Joined
-
Last visited
Content Type
Profiles
Forums
Gallery
Events
Everything posted by JPett
-
 Ahoy Zev Welcome aboard Your build and log look great. It is nice to see another Ratt build on MSW. Looking forward to seeing the transom mounted.
 -
Ahoy Martin As I said " I will be following the rigging portion of your build" and will I am sure, benefit from your experiance I have a pretty extensive rigging background but just not on ships. I am hoping to take some of this knowledge and apply it to my build. I am on the fence as to how much rigging I want to include on my build however. I want to display it in an open setting and know the dust bunnies love rigging.
- 104 replies
-
- 1
-

-
- rattlesnake
- mamoli
- (and 1 more)
-
Ahoy Martin Just found your log. I look forward to following the rigging portion of your build. She looks great too, the carvings you have done really make a difference
-
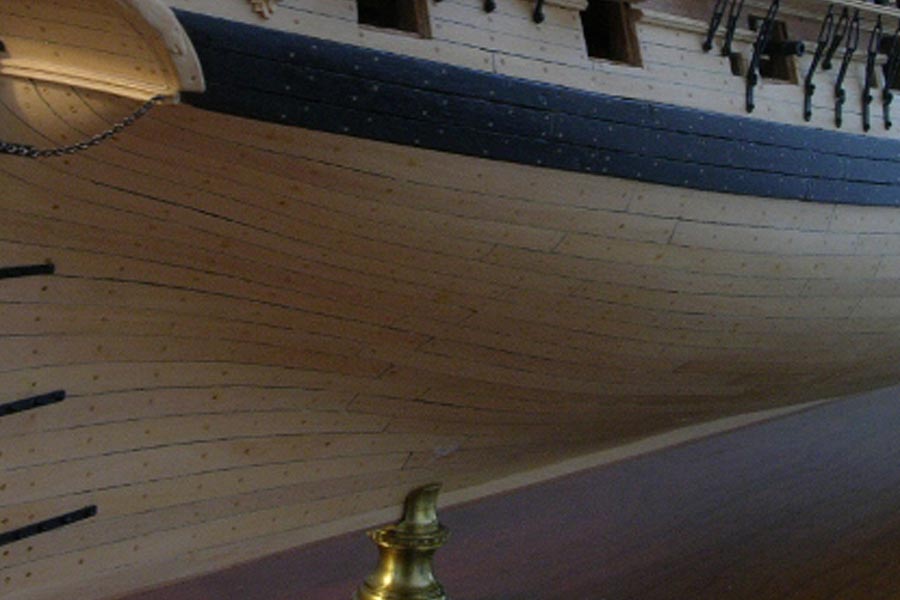
Ahoy Martin I wish I had known about the Byrnes Drawplate before buying this one, I remember that forum too; it cost no more then mine either. Here is the pic I used for my reference. The color inlay is from my build. I am thinking of changing the pattern. I like the look Hahn achieved on his Kingfisher. These were done on the wales which will be painted black and hopefully should not show.
-
Ahoy Eric I do not know the reason. I matched the height of my gunports to a cannon I placed on some wood the thickness of the deck ( I actually made a jig for this) and will do the same when I correct my build. In the end, this is the most important thing (it is a kit). I am considering using a wider piece on my repair for the top and bottom pieces (sills). Install them following the curve of the hull/deck but file/cut in the sills at the correct angle then add the side pieces. As I am a few weeks from this work, I am interested in seeing how you handle this.
-
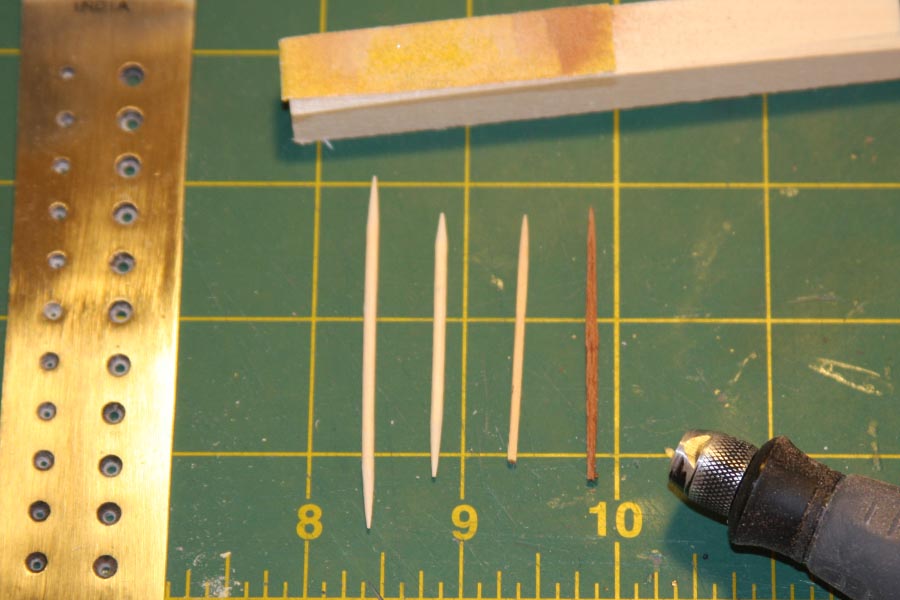
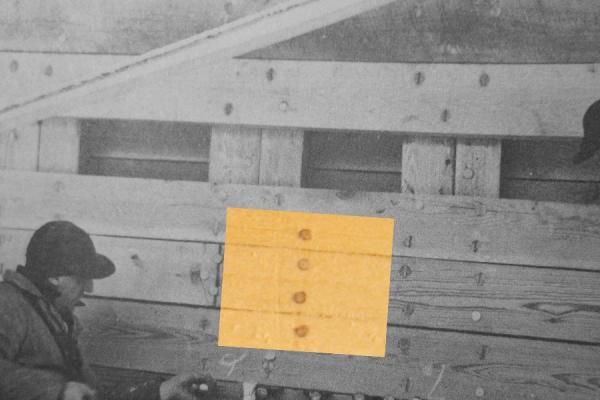
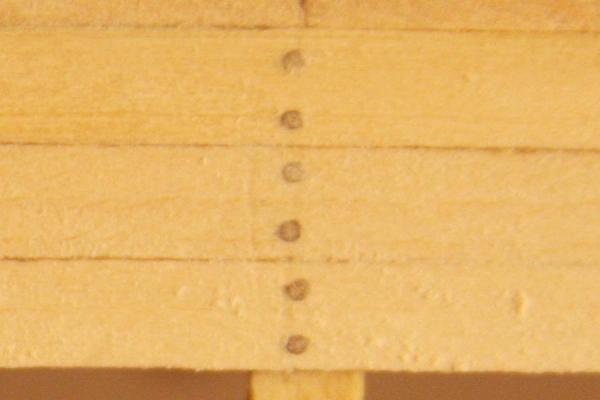
Ahoy Mates Martin: The Dremel was a “DUH” moment Michael D: Coming from you, I consider that quite a compliment "Thank you" I follow your Wasa build and draw much inspiration from it. I am considering adding the railroad spikes to my gunwales and possibly the bulwarks Patrick: Do try them. I find it makes a noticeable difference even at 1/64. Fish: Yes, another pastime I enjoy. Back to the build: I am posting my treenail efforts in hopes that it might encourage others (place little devil emoticon here). I have found that if you can get it in the Dremel chuck it has treenail potential. Once fitted in the chuck (I use the flex shaft attachment) I use a piece of sandpaper and “lath” it to look like a toothpick. This adds another three seconds to the job. I also do this to re-purpose toothpicks for another treenail. I have to be careful about the wasted wood. I do not need to **** off any Ents. Once sanded, I start with the big hole and work down to the size I need. I do skip. I also go back once done as it cleans up the treenail. If the wood is not squarely in the chuck or warped and wobbles, I run it all the way thru a large hole. This re-cuts it and in most cases stops the wobble enough to make the treenail. The wood goes in the smooth side of the draw plate too. Time; five to ten seconds per treenail. Please wear eye protection when doing this

-
Ahoy Eric The jig is a good thing but make sure you check the plans. The gunports sills do not follow the sweep of the hull. Something I must now go back and Re-Re-Do.
-
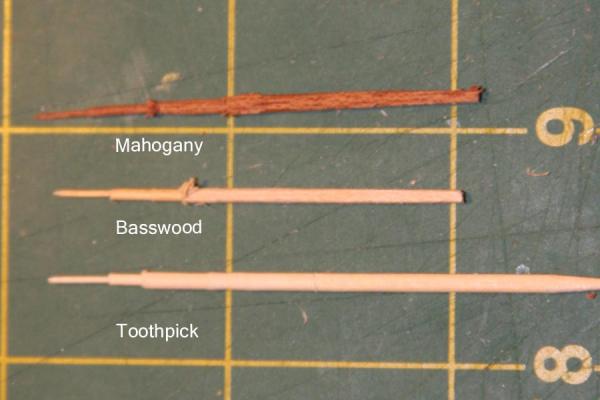
Ahoy Martin Put the toothpick in the Dremel chuck. Fire it up and push the toothpick into the draw plate, working down to the size you need. Wear safety goggles When I first got my draw plate, I was hand feeding it. Took about five minutes to make one treenail. I had completely given up on them. Now it only takes seconds. There is a post about treenails here http://modelshipworld.com/index.php?/topic/740-methods-for-making-treenails/?p=10107. This is where I got the idea.
-
Ahoy Eric She is “looking good” I am with Russ and Martin. This is an investment in your build. For me; This was not the most memorable part of my build. Hours and hours of work that show little progress. I had to walk away a few times while doing this phase. An eagerness to start the planking phase and uncertainty made this a very difficult task for me. I think it was harder then the actual planking ( I am enjoying the planking BTW). You are almost there. Take whatever time is needed and make it right. If you have a question, post. All the work you do now will pay off later. When those first few planks go on and look great, it is all worth it.
-
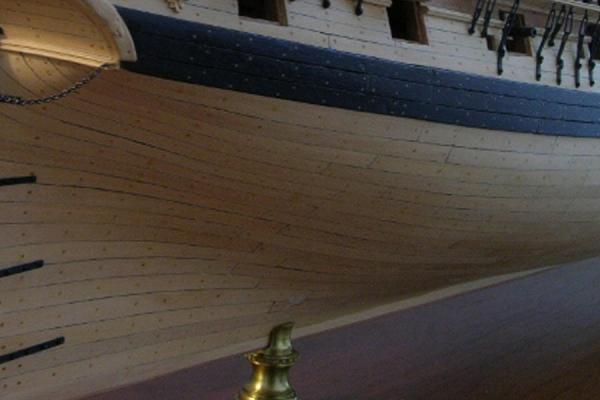
Ahoy Mates Russ: As always “thank you”. I have now made a small change in my technique. I went to a longer sanding block, and lengthened the arc of this curve/dip. This does cause me to fall a little short on the plank width on the next bulkhead. I am hoping too make this up on the next strake. On my next build, I might try using battens to mark the lines for all the strakes, not just the belts. Only using the tick strips to get the width and a rough position, like I did with the belts. Ben: Thanks for stopping by and the compliment. I have mixed feeling about finishing the planking. It is something I find very enjoyable. I started the side project when it started to feel like work. I also wanted to do my first wood finish on something other then the Ratt. I might start another build once planking is completed on the Ratt. One just to supply me with a planking fix.One thing I really like about your build is the run of your planks highlights the hulls shape, something I am working very hard to duplicate. Martin: Your comment makes a lot of sense. I will try to place this strake somewhere it will be less noticeable and only do one. Ben alluded to this too. I did not capture the wave on my build with the pics I recently took. Thankfully, it is not too noticeable right now, I would like to keep it that way but when I saw it getting worst, not better, I posted. As for the redos, I should have photographed my “dead” plank pile when I moved the shipyard. I have remade almost as many planks as I have put on. Thankfully, Basswood is cheap. ;P
-
Ahoy Jason Please let your son know I think his build looks great. He should be very proud
-
Ahoy Russ Thank you for your response Yes: As I plank up from belt “A” (Start of belt “B”) The planks loose a 32nd then need to gain it back+ over the course of three bulkheads to meet the stern post. I found on Belt “A” I could use the curves of the hull to hide this. On "B" I have not discovered how to hide them. It is also right at the start of "B" and I have concern that slight errors in my workmanship will amplify as I plank up to meet "C" over the next five strakes. "C" is also experiencing a similar issue but slightly forward. Thankfully I am half way through "C" and they are just starting to show. My thinking is to put a plank between these two problems areas, creating a place that would be correct and true then work towards the chaos. I do understand that I would have to fit two strakes. I have never “fitted” a plank so I have no idea how difficult this is and the reason for my post. I can also see that fitting a plank into chaos as a bit of a challenge. Thankfully, it is basswood.
-
Ahoy Mates Augie: Magic is a good thing. Well for me anyway. I understand Mr. Johnson kind of got in some trouble with his. Ben: We both know I was fighting it all the way Aaron: Pic is for you. This has been very helpful for me. They are cheap too. When I am done planking, I will have to make some changes. Back to the build I have found that I can use my Dremel to make treenails and have decided to play with them a bit. The first three strakes will get multible coats of black similar to what Ben has so nicley done on his Confed build. (http://modelshipworld.com/index.php?/topic/78-usf-confederacy-by-trussben-ms-164-316/?p=1949) I figured I could run some tests here. I did do some on a few scraps but I already see that on the hull I should loose the graphite. They make a nice intermission while I finish the planking too. Once the planking is done and I have 600 more to do, I am sure that tune will change. I also finally rounded that dreaded 90 at the Stern counter and hopefully the sailing will be a little smoother. Another bend it those planks would have required a fifth dimension I am having some issues with the planks going from wide to thin and then flaring in the stern. I made up a few sanding sticks that can run along the edge of the plank and reduce it when they creep over the line. They are tapered on the side facing the bulkhead to run at an angle, sanding the side of the plank but maintaining the angle I originally sanded to minimize the seam. I am not sure but I think this is contributing to a small wave I am staring to see in the planking. To compensate for this I am considering skipping two or three planks and then planking down from there. Advice regarding this idea would be greatly appreciated


-
Ahoy MSW Thank you. Your posts have been most helpful I always wanted to do treenails but they were just too much work. I was trying to manually push the wood through the drawplate. Working down to the needed size. Kick me, I follow instructions. I gave up after I did the math, 50 hours just to make the treenails for my build. After reading your tips I took a toothpick, stuck in in my dremel (I have the flex shaft), pushed it into the drawplate and can now make them in seconds.
-
Ahoy Buck I am experimenting with the French polish method you describe here with excellent results. I had no clean socks and used a paper towel, which seemed to work. I also found that I could polish with just the alcohol and baby oil on a piece of linen. I used this to find areas that need additional sanding as it dries rather quickly I am having a problem with my shellac on the deck of my build. I am getting what I would describe as blisters. The wood has been laser cut including some of the fine details (lines representing planks) I have eight coats on the deck and am still filling these holes. I sand after each coat followed by a polish only to see I need another coat. They are slowly getting filled but I wonder if there is better method. I did not have this problem on the hull. Thanks for posting. It has been very helpful.
-
Ahoy Popeye In the interest of acurate reporting I pulled down the kit and went through the wood. I stand corrected. The wood I originally thought was for the masts is not. I found some dowels hiding in the bottom of the wood box. Well I guess i just saved myself hundreds of hours and talked myself out of that lathe
-
Ahoy Augie I was wondering if it had anything to do with the warping. I know the dowels are really only available in certain types of wood.
-
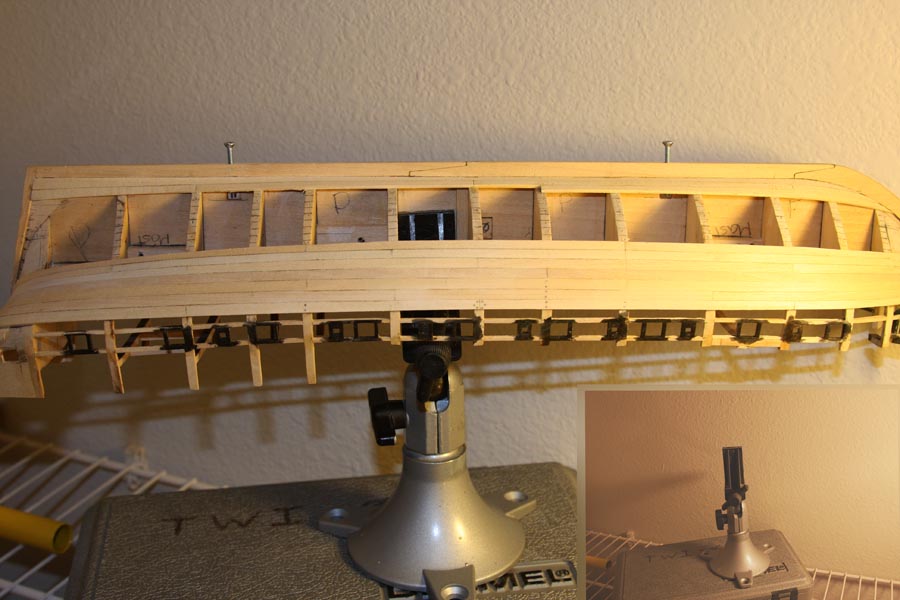
Ahoy Mates The Ratt build is back on the work bench. I think it might be a while before she acclimates to the smaller quarters. On my side project, which BTW has turned into a full-fledged undertaking I suffered from some weird obsession with the finish on the hull. I am in recovery but think this might have had some long-term effects. They are positive so ‘worry not” and I will post this adventure in that log. In my defense, this was encouraged by guests. An extension on this endeavor has however been approved so she now shares the yard with the Ratt. While working the side project I learned a lot. Most importantly, that it is best to only sand hulls with blocks or dowels. I found hand sanding creates an uneven surface. During the anti spiling revolt of January 2013 I had hand sanded the Ratt’s hull. There was now great concern where some hand sanding had followed attempts at “brute force and superstition”. Done to confirm that the clinkering I was experiencing would not be a problem later. Using my new found skills I found an area on the bow, starboard side that had a low spot I was not sure could be corrected. I started to explore my worst case options, which started with removing three strakes and went all the way up to completely re-planking the hull with a harder wood. I found on the side adventure, I really liked the harder wood. Thankfully, common sense came to my rescue and telling myself if I sanded through I just would not stop and re-planking would follow. A complete re-plank or just the strakes would be determined after a sufficient amount of alcohol consumed. Using a small block, surgery commenced. I kept a finger on the underside to confirm I did not sand too much and thankfully, I think it turned out well. Once planking is complete, I will reinforce this area with some epoxy on the inside and hopefully laugh about it in a year or two. Please deduct two more points from my “scale” scorecard. Pics will be in the next post.
-
Ahoy Augie I do not believe the Corel kit I recently purchased included any dowels for the masts. It is a large kit (L 32”, H 28”) like the Syren and I wonder if the solution to this problem is not using dowels but making them from stock. If I can quote Kevin “I’m about 2500 hours from deciding what to do”, so I have some time to consider how I plan to handle this.
-
Ahoy Zev I would be super happy with that too Looking forward to seeing your build here on MSW. I found your Tumblr log inspiring; your Ratt is coming along nicely. Being a big fan of Calvin and Hobbes I also liked the pumkin.
-
Ahoy Eric I would go with Martin's suggestion and soak a plank or two and form them to the hull.. As long as you don't glue them it is easy to make corrections. After you glue them on it becomes much harder to make changes. Much. I will be shortly ripping off three strakes to fix something that would have taken five minutes had I caught it. Live and learn from others, it's easier.
-
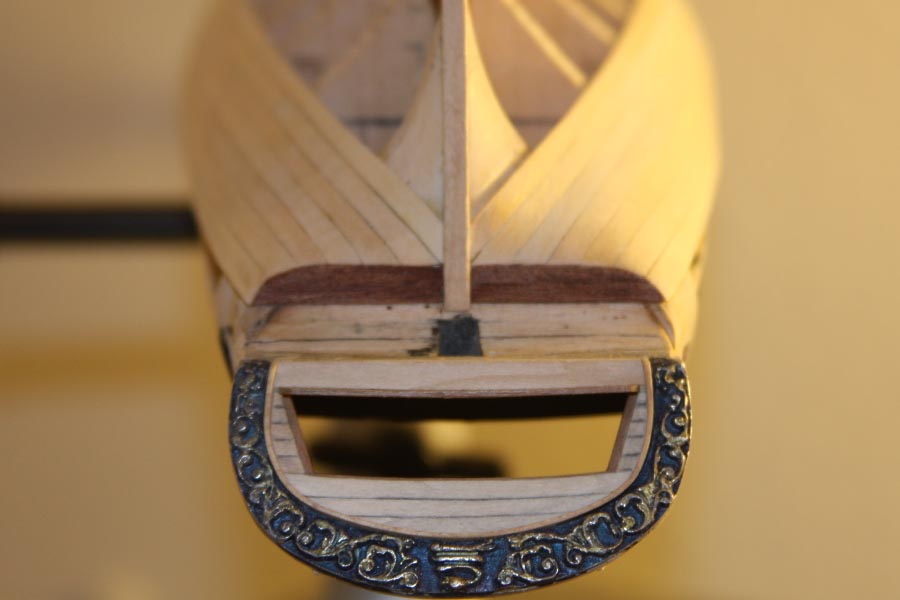
Ahoy Eric I am with Russ, The filler needs a little more. The transom looks great I posted mine three times before it was approved "LOL" The planks need to run into the rabbet, not curve into it "Use the batten Luke"
-
Ahoy Eric Do not despair. Welcome to model shipbuilding. The logs I read here on MSW seem to imply issues such as these are not uncommon when it comes to kits. You do have a choice. You can do the research and build a true scale representation of the ship, build the kit version or a compromise between the two. A great aspect of this hobby. If you choose the scale version, I wish you the best, as I can offer little help in this endeavor. On the other two options, as someone in the same boat I can offer this. The Ratt being a single planked hull, it is very important that battens follow a path that will allow planks to traverse the hull without crowding, conflict and on the right path. On my build, I spent hours tuning the bulkheads. I found that minor adjustments to the bulkheads could really alter the path of a batten. A small elevation or reduction on Bulkhead “D” made a big difference where the batten crossed Bulkhead “A” or met the stem. Using belt positions marked on the stem, stern and every bulkhead, I laid the 1/32 gunwale planking across the hull paying attention to how it wanted to run. On my first attempts, I tried to force the batten to conform. This was a mistake. It was only by paying attention to where the batten wanted to go that I was able to (by much trial and error BTW) determine which bulkhead needed adjustment. I hope this helps. PS: I also put a filler along the path of the first plank, which I faired to the hull. This allowed me to put my first plank on a solid surface similar to a double-planked hull. I felt this helped me to get a good start. Good luck. Your build is looking great too.
-
Ahoy Brian Judging from what I have seen so far on your build the new stem is going to be much nicer then what Mamoli supplied.
-
Ahoy Brian The extra effort you have made to document sources in your posts has become a wealth of information for me on my build and I am sure others. Thank you I do not see why you could not go with the water. Worst case the glue fails and the problematic wood comes off. Best case, it softens up both the wood and the glue and they dry in the proper shape. On my side build, I used paper towels soaked in warm water to correct planks that did not conform. I use the original Titebond, which is not waterproof. I had no issues with them ungluing completely or coming apart. On my Ratt, I have used water to remove planks but also had to apply heat. It is my belief that it was the heat gun, which actually allowed me to remove the planks, not the water. I think that water alone might have worked, but only after a considerable amount of time soaking. Something measured in days. PS: Consider distilled water. I use filtered water but have noticed some staining. Looking forward to seeing the planking stage