JPett
-
Posts
881 -
Joined
-
Last visited
Content Type
Profiles
Forums
Gallery
Events
Everything posted by JPett
-
 Ahoy Apprentice I do not think you will get the length (6 feet) without some joints but Rockler also sells veneers http://woodworking.rockler.com/c/lumber-veneers They have a great selection too.
 -
Slowing down the Dremel Rotary tool
JPett replied to JPett's topic in Modeling tools and Workshop Equipment
Ahoy Mates So I called Dremel's US customer support, which by the way was very good. People were very nice, well informed, spoke perfect english and I was on hold for less then 2 minutes, With customer support like that I will be sure to buy more of their stuff. Official: The variable speed control is no longer sold by Dremel. It was made for the single speed units only (100 series) Off the record: They did elude to but could in no way recommend using a motor speed controller on the variable speed units and only with the speed set at full on the tool. They also said this would for sure shorten the life of the unit. By how long no one would say. -
Ahoy Russ So much for that plan "lol" Thx
-
Ahoy Eric I have seen wheels which were wooden and stained with an iron band around them It was a good look I might try this My plan is to use a brass tube to punch out the circles and then cut the tube with the wood still in there Please note: I have not tried this and only just came up with it
-
Slowing down the Dremel Rotary tool
JPett replied to JPett's topic in Modeling tools and Workshop Equipment
Ahoy Vince It is not on their site Do you have a link -
Slowing down the Dremel Rotary tool
JPett replied to JPett's topic in Modeling tools and Workshop Equipment
Mine is an older varible speed model (395 type 5) I am wondering if opening it up and changing out or adding a resistor to the speed control is an option. I never use it at full power I got the idea from this product sold by Micro Mark http://www.micromark.com/variable-speed-foot-operated-rheostat-4-amps-max,8172.html What I would love to hear is a cheap fan rheostat could be used -
Ahoy Mates Has anyone used a rheostat to slow down their Dremel tool? I know some motors are “OK” with this and but others are not I need to drill treenail holes in my hull and would like to use my Dremel, but at a considerably slower speed. Dremel does not list this as one of the accessorries
-
Ahoy Andy Thank you I have heard from others about the thread included in the kit. None have been able to source it. As for the melting of the wax, I wonder if hanging it as I have seen others do to "prestretch" the rope and using a heat gun or blow drier might also work.
-
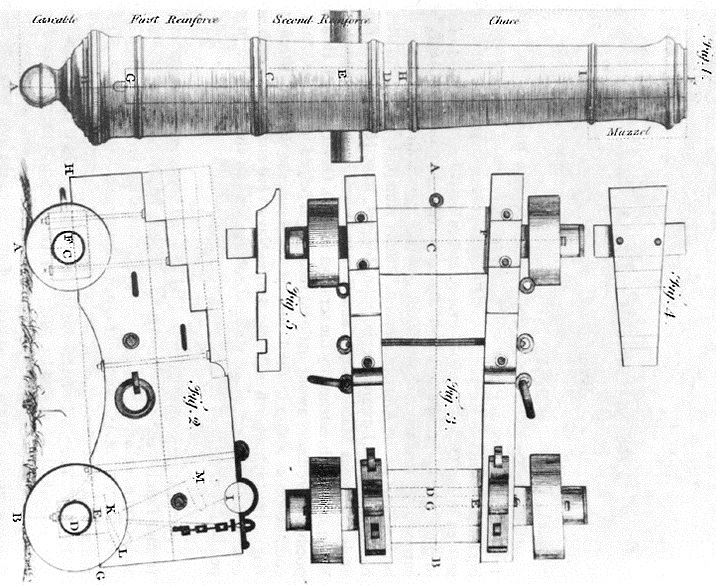
Ahoy Eric Thanks for the tip on the tool shopping. I won’t be driving by those pawn shops anymore. The cannon looks great. This documentation was originally posted on my forum and very helpful to me.
-
Ahoy Andy What did you use for your rigging
-
Ahoy Andy I like to think he just stirs the pot. Now what is in the pot is a different story.
-
Ahoy Augie The jeans are still my favorite.
-
Ahoy Mates Thank you all for stopping by and your comments Ben: When I feel like pounding, I just walk away “lol” Russ: I had a good laugh reading your reply. I soak planks so long mold grows (see my bleaching post). I might have to rethink this Augie: It is more of an idea. Just a little more thought out then the previous one. Blue: My problem is I just cannot stop thinking about it. I see no end. Patrick: I am hoping so. If not, I double plank. Martin: I find it works for most but agree that putting it in stone would be a mistake. I am using a Prismacolor Metallic Gold pencil for my hull caulk lines. I used a standard #2 on the transom, will use black paper on the deck, another color on the bulwark seams and others for the treenails. I would like some things subtle, others sharp, depending on where they are on the build. Deduct another point from the scale card “lol”. As for the heat gun, just used it the other day to fix a plank in the stern. I use it mostly for repairs "mostly". Back to the Build: The last strake in Belt “C” is starting to show signs of Clinkering. It looks like all the bow planks in belt “B” will need spiling. I have 9/16” in the bow and five more strakes that I need to fit there. That gives me 3.5/32nds per (7/64ths) which is plenty. In the stern, I have to redo the measurements on the sternpost. I will post pics of this and cover the problems I had on Belt “C” in my next post. I am not sure it there is a problem at the sternpost “yet”, but there is some concern.
-
Ahoy Andy Beautiful Build I especially like the rigging
-
Ahoy Eric I am not using the "home made pizza wheels" either I cut new ones from a dowl that came in the kit.
-
Ahoy Mog Thanks for the tip on the long boat. I am going to borrow that. I will post the results in my log. As for the comments, I meant them. My plan is to see how far I can push the basswood and if it goes off the cliff, fall back and double plank. Fun comes in many flavors
-
Ahoy David Thank you I will try to include some of these tips in my next photo-shoot. As for the logs, I totally agree. Giving is so much better, recieving is nice too (thx).
-
Ahoy Klaus I am with Brian. Your work is very clean and precise. She is beautiful. .
-
Ahoy Mog I am glad to see your log is back and you are moving right along. If I read your post correctly, you did a second layer of planking. If I am correct, could you share how this went on the MS kit, any issues. It is mentioned in the instuctions but only lightly. I have this on the back burner for my build. I really like how you did the gunports. I also think your take on the stern carving shows quite well "more is not always better". I think I could go on and on; so I will just politely say "I really like what you have going on here". I would also like to second Mark and Martin's comments regarding the ship's boat. Looking forward to seeing more
-
Ahoy David You do very nice work. The shape of the hull is beautiful. Your presentation seems to be very well thought out too, and is appreciated.. Something I work on in my log with limited success. Can I ask what you use for lighting and the camera (settings if any)
-
Ahoy Stelios Thanks for posting, I too am looking forward to this part in my build. Your work looks very good. Are you cleaning the parts or using any flux prior to soldering.
-
Ahoy Sherry As someone who has had their eye poked by "fiberglass" hair I would also like to say its dangerous. Thanks for the tip on its longevity. I will put the bottle back
-
Ahoy Augie "Darned, I was just going to post an update but have forgotten what I was doing." I believe that is caused by glue, not sure about the hairspray. Admiral did have memory loss but that was mostly selective "mostly".
- 1,668 replies
-
- 1
-

-
- syren
- model shipways
- (and 1 more)
-
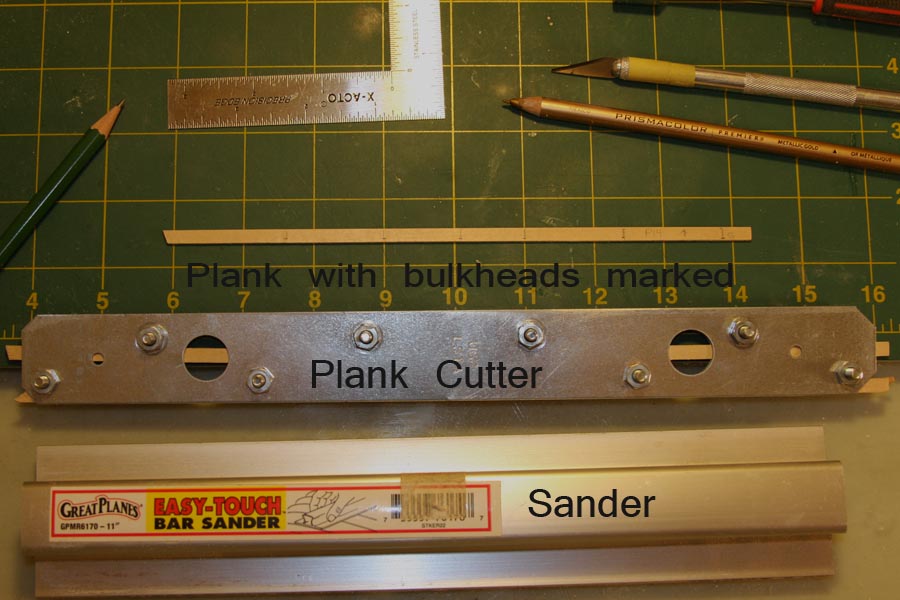
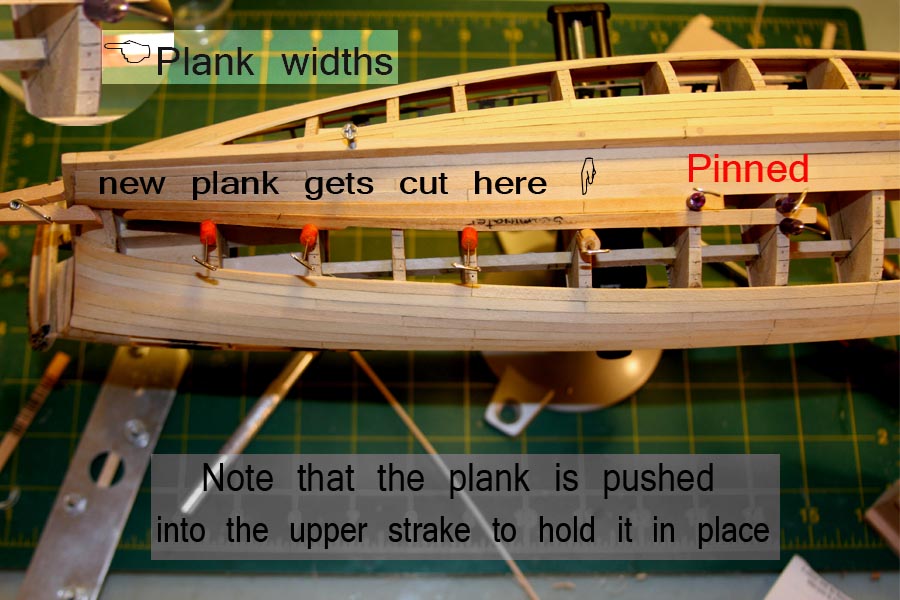
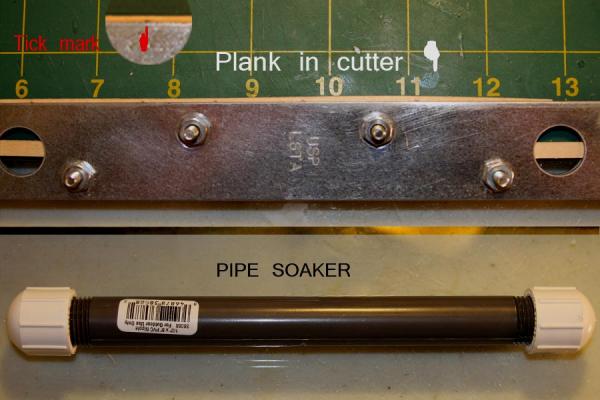
Ahoy Mates Sport: There will be treenails galore Martin: I think Hahn has the right idea. Rock beats scissors, looks cover scale Sinan: I find virtual reality a great place to check my ideas. Back to the build: After many trials and tribulations, I am posting my new procedure on planking for review. My hope is to document it here in this log so when I approach this stage on my next build I have a reference. As I am still learning this version which is now 2.0 will I am sure become 2.1, 2.2, and so forth. First, I roughly cut a plank from stock, at least one bulkhead longer then required. I also do not use the same stock for the following plank on this strake. On future builds I might consider lying out and numbering planks (similar to what is done with tiles) to have some control over the pattern in the hull. Forming a plank longer then needed and cutting it back after bending/shaping it causes it to lay on the hull in a way that better transitions to the following plank in that strake. This was not true for planks first cut to exact length. Next, I place a vertical line at each bulkhead position on the plank. An arrow is added on the plank along with its strake number and the last bulkhead letter. The arrow faces the deck with this side trued using a flat sanding block, done with the plank mounted in the cutter. A slight taper added to this edge to reduce the seam between the next strake. This side is only changed in extreme circumstances such as the narrow width required at bulkhead at Bulkhead “K” and “L” on my current build. Otherwise, it is untouched to provide a known surface for the following strake/plank. The measurements used to mark plank widths on the hull are transcribed (via tic marks) to the plank at the bulkhead locations (vertical lines). I have a cheat sheet. The plank then placed in the plank cutter. After carefully aligning these tick marks, I secure the plank in the cutter; for difficult cuts I position the tick marks at or near the bolt locations to facilitate the bend. After cut, it is test fitted and this cut side is now sanded, also at an angle to reduce any seam. Due to the curve cut in the plank, this sanding is done by hand with a shorter block. The vertical bulkhead lines create an easy reference to the areas needing additional sanding, preventing the thinning of areas not needing it. Next, the plank goes in the soaking pipe for no less then fifteen minutes. Enough time to cut the next plank, take a break or perform some other task. After soaking, it is affixed to the hull to dry noting the method needed to make the plank comply. This same method being repeated to glue the plank to the hull (in most cases). I prefer sideways pressure to downward. Sideways pressure reduces seams and for most planks is sufficient to hold it in place. A hole is drilled in the excess length; this end pinned to its bulkhead. I have found I can have up to three planks drying on the hull at one time. Once dry the plank is cut to the correct length and checked. This end cut also having a slight angle to reduce any seams. Any additional sanding to keep the plank on the lines is done at this time (the entire hull was marked for every strake) If everything looks good, the plank is glued to the hull. I usually bat about 650 here. This is a slow procedure; but a relaxed and enjoyable one. Each plank treated as its own small project. I only do one strake at a time; doing the strake on the opposite side as planks are soaking or drying on the other side . The bow and stern done first with planks fitted between. You can see by the following pic that Belt “C” is almost complete. We are on the home stretch “Yeah baby” Comments are most welcome and appreciated


-
Ahoy Augie My Admiral used a non aerosal "pump" style hairspray which turned hair into a fiber glass like structure. I wonder if you could paint this stuff on with a small brush. She would smoke too while applying it