the learner
-
Posts
757 -
Joined
-
Last visited
Content Type
Profiles
Forums
Gallery
Events
Everything posted by the learner
-
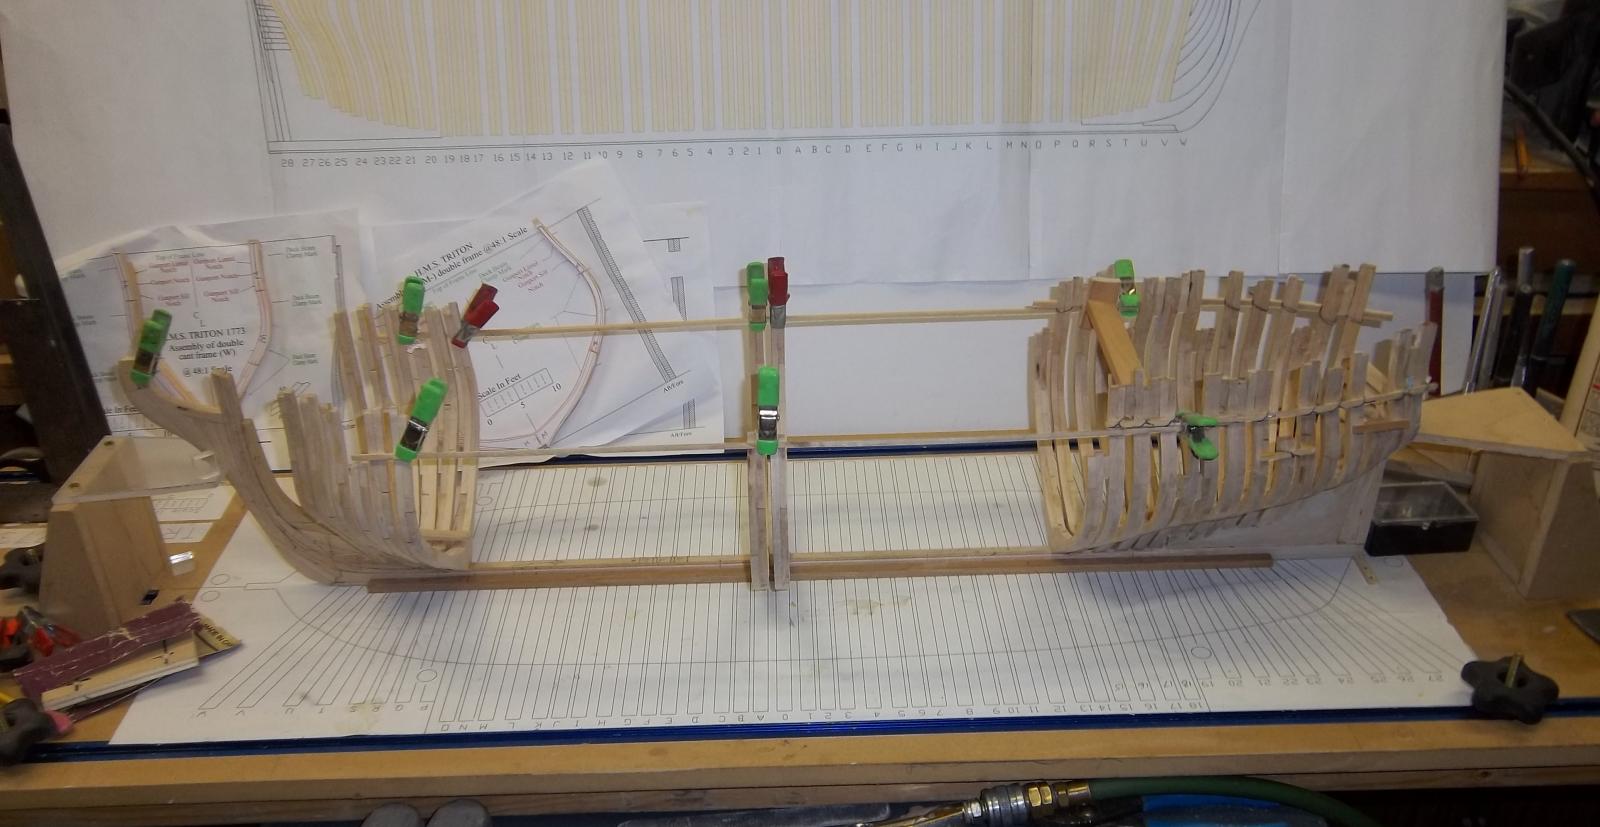
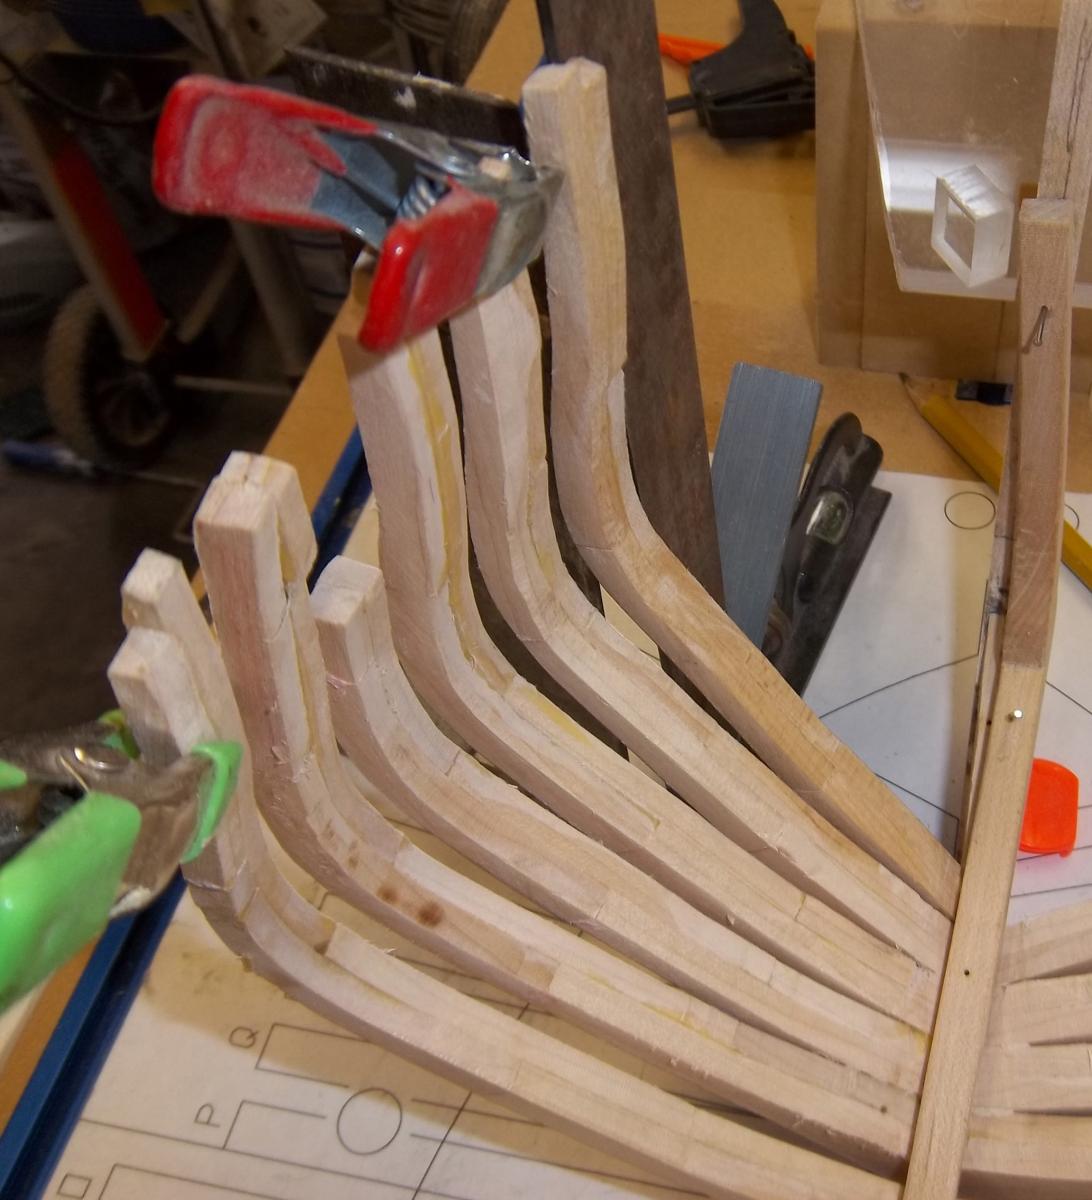
 I have installed my foward cant frames but the outboard lower shape does not seem right? I seem to remember something about some of the frames being out of shape in past threads is this so and how was it corrected? it would cover at least the foward 4 or 5 frames. I will go back and re read but would like to know if this is a error that needs to be corrected!
 -
Thanks Daniel for the response! so its a personal choice then,,perhaps I will add filling after the hull framing is finished depending on the amount of planking I do. Added 4/10/14. I have concluded that the filling timber should have been cut and added as the frames were installed giving more a more accurate spacing of the frames on the keel.....Oh well next build
-
"The methods shown in the last part could be a book chapter by themselves" I expect we can look forward to this chapter then! fantastic instructions, very inspirational.
-
Daniel, need to go back and re-post some of your earlier pictures. I will now go back and see if I need to do the same
-
Thanks Ed! but only you are an expert at it, but my desire. Nice to have you visit our post! Have to mill out one more billet of wood to make the last couple of frames. keeping track of all the frames can be confusing as I cut out several frames that I already had made up! so I used up more wood than I thought I would need. The best part I can cut down more pieces to the thickness I need here instead of sending out for additional wood billets from some one else AlsoI have nevergotten a response from and earlier post, should I be adding filler on the keel between the floor frames?
-
This is not just a ship model but a diorama in the making, perhaps just putting it in a case might not be enough! perhaps next to a dock and warehouse with several boats tied up alongside the dock and the ship? You are the one that could pull it off!
- 883 replies
-
- 1
-

-
- royal caroline
- ship of the line
- (and 1 more)
-
Ed, thank you for taking time to do that.
-
Looking great Ed!, I think the iron work was a fantastic inclusion and in a couple of hundred years when the model is being inspected by "experts" and "students" this model will be a fine example of extreme clippers being built in the 1800's and one they will be writing their research and thesis on!
- 3,618 replies
-
- 3
-
-
- young america
- clipper
- (and 1 more)
-
I have just cut out the patterns for the last 9-10 frames and pasted them on the wood, in the next couple of days I will cut them up and assemble the remaining frames, then on to the hawse pieces. I think then if I am not going to plank over the stern area, I might go back and rework some of the timbers there.....we'll see sorry no pictures! when I have all the frames sitting on the keel I will take one. Not much activity on this thread, every one must be getting ready for spring cleaning!!
-
Fantastic! Excelent work.
-
Doris, Congratulations, I see that you have added successfully your build URL at the end or your page. I went through 10-12 pictures of the Sovereign of the Seas, it is exquisite! again another beautiful model with such fine detail Guy
- 883 replies
-
- 1
-
-
- royal caroline
- ship of the line
- (and 1 more)
-
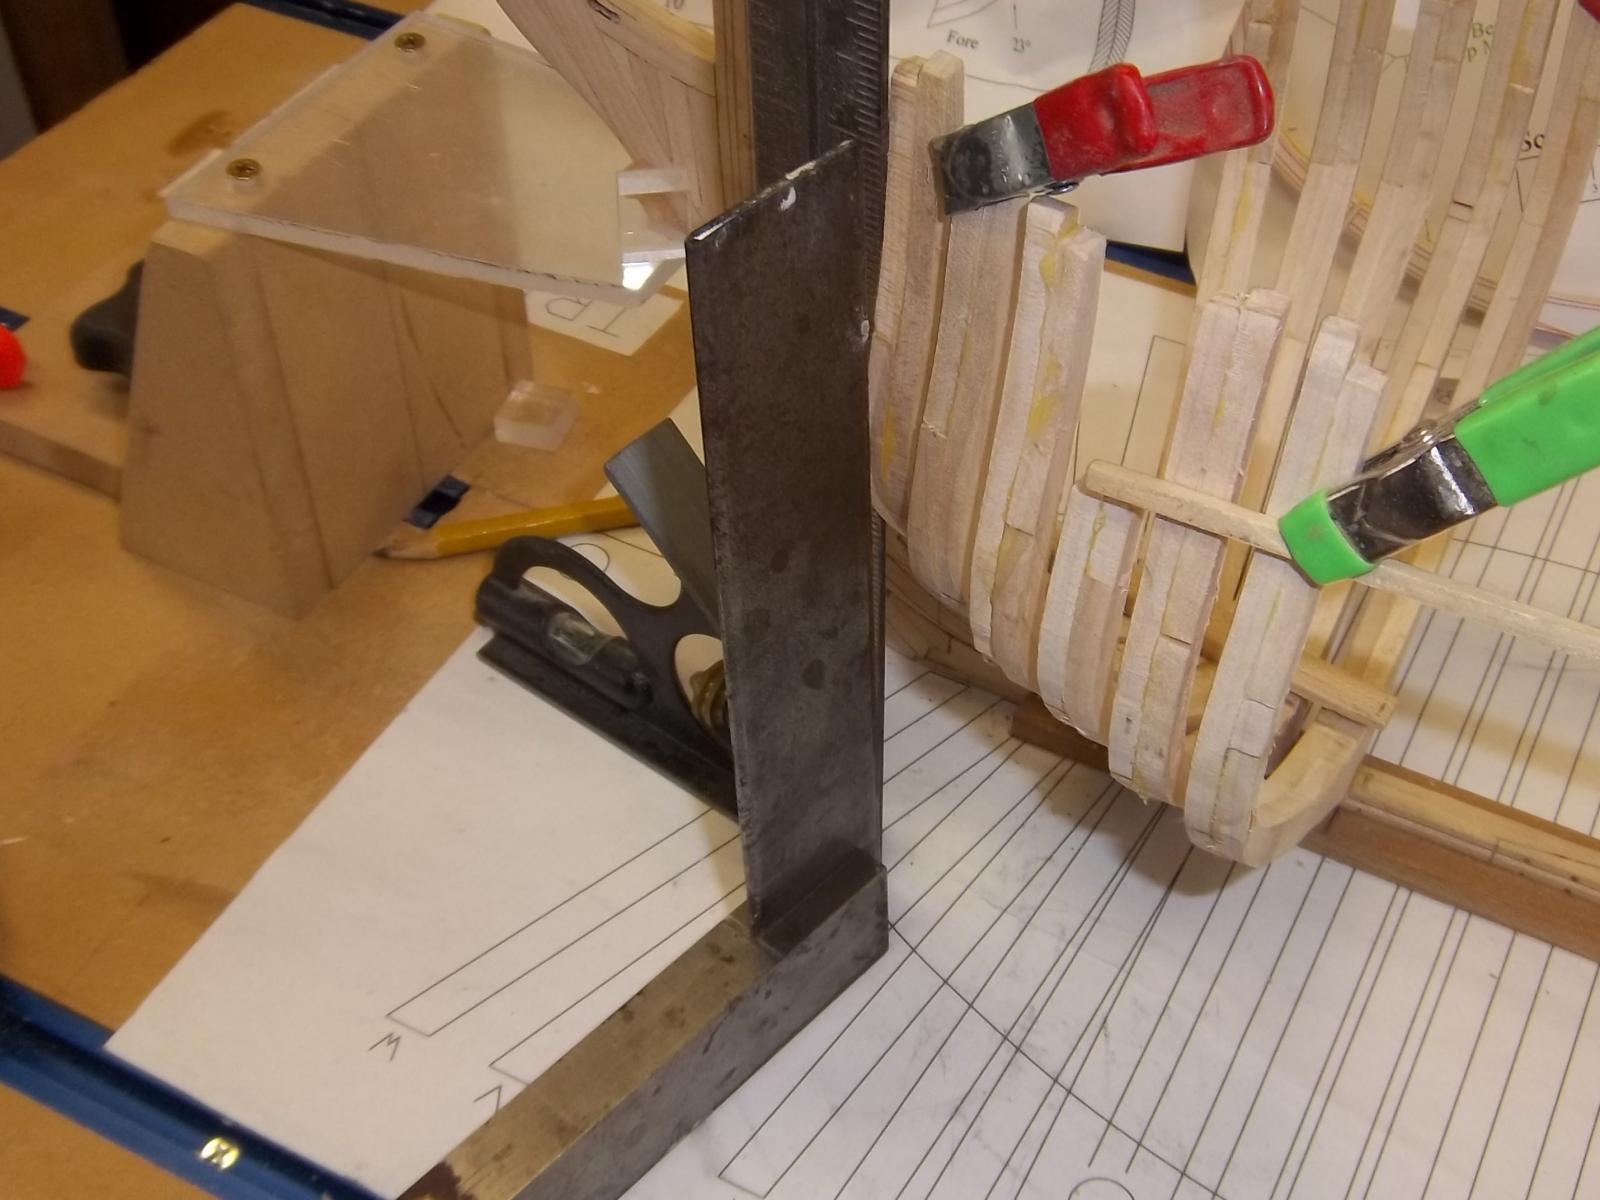
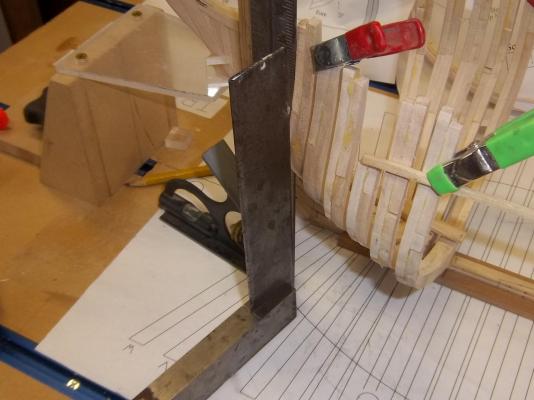
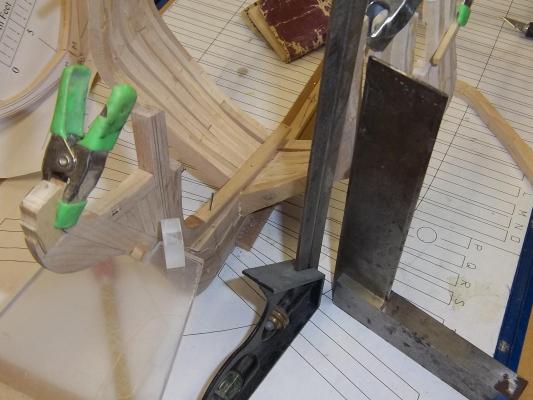
You forgot the stern! but yes they were a great help giving an almost an exact angle of the frame to the keel. I can't help it I have a slow and underpowered sander, the price was right! free lol
-
Off the grid? fantastic start! look forward to more pictures and post
-
Great start Hank! where are you? more pictures and post comming?
-
Great start! are you still active?
-
WOW! great progress, well done!
-
I tried to check this out but for some reason the Smithsonian will not accept my e-mail address when I try to register but sounds interesting. I do not have version 11 of IE perhaps that is why? Your build looks fantastic and the 1/4 scale looks like it will work! I know Dave Yotter's boat is huge but it allowed him to add a lot of detail. I look foward to following the rest of the build
-
Looks fantastic! at that pace it will soon be finished
-
Sketchup where are you? what happened to the progress of your facinating build
-
Some more pictures! At this point I have to mill some more wood for frames. I have already printed out and cut up the patterns. This process is comming along quite nicely and I am enjoying it


-
Fantastic! I love too watching you build, your attention to detail is quite amazing you are a true artist.
- 883 replies
-
- 1
-
-
- royal caroline
- ship of the line
- (and 1 more)
-
Ed, fantastic work on the strapping! as always the master perfectionist
-
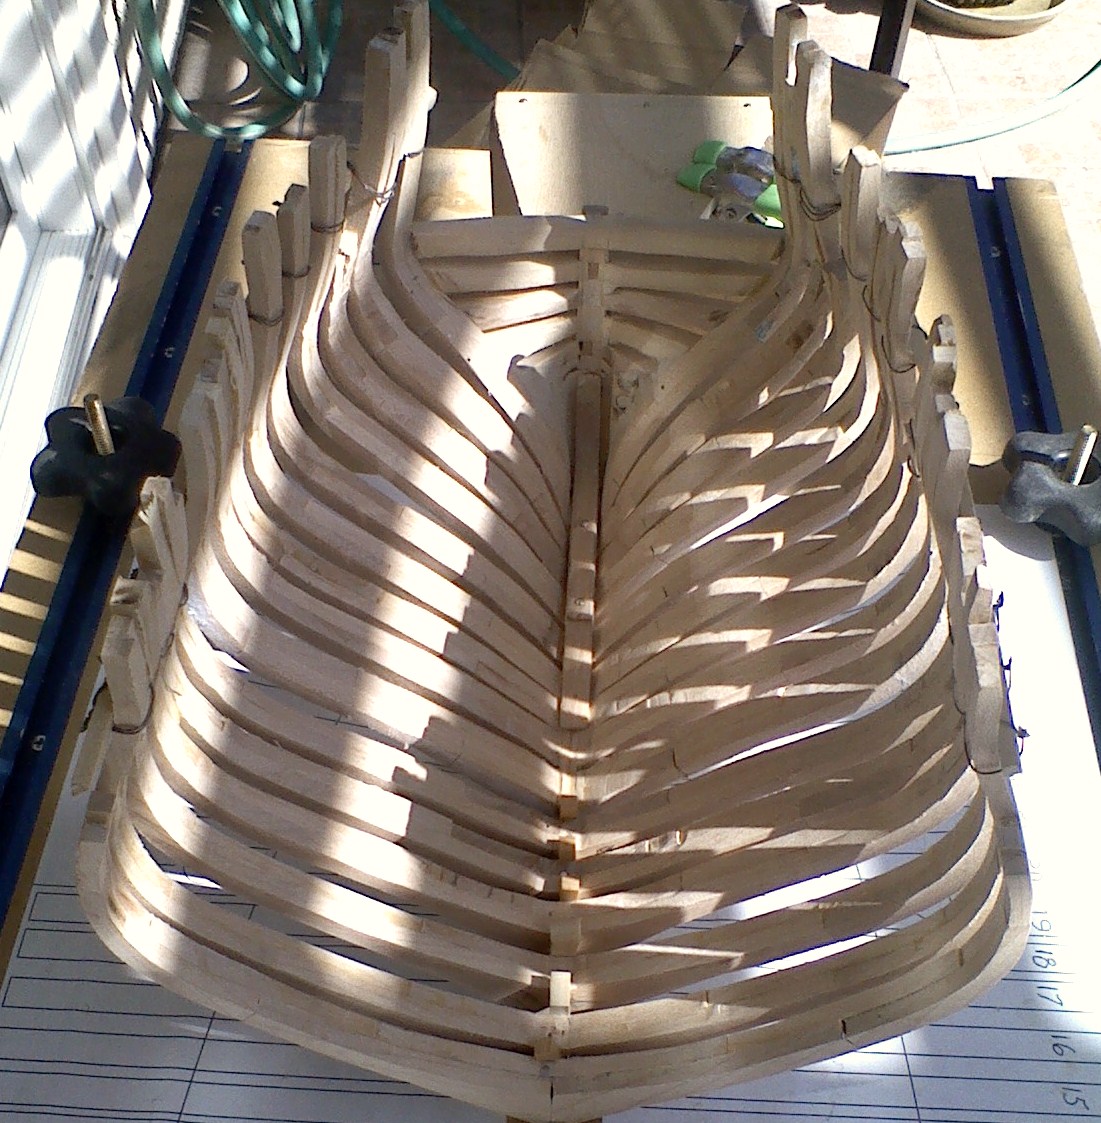
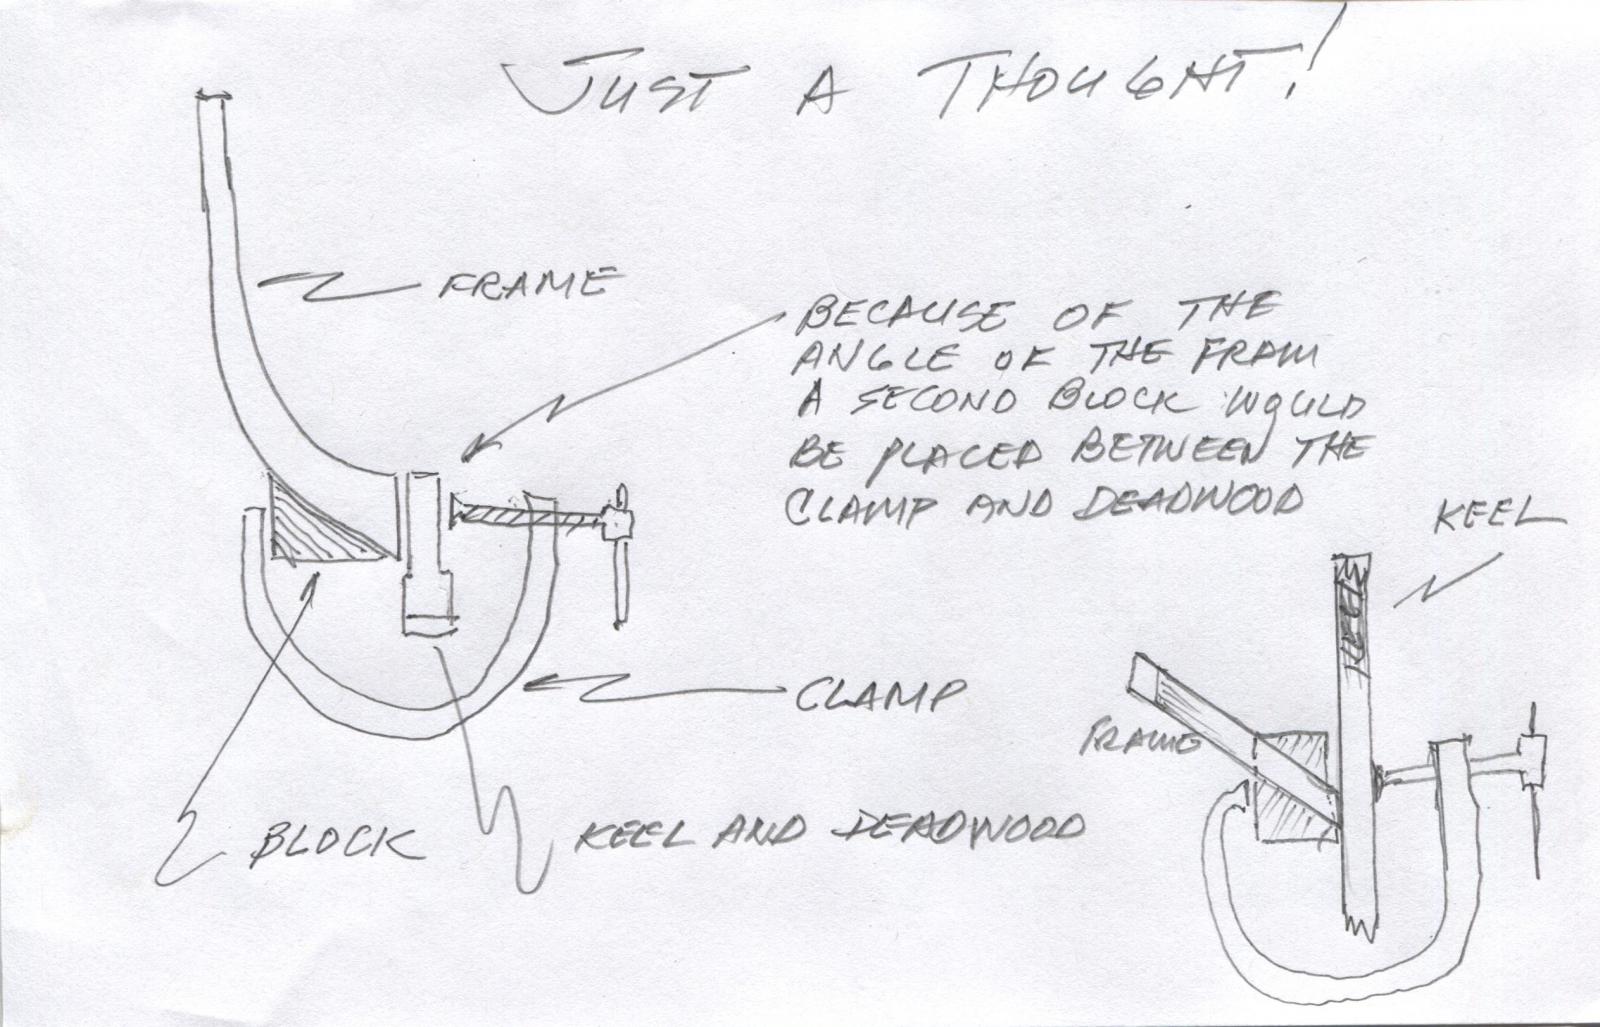
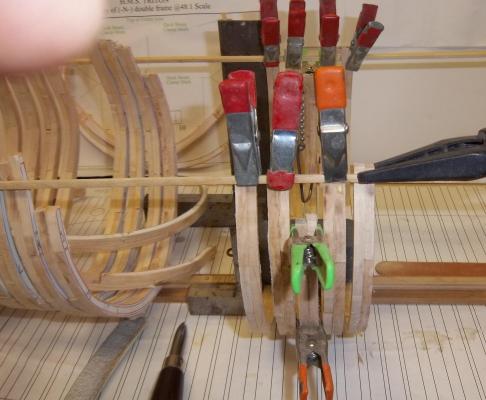
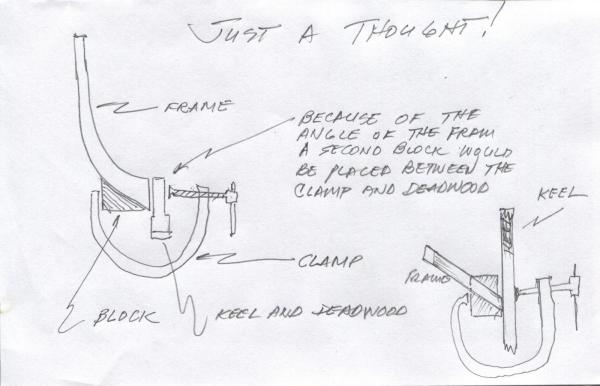
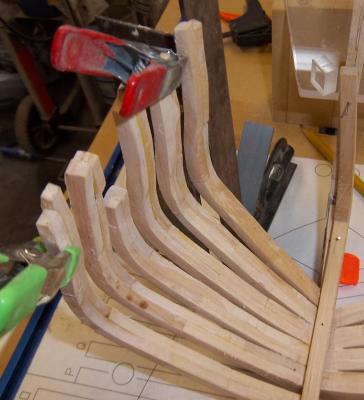
Thanks Guys Christian your cutter is progressing well Ben! the cant frames are actually very easy to install but just one at the time, as they are difficult to clamp except with the fingers! I actually thought of gluing a small angled piece of wood onto the frame and deadwood to assist the clamping
-
Guess I am an eyeball person, it’s the wantabe artist in me....not all things come out perfect but I can usually manage to make them look good. The jig is probably the best way to go and the extra time is well spent! but the thickness of the frame where it rest on the jig must be accurate unless you allow for extra material for the frame in the jig. Harvey on your last question...I will post the build once I start it
-
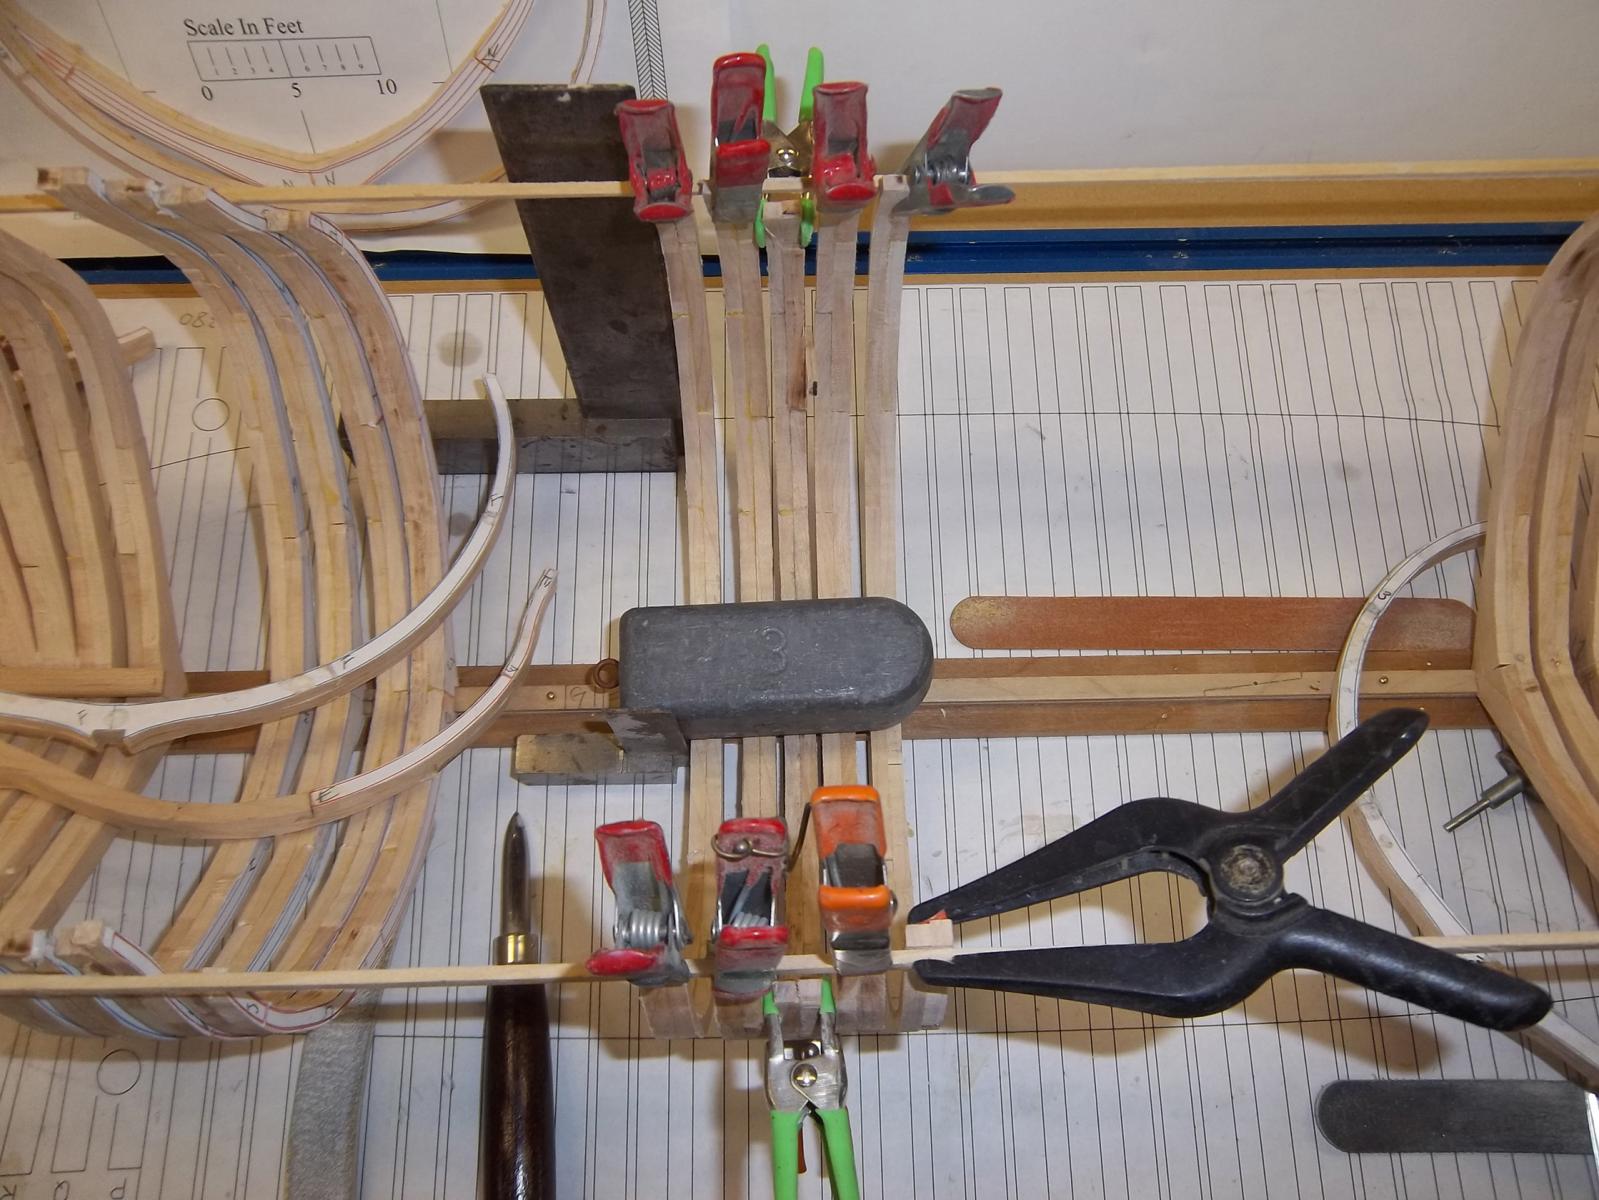
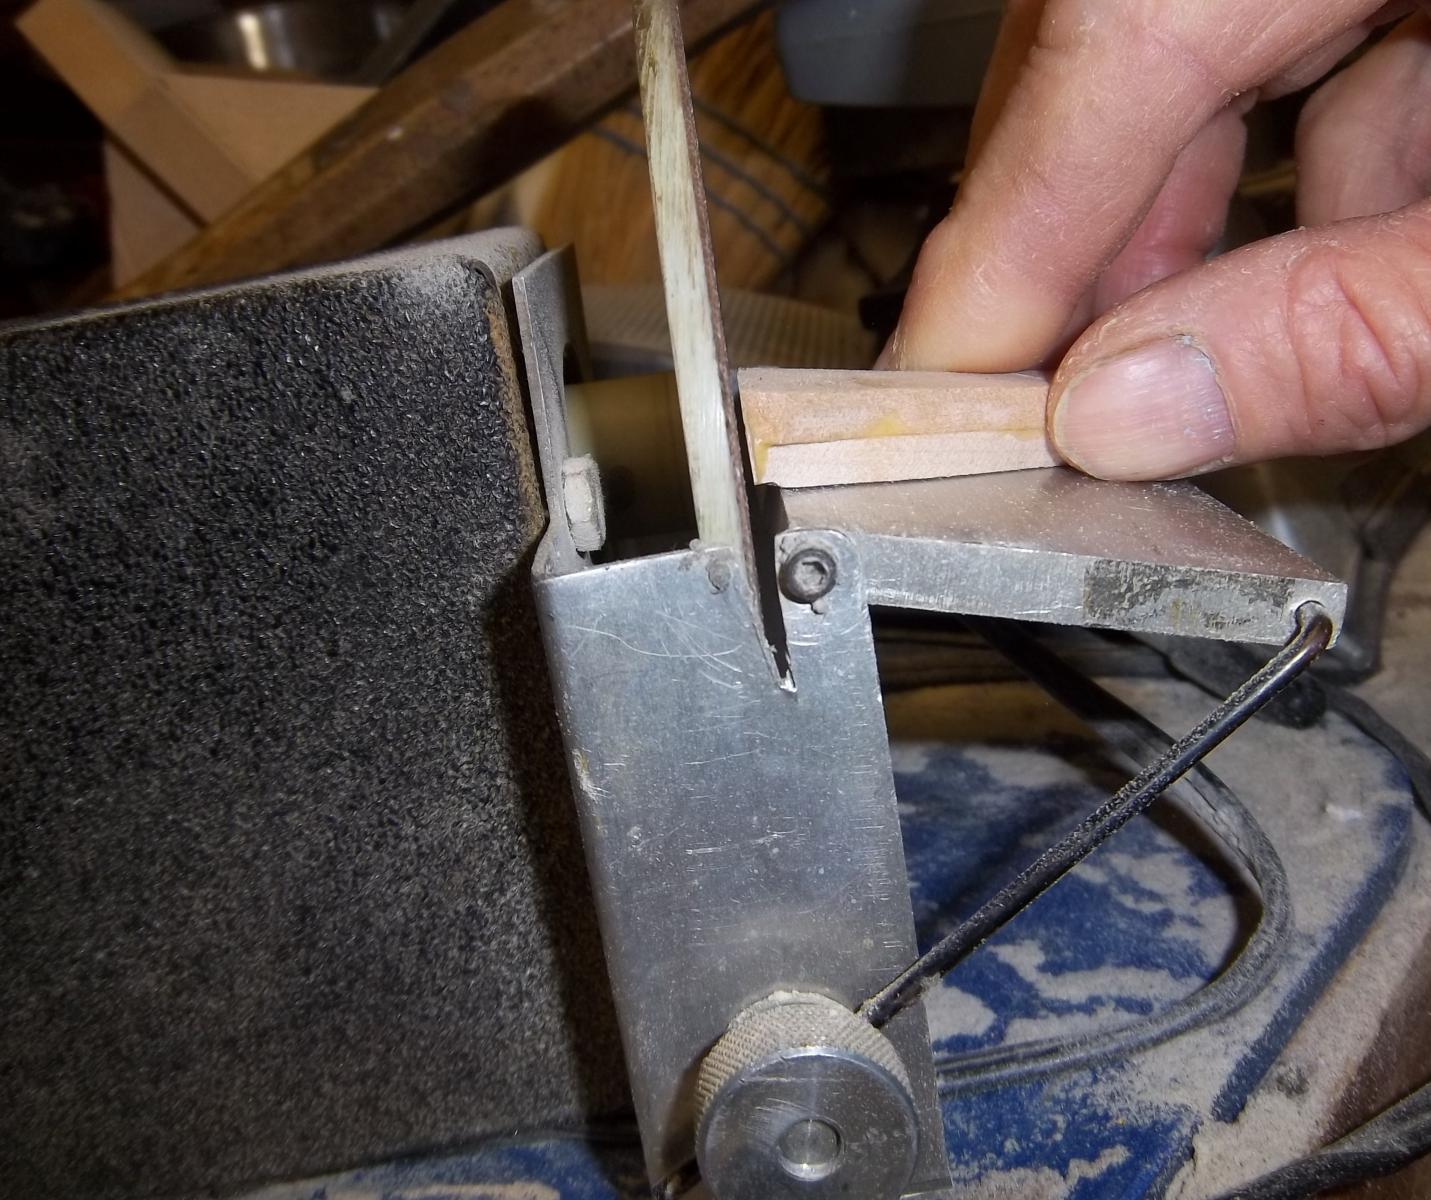
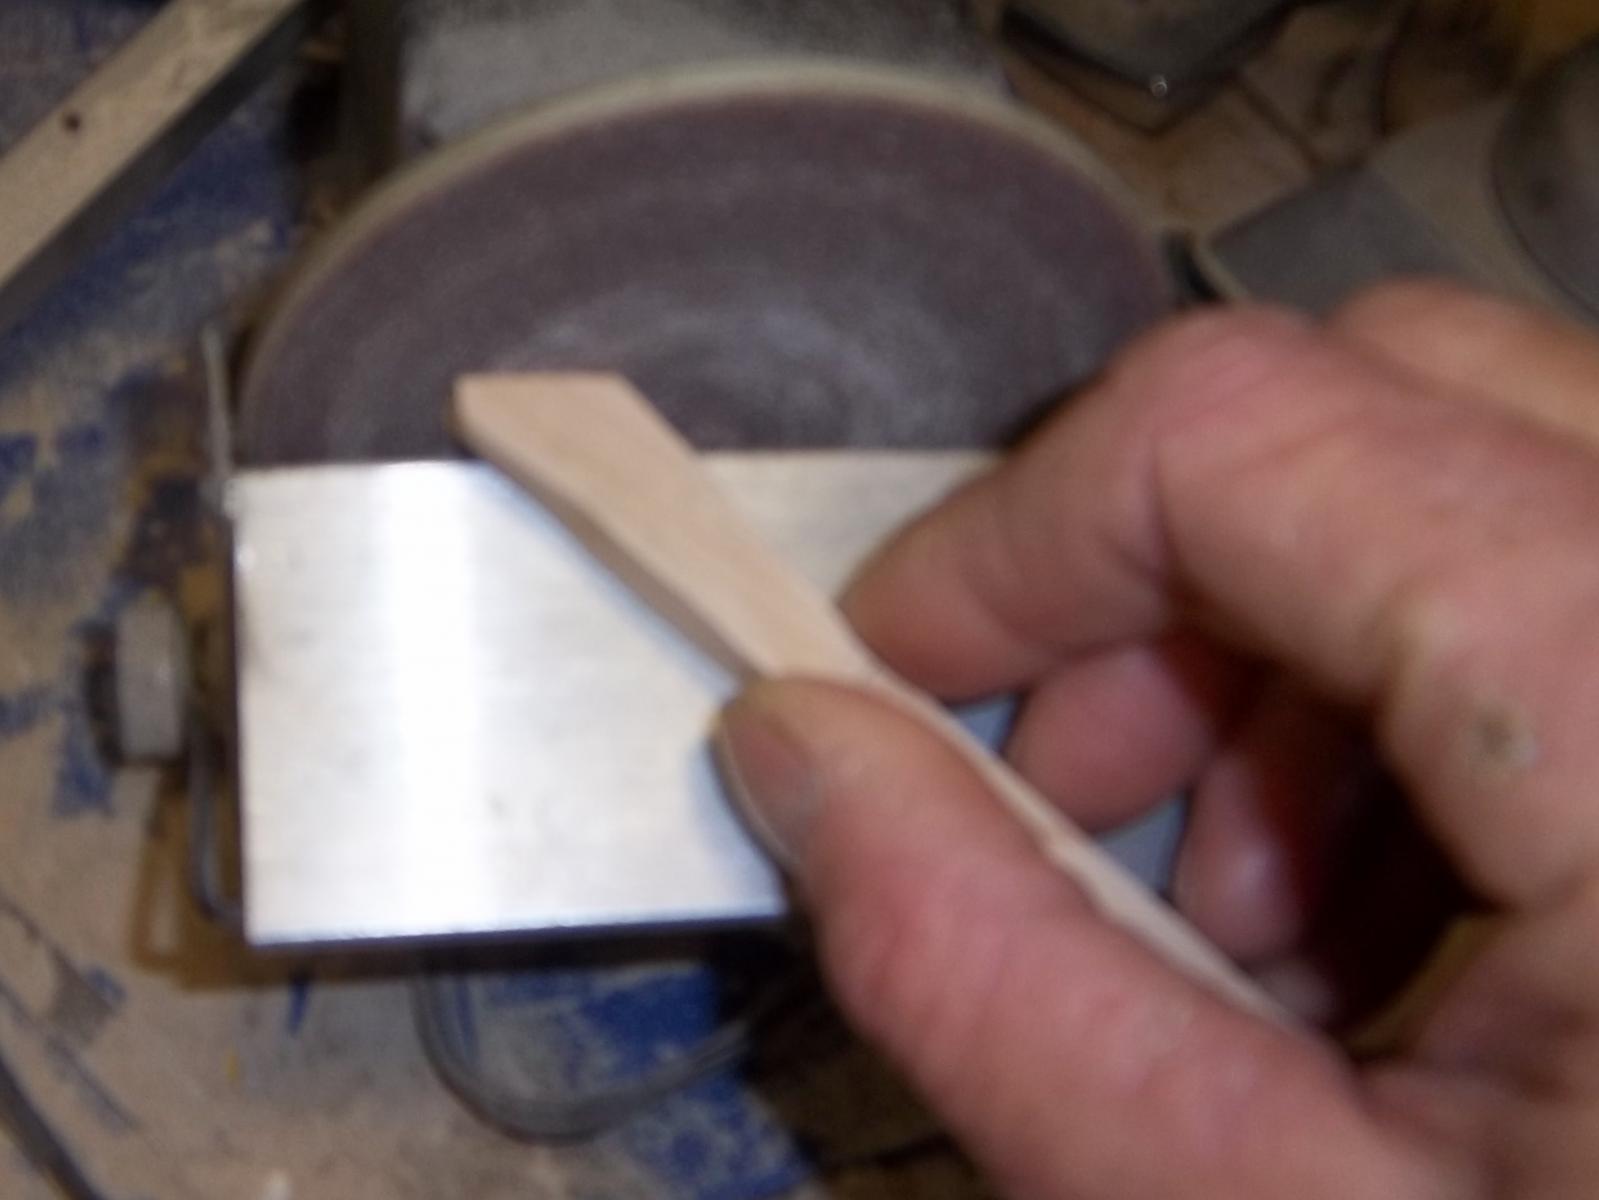
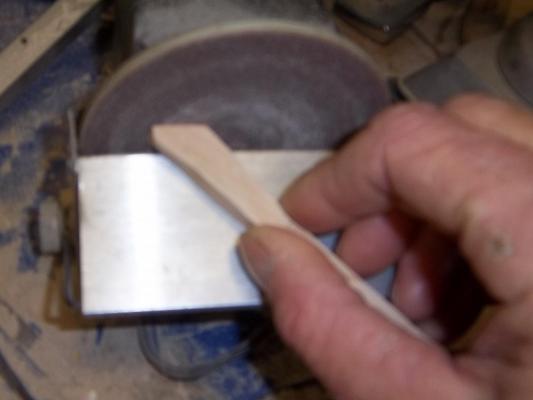
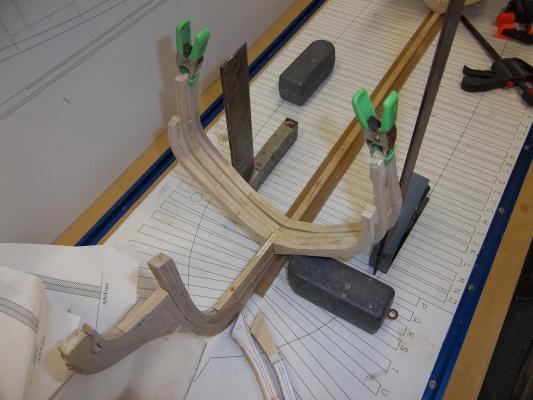
Sanding angle on cant frames, the sander is homemade and way underpowered, but it works slow but sure. Lining up and setting cant frame to deadwood Two more cant frames and I can start the bollards and hawse construction Progressing! couple more years and I will have it done I have anouther project that I am working on so I am dividing time between them


- 205 replies
-
- 12
-