the learner
-
Posts
758 -
Joined
-
Last visited
Content Type
Profiles
Forums
Gallery
Events
Everything posted by the learner
-
Looks like a nice set of tools to me but its missing the grilling element attachment!
-
Protective film for plans
the learner replied to Nirvana's topic in Modeling tools and Workshop Equipment
Make sure that what ever type of clear film/vinyl you use that it is acid free to protect the paper that the plans are drawn on. -
Where Do You Keep Your Working Plans
the learner replied to BubbleHead's topic in Modeling tools and Workshop Equipment
Nice looking shop Bubblehead.....I take it you are not married as that appears to be your kitchen too! -
A fantastic Build! I love your detail describing and constructing all of the iron work, Great job!
-
Fantastic metal work!!
-
A nice cean build! Great job
-
Klimi! looks good! its ok to use spit it is a good ceaning agent and it does not harm the wood
-
Hi Bob, if you have not already picked out a color for the interiour of the pilothouse Behr "Canton Jade 460A-3" or "Tropical Dream 460A-2" are close shades that I think would work as I remember, but I think it was called pea green. there was a lot of wood work around the windows and on the inside of the pilot house and and an equal amount of painted walls. cieling was white! the window glass droped down from the top into the wall cavity below it...all the front cabin window were the sam for the pilot house...no cranks Guy
-
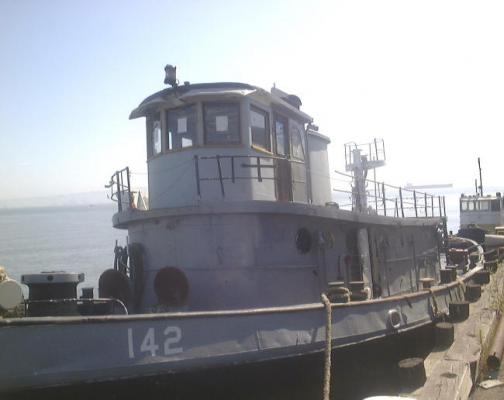
This was one of the newer boats that were attached to NOB service craft department. Including this one there were atleast 5 of them
-
we were supplied paint from service craft stores the the colors were limited but as I remember the interiour colors were either light green, white or grey. the crews quarters was light green as was the captain and chief engineers cabin most of the rest was white. I remember adding blue into the white to keep it from turning yellow. for the galley, engine room, and the open area (crew washroom and rest rooms). Some of the newer boats had a light blue/white on the inside the pilot house interiour was light green (I think this was an industrial color used in the 60.s and 70's) I can look at my Behr paint color swatch book and see if I can come up with a color match for yo if you want Bob I like the brass rim port holes......just as I remembered as I had to polish them LOL. Guy
-
I know it was early in the post but I like the process you used to make the splice. I my self spent 4 years splicng line when I was much younger sic, never thought I would use it again OH well!! a good job and the link was a good teaching aid Ps nice work space!
- 1,215 replies
-
- 2
-

-
- sloop
- kingfisher
- (and 1 more)
-
To make the pictures look rite you have to smile more!
-
No II arrived yesterday in the mail have not put it down since except when my wife yelled at me that it was past time to go to bed!!! She was asleep when I finally got there! As you promised EdT well done Guy
-
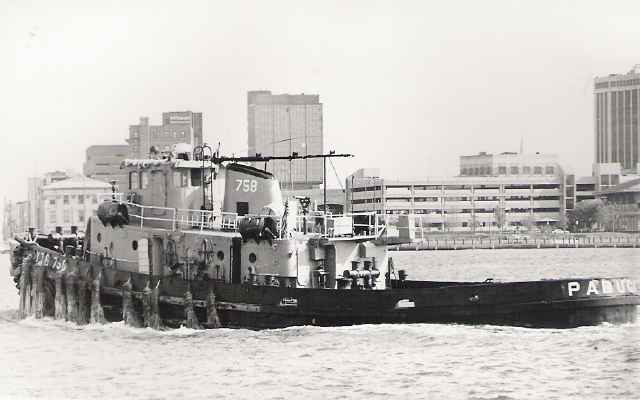
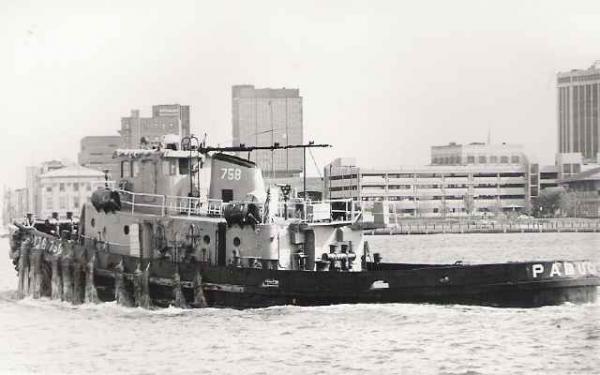
Bob, looking fantastic! can not wait until you finish. Were you able to determin why it was painted such a dark color while in Pearl? This picture of Nakomis shows the midships set of bits Missing shuttle One thing I notice in a previous post you are missing a scuttle hatch between the capstain and the fwd cabin bulkhead on the deck that accessed the crew quarters. There was also a hatch fwd under the kingpost to access the chain locker. the king post on the YT150 during the 60's had a cap on top about two inches larger than the post and there was a cross bar 3-4" in diameter about half way between the gunnal and the top of the post. when you have finished the deck house and pilot house are you going to add bow matts and fenders? Guy
-
Edt, enjoyed talking with you this last weekend in Charleston. Guy
- 3,618 replies
-
- 1
-
-
- young america
- clipper
- (and 1 more)
-
Dan, fantastic job on those anchors! see you next week
-
EdT, As usual you build is off to a fantastic start. good job! Guy
- 3,618 replies
-
- 2
-
-
- young america
- clipper
- (and 1 more)
-
HMS Pandora 1779 in 3D
the learner replied to ppddry's topic in CAD and 3D Modelling/Drafting Plans with Software
Super awesom! Fantastic detail, thank you for all the post -
Panthere 1744 in 3D
the learner replied to malachy's topic in CAD and 3D Modelling/Drafting Plans with Software
Awesome...sure cuts down on the sawdust or do you add that too? -
I don't think I will want to get that detailed and I am re-thinking the scale too. It is quite nice of you to offer your collection of your research on what you have collected for your build. It takes time to put all of that togther. I wish I could find the pictures I took while I was on the YT150 not that they would be that detailed but they would trigger memories of details Guy
-
Looks fantastic kind of what I am doing. but slower! much slower! Thanks for the angle patterns. I will cut them out of wood and add to my tool chest!
-
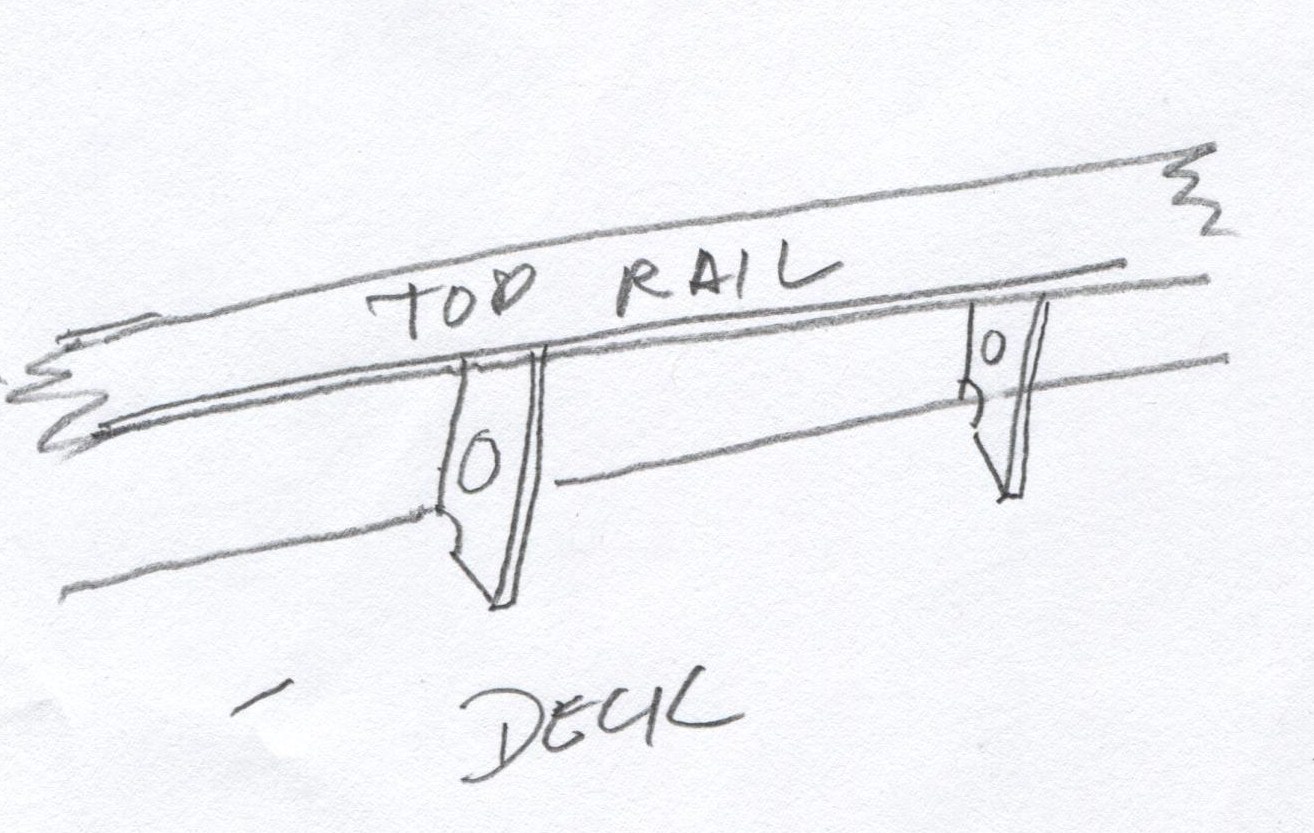
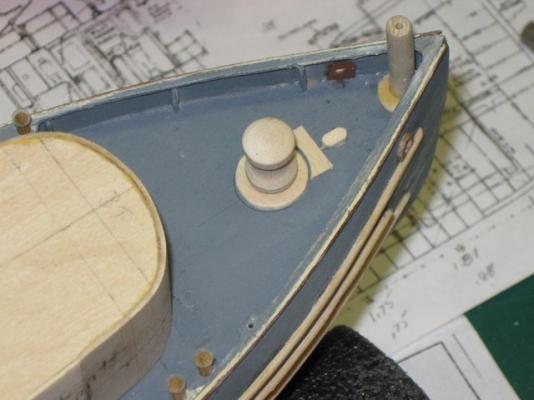
the gunnel support looks right but is not a box but a flat piece of metal bent at angle on inside edge. my boat spent several weeks tied up to a naval tender at Norfolk NOB and they replaced about 60 feet of our gunnel on both sides and they mfg'd the supports the same as the existing ones The drying racks at the stern (raised grid) was proably added later and might not have been on the original construction. basically it was used to dry the towing hawser when not in use. we basically flaked it on the drying rack to the conture of the stern
-
There is no wood in the construction of this vessel. exception being the captains cabin and the chief Engineers cabin had wood entry doors with wood trim around them and the bunks, desk and personal storage was wood. there is some wood trim through out the vessel but the primary construction material is steel!
-
juergen, You like me will find time to complete your build. I try to do something on it even if its onel 15 min. and every one wants to know why it takes so long ...guess they forget about life! Thanks texxn5
-
Bob, the disfigurement you see on the sides is from the constant banging against other objects barges ships fenders etc the older the boat the more indentations the gunnals/sides above deck had internal supports that looked like this,so you can leave the supports but the inside edge needs to be perpendicular to the deck. the inside edge also had a right angle bend to stiffen the support. How did you determin the angle of each support as you go from bow to stern? and you are right the maximun angle is at the stern and how did you detrmin each support was 72" apart? Its possible you can see the spacing on the outside of the YT149 just as you do on the hull but I remember them being about 60" apart. not much support but the main support was the large rub rail at the deck line on the outside surface of the hull and internal framing