.JPG.ca33079f5815b861e67b9c2cccd37982.JPG)

Blue Ensign
-
Posts
4,572 -
Joined
-
Last visited
Content Type
Profiles
Forums
Gallery
Events
Everything posted by Blue Ensign
-
 If you're going to plank over the Quarter deck very little will be seen of the cabin area, so probably not worth the effort and risk of modification. B.E.
- 857 replies
-
- 2
-

-
- Sphinx
- Vanguard Models
- (and 1 more)
-
Cheers Guys, @ Glenn, Bob, Tom, and Jacek Blame Chris, for how he designed the kit, providing the scale Quarter deck beams which gave me the idea for a Navy Board style model.😄 It was the possibilities of enhancing the kit that persuaded me to buy it, hours of extra fun for the money. I’m surprised Chris hasn’t charged me extra for the kit.😉 @Richard, A case of stuff happens Richard, James and the team do a great job of providing the means for us all to record our work, and MSW were let down by the previous host. I write all my logs on word and copy and paste to MSW The words docs and photo files are all backed up from my system. The problem with the lost Pegasus log was reconstructing the photo inserts which took all the time. You will note that I now add the reference below each photo, so I can quickly identify them. B.E.
- 857 replies
-
- 4
-
-
- Sphinx
- Vanguard Models
- (and 1 more)
-
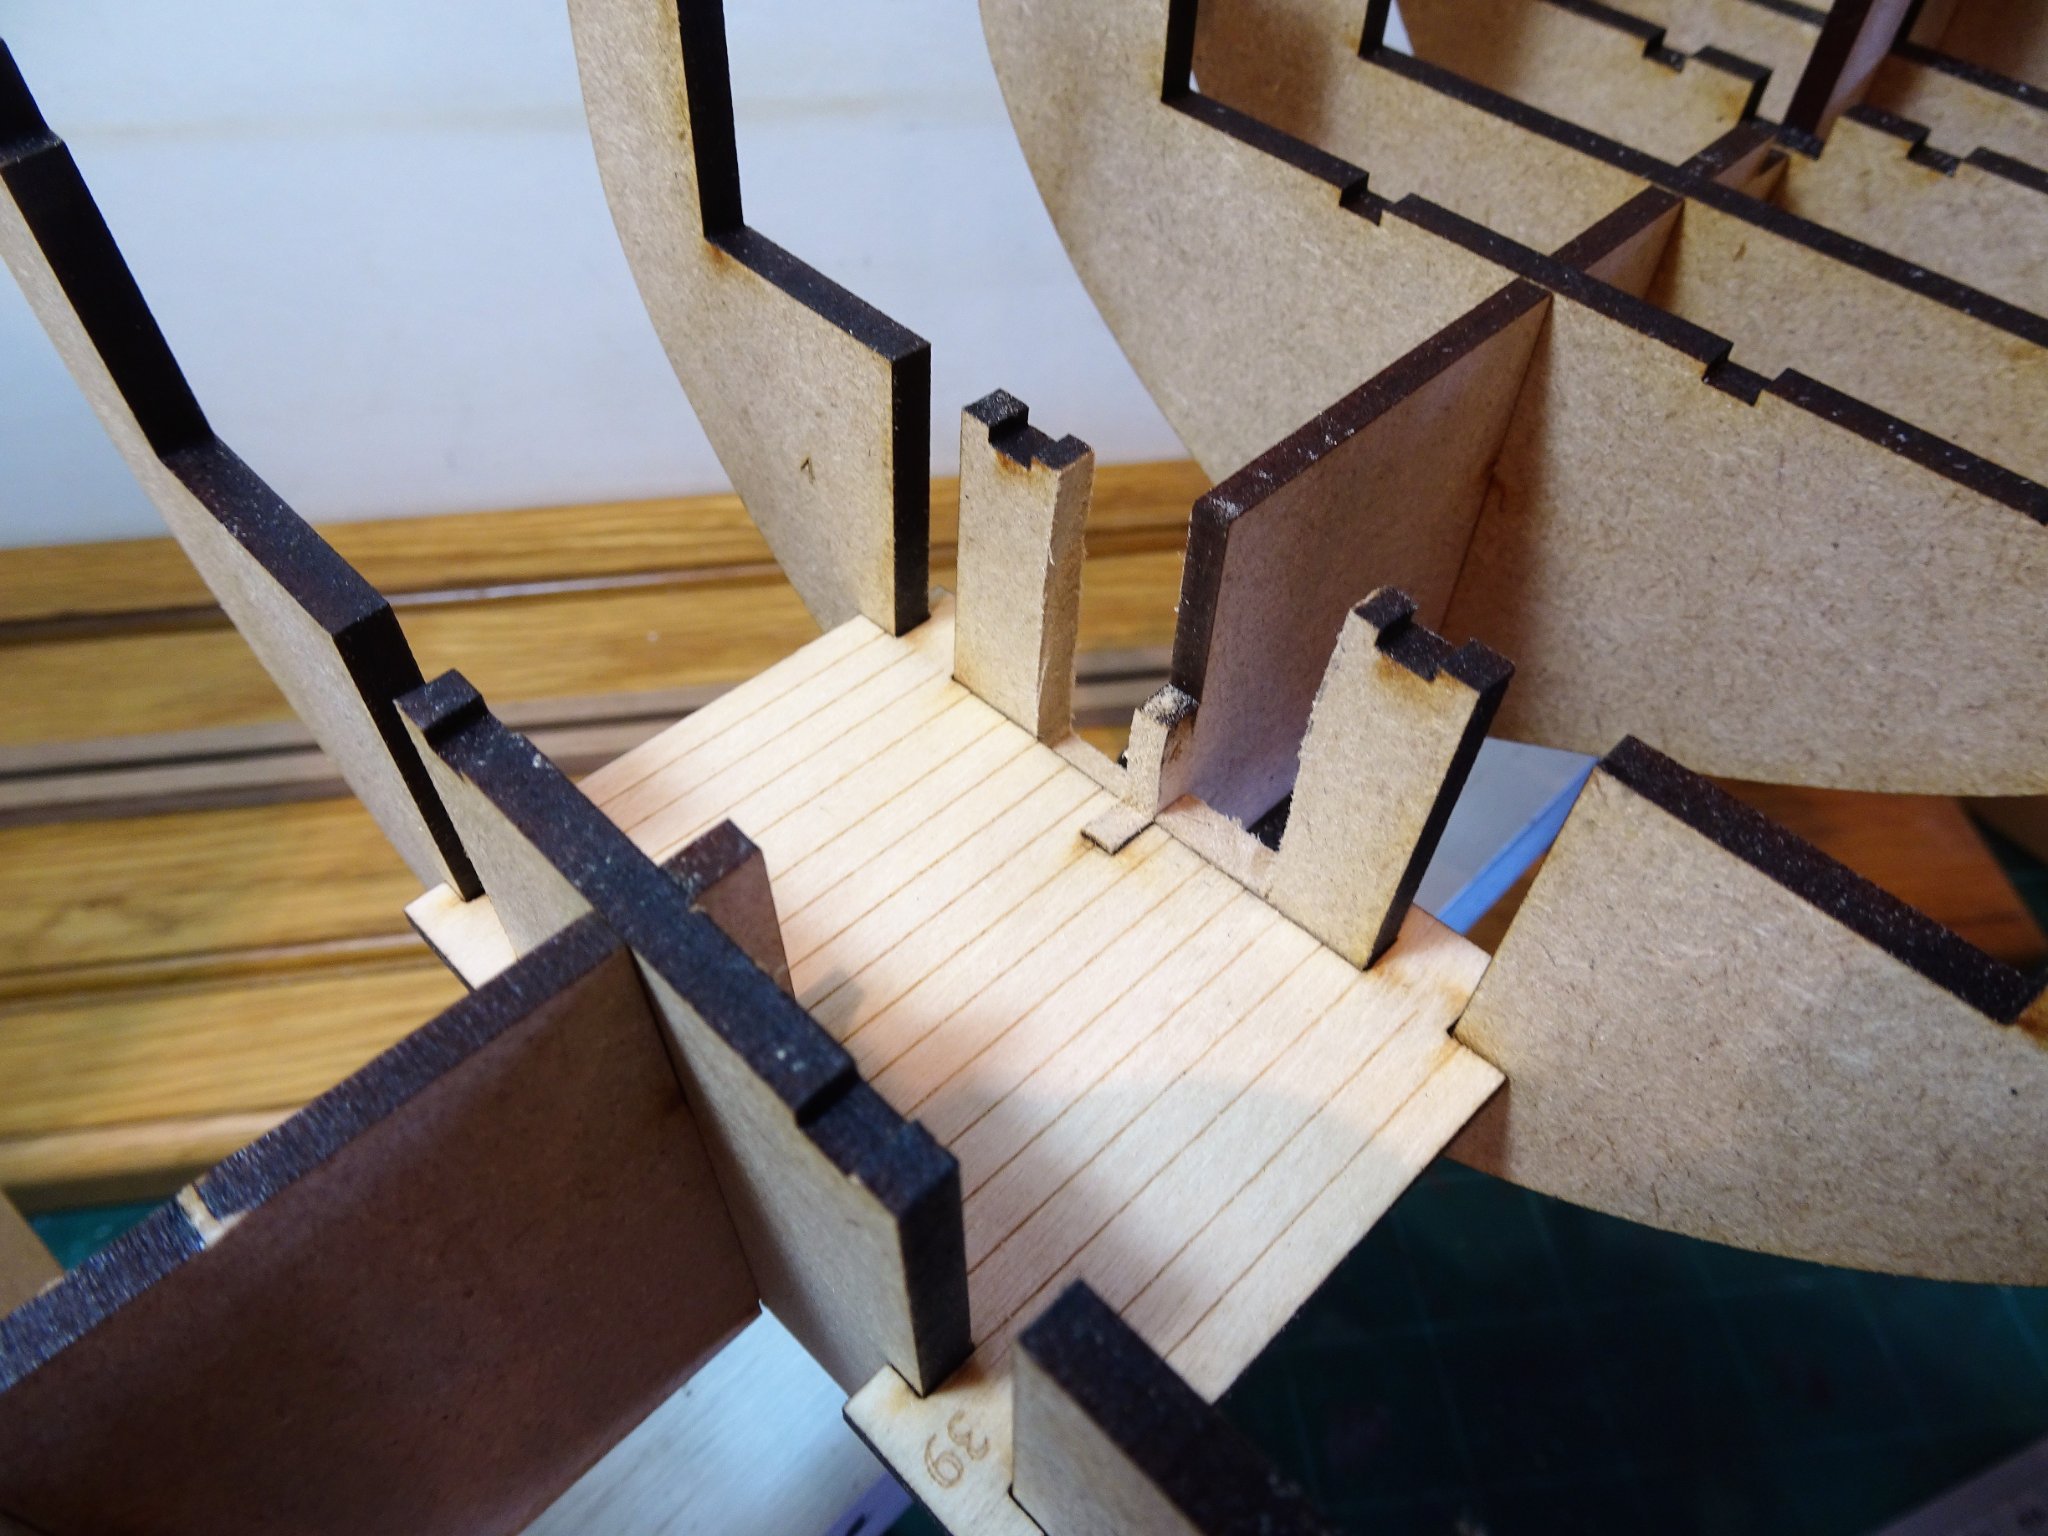
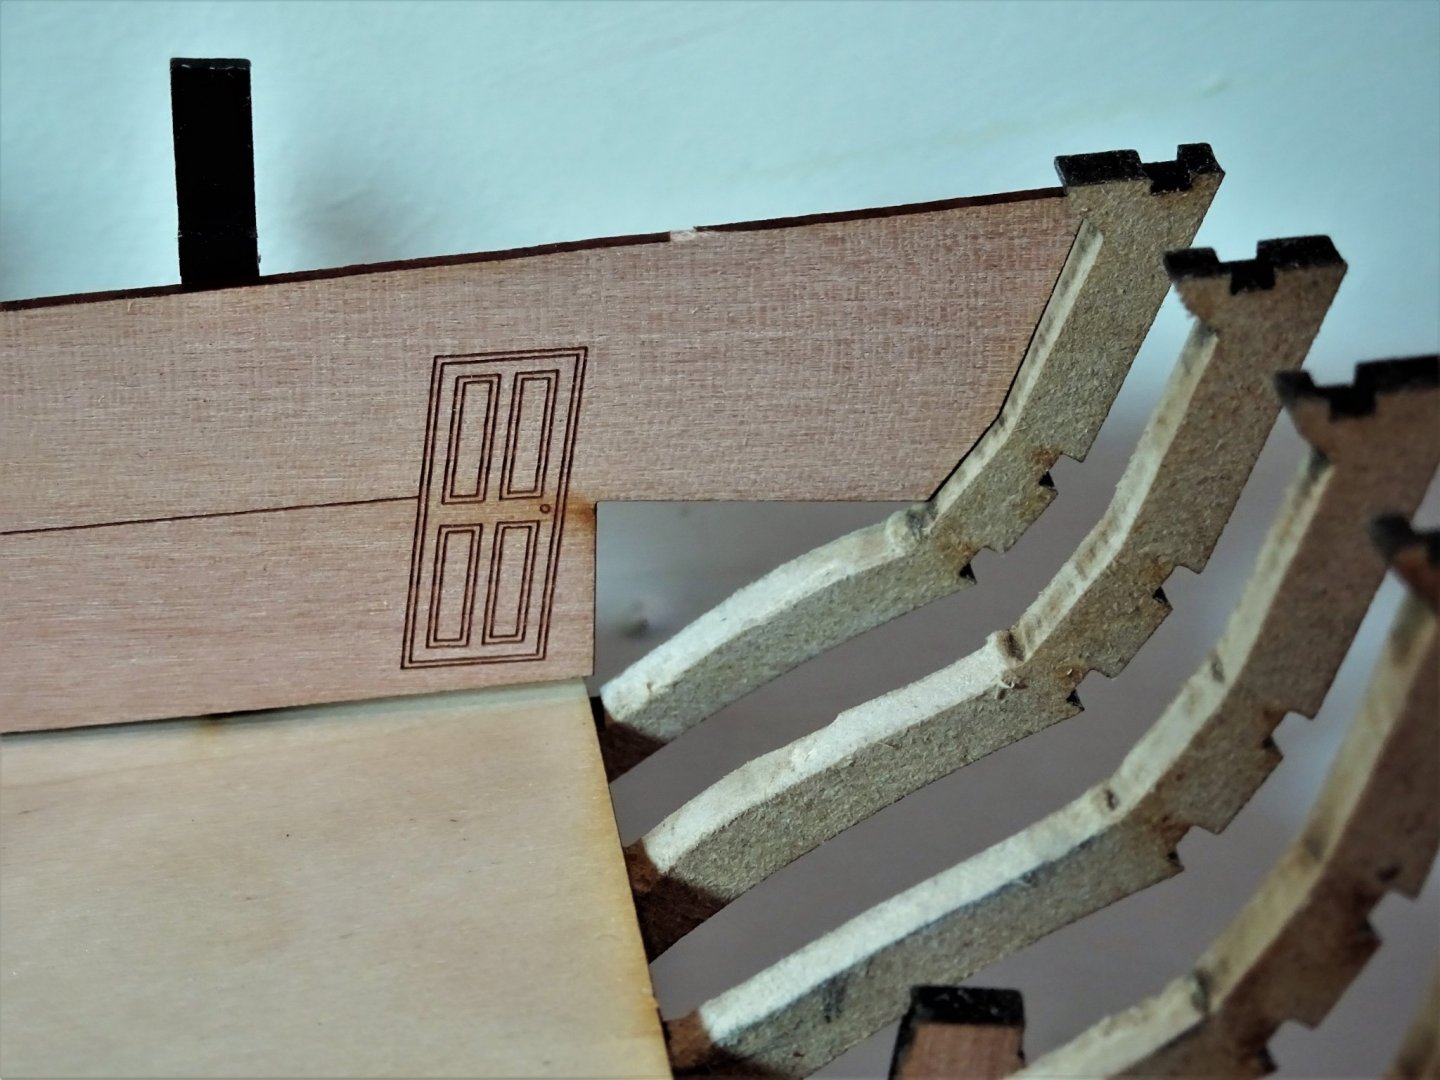
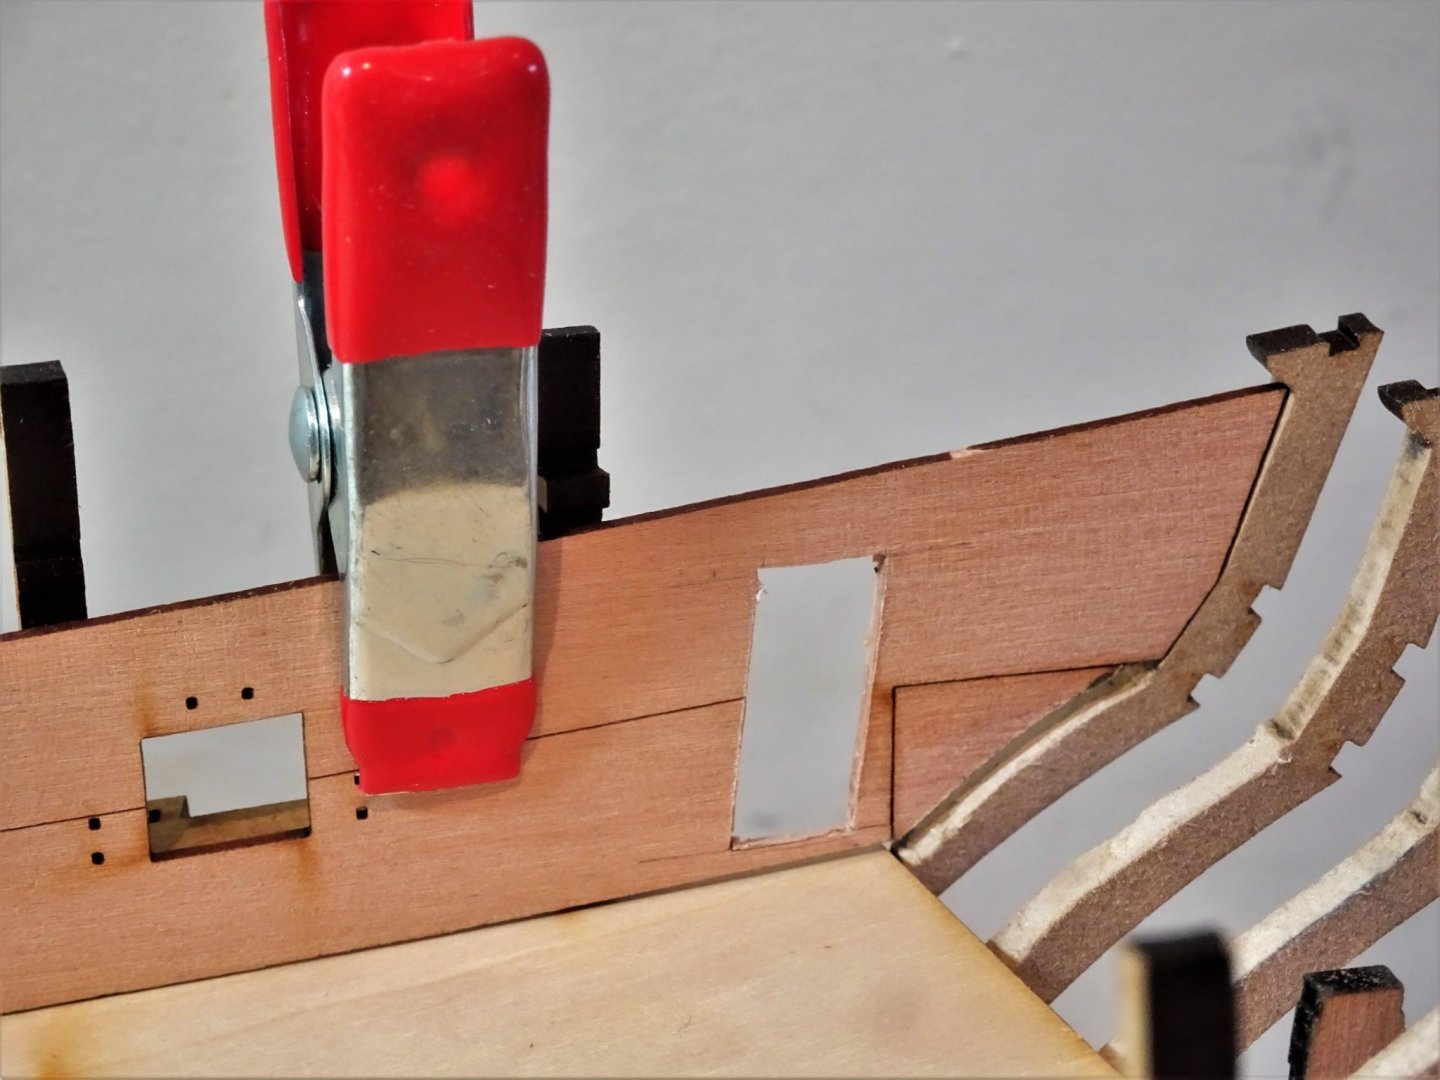
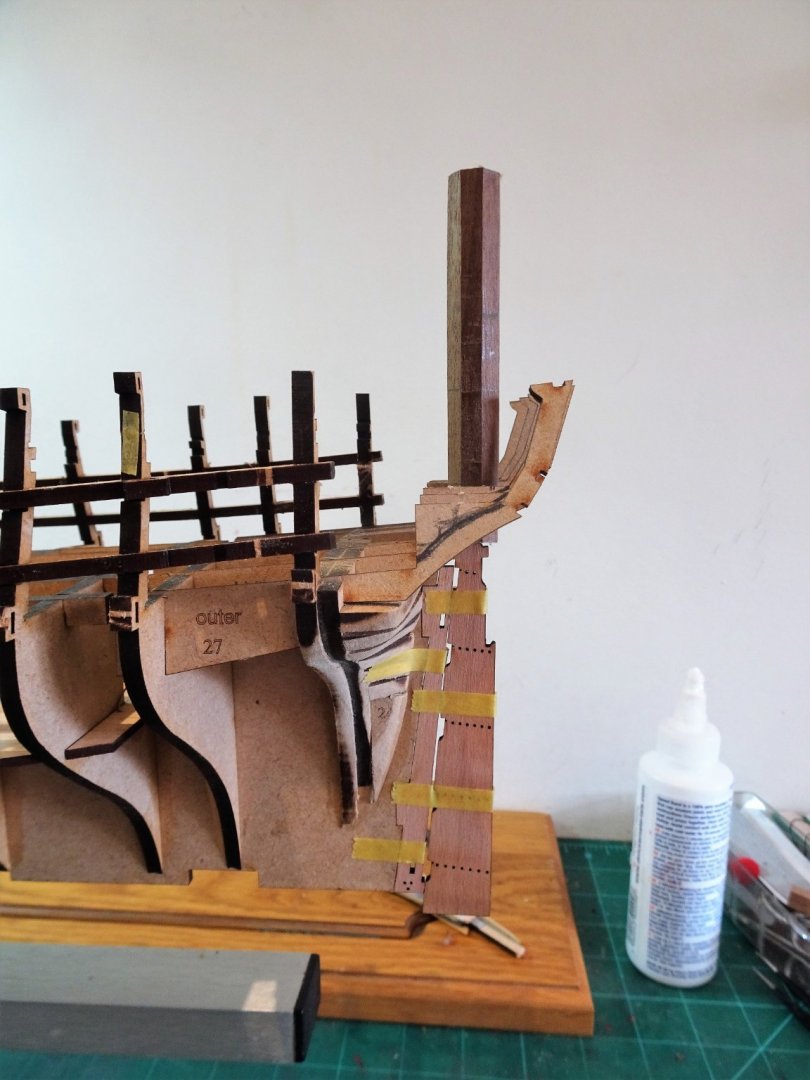
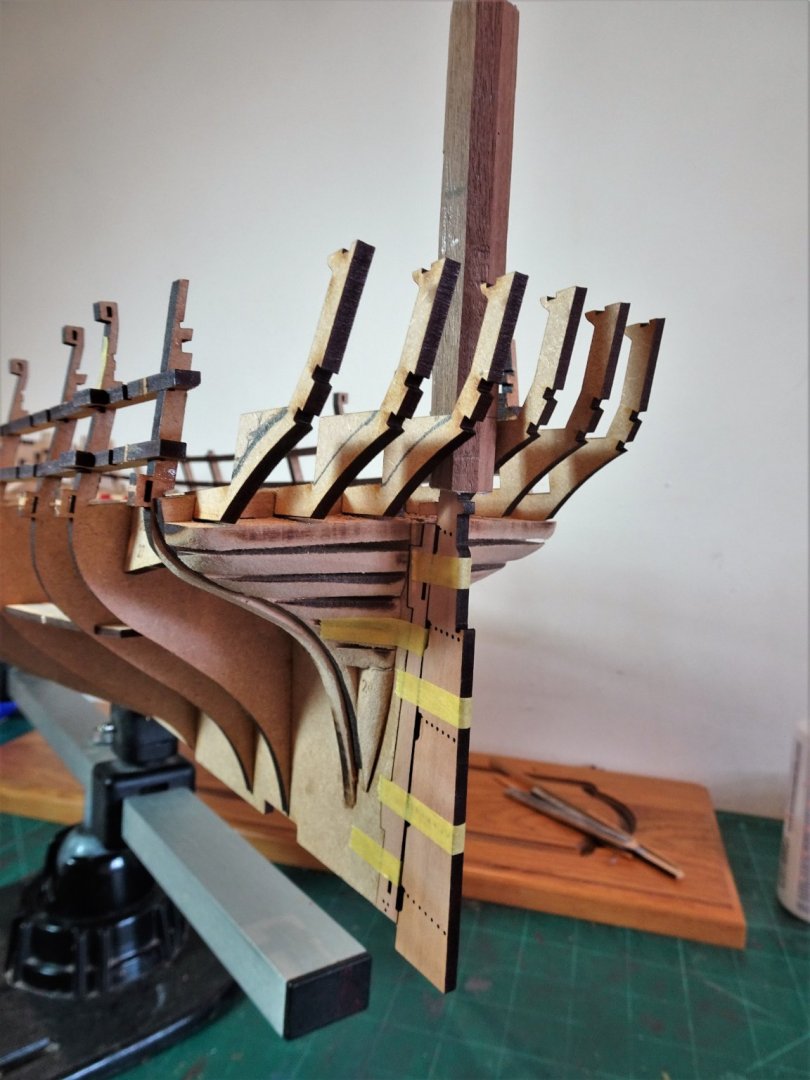
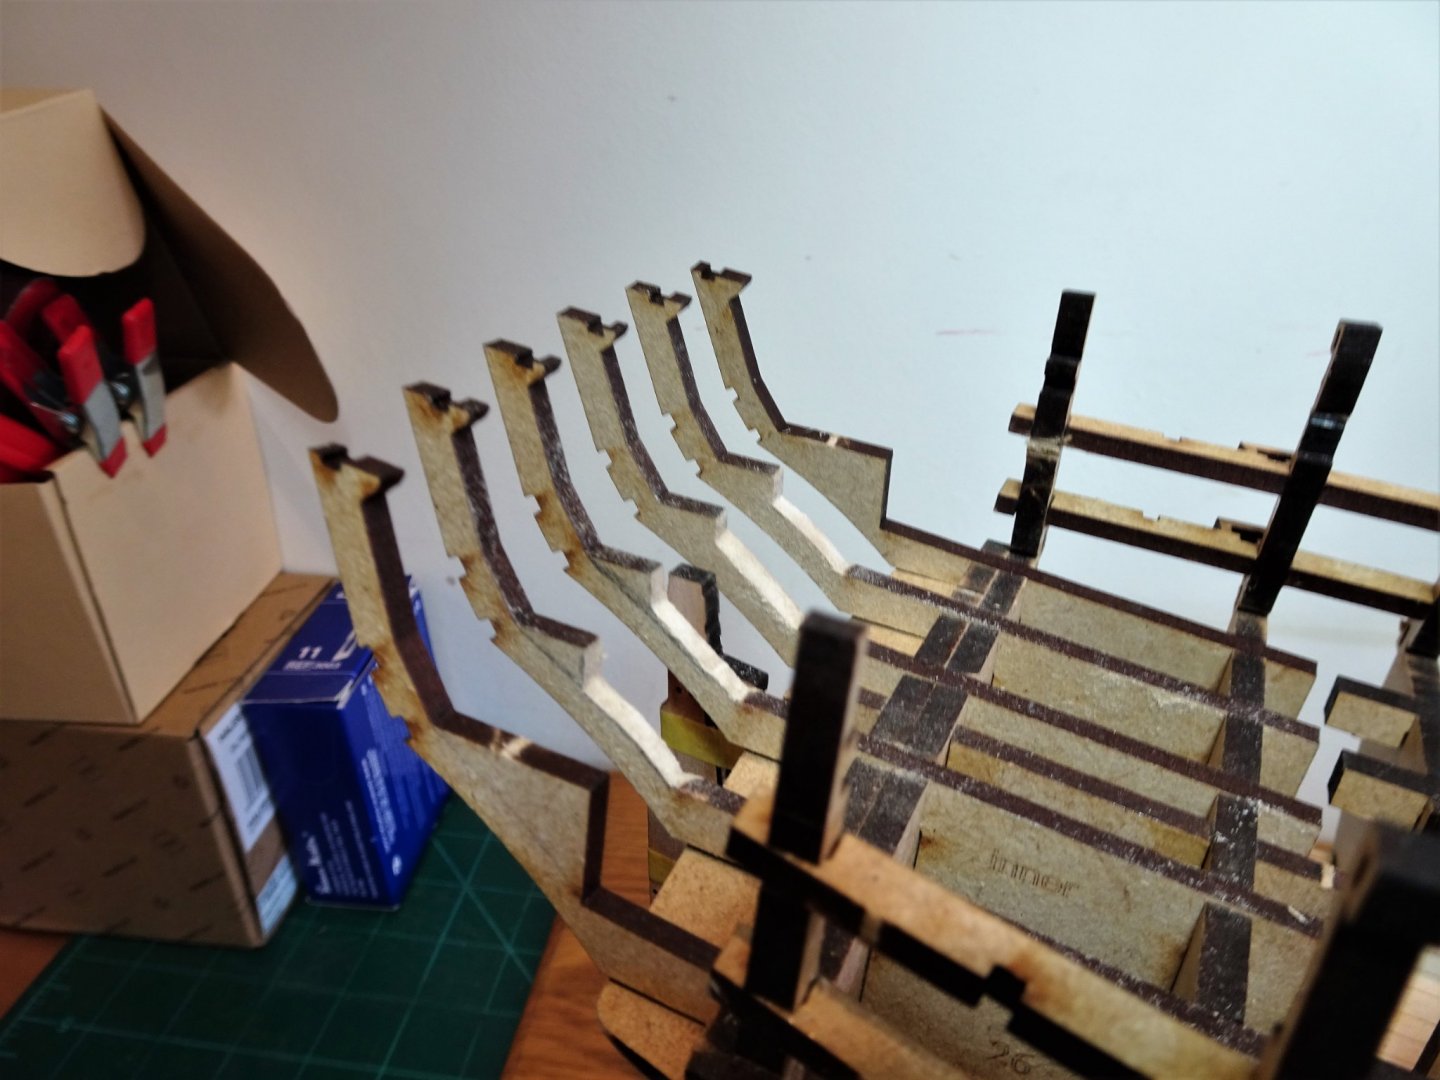
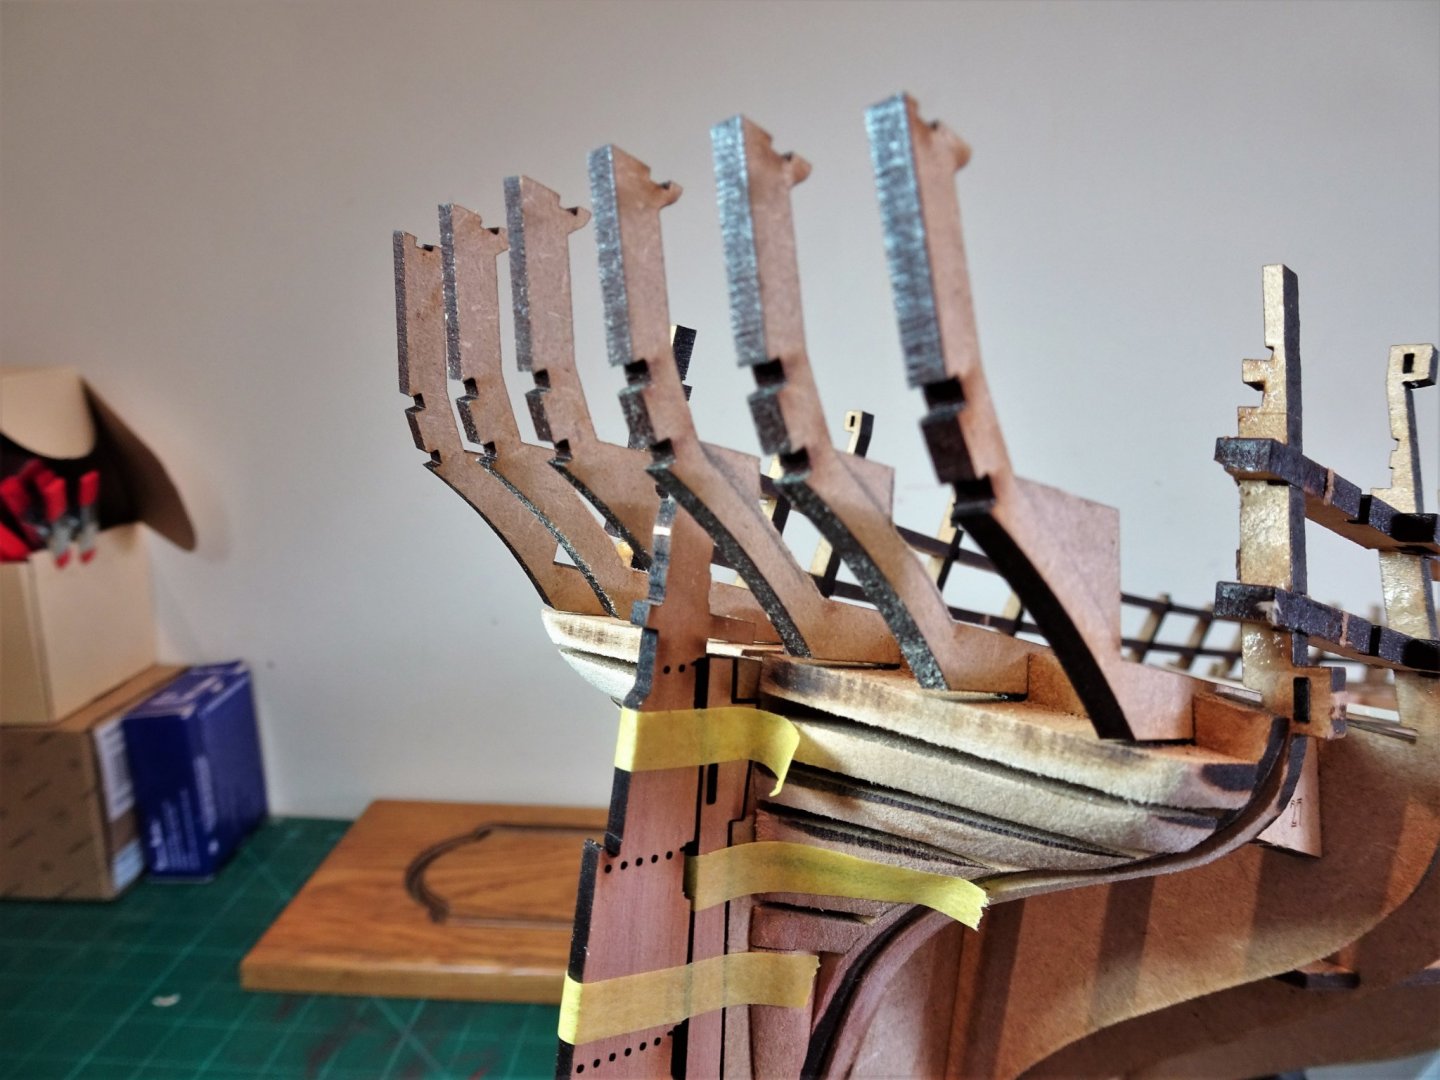
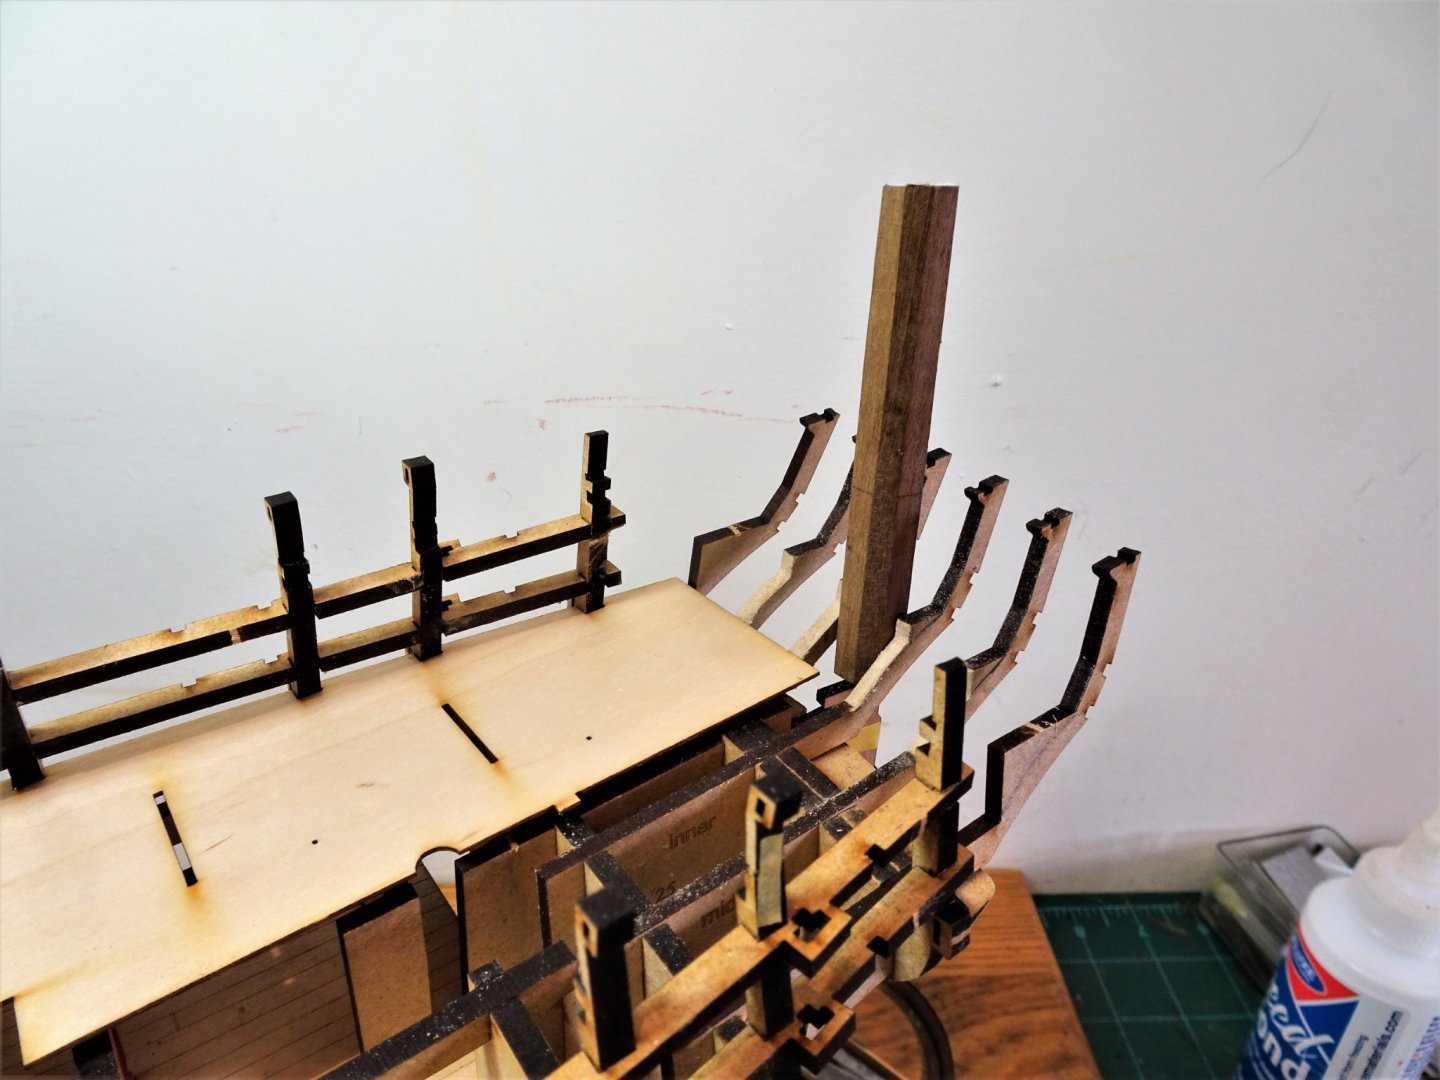
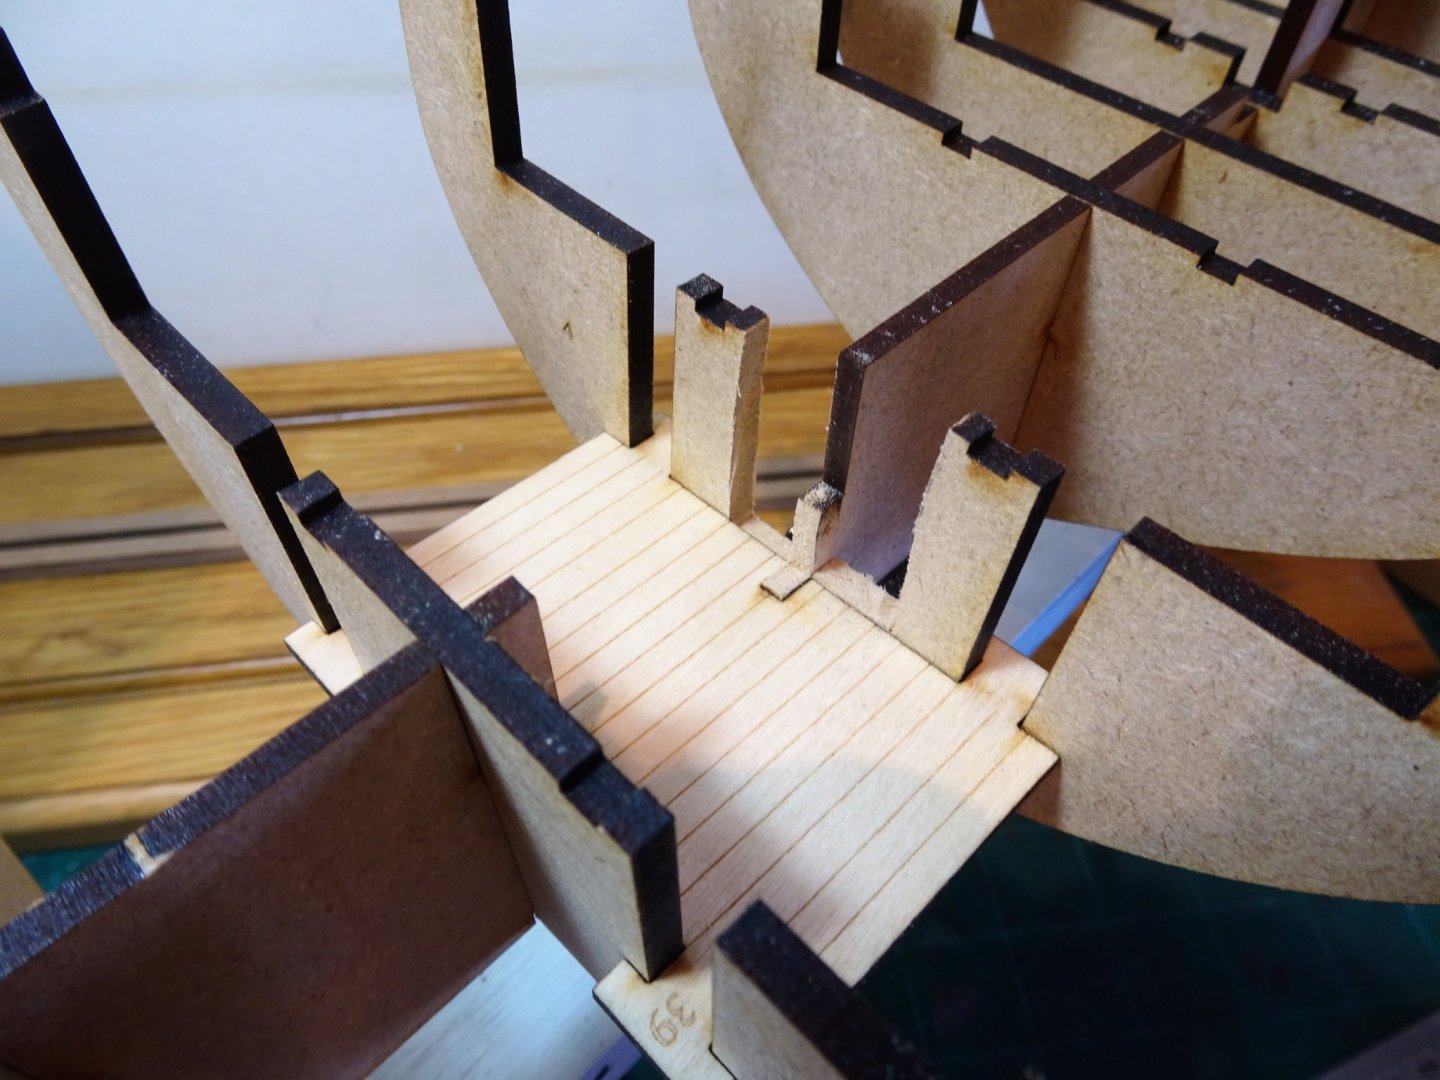
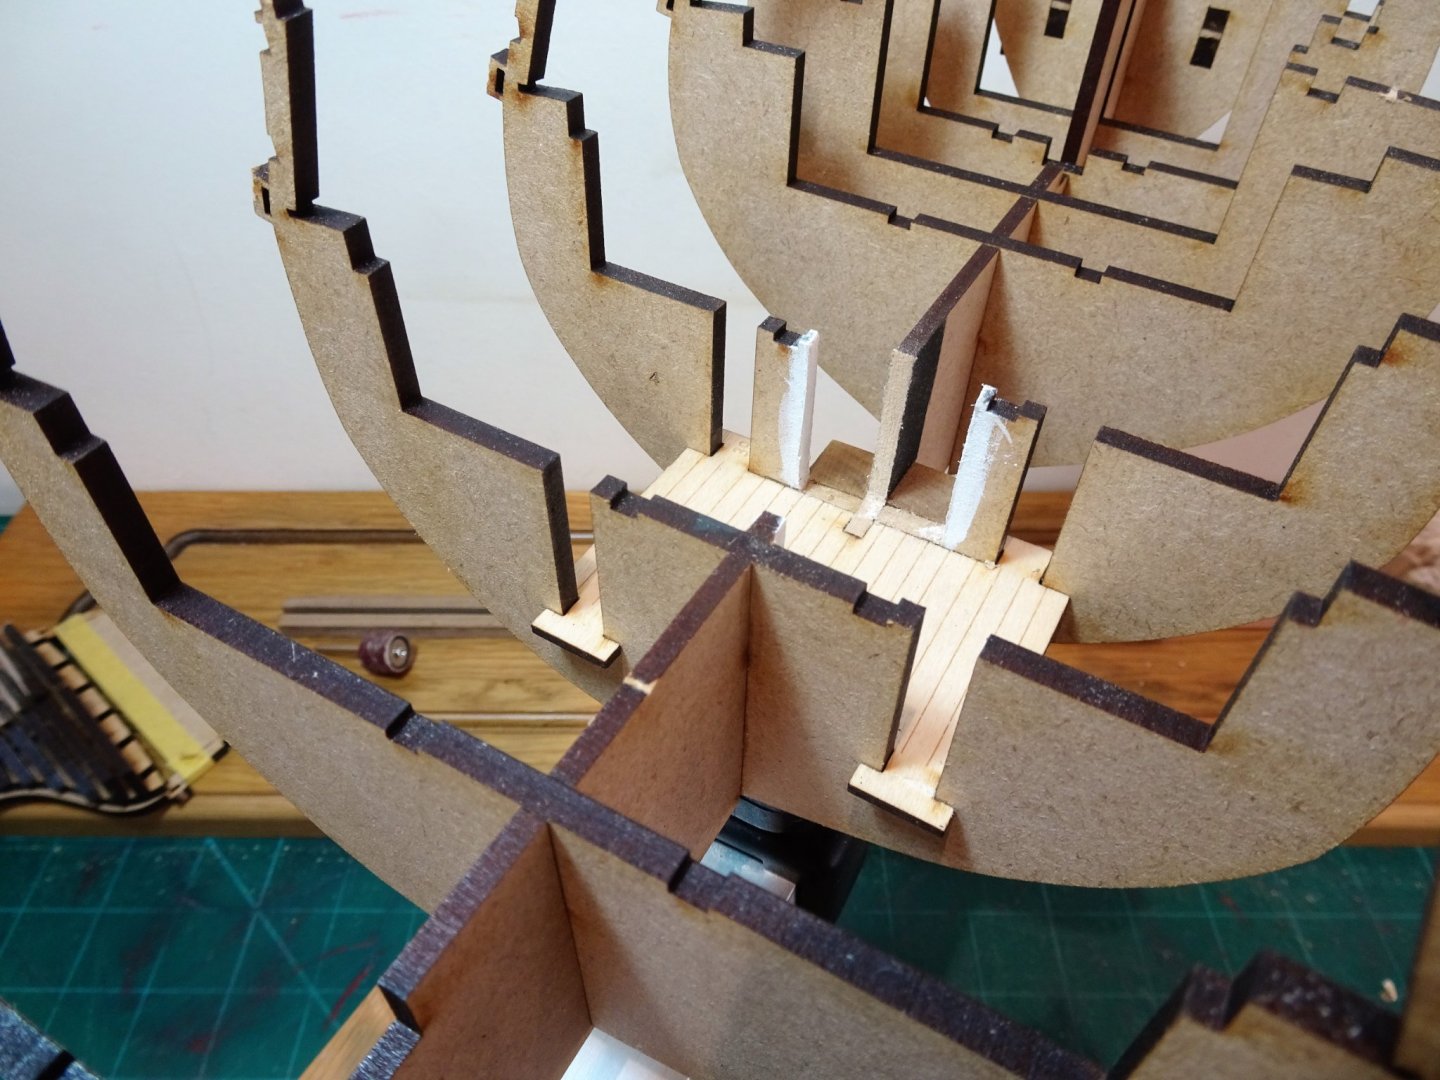
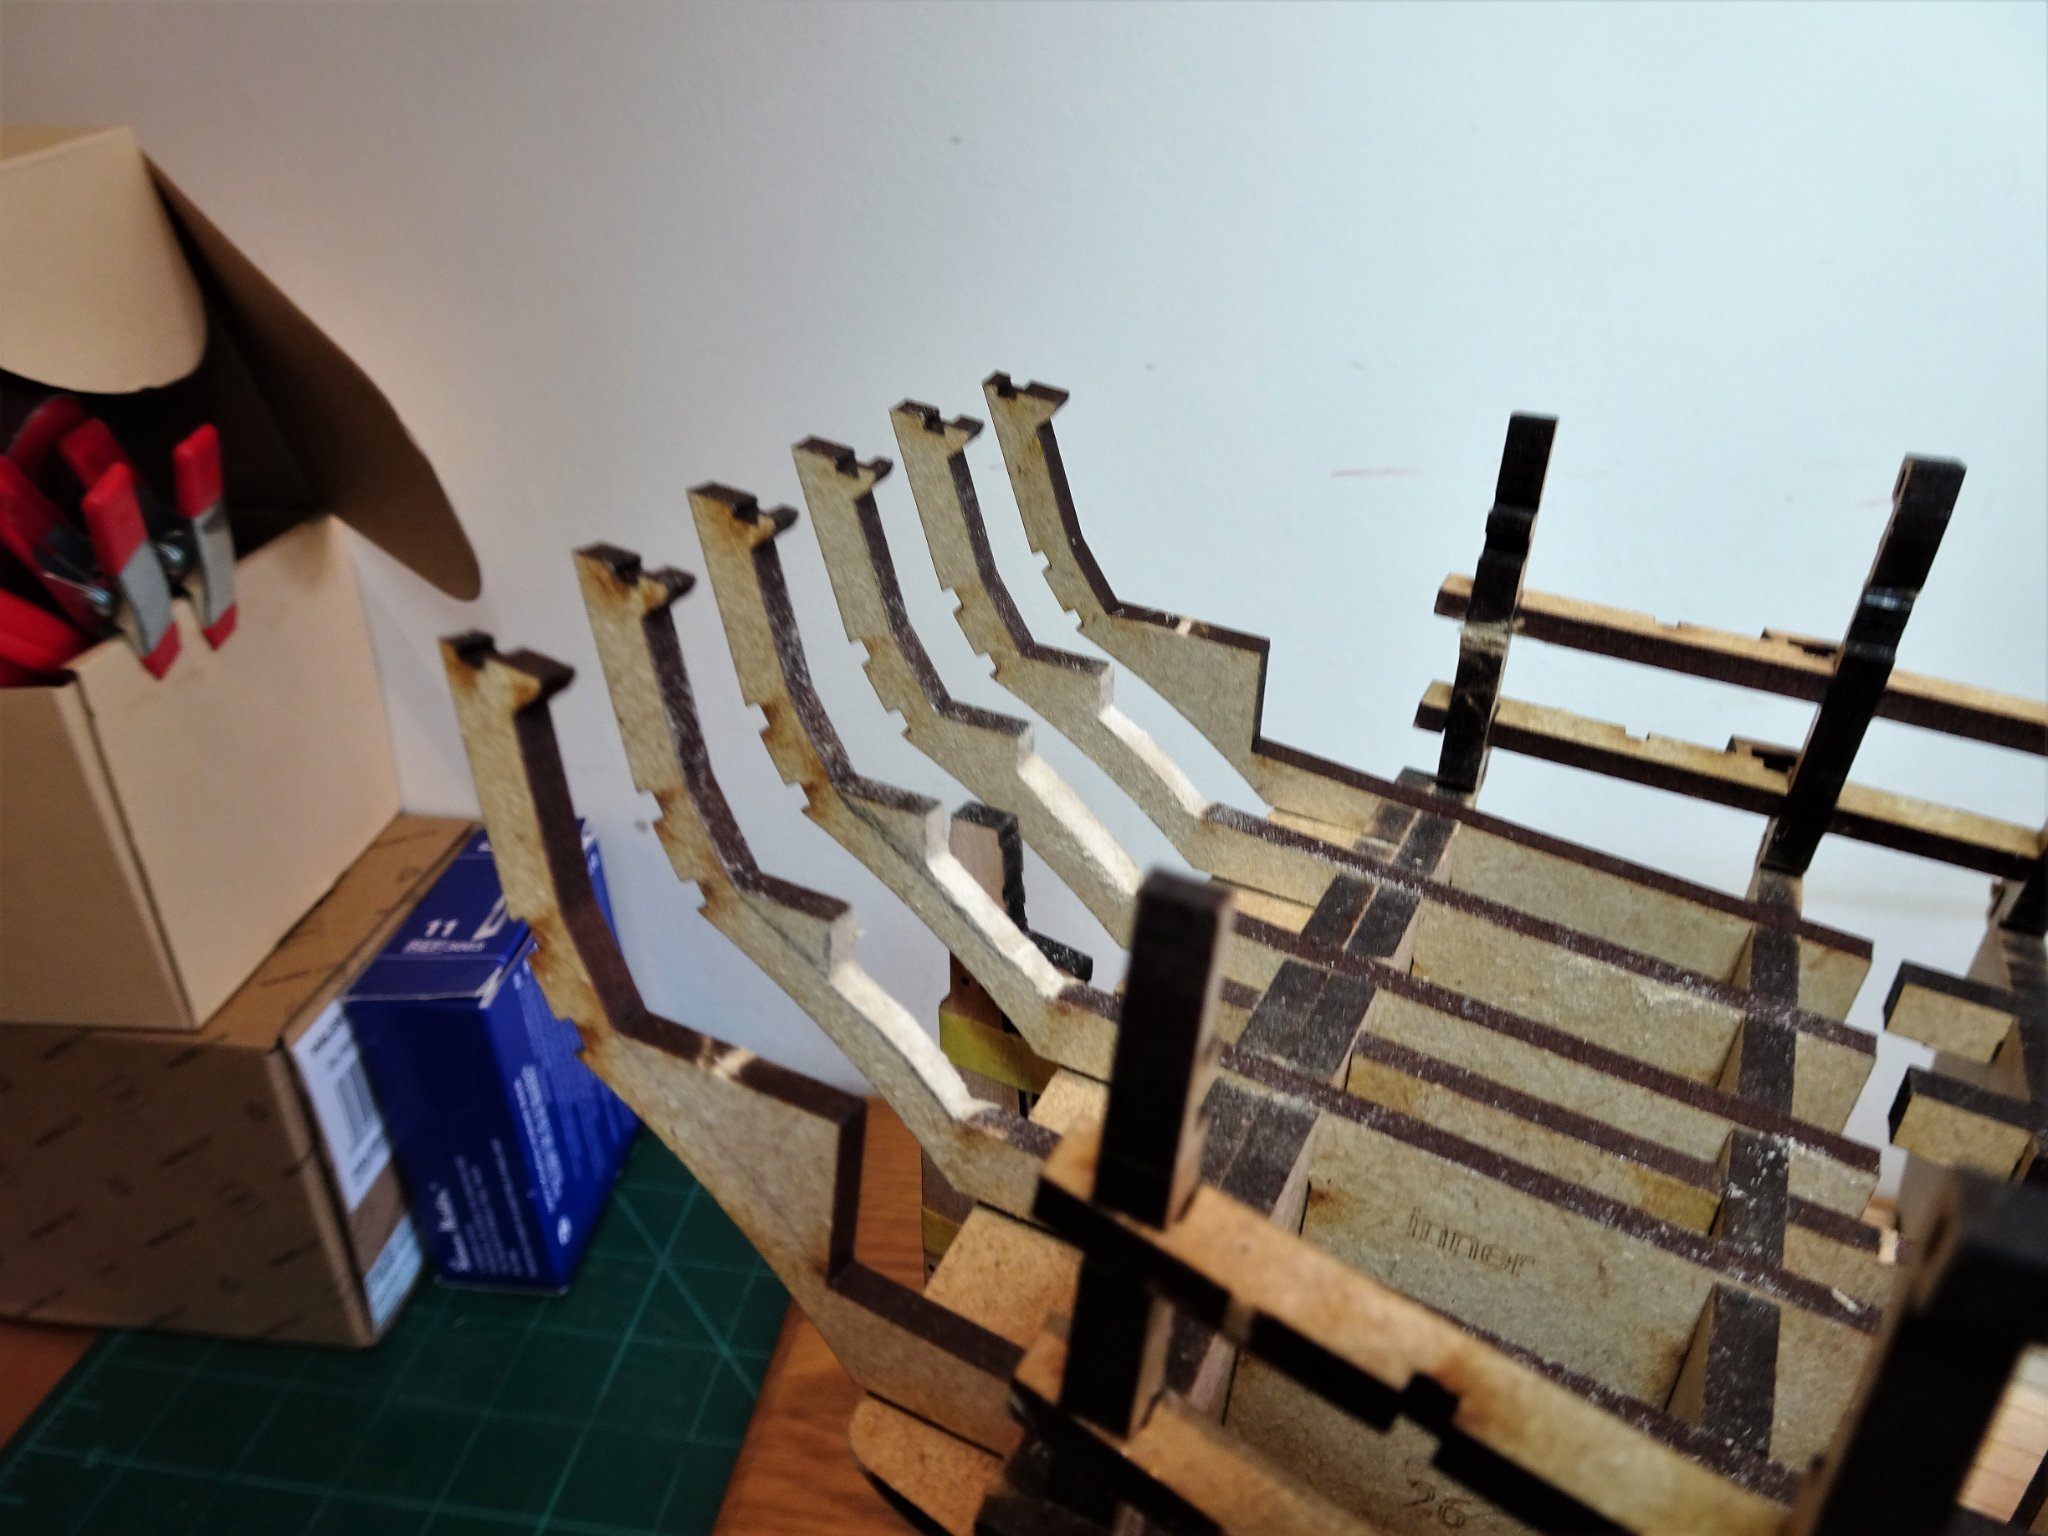
Post Eleven Stern mods continued. Having studied Chuck’s Winchelsea build which is acting as a sort of proxy plan, I can see where I am going. 01429 All the stern frames have now been adjusted including the two outer frames. 01428 My Proxxon scroll saw is my most used machine, would hate to be without it. 01431(2) 04141(2) Fully modified stern frames in place. 04131 This results in a gap where the kit rear inner bulwark pattern (214/215) is designed to fit over the original layout. No matter this is easily rectified. 01432 I have also removed the door as I hope to open up the Quarter gallery. A little more cleaning up and the frames can be glued into place. B.E. 12/09/21

.thumb.JPG.c64f402f57275e0605fa484044bc61c0.JPG)
.thumb.JPG.a5022b06f5a00300f95c5b167c318a48.JPG)
- 857 replies
-
- 22
-
-
- Sphinx
- Vanguard Models
- (and 1 more)
-
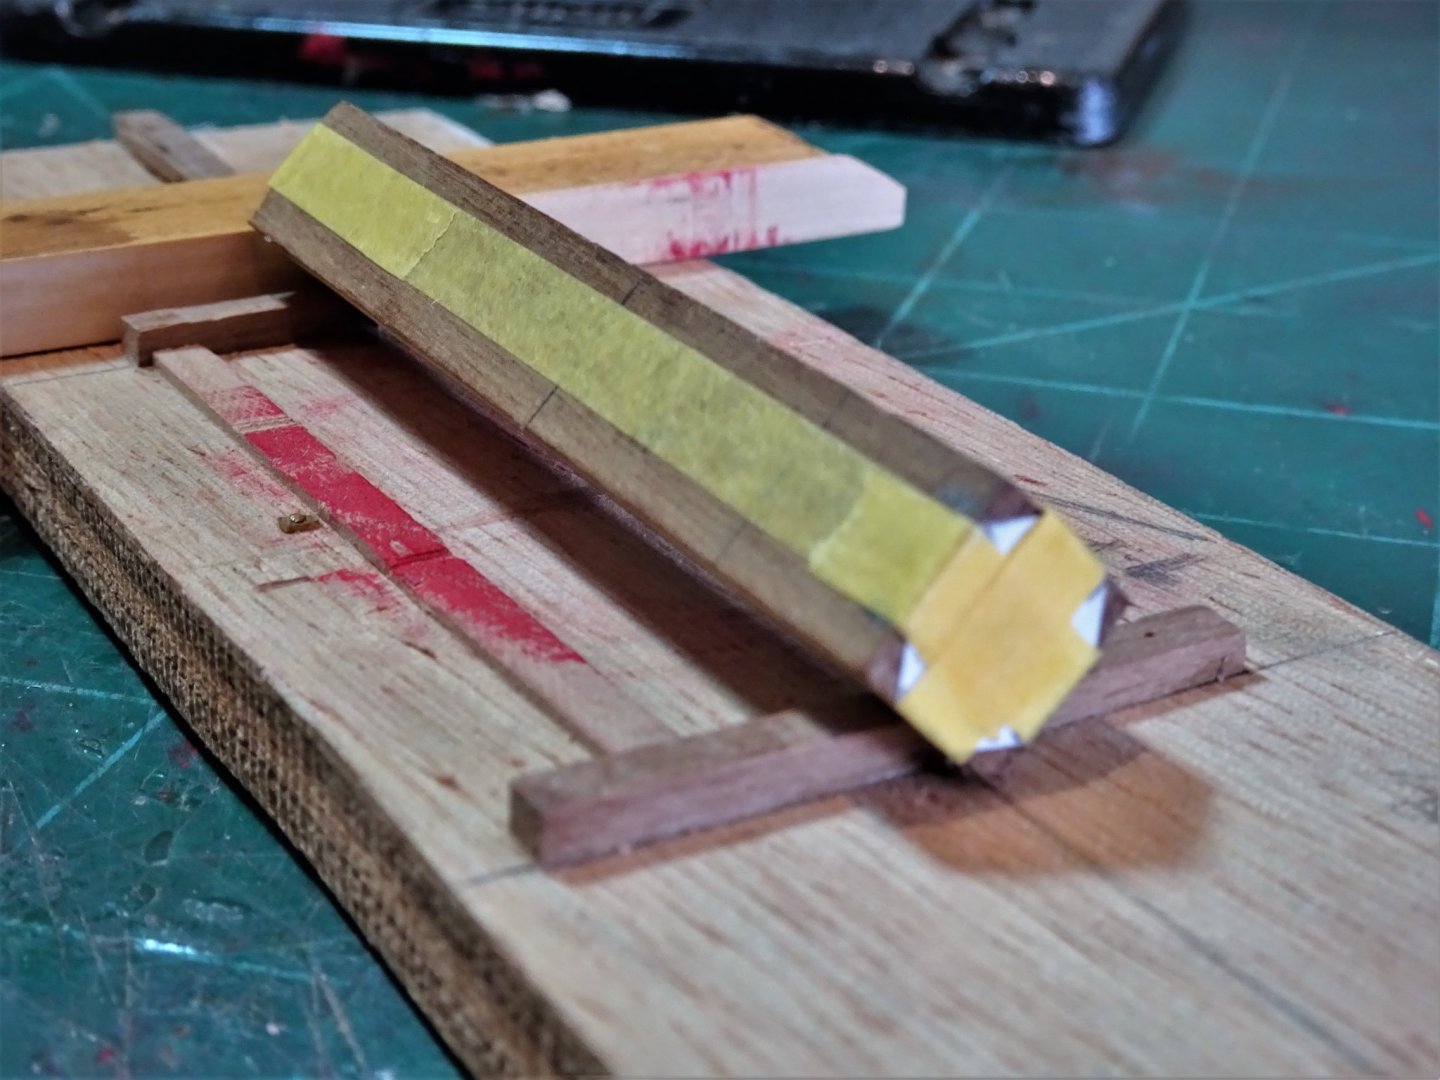
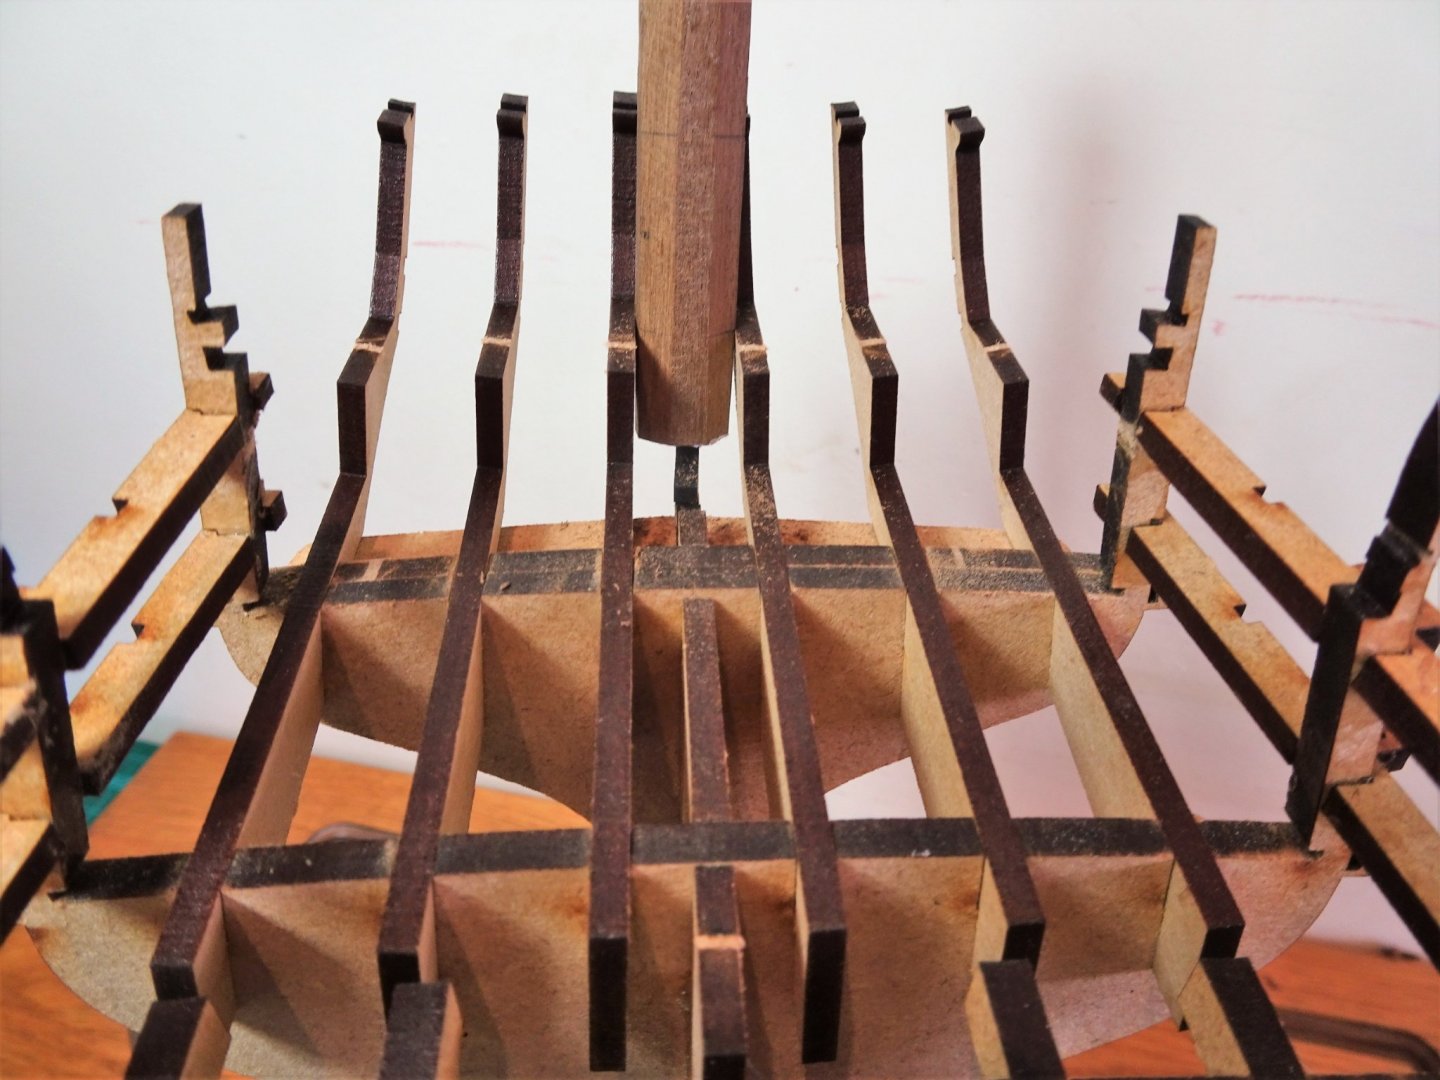
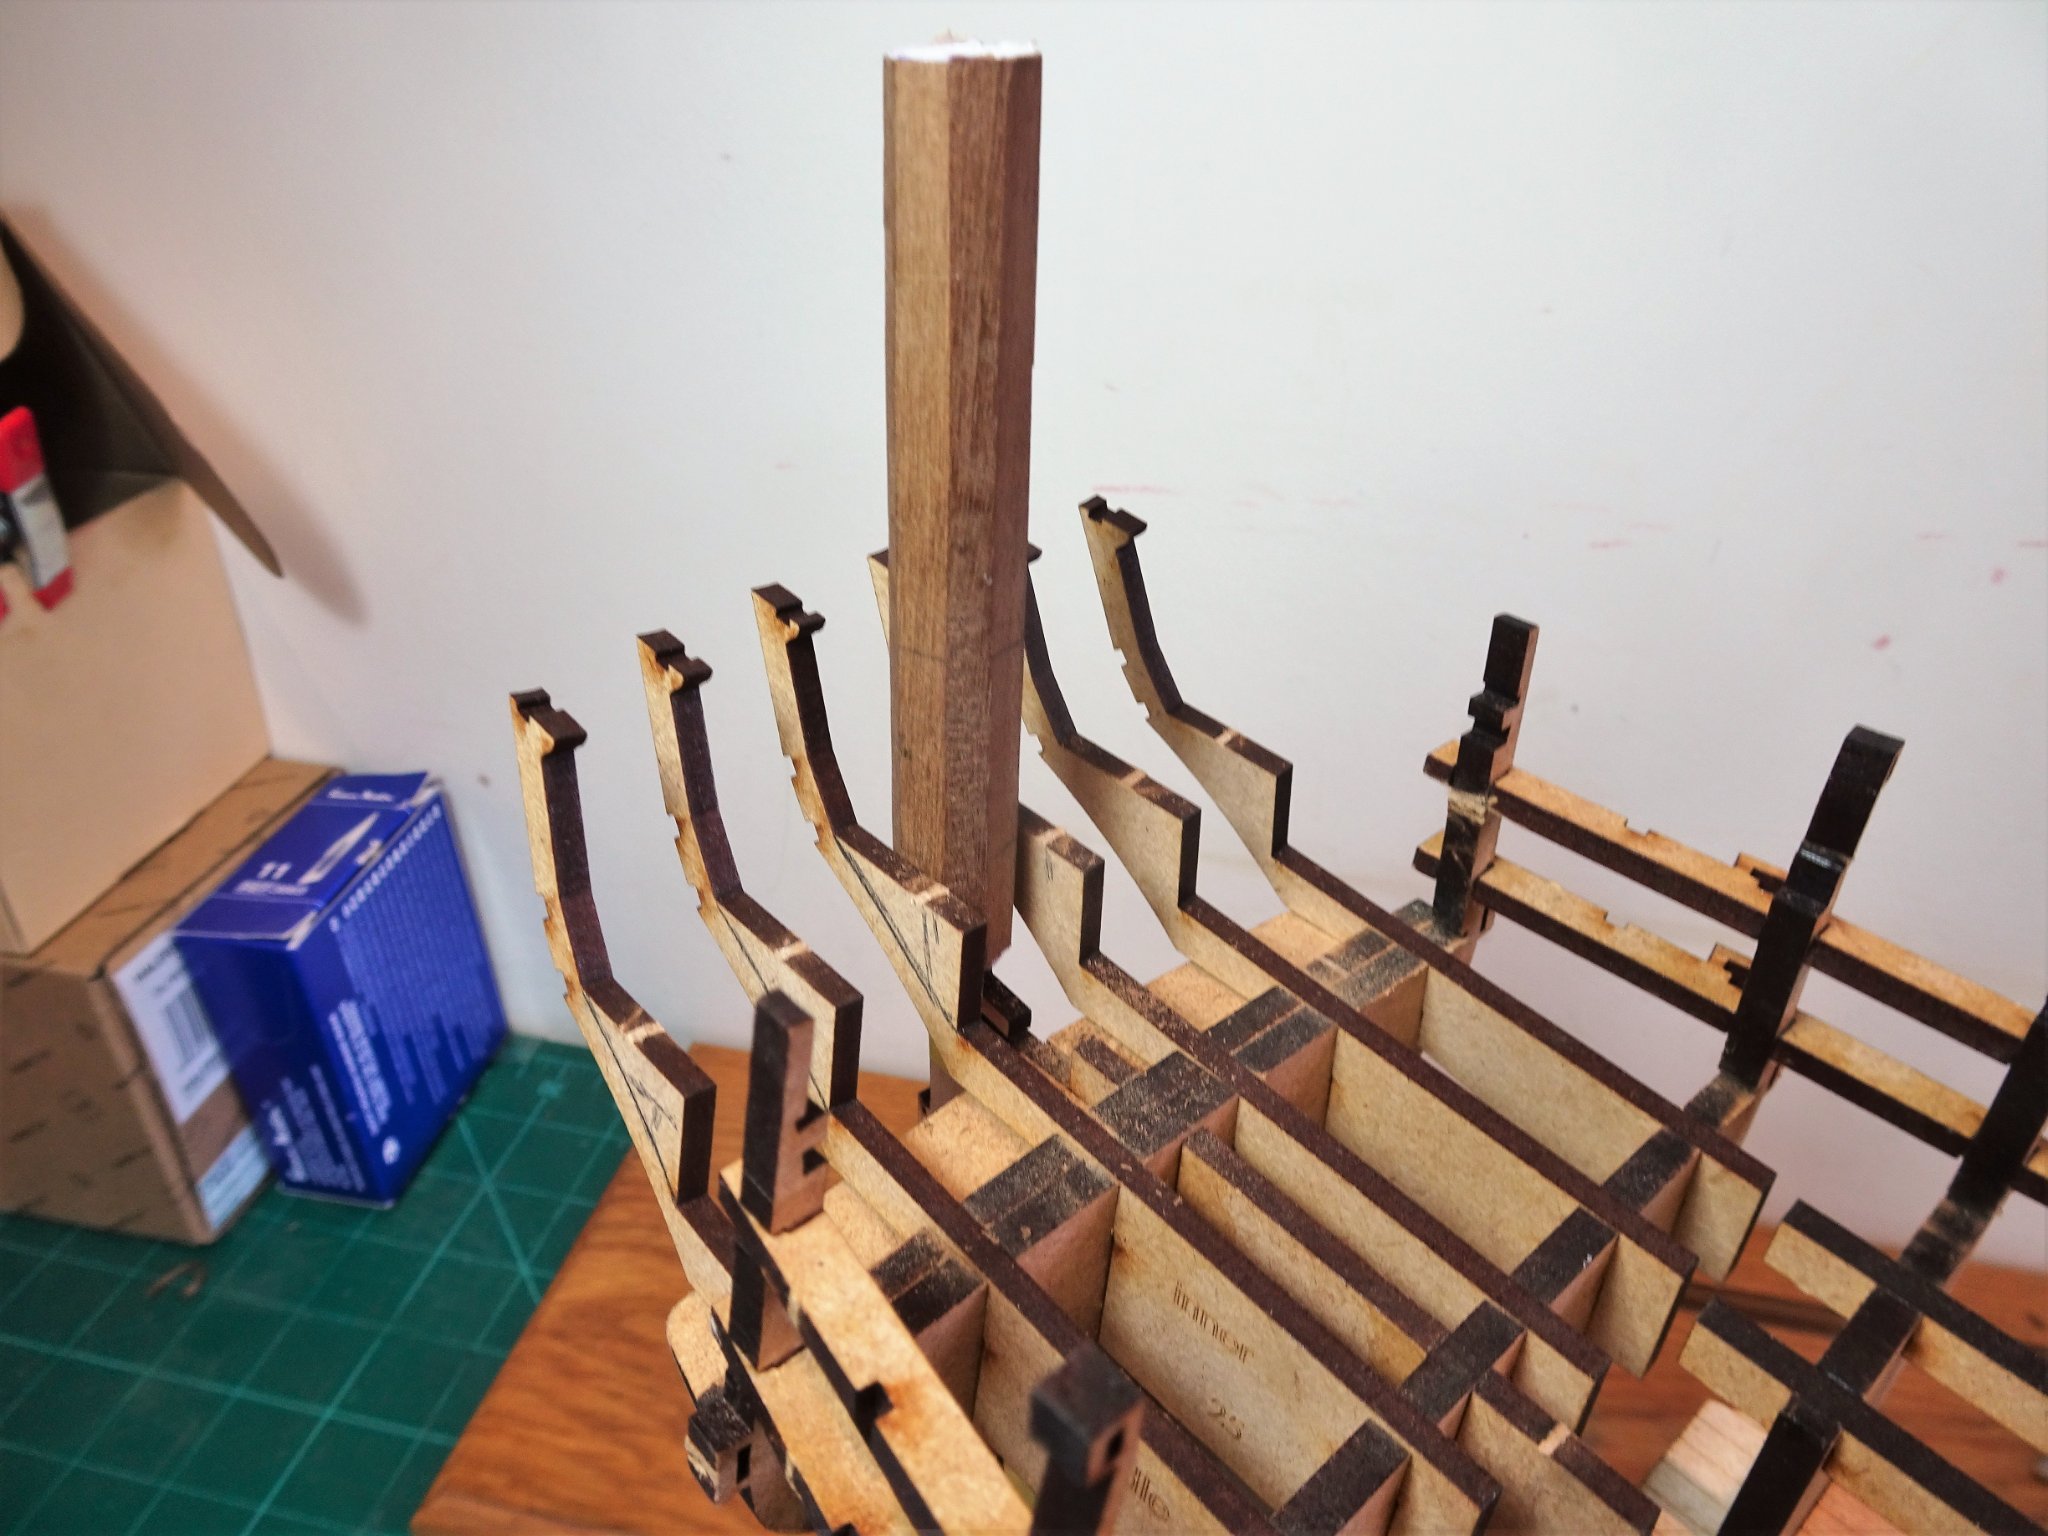
Post Ten Starting the stern modification The first job is to establish where the Rudder head cover will sit. 04410 To this end it is necessary to temporarily fit the stern post and rudder. 04107 A piece of 12mm Walnut square stock is shaped into an octagon. 04111 The piece is then hollowed out to fit over the Rudder head. 04115 By design or accident, the scale cover fits between the central kit stern frames. 04113 This is purely to assess the position. 04118 The cover will not sit this low in the framing. 04116 This will enable me to work out the height and line of the bench which butts to the cover. 04121 Here the shaping of the inner four frames has begun. 04124 Not sure at present whether the two outer frames will require shaping, I am conscious that the aft internal bulwarks are cut to fit above them. 04122 I am taking things slowly as I’m basically making it up as I go along, having no plans to work to. I need to keep looking ahead to see how the mods impact on stages further along the build. That’s enough headache for one day. B.E. 11/09/21


- 857 replies
-
- 18
-
-
- Sphinx
- Vanguard Models
- (and 1 more)
-
Thanks Bob, I’ve not really considered internal lighting, a lot to do without bringing wiring into the mix. Who knows tho’ it’s early days yet. 😉 Cheers, B.E.
- 857 replies
-
- 2
-
-
- Sphinx
- Vanguard Models
- (and 1 more)
-
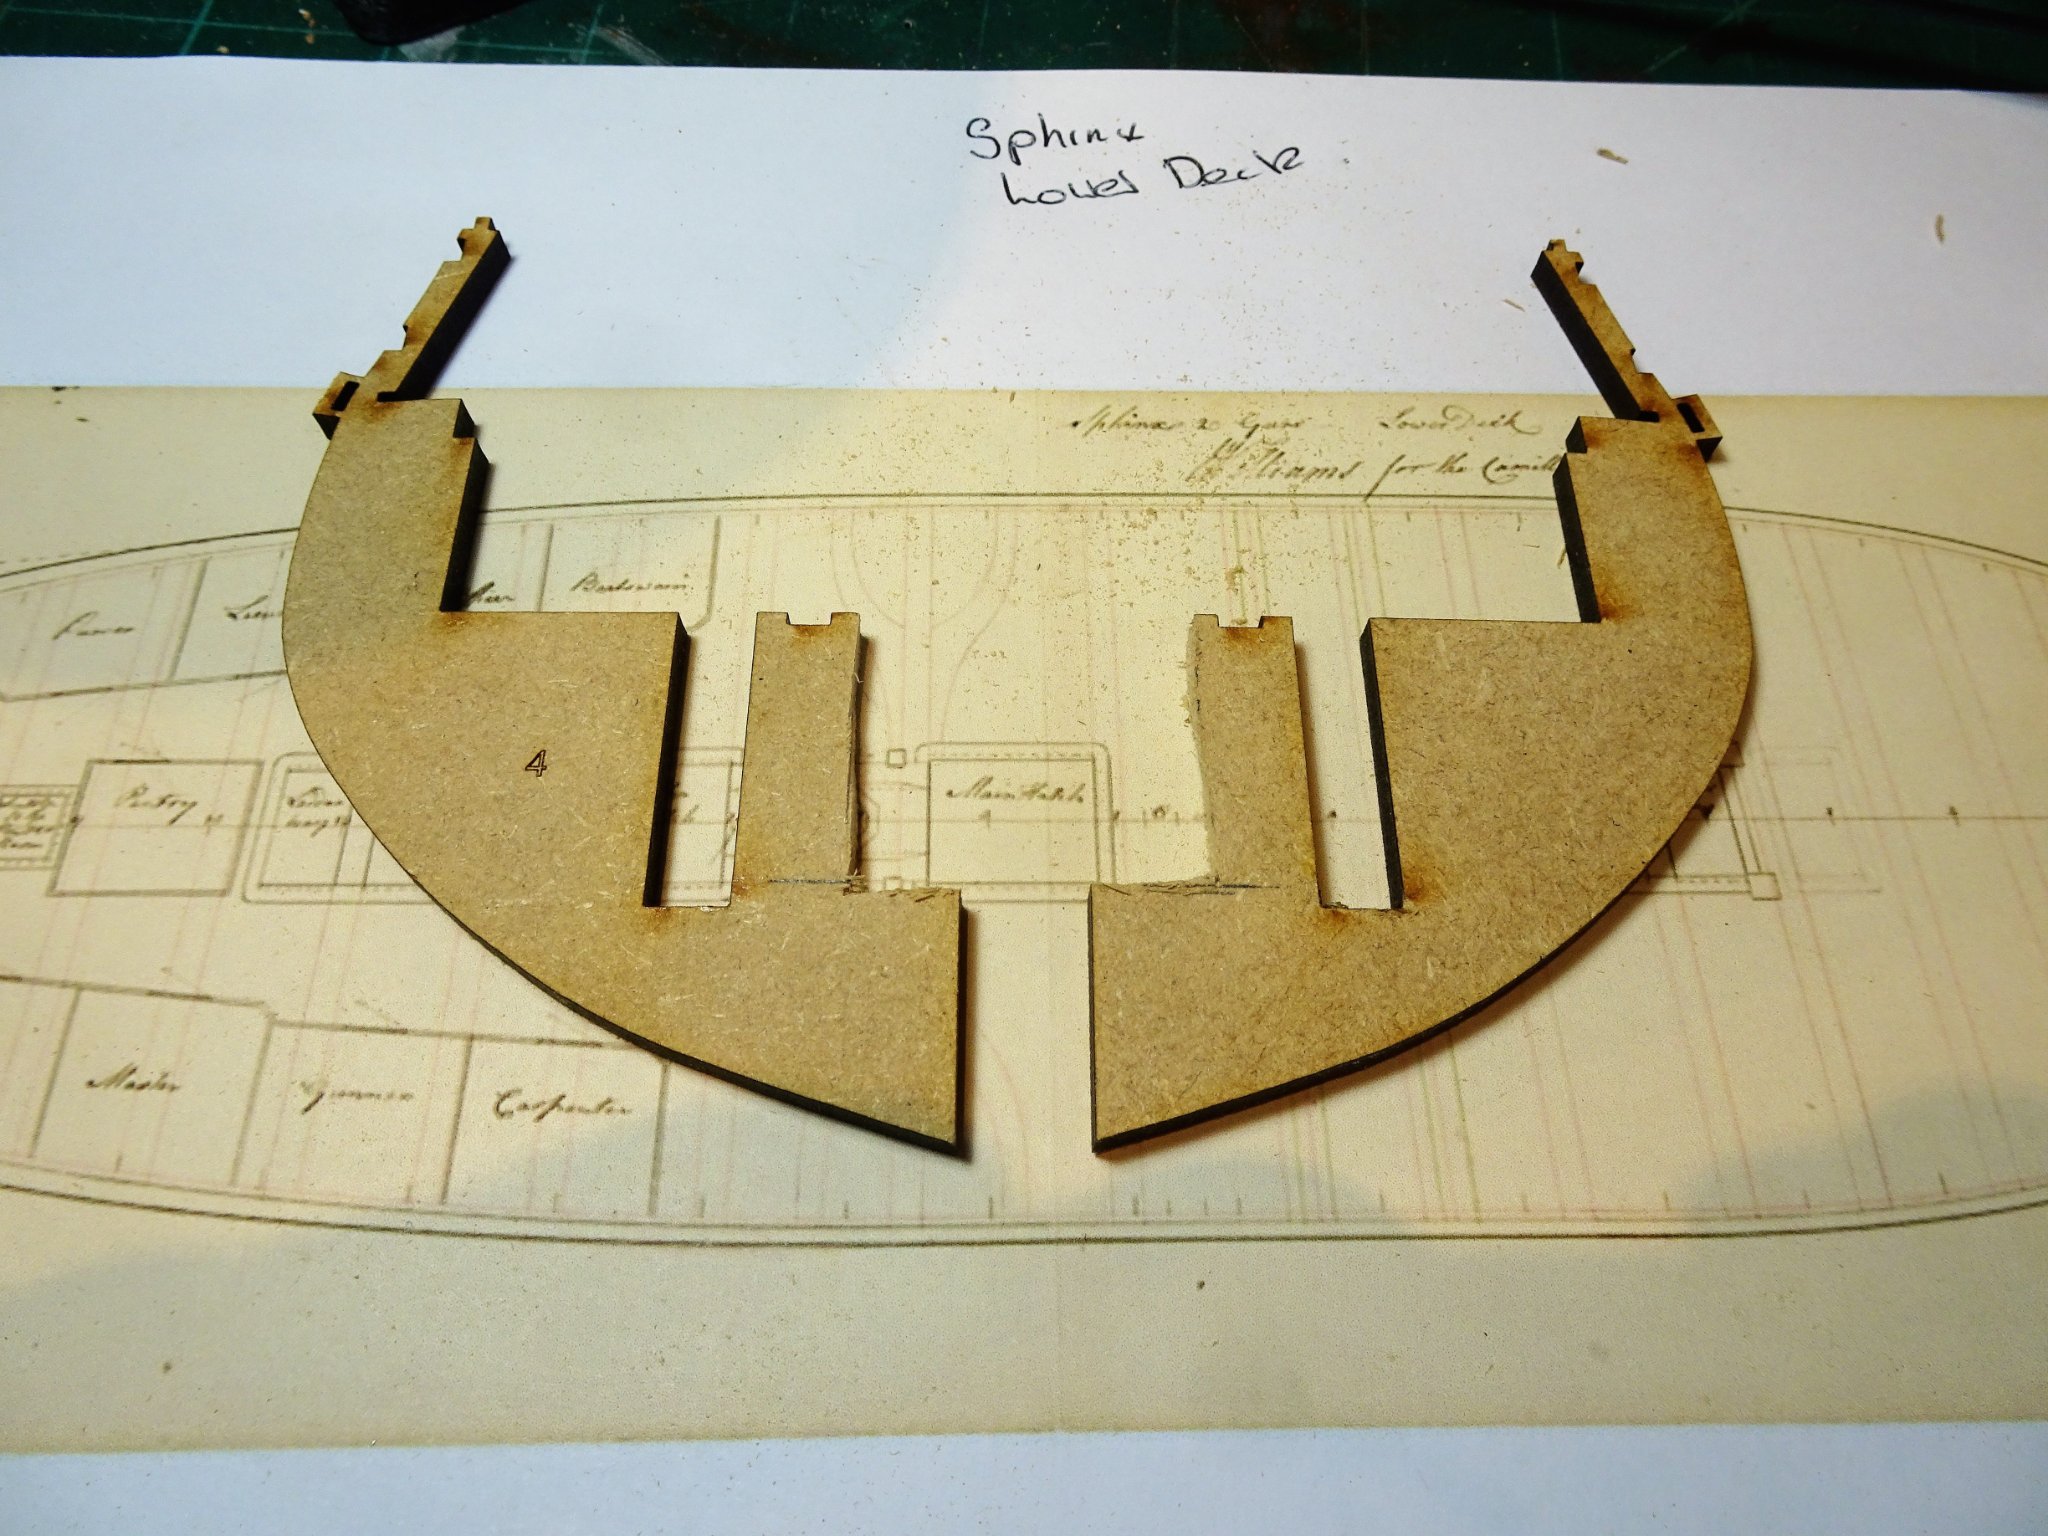
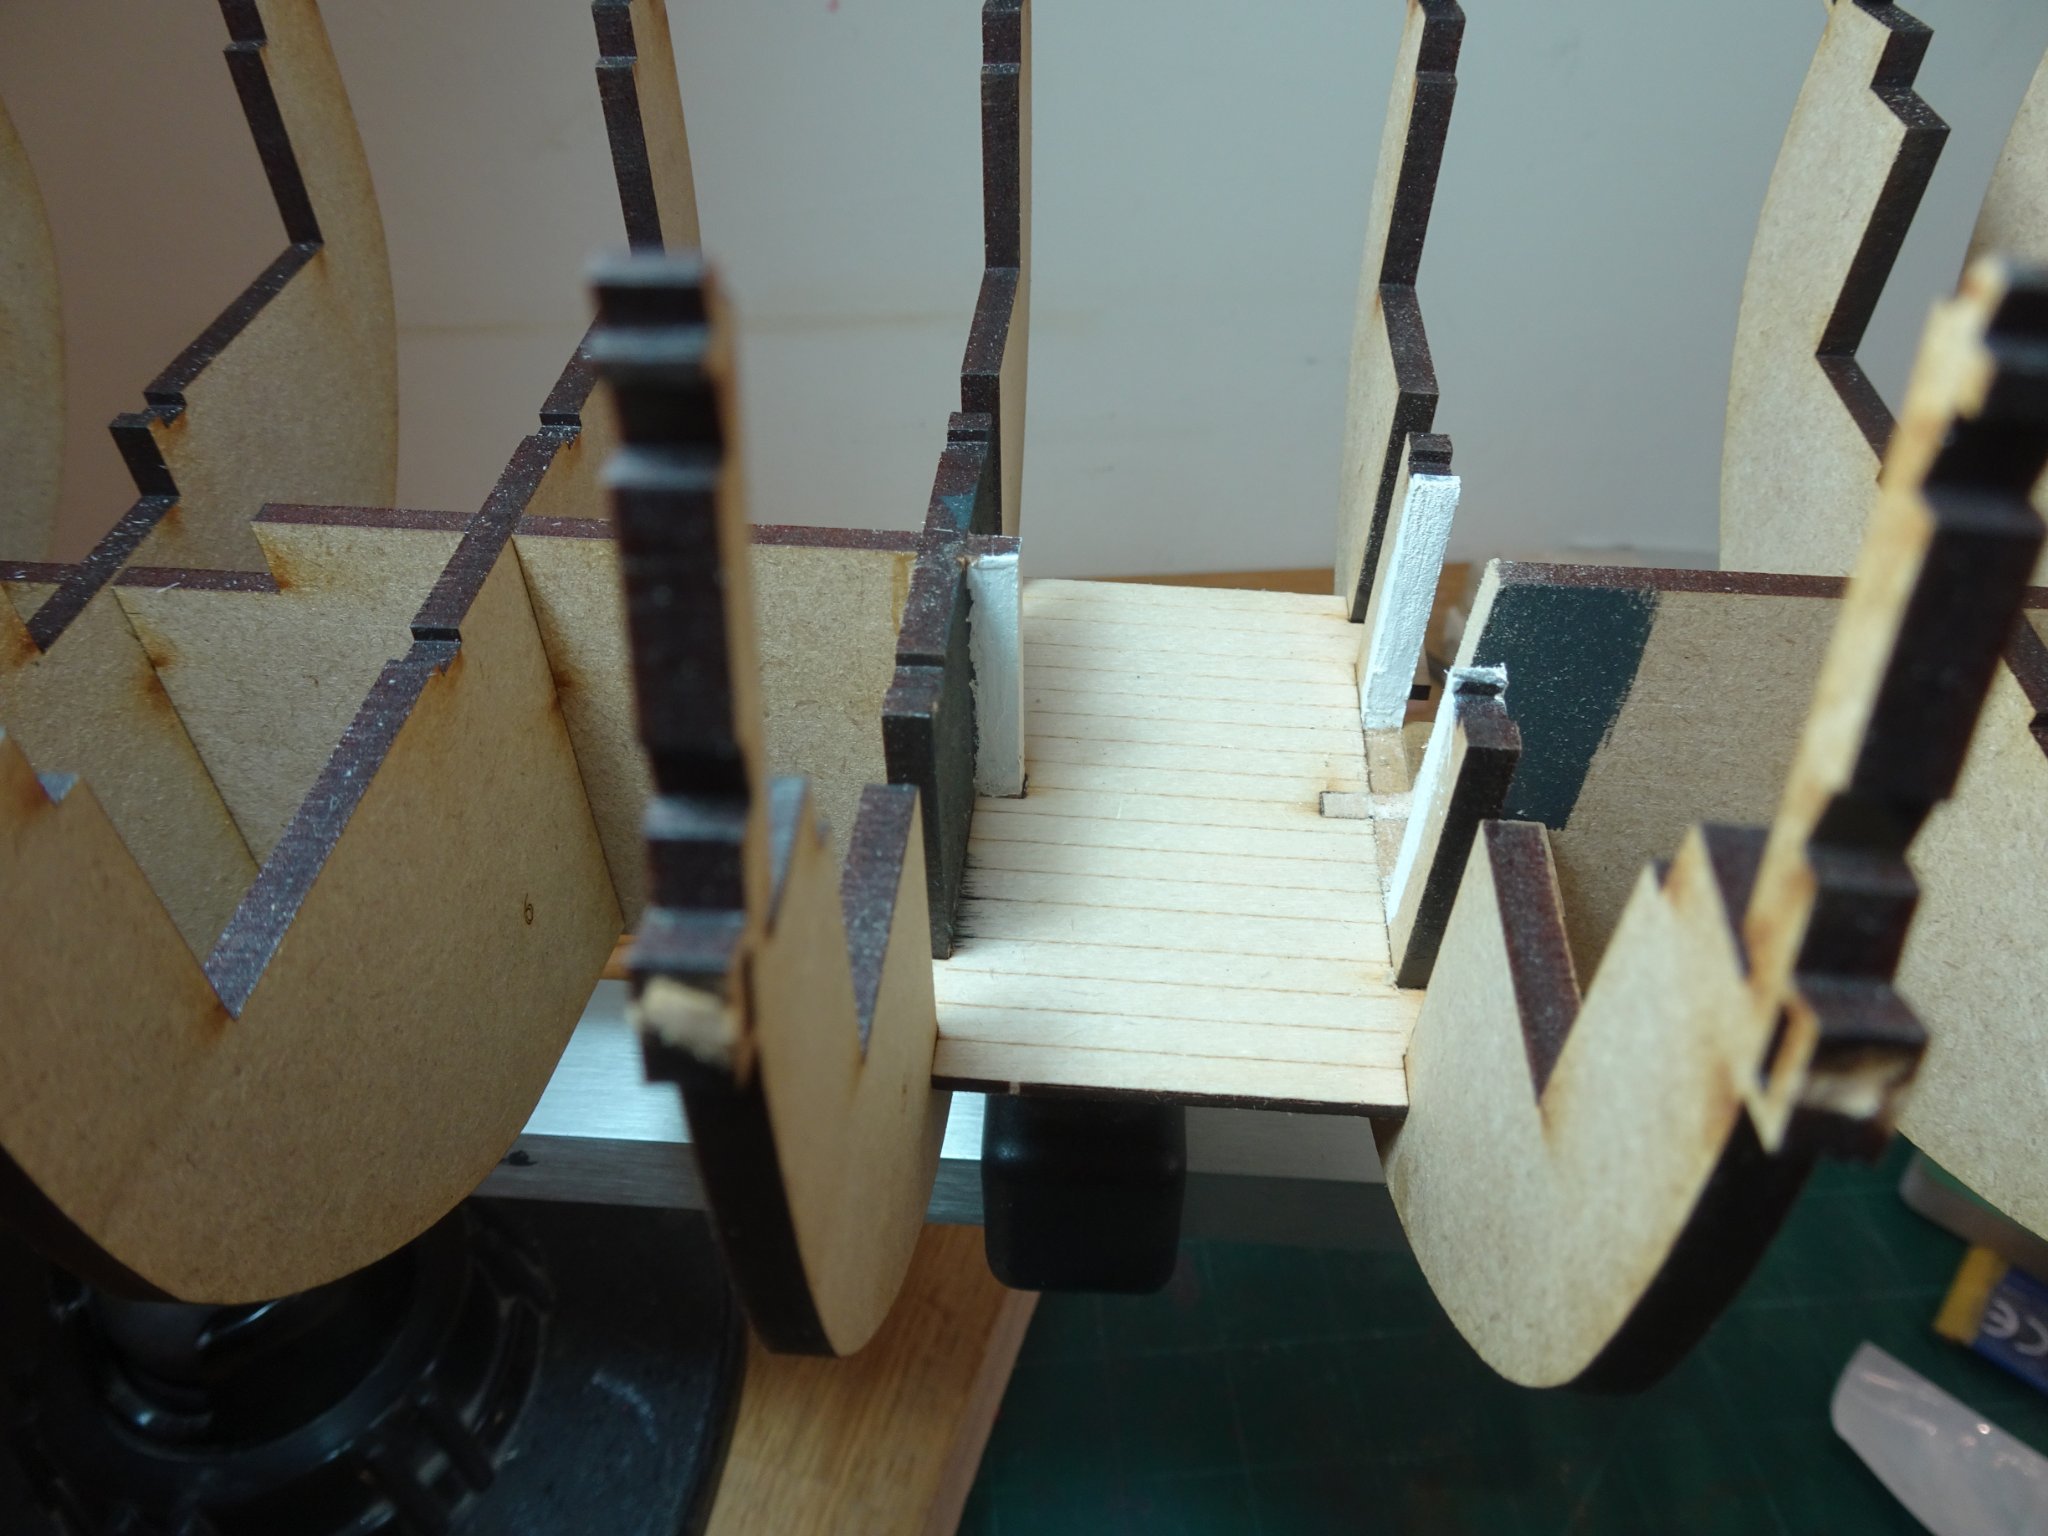
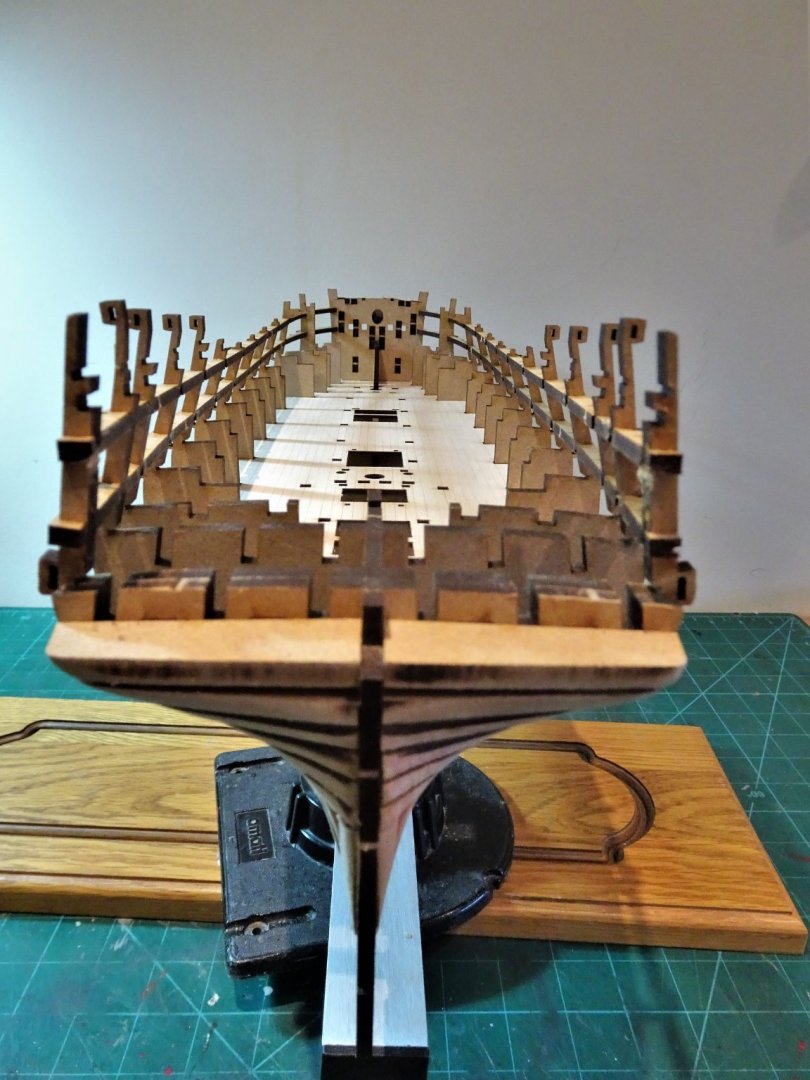
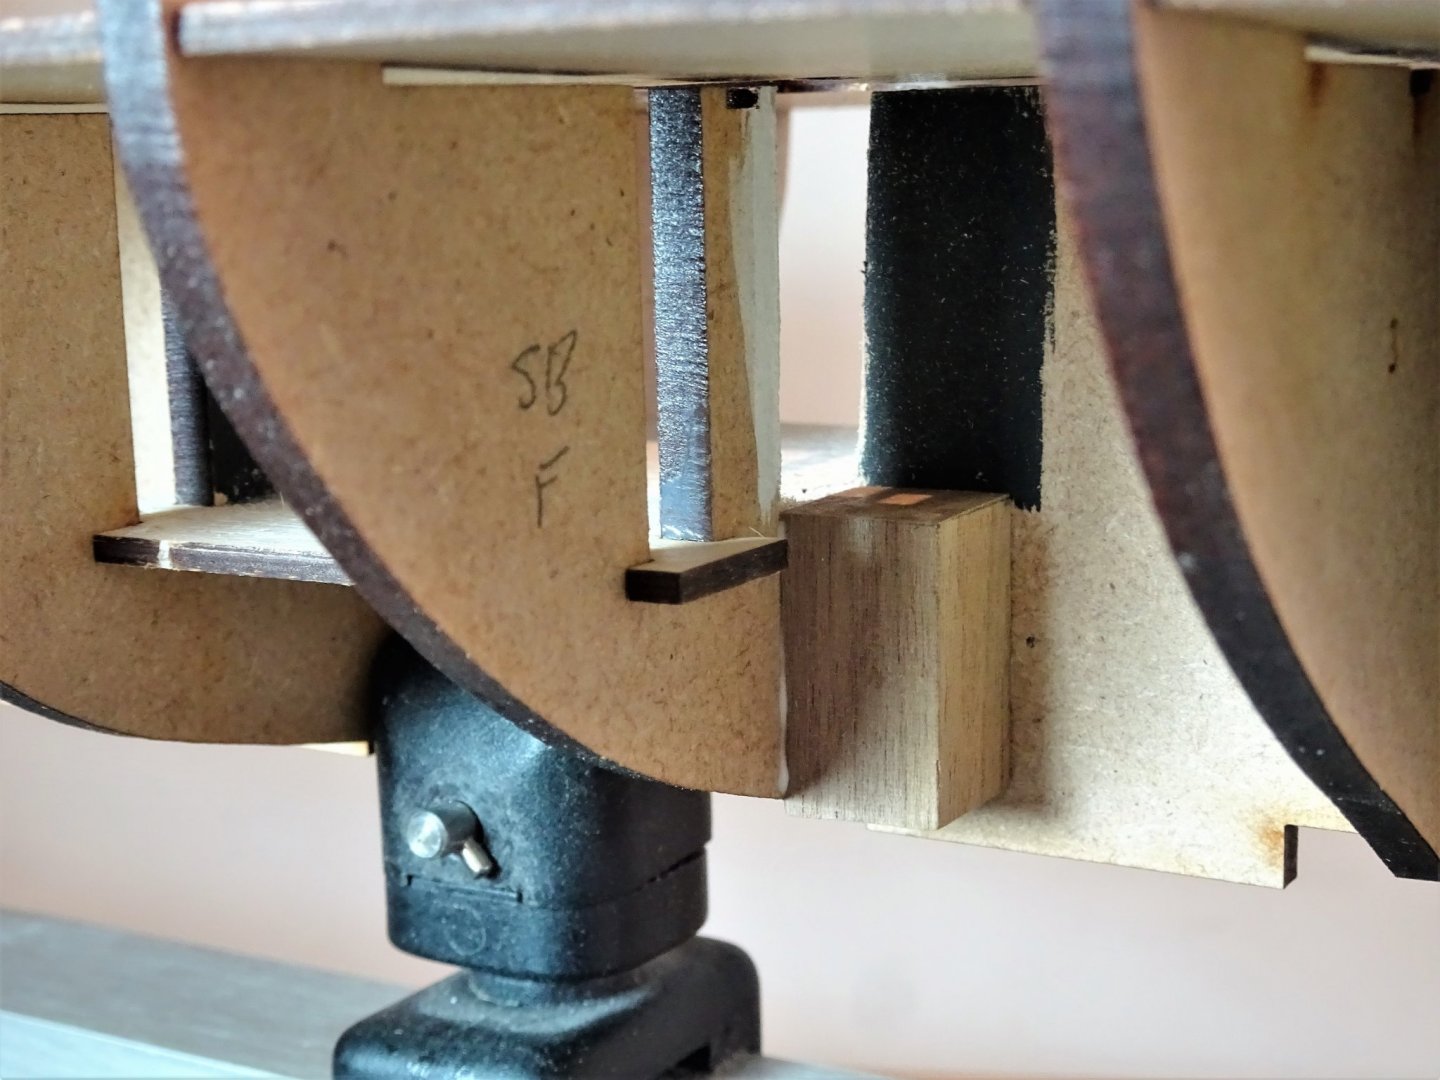
Post Nine Mulling over a Stern modification. With the deck beams now completed I need to consider the first major departure from the kit. 0244(2) Those longitudinal deck beams slotted into place perfectly, beautifully accurate laser cutting. The stern frames have a direct relationship to the internal fittings of the Great Cabin. 0242(2) With the kit arrangement the inboard horizontal extensions form what will be the seat pattern extending from the stern lights. (instr114) I suspect this is a simplification, but one which under normal circumstances would not be of great concern. However, as I intend to have very little of the Quarter deck planking in place, this simplification becomes an issue. The bench seat should be narrower, a little lower, and, in the centre, should be the Rudder head cover. This shot from Chuck’s wonderful Winchelsea build shows a typical arrangement altho’ with Sphinx the head is octagonal and of smaller proportions. 0240(2) This means that a quite drastic re-shaping of the stern frames is required, removing the sections that form the bench top and front. It would then look as it would on a plank on frame set-up. This photo of Chuck’s Winchelsea build demonstrates the change required. There are drawings of the Rudder cover and bench arrangements in the Pandora book, one internal profile at 1:64 scale, and a plan at 1:128 scale. I will use these as a guide for my modification. The octagonal Rudder Head cover, which scales to a diameter of 30” (12mm) and a height of 35.3” (14mm) sits between the central stern frames and butts against the back edge of the kit upper deck. The bench seat scales to a depth of 15” (6mm) and a height of 20” (8mm) Stage one will be to modify the stern frames, stage two, extend the deck, stage three, create the Rudder head cover, and stage four, form the bench. I also intend to open up the doorways to the Quarter galleries. I did something similar with the Quarter Badges on Pegasus. With light being able to penetrate thro’ the gallery and stern lights, the appearance is far more natural in my opinion, and gives a view of the Great Cabin with its chequer sailcloth covering, and Rudder head trunk. In the case of Sphinx the cabin area will also be open thro’ the deck beams of the Quarter deck. It is likely to be some time before I actually get the Upper deck in place, and then it will have to be manually planked to match the part planking of the Foc’sle and Quarterdecks. I will record my progress with this modification in the posts to follow. B.E. 10/09/21

.thumb.JPG.c40992d8f92deb8acbba3a354ec78a48.JPG)
.thumb.JPG.d7af55009c7eedbc2feb913ffbfd4541.JPG)
.thumb.JPG.0cf995968207af5a341d4c3fd4598176.JPG)
- 857 replies
-
- 21
-
-

-
- Sphinx
- Vanguard Models
- (and 1 more)
-
I would be a happy man to achieve that level of completed planking Glenn, very well done. B.E.
-
Thanks for looking in Radmancoop, and for your very kind comment. The shipyard re-opens on Saturday, and hopefully some progress made. Regards, B.E.
- 857 replies
-
- 1
-
-
- Sphinx
- Vanguard Models
- (and 1 more)
-
Thank you Steve, I’m away at the coast, almost reluctantly, as I’m keen to resume the build with the first major modification in progress. Regards, B.E.
- 857 replies
-
- 3
-
-
- Sphinx
- Vanguard Models
- (and 1 more)
-
Positively rattling thro' this build, you'll have it finished before I've got the deck in. Good to have a pathfinder to sort out any wrinkles of which there seem to be very few. B.E.
-
A fine planking job you've done there Glenn, Boxwood is my preferred wood for ship models, even with a bit of shade variation. B.E.
-
I think Glenn and me are in accord on this one, Jacek. Cutting the legs would introduce a weak point, and could subtly affect the angles Different approach for show deck stuff, but sufficient for the lower deck. Cheers, B.E.
- 857 replies
-
- 4
-
-
- Sphinx
- Vanguard Models
- (and 1 more)
-
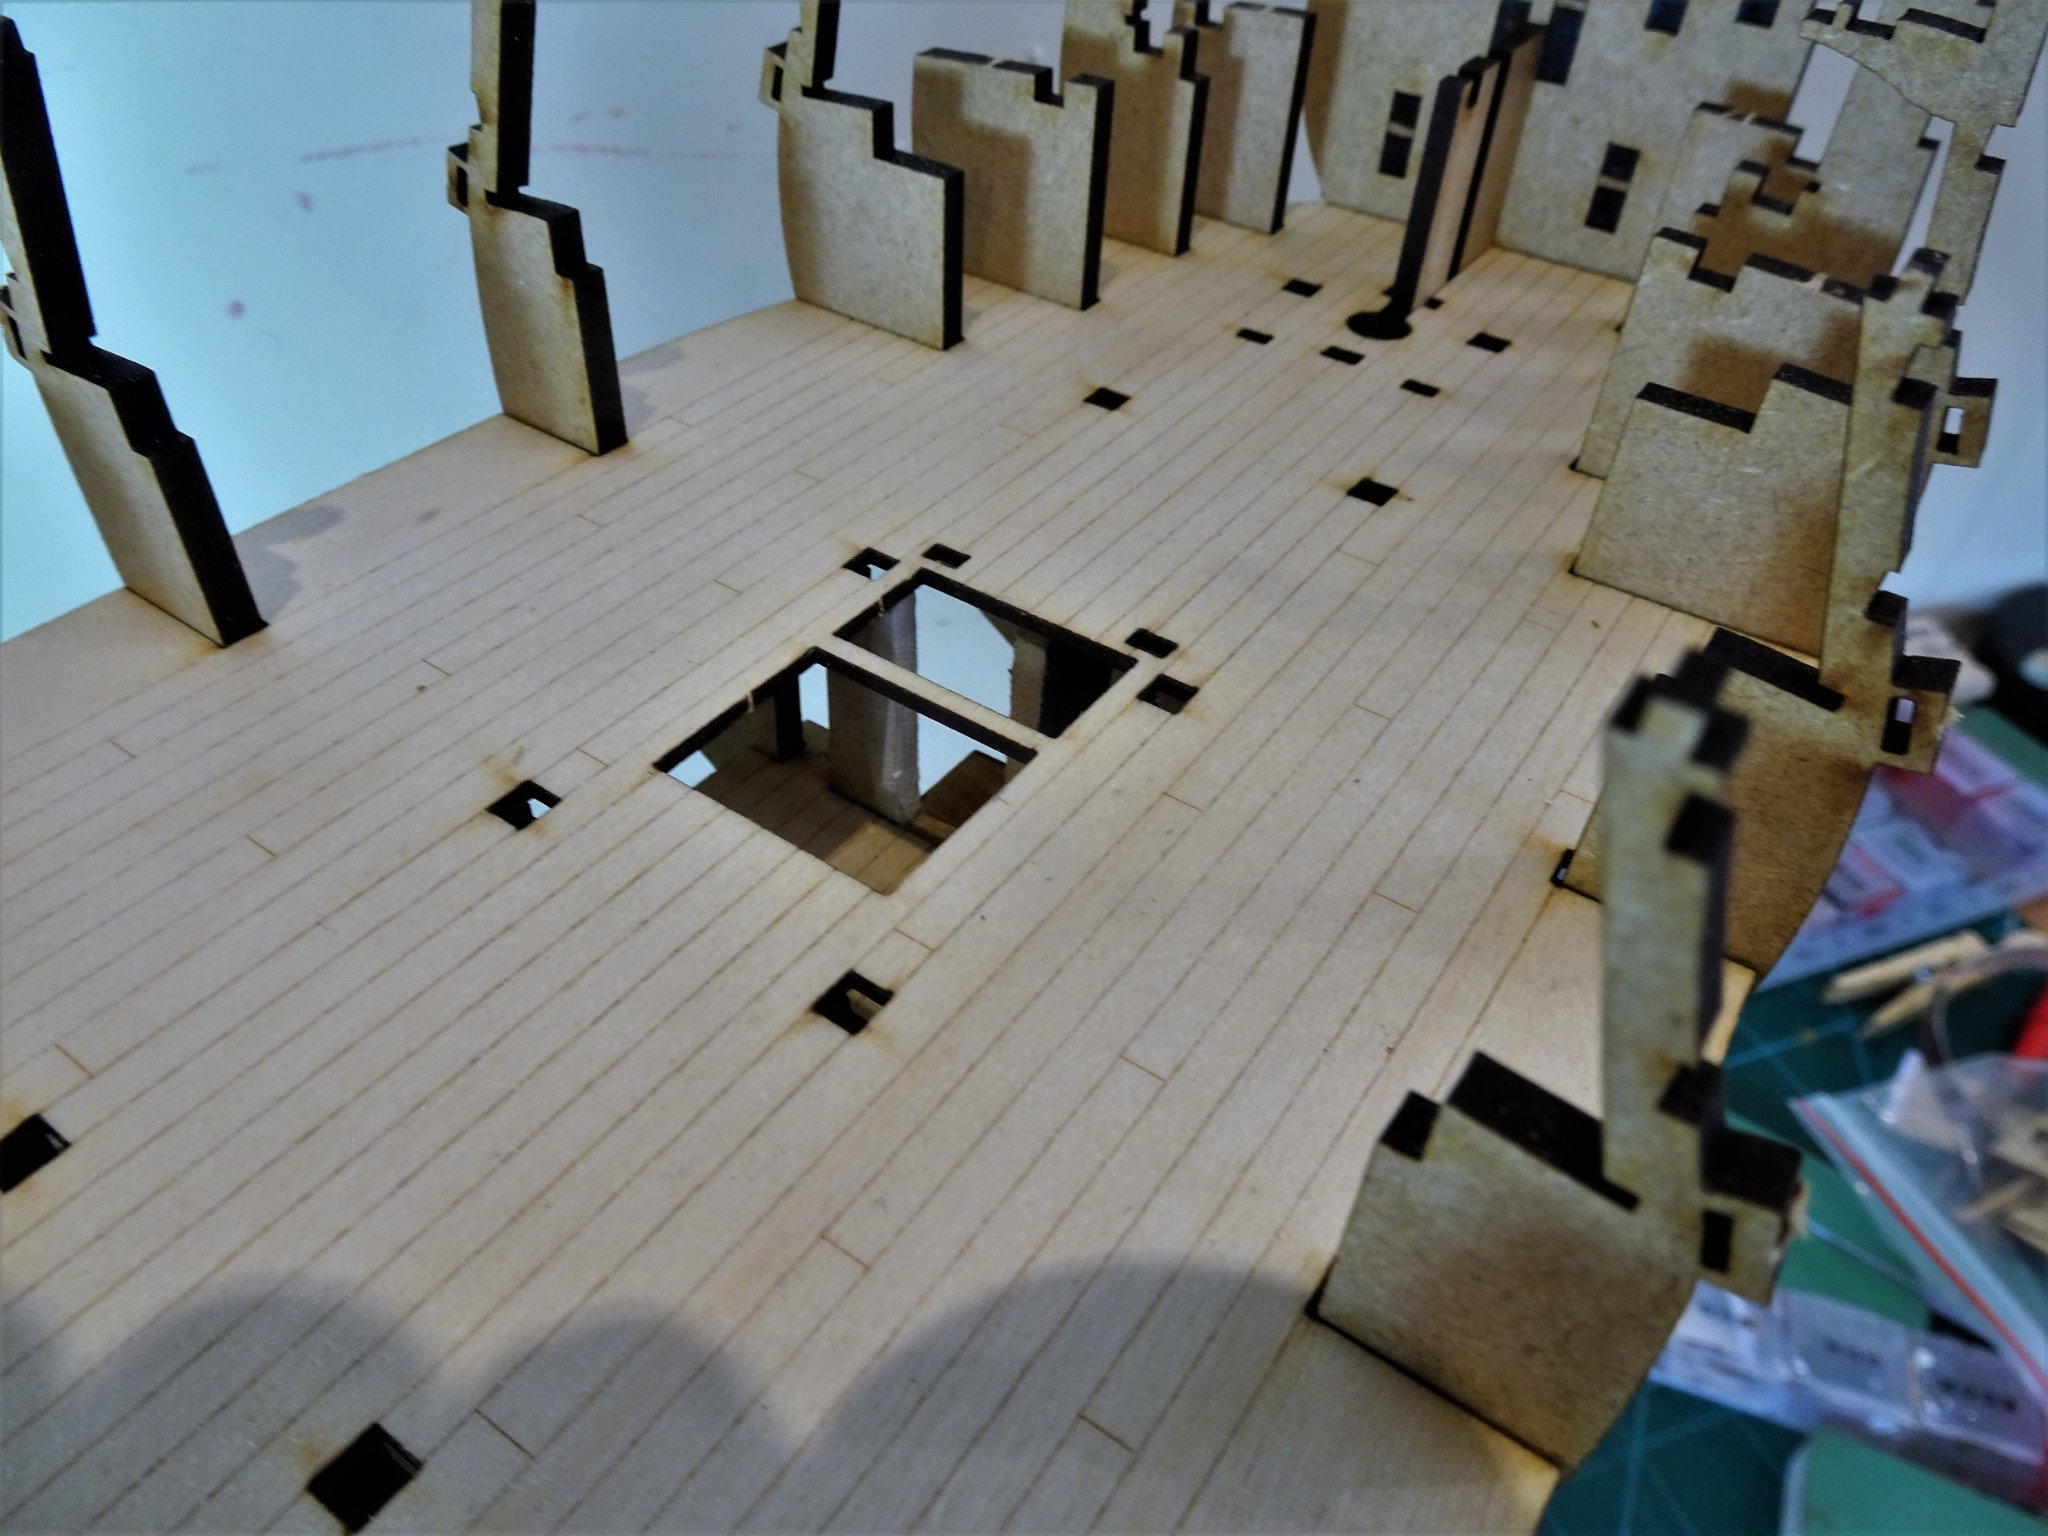
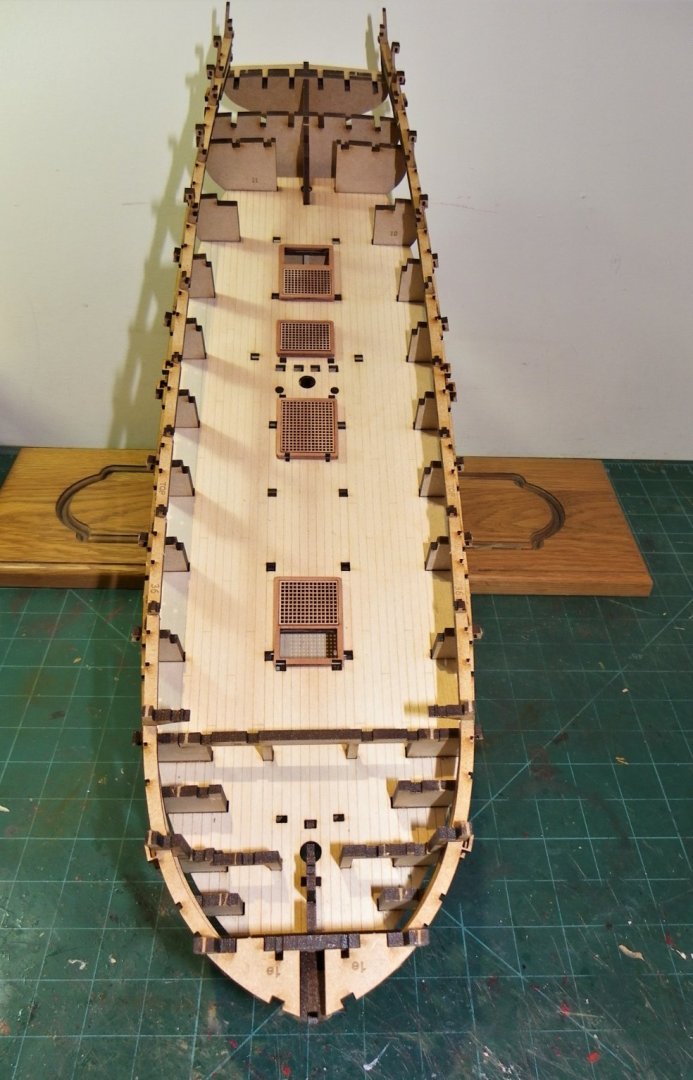
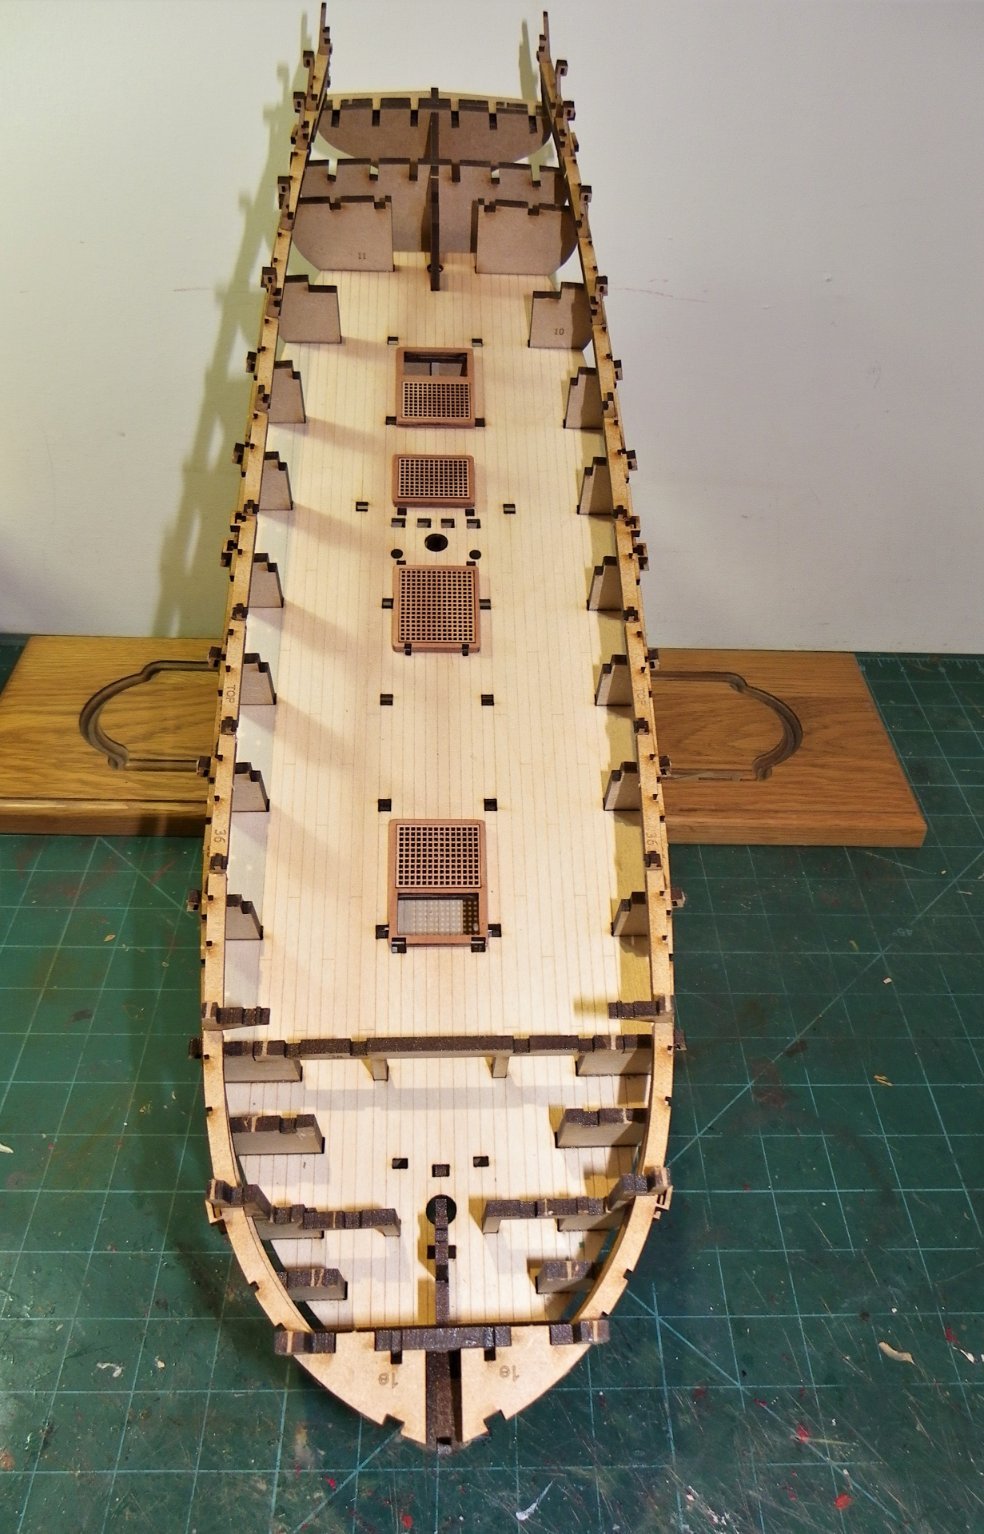
Post Eight Upper deck supports A couple of the support beam legs needed a little fettlin’ to get them to sit right down on the Bulkhead shoulder. This only entailed sanding the leg bottoms by degrees until the beam was firmly down. Depending on what arrangement I finally decide upon there may be a glimpse of the upper deck support beam legs. In reality these are shaped columns and for those that may be seen thro’ the upper deck openings a little shaping is in order above coaming level. 0235(2) This relates to support legs 4a thro’ to 10a. Dry fit only at this point. 0237(2) There is a risk of breaking the mdf legs so the shaping process was done very carefully using scalpel and light sanding strokes. 0229 Upper deck base temporarily in place. 0227 Whatever remains to be seen will link the two decks in a more realistic manner, all about smoke and mirrors below the Upper deck. 0231(2) The shipyard is now closing for a week or so while I spend some time at the coast. B.E. 01/09/21

.thumb.JPG.cccbe1d7b0cf185c0c5047a47358fc3e.JPG)
.thumb.JPG.bcdd2016e8bd6b81b990a1906836cd8c.JPG)
.thumb.JPG.f9dd70d83d3047ed2831971b01907360.JPG)
- 857 replies
-
- 24
-
-
- Sphinx
- Vanguard Models
- (and 1 more)
-
I remember those breast rails, tricky little beggars to fit, well done Richard. 👍 B.E.
-
If I were masting and rigging the model, and not cutting away more than the existing unplanked areas, i would say it is not really worth the effort. B.E.
- 857 replies
-
- 3
-
-
- Sphinx
- Vanguard Models
- (and 1 more)
-
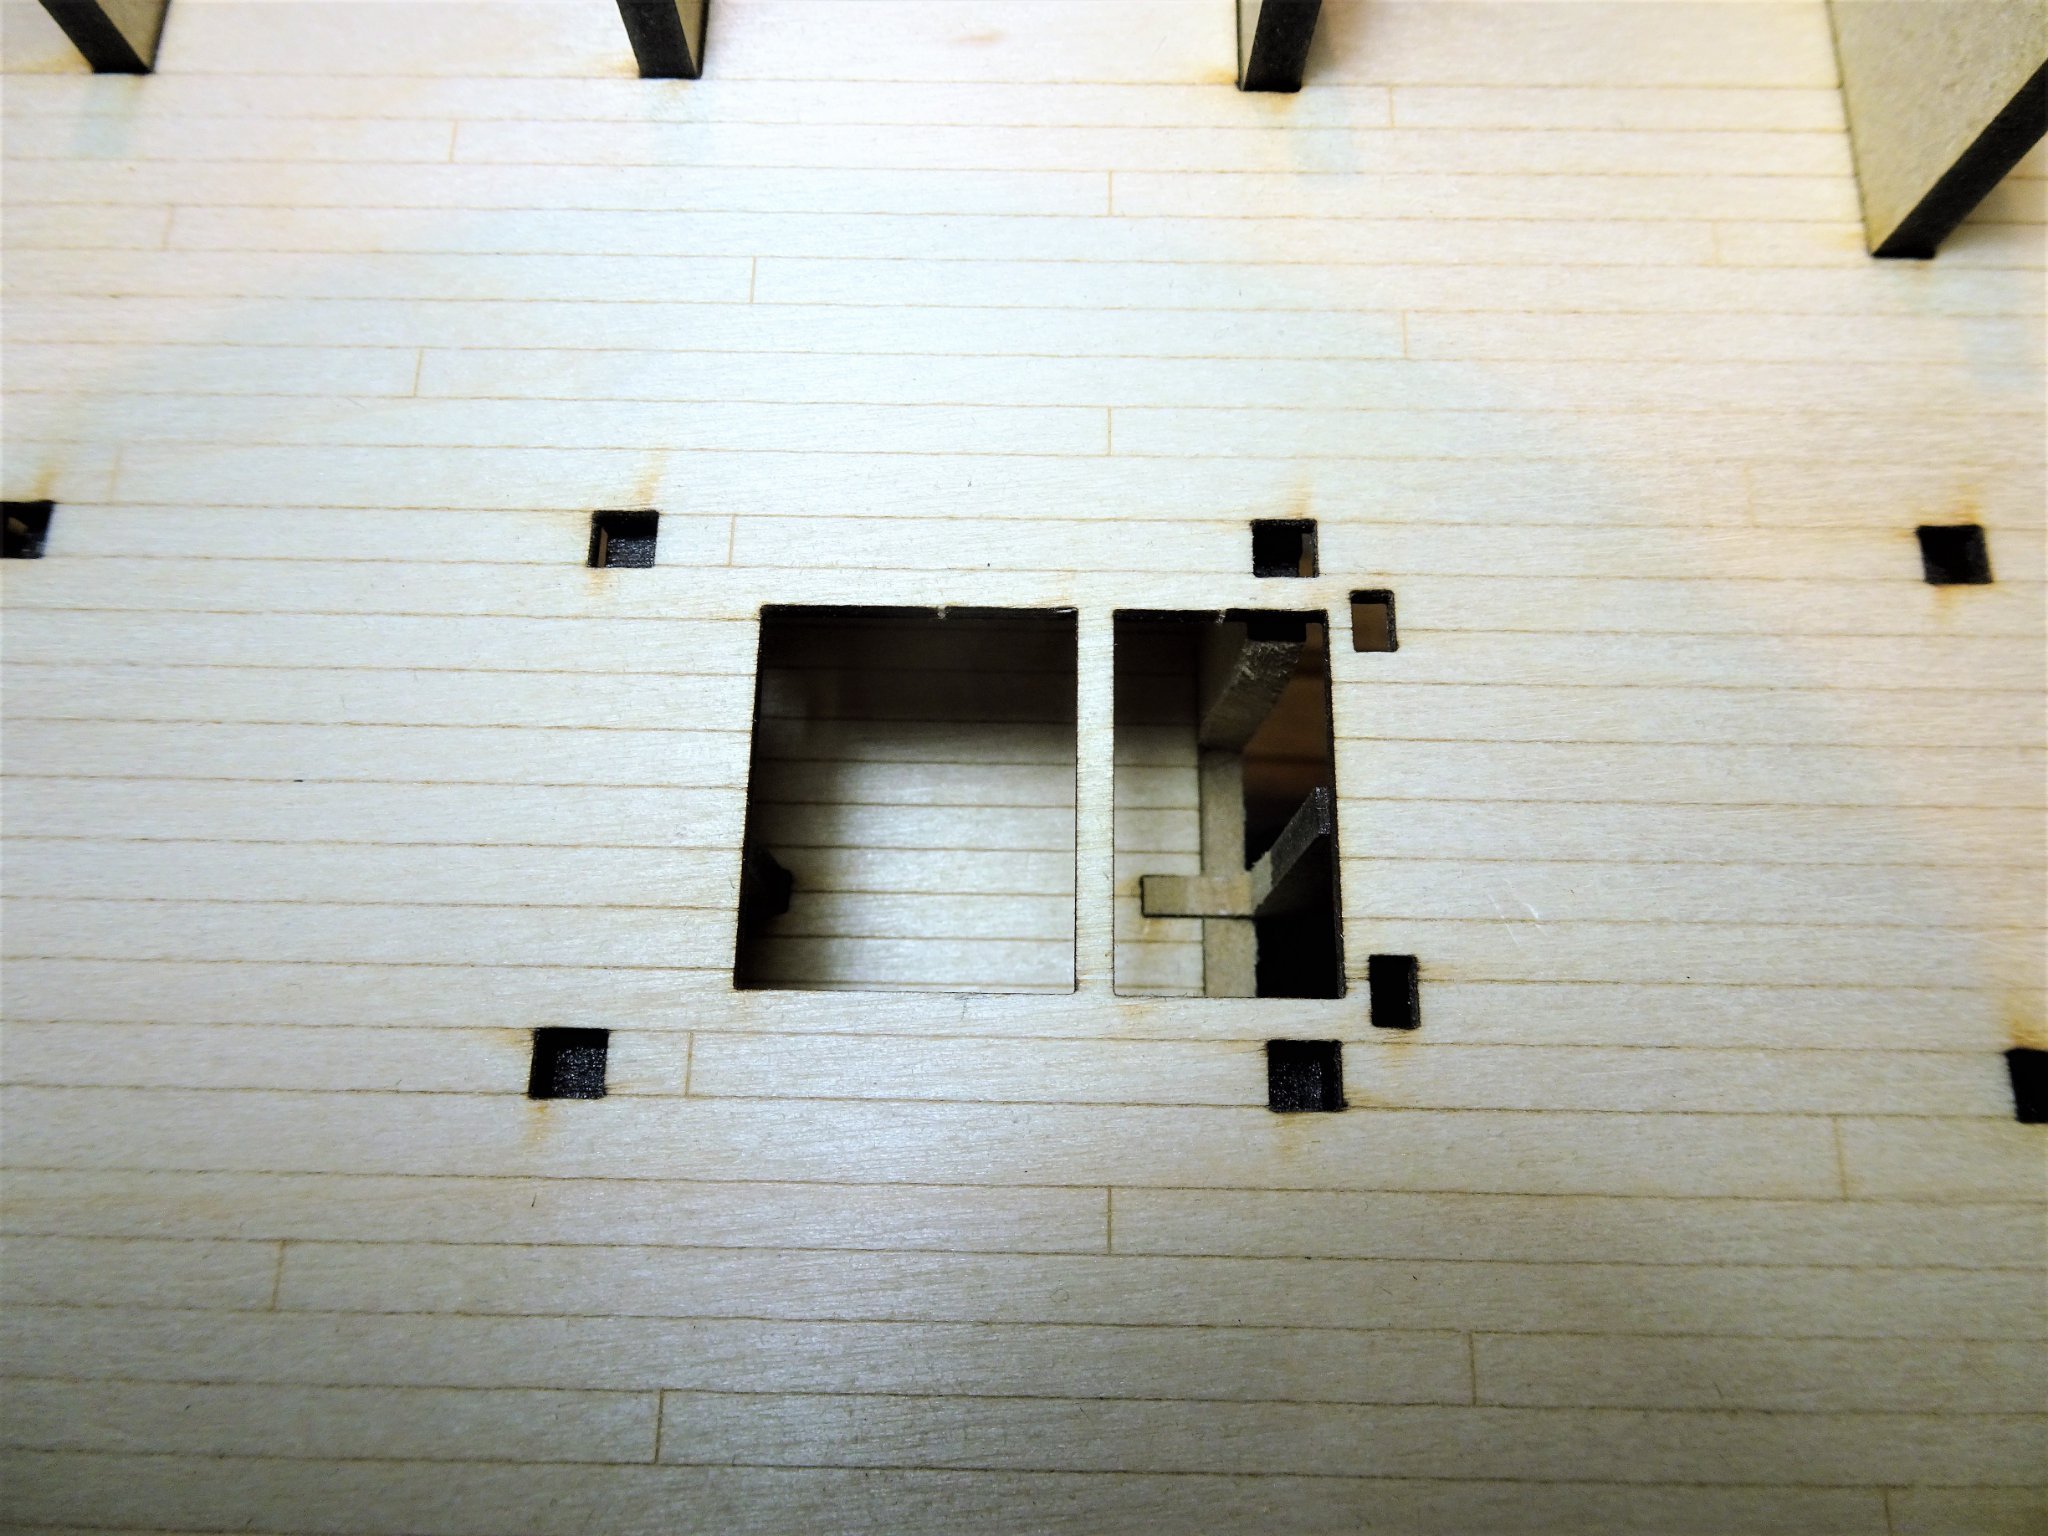
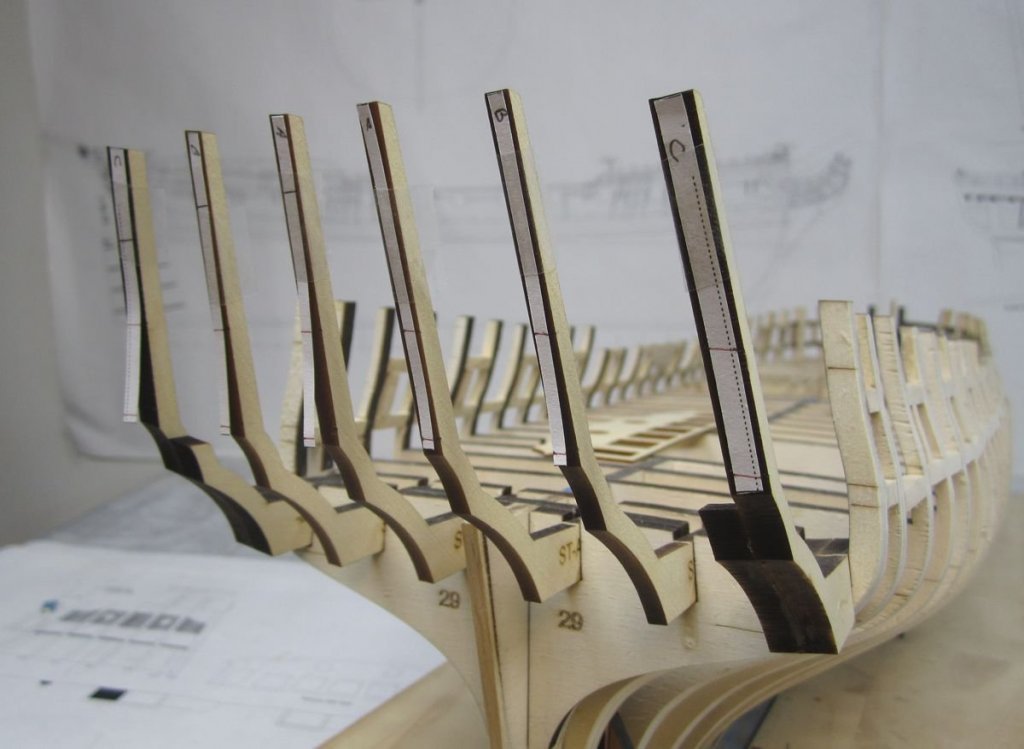
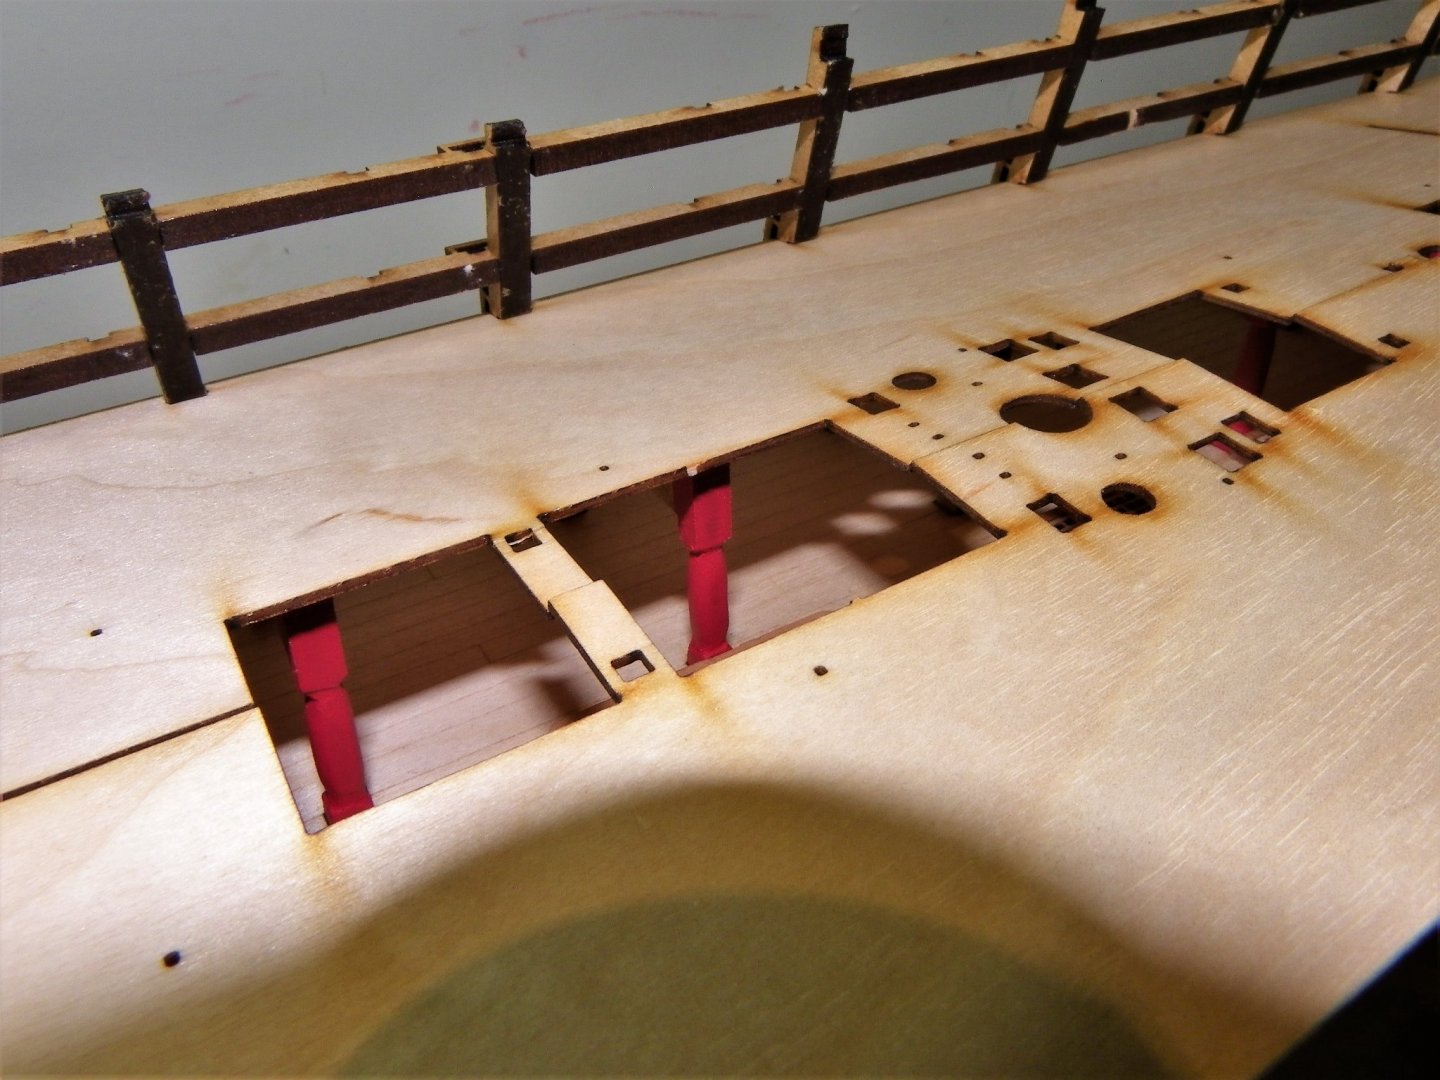
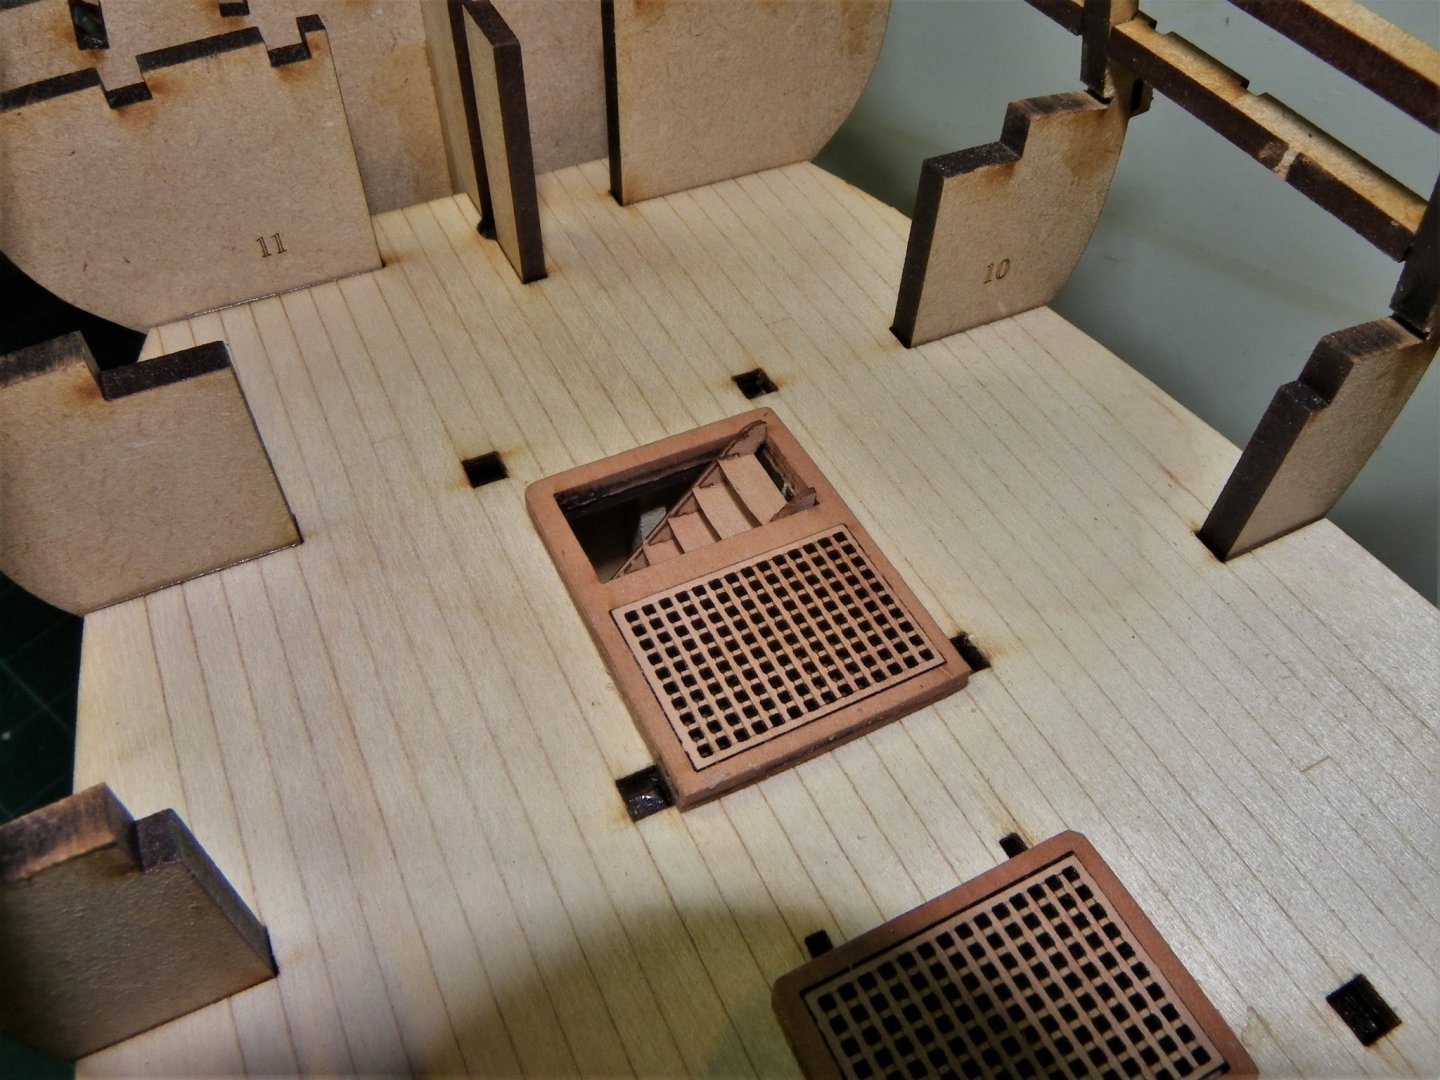
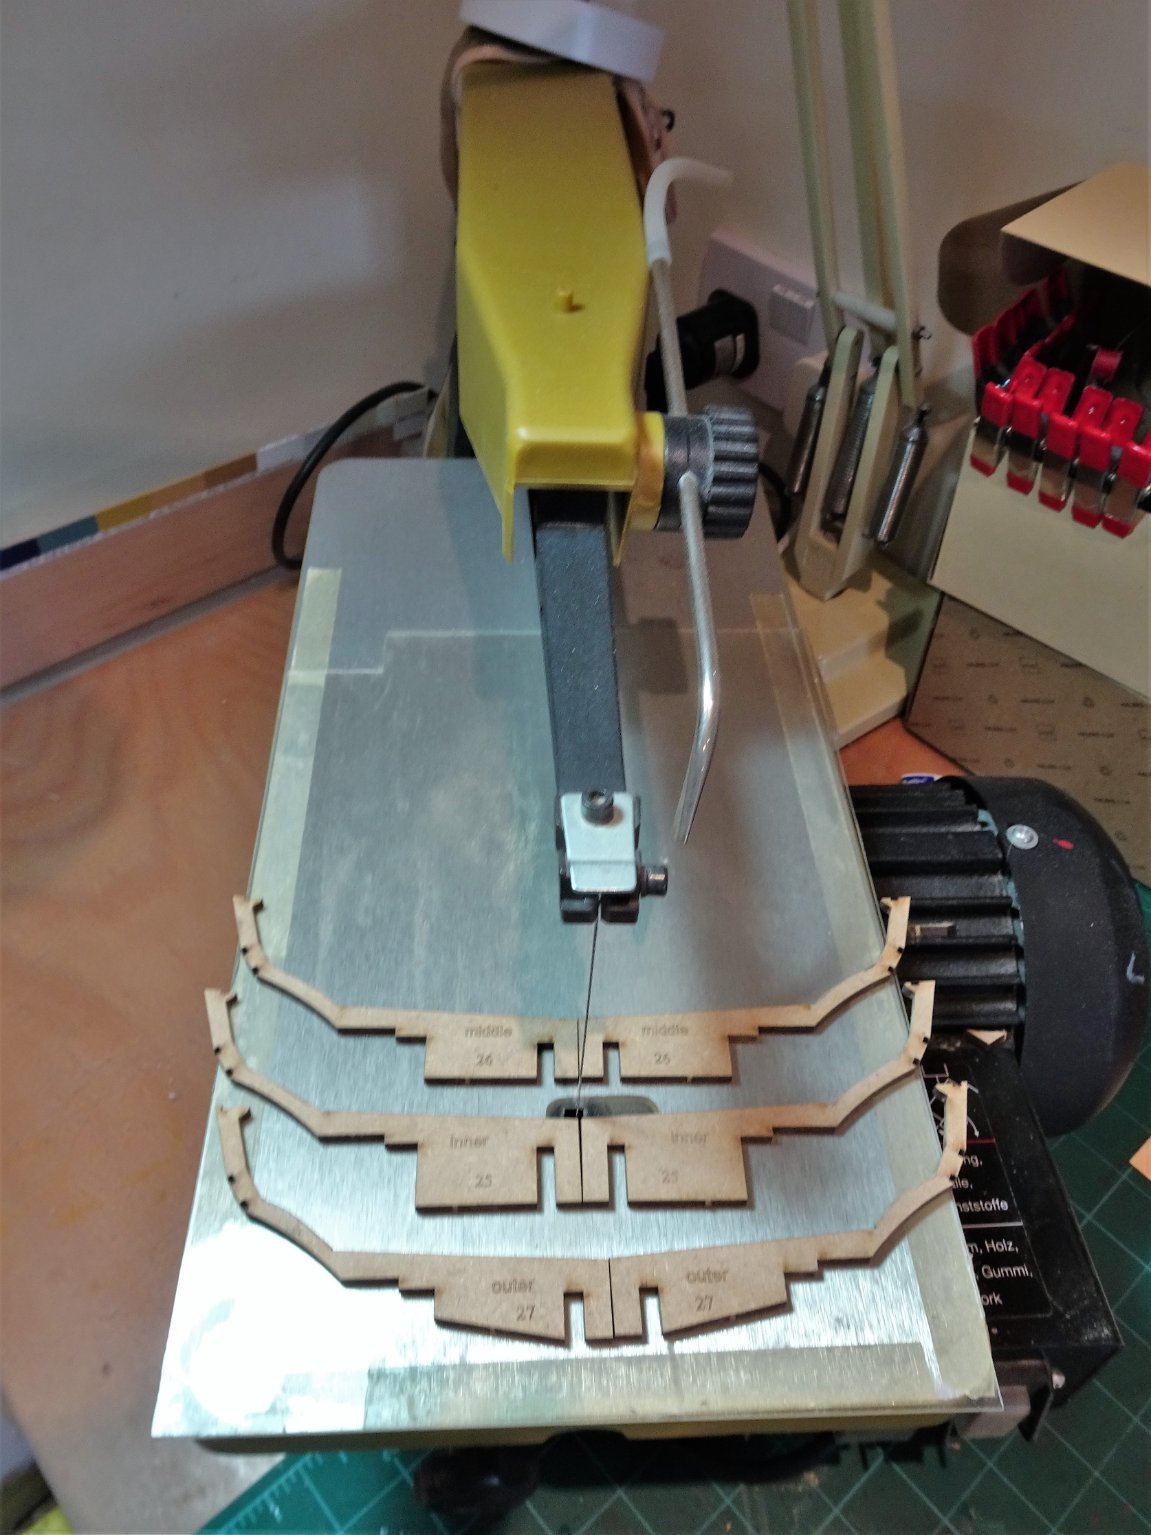
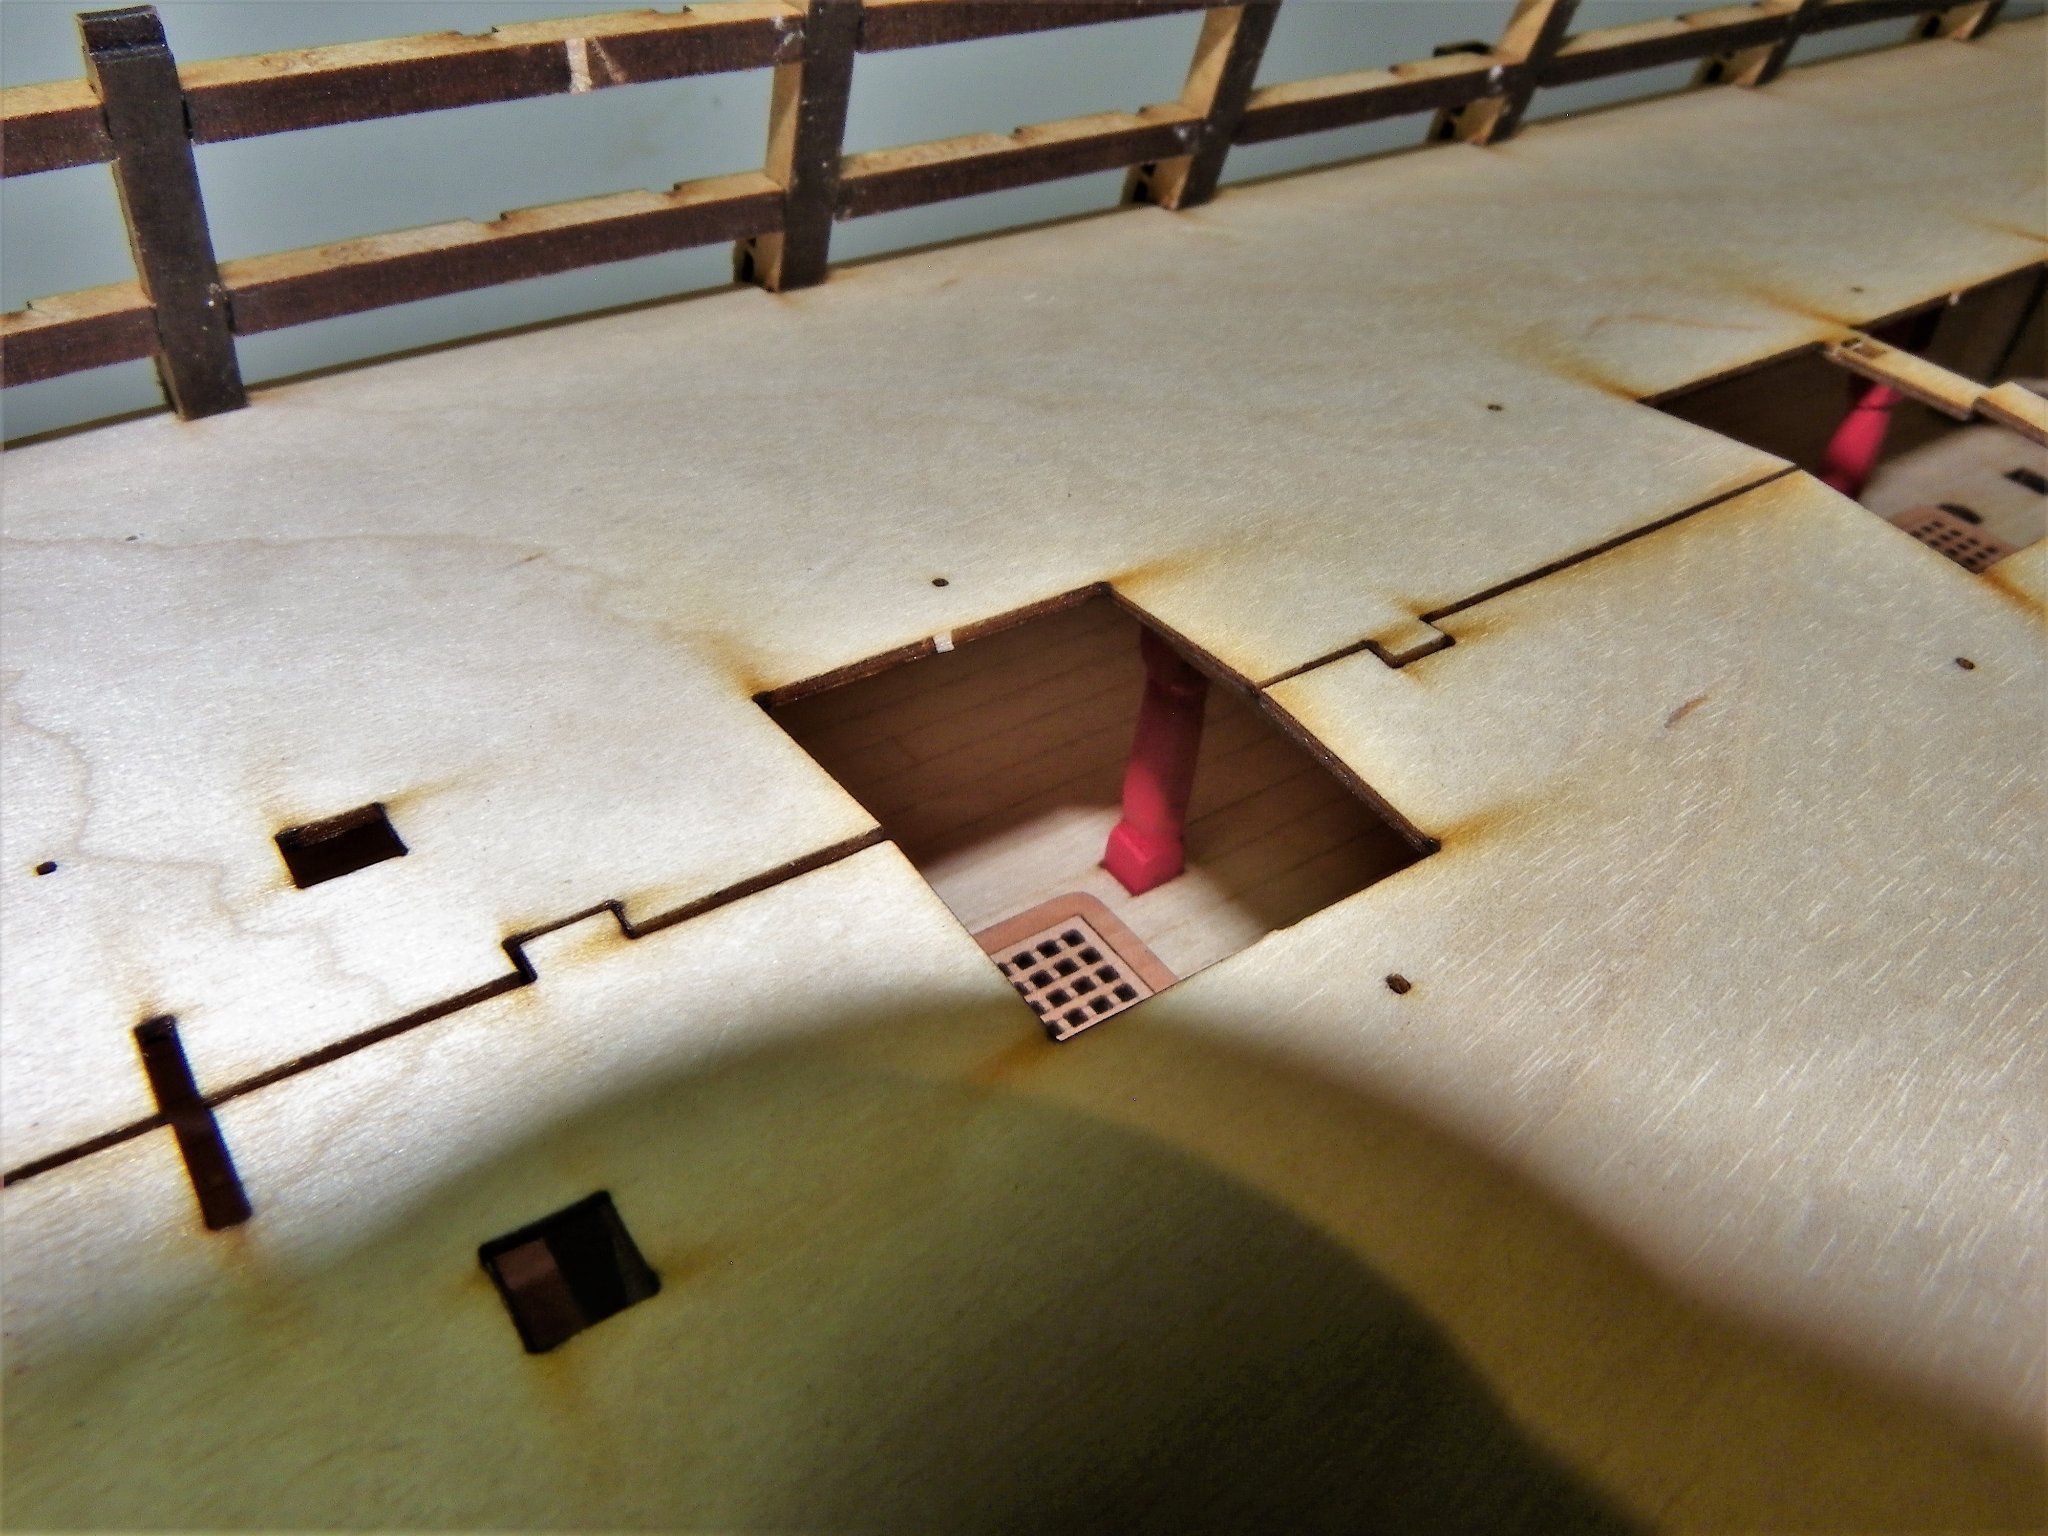
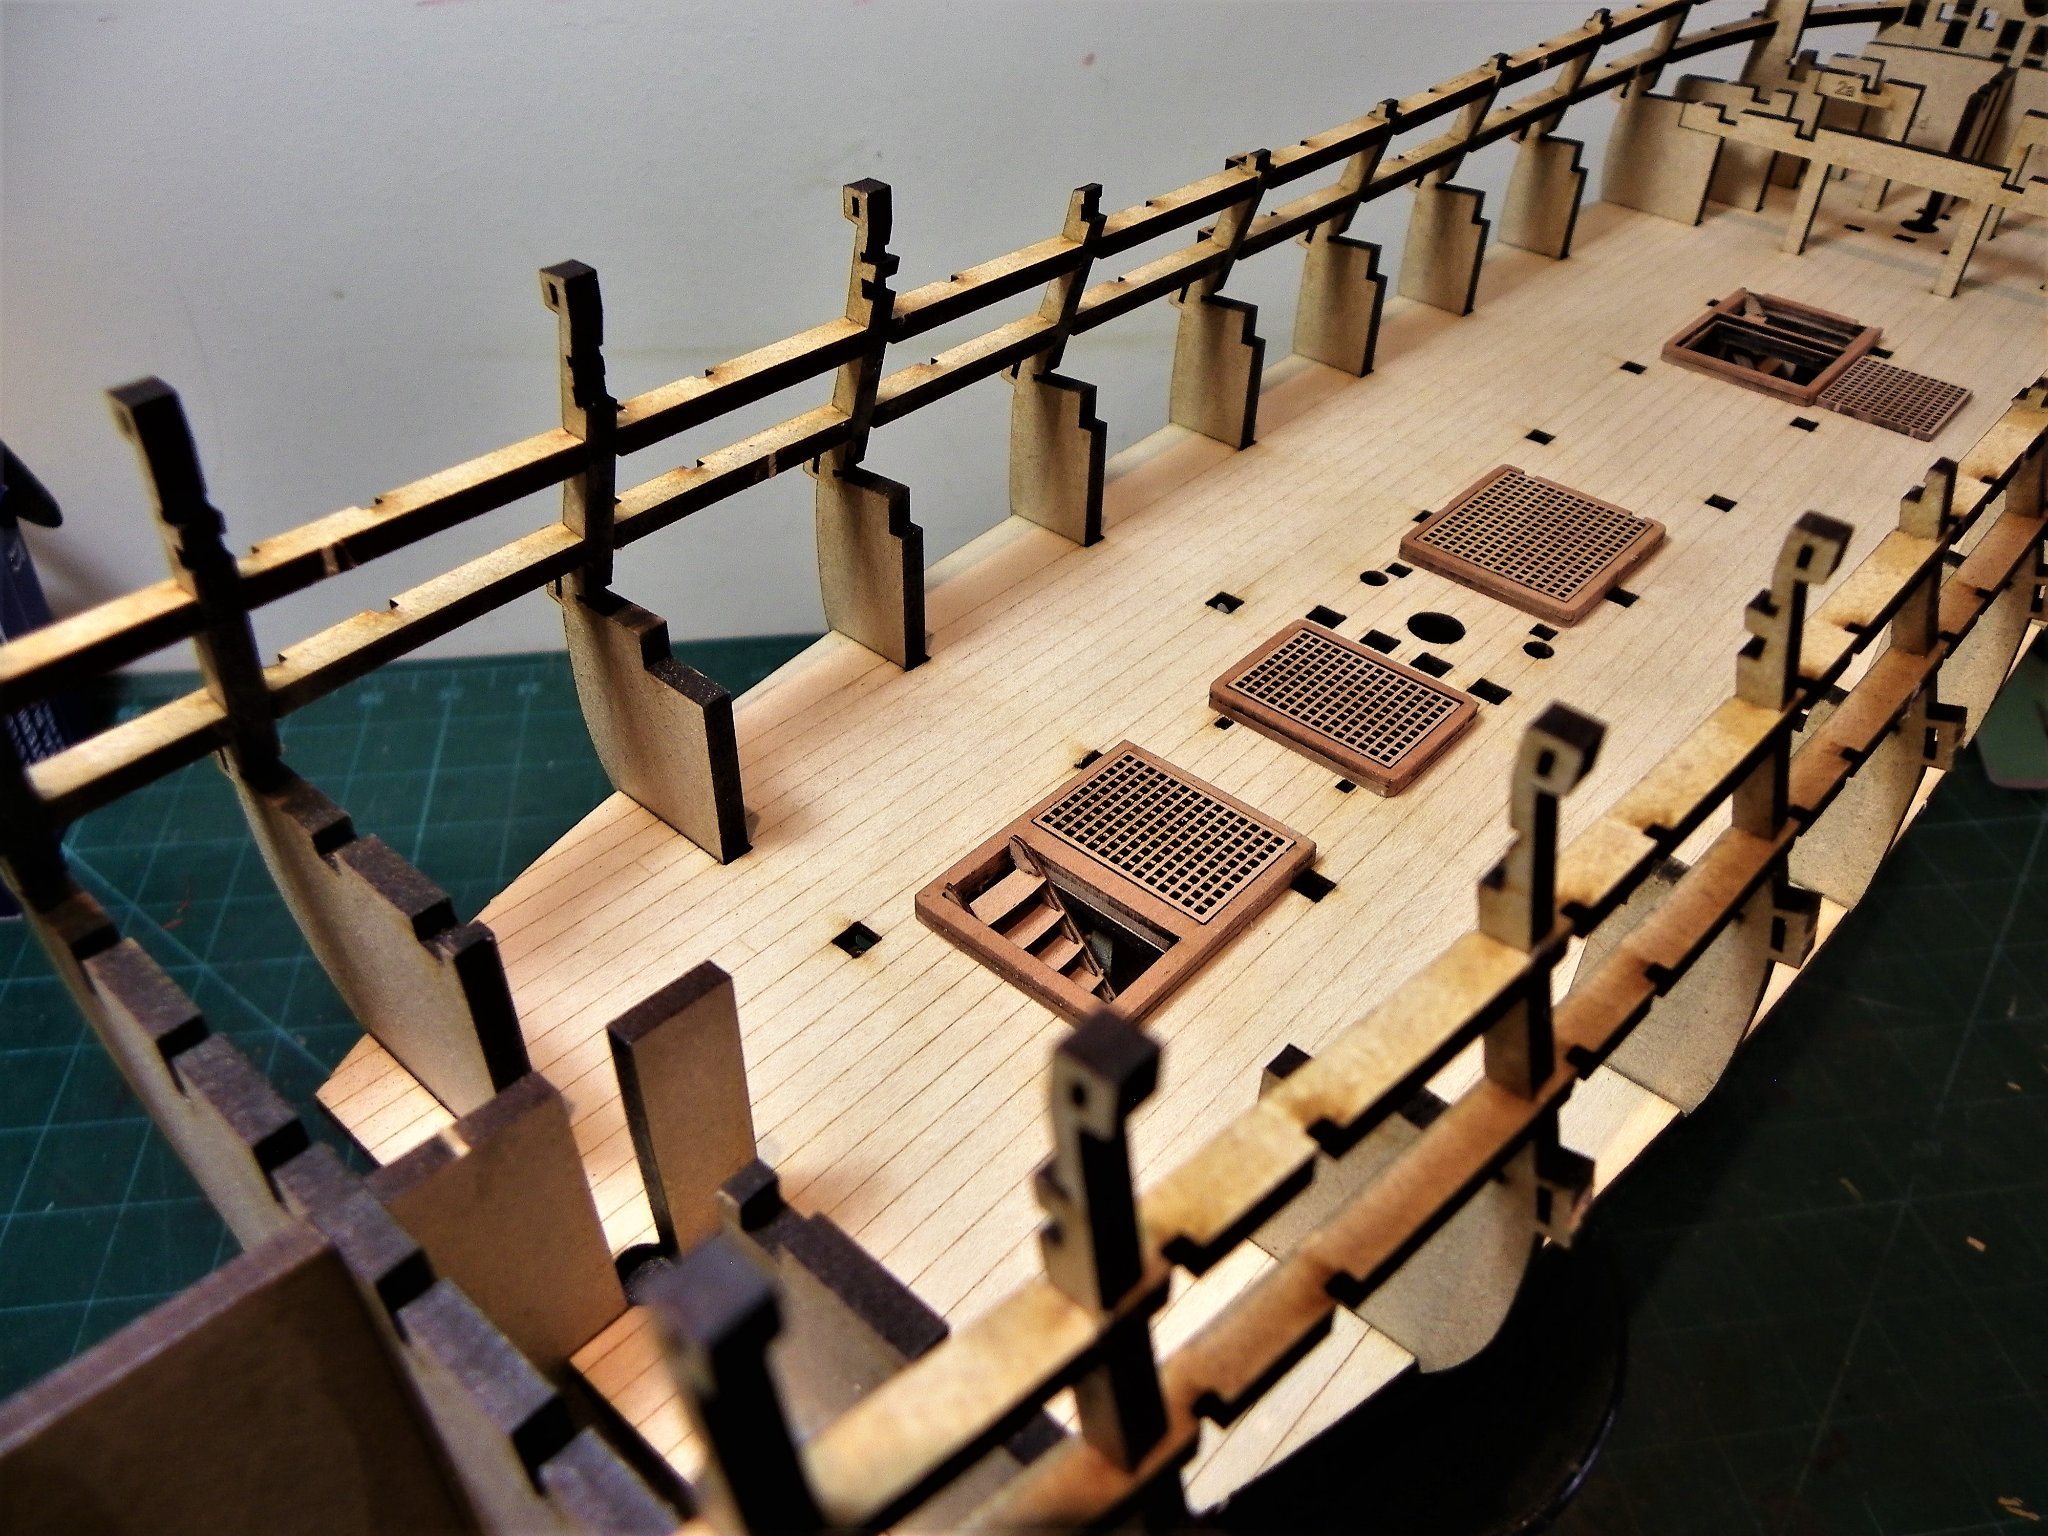
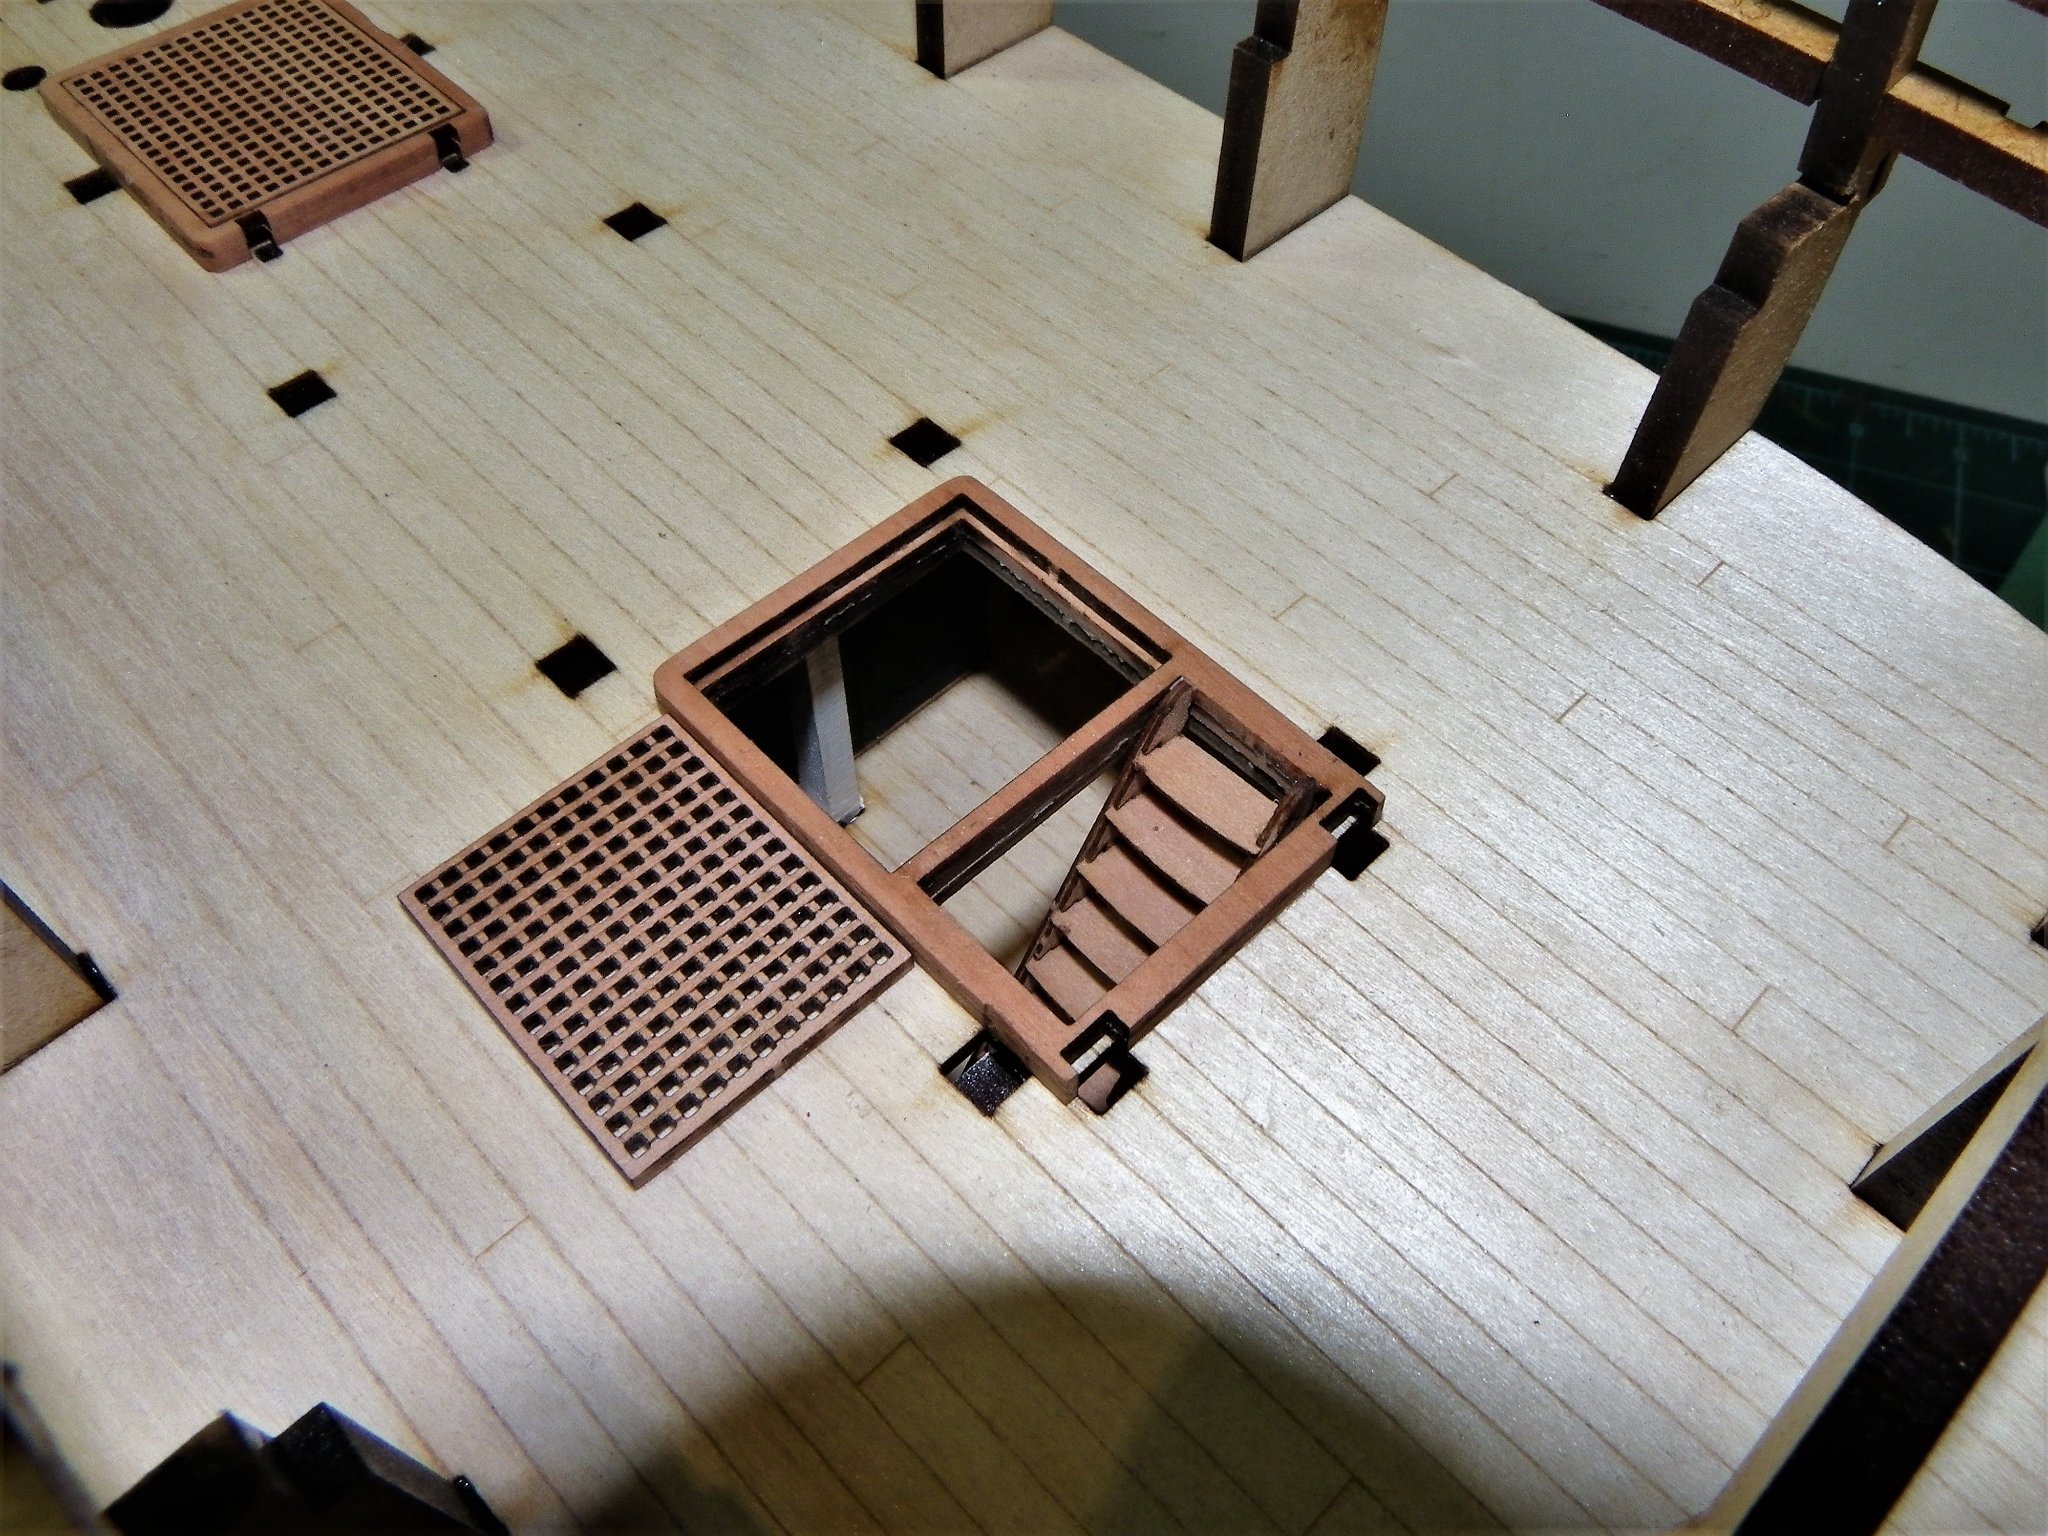
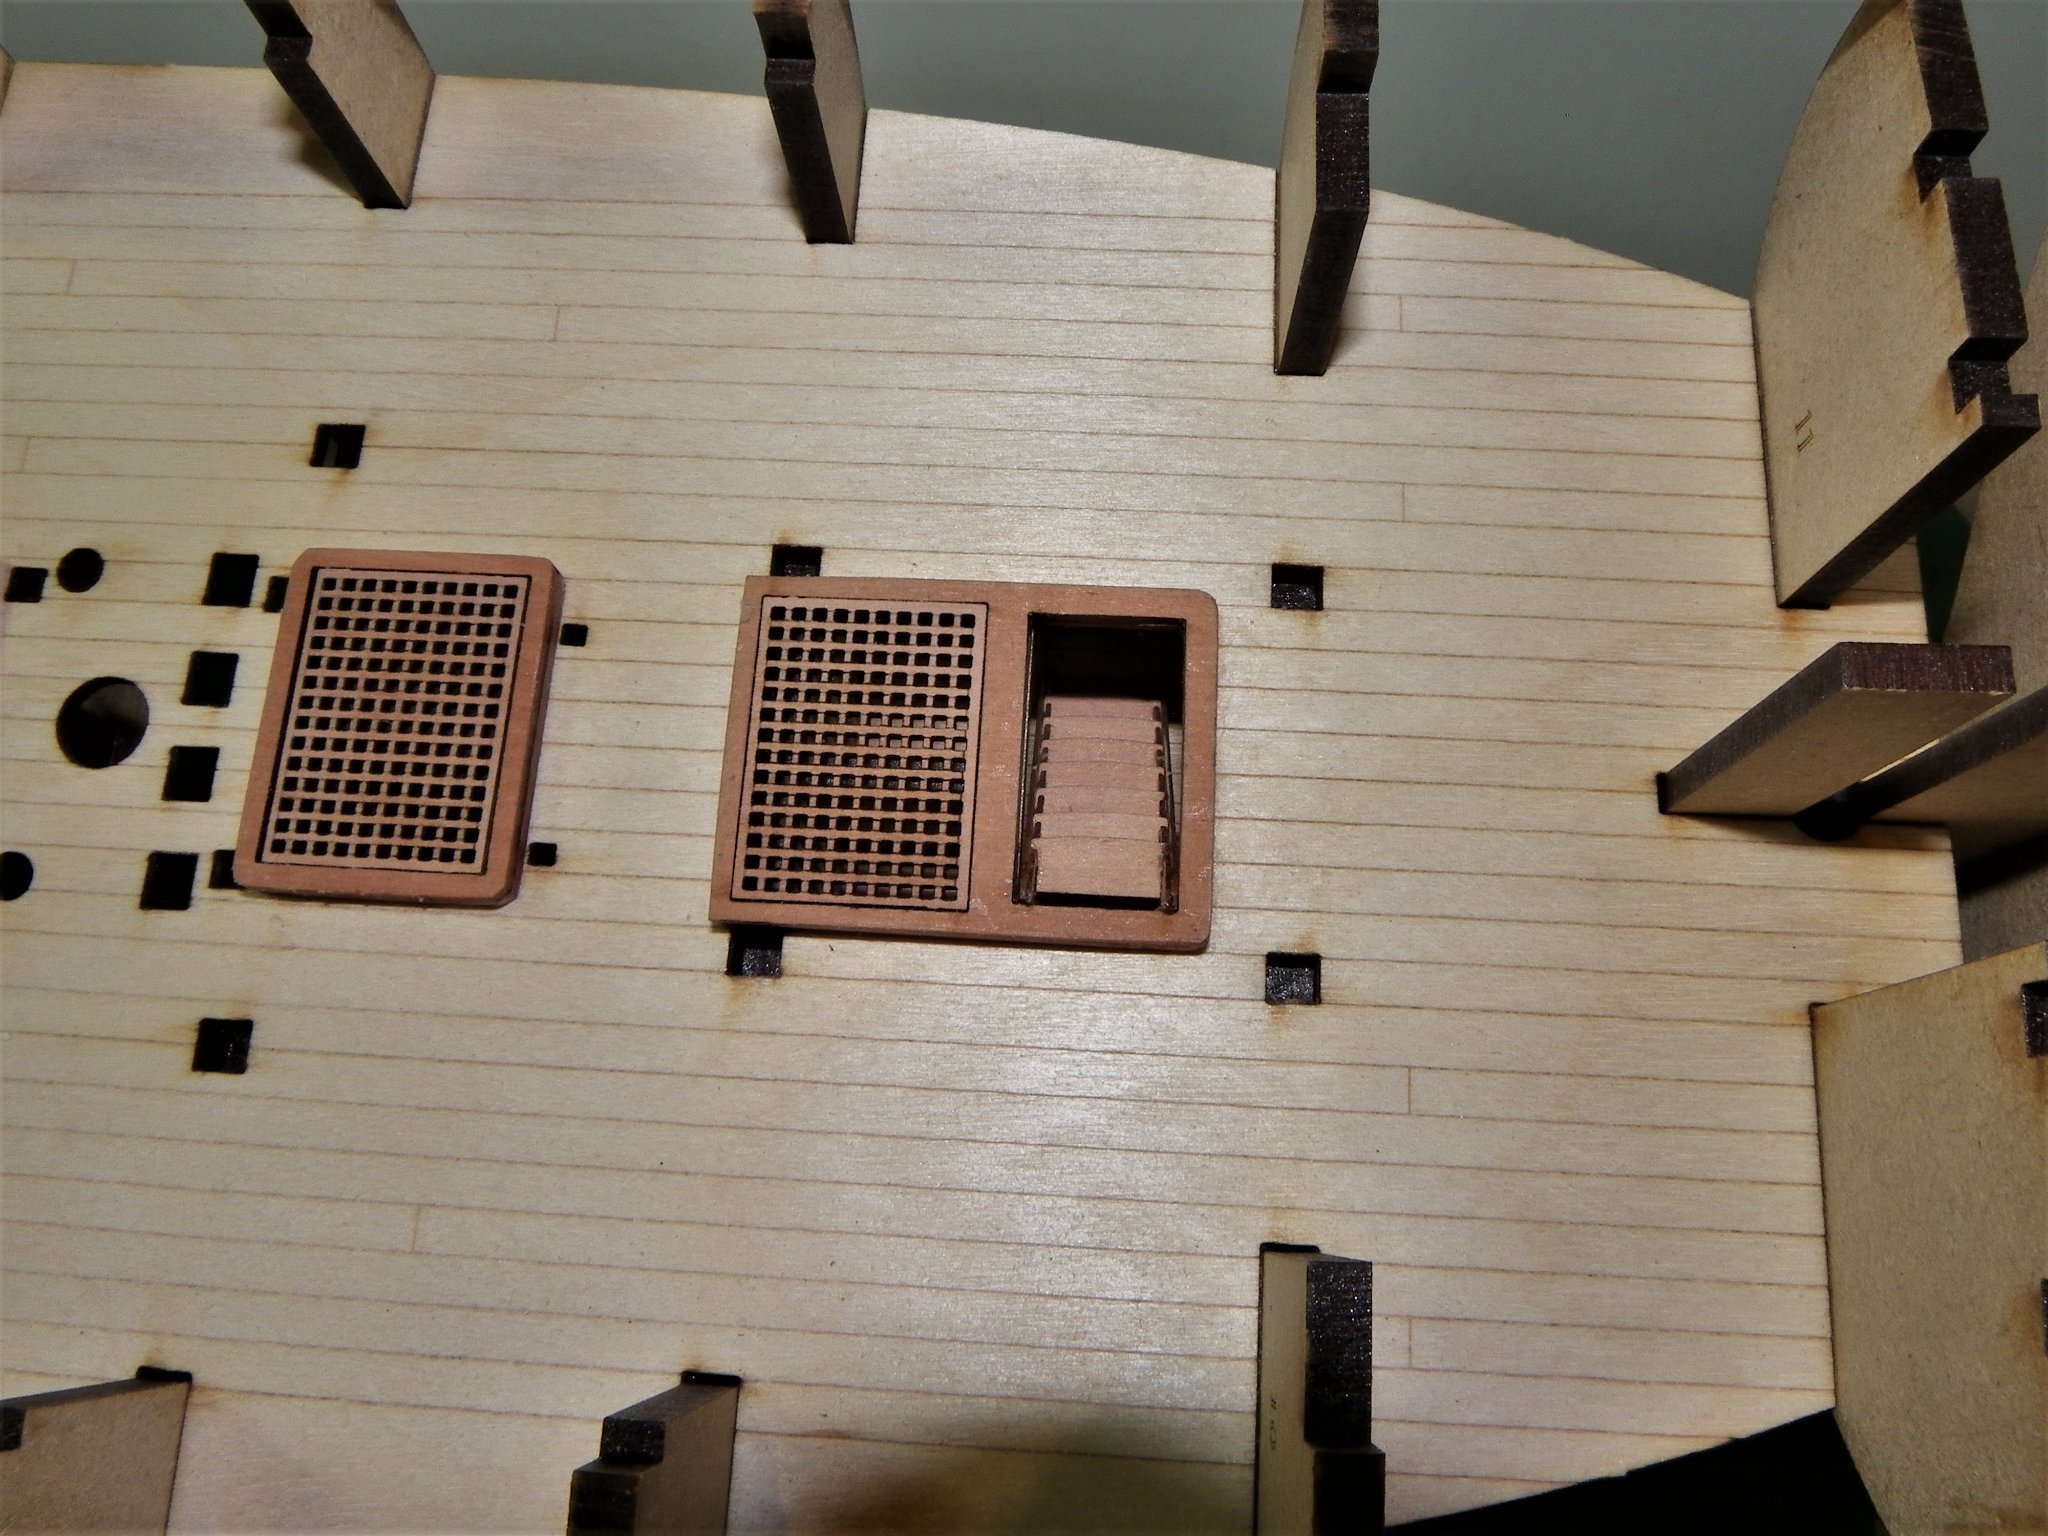
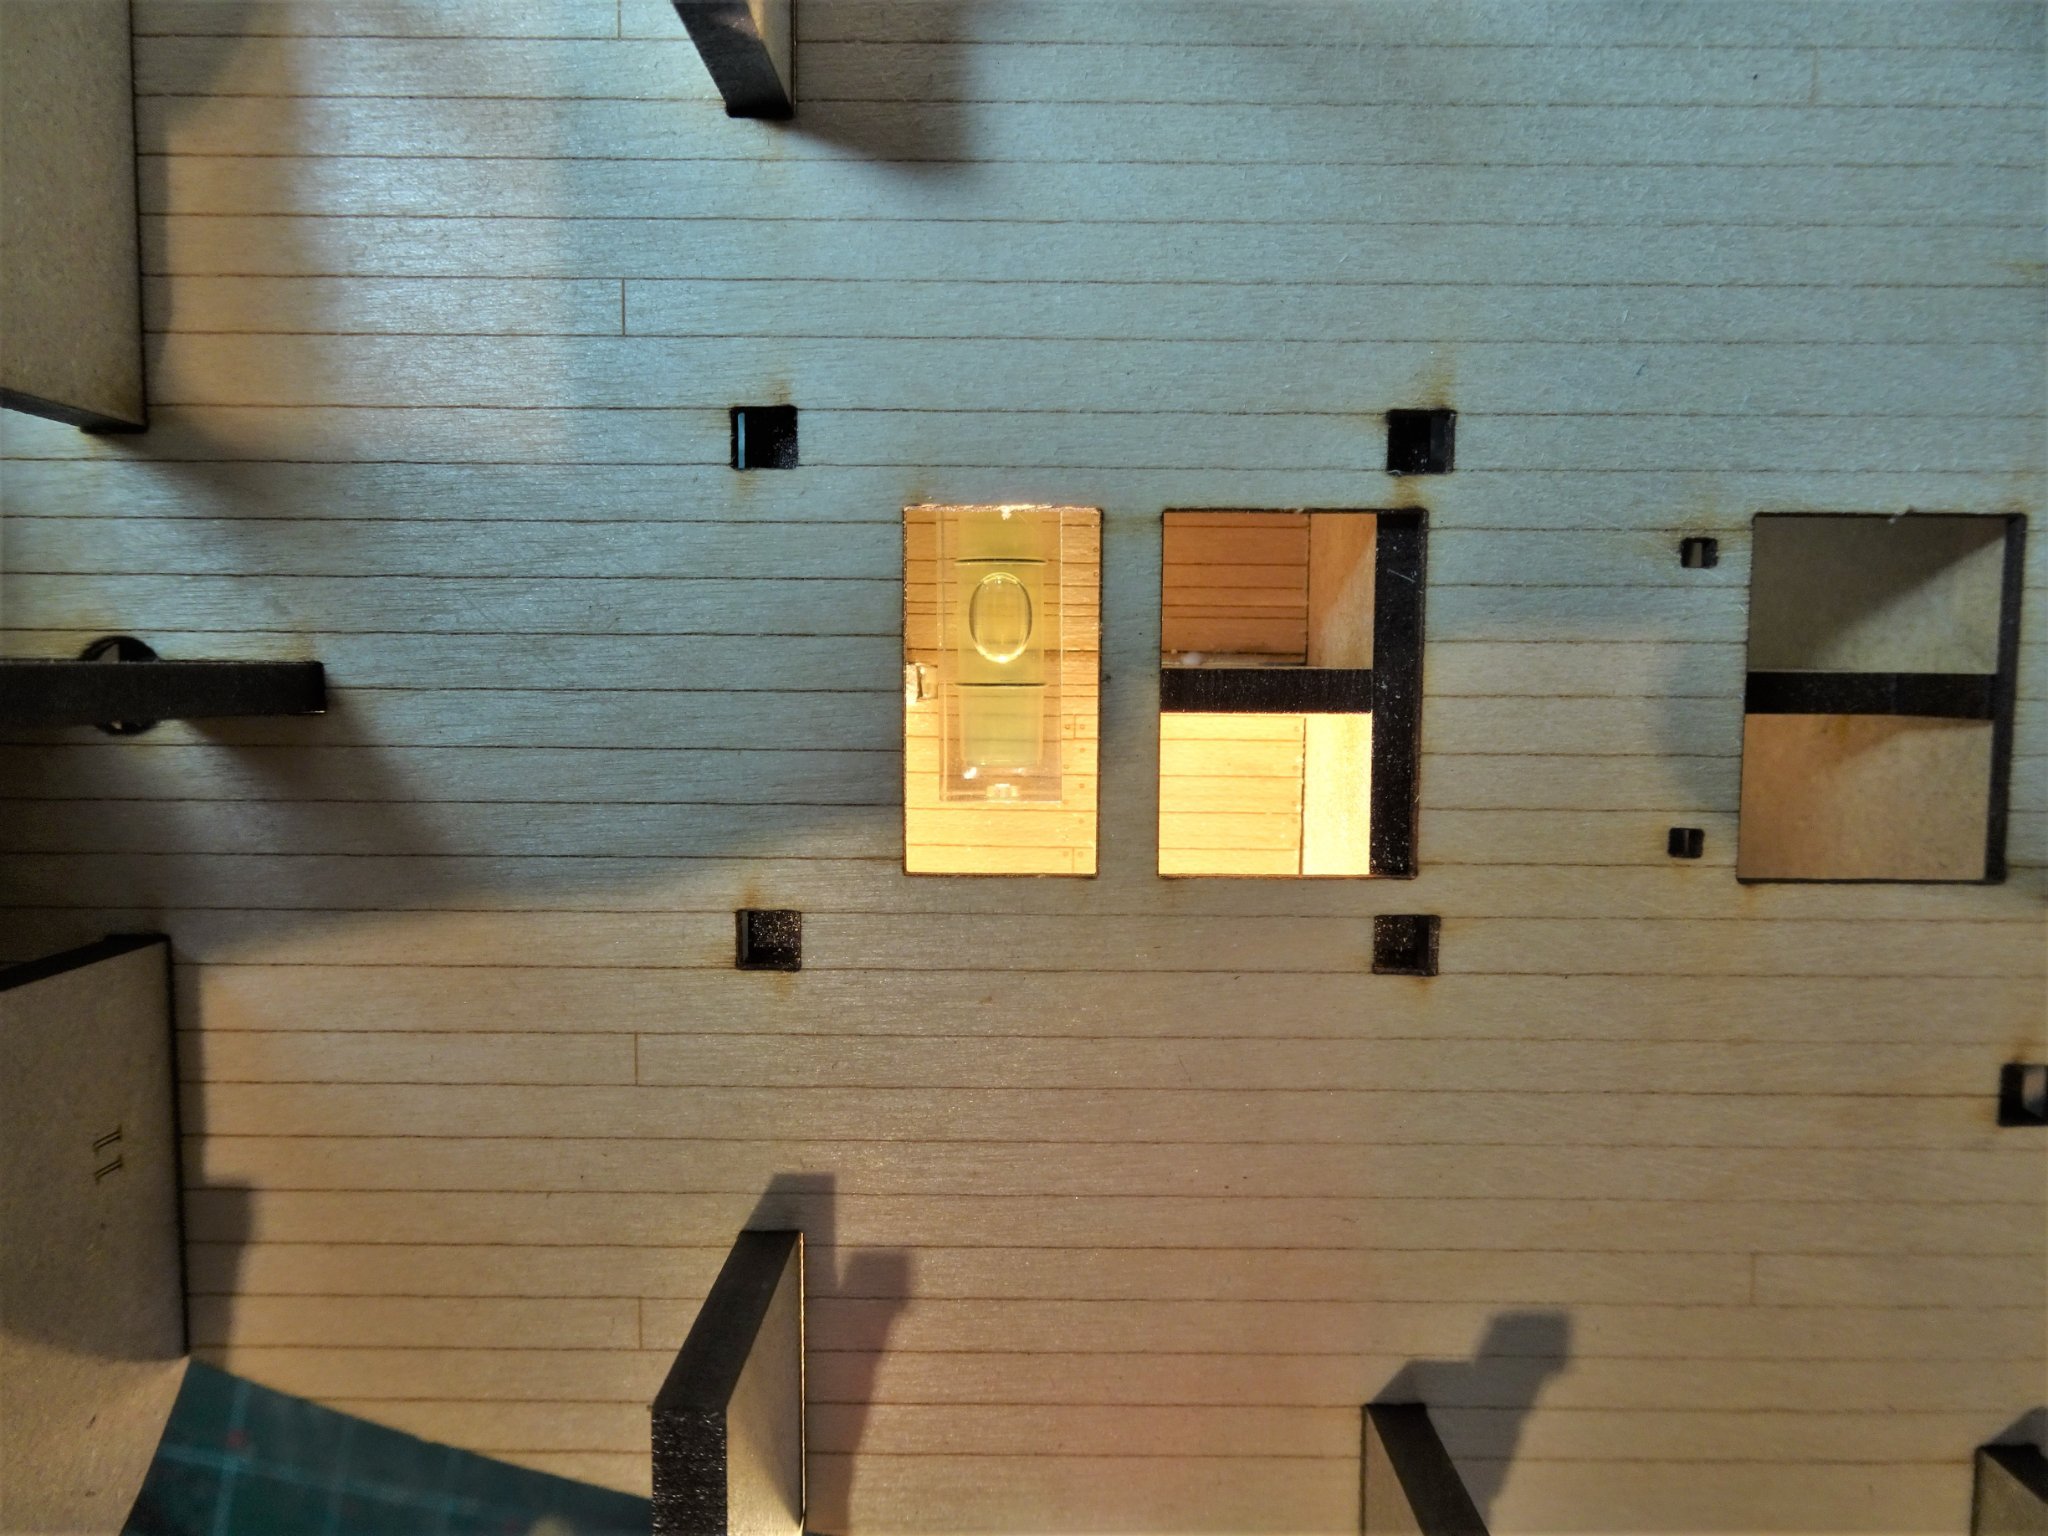
Post Seven Gunport patterns These fitted perfectly in the slots altho’ there was a little spring in the patterns which gave me cause to think about the diluted glue joint brushing approach. I did it, but light clamping was required for several of the slots. TheY feel very delicate and soft hands are required to fit them, whilst ensuring the rails fully fit into the slots. 03902(2) To my annoyance the port side extension at the top end of Bulkhead 12 came away. (It’s the one with the yellow tape on it) Nowt to do wi’ me Gov, I swear it fell off on its own accord; re-glued, but it remains to be seen what subsequent stresses it will be subject to. With the rails in place the hull is beginning to look the part and with the glue set it is now a rigid structure. Still need to be careful with those bulkhead extensions in the Quarter deck area. 03903 Finally, I removed the infill from Bulkhead 13. I took this very slowly and ensured that I could slip a scalpel blade between infill and bulkhead before I applied any pressure. Fitting out the Lower Deck I will be using the provided coaming/grating sets for the lower deck; they will only ever be viewed from above once the upper deck is fitted. I note that there is no round-up to the head ledges, which appears to follow some of the drawings in the AotS book on Pandora. Some of the general isometric and deck plan drawings in the book also show picture frame corner joints to the coamings, hmmn. 🤔 The cross section drawings do appear to show a round up, so this is an area I will re-visit when I get to the Upper deck fittings. The Pearwood Laser cut coamings are cleanly cut, remember to apply glue to the top half of each set, helps to keep glue off the grating rebate. 0197 The gratings are accurately cut and are a perfect fit to the coamings. At this point I can also add the ladders down to the Platforms. I had run out of generic ladder sets and considered buying and converting the Pearwood set supplied for Speedy. 0190(2) Chris was kind enough to knock me a set out from earlier Sphinx plans he had when he considered fitting out the ladderways. He does not intend to generally include these as separate fittings but will supply them on request. (He tells me) 0194(2) 0201(2) 0205 Fore hatchway 0213(2) I will leave the Fore lower deck hatch open. 0209 There will be a view of the Fore Platform down thro’ the Upper and lower decks and it will enhance the impression of a fully fitted out model. 0206 Aft hatchway. 0210 Here the grating will remain in place as it sits below the Capstan, and there is no open space below it. Less will be seen of this ladderway as the Upper deck ladderway sits above it. B.E. 31/08/21
.thumb.JPG.846b5f897ea25c51787c014d564b9ad8.JPG)
.thumb.JPG.ab6aeef2dd55188e21592321a2ff3aa9.JPG)
.thumb.JPG.39d8855fb91701061b9fc10f9675cace.JPG)


.thumb.JPG.2c3c8367ae67c96a23ff5521fe7bee99.JPG)
- 857 replies
-
- 27
-
-
- Sphinx
- Vanguard Models
- (and 1 more)
-
Hi Bob, The sanders I use are made by Model Craft, are spring loaded and come in various sizes. Being angled at one end and round at the other they are useful for fairing hulls. B.E.
- 857 replies
-
- 3
-
-
- Sphinx
- Vanguard Models
- (and 1 more)
-
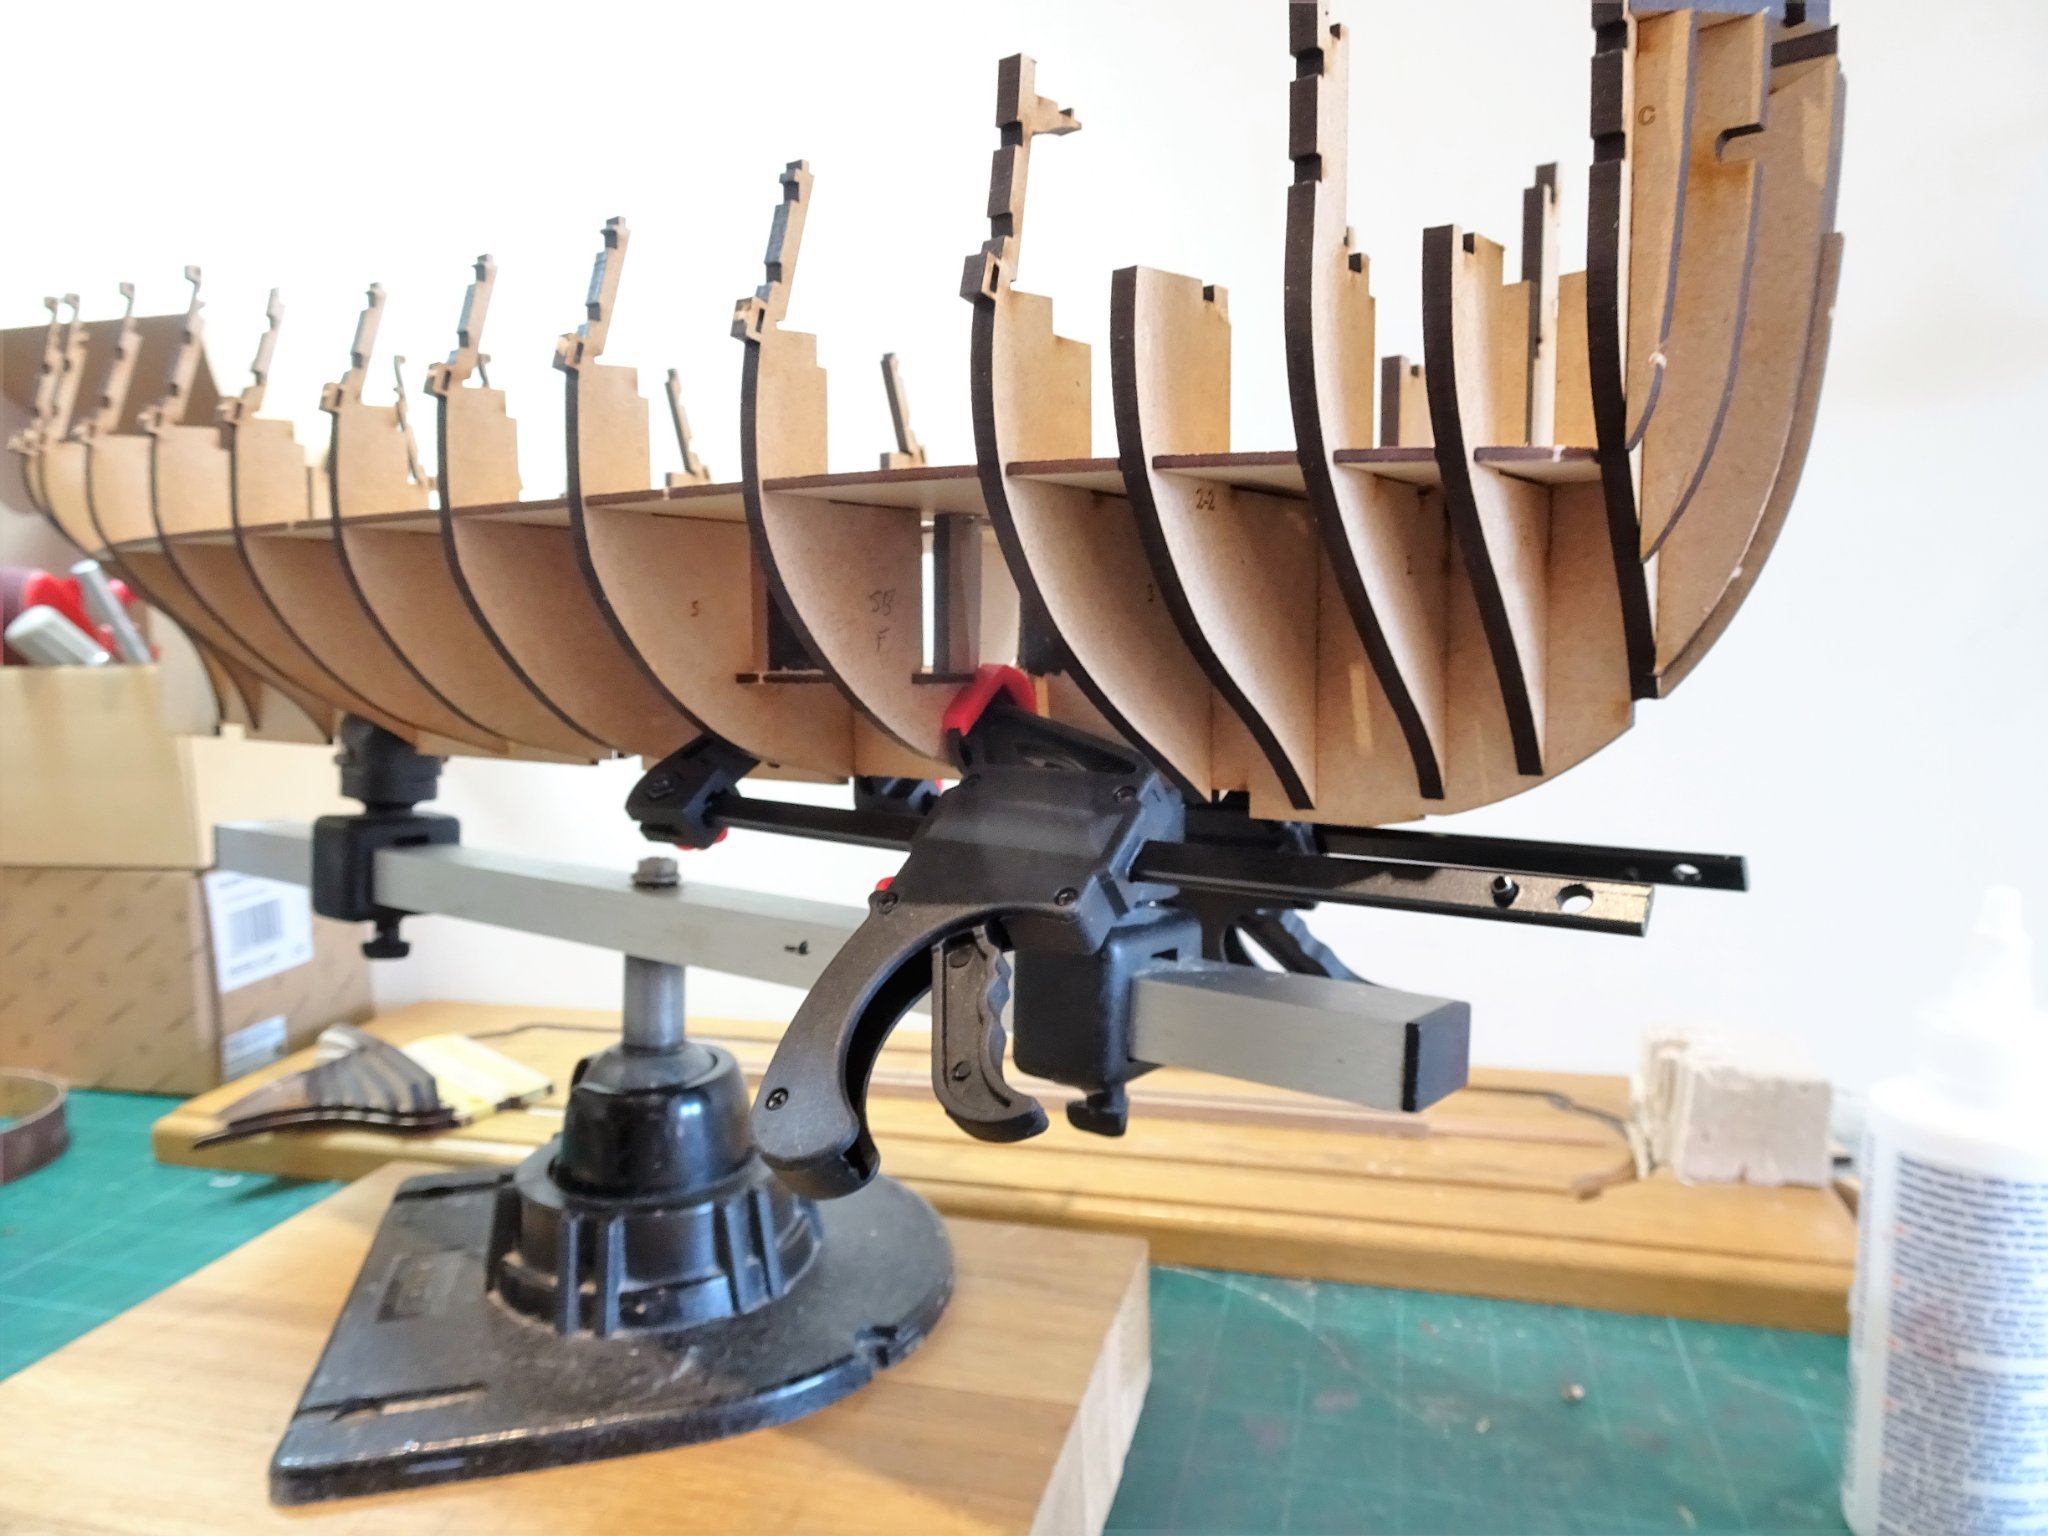
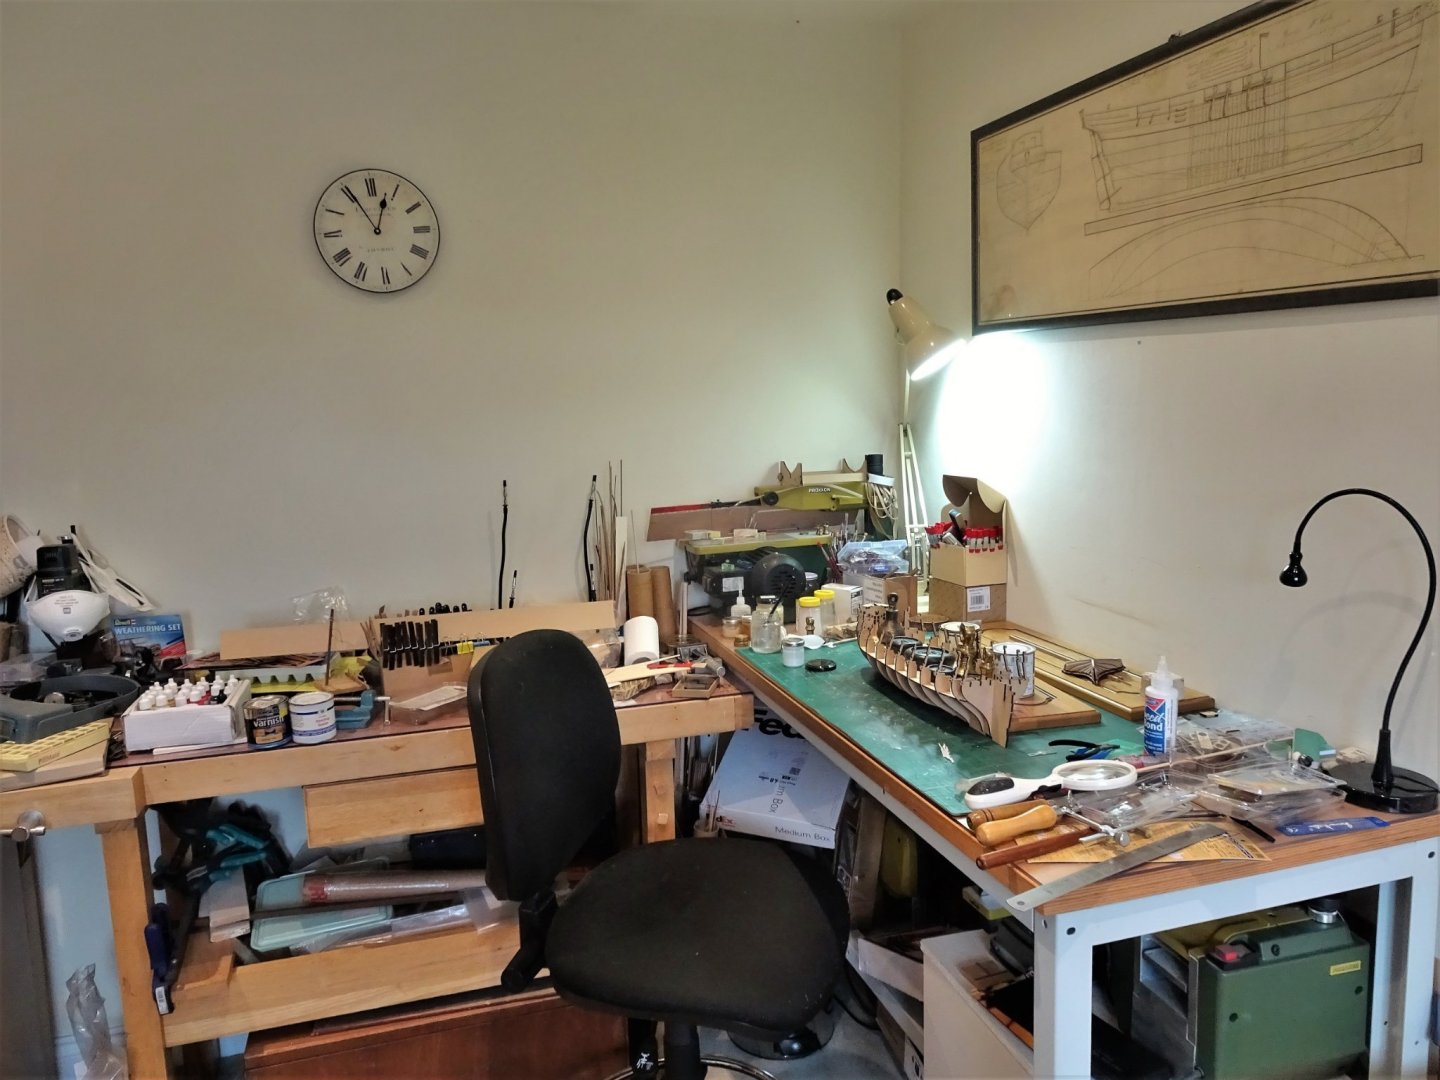
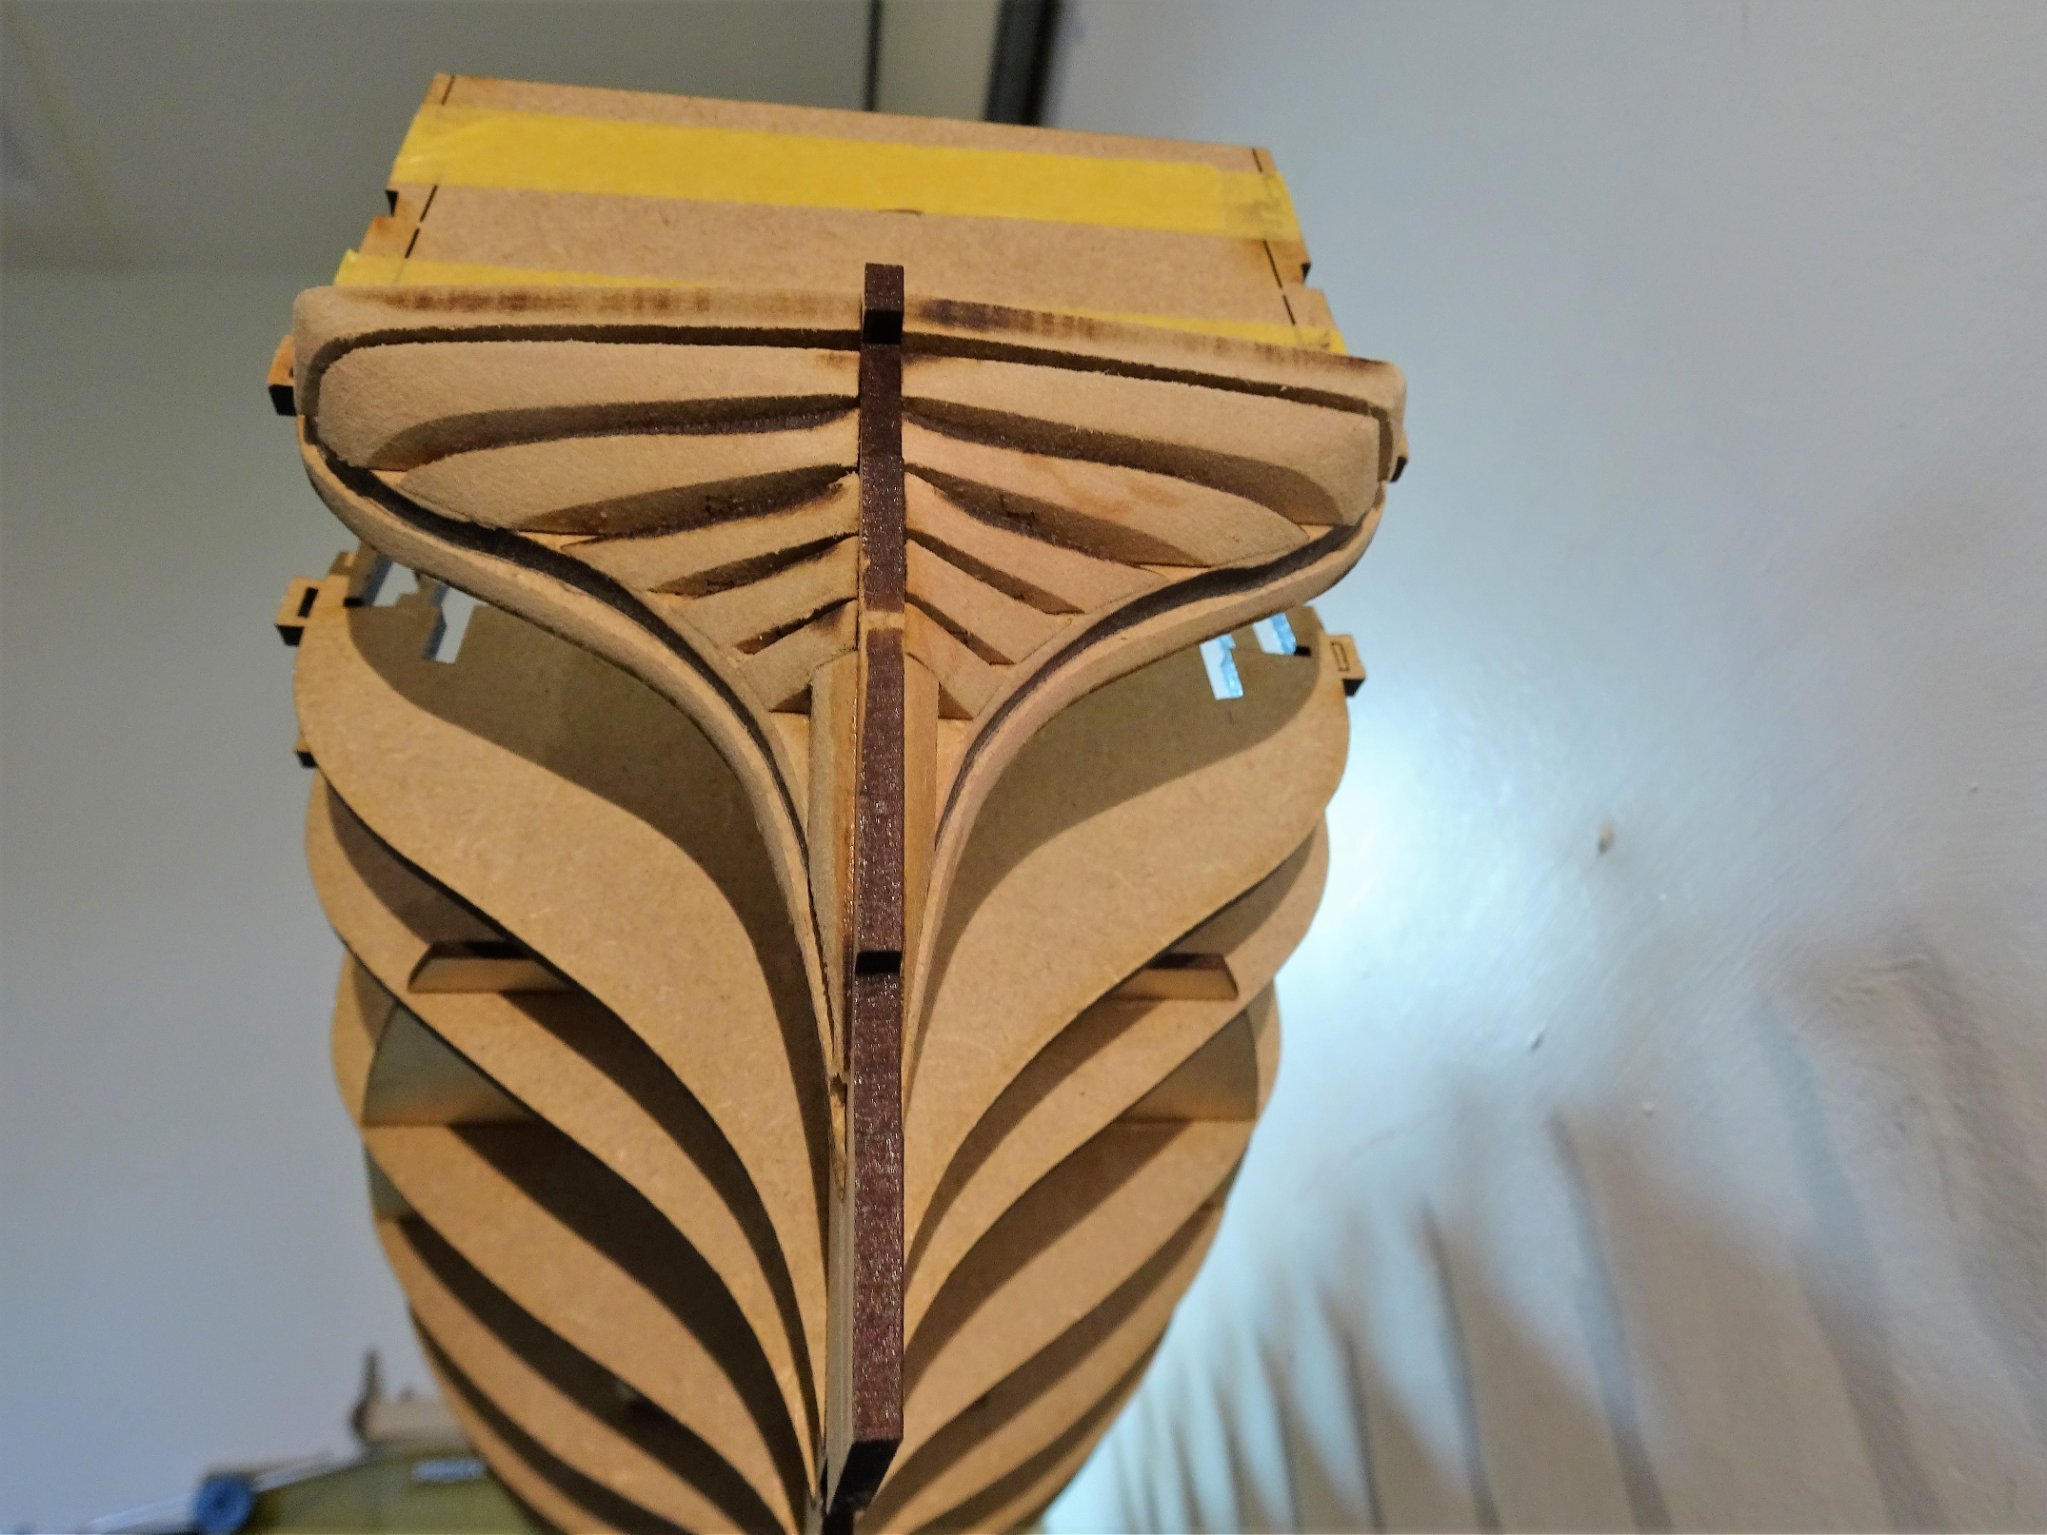
Post Six Stern and bow patterns. I wasn’t too keen on working the bow and stern patterns off-model, particularly the stern. As it happens, for the bow pattern the off-model option was removed; unlike the bow pattern bulkhead which wouldn’t shift after fitting the patterns. It slid on ok and I was careful not to allow glue onto the keel, but move it would not and I had the nightmare vision of snapping the false keel which at only 3mm wide and quite long is very vulnerable at this stage. So, on-model fairing it will be. For preliminary fairing of the stern pattern I am using 10mm and 20mm Finger sanders, initially with coarse grade paper. It is worth slipping a couple of lengths of waste strip from the keel fret between the stern patterns to support them during sanding, particularly parts 24. One of mine fell off during sanding, probably due to insufficient glue used to avoid sticking it to the keel. 3816(2) So, this is as far as I felt comfortable with off-model fairing. 3825(2) 3819(2) 3826(2) All Bulkheads glued into place now. 3812 Only been four days and look at the state of my working area, think I need a general tidy up. B.E. 28/08/21
.thumb.JPG.7d11c55ccfe51838c92deab898ed0c79.JPG)


.thumb.JPG.cc82f970dd65671e1f42cf7a71e7228f.JPG)
- 857 replies
-
- 18
-
-
- Sphinx
- Vanguard Models
- (and 1 more)
-
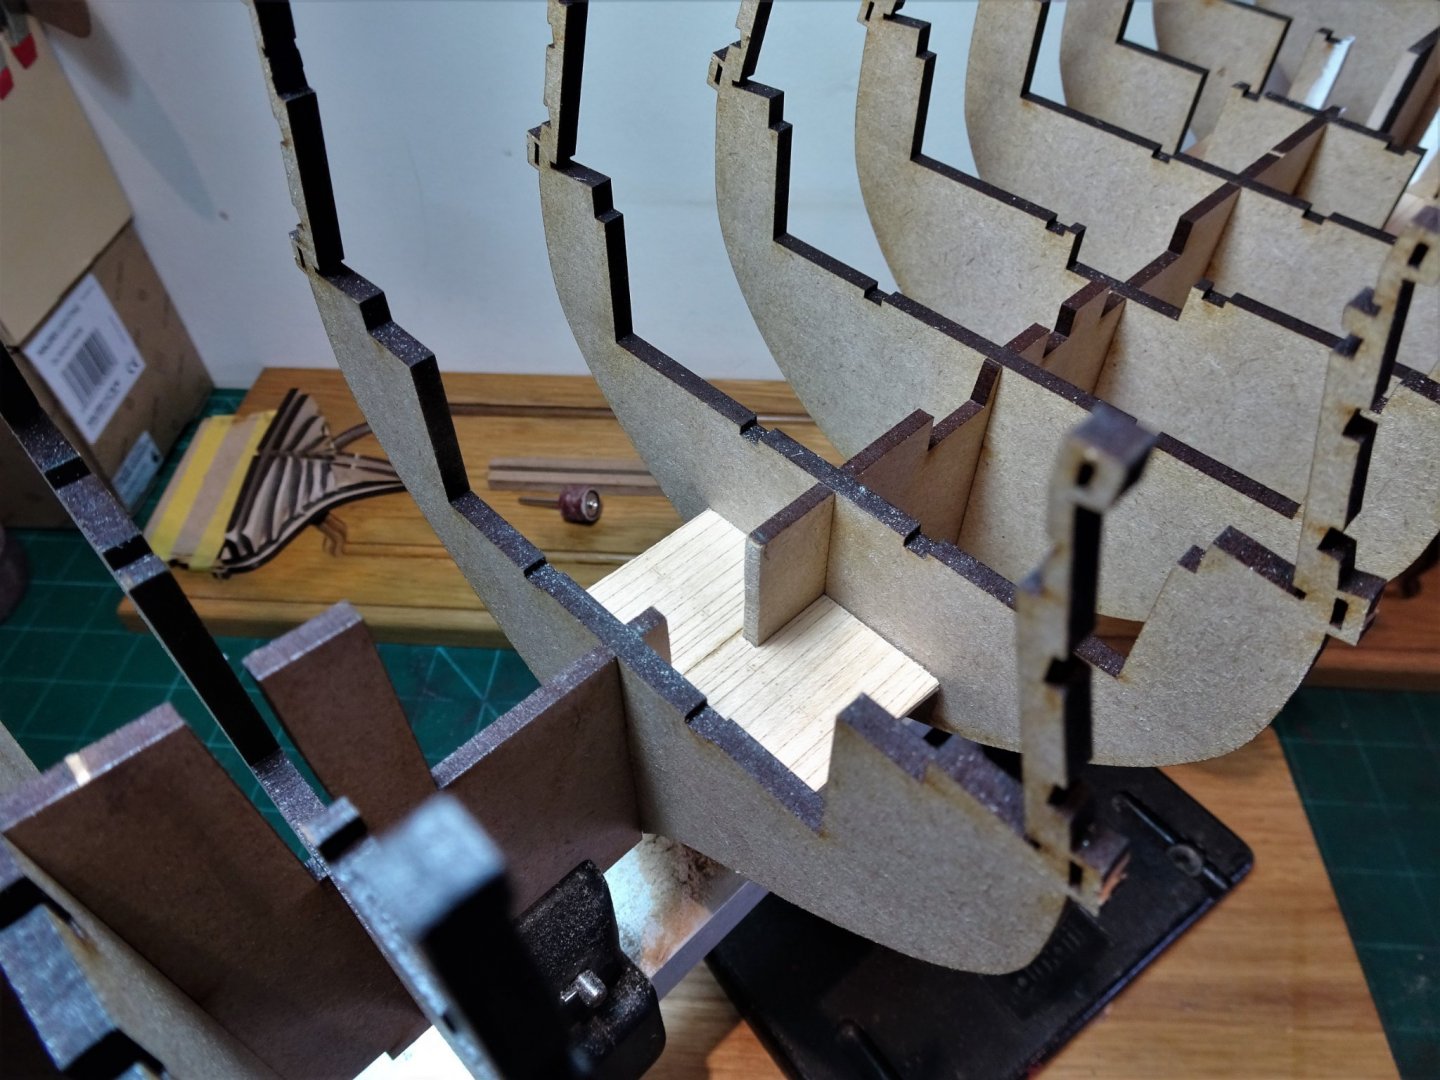
Post Five Aft platform modification This involves cutting away a section of the false keel between bulkheads 9 and 10. 3805 I have restricted this to the area covered by the ladderway only, the hatchway is grated and covered by the Upper deck capstan. I used a section of unused maple decking from my Zulu build for the platform, sufficient for the purpose. 3802 Checking the level. 3808(2) The aft ladderway down to the platform from the Lower deck is almost directly below the Aft Ladderway on the Upper deck, so that ladder will probably obscure most of the view down to the Aft Platform, but I'll know it's there.😀 Time to get back to the main event. B.E. 27/08/21

.thumb.JPG.3243cfdde441dd955cb781bbb2f5581b.JPG)
- 857 replies
-
- 16
-
-
- Sphinx
- Vanguard Models
- (and 1 more)
-
Yes it can, I detailed my approach in my Pegasus log - Page 9 post 246, Here's a link to Chuck's Cheerful instructions where he used the same system Chapter-Thirteen.pdf (syrenshipmodelcompany.com) Give it a go, nothing to lose except some printer ink. B.E.
-
Hi Jacek, look up BECC Model flags, I think they have EU Stockists. Have you thought of printing your own using Modelspan tissue, gives a far better scale appearance. B.E.
-
Well done Glenn, great photos of the bow/stern off- model fairing process. 👍 B.E.
-
Thank you Phil, they are nice little projects, and don't take up hardly any room at all 🙂 B.E.
- 70 replies
-
- 1
-
-
- 22ft Yawl
- Vanguard Models
- (and 2 more)
-
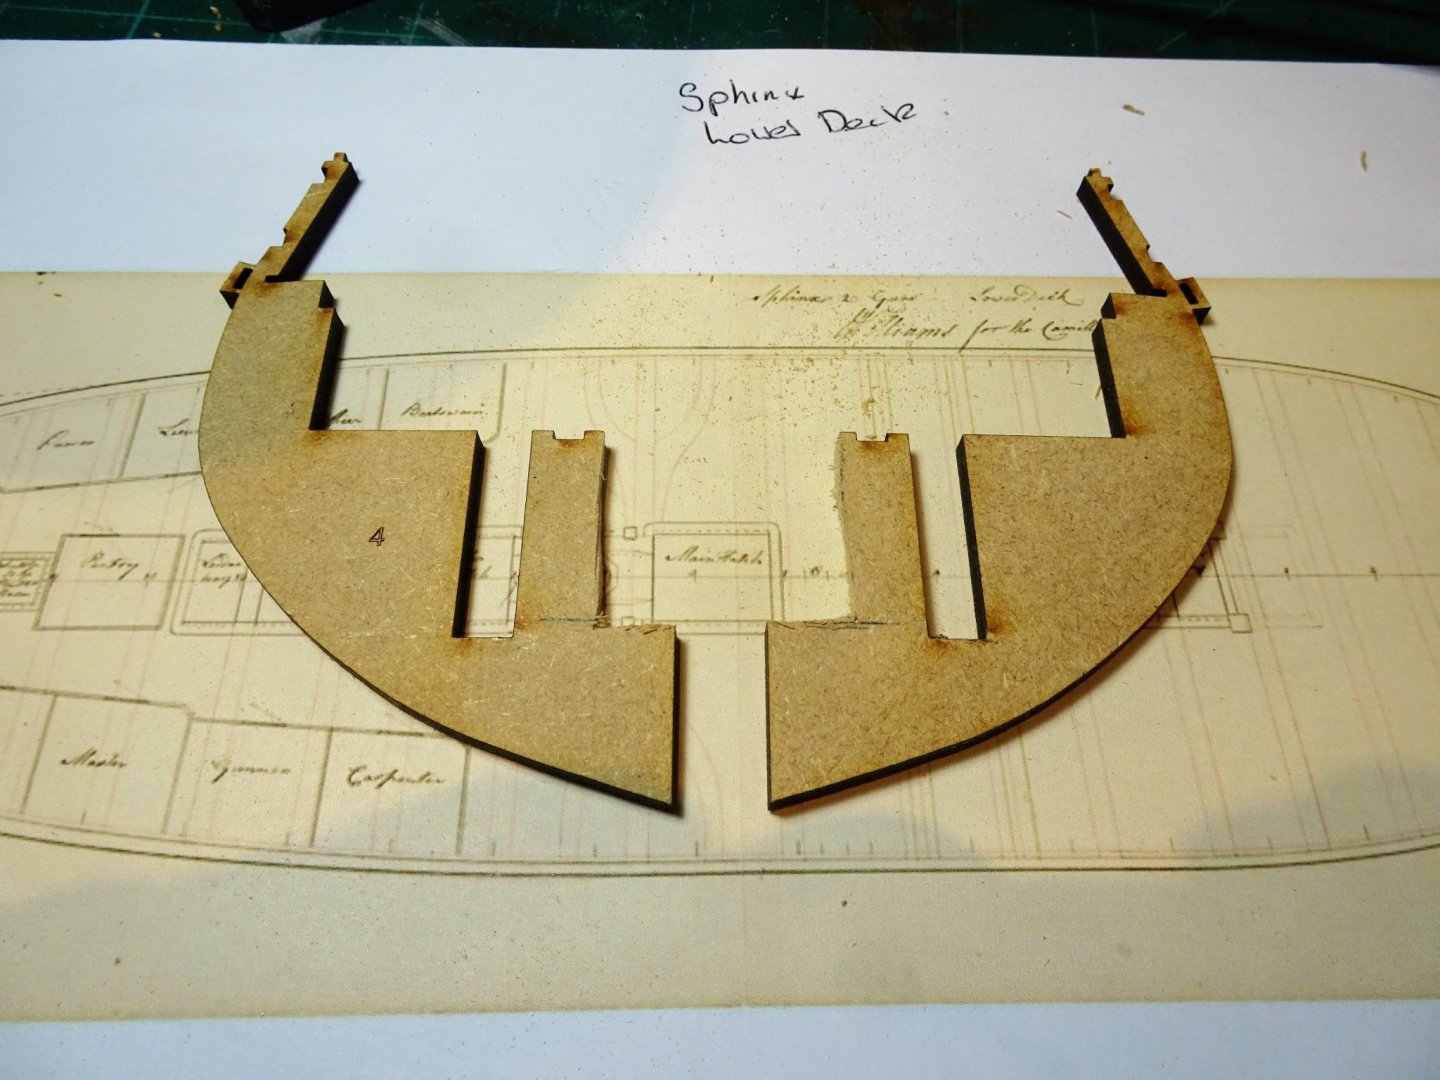
Post Four Creating a Ladderway This post involves modifying things to create a Fore hatch ladderway on the Lower deck down to the Fore Platform. This is not for the faint hearted as it involves cutting Bulkhead 4 in half and trimming the false keel. 3716 The bulkhead is halved, and the centre section is removed. 3718 The short keel piece sticking up in the centre will also be removed. 3719 A test check of the Ladderway with the lower deck in place. 3723 Bulkhead 5 is glued into place along with the Fore Platform. 3722 The lower deck is temporarily refitted to hold the bulkhead in place until the glue sets. 3753 Bulkhead 4 halves are glued into place against the False keel and forward connections of the Platform. 3747 Bracing blocks are glued to the lower part of the bulkhead and the keel. 3725 The Lower deck was again put back to square the bulkheads. 3755 The completed area opened up. 3735 3752 A ladder can now be installed once the hatchway coamings are fitted. Onto the stern Ladderway and Aft Platform, which is a less dramatic modification. B.E. 26/08/21


- 857 replies
-
- 21
-
-

-
- Sphinx
- Vanguard Models
- (and 1 more)
-
Well Chris, at least you have provided a run through upper deck which has saved me the trouble of the serious mod necessary on Pegasus, and for that I'm ever grateful.👍 B.E
- 857 replies
-
- 4
-
-
- Sphinx
- Vanguard Models
- (and 1 more)


.JPG.71df9e80085d96628822e87bc7919836.JPG)
.JPG.1391569b5d0b258c946cad39ee58987b.JPG)


.JPG.a7bf578427a5f090ebf62679c4950f88.JPG)
.JPG.1a81dc83511e9690b08d03ceb65e6e83.JPG)
.JPG.97e3666d9b205d7b7c861307aa25733b.JPG)

.JPG.340e9441f08384ee2fa4db6654902866.JPG)
.JPG.55d6be8ce3cbccb56c2c6ec8bdce5f10.JPG)
.JPG.4e6cb73a975204e48e3c58bbbaad3fbe.JPG)
.JPG.3d0f6da2b8cba67a9ce70d67df8537a7.JPG)

.JPG.00901fbfd5d7876efa48518aa4caf585.JPG)
.JPG.51dd1be1b7aa85b1e8f54c638abc97cd.JPG)


.JPG.31cf926ac4b169e2b52af67b337eadb9.JPG)
.JPG.67f9e2c3e050879acb3ed6120bde8627.JPG)

.JPG.d0809f34633c74dabf4a2496588f3f26.JPG)

.JPG.30bf1ea1fcc802659610cec47fdde3e4.JPG)