


SawdustDave
-
Posts
1,770 -
Joined
-
Last visited
Content Type
Profiles
Forums
Gallery
Events
Posts posted by SawdustDave
-
-
Always a pleasure to see Chuck bring his masterful touch to the development of another major creation. Just wishing I were a younger artist and could participate in this build. Working with Chuck really cranks up the creative juices in a modeler, for sure.
Happy to take a front chair to follow this build, while I enjoy building his English Pinnace.Thanks Master Passaro, for allowing us mortals to follow along.
Dave
- Canute, paulsutcliffe, marktiedens and 5 others
-
 8
8
-
Glad to see you return in good health Patrick.
Beautiful job on your Vic.
Dave
-
-
The bulwarks are looking fantastic Jon.
Progress.... you’ll be tying rat lines before you know it.
Dave
-
NEXT PROJECT.... DECISION
After careful consideration, and discussion with an old friend, I ordered my first manufactured kit ever today.
Chuck Passaro’s English Pinnace is my clear choice for a beautiful model that does not require rigging shrouds and tying rat lines.
While I'm not exactly sure if this will be achievable, my plan is to increase the scale to at least double the size of the completed model..... (from roughly 12" to 24")
Should be quite a challenge.
Very excited to be able to, once again, be working with the clear instructions written by the Master.
Dave
-
-
So why pay $90 bucks for a book when we can enjoy the entire build logs by such master modelers as KenX right here on MSW?

- xken, CaptainSteve, Canute and 2 others
-
5
-
-
-
She's coming along really great Jon.
Just sent you a PM.Dave
-
Beautiful job Steve. The Vic is my favorite, having scratch built her three times over the years. I go to sleep every night with her sitting right beside my bed.
Dave
-
TYING UP A COUPLE OF LOOSE ENDS THIS MORNING.....
So after taking a couple of "victory laps", I began studying the model for any tweeks needed to make it better.
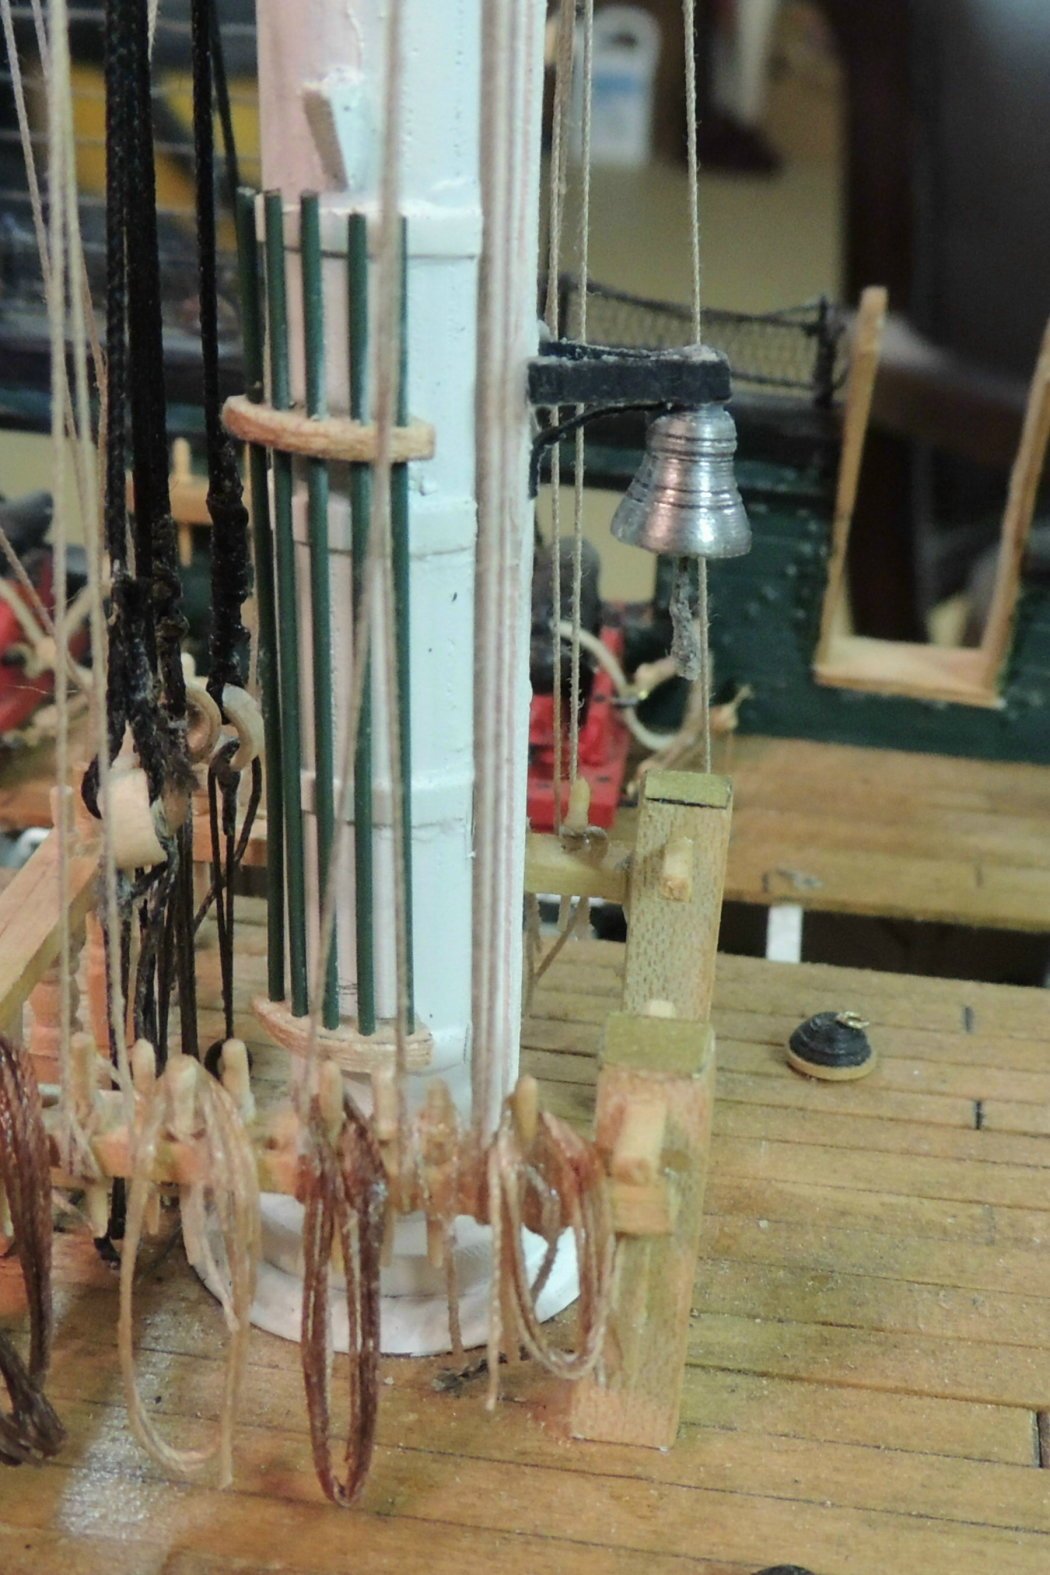
First thing I discovered was the absence of the ships bell.
Here's the big brass wood screw I used to create the bell.
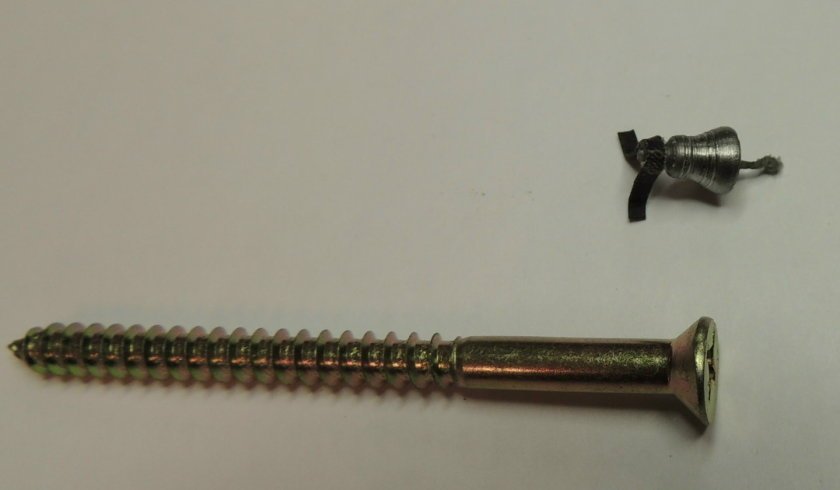
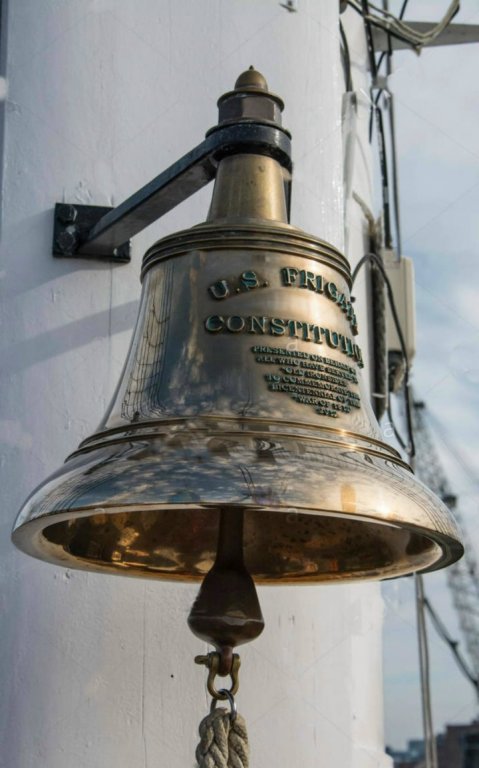
OK, so I wasn't able to etch the lettering seen here in this photo of the real bell.
Mounted on the fore side of the main mast.
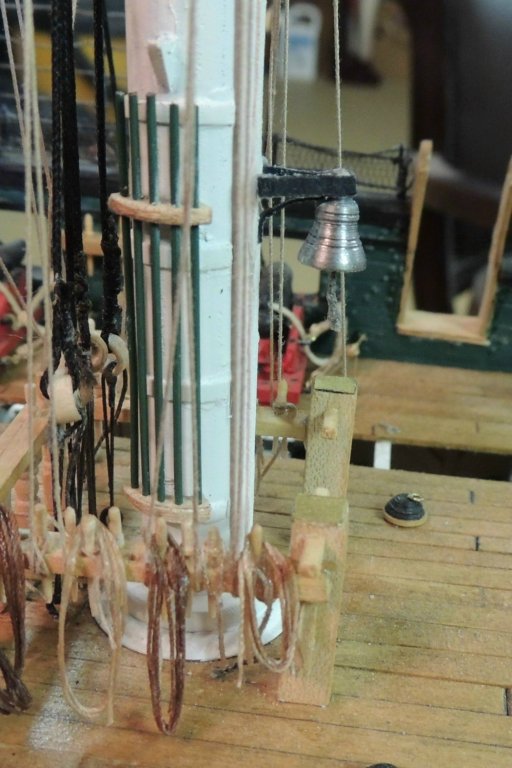
Now, I can begin creating a few dozen rope coils to hang on all those belaying pins
- Canute, GrandpaPhil, paulsutcliffe and 7 others
-
10
-
-
-
35 minutes ago, yancovitch said:
yes yes super dave.....but you gotta have a case.....i made one where the end acrylic slides up for easy access....works great....you could use glass if weight is not a problem
Three of my models are in glass cases Vic. Then I have four major models that are not encased. I’ve found, because my wife keeps such a dust free house, there is not much need in the cases.
- Canute, mtaylor, CaptainSteve and 1 other
-
4
-
3 hours ago, usedtosail said:
She is beautiful Dave. Try to keep the dust off her though.
Thanks all. I always enjoy hearing from fellow MSW artists.... many, I consider old friends.
Tom.... the display in my shop is temporary, until I figure out a location inside the house.
Negotiations with the Admiral currently not going too well.

- CaptainSteve, Canute, Piet and 1 other
-
4
-
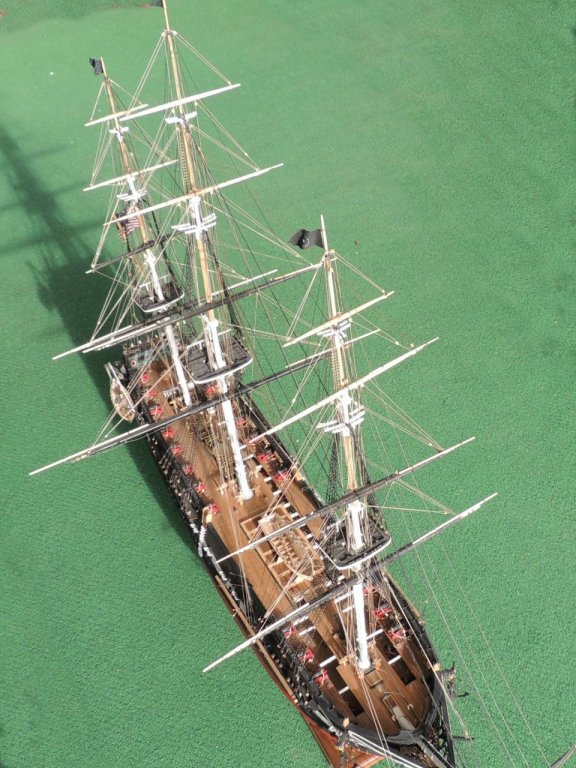
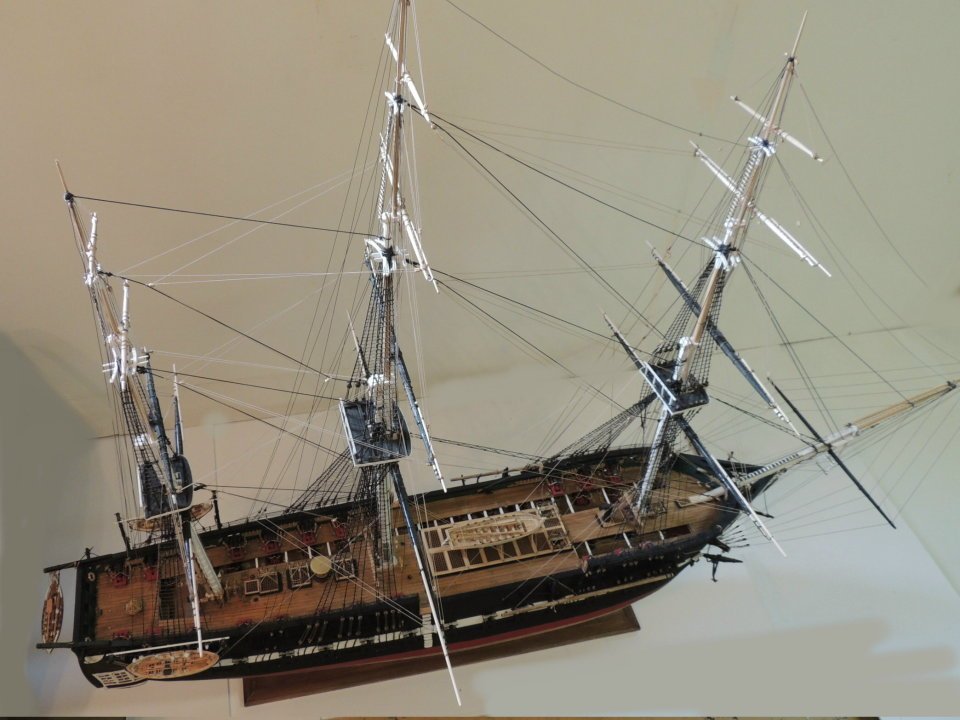
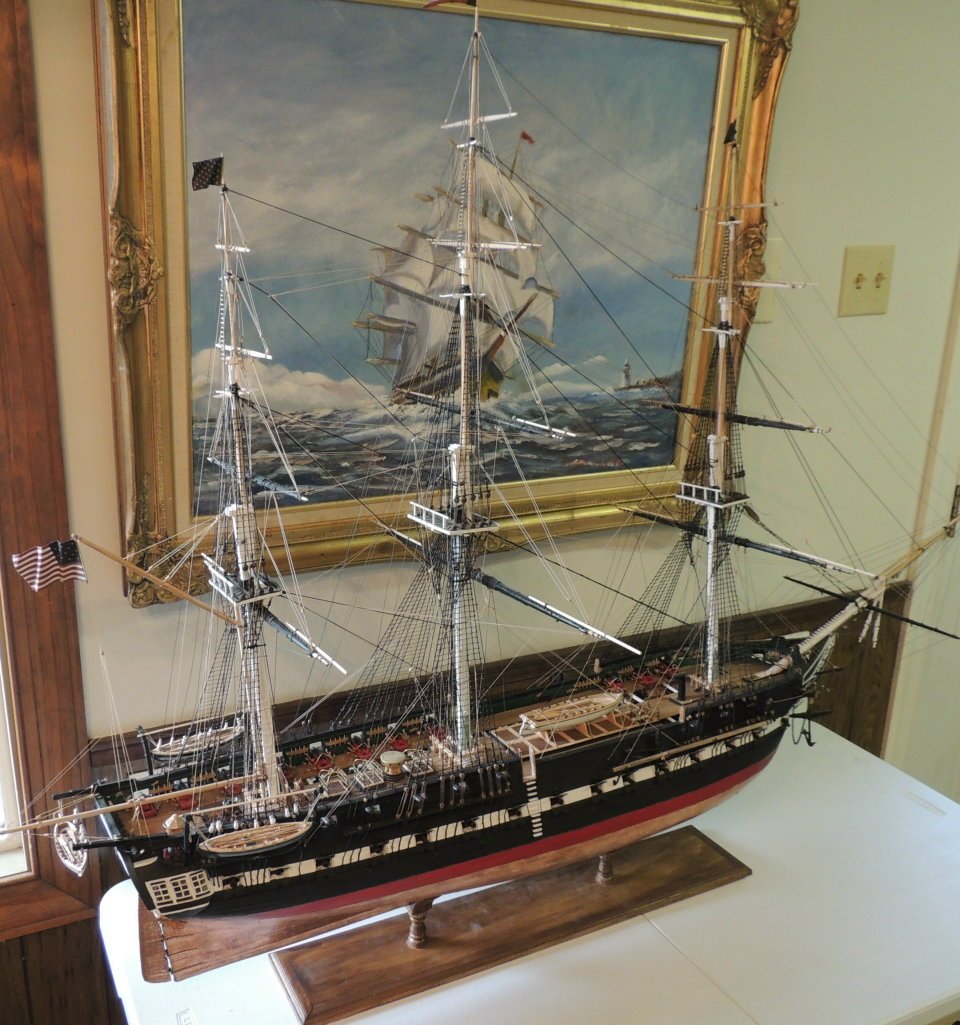
USS CONSTITUTION FINISHED.
She is so large I have a problem finding a place to display her in my home.
For now, this table in my shop will have to do.
Actually, I kinda like the oil painting on the wall as her background.

What the heck am I going to do with my mornings now?
- ccoyle, CaptainSteve, Valeriy V and 21 others
-
24
-
Rigging Update......
Finally completed most of the rigging of the yards for all three masts.
The Spanker Boom and Gaff have been built for months, just waiting to be put into service.
I can see the light at the end of the tunnel!
Once all rigging is complete, I will wrap her up with her flags (not yet created).
-
-
Took a few days off from rigging to build a new cargo container for the back of my truck.
Since I've began attending a number of modeler shows and competition events around the region, I really needed to have a solid container to protect my ships from weather and 70 MPH wind.
Just mounted this yesterday morning.....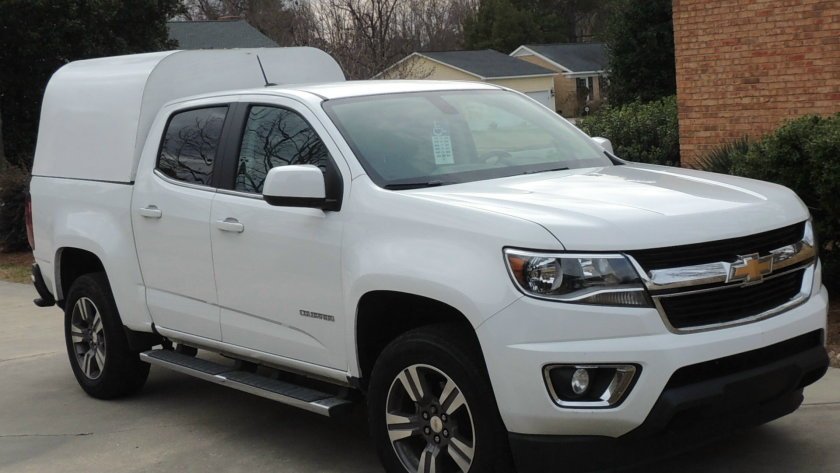
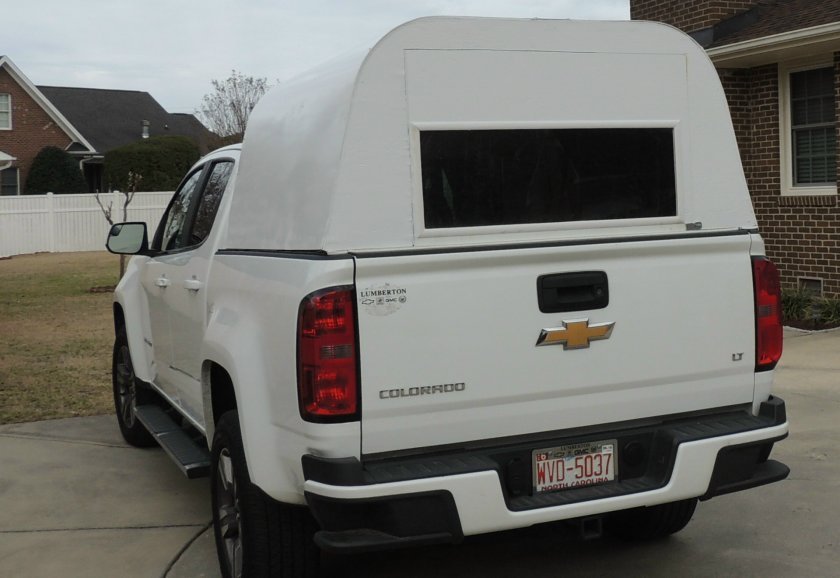
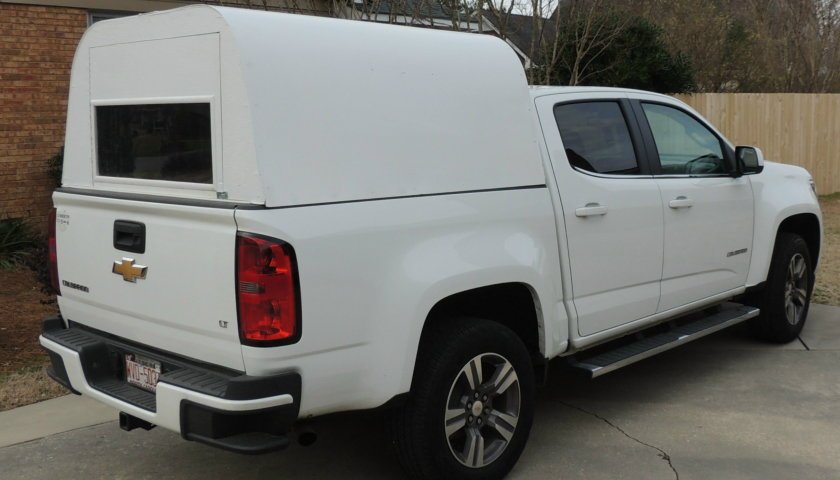
Back to rigging..... (getting very close)
-
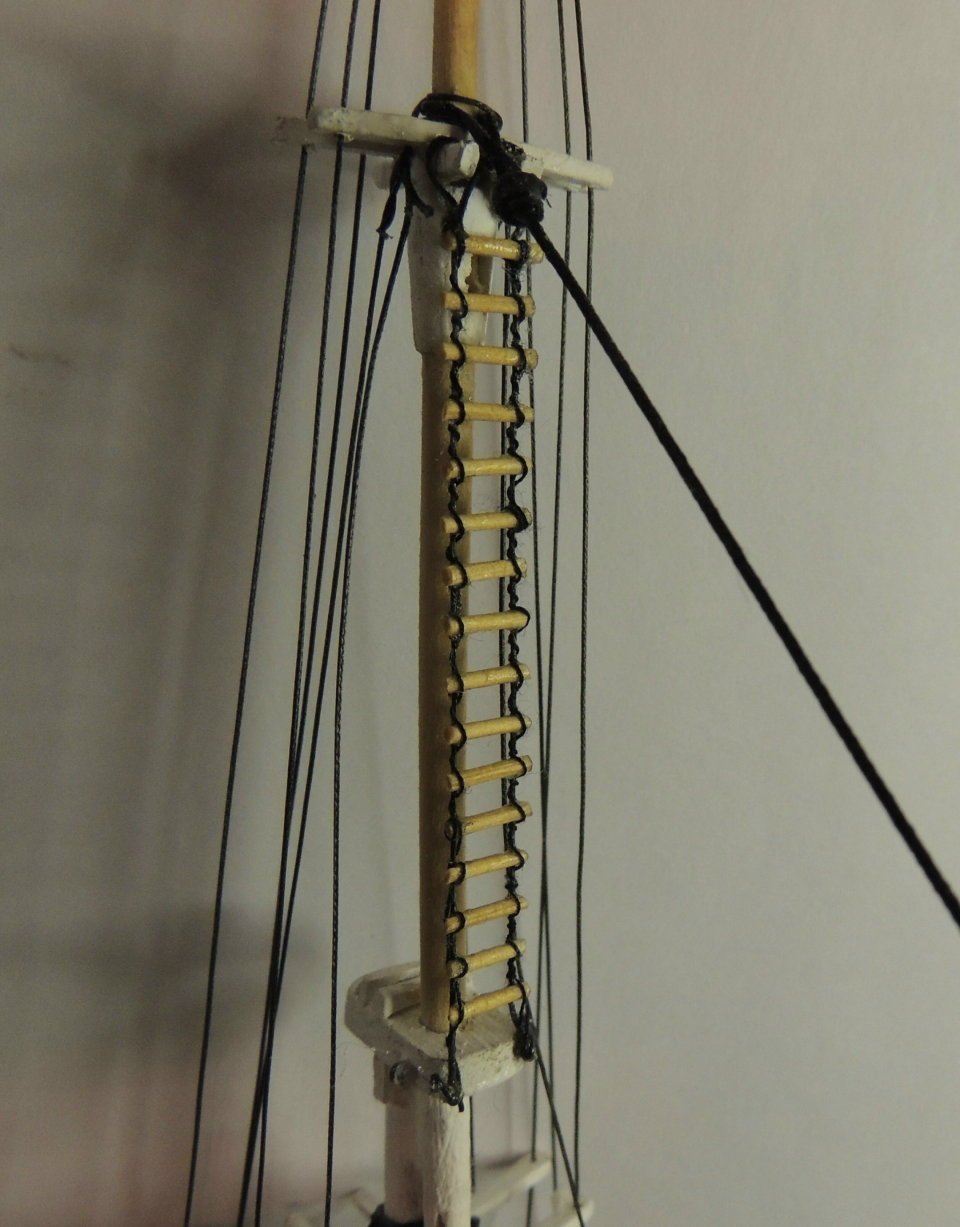
Ladder installed to Mizzen.........
Thanks to Ken's suggestion, I took a day to play around with creating my first mast cap ladder.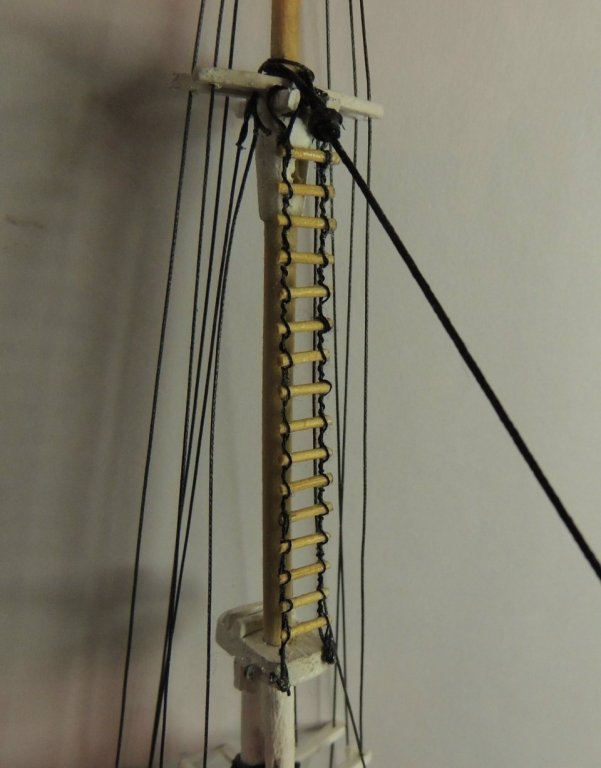
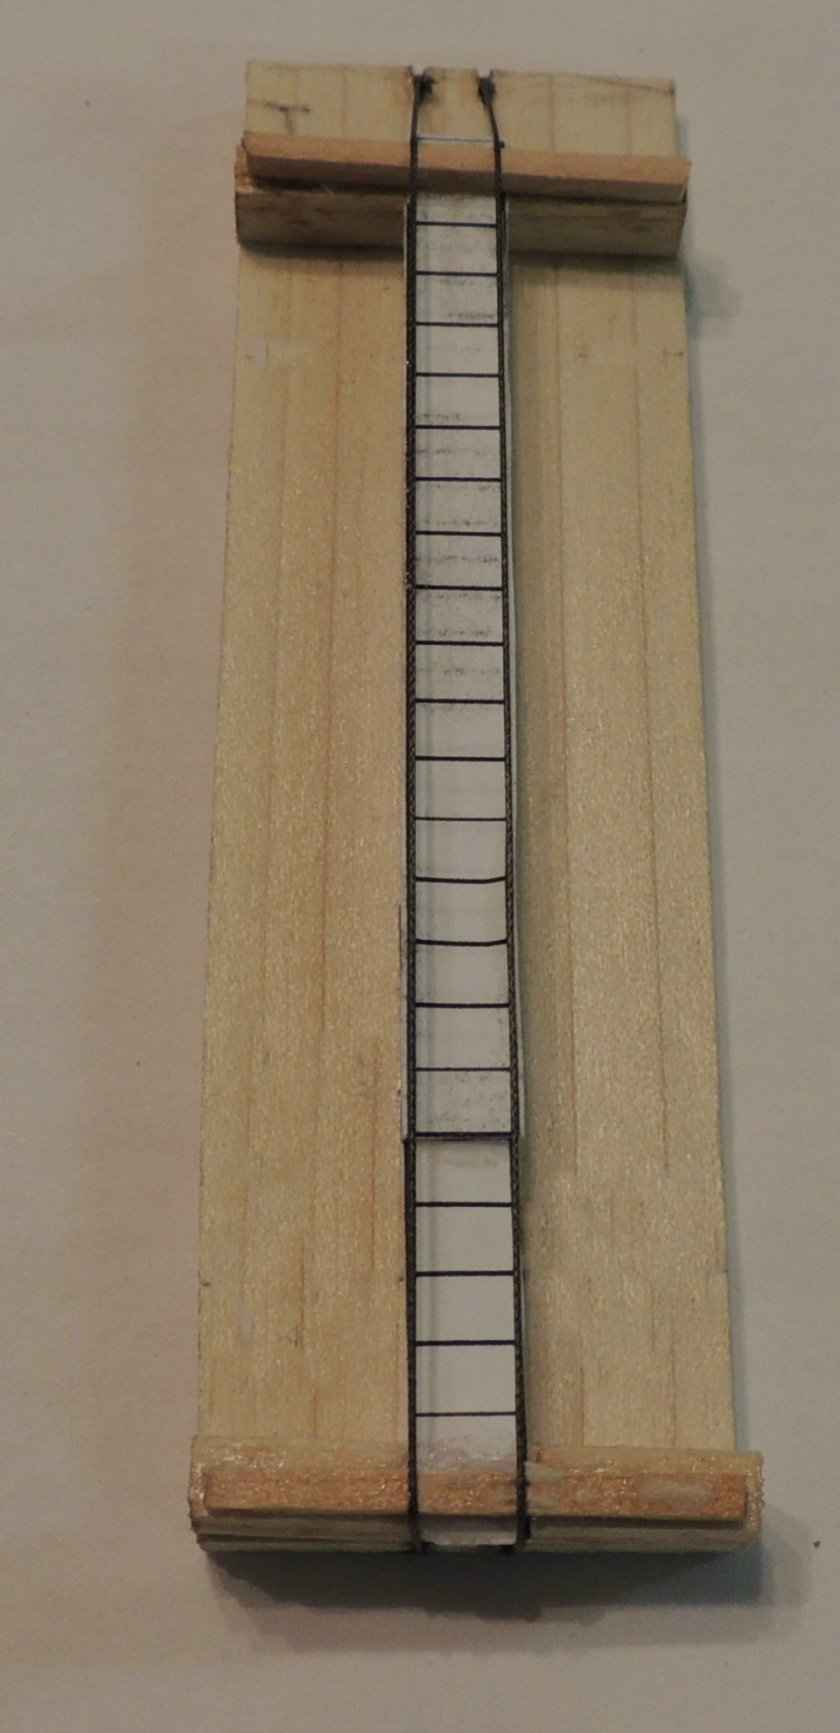
This little jig worked fine. The rung spacing pattern is a simple Autocad creation.
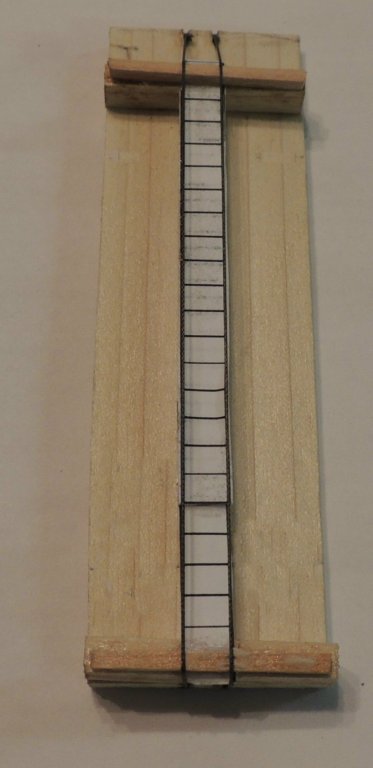
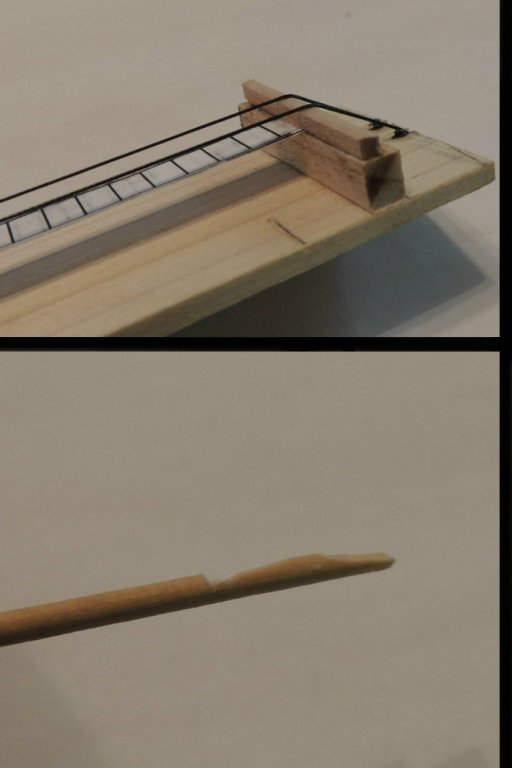
The key to this jig is the space between the graphics and the ropes on each side.... needed to allow CA tacking of each rung without cementing the ropes to the pattern. Also necessary when lashing the ends of each rung to the ropes with sewing thread.
Also, note that each rung is notched with a flat surface on each end..... helps with tacking the round pieces to the ropes before lashing them down with sewing thread.
- Tigersteve, CaptainSteve, Canute and 10 others
-
13
-
Ken.... As usual, your exquisite work simply blows me away sir. I do thank you for sharing those ladders with me.
And I really do love the "no clove hitch" alternative design.
Thanks Mate
- keelhauled, Canute, Piet and 3 others
-
6
-
On 1/9/2019 at 7:46 PM, keelhauled said:
Dave,
Now that you have the course yards rigged with the stunsul booms, how wide is the model?
Thanks
marc
Measuring tip to tip of the studding booms, the main yard measures just over 23"..... remember, I have re-scaled everything to 1/60th.
-


US Brig Syren by Rustyj - 1:64 - Rigging Redo
in - Kit build logs for subjects built from 1801 - 1850
Posted
OMG!
Rusty, I am so sorry to learn about your damaged Syren.
I don't know what I would do if something like that happened to my own, which, as you recall, you and I were both honored to work with Chuck on this project as well as the Confederacy.
But then, the plus side is, think about how much more skilled you are now.... and how much better she will be after your re-do.
All makes for a good story for the grandkids..... right?
Dave