


SawdustDave
-
Posts
1,770 -
Joined
-
Last visited
Content Type
Profiles
Forums
Gallery
Events
Posts posted by SawdustDave
-
-
-
-
TECHNIQUE TIP.....
Once in a blue moon, looking for a better solution to an issue, I might come across some little technique worth passing along to my modeling friends.
This particular one has to do with keeping the shrouds in true alignment as I work my way up with tying in the ratlines. Don't know about everyone else, but I don't always manage to maintain perfect spacing between the shrouds around mid-way. We've all seen it.... the tendency to allow those outside shrouds to CREEP INWARD.
Took a couple of shots to show my very simple and effective solution.....
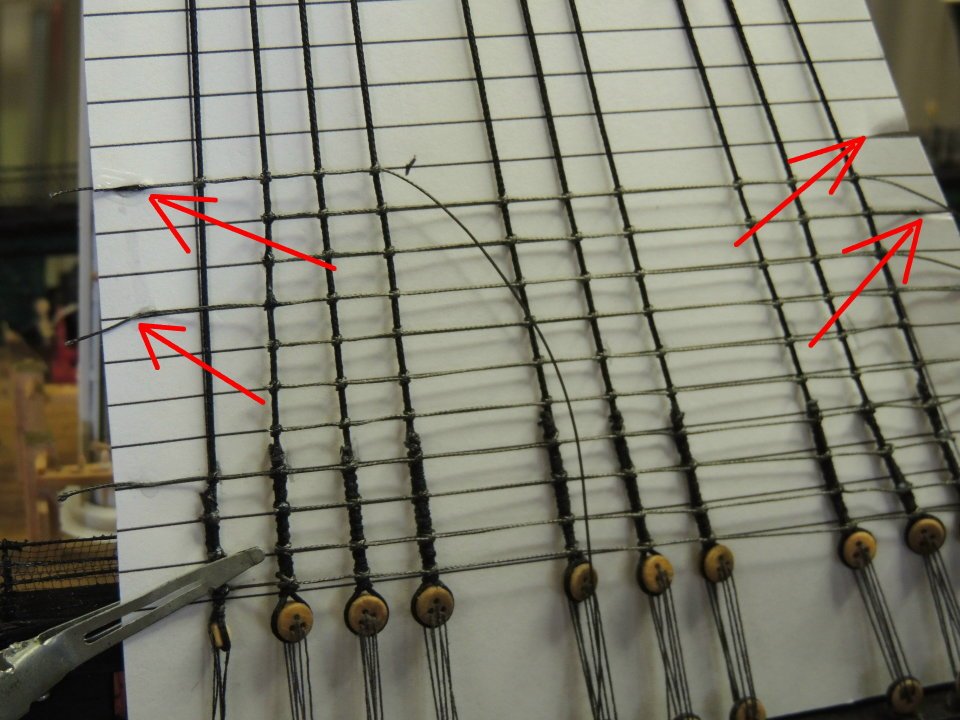
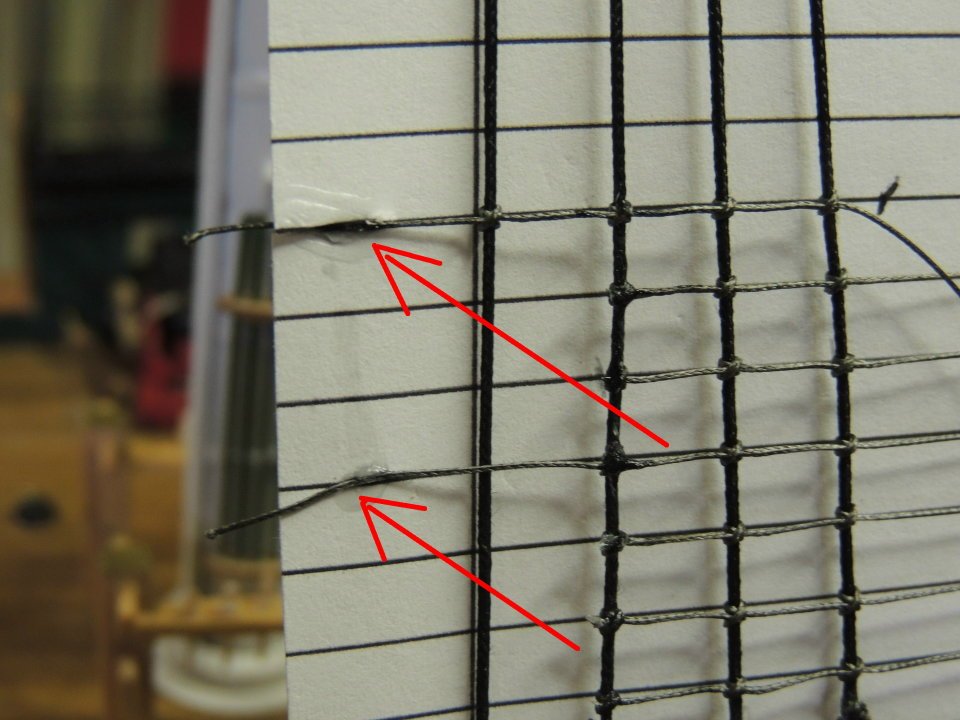
Note the slit in my pattern paper about every third or fourth course of ratlines.
I simply pull the end of the line into the slits and touch it with a small dab of CA, thus locking the outside shroud in place so I don't have to be concerned with "Inward Creeping" as I work my way up.Note, I have used tick marks on the pattern paper to indicate the spacing of all the middle shrouds.
Back to a few hundred more clove hitches.......

-
You are welcome to come visit us in NC..... got plenty to do.... clove hitch, clove hitch, etc. etc.
-
PROGRESS..... Sometimes one step aft, two steps fore!
Happy to be back to where I was when my "fore progress" was interrupted.
Too many improvements to be of interest, so we will just move on from here.
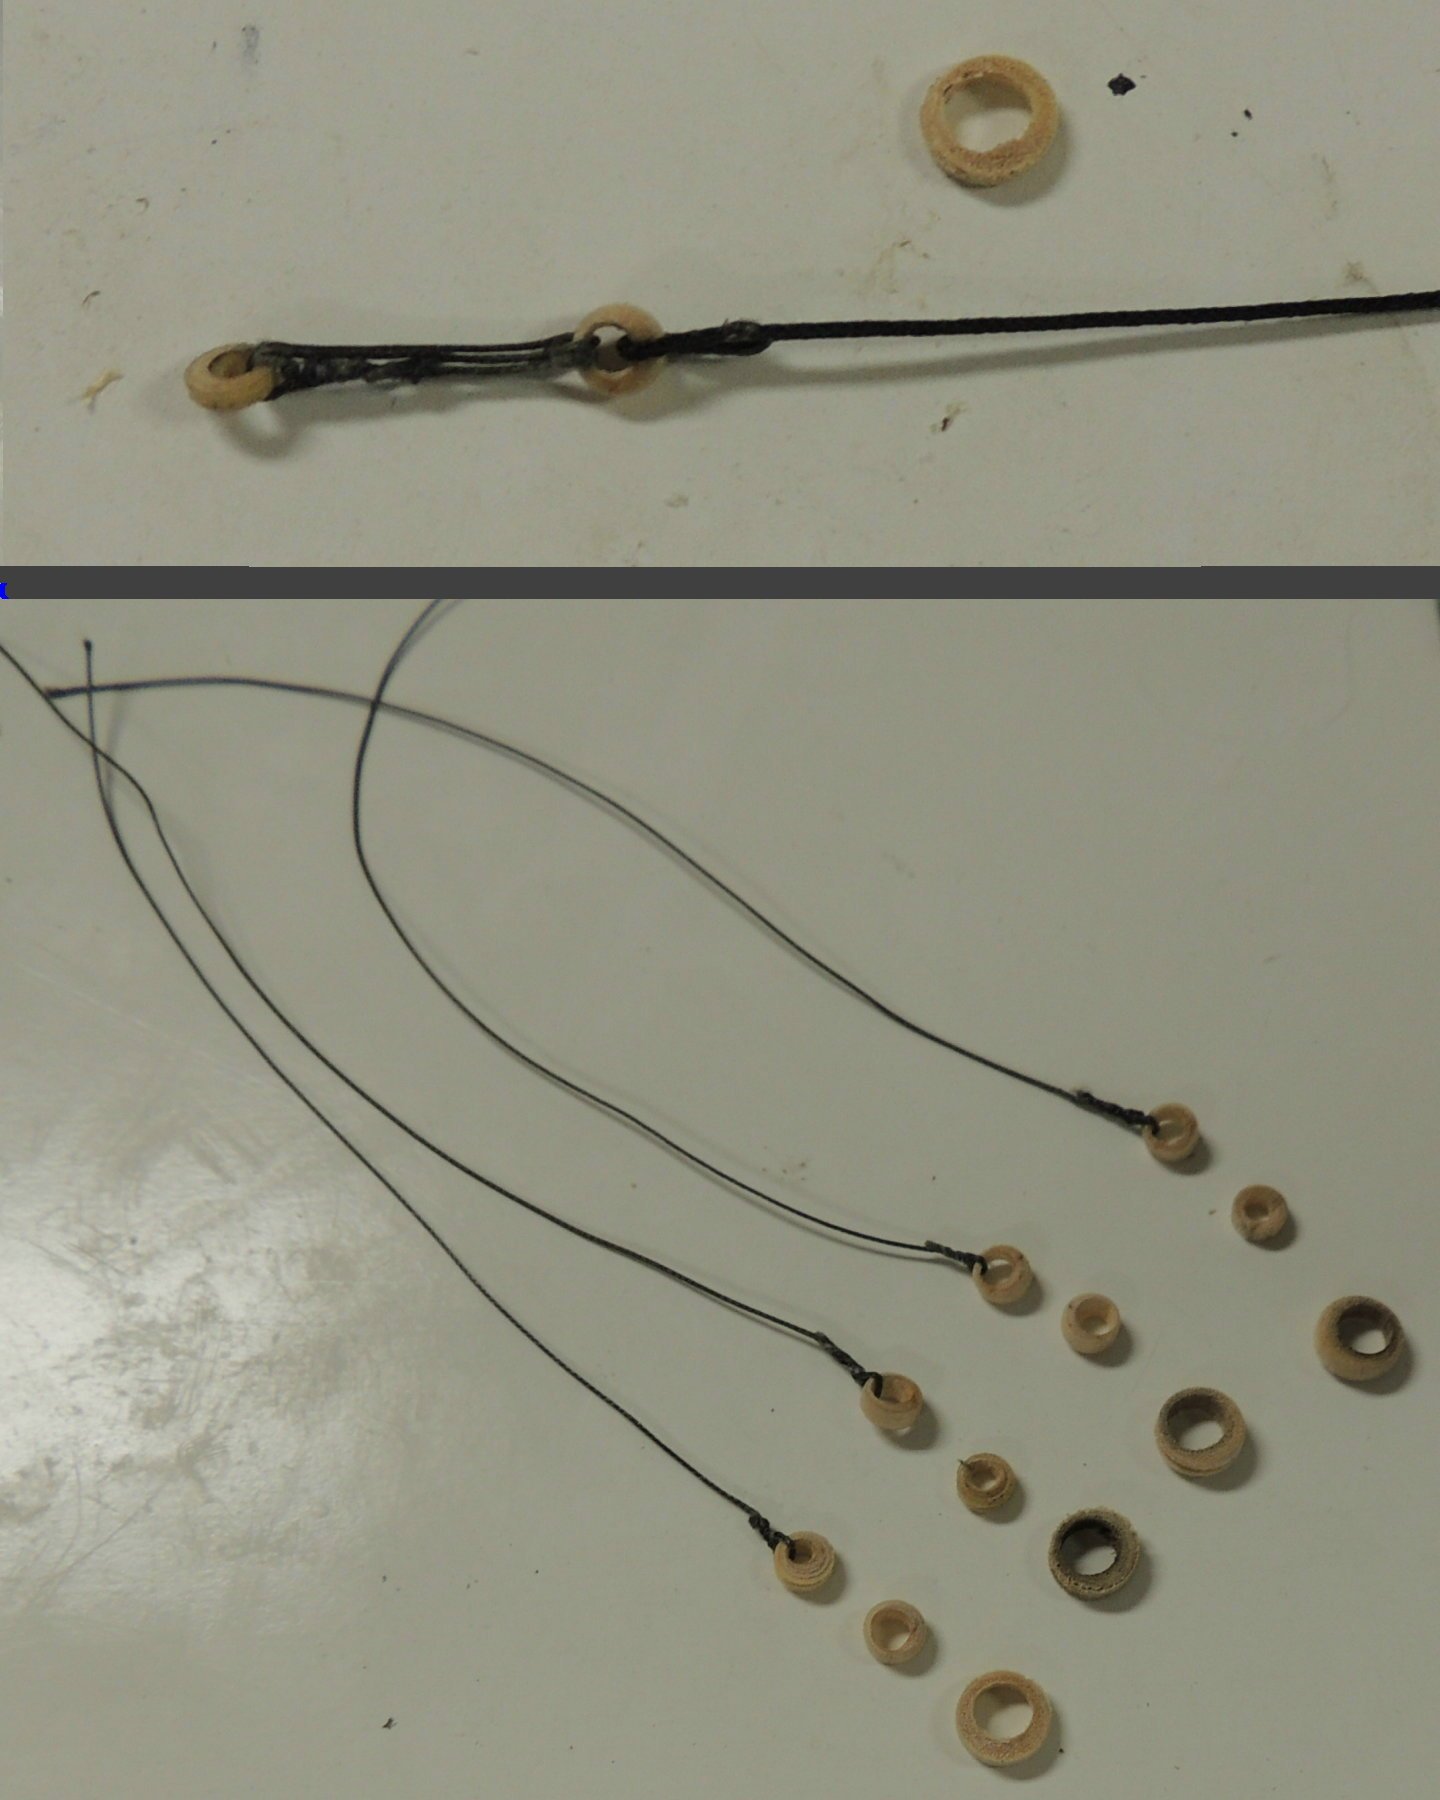
Note, the production of rings and hearts to be used in the rigging of the Fore and Mizzen masts.
Also note that the addition of the starboard side futtock shrouds and ratlines.
Now ready to rotate the model and resume the exciting process of tying the port side clove hitches, etc. etc.....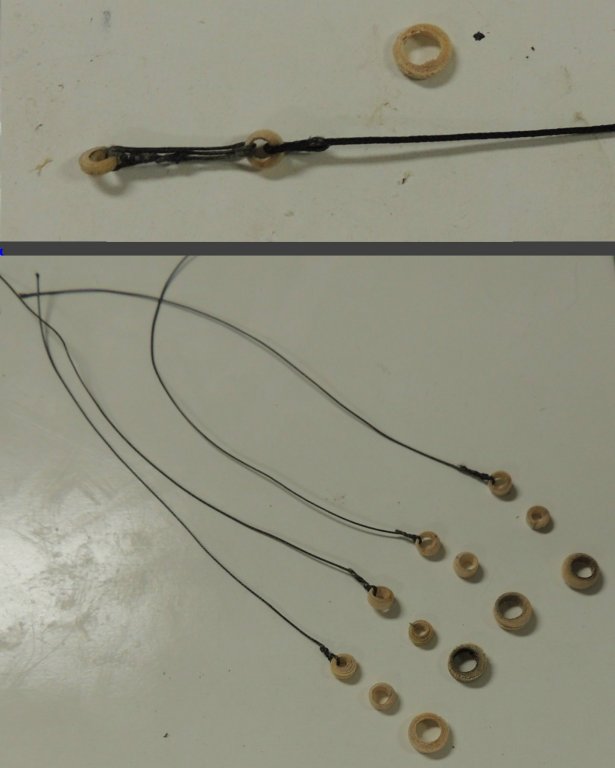
-
-
-
-
-
-
Just finished rigging the shrouds and deadeyes for the Main Mast, and trying to decide whether to move on to the next mast or.....
RATLINES!!!I really do dread the looming prospects of endless clove hitch tying (don't we all).... so, at this point, my inclination is to work on the ratlines for each set of shrouds as I go, thus breaking up the formidable task into smaller exercises. Of course, this would include rigging the Futtock shrouds and Staves etc.
Also beginning to look at the rigging of the Bowsprit.
- usedtosail, JesseLee, xken and 9 others
-
 12
12
-
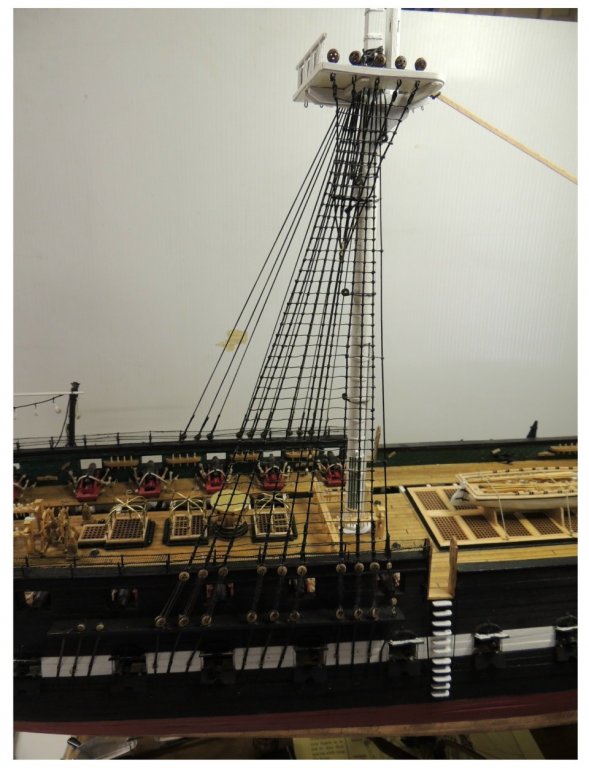
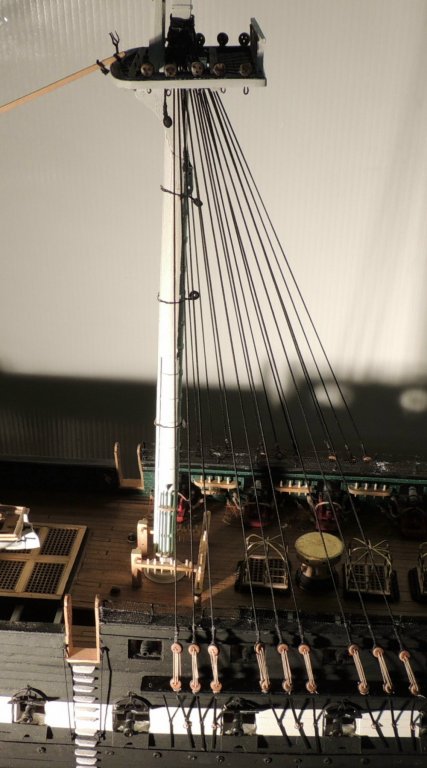
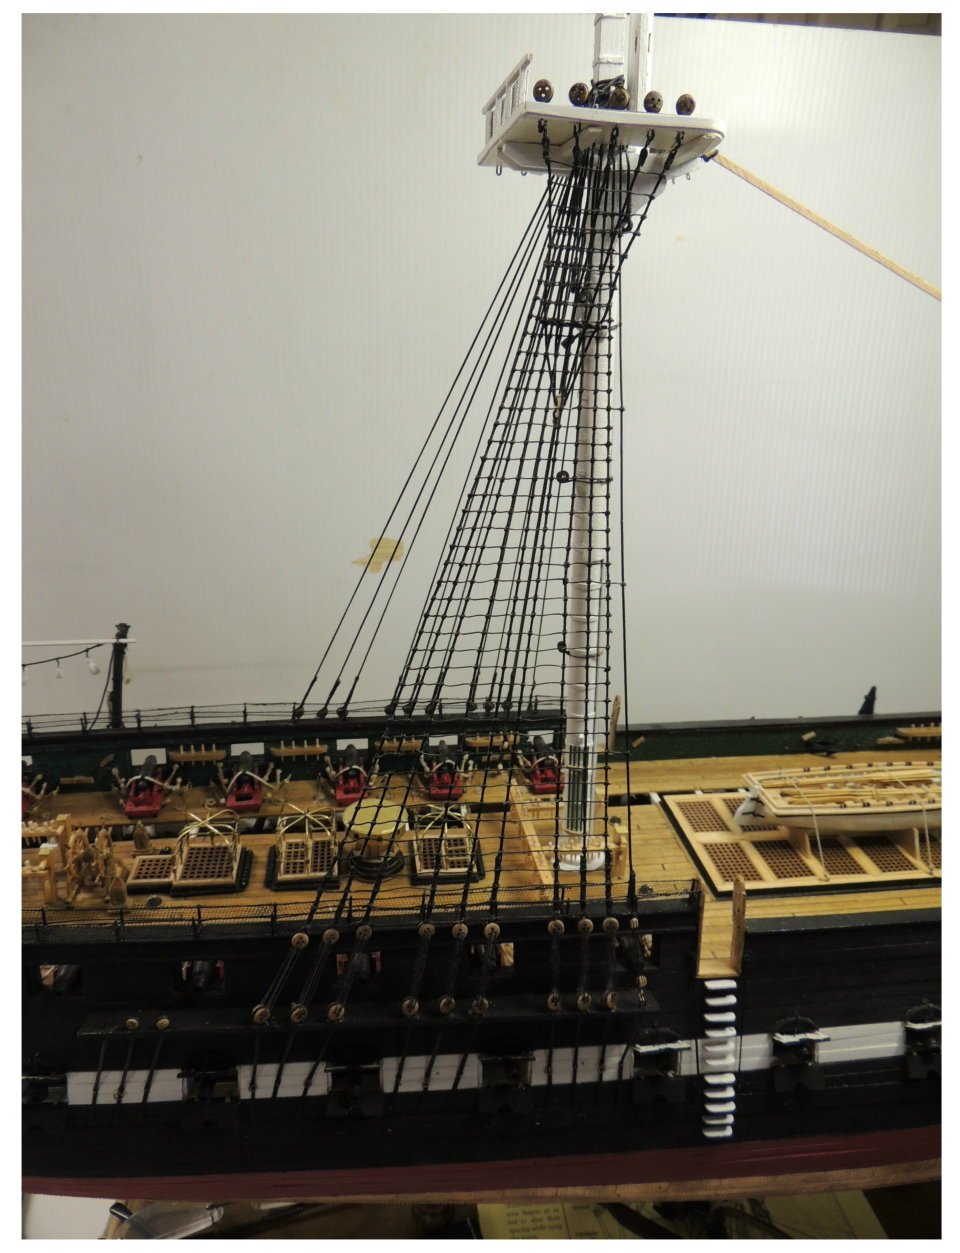
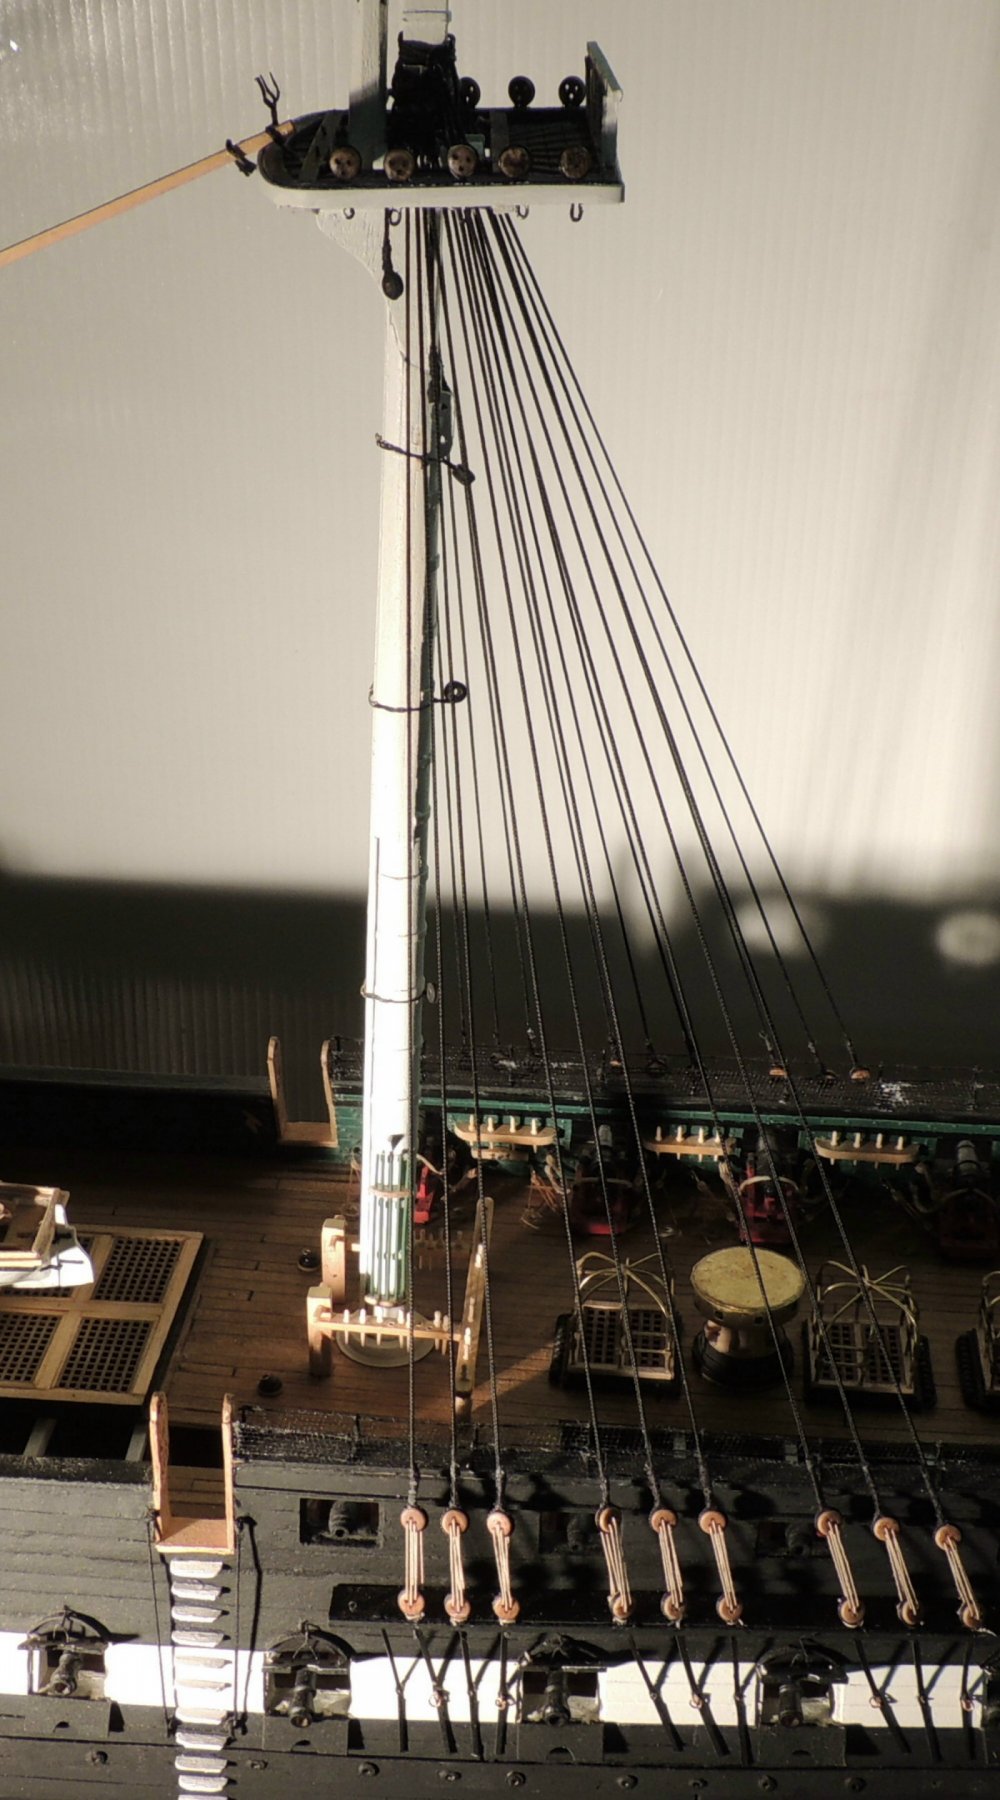
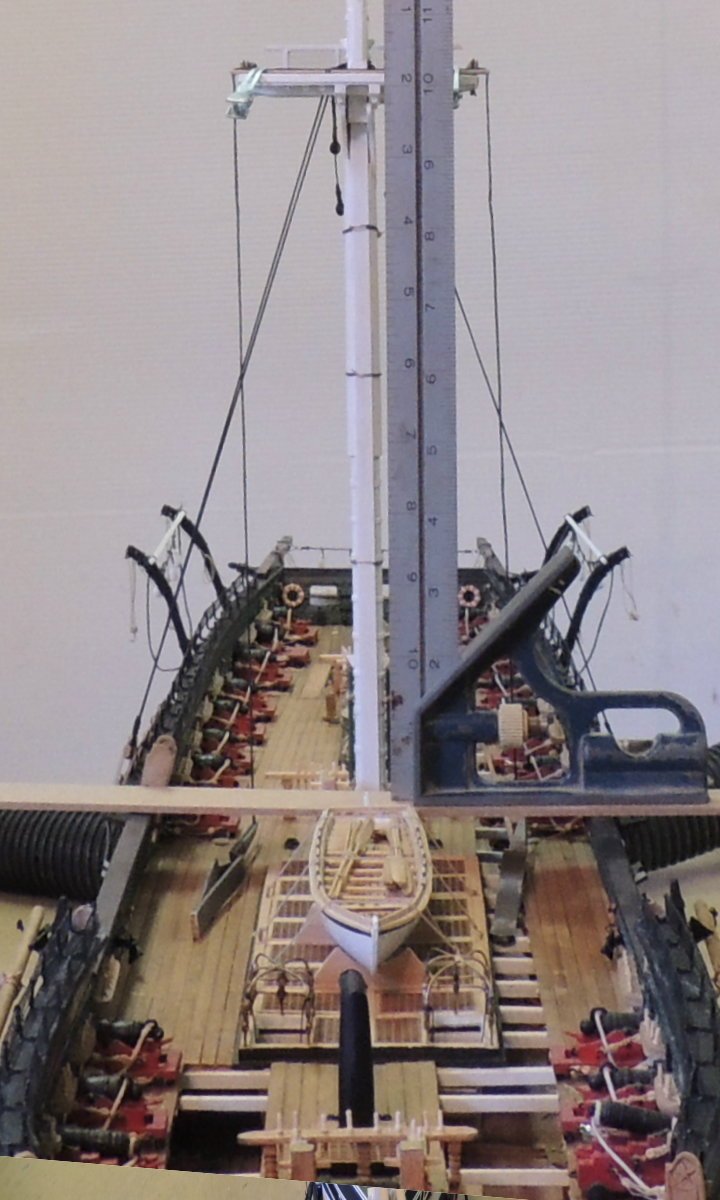
MAIN MAST ALIGNMENT.....
This photo was taken to visually check the vertical alignment of the Main Mast after rigging the first two shrouds.
Seen here, I used a plank laying across the lower rails with a framing square to check for perfect alignment.
I also used a plank laying across the fighting top to physically measure the distance of each side down to the channels.
Note....I will also be using a temporary stay line tied off to the bowsprit to physically hold the rake at 3.5 degrees as I proceed with rigging the remaining shrouds.
It's nice to see this phase finally begin, but I'm not real excited about it being one step closer to tying all those rat lines .....
(clove hitch, clove hitch, clove hitch, etc, etc...)
- mtaylor, paulsutcliffe, JesseLee and 11 others
-
14
-
-
I do appreciate the offer of assistance when needed. Good to know you’ve got my six.
creating collars this morning and returning to numerous fixture details omitted in the course of building the spar deck.... like the cannon ball racks on some of the companionway coamings.
Still much to do before I actually place the masts and begin adding string.
Cheers
-
Hi Tom:
I have finally reached a point in my build where I need to spend more time researching and studying your work for personal guidance. The mast assemblies are finally done and I am getting ready to begin adding strings.
At this point, my feeble efforts to make sense of the horrible Instruction Manual from Model Shipways is actually embarrassing for me.
I honestly don't know what I would do without the amazing logs provided by you and Ken. I catch myself looking at your logs as if I have never built a model ship before. I think I was completely spoiled by the instruction script of Chuck as I scratch built three of his models.So, I just wanted to say "hi" and a sincere "thanks".
I really look forward to the many hours I will be spending on your log in the weeks and months to come.
Dave
-
TURNING TOPGALLANT MASTS....
With the outstanding build logs from a number of MSW fellow builders, I haven't found many things to share lately. Most everything I've done lately has been my feeble attempt to emulate details found in their log postings.
I did, however, while turning the very delicate Topgallant Masts, wonder if my technique might be of interest to others faced with the challenge of getting very thin tapering at the end of a dowel. Here goes....The hardwood block of wood seen here has a small hole drilled through at the exact height of the center of my lathe chuck. This allows me to move the block back and forth on the lathe bed while applying pressure with course sanding paper and files.
Pretty simple and very effective technique.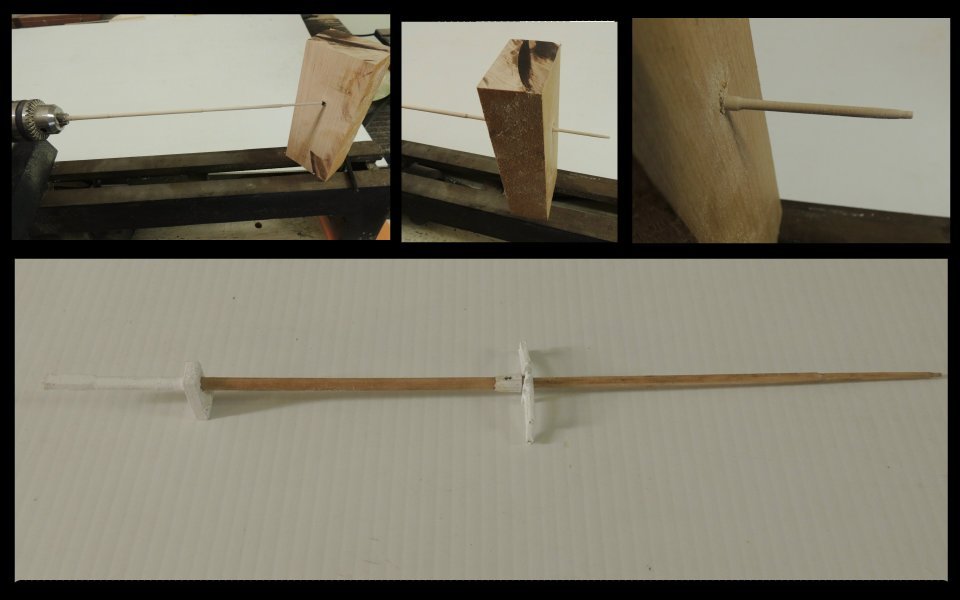
- kees de mol, capnharv2, mtaylor and 8 others
-
11
-
RETIREMENT!?
I do wish you the best in that my friend. It is a big adjustment in your live. I retired three times before I got it right,
What is your next model?
-
-
-
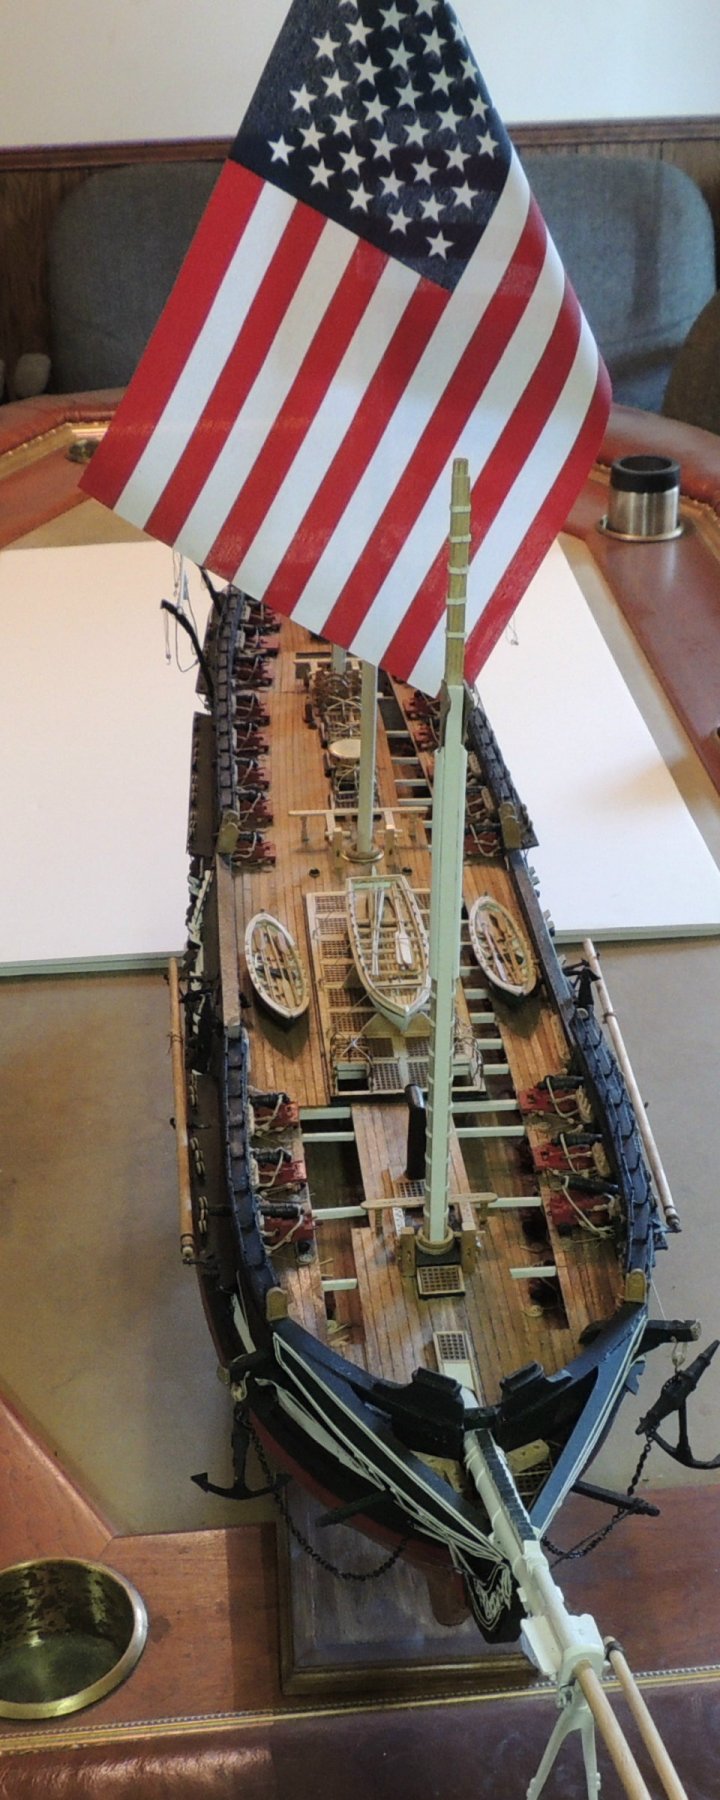
Hammock crane netting completed....
Masts are now ready for paint.... Now working on the fighting tops.
Needless to say I am pretty excited about finally getting to this point in progress.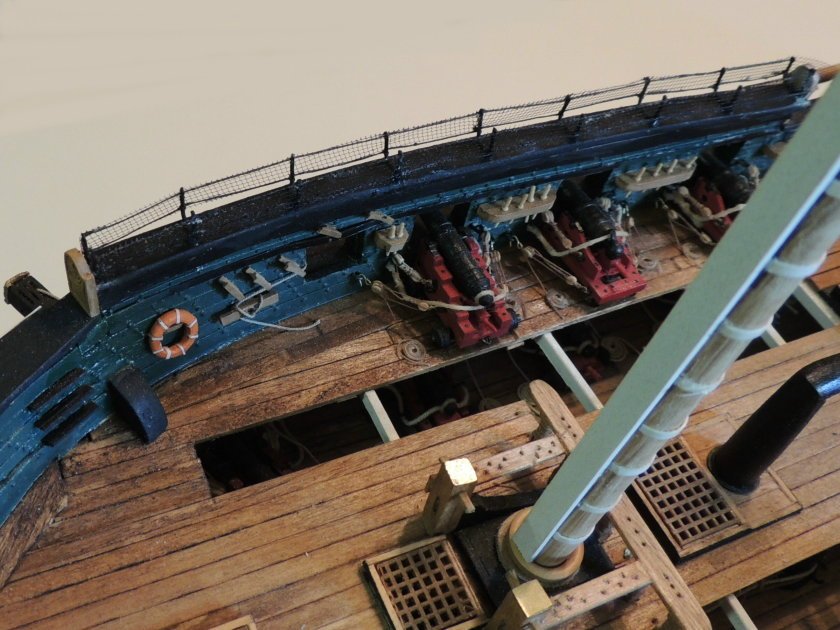
- Farbror Fartyg, Canute, JesseLee and 11 others
-
14
-
-
28 minutes ago, JesseLee said:
Dave, what kind of soldering iron and solder do you use? I have had very poor results trying to solder. I'm thinking I don't have the right kind.
Jesse
Thanks Tom. I agree....Well worth the effort.
Jesse - I know exactly what you're going through. I really struggled with the soldering technique as well. Gave up on using the electric iron and went to using open flame from the little BERNZOMATIC butane system. Creating a jig to hold the parts together was easy. Sanding the surface of each part and getting the area covered with the right amount of flux is the secret. Also.... applying the flame AWAY from the joint, allowing the wire to heat up and suck the solder into the joint is key.
You'll be amazed at how quickly you will pick up the technique with a little patience and practice.
BTW.... Club meeting in Fayetteville tonight. Hope you can make it. -
Back to work....
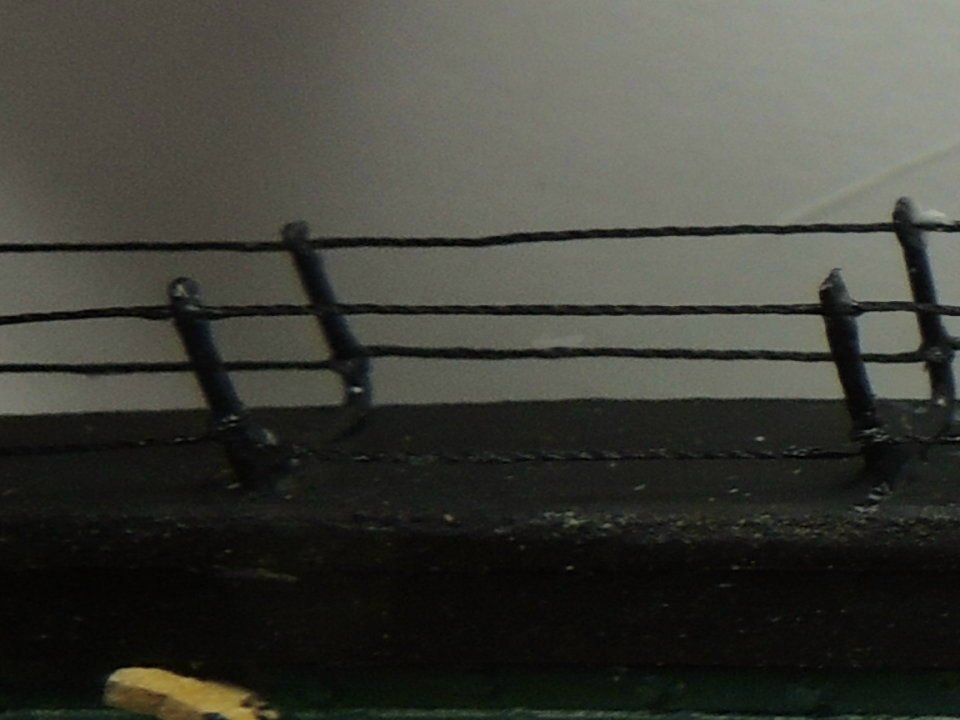
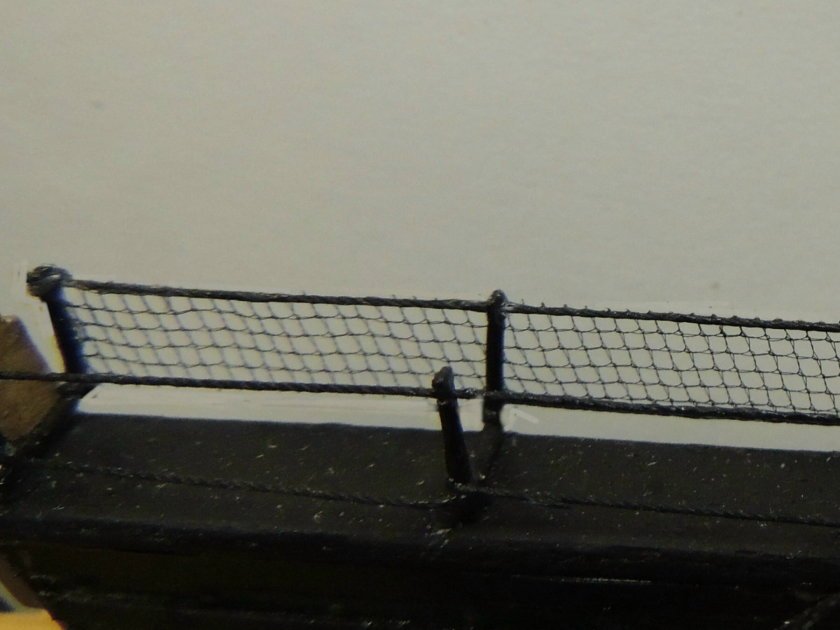
Fifty of these two piece hammock crane stanchions were formed from steel wire. Each being silver soldered at the joint, and snipped to size. The post was filed to a point, and each stanchion tip was flattened and notched for the rope to be attached, as seen in the second shot.
Upper and lower ropes attached nice and tight....and, finally, the slow process of tacking the netting to the ropes.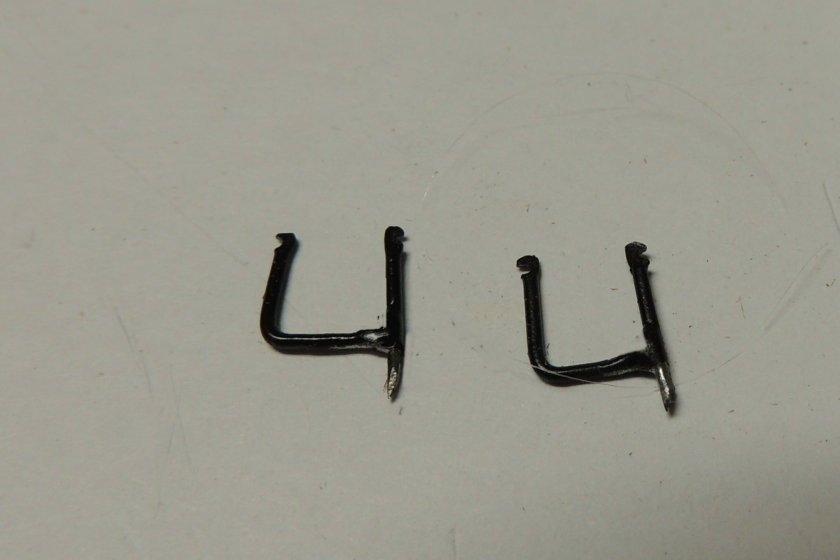
- mmdd, Tigersteve, JesseLee and 6 others
-
9
-
Jesse, I honestly considered offering to work out a way for you to attend this event with me, but realized the all-day ordeal would likely be a serious overload for you.
Personally, the annual Beaufort trip is more about visiting that very old historic harbor town. Reminds me very much of Charlestown Mass. on a much smaller scale.
Take care my friend.


USS Constitution by JSGerson - Model Shipways Kit No. MS2040
in - Kit build logs for subjects built from 1751 - 1800
Posted
Nice job on the ball racks Jon. Are you going to add wire frame around the balls?