


SawdustDave
-
Posts
1,770 -
Joined
-
Last visited
Content Type
Profiles
Forums
Gallery
Events
Posts posted by SawdustDave
-
-
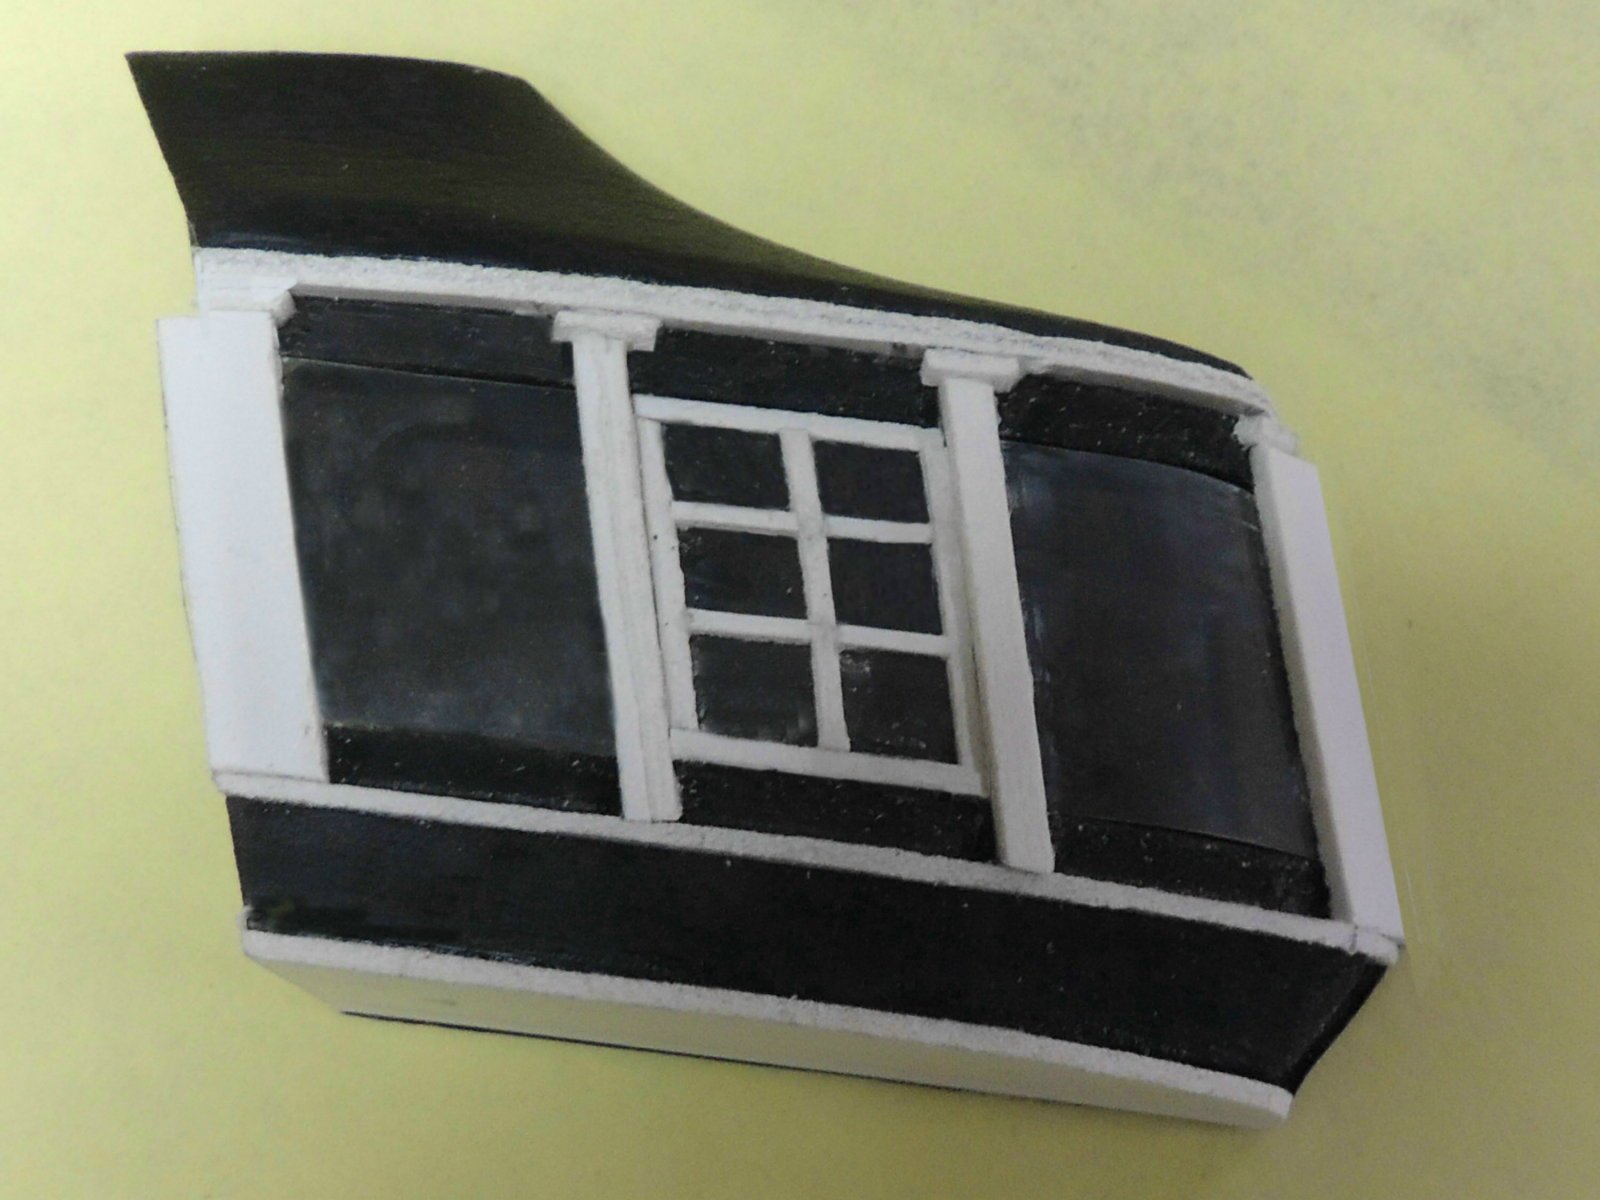
Quarter Galleries....
Still focusing on the stern development, I set aside the transom work for now because I realize the blending of the Quarter Galleries is crucial, and I have been struggling with how I will approach the slanted windows.
Third (or fourth) attempt, here's where I landed....
Used transparency film for the glass, and very fine cut strips of white vinyl to represent the window framing....... I just finished one window and snapped this quick shot in order to examine this method closely before continuing further.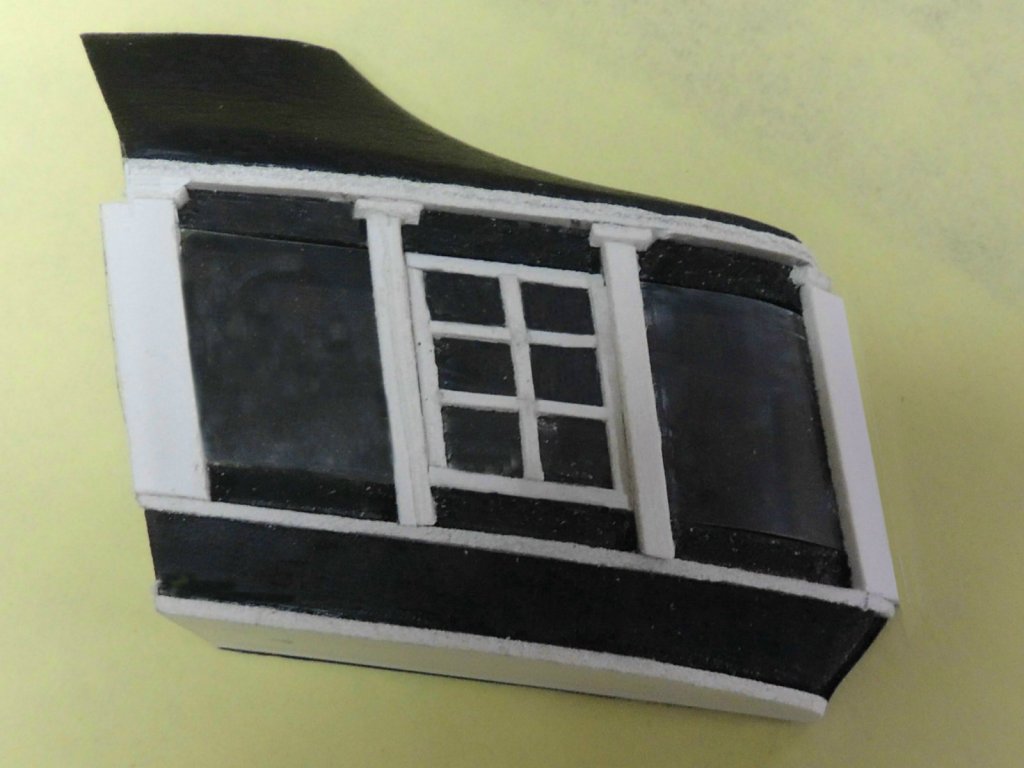
- popeye the sailor, Piet, coxswain and 6 others
-
 9
9
-
-
Like so many other things about this great old ship....No telling how many eagles have graced her stern.
- CaptainSteve, Omega1234, Piet and 3 others
-
6
-
Hi Ken:
So glad to find your beautiful build log to add to my list of helpful resources.... also a scratch builder of the Conney.
Stunning work mate.Dave
- CaptainSteve, Jack12477, mtaylor and 1 other
-
4
-
Hi Rich:
Just discovering your beautiful build of the Conney (my current project).... nice job mate.
I considered leaving her hull in natural wood, but gave in to tradition. Being a woodworker, I'm glad to see someone went with the beauty of wood.
Hat's off to you sir.Also, being a scratch builder, your log will be a great resource for my own build... thanks
Dave
-
-
-
-
14 hours ago, Greg the peg leg sailor said:
G'day Dave
Thank you for passing your knowledge of plank sanding to the rest of us. I'll be doing that exercise very soon.
Perfrct timing mate!
Havagooday
Greg
I honestly didn't know if any of those postings about creating scratch planks would be of any use to others. It's just so easy to purchase perfect planks of about any size without all the hassle.
Thanks.... and I do hope my methods are helpful to you mate.Dave
-
2 hours ago, JSGerson said:
I am curious about the tools you are using for the carving especially the spoon chisel (I think) in the X-acto type handle. Is that part of a set and where did you buy them?
Jon
Hi Jon:
Interesting you should ask about that little surgical blade. It is one of four assorted shapes and sizes I got a couple of years ago from the surgeon who operated on my ear.
Here's a link to where you can purchase....
http://surgistar.com/product-category/dental/micro-miniature-blades/Dave
-
Thanks guys.
You are right Patrick. I needed a little break from the hull planking right now, and this little carving really is fun.
The maple is extremely dense, heavy wood. I tried to use it for a poker table once no it burned up saw blades like crazy. Excellent for carving fine details.
Hated to shut it down so early tonight, but my boys (UNC Tarheels) have my undivided attention tonight. It would not be safe for me to be handling sharp tools while watching this game.
-
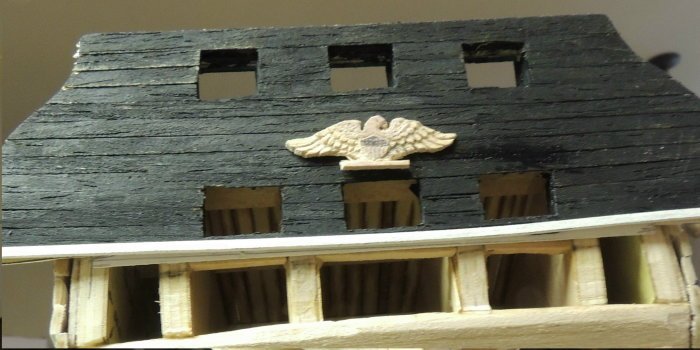
EAGLE CARVING....
Began planking the outboard transom early this morning. I couldn't resist beginning the eagle carving.
Seems like only yesterday I was spending hours upon untold hours on the SOS carvings.... all a blur to me now.Been saving this piece of hard rock maple just for this figure.
So I was able to rough out the overall shape and work on some details for one wing, just so I could get a little feel for carving again after weeks of gathering rust.
Also.... Taking photo's is the most effective means of examining my work in progress.
The wings appear to be much thicker at the shield than depicted in this plan sheet drawing. I am using a photo of the transom as my primary source for this carving.- Omega1234, robnbill, Geoff Matson and 10 others
-
13
-
Nice work CapSteve.
Always fun to read your postings.
Dave
- mtaylor, Canute and CaptainSteve
-
3
-
Plank Thickness Sanding Jig....
Creating scratch planks from raw lumber can be a bit of a challenge in terms of precision width and, even more so, thickness.
While it is easy enough to rip the exact width with clean edges on a table saw, the task of taking lumber through the band saw to rip the thickness is another story since band saws simply do not leave a clean surface as seen here....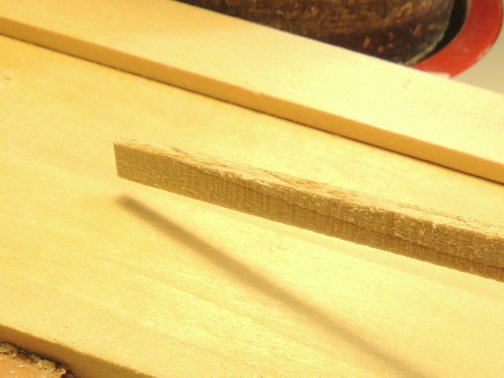
Obviously this plank cannot be used until the outer surface has been dressed down perfectly smooth. The trick in doing that is to wind up with exactly the same thickness from plank to plank.
Since passing such a thin piece of lumber through the table saw is not real safe, and I do not own a thickness planer, I created a little jig that utilizes an old osculating drum sander.
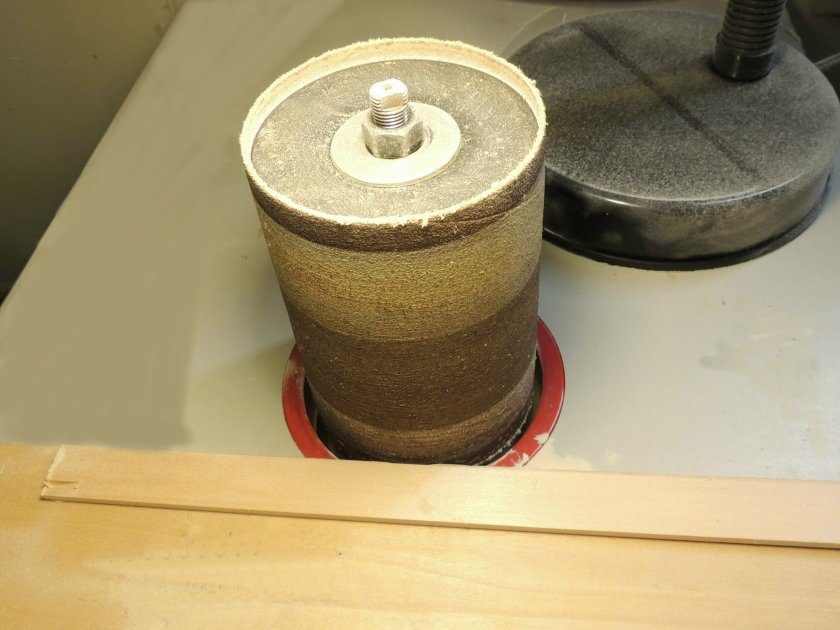
The fence allows me to pass each plank through the sanding drum with the thickness gap set to remove exactly the same rough surface from every plank.
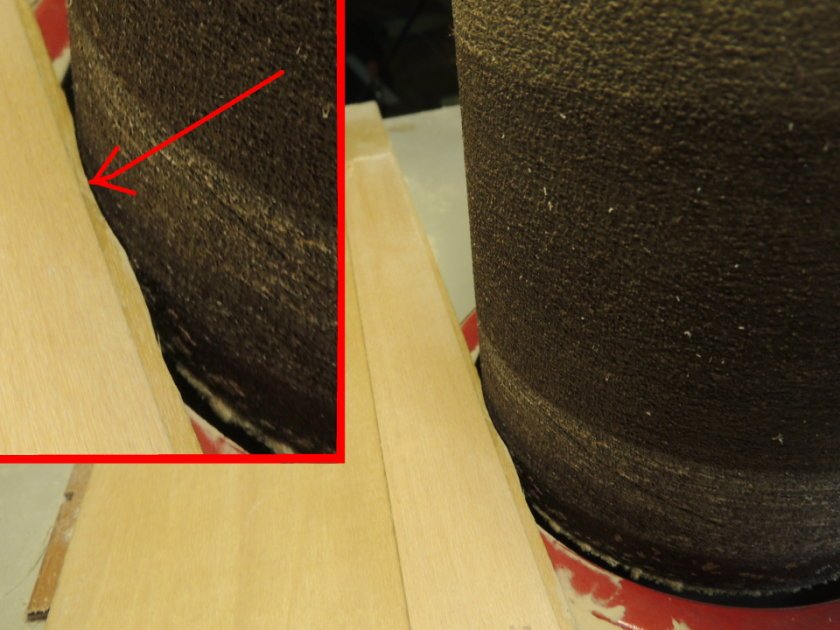
Feeding the plank through the jig takes about 30 seconds per plank.
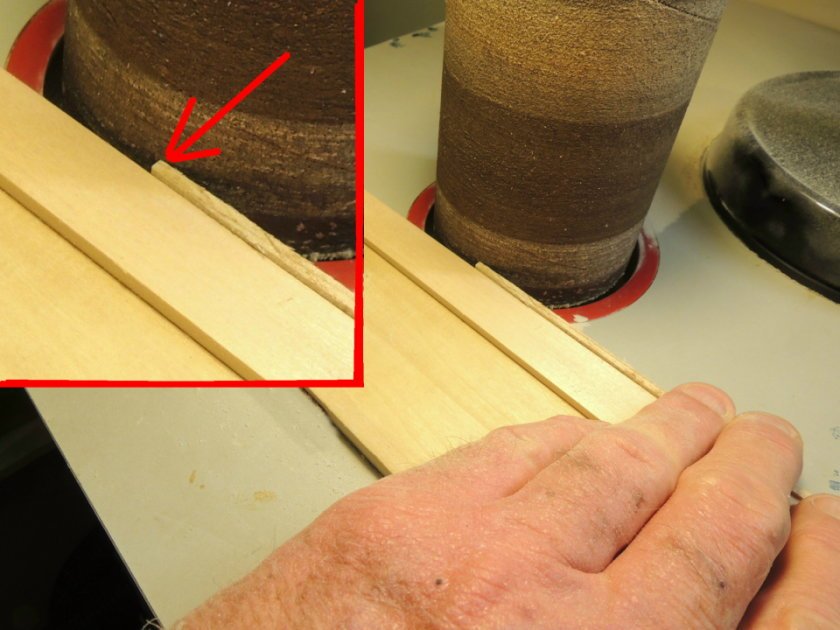
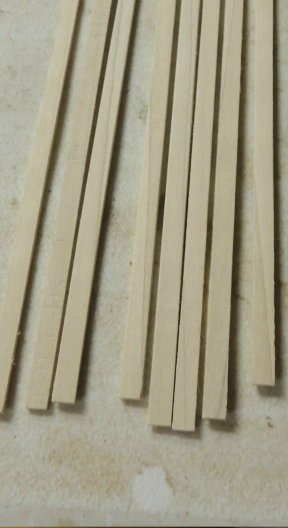
Perfect planks every time....
-
This fascinating point was brought to my attention by a friend who served as an Army sniper (Special Forces). According to him, the development of rifled long guns quickly led to other improvements in sights and firing mechanisms that gave rise to highly skilled sharpshooters with real accuracy at ranges never before dreamed of.
New battle tactics had to be employed as a result.
- Elijah, Piet, CaptainSteve and 5 others
-
8
-
VERY INTERESTING BIT OF RESEARCH....
"The hull of the ship began to be altered between 1847 and 1858, with the upper bulwarks being raised ~20”
Is this a coincidence that it is also the same time in history that the British began issuing muskets with rifled bores to their troops?
I would speculate the additional 20" inches might have been added to protect the crews from snipers.What think?
-
Thanks Greg... Knock on wood - I wouldn't expect any more of these types of issues.
However, I'm quite sure I'll manage to create plenty of unrelated issues on my own.... and will have to dig my way out of each as they come up. It's just the wacky way I sometimes tend to go about ship building.Dave
-
Spar Deck Bulwarks....
Still dealing with issues that arise as a result of my initial launching of this build with plan sheets designed for a completely different configuration.
In this case, it is the height and location of the bulkhead extensions above the Spar deck.
Since my bulwarks have been created off ship as a long continuous module, I found it necessary to cut off all of the original bulkhead extension's and replace them with these custom fit pieces.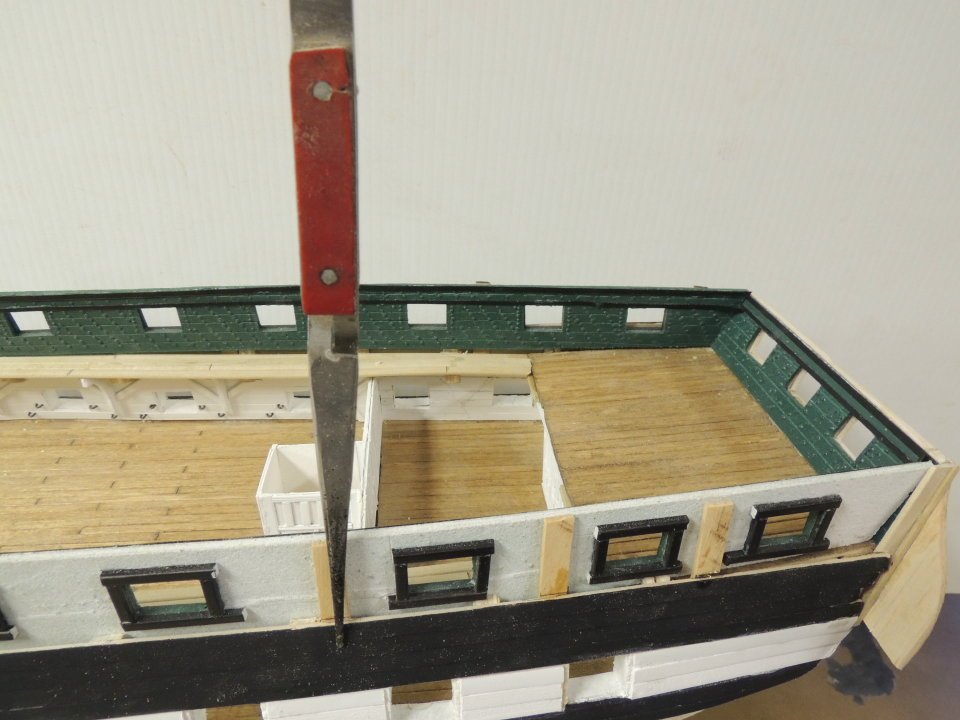
These new pieces have been carefully milled to match the exact thickness of the black gun port framing seen here.... also, the location of each is uniformly mid-way between each gun port.
I can now continue with the planking of the hull all the way up to the rail caps.
-
Thanks for that info Tom. As much as I am enjoying this build.... especially being able to get so much help from so many friends familiar with her.... I must confess the many versions can be quite confusing to a "non-historian" such as myself.
Beautiful work on the tops.
Love the rope maker.... I may finally break down and give it a go after all these years.
Dave
-
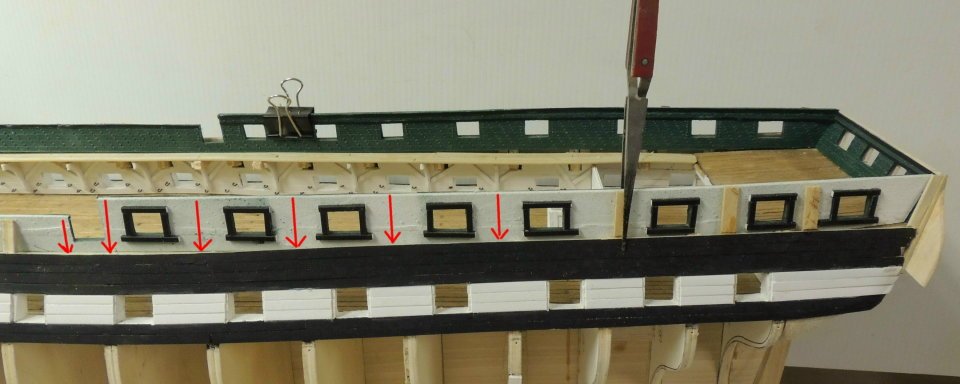
Tom:
I have struggled with the configuration of the spar deck bulwarks and hope you or some of the historians can clear up for me. More specifically, I'm talking about the height of the bulwarks above the aft eight gun ports as well as the forward three gun ports.
Here is a photo showing the issue I'm sure you will be familiar with.
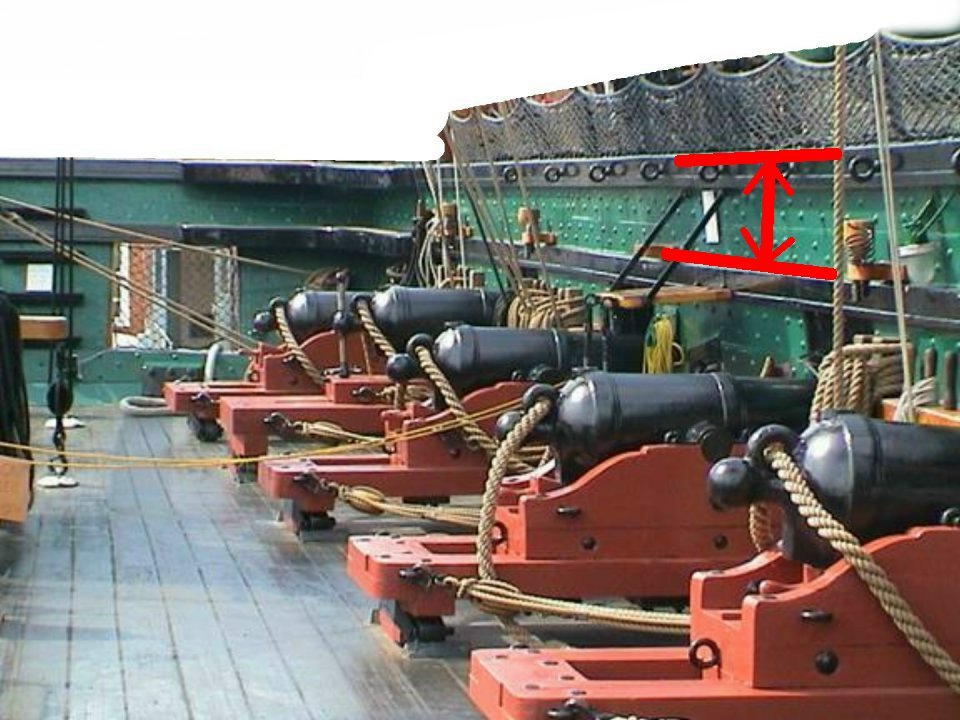
I can only imagine that the increase in the height of these bulwarks occurred at some time in her numerous referbs....
Anyone? -
Hi Tom:
Thanks for the many tips throughout your detailed postings.... especially this section dealing with gun rigging, as I am having a heck of a time with getting blocks and rigging to look right considering the scale of the blocks and the rigging line. Wish those were my gun rigging photos seen here.
Keep up the beautiful work my friend.Dave
-
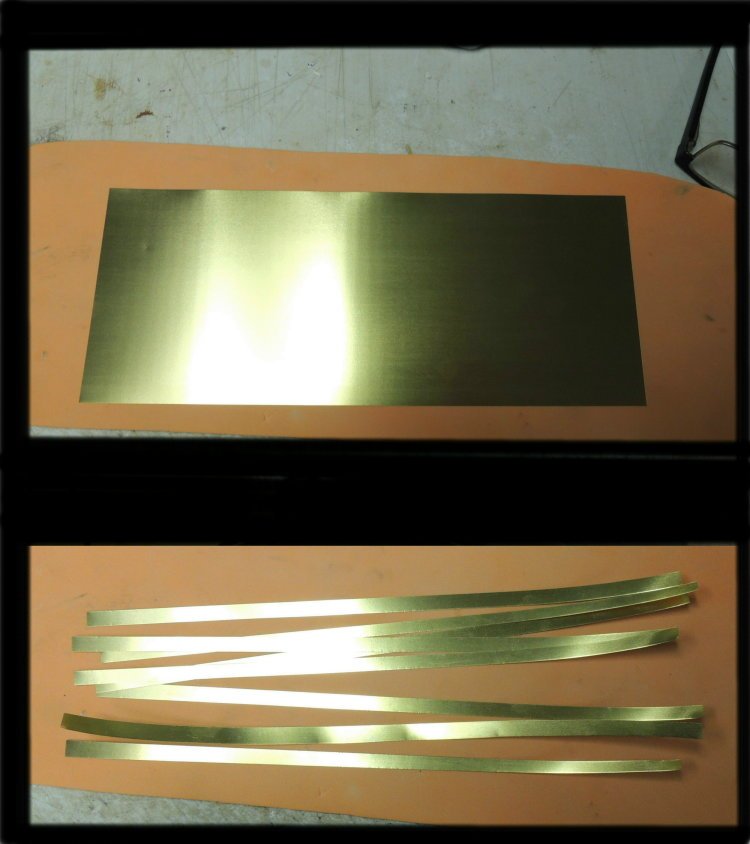
COPPER PLATES....
Now that I'm adding a few planks to the hull (around the gun deck gun ports).... I am looking out to the copper plating and the thousands of copper plates eventually required.
Resources indicate there are over 3,000 of these 14" x 48" plates.
I am using 8 cm X 20 cm plates to represent the plates on my 1:60 model.Used a paper cutter to slice the 8 cm strips from the 4" x 10" sheet purchased from a local hobby shop.

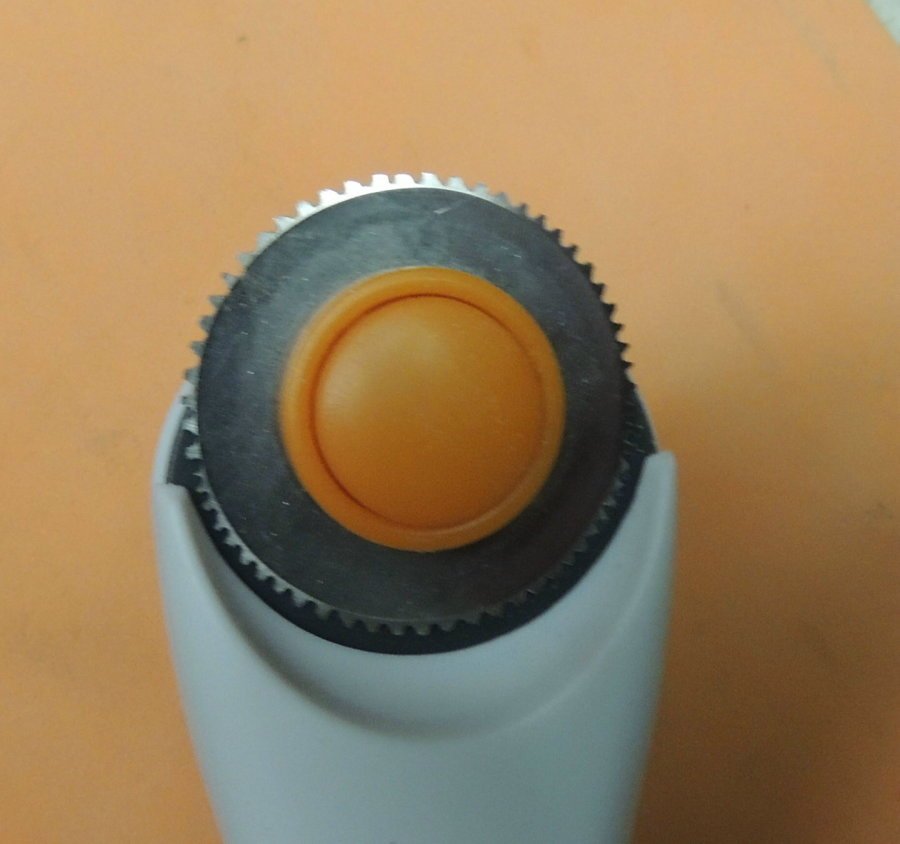
Also purchased this little pattern wheel I found at WalMart, then cut the notches to create a pounce tool.... (the tools I found on the market do not have the right spacing of the serrated tips)
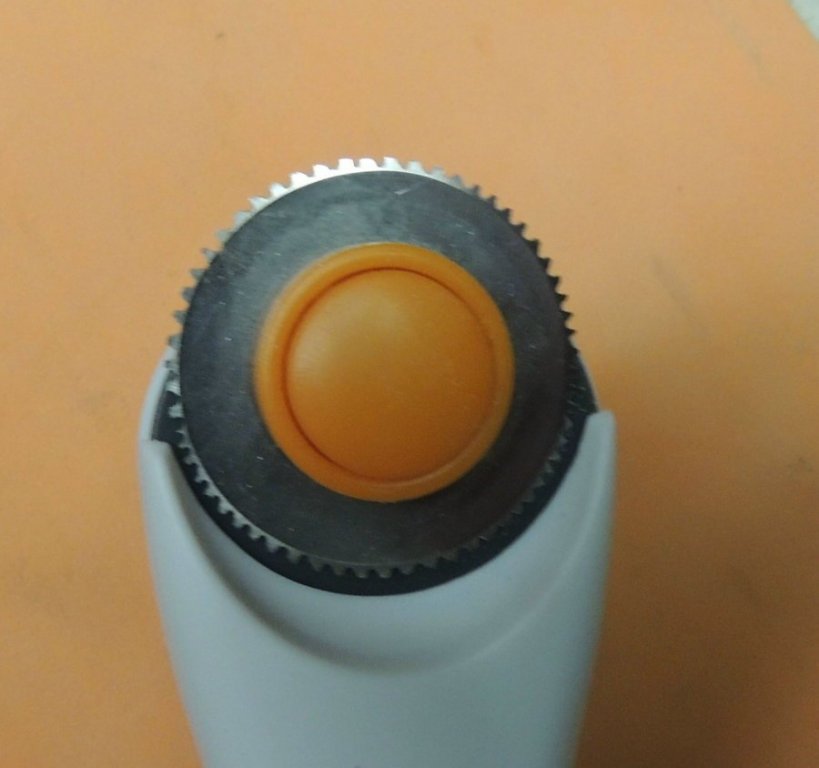
The results appear to be a pretty consistent pattern of dimples to represent the surface rivets....
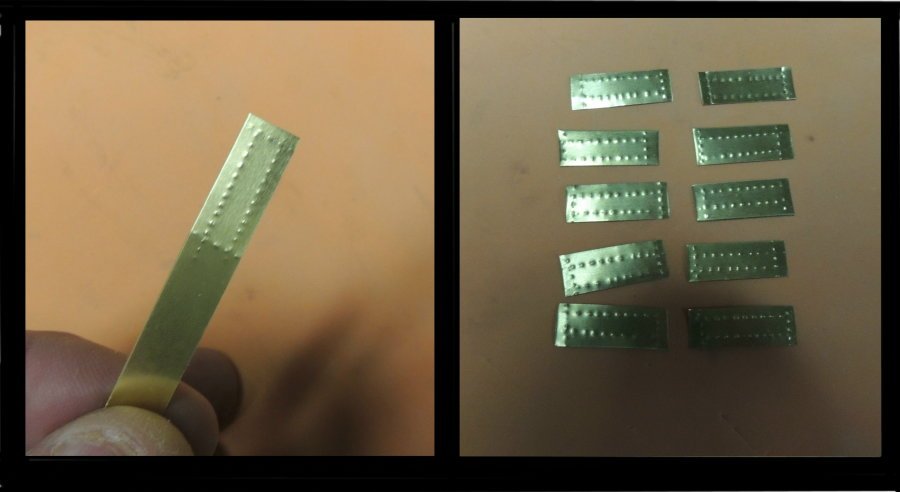
So I figure I need to create about twenty five per day to accumulate a good starting supply by the time I get around to the need.
-
On 3/8/2017 at 0:29 AM, CaptainSteve said:
Bolt-heads looked fantastic, Dave. More to scale than other methods which I had considered. I'm just hoping, though, that you have left enough room for all the cannon fixings, cleats etc etc ...
Thanks CapSteve.... Indeed I have considered the bulwark fixtures. Great thing about these little pegs is that they are so easily trimmed flush in the event I need to add something over them.
BTW.... Managed to finish the starboard side this morning.
-
Thanks Greg.... very pleased with the result.
No reason to think they would not work on the wales exactly the same.
I should have also noted.... before painting, I used a long sanding block with medium grit paper in order to bring all of the pegs to uniform height.
Two coats of spray paint filled in around the base of each peg very nicely and left a nice rounded appearance to the top of the pegs.

USS Constitution by SawdustDave - FINISHED - 1:60th Scale
in - Build logs for subjects built 1751 - 1800
Posted
Thanks for the info on the blades Shawn. Now I know where I can get them if I ever need more.
Dave