


SawdustDave
-
Posts
1,770 -
Joined
-
Last visited
Content Type
Profiles
Forums
Gallery
Events
Posts posted by SawdustDave
-
-
-
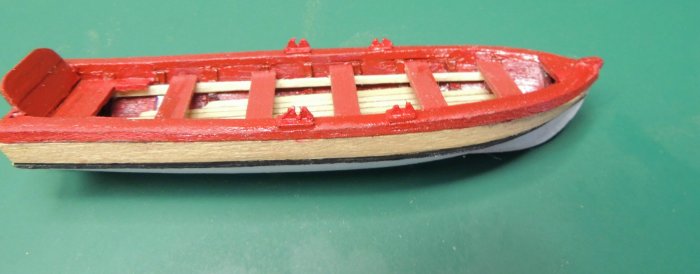
Launch progress.......
So much fun to be back to the modeling tasks I enjoy most.
Took a few shots along the way from shaping the launch hull to this mornings stage of applying outboard planking.
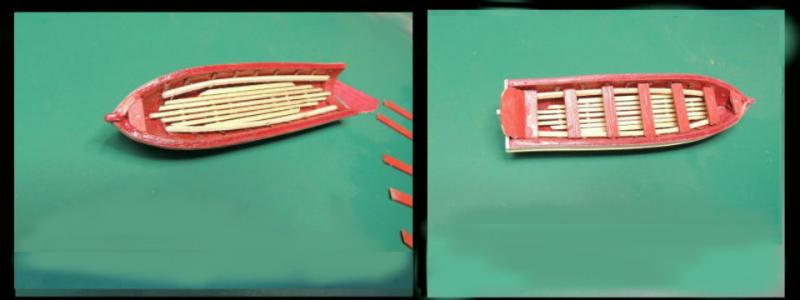
Shaping and planking and painting the interior ....
Adding the catwalk and side rails.... transom and seat boards....
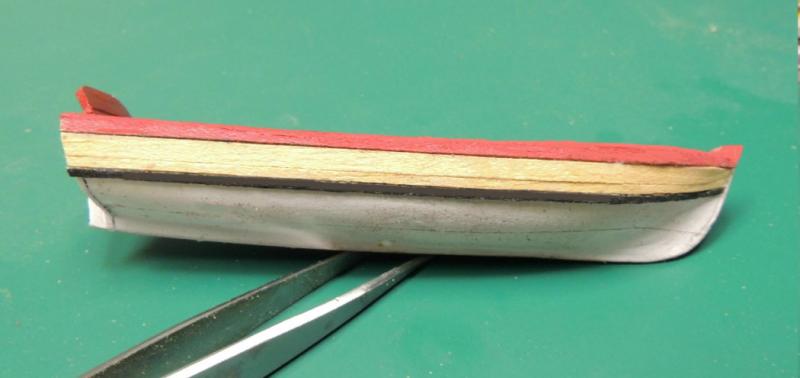
Shaped hull and false keel .... painted and adding planking....
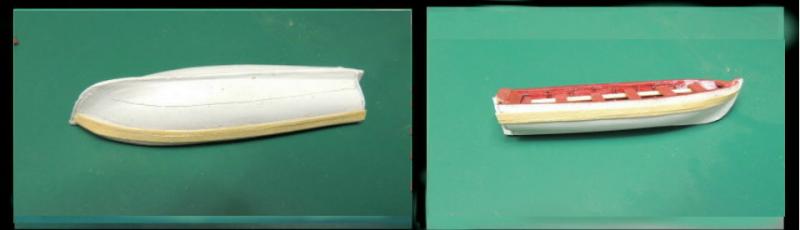
Planking and wale added....
- marktiedens, dgbot, mtaylor and 10 others
-
 13
13
-
-
Always such a treat to re-visit this log and catch up on your progress Ed.
As always, completely lost for words to express my admiration for your amazing modeling skills and attention to the most minute details.
Thanks again for sharing with hacks like myself.Dave
- Chasseur, mtaylor, CaptainSteve and 2 others
-
5
-
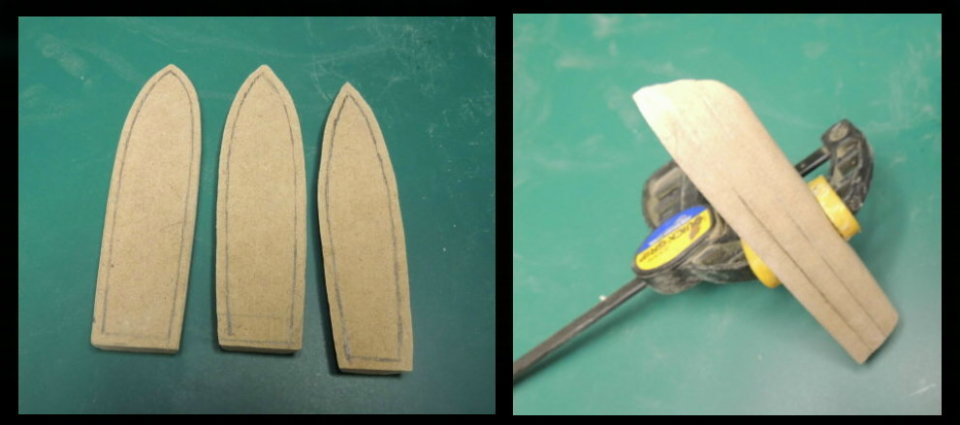
Thanks Michael.... So far I am liking the way the press board material is easily shaped with a Dremel drum bit. Had to put on my dust mask and apron as the sanding dust from this stuff is really nasty.
Plan to remove most of the center material with my band saw before gluing the three layers together.... then chisels and sanding strips to smooth inside and outside. Not too concerned about seams since the hull will be painted white, and the inboard will be planked and somehow fitted with ten ribs.By the time I add the floor grating and seat boards, the inboard area should be pretty busy to the eye.
- Canute, CaptainSteve, edmay and 2 others
-
5
-
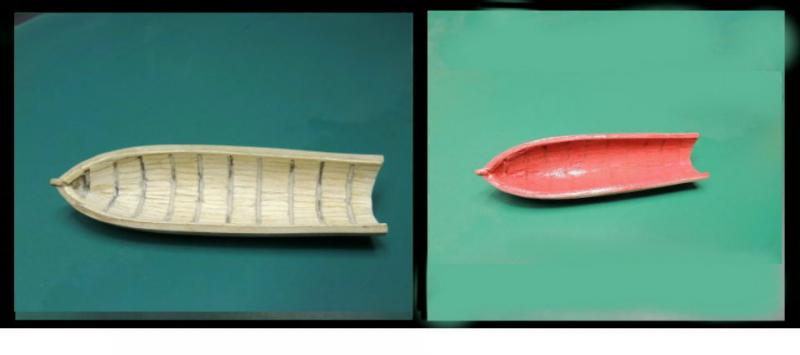
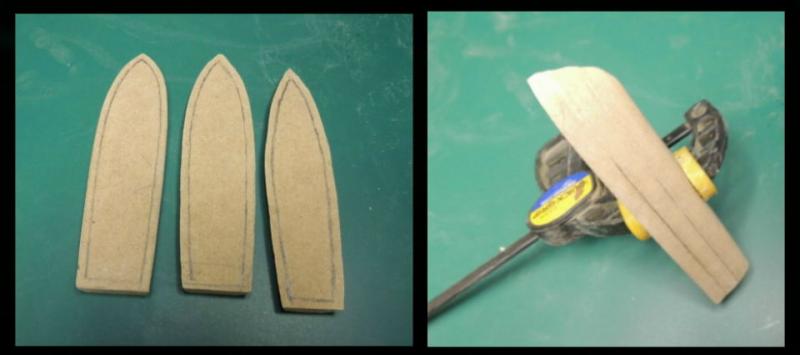
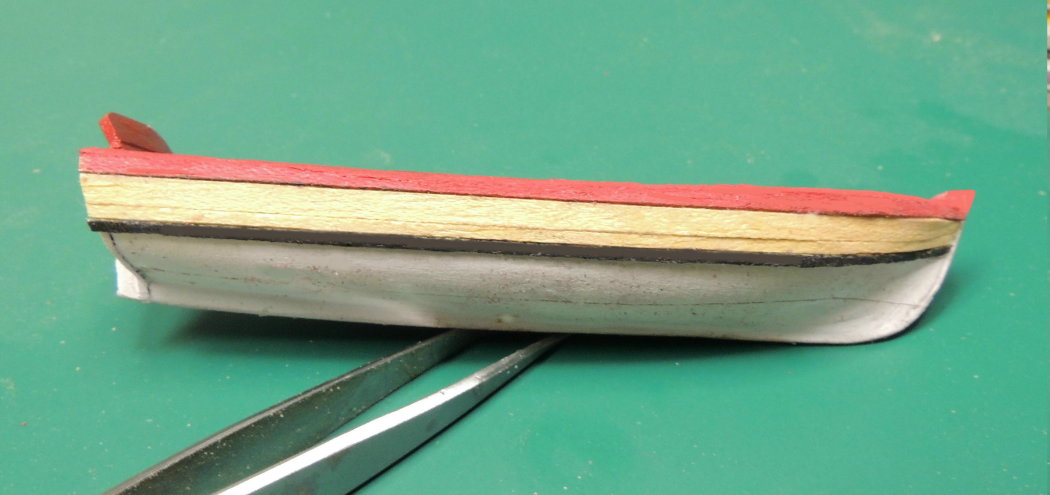
Playing around with creating a launch....
While waiting for flags to arrive, I decided to explore adding a launch.... bread and butter construction.
I've never used "bread and butter" technique before. Looks like fun.
Cutting up some scrap press board to experiment with.Planning to add a false keel before removing the inboard material.
Then, I think fake ribs, planking, floor grating, seats, rudder, etc.Maybe / maybe not.... we shall see.
- Omega1234, mtaylor, CaptainSteve and 8 others
-
11
-
-
Dave.... Beautiful rendering.
Been using AutoCad for years, This looks like more fun than scratch building with wood.
However.... Too much on my plate right now to take up a new toy.Cheers
- mtaylor and thibaultron
-
2
-
Russ / Patrick.... Always good to have you visit. Thanks....
The mechanical functions do indeed work Patrick..... guess that's why I love building the little suckers.
- CaptainSteve, mtaylor, russ and 2 others
-
5
-
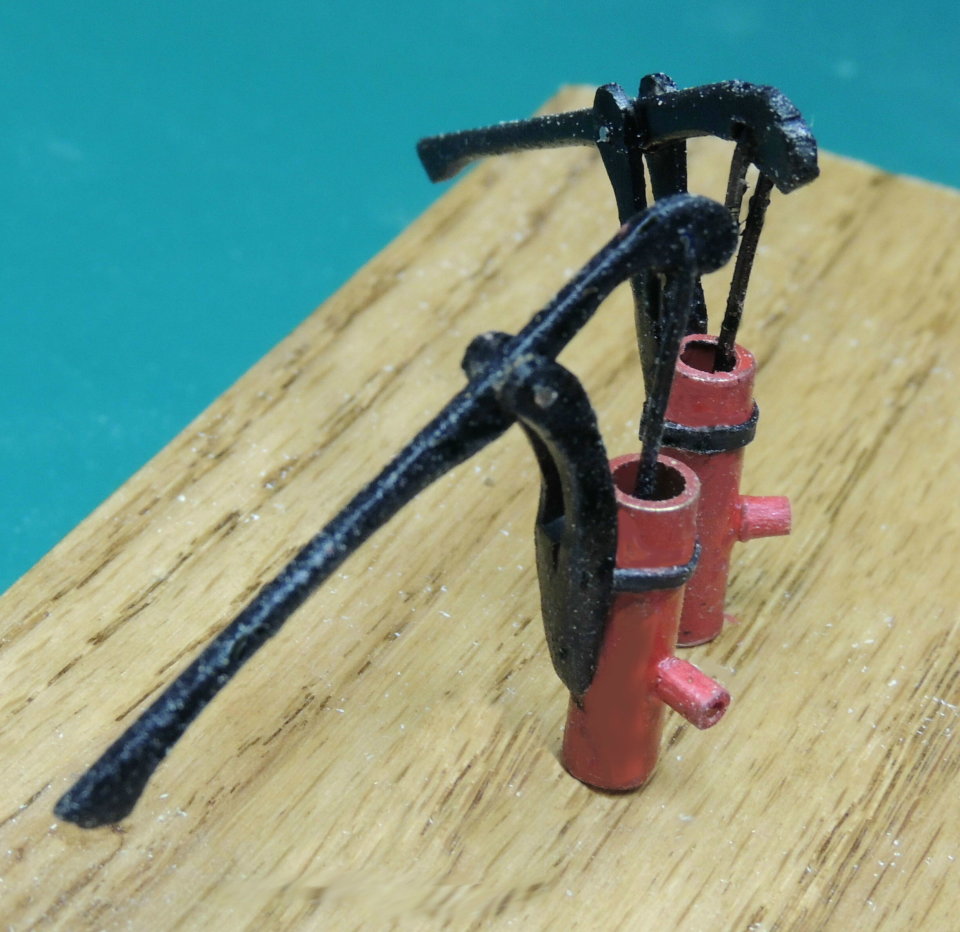
Pumps completed....
We all have our personal favorite little item we love to build. I think these little water pumps are mine.These went pretty quickly.
Most of the time spent on shaping the handles and mounting brackets.


- Jack12477, Omega1234, marktiedens and 14 others
-
17
-
Windlass..........
Digging through my many trays of shop "stuff", I came across a couple of these wall pegs.
I'm thinking I picked them up over twenty years ago to build a coffee mug holder for a friend.Do you see a windlass like I do?

Works for me.
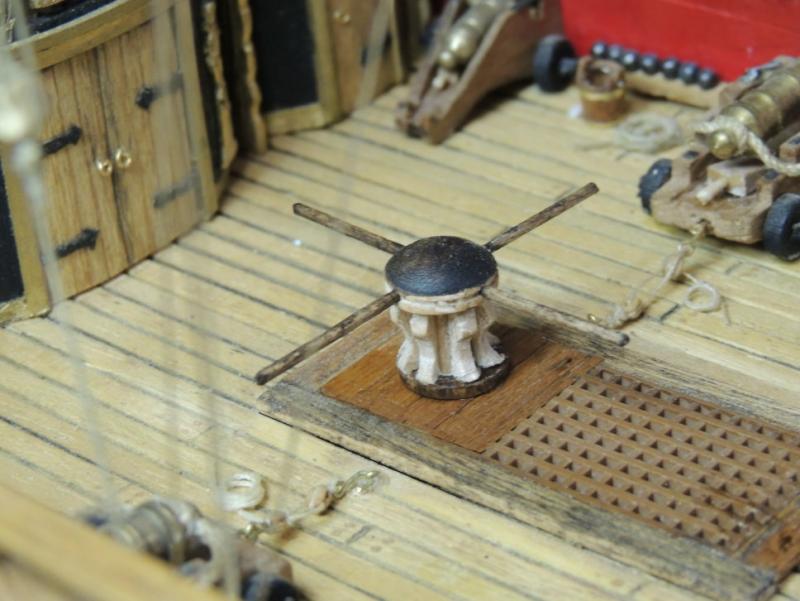
Never throw "stuff" away!
-
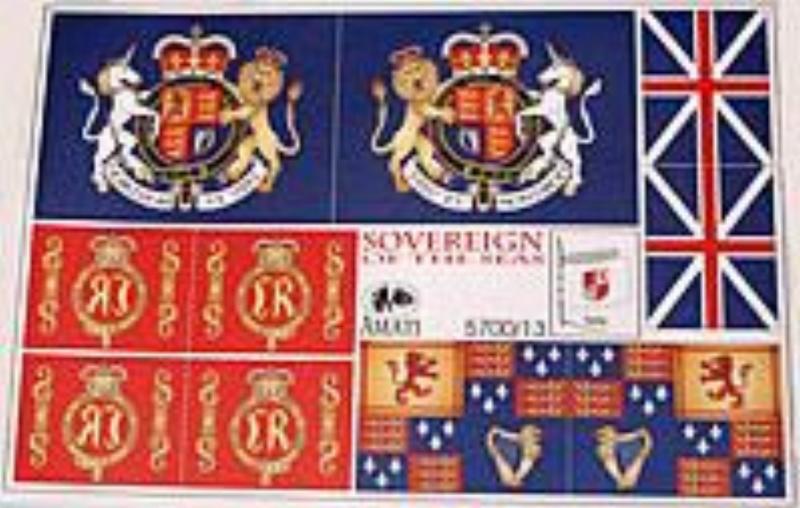
FLAGS....
Lookey what I just found online at "Ages of Sale"..... for about $12.00
OH YEA!
- Ryland Craze, mtaylor, BANYAN and 4 others
-
7
-
New pics of finished rigging now posted (#903 above)...... more better.
Cheers
- Canute, CaptainSteve, Omega1234 and 1 other
-
4
-
Thanks Don and Jesse....
Flags - I've done both paper and very fine silk fabric in the past. It's tricky, so I'll play around with this one and come up with which looks most realistic.Much better weather today, so I just came in from a photo shoot that should be much improved over the ones posted above.
Plan to replace all of those shots before the end of the day.
I think everybody will agree, they are pretty rough.
Cheers
-
-
Thanks to each and all for dropping in..... many cherished old MSW mates.
Good night at the poker table. Back to work tomorrow.... two water pumps - a windlass - flags - Name Plate carving - and several little touch-ups in mind.
Still thinking about whether or not I will build a ship's launch.... what think ye?
Cheers- Ryland Craze, Canute, CaptainSteve and 4 others
-
7
-
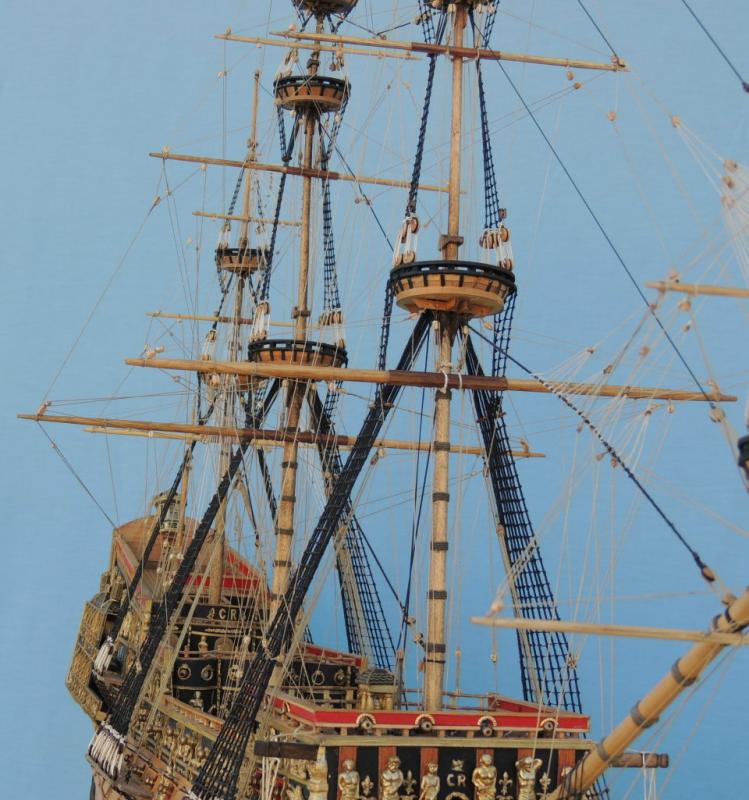
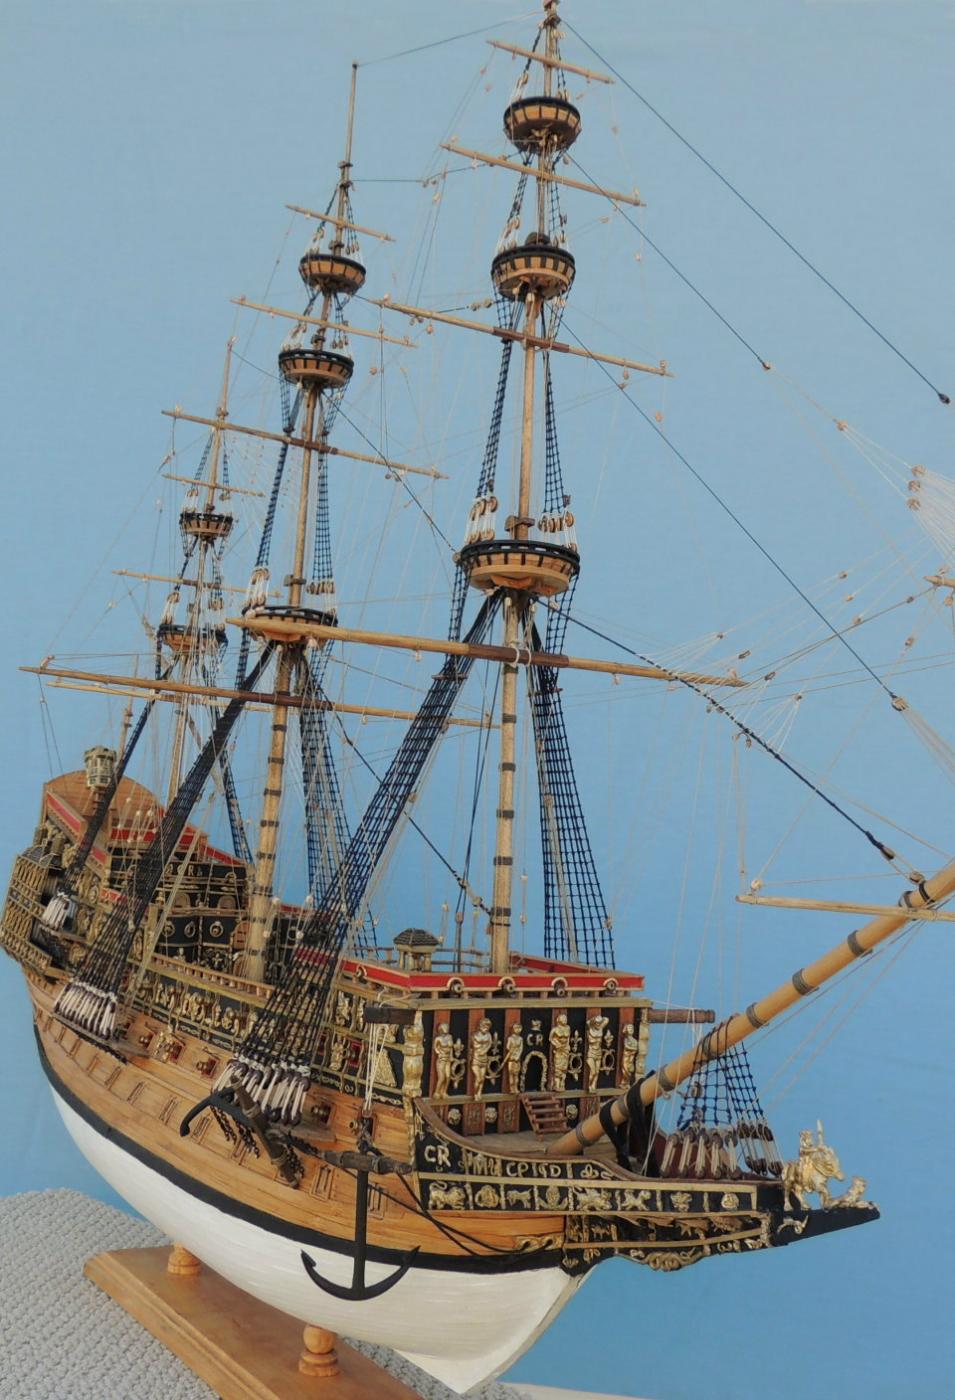
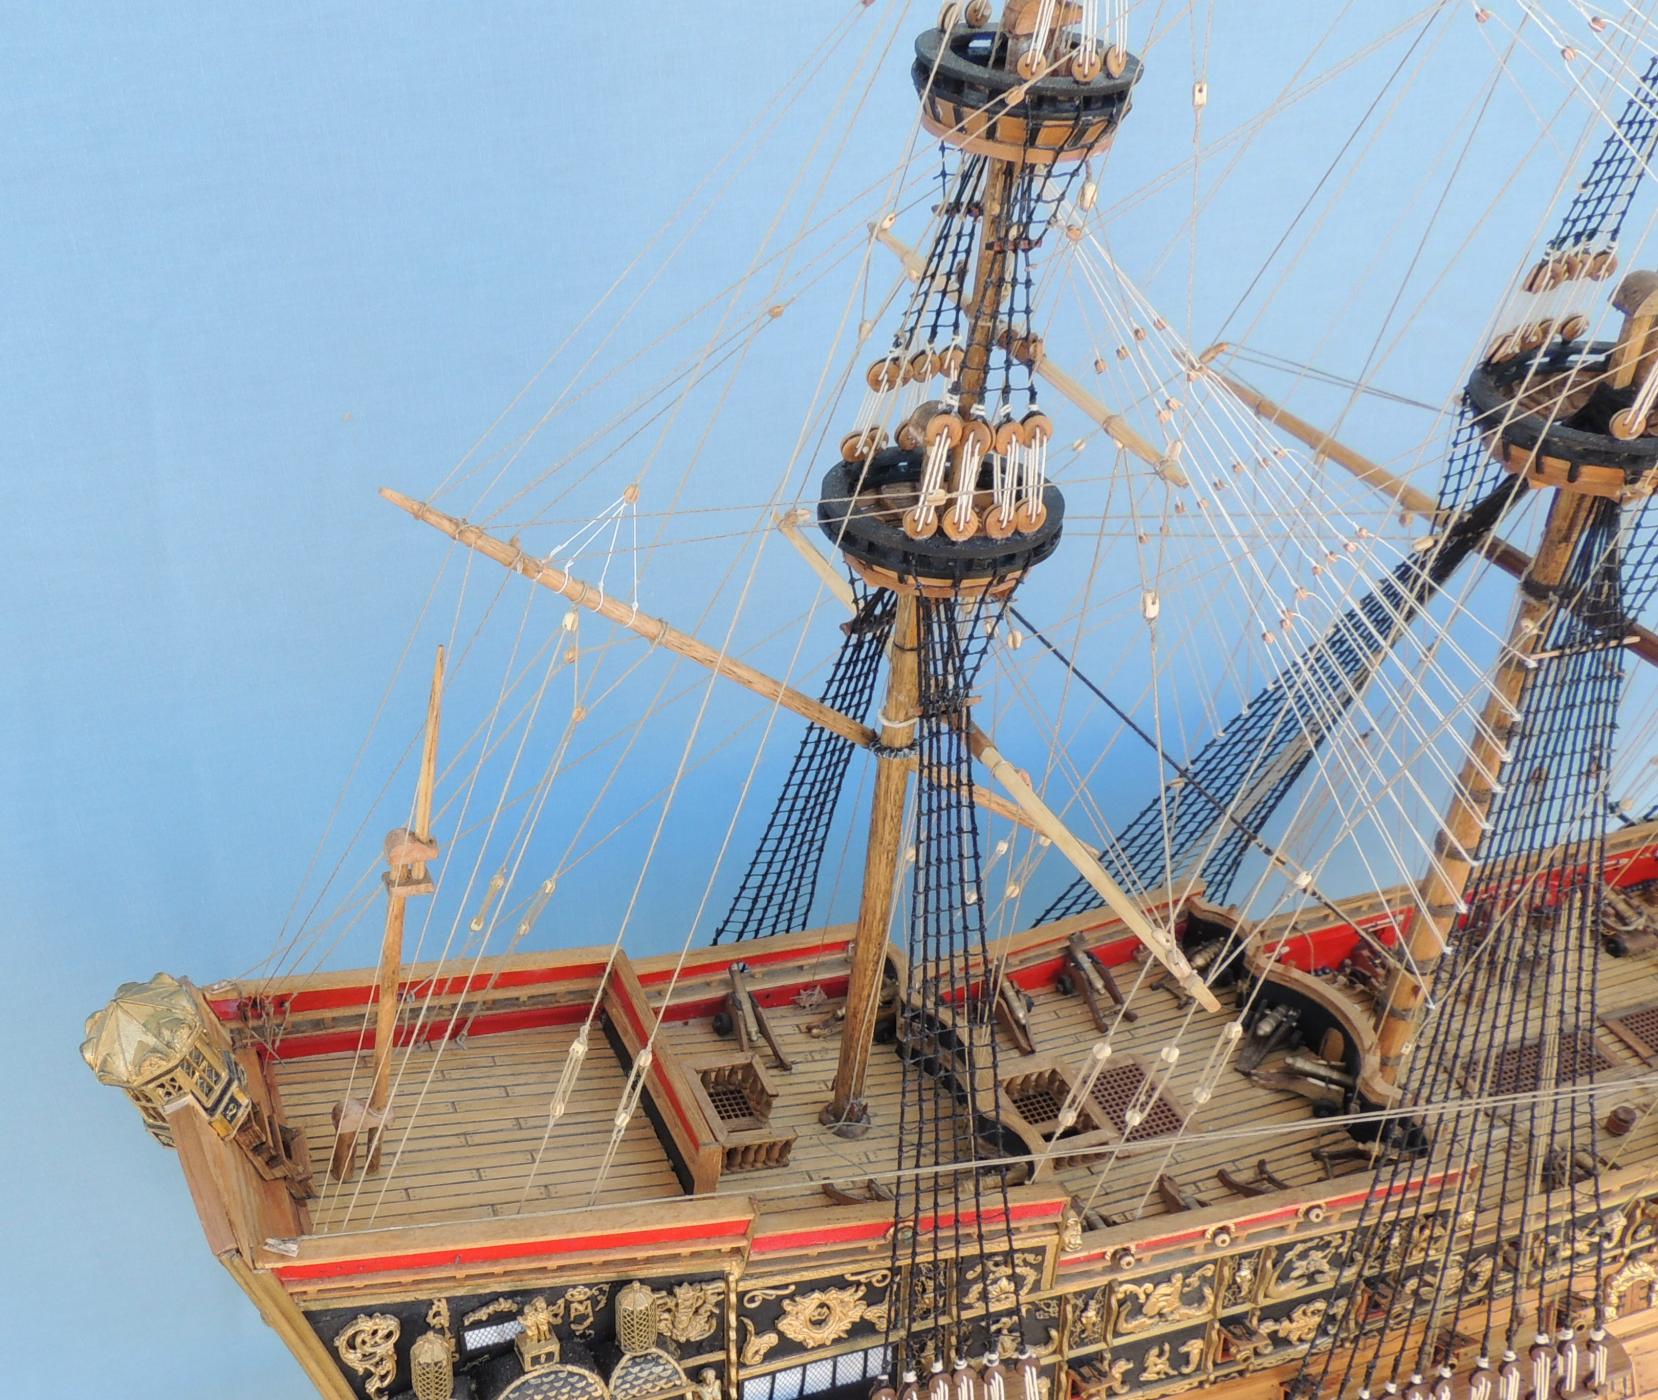
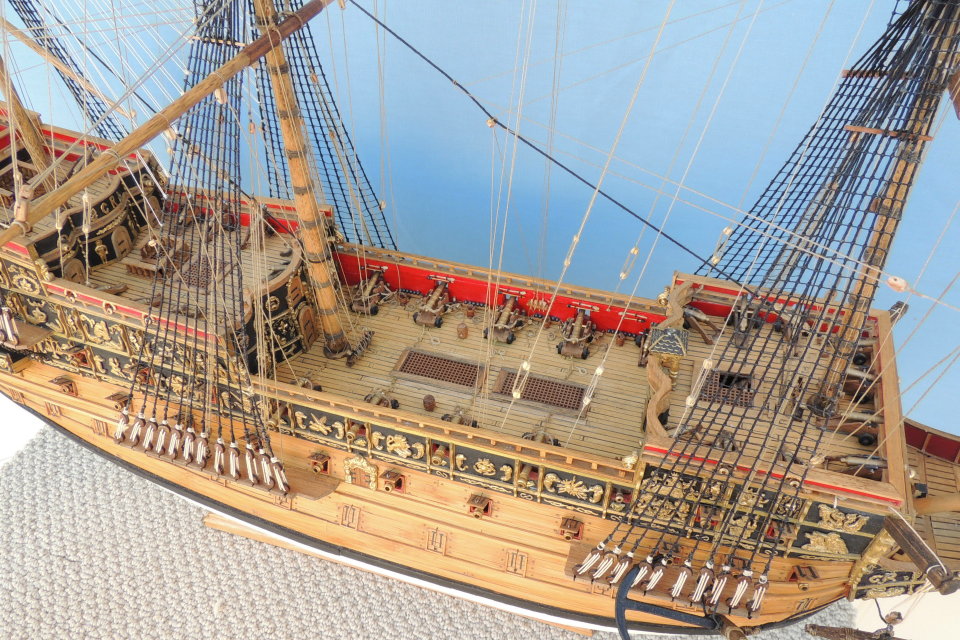
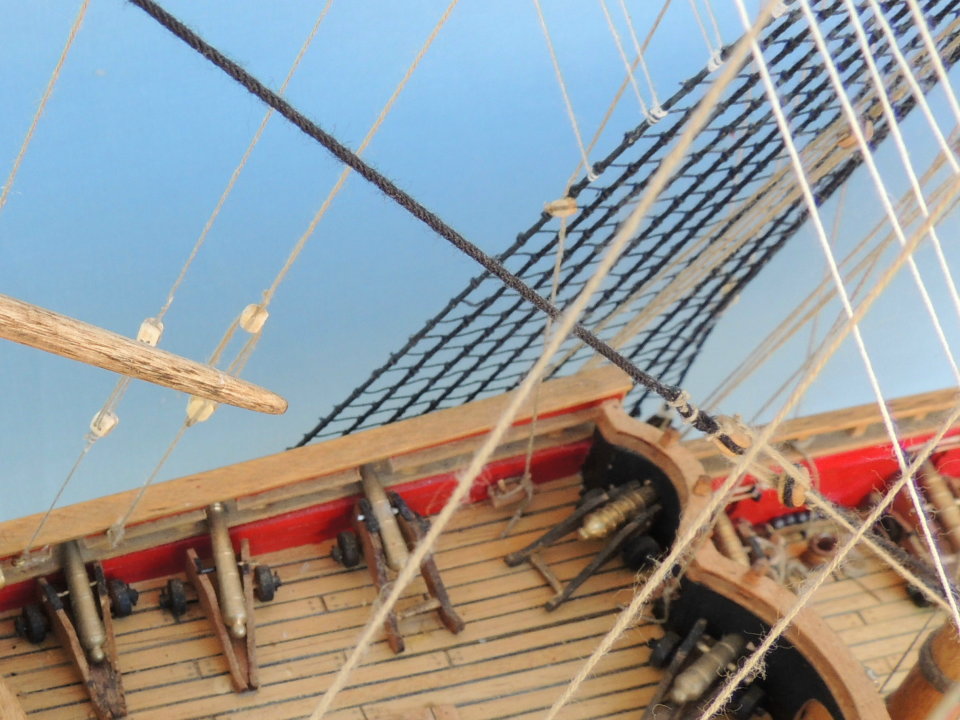
Running rigging now completed!

New pics of finished rigging........
Other than tying the last rat line clove hitch, I can't think of a more satisfying point of celebration in a build.This has been the most challenging rigging I've ever done, mostly due to the lack of clear plan sheets.
Thanks again to Bill Short for providing a lot of daylight with the material he passed on to me.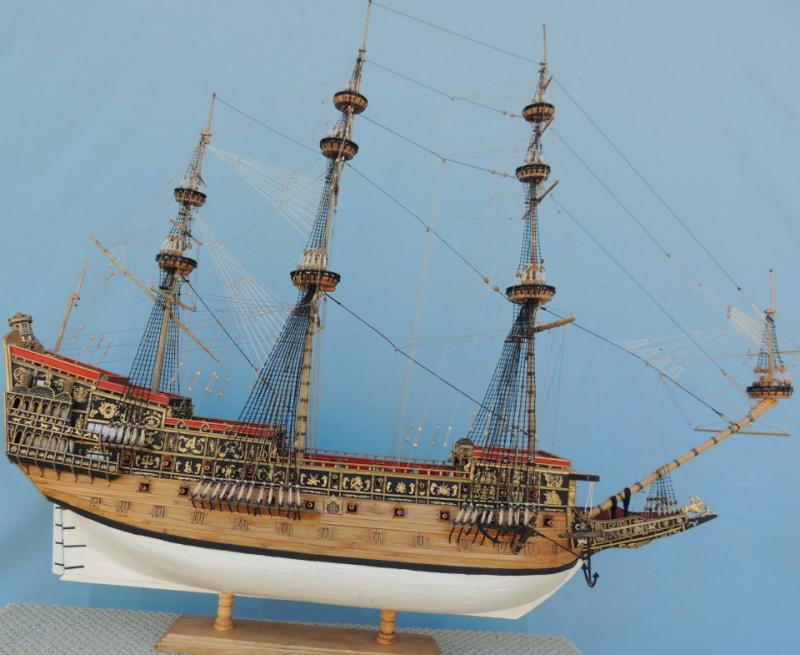


- tadheus, Ryland Craze, russ and 20 others
-
23
-
-
Excellent point Drux....no argument here.
You know me well enough by now, after a dozen ships of all sizes (including the Cutter Pilsbury built as a gift to my ear surgeon), I am personally drawn to large historic ships.
Chuck's Winchelsea, along with the Connie definitely meets that criteria.
Haven't decided.
-
So frustrating to me at my age (74 yrs young). As I stated to Chuck once after his observation that I needed to slow down.
A person of my age struggles with the one factor beyond his control.... TIME.
Building to Chuck's standards does require lot's of that one element, which means, in my case, I might never finish the ship I've been working on for over three years now. Or it means I might never even begin that next ship I hope to build while my health allows.
No excuses.... it's just a trade off.Note: This doesn't imply that I think I can build to Chuck's level.
- Ryland Craze, Canute, PeteB and 5 others
-
8
-
-
-
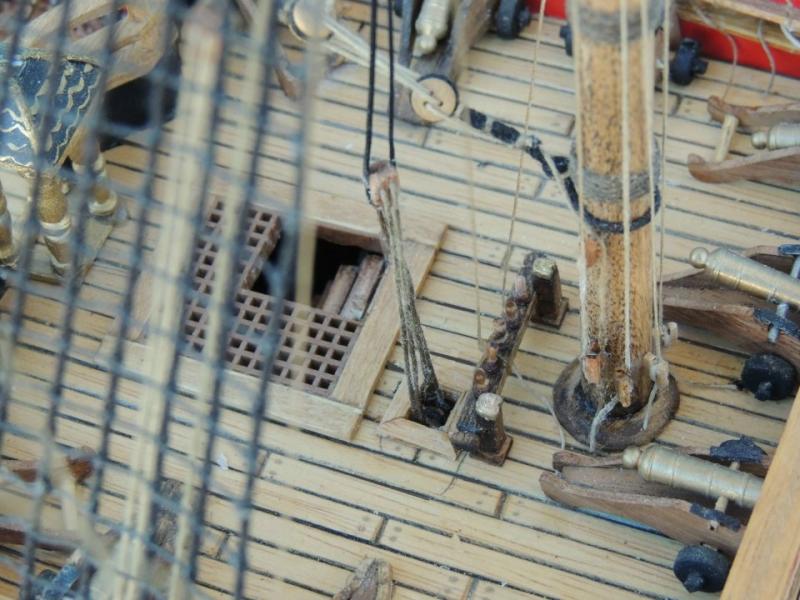
OK gang..... Sometimes you have to take a problem to the Master - Right?
So here's what Chuck tells us about that heavy tackle......
The lower block was belayed with a hook onto a heavy bit below deck.
"It was to raise and lower the yard on the foremast. Its for the "tie" which is normally secured to a knight head on deck. In this case below deck."
- CaptainSteve, Canute, JesseLee and 2 others
-
5
-


Sovereign of The Seas by SawdustDave - FINISHED
in - Build logs for subjects built 1501 - 1750
Posted
LAUNCH FINISHED....
I guess we're running out of road very rapidly here. The launch is now sitting in place on deck.
After cleaning up and adding the oar locks and stern post, the launch is ready to be staged in place.
The cradle is about as simple as they come..... The oars are quite thin and very delicate around the grip end.
The rudder somewhat tricky getting the pentles and gudgeons to match up .... and the tiny anchor shaped from a piece of scrap pewter.
All staged on deck....