


SawdustDave
-
Posts
1,770 -
Joined
-
Last visited
Content Type
Profiles
Forums
Gallery
Events
Posts posted by SawdustDave
-
-
Poured the new mold last night....removed this morning. The casting turned out perfect.
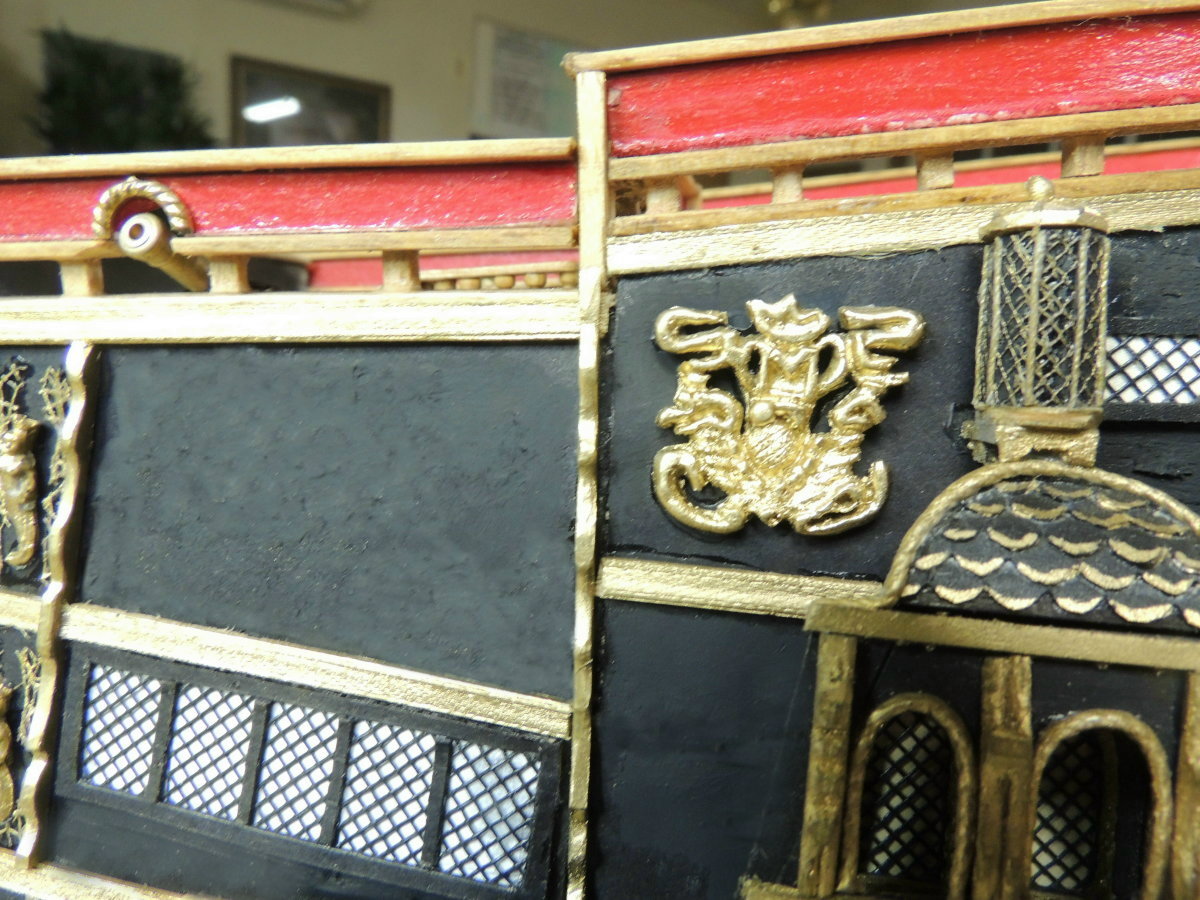
Painted with three coats of metallic gold..... glued in place.
Also carved the little crown and glued in place.

Works for me.... but that panel still doesn't look complete.
I'll come up with something to fill in the corners.
-
-
-
Managed to get in a couple of shop hours early this morning, and another couple following our day on the links....absolutely beautiful day.
Plenty of rounding and smoothing with some very smooth bits and very fine sanding sticks.

Hate to put it down right now, but it's almost poker time.
-
Rough shaping done.... I went back to vinyl for this one because I want to see if I can get the same details using the new scalpel tools.
Just making a final check of the scale before I spend hours on this piece and decide the scale was not right. Been there, done that.... lol
Think I'll spare you folks all the step-by-step on this one.....like watching grass grow, right?
Pretty day for golf tomorrow.... then poker club night.
Looks like a short day in the ship yard.
-
Thanks Piet, as always.... Not as easy as I was hoping it would be.
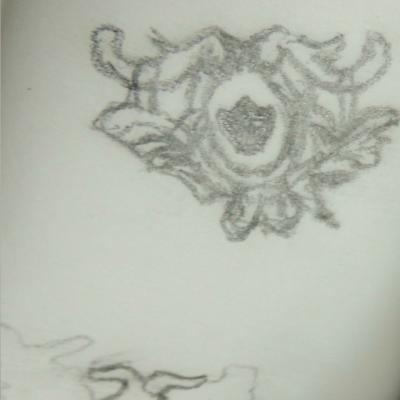
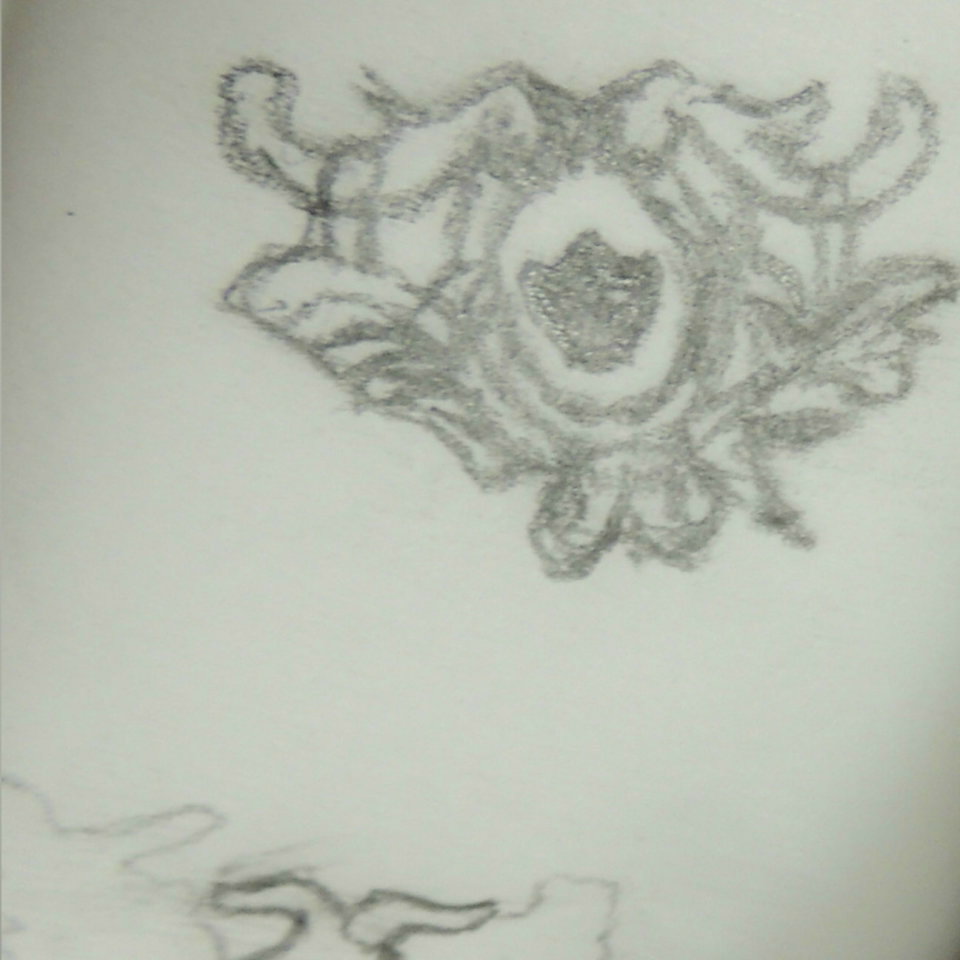
Searching through all my clip art of fancy scrolls, I couldn't find the one to fit my minds eye for that particular panel.... So I began doing some sketching of various concepts.
For better, or worse, here's roughly what I came up with .... a good starting point anyhow.Got to start somewhere, right?
-
I continue to visit this amazing build whenever I need to be completely humbled. This is perfection beyond crazy.
- CaptainSteve, GLakie, wyz and 3 others
-
 6
6
-
Quick update....
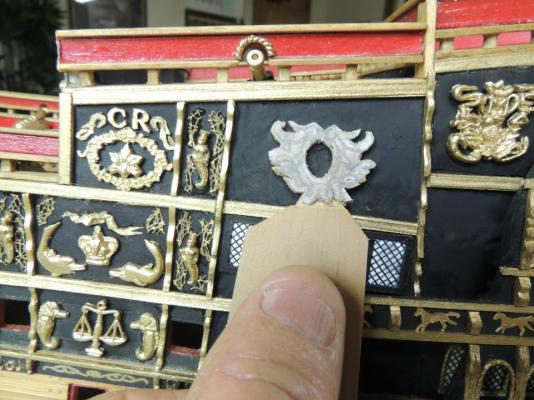
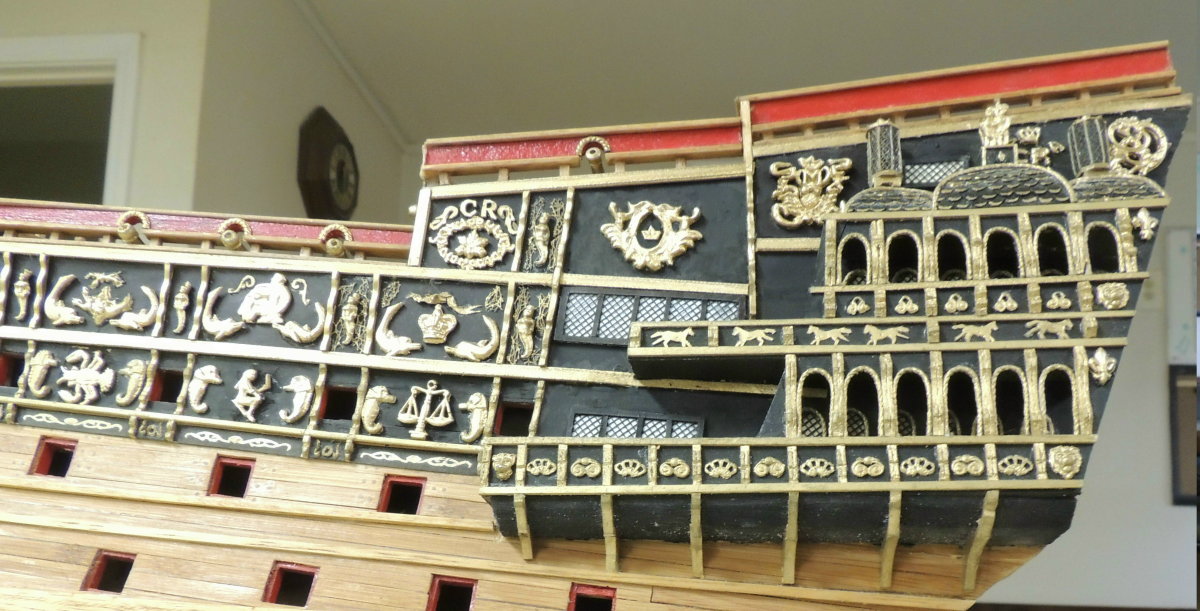
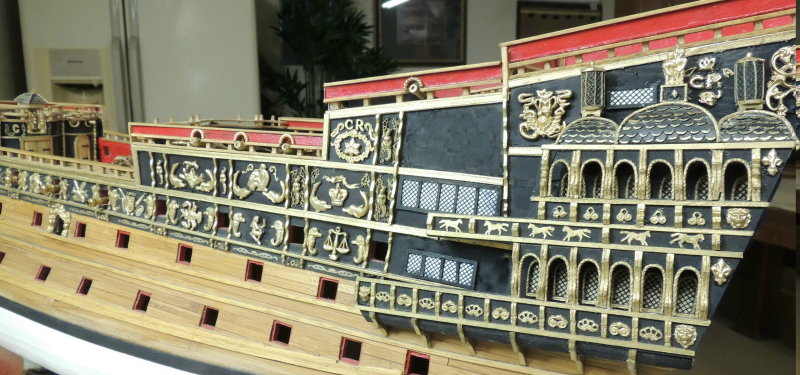
The first pic is the way the port side looked before I began ripping it apart....
Here's how it looks now....after moving moldings, trims, windows, and either moving or replacing all of the original carvings....
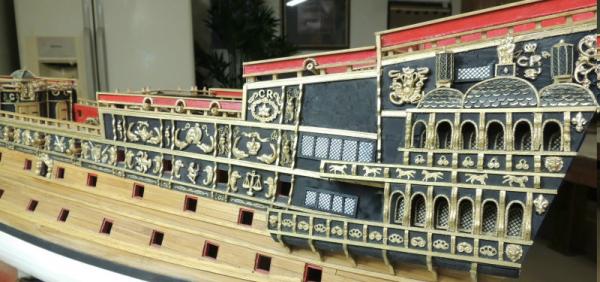
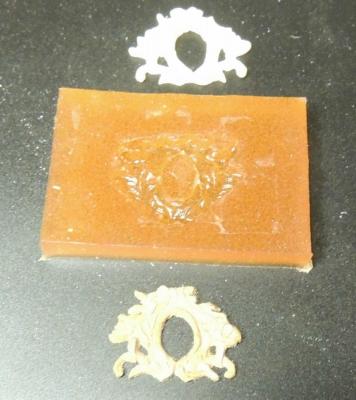
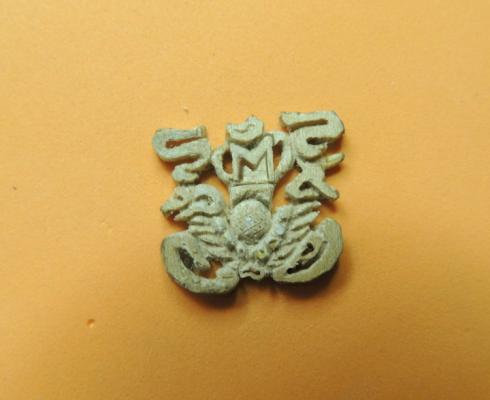
And here's the little badge I've been working on the last few days....

That big blank panel to the left is the next focus.... not sure what will go there yet, but feel it has to be pretty special considering the size and prominent location.
-
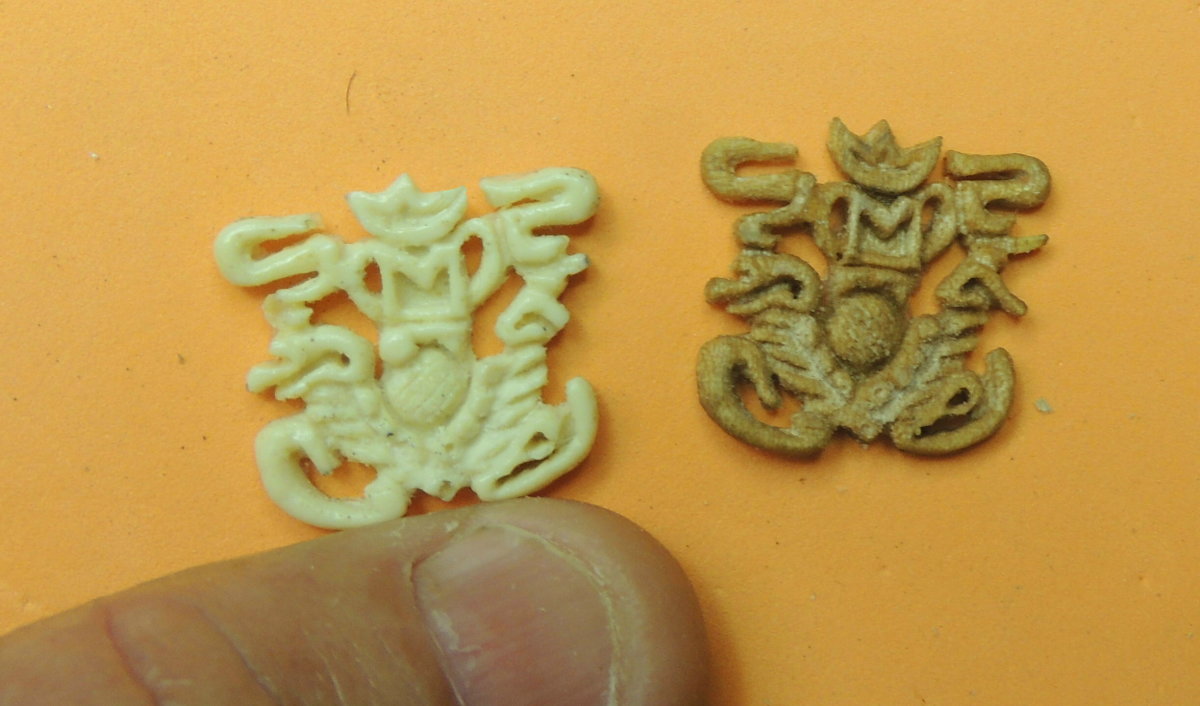
And here's the result of the re-pouring of the mold last night.

The new mold was absolutely flawless.... which gave me a really fine reproduction part.
On to the paint booth.

- JesseLee, CaptainSteve, Jack12477 and 12 others
-
15
-
Thanks for the visits guys.... We're off to a much better start this morning.
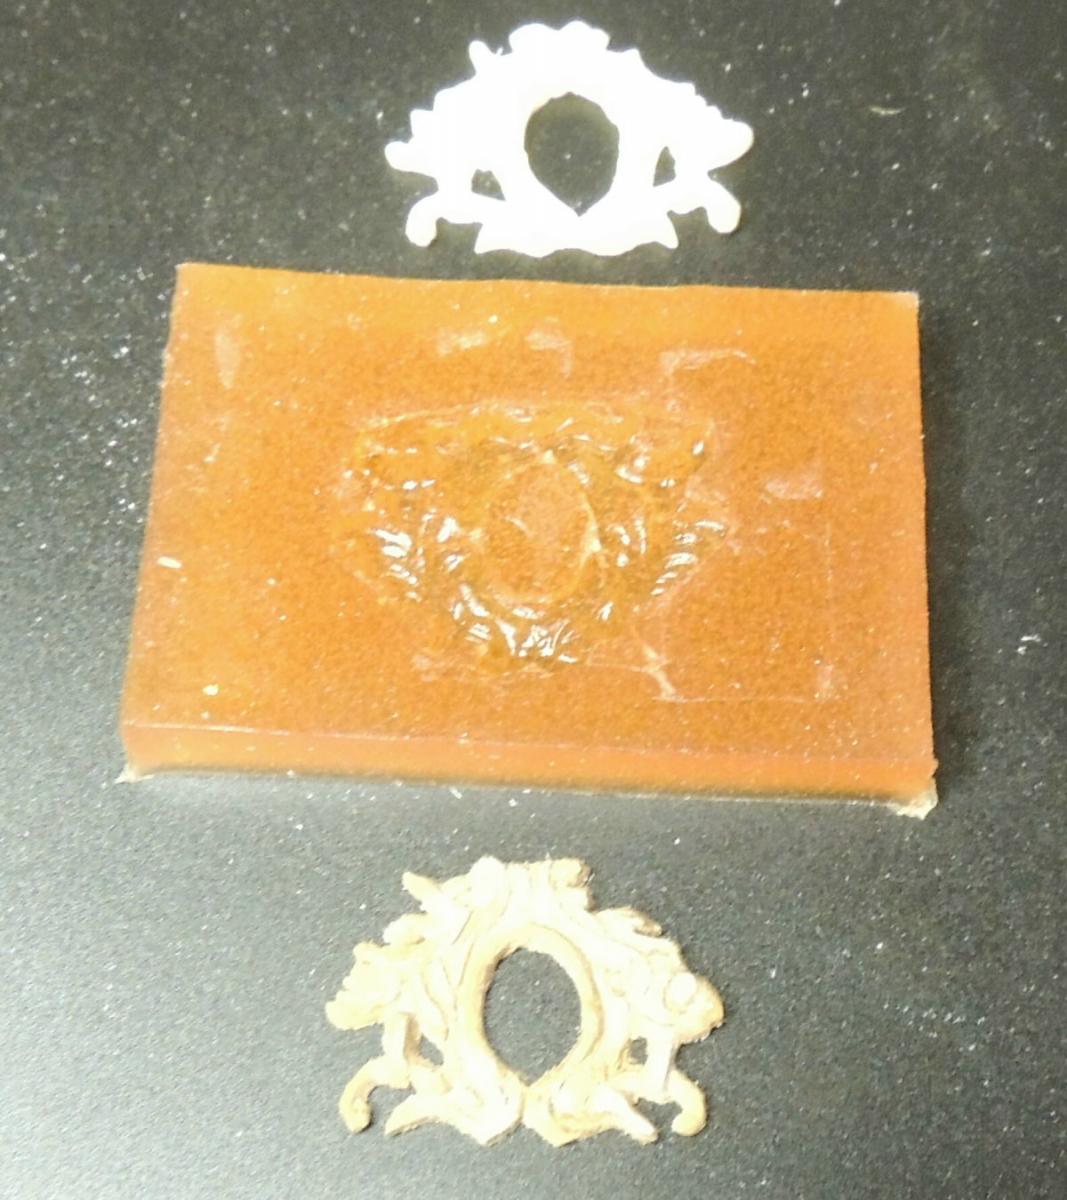
First - To answer Greg's Q....
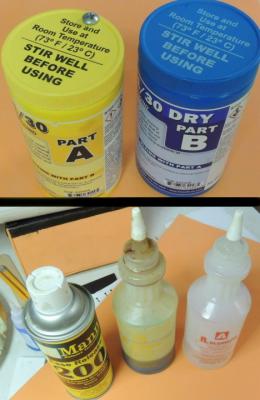
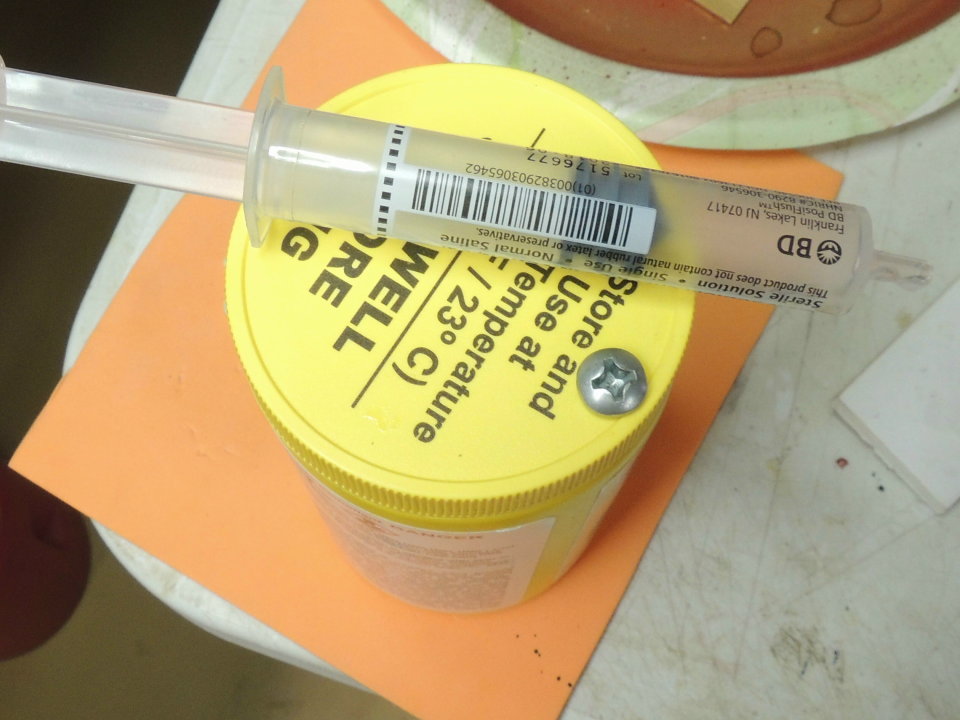
The two-part rubber mold compound ( top pic ) .... Smooth-On Urethane Mold Compound (Part A and Part B )
> Requires 8 to 10 hours cure time.
The two-part casting compound ( bottom pic ).... Alumilite Liquid Casting Plastic (Part A and Part B )
> This one, once mixed, you must move pretty fast.... It begins curing in about 30 seconds!
Mann Ease Release.... Extremely important to use before pouring either of the two processes.
Here's a great tip for users of the Smooth-On Mold Compound:
The yellow container (Part A) is extremely reactive to exposure to oxygen. Consequently, once opened, the thick clear compound will begin to increasingly become thicker from one use to another. Within a few weeks of repeated openings and exposing to the air, it tends to become less and less usable.
I found a pretty good solution as seen here.
Note the Phillips head screw in the top of the container - and the syringe....

This container has never been opened.
The screw is removed and very quickly replaced with the end of the syringe.... used to draw the fluid from the container. Then, very quickly replacing the screw to maintain the air-tight seal.
-
CapSteve.... Good observation my friend.
Yes, the original crown was so cocked out of alignment, it had to come off, rather than attempt re-shaping. It was a little bit of a delicate job of joinery, considering the scale, but the hard maple stood up to the challenge like a champ.
Pretty simple, really....
From the original crown, I created a strong square "tab".... Then carved a perfect matching slot on the back side of the new crown. Result was a bond that is actually stronger than the original.
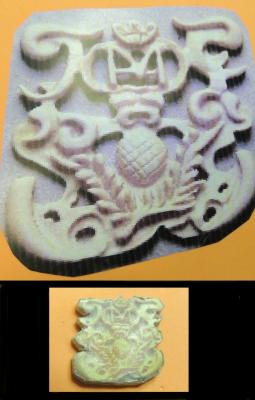
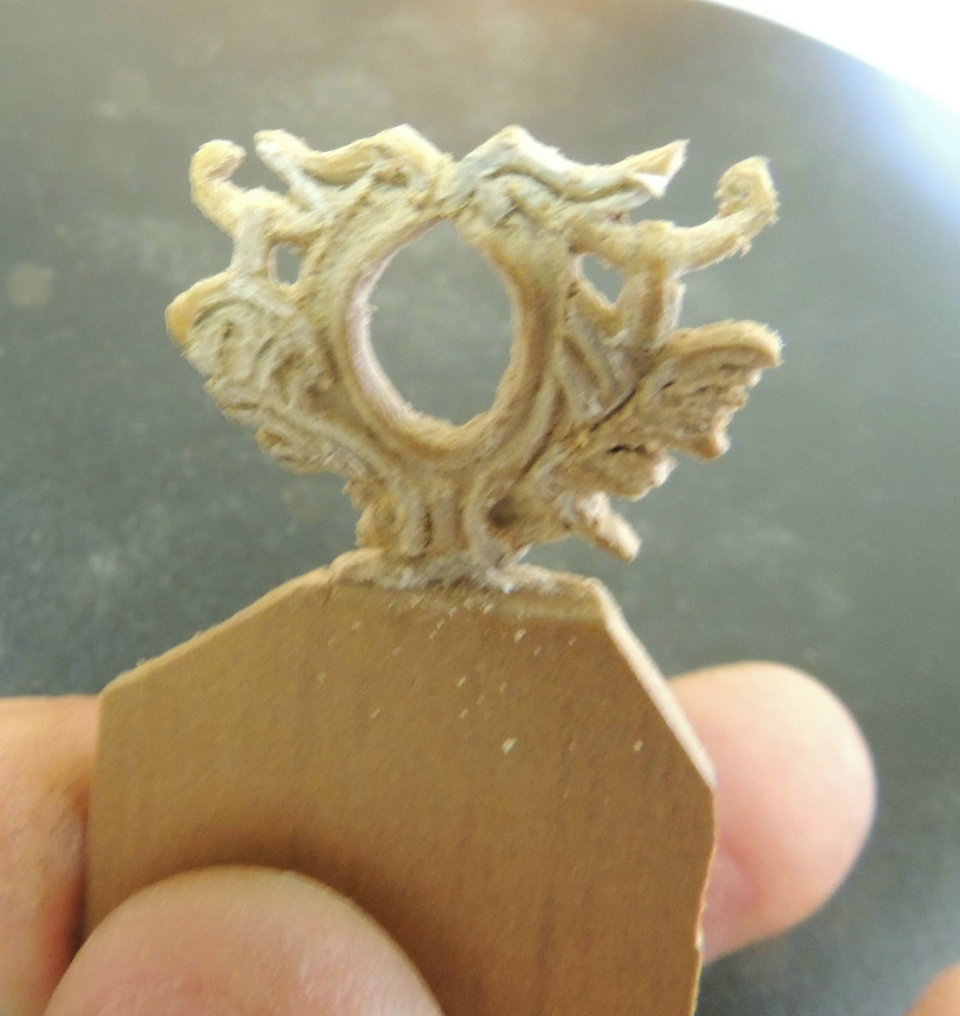
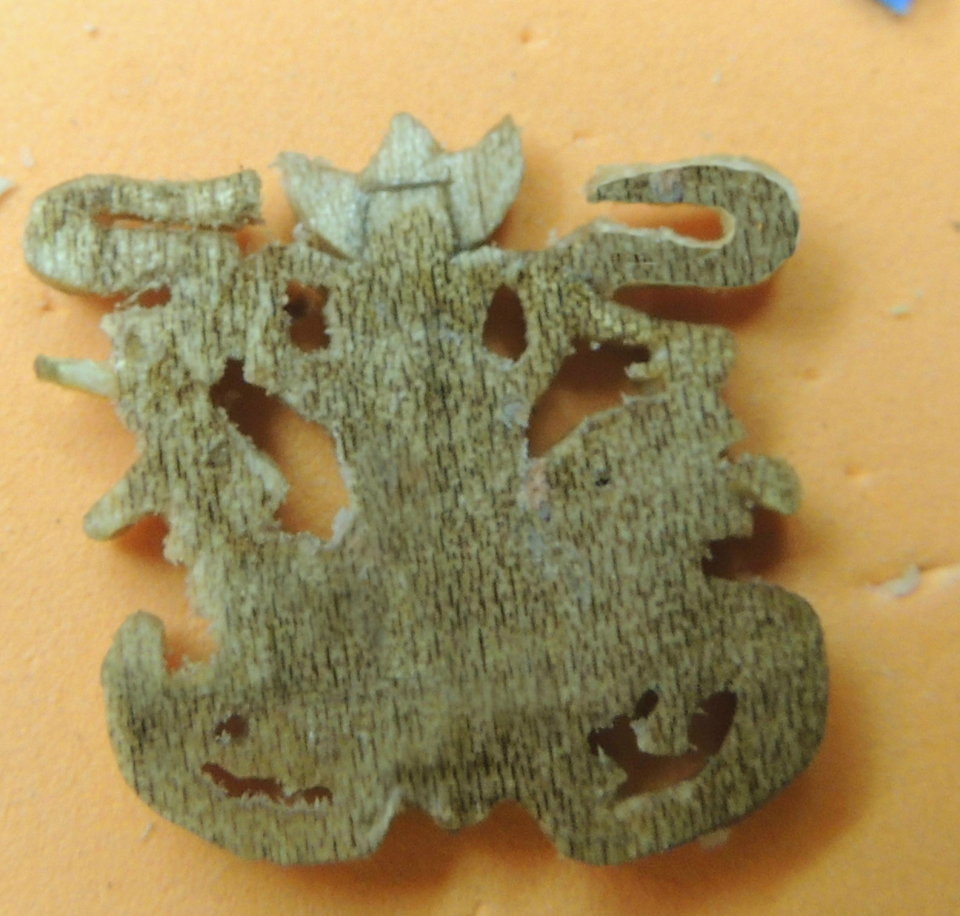
Here's the back side of the piece.
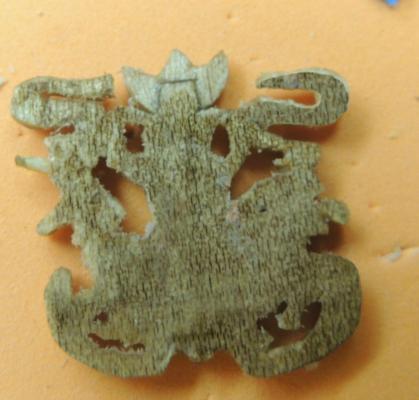
You'll get a kick out of this....
Poured the mold early this morning and rushed off to play golf with some old friends. Came home, took a little nap, and then came to the ship yard anxious to pull the mold and make the duplicate badge.
Would you believe, I found that the carving had risen to the top of my rubber mold form.
(tiny bubbles will occur when stirring the two part compound)
So I have a pretty good impression of the back side of the carving....looks like the photo you see here.
YAHAHAHA!
- GLakie, JerryGreening, CaptainSteve and 6 others
-
9
-
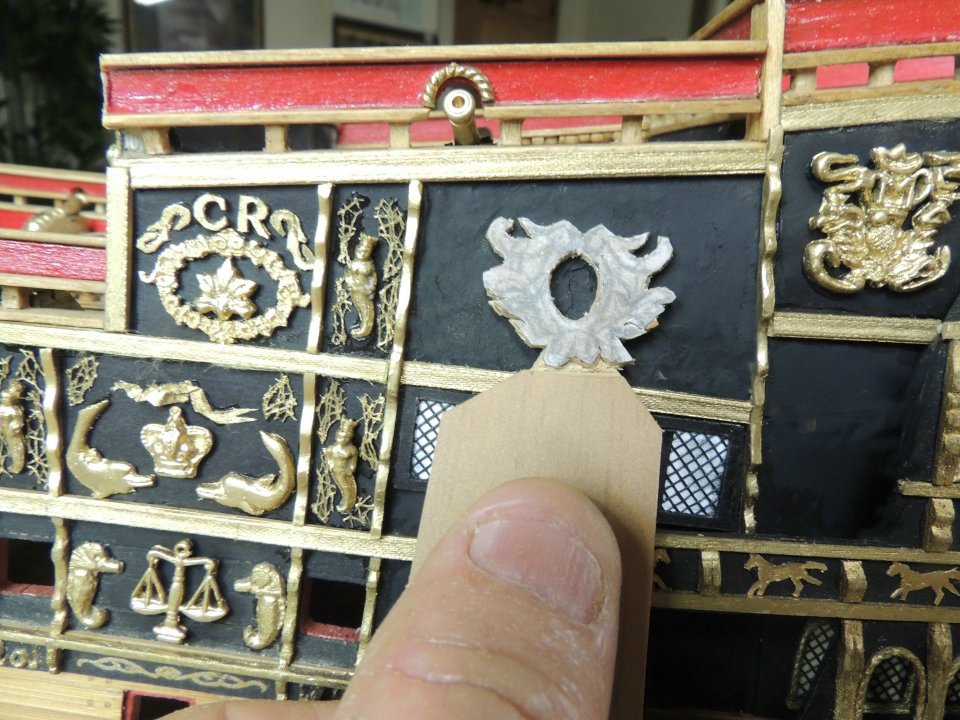
Clean up went pretty well....
I made several little tweeks - most noticeably the little crown (an obvious mess) was completely replaced by the one seen here.
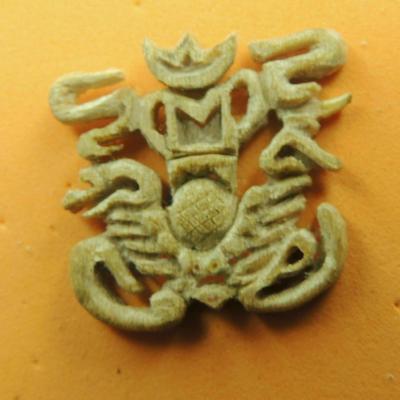
I'm thinking I should be able to get a pretty good mold from this one.
- mtaylor, UpstateNY, JerryGreening and 8 others
-
11
-
Rough shaping complete....
Quite a bit of clean-up, and edge rounding to do yet before I use this carving to pour a new mold.
Not identitical, by a long stretch, but I am far from being a Bill Short.
- GLakie, mtaylor, avsjerome2003 and 11 others
-
14
-
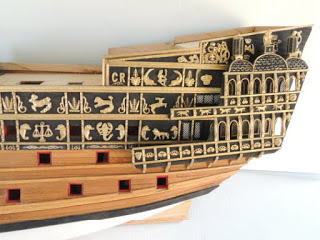
All the re-working is coming along pretty well so far. Looks like I am ripping far more off both sides than I planned, but like the direction it's going in.... Still pretty much a train wreck, not ready for show at this point.
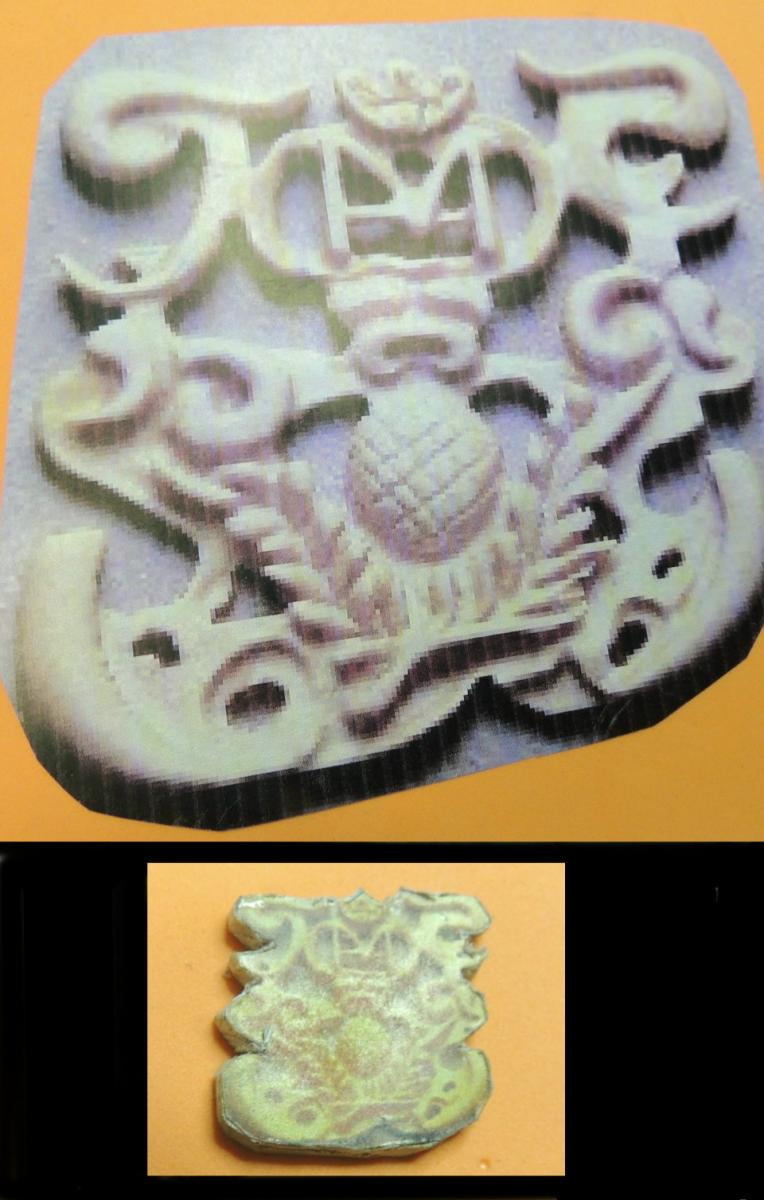
Need a break from all that, so I began a new carving this evening.
I really like and admire Bill Short's carvings, so I'm going to take a shot at one of my favorite carvings from his SOS (still under construction)....
Note: The top photo is taken from Bill Short's build log. The bottom photo is just the beginning of my attempt to replicate it.
Decided to go back to hard maple for this one because of the fine detail required.
- UpstateNY, BLACK VIKING, Piet and 12 others
-
15
-
Greg.... Believe it or not, I find myself cleaning as I go now.
Has it become real fetish?
I really don't need a "fetish" at my age!
- Omega1234, CaptainSteve, Canute and 4 others
-
7
-
Daniel.... Mark is exactly correct. My dentist is also a golf and poker pal.... Opened up a drawer full of used burrs and allowed my to go crazy.
As for the Dremel.... I always do my close detail carvings with my cable drive attached to a Dremel with good speed control. Much finer finger control. Very light touch!
DaveB.... My dentist doesn't love enough to give me an "engine", but the Dremel is plenty fast.... Actually, I seldom crank the speed beyond 25%.... Too fast is not so good.
Actually, most of my shaping is done with a super fine tipped scalpel blade....very careful....a slip will take you to the bone.
- CaptainSteve, GLakie, Canute and 5 others
-
8
-
-
-
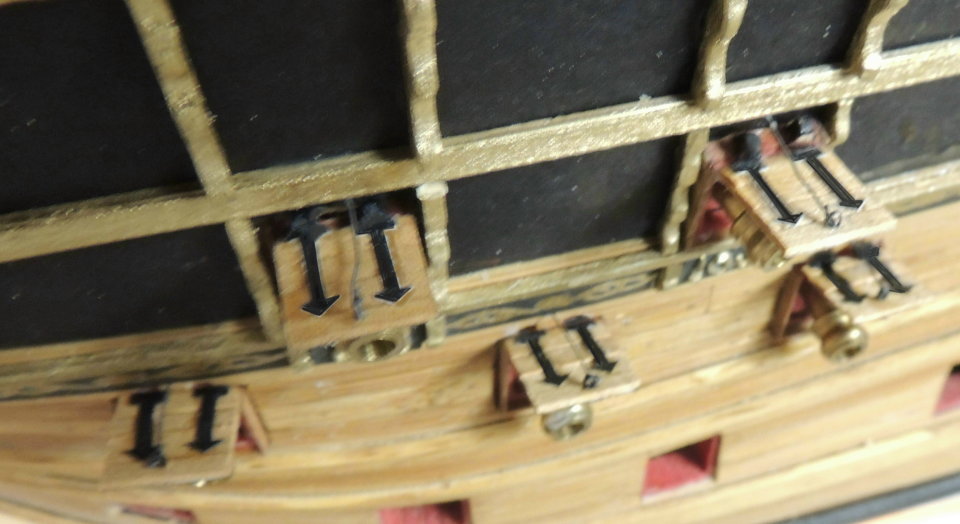
Guess I'll go with these gun port frames and lids....
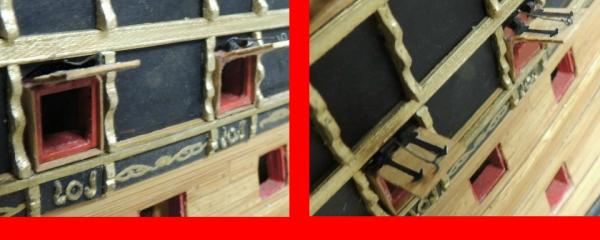

Open lids.... 5 down - 30 to go.....

- JesseLee, usedtosail, albert and 11 others
-
14
-
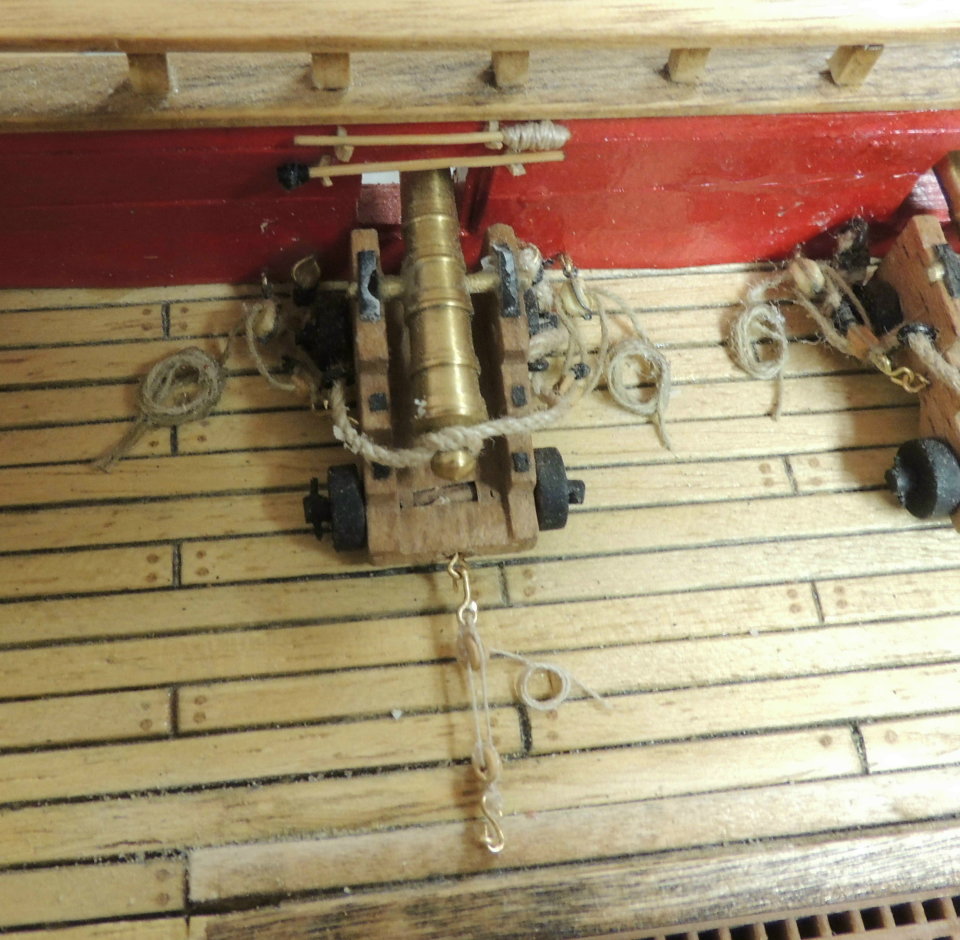
Playing around with rigging the first 32 pounder on the main deck this morning. Planned to add brass monkeys and cannon balls, but did some research and came across this little tidbit....
"Warships didn't store cannonballs (or "round shot") on deck around the clock, day after day, on the slight chance that they might go into battle. Space was a precious commodity on sailing ships, and decks were kept as clear as possible in order to allow room for hundreds of men to perform all the tasks necessary for ordinary ship's functions. (Stacking round shot on deck would also create the danger of their breaking free and rolling around loose on deck whenever the ship encountered rough seas.) Cannonballs were stored elsewhere and only brought out when the decks had been cleared for action."

This doesn't bother me a bit to know I now have a perfect excuse for not adding these tiny fixtures to each gun position.

-
-
Thanks for all the HBD wishes mates. For some reason, I think I appreciated this one a little more than the usual.
As for setbacks.... No big deal. That's what we modelers do...right?
- mtaylor, GLakie, CaptainSteve and 3 others
-
6
-
ANOTHER LESSON LEARNED....
Poured the first castings of the gun port frames this morning.
The frames came out fine....BUT....Here's a new little tip regarding casting of these type of parts....
Mistake #1....I placed the frames much too close to each other when I created the rubber mold. When removing the casting from the mold, the thin walls between the different frames were not strong enough and the mold tear-out was severe.... rendering the re-use of that mold impossible.
Mistake #2....Considering the amount of time pouring and removing and cleaning and scraping each part, I'm not sure there's that much benefit in this particular case. I may choose to simply cut and assemble each frame individually.
- Omega1234, CaptainSteve, Piet and 4 others
-
7
-


Sovereign of The Seas by SawdustDave - FINISHED
in - Build logs for subjects built 1501 - 1750
Posted
Back to play dough.....Sculpy.
Spent the morning playing around with a couple of modeling clay pieces.
The main advantage I'm looking for is the ability to get a little smoother (rounded) edges.
I'll bake these rough forms in the oven for about 5 minutes (250 degrees), and remove them before they completely cure.... work on some detail refinements.... then back to the oven for another 10 minutes at 350 degrees.
A little more sanding and clean-up will still be required before painting.