


SawdustDave
-
Posts
1,770 -
Joined
-
Last visited
Content Type
Profiles
Forums
Gallery
Events
Posts posted by SawdustDave
-
-
Beak-head framing....
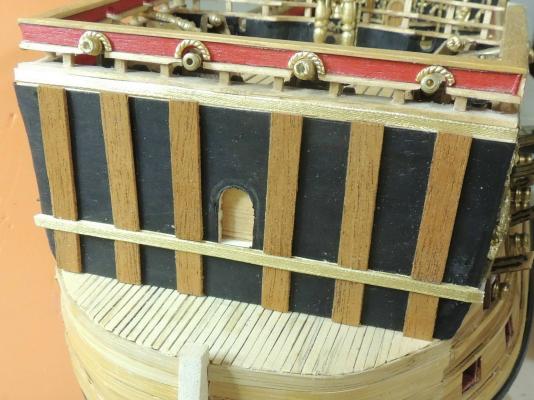
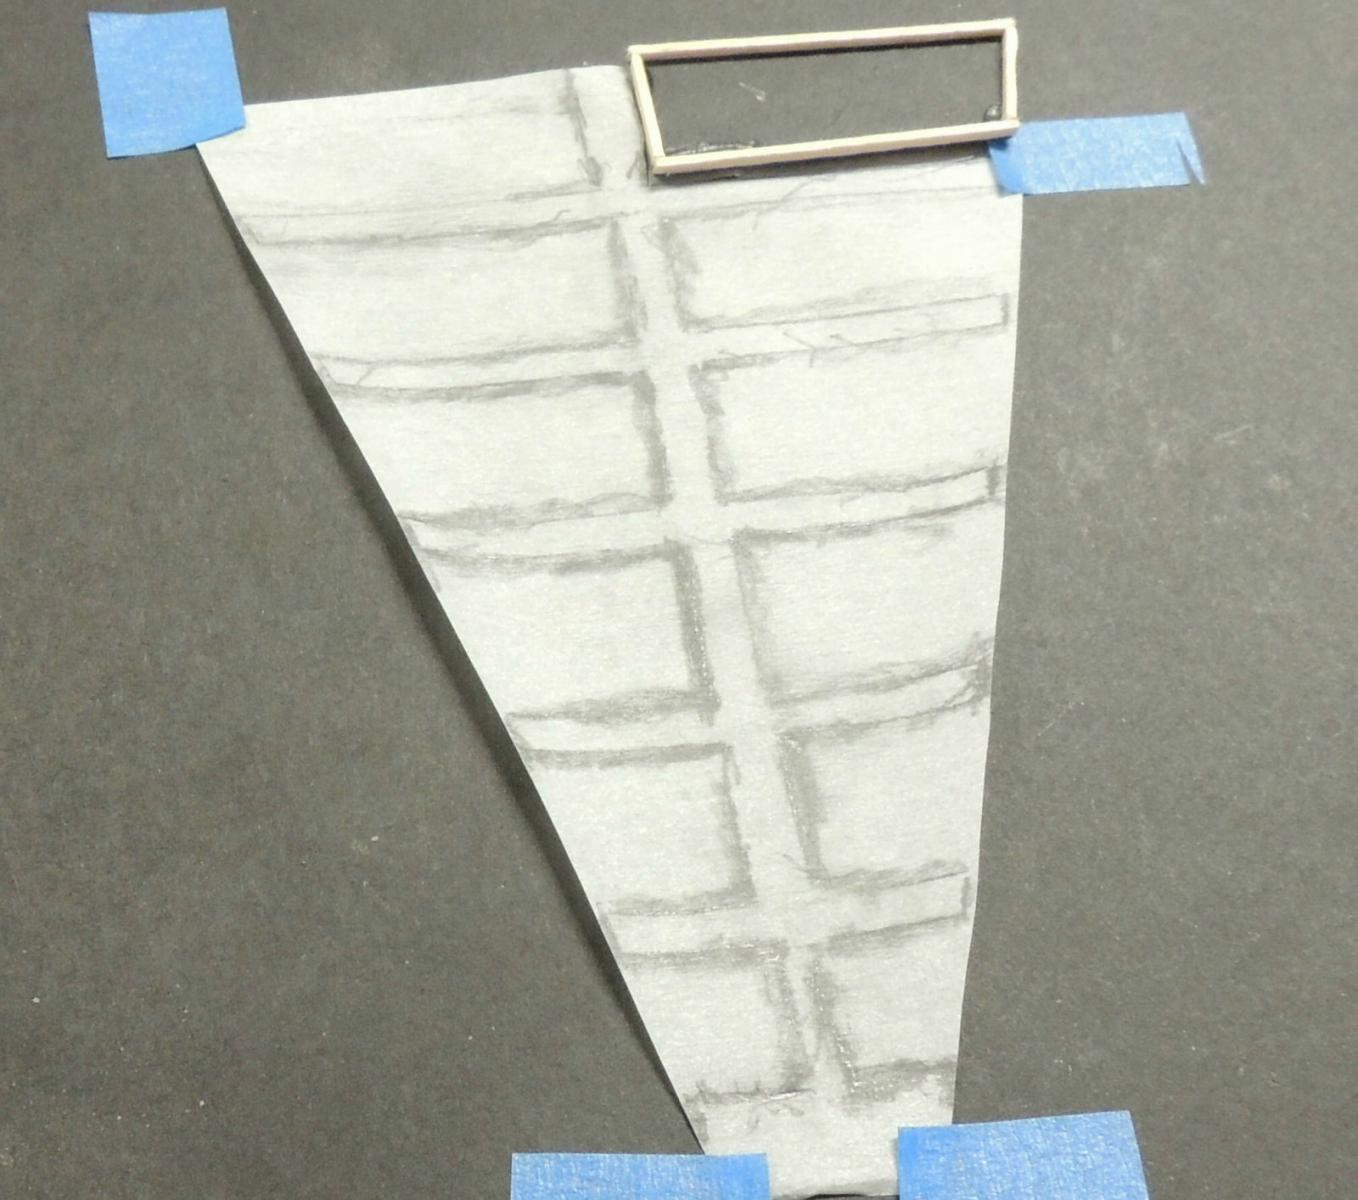
After clean up and trimming of the bulkhead, I began building the 14 catwalk panels. First, using tracing paper to create a precise fit for each of the panels, as they must fit perfectly between each frame member.

Then planking each frame with a uniform gap (used the thickness of my steel ruler to maintain consistent gaps).... all panels were glued in place.
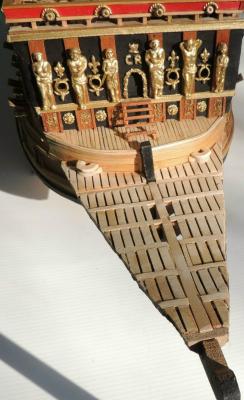
Here's a little closer look at the finished bulkhead with outside morning light.... note the addition of the two "heads".
Some clean up of glue stains still to be done prior to applying golden oak stain.
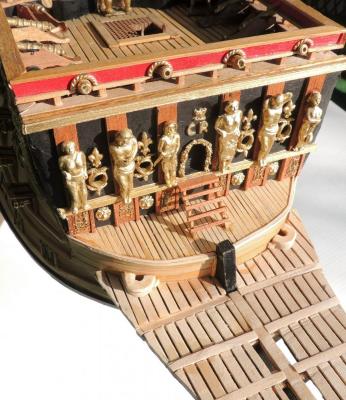
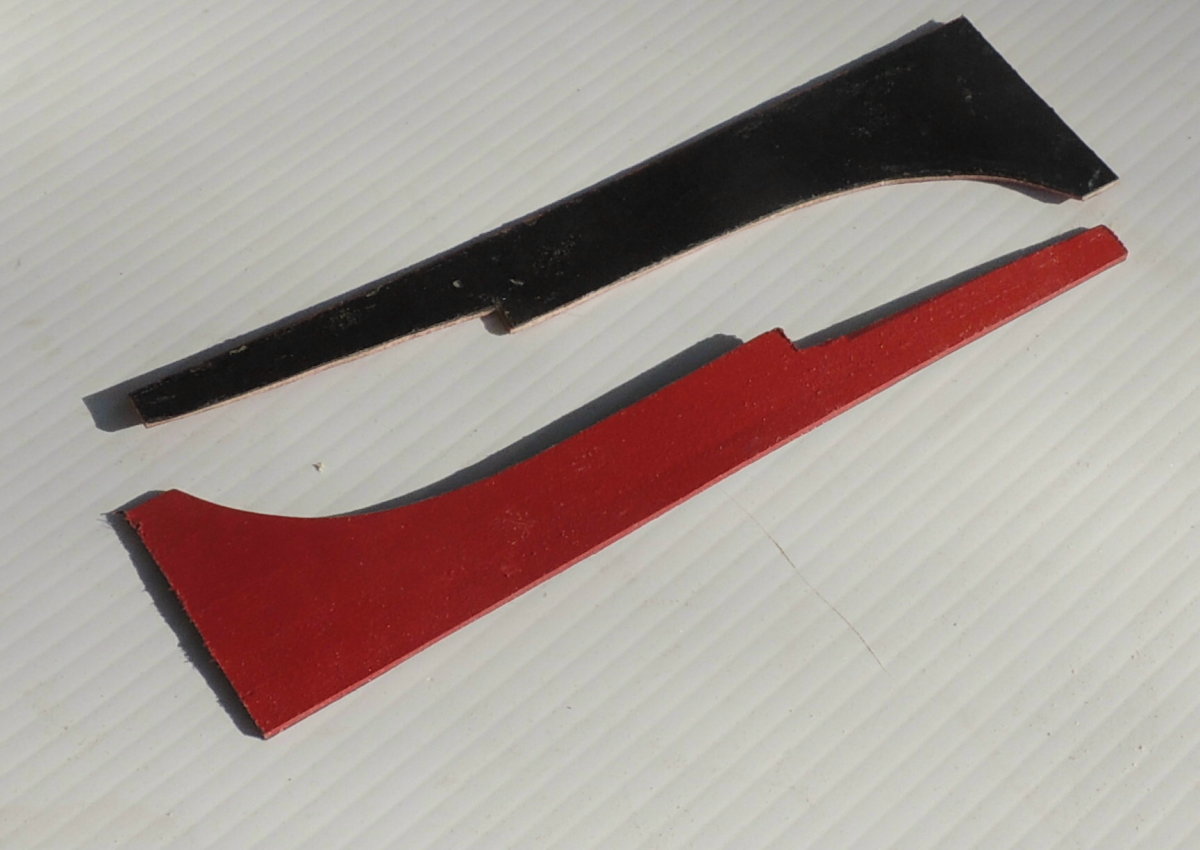
The cowlings (bulwarks) have been cut out and, seen here, painted red on the inboard side....
- marktiedens, edmay, Jack12477 and 16 others
-
 19
19
-
Now THAT'S some great looking pin rails my friend!
Wooo Hoooo!
Dave
- CaptainSteve, Omega1234, Piet and 3 others
-
6
-
How many modelers would do that amount of incredible detail to the inboard structure of a boat that will be displayed upside down?

Hat's off to ya' Ed
- dgbot, CaptainSteve, GLakie and 4 others
-
7
-
Thanking Ian for that tip as well.
- CaptainSteve, mtaylor, GLakie and 3 others
-
6
-
Always nice to wake up and begin the morning with such encouraging remarks from MSW friends.... so undeserving....
Thanks Mark and Patrick, and, from down under....Greg with the peg leg....

You guys made my morning much brighter.
Cheers
Dave
- CaptainSteve, Canute, Omega1234 and 6 others
-
9
-
Off to a great looking start Nigel. You're going to really enjoy this incredible set of plans and the beautiful job Chuck P did with the step by step illustrated instructions.
Pulling up a chair to watch another great Confederacy come together by a very fine modeler.
Cheers
Dave
-
Thanks Patrick and Nigel. I must confess, I was more than a little satisfied with the whole bulkhead module, which I completed off ship.
I guess it was the most dramatic change in overall appearance of the model vs. anything I have added in many weeks.
Funny thing 'bout those particular figures.... Except for one piece which I used a drawing from the plan sheets, I wasn't real sure, as I began each piece, exactly what I was going for, until they began taking shape on the glass.
That's the fun part about working with Sculpy. You can kinda' let your imagination go to work without fear of messing up....add a little here and remove a little there.
Sorry if I'm beginning to sound like a Sculpy salesman here?
Cheers
Dave
-
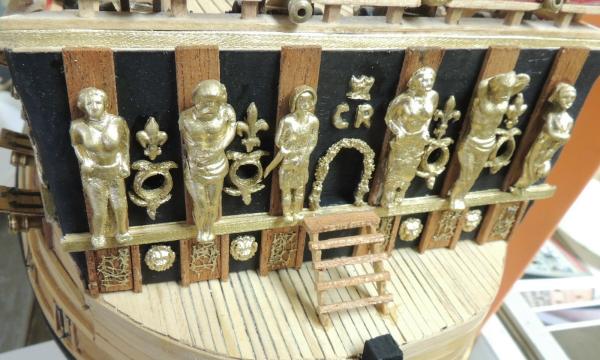
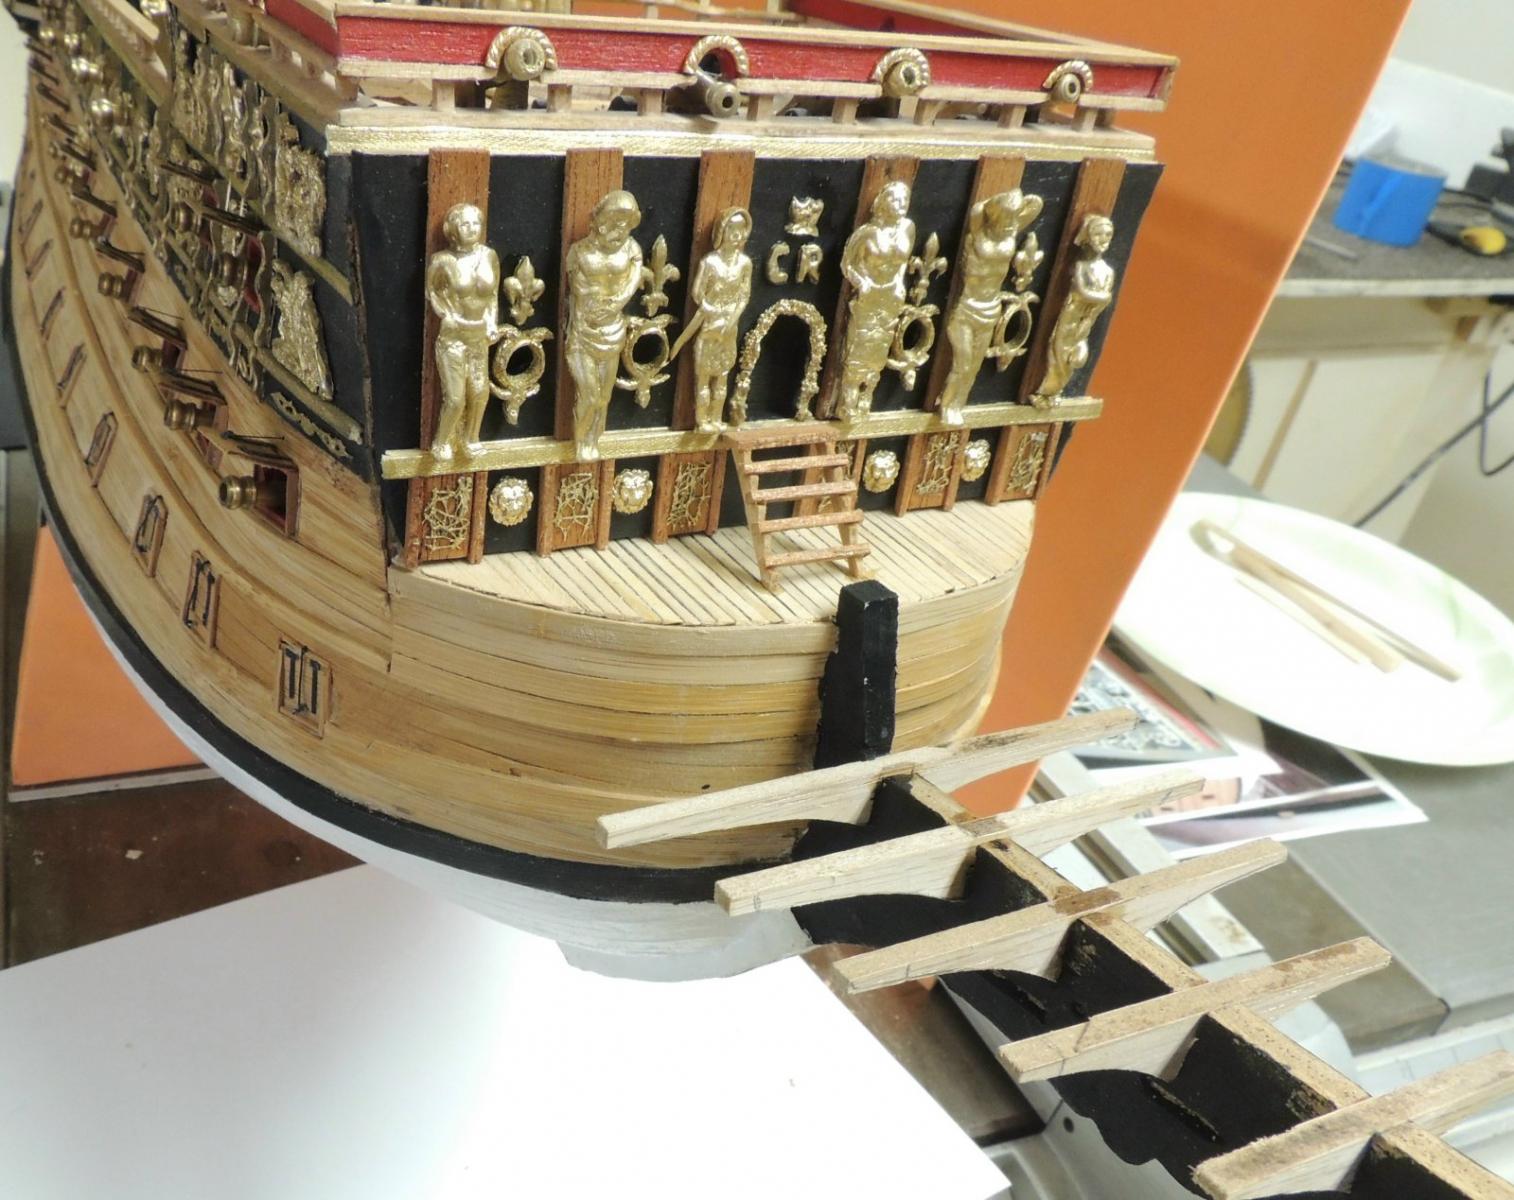
The beak head bulkhead carvings now in place....
Ready to proceed with the creation of the grating panels before I attempt to develop the bulwarks on each side..... and more carvings.
Note, I still need to clean up and trim out the bold molding immediately above the carvings.
-
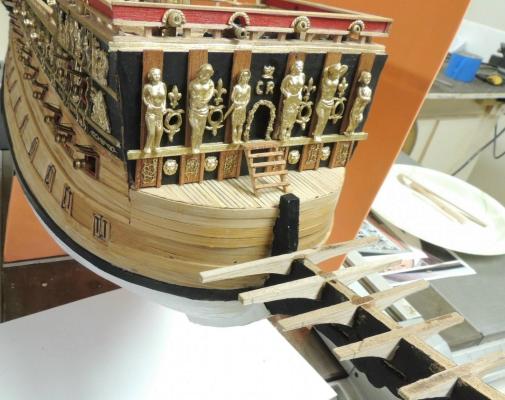
Update.... Building the beak.....
Painted black and notched for the seven frame members shaped out of hard maple, the construction of the beak is a little tricky.
Seen here, being very careful in the spacing between the frame members in terms of maintaining perfectly square and level alignments.
The square block is clamped in place for each frame and carefully tweeked and miked until perfect.
- CaptainSteve, Piet, WackoWolf and 4 others
-
7
-
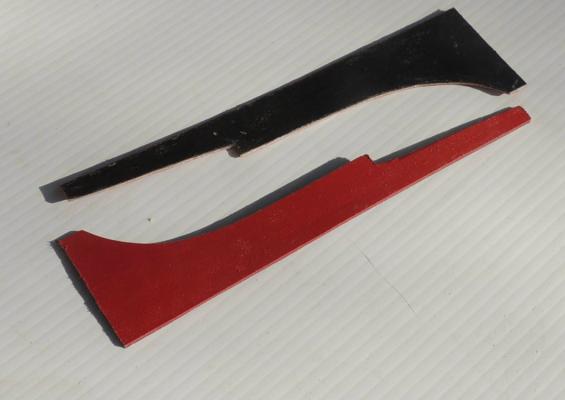
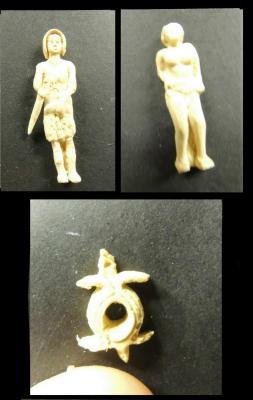
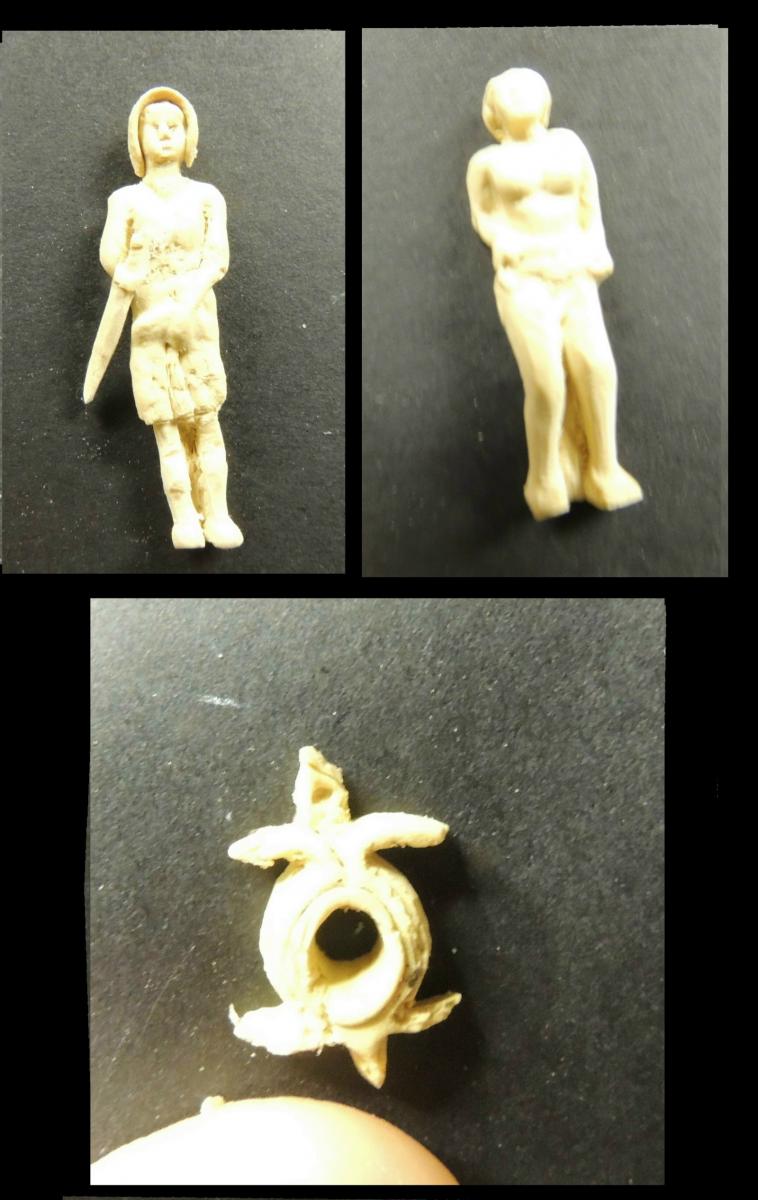
Cleaning up the carvings after baking.....
Here's another important quality about working with Sculpy, I should point out to those who might be considering giving it a go....
The ability to carve really fine details into your figure AFTER BAKING.
Here are two of the figures I baked yesterday after clean-up with a scalpel blade....
Note the three dimensional effect of shaping the sides and back side of the pieces.
Surprisingly, I was even able to put an edge and a point on the sward with no problem.
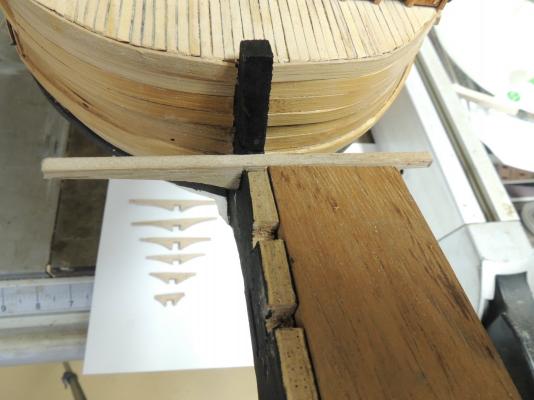
The bottom piece, I created this morning. This will be used to decorate the four chaser cannon ports located between the columns on each side of the passage door.
I'll have to create a mold of that piece in order to duplicate it precisely with plastic castings.
-
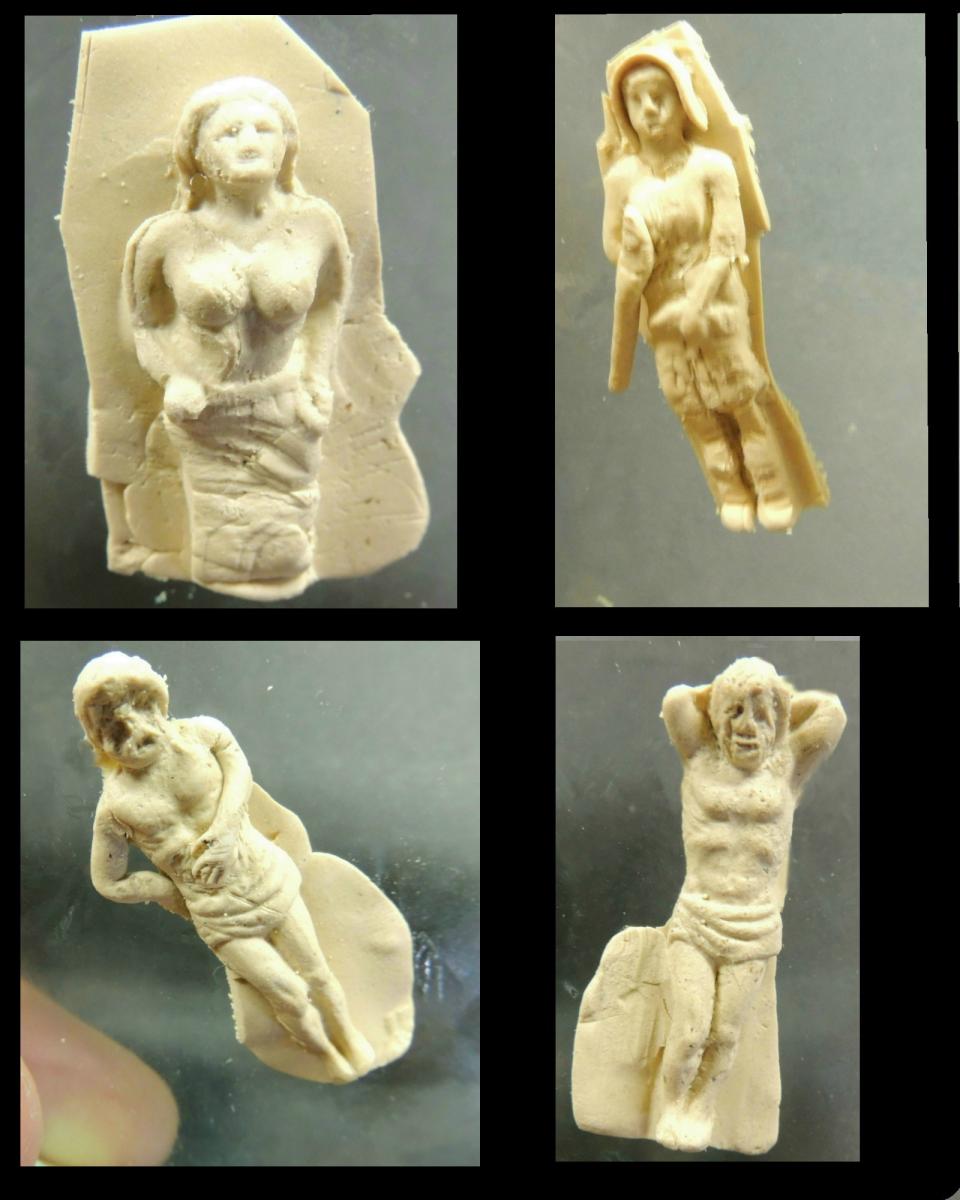
UPDATE....New carvings
The bulkhead layout and deck planking went without great complication.
There will be six new carvings mounted on the wooden columns seen above the deck.
Here are the first four roughly shaped Sculpy figures I created over the last two days....

-
So BBQ is BAMBOO!
I agree, Bamboo is wonderful Nenad.
Most of my SOS (current build) hull is bamboo planks, and both of my Mayflower models have bamboo hulls.
I love the grain, and the beauty of the finish.
It is so strong, yet can be bent and shaped without fear of snapping.
Modelers who have not discovered the unique qualities of bamboo should definitely give it a go.
My favorite source, by the way, is a bamboo serving tray that can be purchased at most Walmart stores (seen here).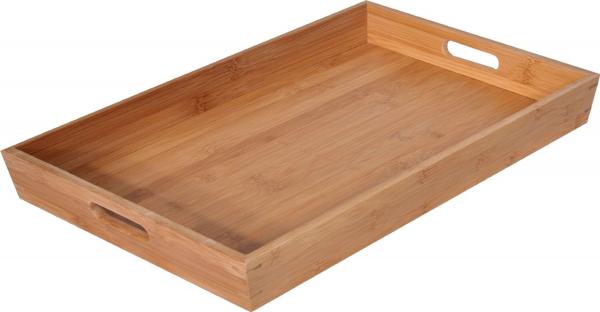
Cheers
Dave -
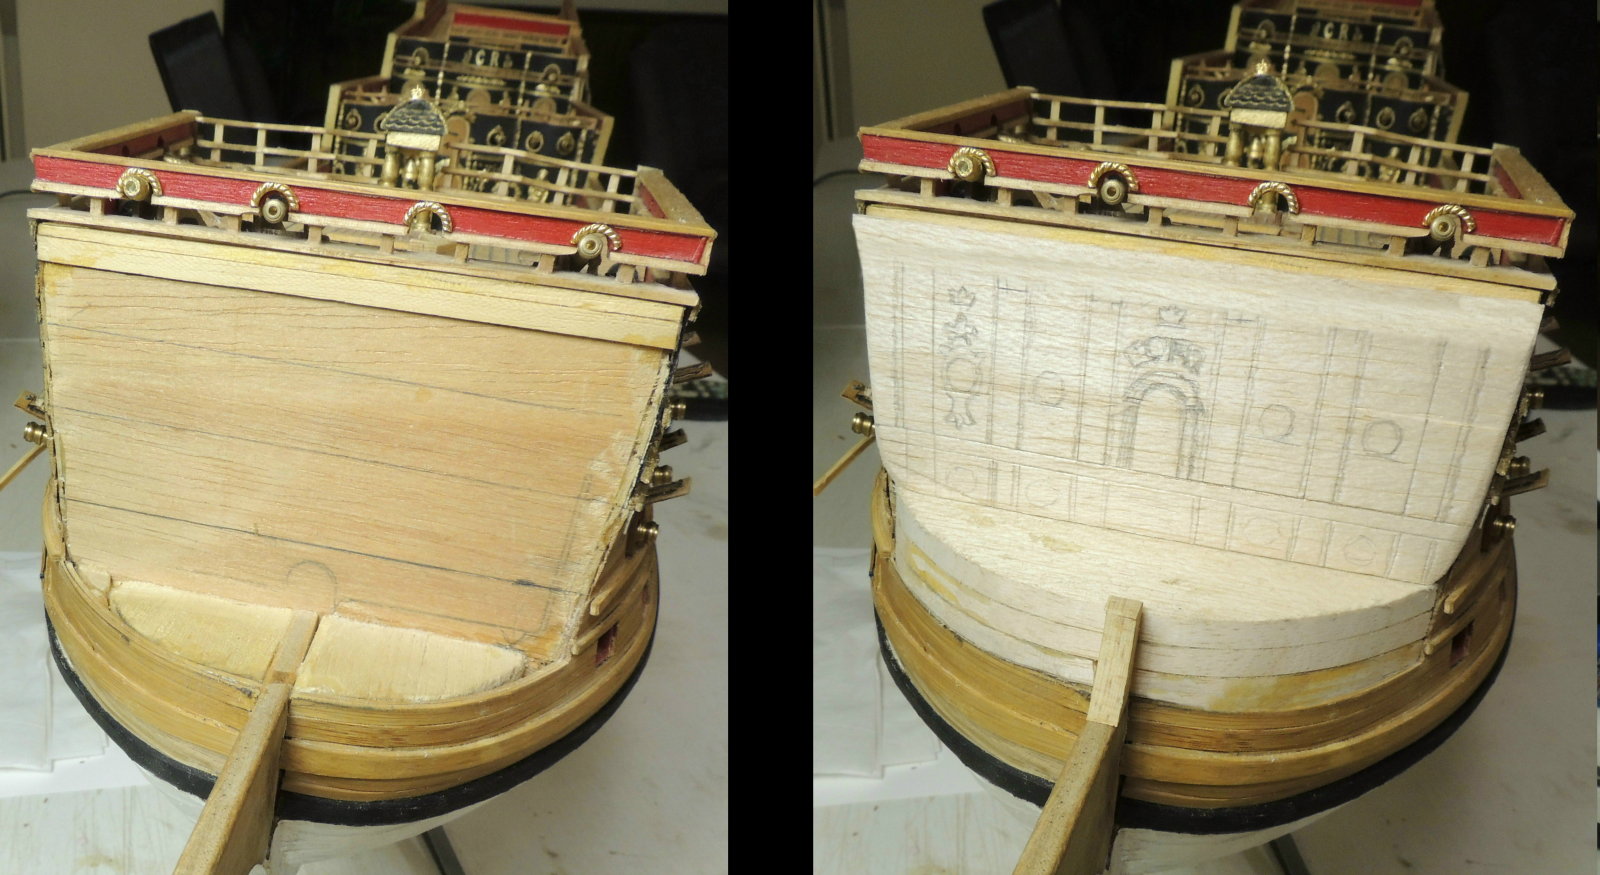
More reconstruction....
Taking a break from cannon ports and lids, I began taking a serious look at the beak, again, using the beautiful build log provided by Doris as my primary resource. No surprise, the architecture had to be modified.
The good news is that this may be the easiest modification issue I've run into with this build.
Before and after shots.... the beak deck needed to be raised about 3/4" and the bulkhead layout was a simple matter of shaping a thin sheet of balsa. All will be planked over of course.
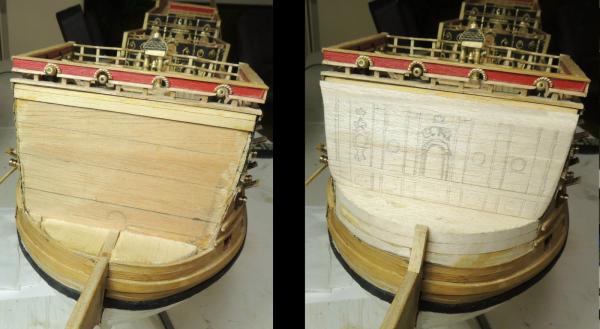
I'm thinking I will probably build the bulkhead, with all the ornamentation, offship.
- CaptainSteve, WackoWolf, GLakie and 10 others
-
13
-
-
-
I appreciate the visits and valued input guys. Hope I can begin to pick up the pace a little bit while the chilly weather keeps me off the links.
Gun ports will move along much easier now that the resolution to all the issues has been established.
Cheers
Dave
- Omega1234, CaptainSteve, GLakie and 6 others
-
9
-
Thanks for pointing that out Mark. Here's still another example of the type of issues I keep running in to at every turn with this build.Dave,
I'm in total agreement with you. Seems an awful lot of things in this hobby are "reconstructions". I think you're doing great.
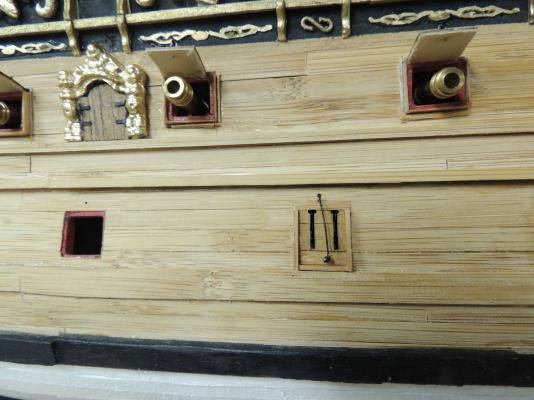
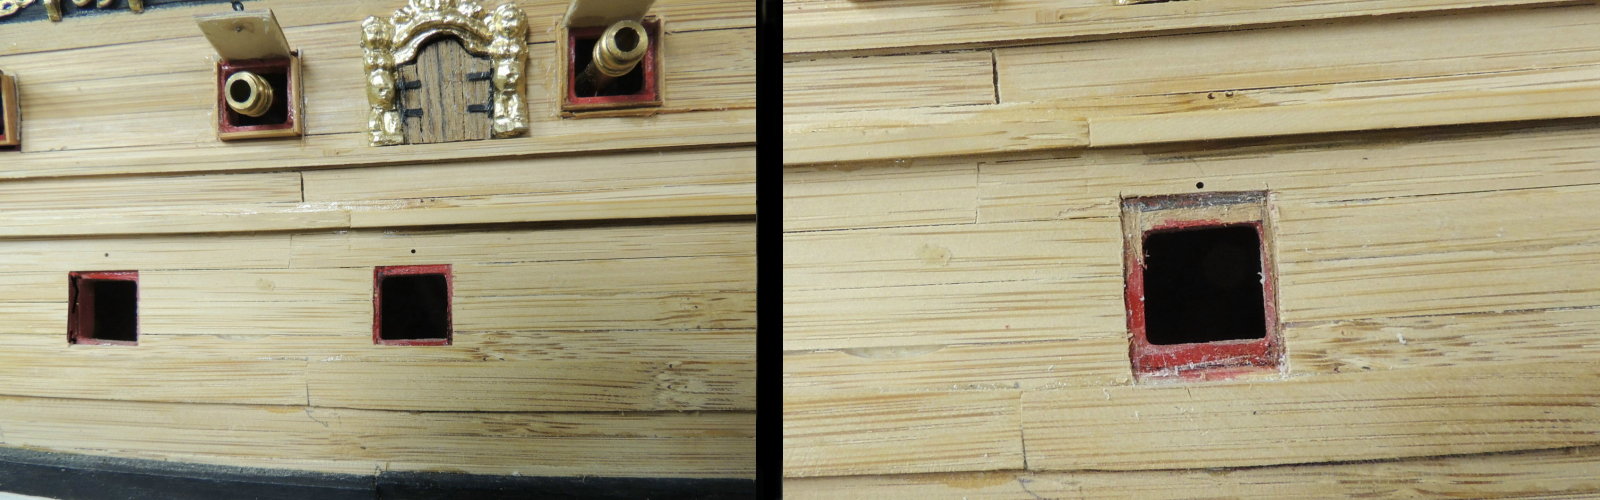
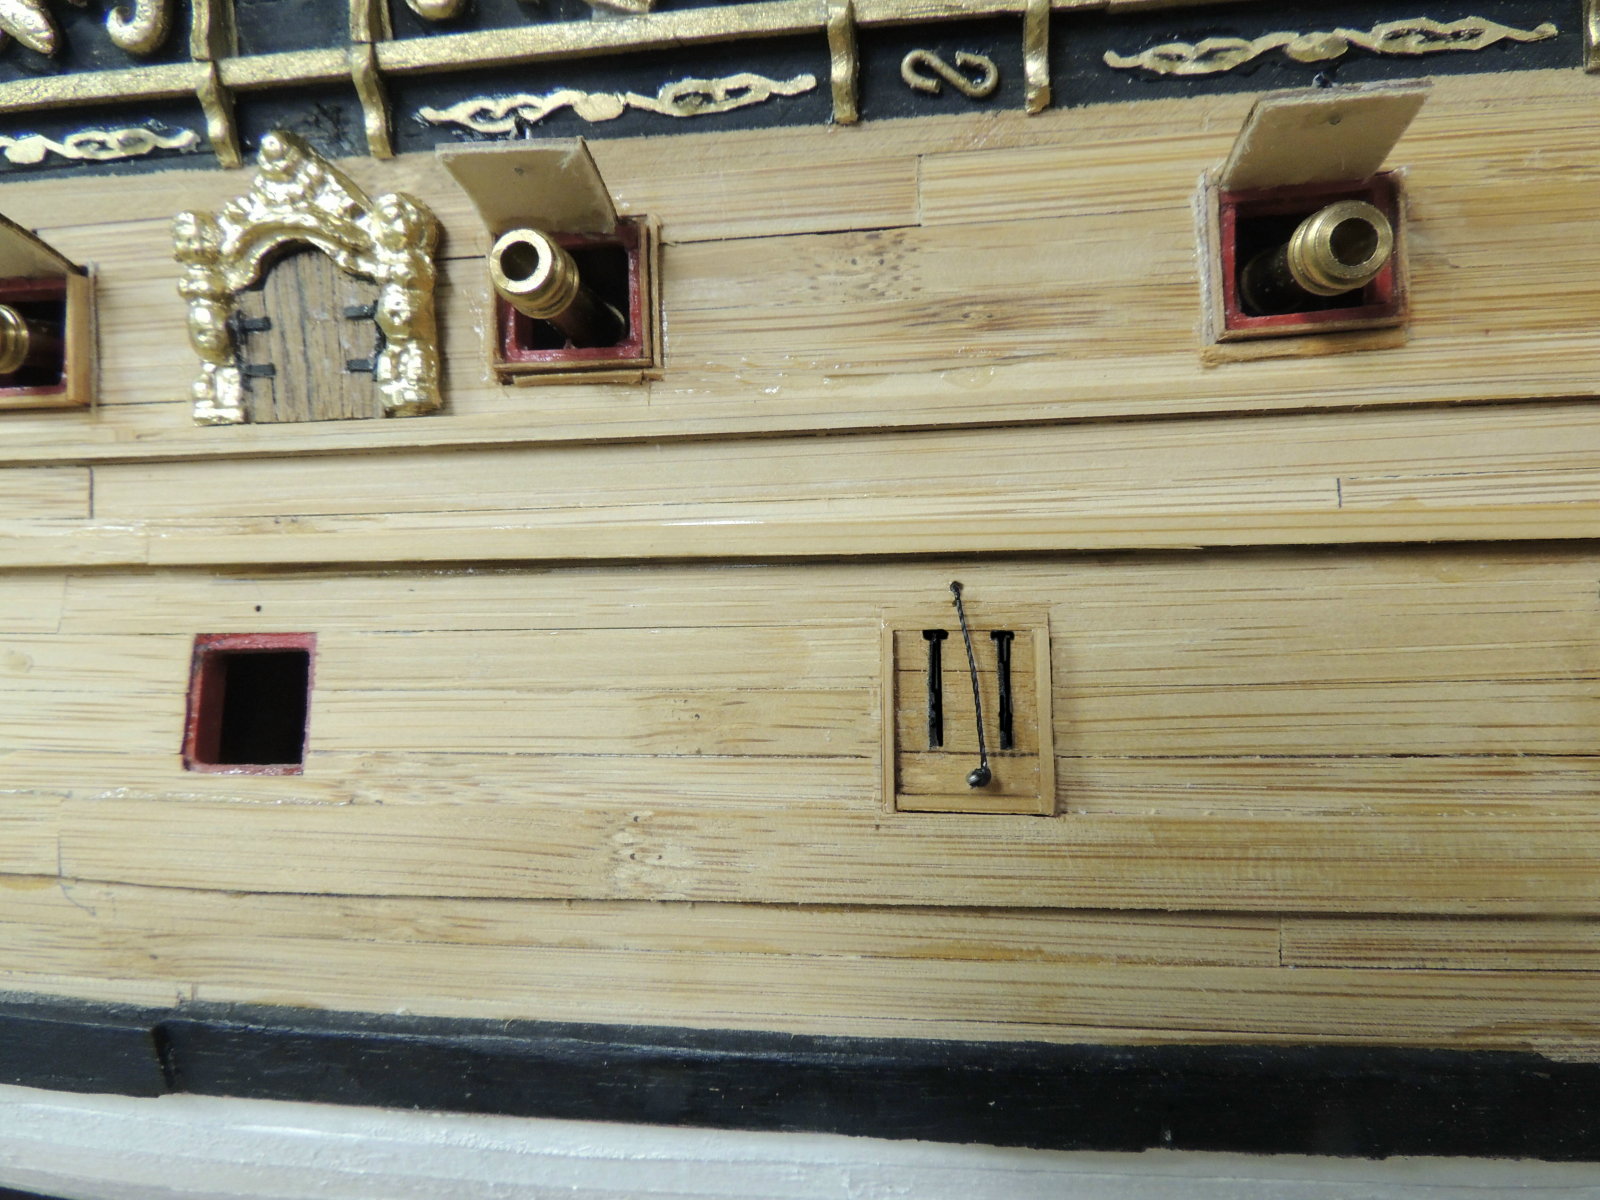
The gun port openings were all created according to the plan sheets. Although it may seem like a small issue, the dimensions of the openings were not correct.... and it became more noticeable once I began mounting the closed lids for the bottom row. Even though only slightly "underscale", the eye picked up on the flaw immediately after installing the second, third, and fourth lids.
After ripping off the first four lids, and researching the common dimensions for the gun port openings, I set about with my trusty scalpel to re-size the openings.
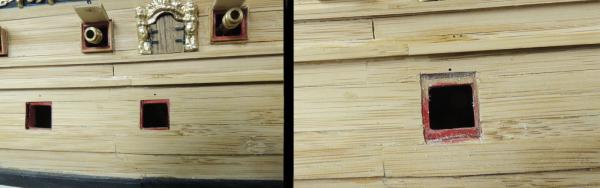
Next, I began looking at the new lids, mounted FLUSH with the hull planking and ran into another issue....the lack of definition.
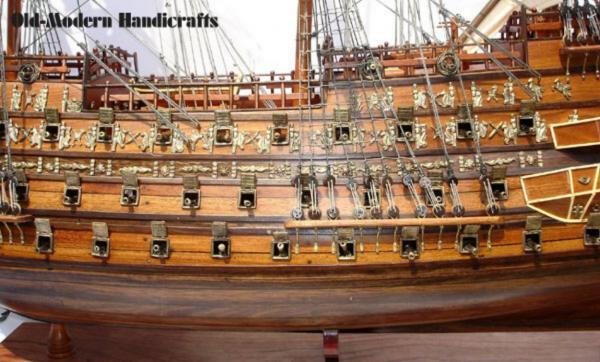
After mounting four lids flush with the hull planks, I went back to the internet and pulled a number of images of "ships of the fleet" kits, and found a number of models with the gun port frames standing proud from the hull planks.... and I tend to like the more defined look, especially for the closed lids.
I ripped the second four lids off and set about building frames around the lids in order to get more definition....
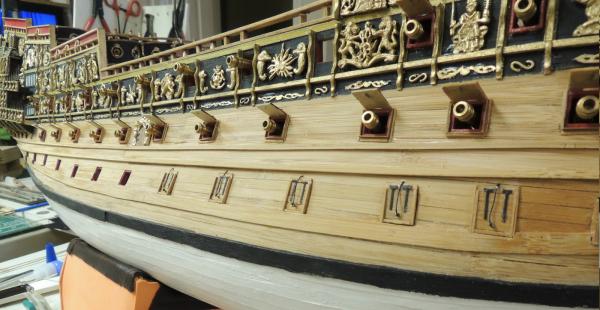
So, after almost a full week of construction and reconstruction, I've managed to install all of the open lids for the middle deck and just over half of the gun port lids for the bottom deck.
-
My respect for a few "Masters" of the art of ship modeling is so high, I tend to read their teachings like the gospel of truth. This comment by my personal favorite Master of all, EdT, kinda put me in a personal quandary....
"We are modelers, not designers. Sometimes design is unavoidable due to lack of definition, but in the case of the single brass rail, I think it is reasonable given the evidence."
As much as I intended to take a pure modeler approach to building the SOS, I quickly discovered that the plan sheets were so flawed, I had to completely abandon them and seek other graphic resources. Then, finding, among every SOS BUILD I have studied..... They are all different in so many ways, I concluded that there really isn't a truly "correct" interpretation of this great ship. While Bill Short seems to have approached it most closely following the only painting in existence,, there are still many ways to approach much of the structural architecture.
So, rightly or wrongly, I do find myself, out of necessity, being a "designer" in this particular build.
Would much prefer having a complete set of historically accurate plans.
-
-
-
Thanks Dave
Just an idea from Doris. She makes her figures on the back paper of contact sheeting, and it works for her.
Havagooday mate
Greg
Doris is an incredible artist, as you know Greg. Her SOS just may be among the finest in the world....created in paper, by the way.
Have also used waxed paper.... but, now I must give away another personal secret....

The "glass" I use for sculpting is actually a 5" magnifying lens taken from an old shop light fixture.
The radius surface allows me to spin it around as needed, and the size allows me to hold it in my hand when I go in really close for extremely fine details.
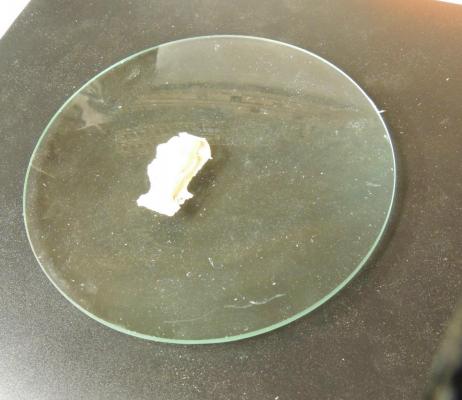
I also usually work over a solid black mat for the background in order to see the sharp contrast of the edges.
Then, there's the advantage, that the finished piece can be taken directly to the oven without risk of distortion.
Works great for me.
Many thanks again for your interest, and thoughtful comments my friend.
Dave
-
G'day Dave
I didn't explain my question in the correct manor. Before you place the dragons in the oven, did you remove it from the glass or waited till it dried a bit then placed them in the oven, or what did you do? I think trying to remove the dry, unovened piece it would brake up. On the other hand the ovened piece would stick to the glass and would brake up when removed. Hope tht you understand my question now.
Thanks for the temperature info on your previous post.
Greg
I think I understand your question more better now Greg....
This particular piece was so delicate, mainly because of the long skinny necks of both dragons, I chose to bake them on the glass without trying to move them.
Then, even though the clay was fully cured, I was afraid to try to remove them from the glass.... so I simply built a mold box around the clay piece while still on the glass. You're right....a piece this fragile cannot be moved from the glass without great risk, even after baking.
Sure enough, after removing the perfect silicone rubber mold, I very carefully attempted to removed the clay figure from the glass....THREE PIECES!
That help?
-
-
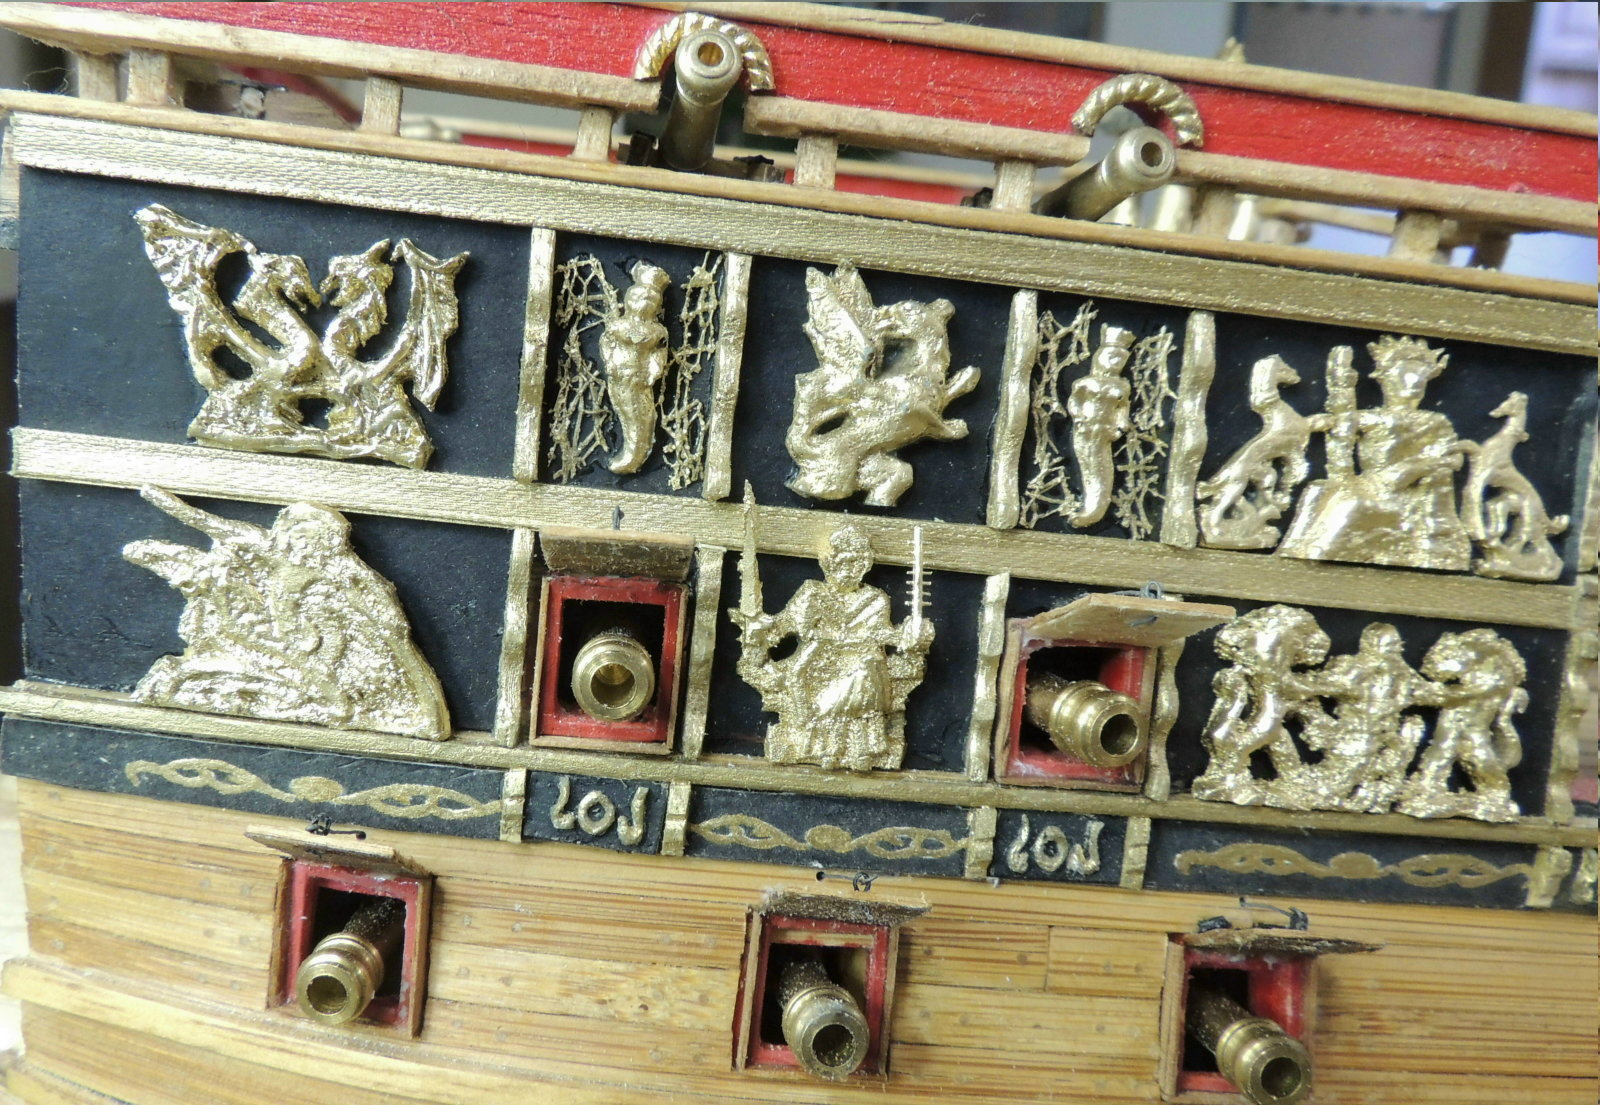
Every ship modeler knows and appreciates these little moments of celebration..... last plank of a hull or deck, last clove hitch finishing up ratlines, last cannon rigged of a major war ship.....
Here's the last carving to fill in all the broadside hull carvings of my SOS....


Sovereign of The Seas by SawdustDave - FINISHED
in - Build logs for subjects built 1501 - 1750
Posted
George, Piet, and Greg.... thanks for your visit as always.
Looks like I'll be fitting those tricky little bulwarks today so I can get on with some more sculpting and carving.
Real anxious to see her with a dressed up beak.