HOLIDAY DONATION DRIVE - SUPPORT MSW - DO YOUR PART TO KEEP THIS GREAT FORUM GOING! (Only 20 donations so far - C'mon guys!)
×


_SalD_
-
Posts
828 -
Joined
-
Last visited
Content Type
Profiles
Forums
Gallery
Events
Everything posted by _SalD_
-
 Ken, thank you for sharing your technique for doing the trailboard scroll and for the template. I'm not building this ship nor am I planning to but I liked your method so I thought I would give it a try just to practice. I have one question, how is the wooden finger held in place? Thanks again.
 -
Thanks Elijah, didn't mean to scare you and don't worry I'll build another ship. I'll also post pictures of the case once I build it.
- 659 replies
-
- 4
-

-
- syren
- model shipways
- (and 1 more)
-
Steve, thanks so very much for the kind words I really appreciate them.
- 659 replies
-
- 3
-
-
- syren
- model shipways
- (and 1 more)
-
Nice work Richard, hard to tell from the picture but make sure you have enough room behind the belaying pin to get the rigging line in between the pin and the bulwarks when you tie off the line. I had a couple of questions: Did anyone finish these differently? I let them soak for a few minutes in Minwax wipe on ploy, clear satin and then made sure the holes were not blocked after they dried. Which supplied threads did you use to strop... did you serve or just tie it off? the 0.012" thread and seized it around the traveler but didn't serve the line. What type of glue did you use to attach the eye bolts, etc to the bulwark? I used medium ca with a 5-10 second drying time to give me some time position it correctly. They have thicker ca which will give you 10 -20 seconds. I also placed all the eye bolts in the holes prior to gluing them to make sure they fit, then took one out added the glue and replaced it in the hole.
-
Thanks Thomas, your build of the Syren was a big inspiration for me, your work is magnificent. Thanks Richard Thanks Ryland it was nice meeting and talking with you at the conference too. Thanks Jack I'll definitely check the museum out. Thanks John and it will be a pleasure to work together on the ships, talk to you at the next meeting.
- 659 replies
-
- 5
-
-
- syren
- model shipways
- (and 1 more)
-
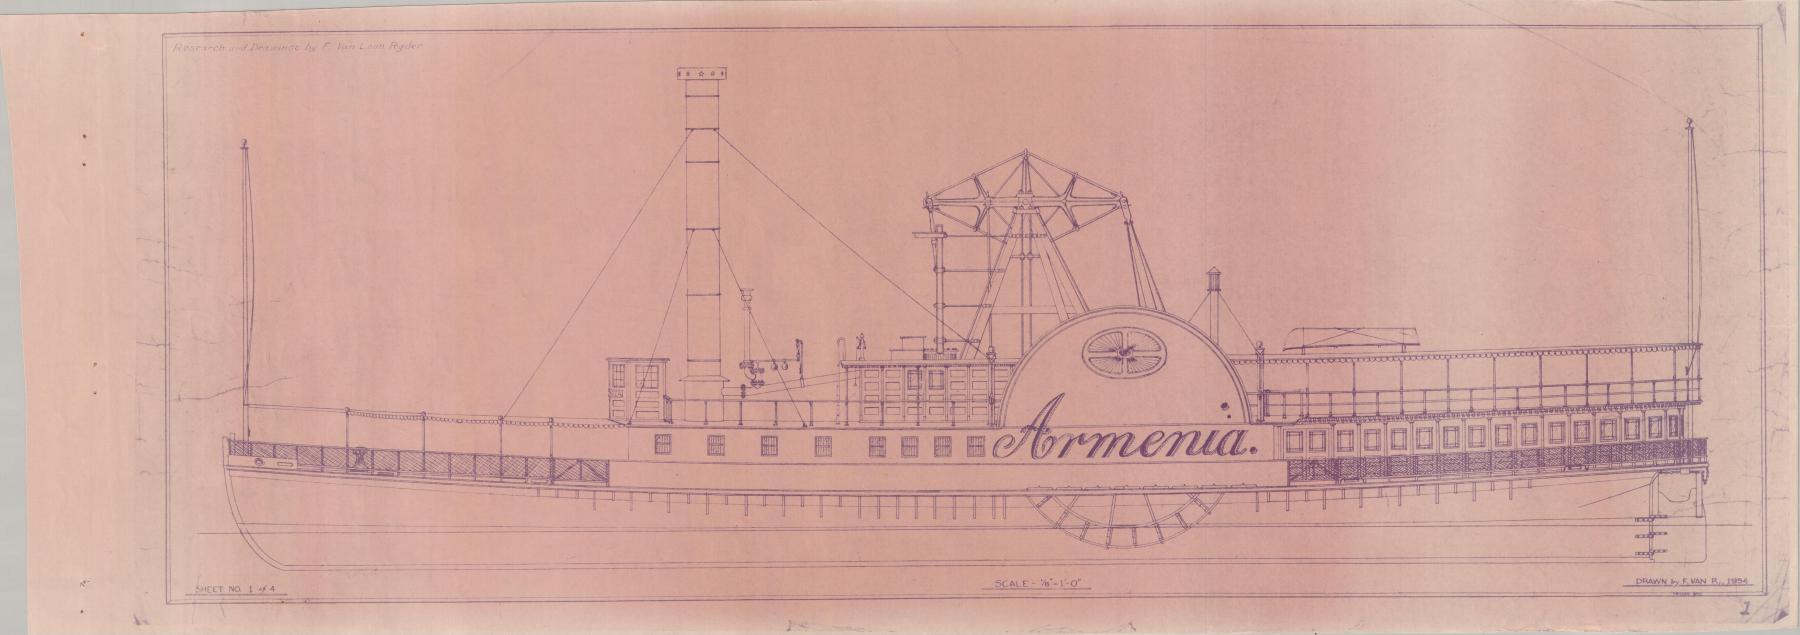
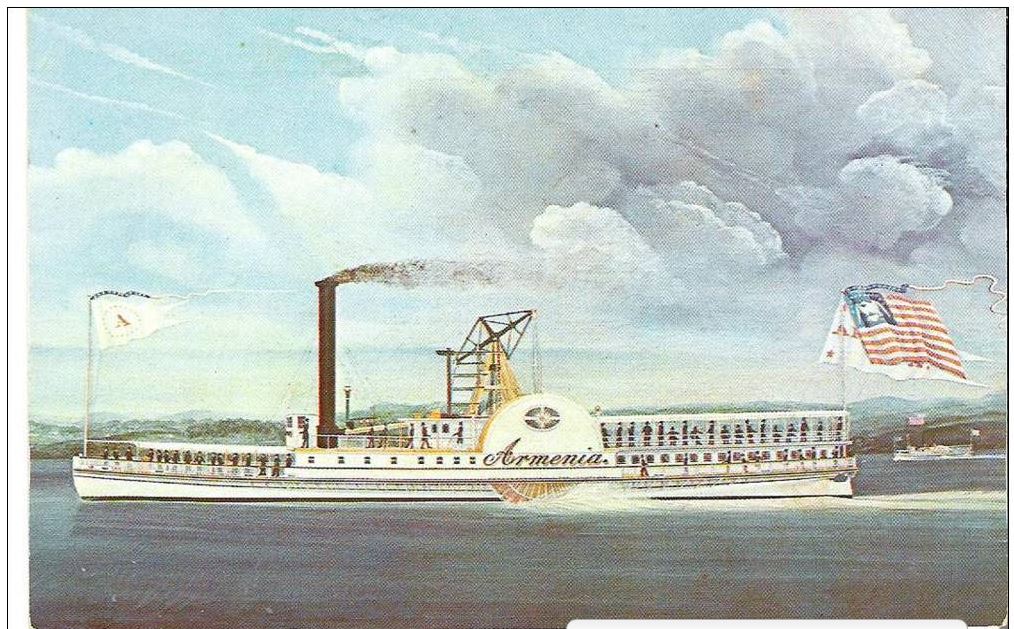
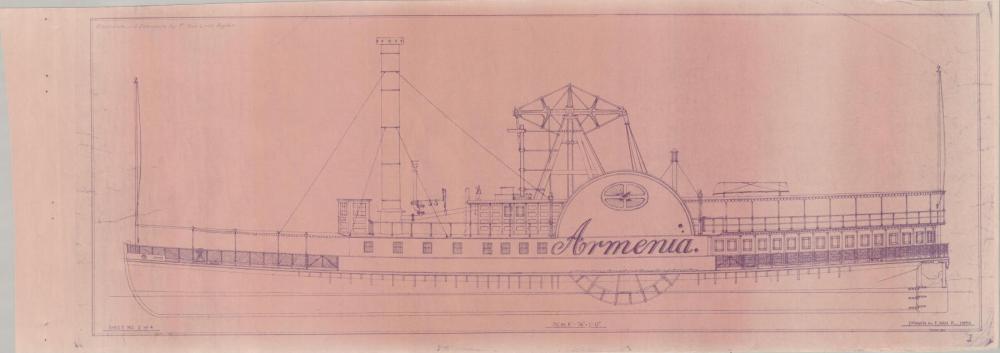
Thanks Tom, maybe next time. Thanks Jesse, it is a little bittersweet, it’s nice to have finished but I will miss working on her. I do need to build a case so that should keep me busy for a while. Thanks Bob and Jack, appreciate the nice words And thanks for all the likes Al, thanks and I did have something in mind but that was before I won the award. I think now I’ll just retire from ship building, you know, go out on top. Just kidding, I had acquired a set of plans from my club a while back of a Hudson River paddleboat called the Armenia. What drew my attention to her was the interesting mechanism amidships that I’ve come to learn is called a ‘Walking Beam Engine’. As of now I’ve just started to do a little research on her and am in the process of redrawing the set of plans I have to a larger scale. So this is what I would like to do but am not sure if my skills match my desires.

- 659 replies
-
- 7
-
-
- syren
- model shipways
- (and 1 more)
-
Thanks wyzwyk and I do appreciate the feather. Thanks Jack and likewise it was very nice meeting you and Ryland at the conference. Thanks Jimmy, I was planning on bring it to the next meeting for the guys who didn't make the conference. Thanks Dirk, you've taught me a lot through your own build and comments
- 659 replies
-
- 6
-
-
- syren
- model shipways
- (and 1 more)
-
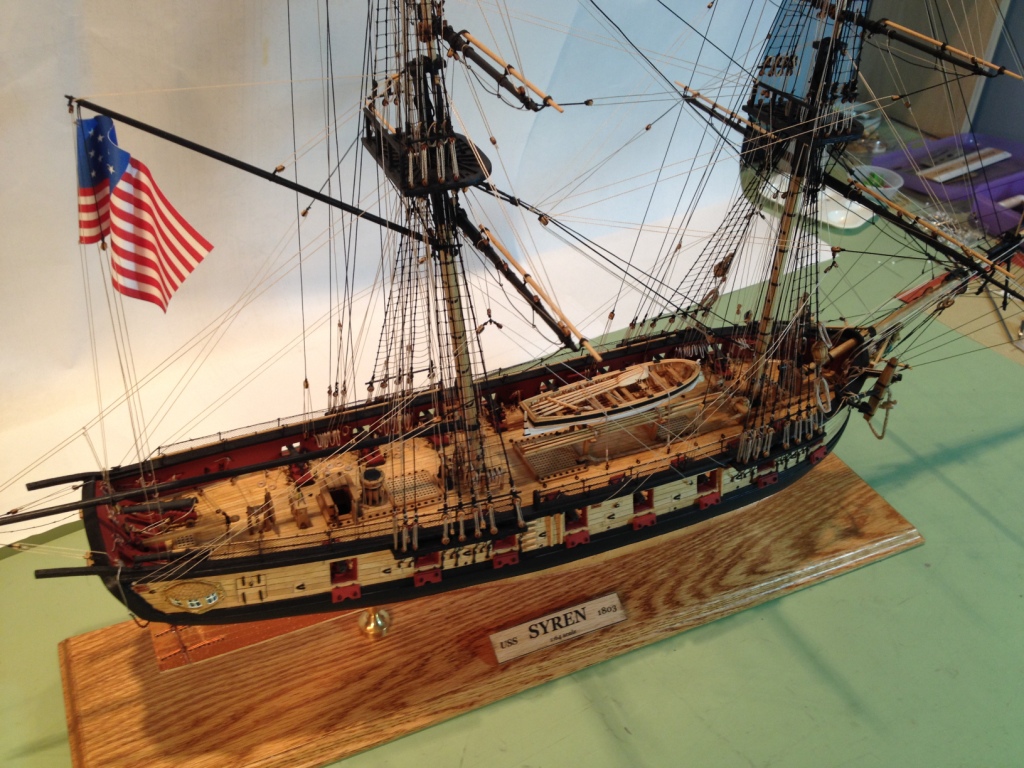
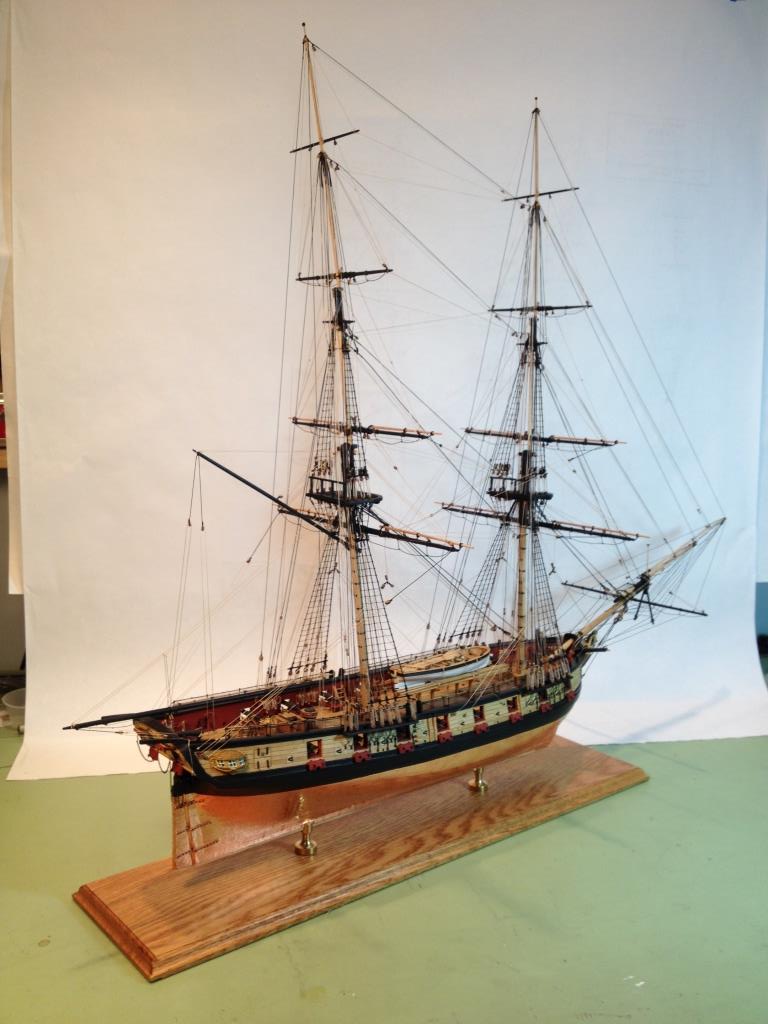
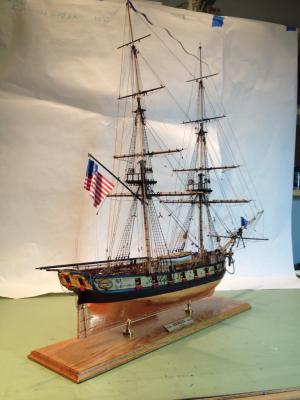
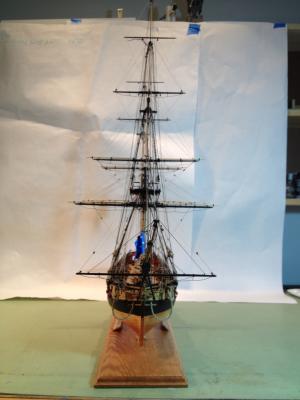
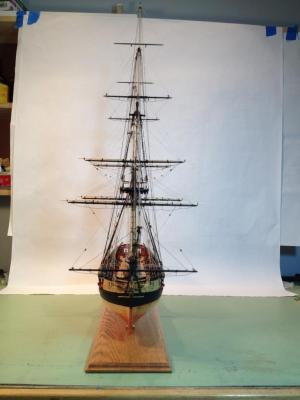
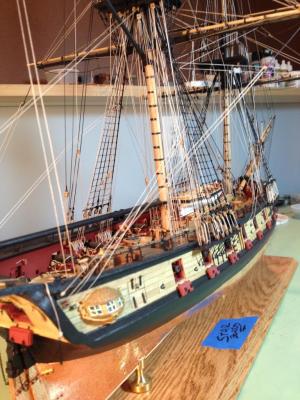
Epilog What a journey! It’s been approximately 18 months since I began this build and now that it’s over it seems like I just started. I’ve learned a lot about ship building over this time and come to know many knowledgeable people on this site. I’d like to thank you all for your encouragement and kind words and for all the 'likes'. I’d also like to thank my biggest supporter, my wife. She has been very understanding these past 18 months by letting me do something that I've wanted to for a very long time (I can’t wait to see the list). I’d also like to thank Chuck for designing a kit and writing an instruction manual that even novices like myself can follow. The kit itself for the most part is well made and the only pieces I substituted were the cannonades. I think they should provide a bit more rigging line though. Again thank you all. (need to get a better backdrop)


- 659 replies
-
- 23
-
-
- syren
- model shipways
- (and 1 more)
-
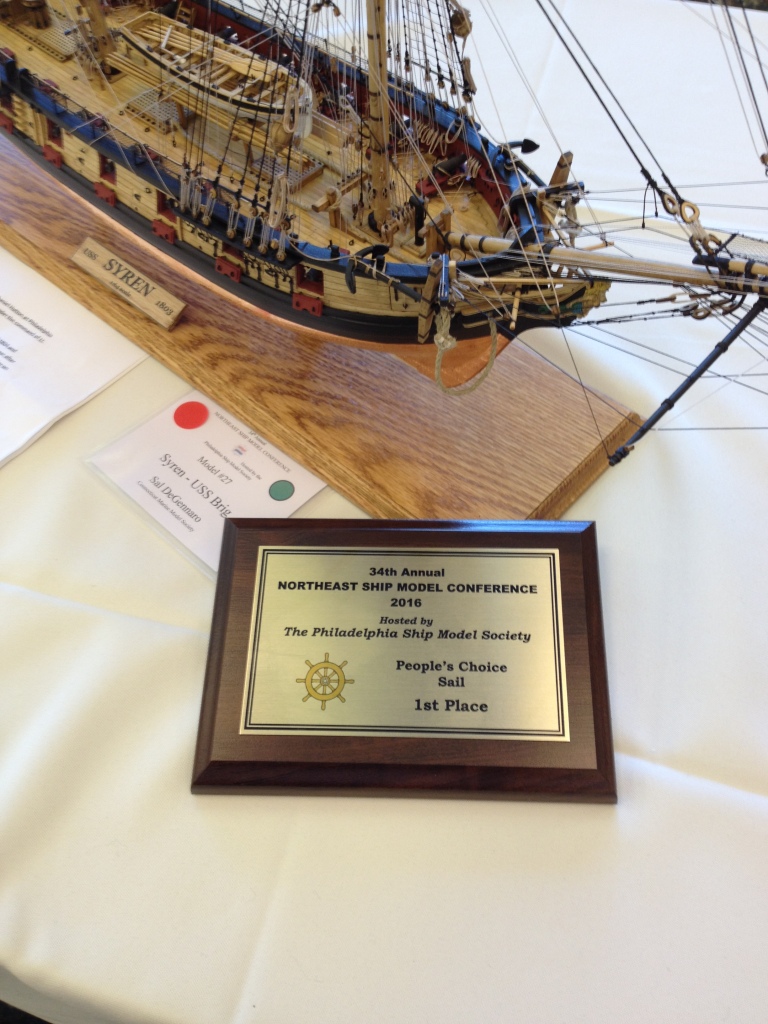
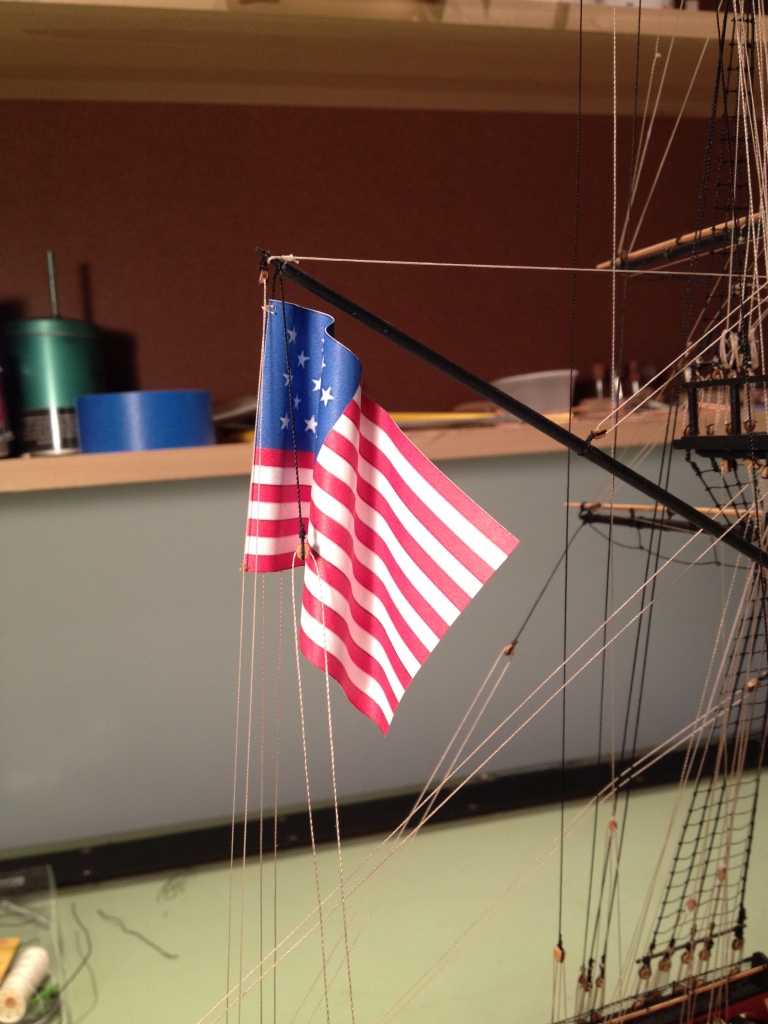
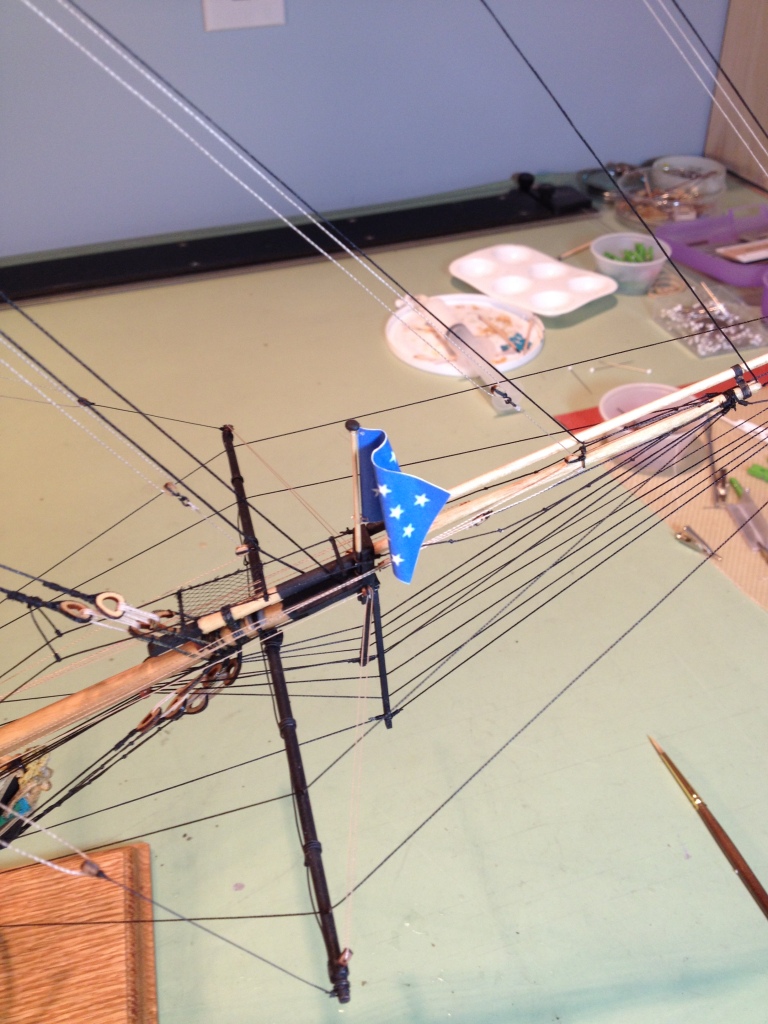
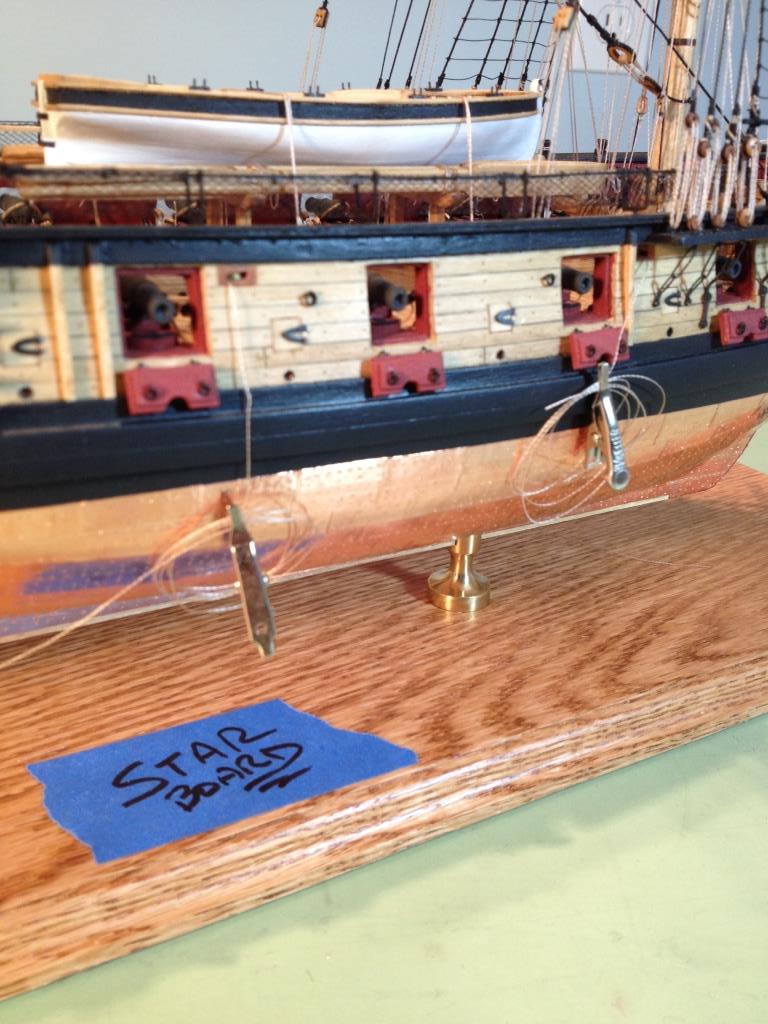
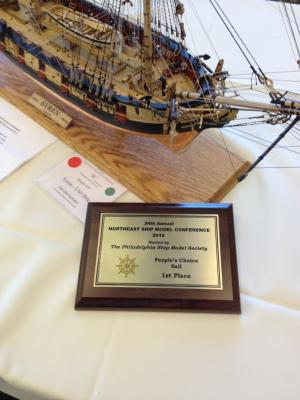
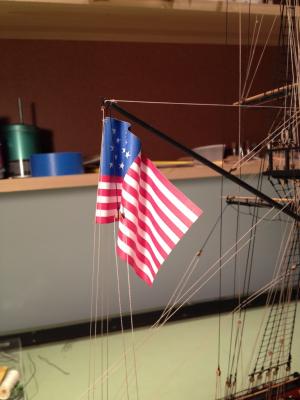
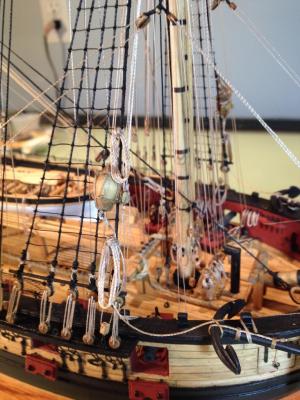
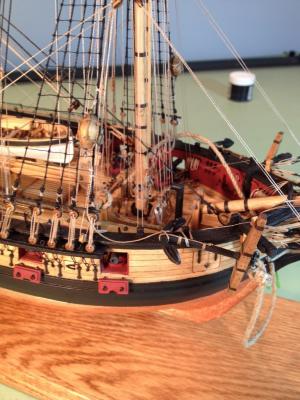
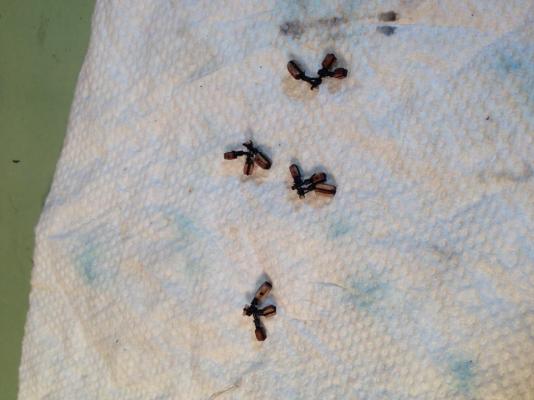
As Joe mentioned above I was honored Saturday at the Northeast Ship Model Conference by having my Syren chosen first for the People’s Choice Award. I really didn’t expect to win as there were many beautifully built ships there. I need to give credit to all those who have offered advice and encouragement on this site and to Chuck for putting together a great kit for those of us with limited knowledge of ship building to follow. So obviously I’ve finished my ship and the last few details were the flags and the rope coils for the anchor buoys. I didn’t use the flags provided with the kit because they were too shiny. I printed my own out on plain white computer paper and then glued and folded them as Chuck describes. Anchor buoy rope coil and anchor cable


- 659 replies
-
- 19
-
-
- syren
- model shipways
- (and 1 more)
-
Thanks Tom. One more thing about wrapping the pudden on the straight wire is that I put a little ca glue on the wire as I wrapped it to keep the line in place. The white serving thread was added after the ring was formed. ps: Happy Birthday
- 659 replies
-
- 6
-
-
- syren
- model shipways
- (and 1 more)
-
Dirk,Jesse, Al, Ian, thank you all for the nice words and I'm glad to share my experiences with you all as I build this model. I've learned so much on this website that it seems only right to give something back when I can. And thanks for all the likes also.
- 659 replies
-
- 7
-
-
- syren
- model shipways
- (and 1 more)
-
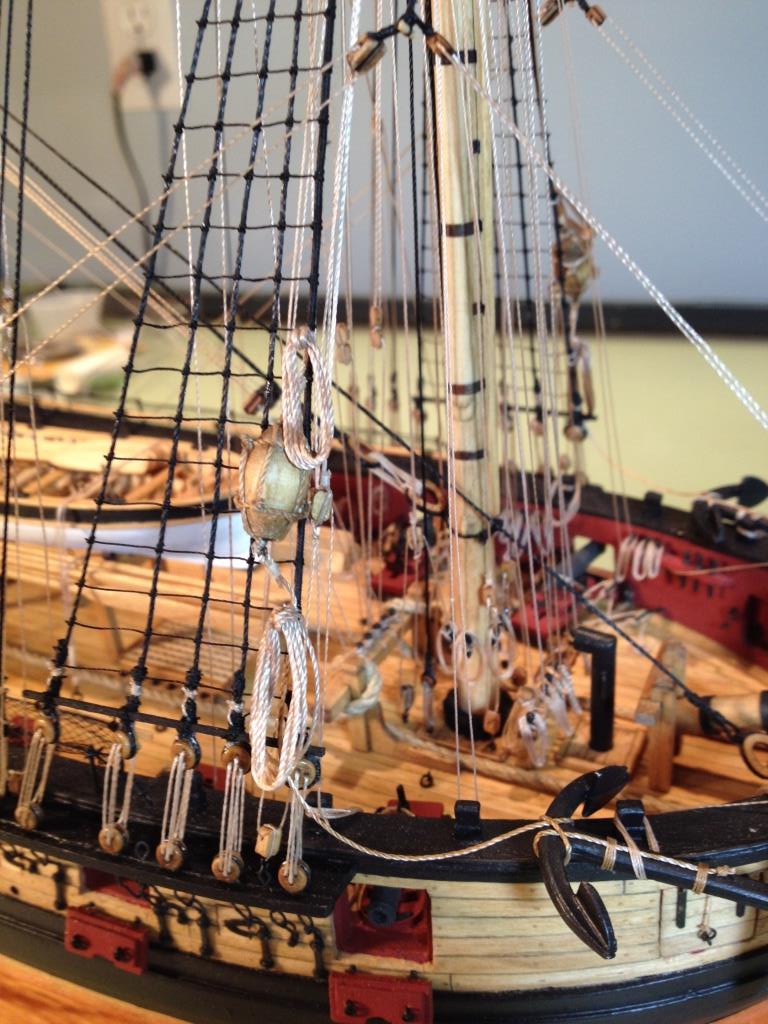
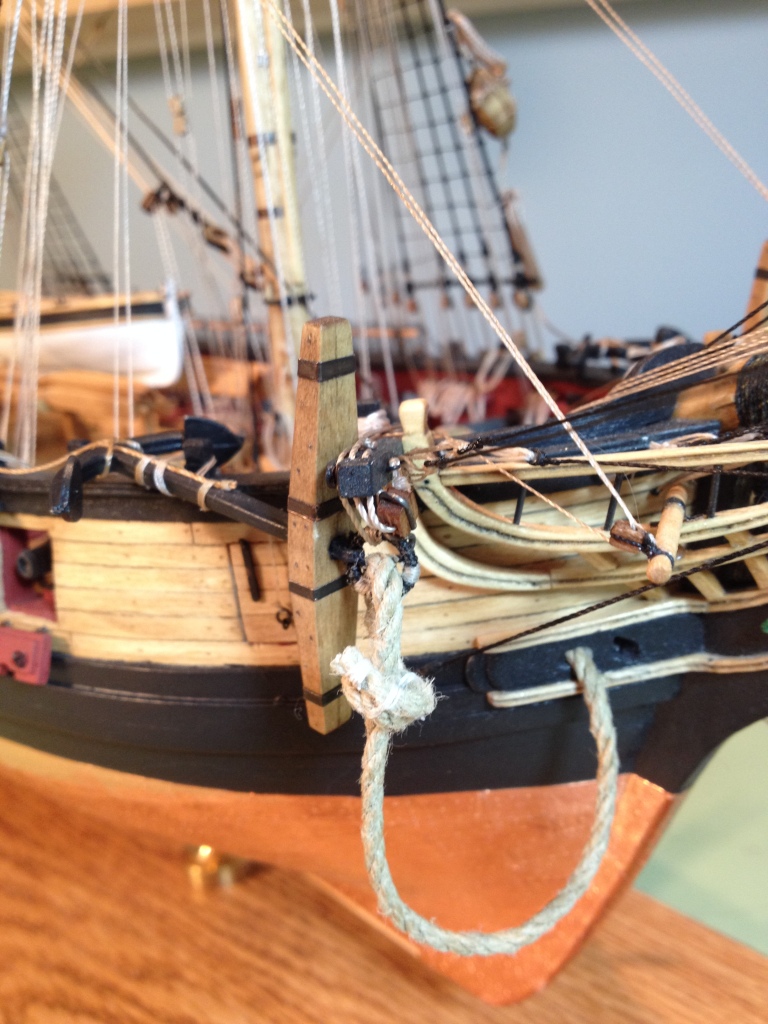
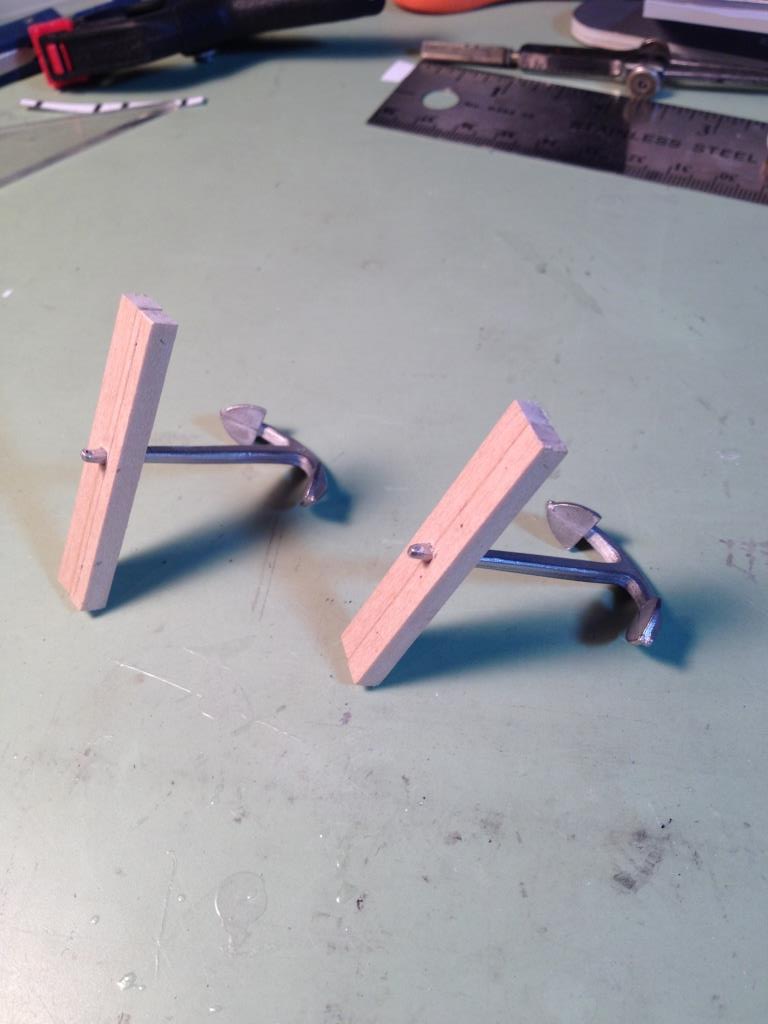
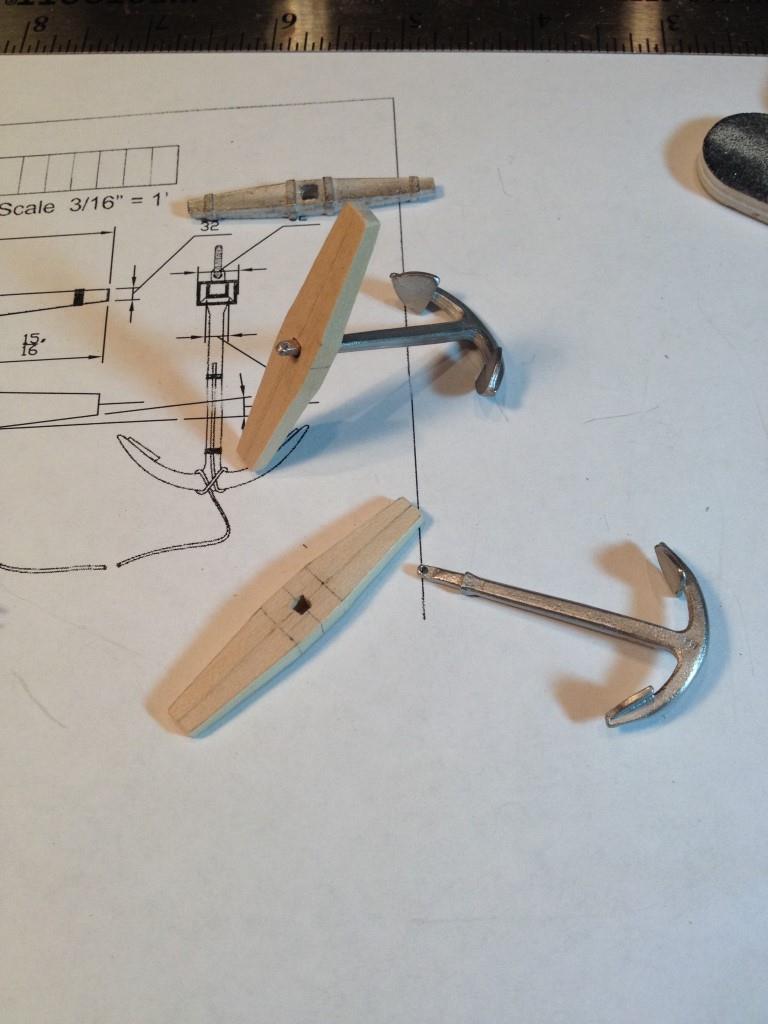
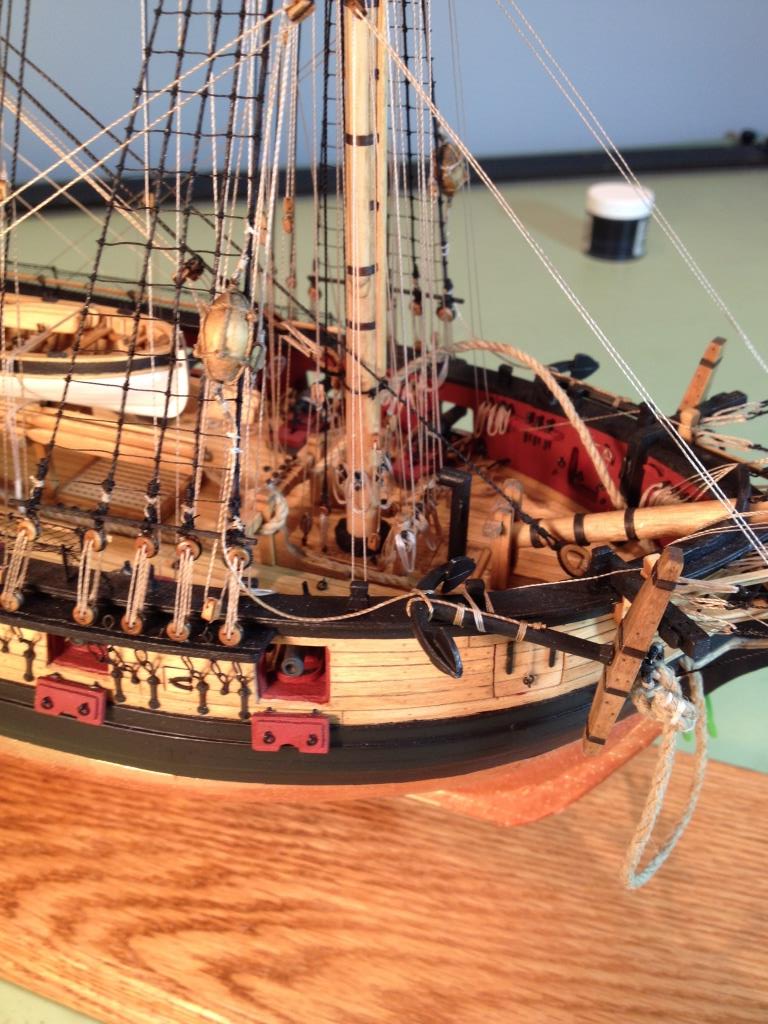
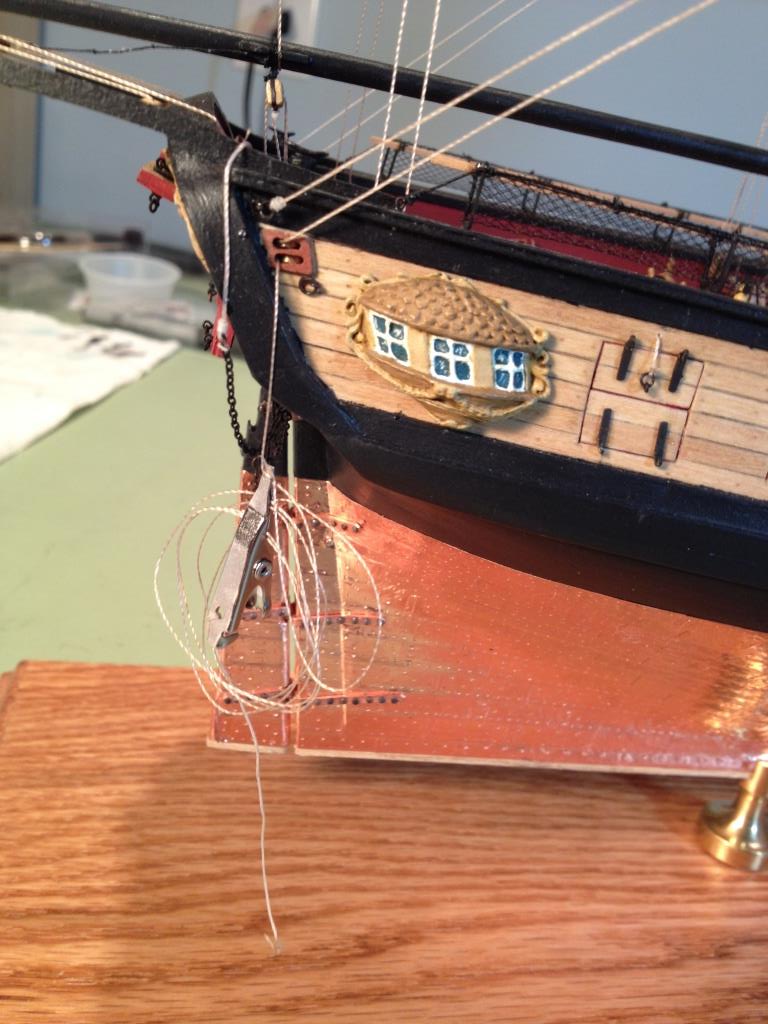
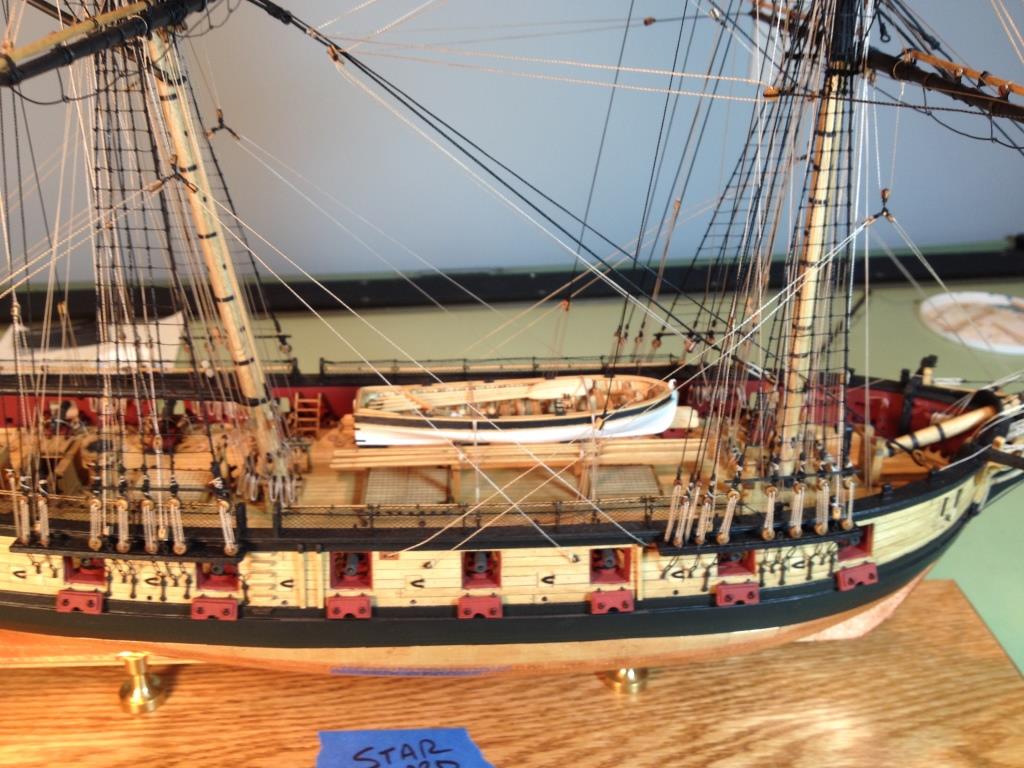
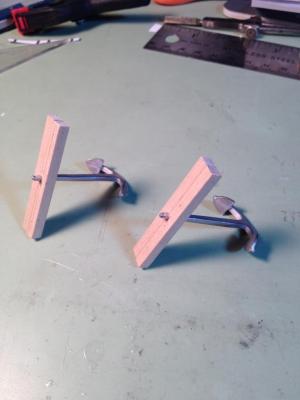
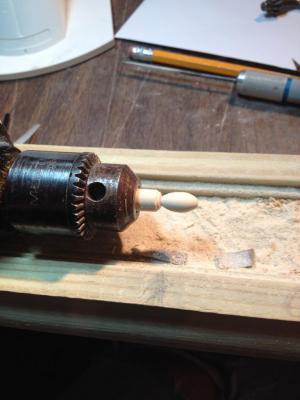
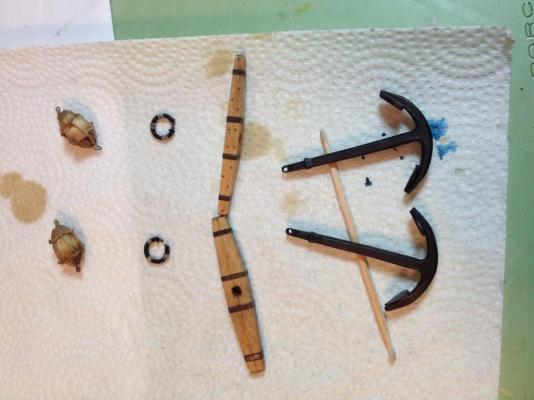
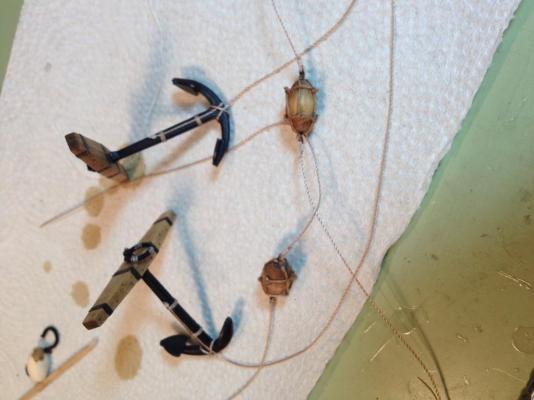
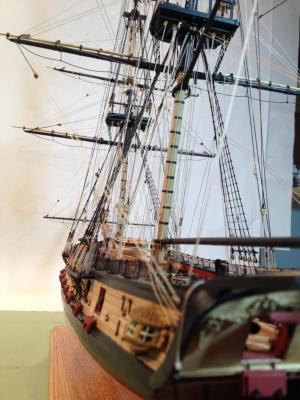
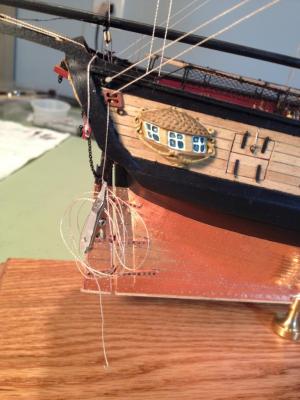
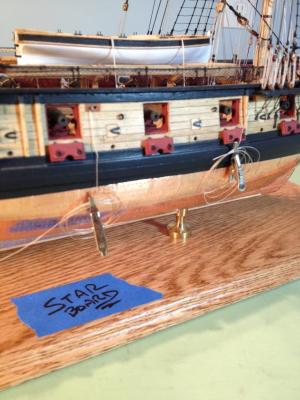
Anchors aweigh... For the anchors I decided not to use the provided metal stocks and tried making my own. Four pieces of wood, 5/32” square, were notched with a file for the anchor and then glued together. After the pieces were dry they were tapered per the detail shown on the drawings. The anchor buoys were also made a the same time. These were made out of a 5/16” diameter dowel, chucked into my ‘poor man's lathe’ and shaped per the plans using a small file. After the stocks were tapered they were stained, then faux treenails were added, and then the iron bands put on. The treenails were simulated by drilling holes into the stocks and then filled with a Minwax blend stick, the iron bands were made using the copper foil tape, blackened and cut into 1/16” strips. The anchors were paint black and the buoys were stained. The harnesses were made and tied around the buoys as described in the manual. The iron rings were made from 22 gauge wire and wrapped (puddened) with .021 rigging line (hard to see in the picture). I kind of cheated when doing this because I found that I could serve the wire while it was straight and then bend it around a 3/16” diameter dowel to make the ring. The ends of the pudden need to be cut back a little so the ring can fit into the anchor hole. All the anchor pieces were assembled and the lines were then tied to the anchors and buoys Lashing the anchors to the cap rails and the buoys to the shrouds was pretty straight forward. The hard part (and now I know why Dirk ran his anchor cable ahead of time) was threading the anchor rope along the deck with all the rigging in the way. That was tough especially wrapping it around the riding bits. One thing that would have made it a bit easier would have been to drill a deeper hole in the hull where the cable does down through the hatch openings. I only had about a ¼” deep hole and had a difficult time bending and holding the rope in place while the glue dried. With a deeper hole, say ¾” to 1” deep, the thick rope would have been easier to bend into the hole and keep in place. All I have left to do are the rope coils for the buoys and the flags and some last minute tweaking. I don’t want to rush but I’m hoping to finish everything for the Northeast Ship Model Conference this Saturday in New London, CT. Finished or not I will still be bring her.


- 659 replies
-
- 18
-
-
- syren
- model shipways
- (and 1 more)
-
Cannonades look terrific Jesse, nice job. Sorry to hear your still not feeling that great, get well.
- 1,306 replies
-
- 8
-
-
- syren
- model shipways
- (and 1 more)
-
That's a good question Elijah and I hadn't given it much thought until you asked the question. Do I keep it in the basement man cave so basically only I can look at her? Or do I keep it upstairs so the Admiral, myself and friends who come over occasionally can look at her? Or do I loan it to the local library (I don't think I could donate this one) so many people could enjoy it? Decisions, decisions, when I decide I'll let you know.
- 659 replies
-
- 5
-
-
- syren
- model shipways
- (and 1 more)
-
Thanks George, Thomas and Jesse. Sometimes when you do something you even impress yourself, I have to say (humbly) that this is one of those times. I'd like to thank all those who hit the likes button too, the likes are always appreciated
- 659 replies
-
- 4
-
-
- syren
- model shipways
- (and 1 more)
-
Thanks Al, I'm almost done, just need to add the anchors and flags.
- 659 replies
-
- 3
-
-
- syren
- model shipways
- (and 1 more)
-
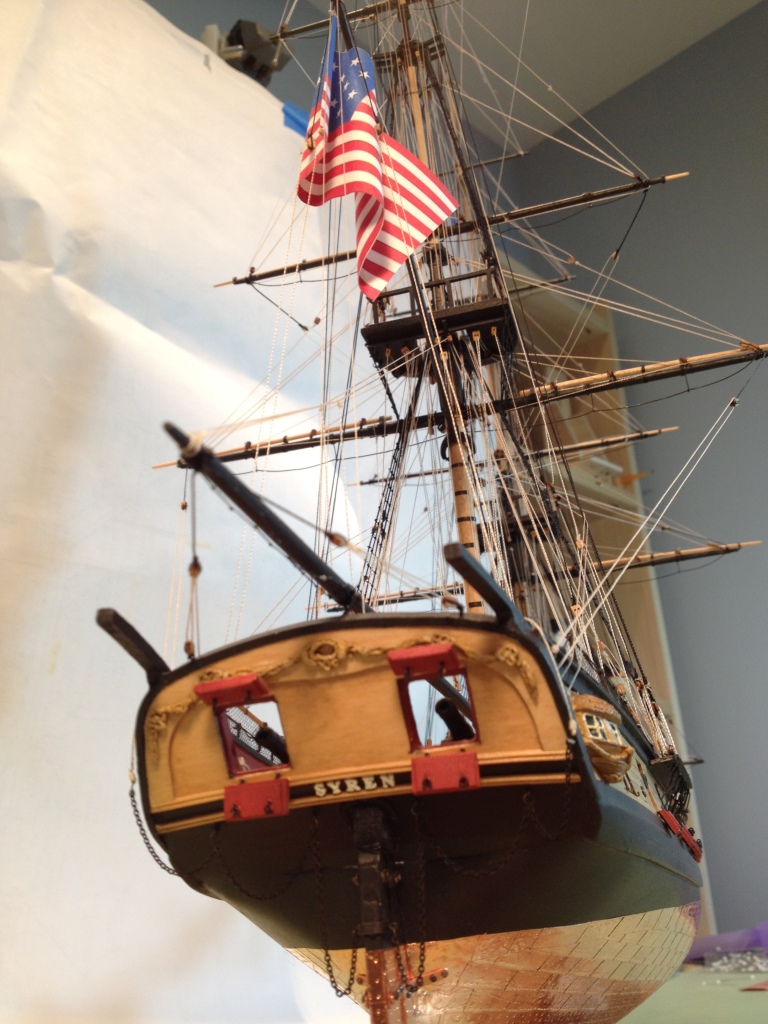
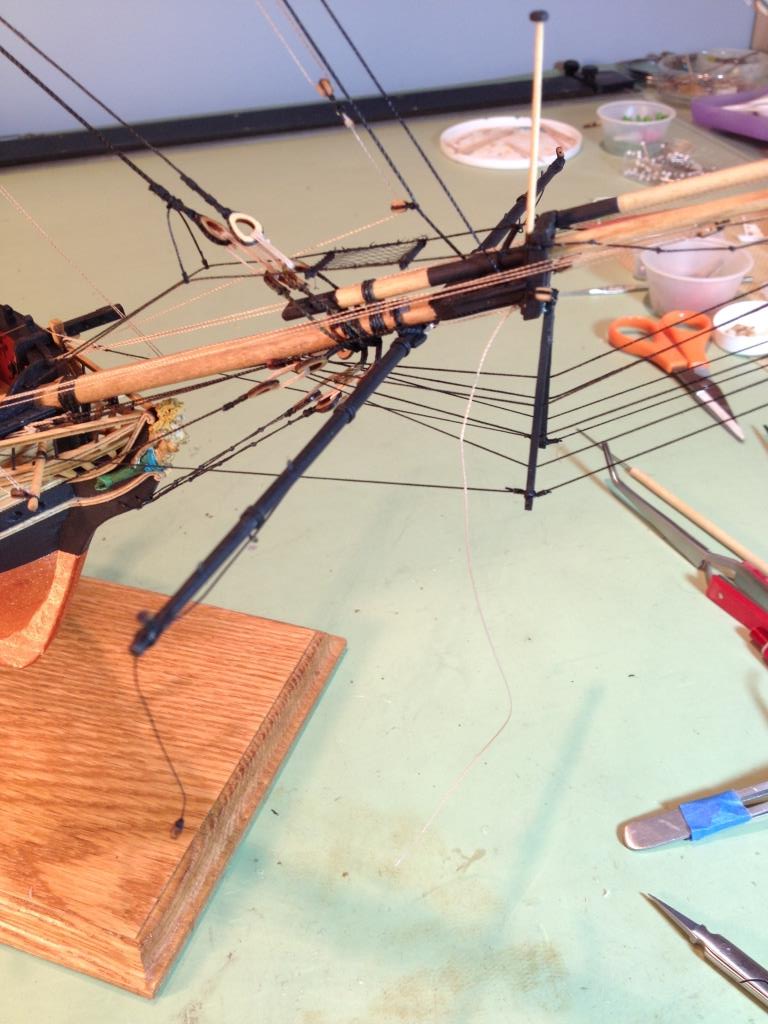
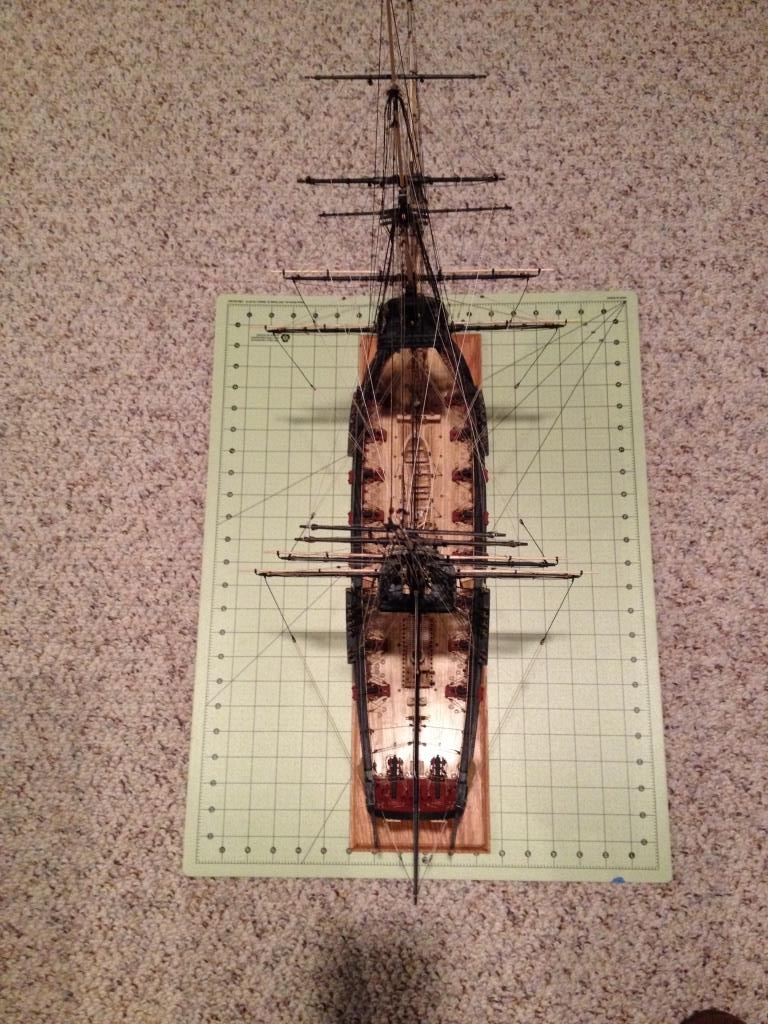
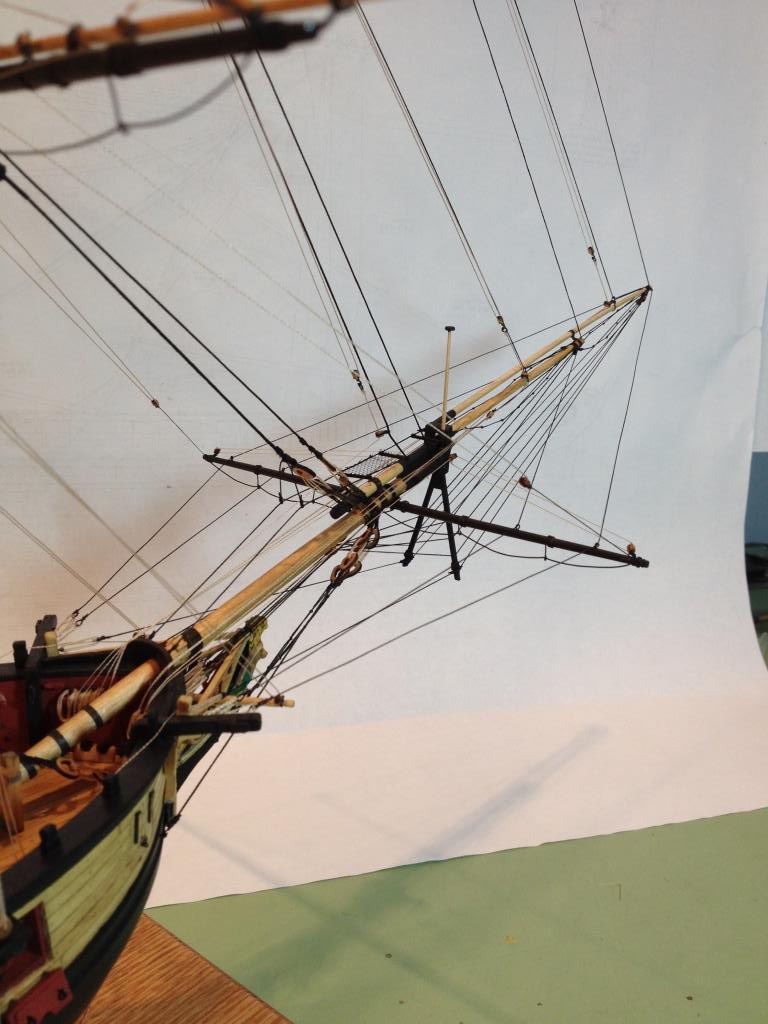
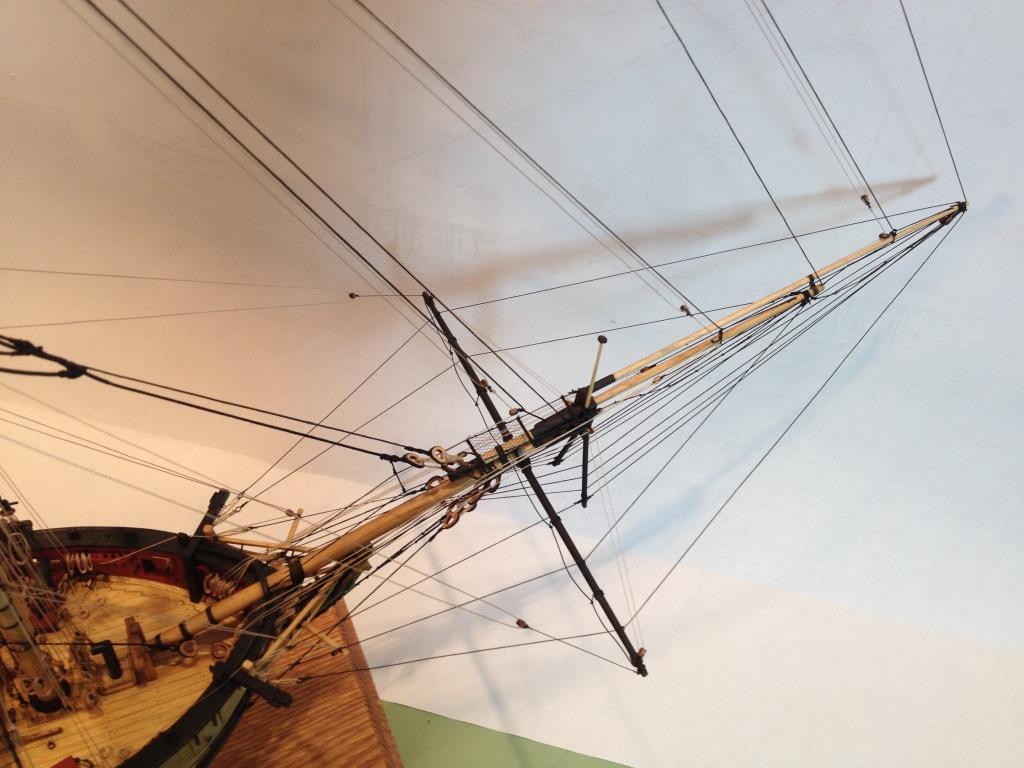
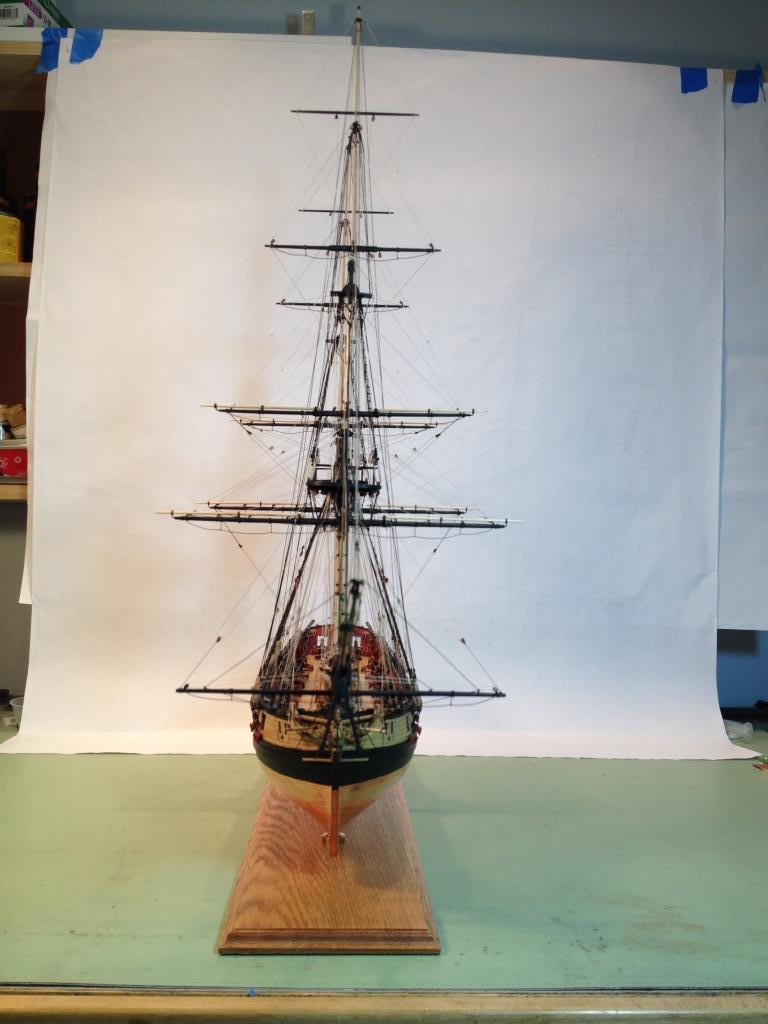
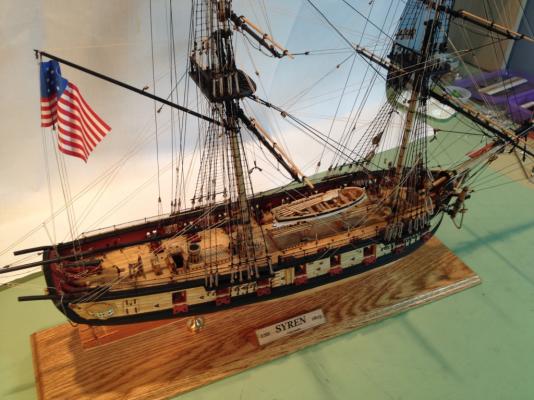
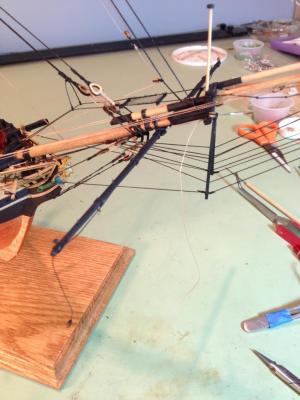
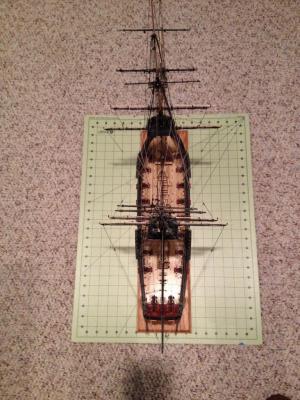
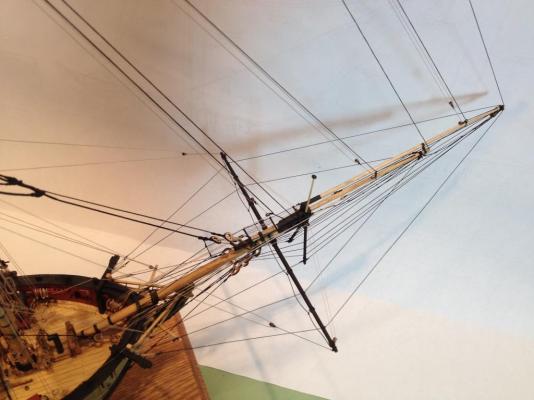
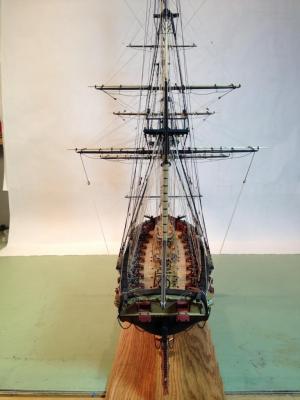
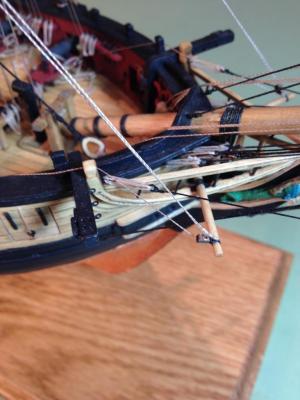
The last yard!! The spritsail was hung and rigged following Chuck's instructions. The hardest part was tying off the spritsail braces to the pin rails with the lower yard's sheets and tacks rigging in the way. The only other little problem was that the directions for running these lines abruptly stops so you know where it starts but not where it ends. Like I said though it’s not a major problem because it’s shown on the drawing. Completed spritsail rigging. My method for checking if the yards are square to the ship centerline. Not too bad for an amateur. You need to be careful standing over the ship to look down that you don't hit the bowsprit. All rigged out and ready to go. Rigging this ship was, to say the least, an experience, an enjoyable one though. Enjoyable because of Chuck’s detailed instructions. If it wasn’t for his instructions I’d still be fumbling around on the footropes. For those of you working on this ship if you go step by step as shown in the manual you should have no problems at all. That being said the only little deviation I made was the placement of the rope coils on the belaying pins. I had started to put them on as I ran the lines but I found that it was getting hard to tie off the later lines with the coils in the way. So I just waited until everything was finished, except for the lower yard’s sheets and braces, to put all the coils on. That went for the cleats on the bulwarks and the tops also. And one complaint, not with the directions but with the amount of line that is provided with the kit because I ran out of 0.012 and 0.018 manila line. Maybe it was the lack of experience on my part as to how much line to use for each rigging line but I didn’t think I was wasting that much. They did however give me a lot of .021 manila thread but you don’t use it anywhere. I also ran out of 1/8” double blocks and I know I didn’t waste or lose them. On to the anchors.


- 659 replies
-
- 18
-
-
- syren
- model shipways
- (and 1 more)
-
Lawrence thanks so much for the compliment I really appreciate it. It's been so long since doing those I needed to go back and refresh my memory.
- 659 replies
-
- 4
-
-
- syren
- model shipways
- (and 1 more)
-
Thanks daddyrabbit. I think I'll look for a smaller magnifier, the visor I have is like wearing a welders helmet.
- 659 replies
-
- 3
-
-
- syren
- model shipways
- (and 1 more)
-
Thanks for the tip Bob. It's amazing how many lines are on these ships and how they kept them all in order.
- 659 replies
-
- 4
-
-
- syren
- model shipways
- (and 1 more)
-
And interesting thought Elijah but.....I think the spars on this ship will stay right where they are, maybe next time.
- 659 replies
-
- 3
-
-
- syren
- model shipways
- (and 1 more)
-
As always thanks for the kind words Dirk. Thanks for the advise Gary, the darner would definitely had helped, I should have asked sooner. and thanks for all the likes, much appreciated.
- 659 replies
-
- 4
-
-
- syren
- model shipways
- (and 1 more)
-
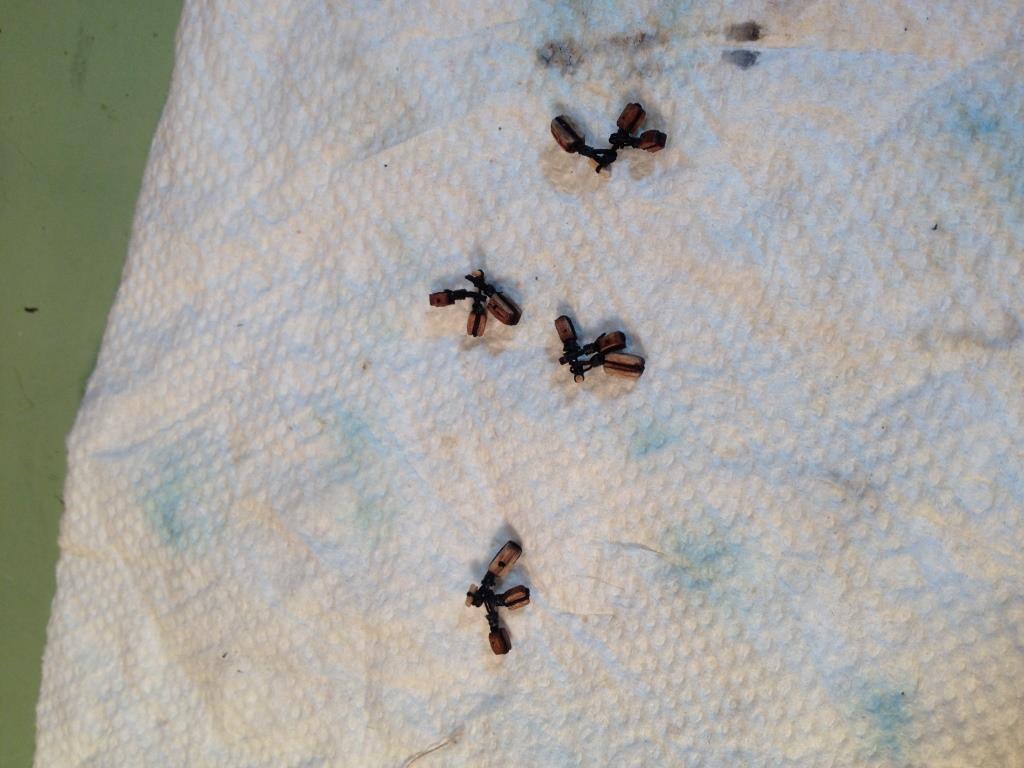
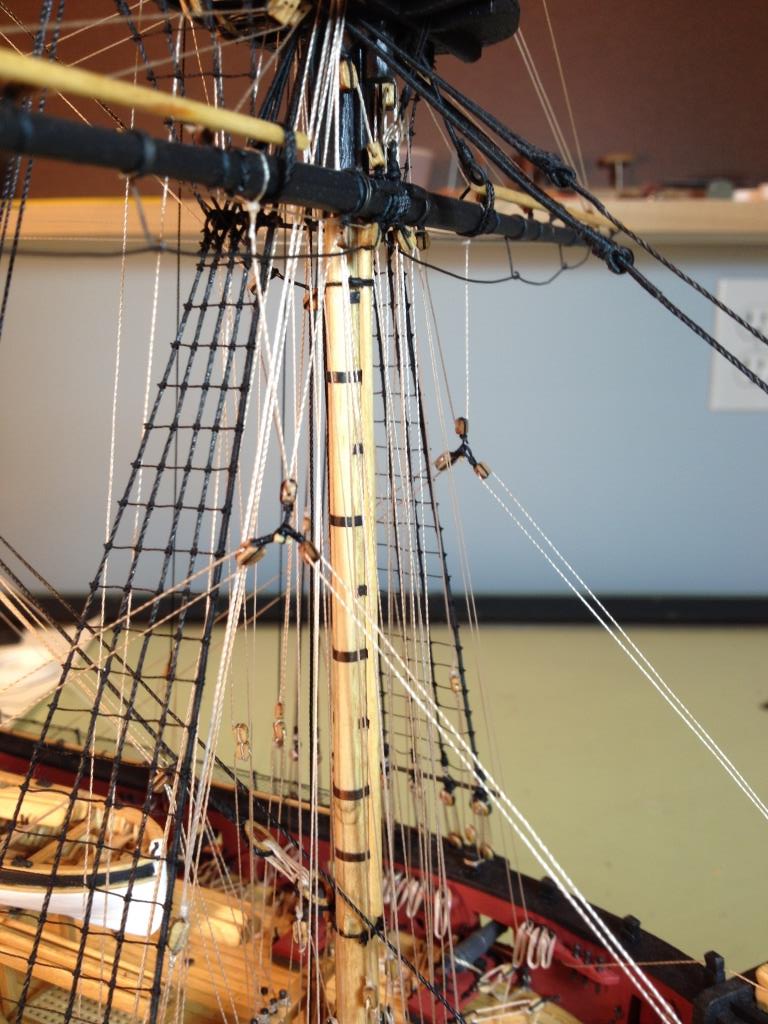
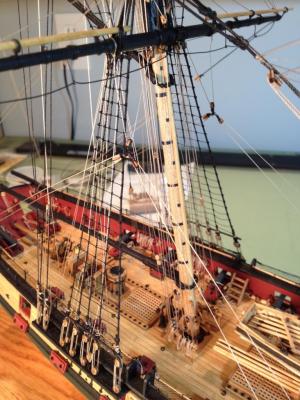
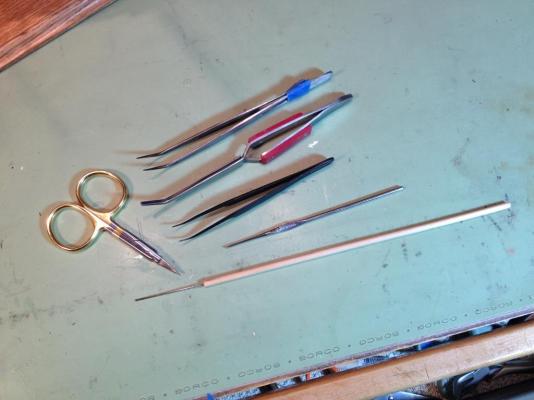
Finished placing all the fore and main mast yards and moved onto running the lower braces. The instructions call for placing the lower braces in two pieces, one on the inboard side from the cleat to the pseudo sheave in the bulwark and the other on the outboard side from the pseudo sheave to the brace pendant. For my lines I deviated a little from the instructions seeing that I had gone to the trouble in the beginning to install working sheaves in the bulwarks for them. I did however follow Chuck’s advice to install these lines on the inboard side prior to starting the yard rigging. Main and fore brace and sheet lines coiled outboard. Block assembles for the lower course sheets, tacks and clew lines. Main lower course braces and sheets, tacks and clew lines Fore lower course sheets, tacks and clew lines These are the primary tools I used for rigging. The dowel has a sewing needle inserted into it with the eye cut in half. This came in very handy tying off the lines around the cleats and belaying pins. The yards added another whole new dimension to the ship and for me, needing a magnifying visor to see the smaller parts, I found it hard at times to get close enough without banging into them. Need miniature caution tape to hang from the yards. Another part of running the rigging that’s not really described in the instructions but is probably understood by those who have done this before is when you bring the lines down through the lubber holes. You need to pay close attention to how the lines run so they don’t wrap around and pull on the lines that are already there. I needed to rerun some lines three or four times to make them run without interfering with other lines.


- 659 replies
-
- 19
-
-
- syren
- model shipways
- (and 1 more)