MORE HANDBOOKS ARE ON THEIR WAY! We will let you know when they get here.
×


clearway
-
Posts
2,226 -
Joined
-
Last visited
Content Type
Profiles
Forums
Gallery
Events
Everything posted by clearway
-
 looking nice there Daniel- regards the wheelhouse windows i would glaze them as it will help stop those dust bunnies having an orgy in there 😁 Keeith
 -
Glad to see you are still working on her- they have thimbles and lashed with rope as opposed to deadeyes. Keith
-
the two holes midships behind the foremast are actually pumps (occre messed up) and the two nearer the mainmast will be for the anchor chains which will go either side of the main hatch. Note the lower drawing does not cover our period though is interesting as it shows the earlier shroud protectors and the hatch off to starboard before it was moved midships like on upper plan for Erebus. Keith
-
ouch at the ships wheels- i know it is 1/100 but jeez- i would find some tubing and drill into it for wire spokes for the outer rim and some smaller tubing for the hub which can be parted off when drilled and glued if that makes sense? Keith
-
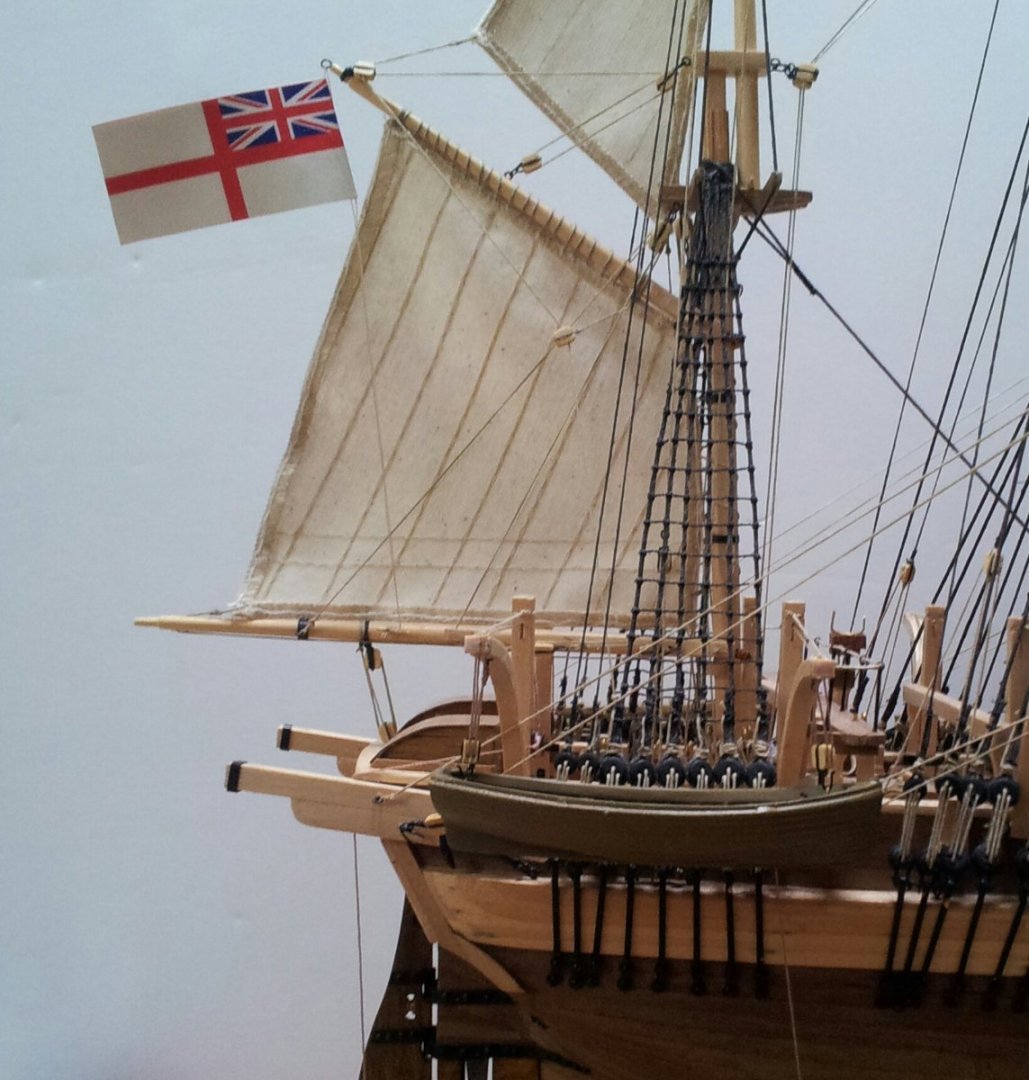
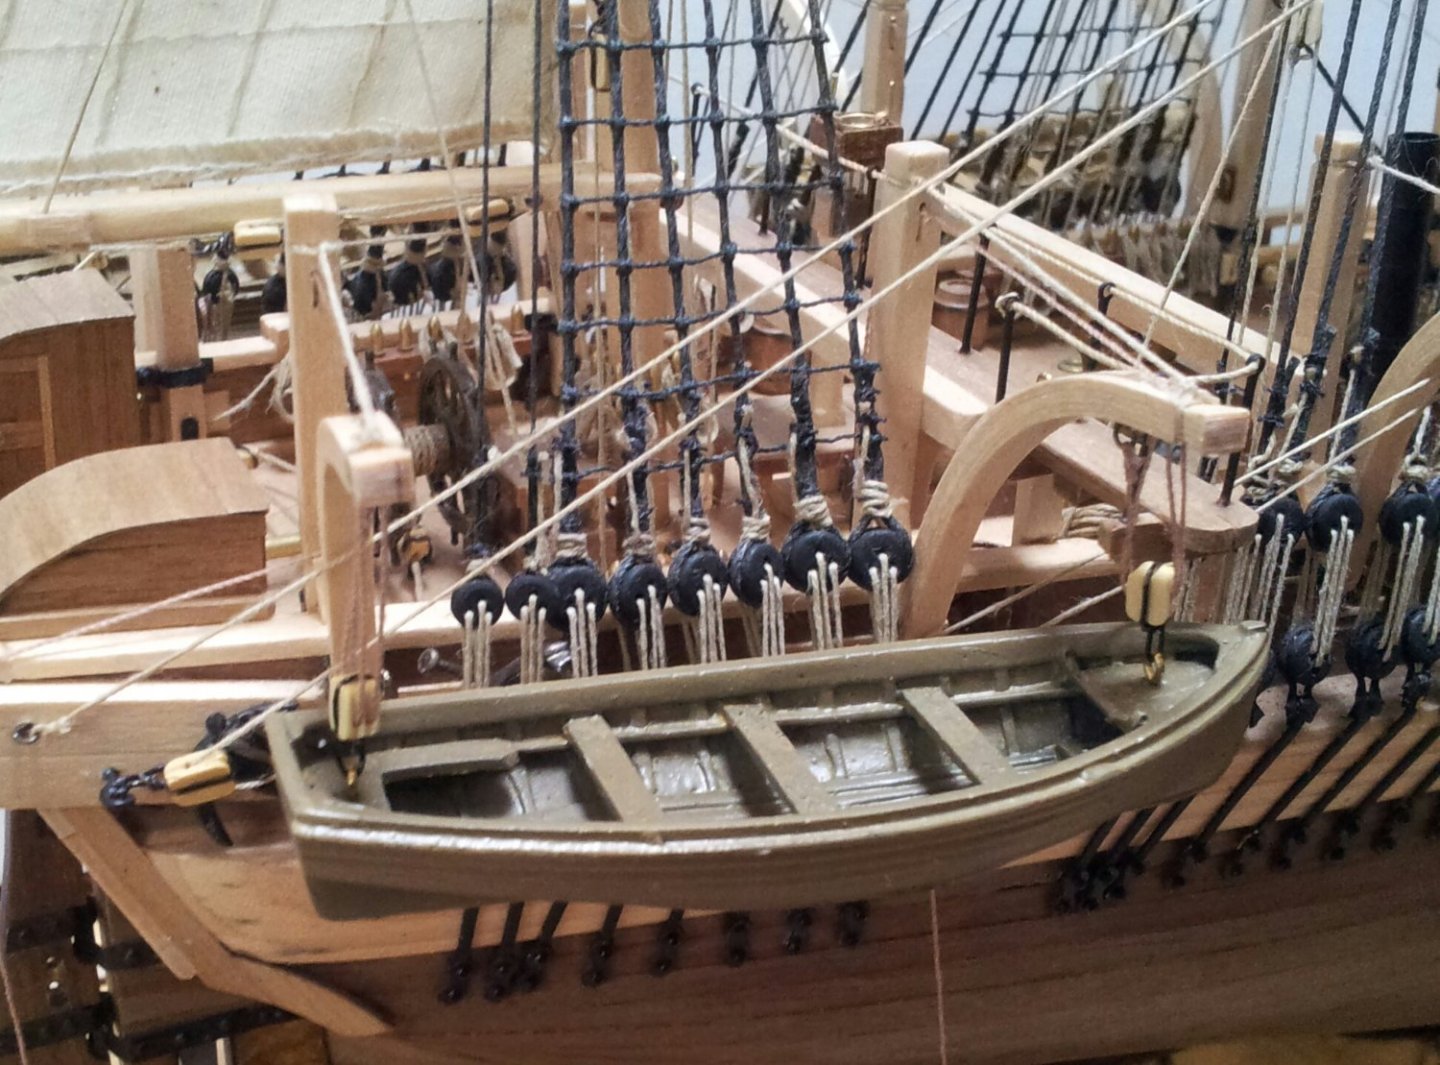
Thanks for looking in - after a break of a few weeks carried out a little work on Terror today with the White Ensign run up and boat no.5 added to the davits- still not 100% sure if i am happy with the flag, will have to ponder it a while. Thanks for looking in and take care everyone. Keith
-
nothing new with the ships wheels regards occre huh- i take it they are the standard offering supplied with all their kits😬 Keith
-
Nice to see you back with her Hake, interesting vid- i suspect with ships with larger anchors/ chains the didn't wrap the anchor chain around the barrel as Terrors anchor was 10 feet in length and would have probably ripped the windlass off if let go but used a messenger cable with maybe a cats claw style hook to grab the chain? On a lot of older models i have never seen the anchor hawser or chain wrapped around the drum. Keith
-
looks good Daniel- are we suckers for self abuse or what!😉 Keith
-
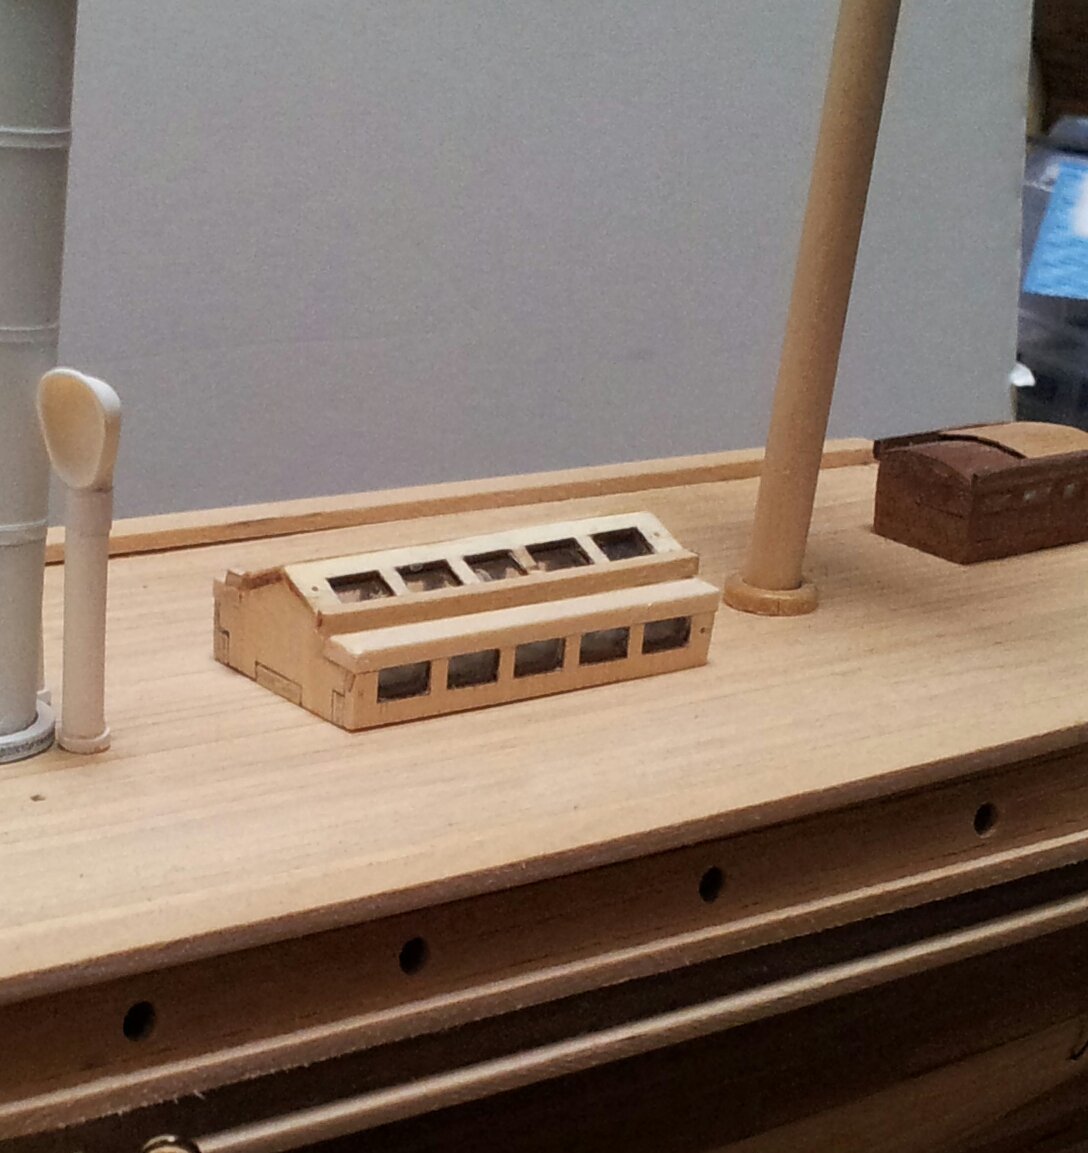
they are actually the location of the coal holes for the bunkers- i think Occre got confused with the plans and the galley stove pipe on pictures of Endurance- the galley is in the foremost part of the deckhouse or "ritz" as it was referred to. Unfortunately i opened them up on my deck(will need to make a couple of round covers to hide the holes. Build is coming along nicely Tom (dont forget the sides on the bulkheads under the anchor deck) Keith
-
Welcome to the Terror club JB - i have noticed a few builds where people have made the same faux pas regards diagonal planks - could be removed and redone but depends how well you glued them planks down! I do like the weathering. Keith
-
you never know til you try JB- Keith S and myself had lots of fun passing ideas back and forth- to be honest think it kept me sane through all the lockdown debacle! Keith
-
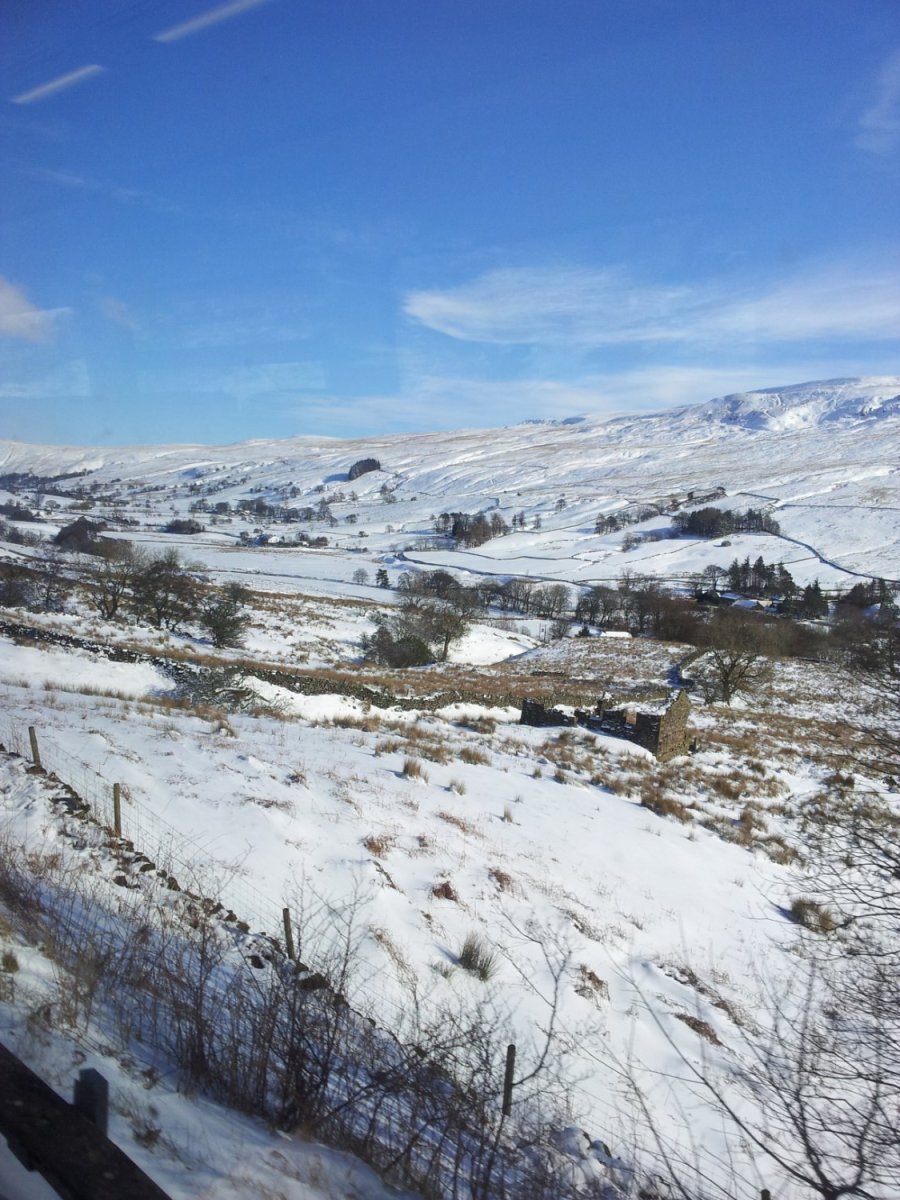
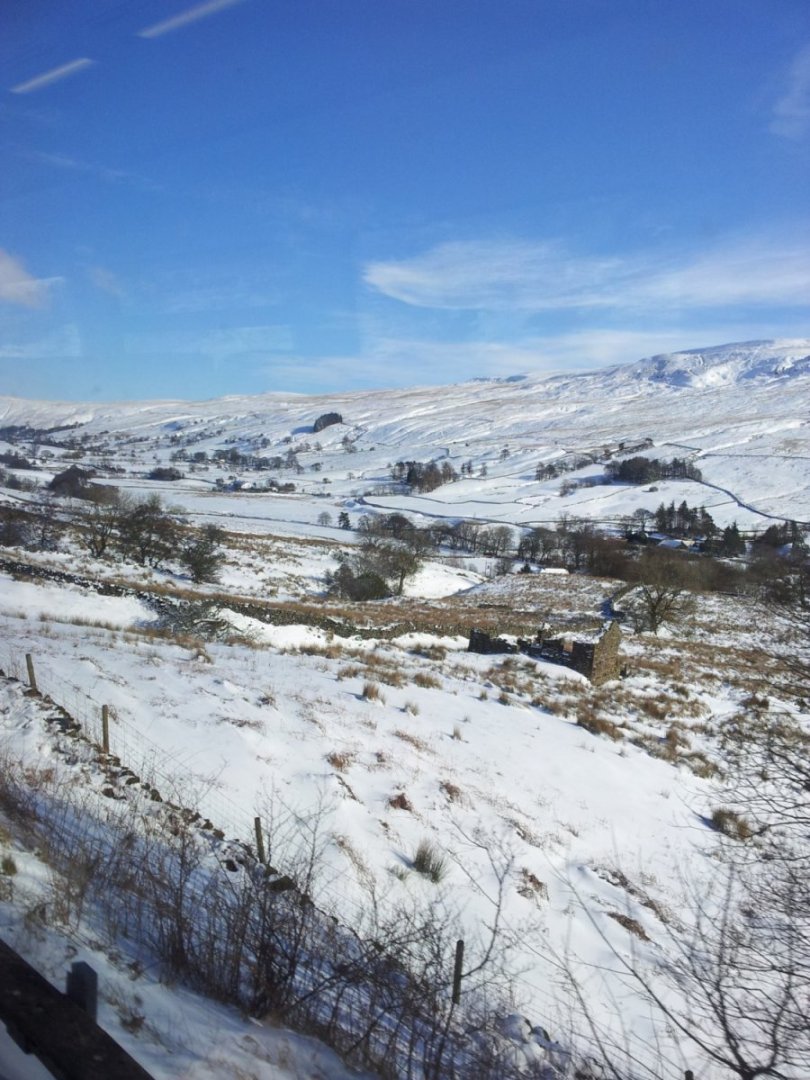
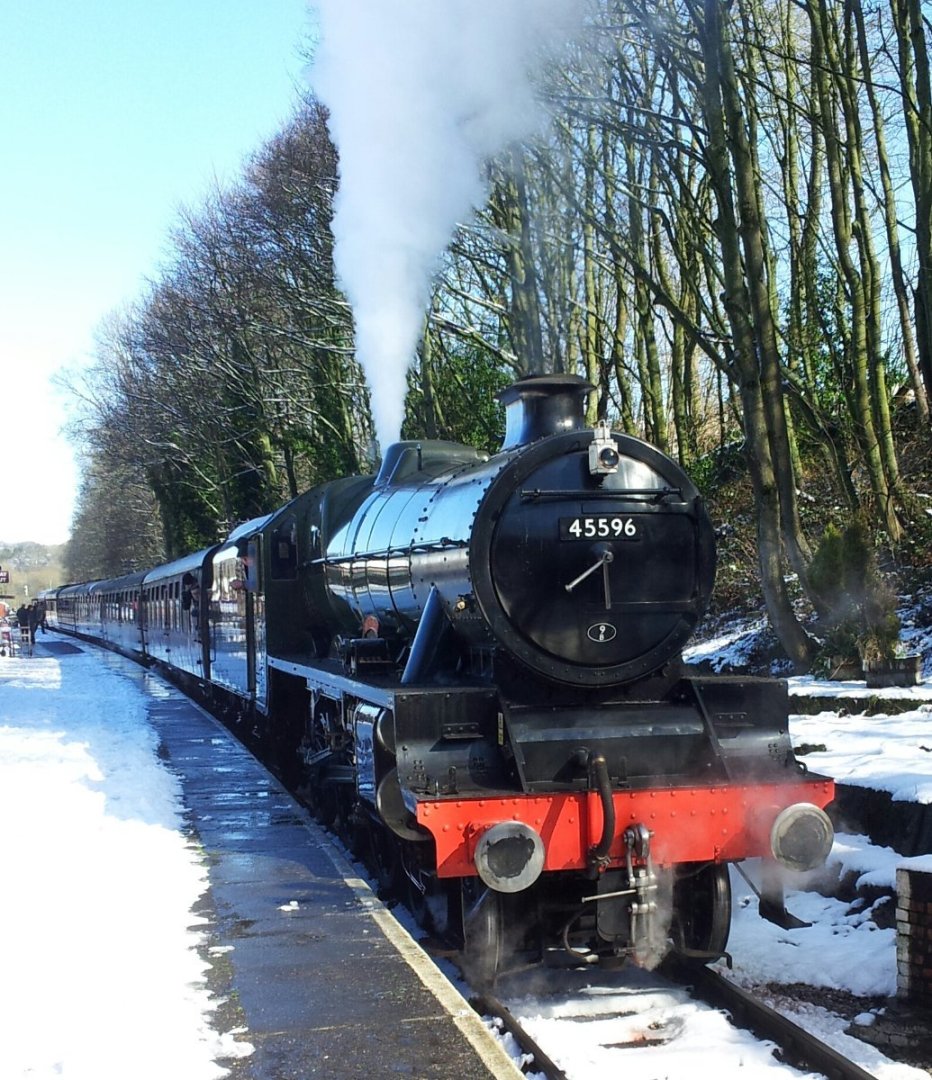
Interesting pic Tom and interesting to see everyones interpretation of her- Back in the shipyard and i have started giving the engine room skylight a redux- the film footage of her being wrecked in the ice is posted on u-tube which gives a good view of it- though not 100% correct i hope to have a passing resemblance to the original. On Friday last went down to the steam gala at Keighley (can't believe a year has passed since last one)! Safe to say i was lucky as it threw a snowstorm for 24 hours beforehand (the Settle to Carlisle railway line stayed open thankfully and first pic shows the view eastwards just after Kirkby Stephen station. Next Jubilee class loco "Bahamas" and finally two Black 5s waiting the off at Haworth Station Take care everyone. Keith


-
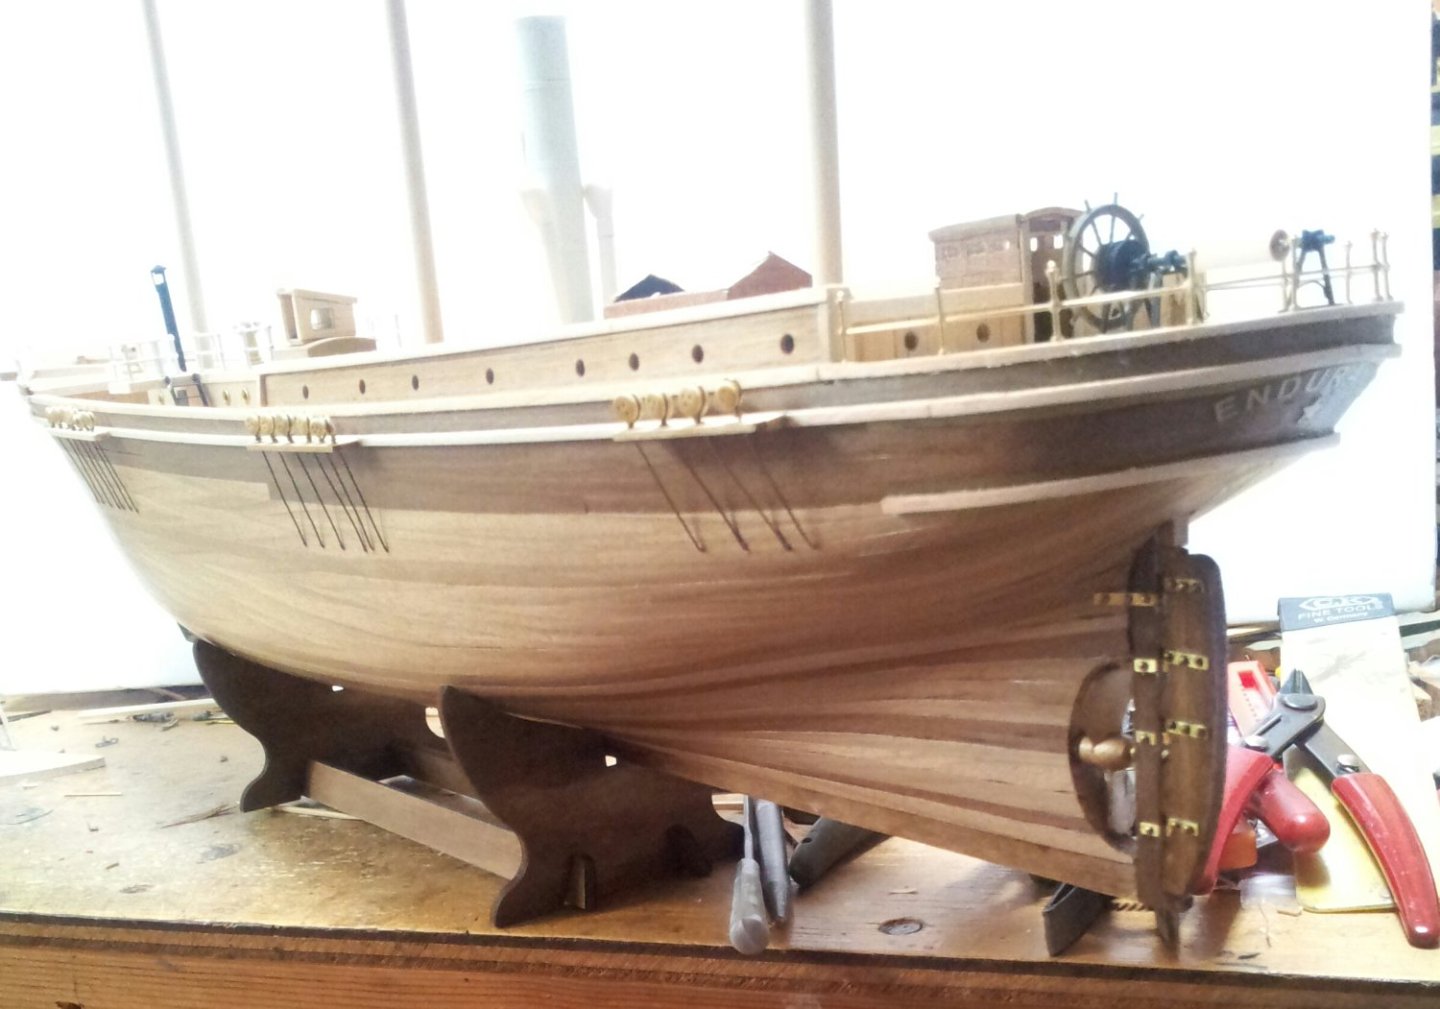
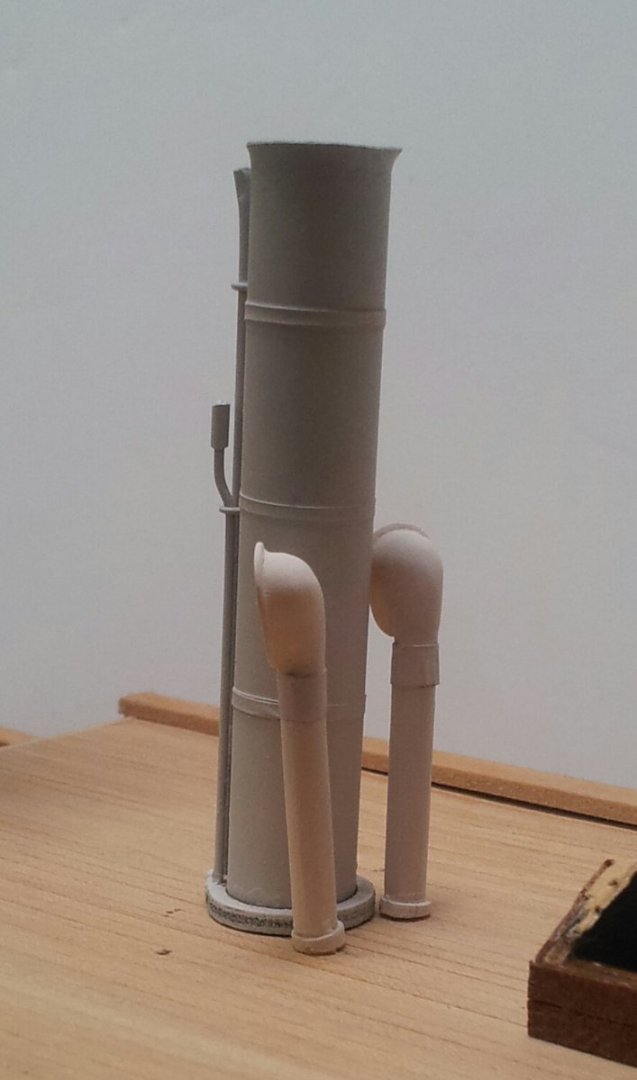
the two "rooms" under the foredeck will need walls adding to represent the aforementioned lamp room and wc - also note the anchor windlass- the half moon shape which fooled me into leaving it on my build is actually the two bladed prop (note the prop shaft continues through the prop into a bearing on the sternpost). Also the funnel has flattened sides and is oval shaped in cross section (i didn't fancy working the flange into the funnel top on an oval shaped tube- chicken i know)! Keith
- 204 replies
-
- 1
-

-
- Endurance
- Shackleton
- (and 2 more)
-
Yes Tom i am talking about the cabins under the foredeck- the plans i have are for Polaris from the national maritime museum- unfortunitly they show her as Polaris without any modifications- on the plans the fore/ anchor deck is actually cut away a bit like Cutty Sarks, but the give dimensions for funnels/ masts deckhouses etc- when squaring off your stern aperture for the propellor the top angles upwards to the sternpost by about 30 degrees. Keith
-
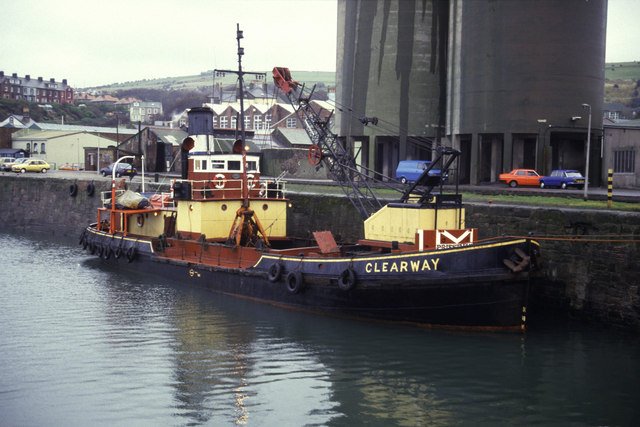
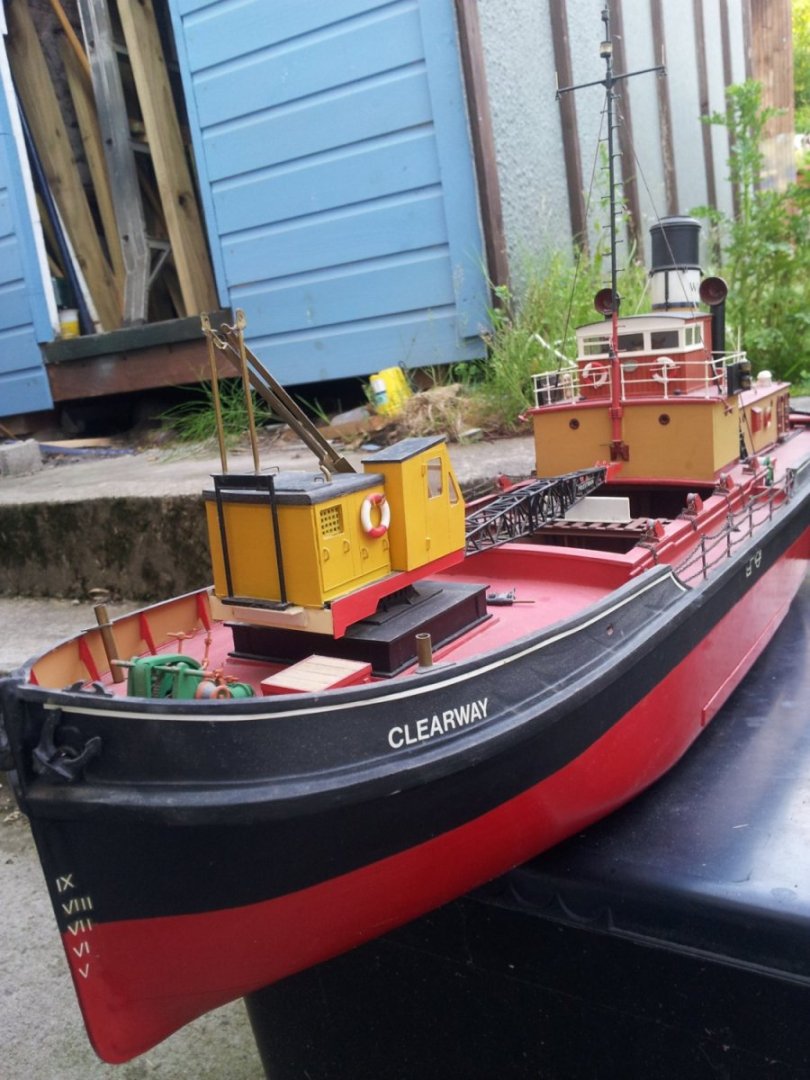
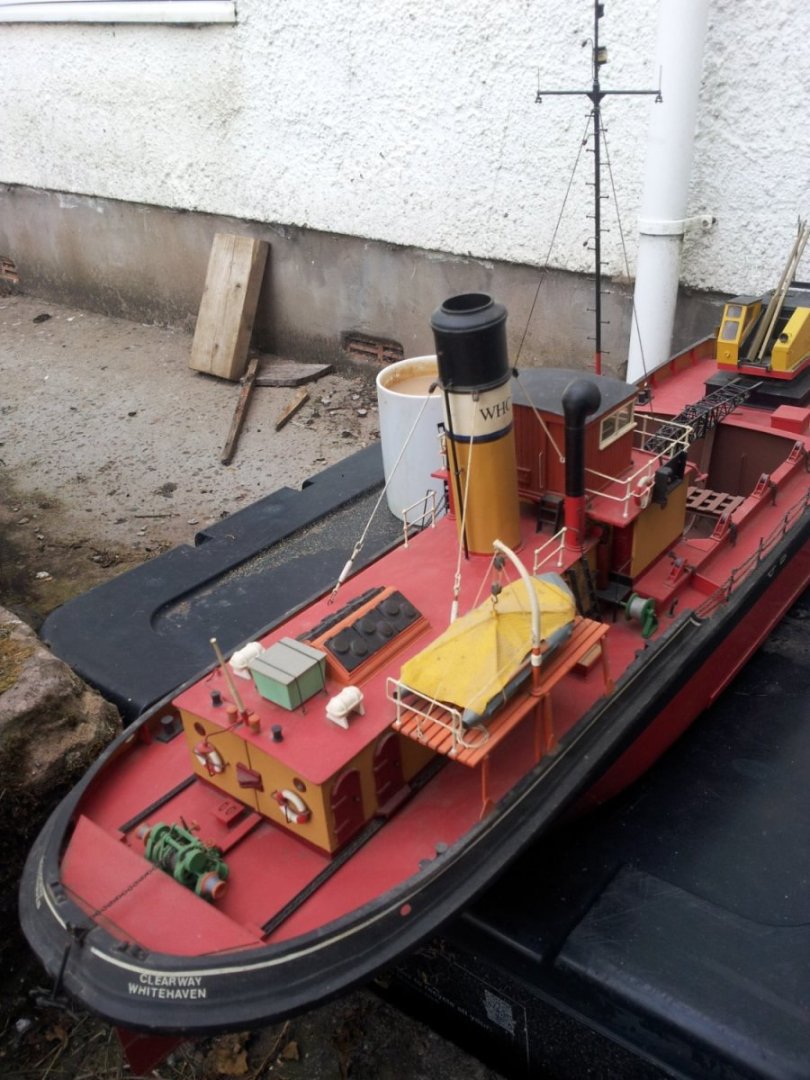
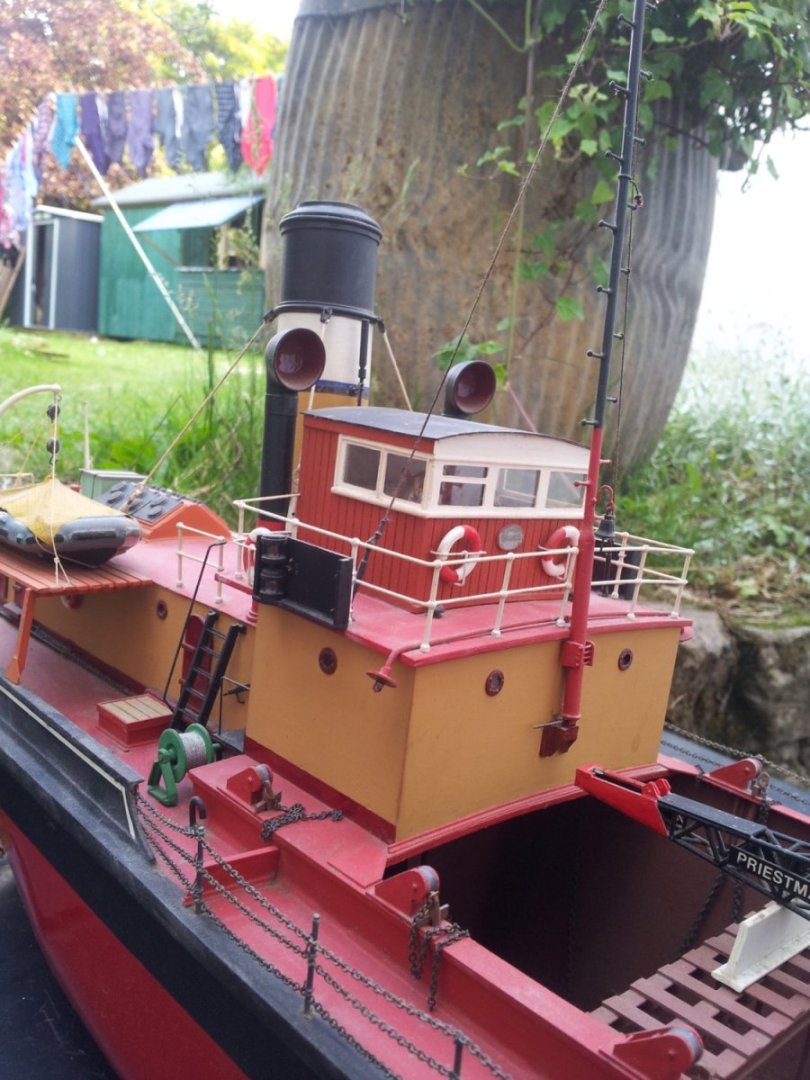
Here you go Greg- Grab hopper barge Clearway built by Alexander Hall and sons in 1927 if memory serves me right- model depicts her from around 1985 til mothballed 1991 (decay set in real fast and she went for scrap in 1998- though the steam engine and boiler went into a scandanavian lake steamer that was being restored). first two pics show her in the early 70's and 1990 next pics are of the model hope you like them Greg Keith
1.jpg.05fc2a8eca2d75bcce1587ab36391bff.jpg)
- 123 replies
-
- 2
-
-
- Le Pourquoi-Pas
- Constructo
- (and 1 more)
-
pull up a chair Keith- though might be interruptions depending on which of my many comely wenches seduces me when i walk into my workroom😜- will check the link out when i have some quiet time. Keith
-
Well pointed out regards vasa- i cut my teeth on billings kits and like them because they are easier to convert/ adapt/ upgrade as the frames tend to be accurate for a start! I also find some of the older billings kits had advantages over the new ones as everything is laser ply for a lot of the parts that used to use "proper" wood though they did like their plastic for deck/ mast fittings. Keith
-
No log for the dredger as most was built between 1998- 2002, then we moved house and never really had a dedicated modelling area till 2011 so really need to kickstart her (just really the crane to finish)- i will dig out some pics and post them on here if you want- also the pic on my profile is of the dredger and was called clearway (where my nickname comes from i use on here). It can be scary when you put something to one side and realise how many years have passed !!!!! Keith
-
i am just going to glaze the portholes as they look at the moment montaigne- though maybe enlarge them a little. Thanks for the offer of pics though i do have the book south with endurance which has a lot of frank hurleys pics and of course there are some good ones on getty images you can look at. Keith
-
Ty Montaigne, i just wish i had noticed that "gap" under the fore/anchor deck before i installed everything- if anyone is adding nit the deck planking will run uninterrupted into it and there is an anchor windlass under there. According to the plans i have the starboard cabin is the lamp room and the port side is the WC. Keith
-
Still can't believe how wrong Billings got the original kit- here's me complaining about occres offerings! Keith
-
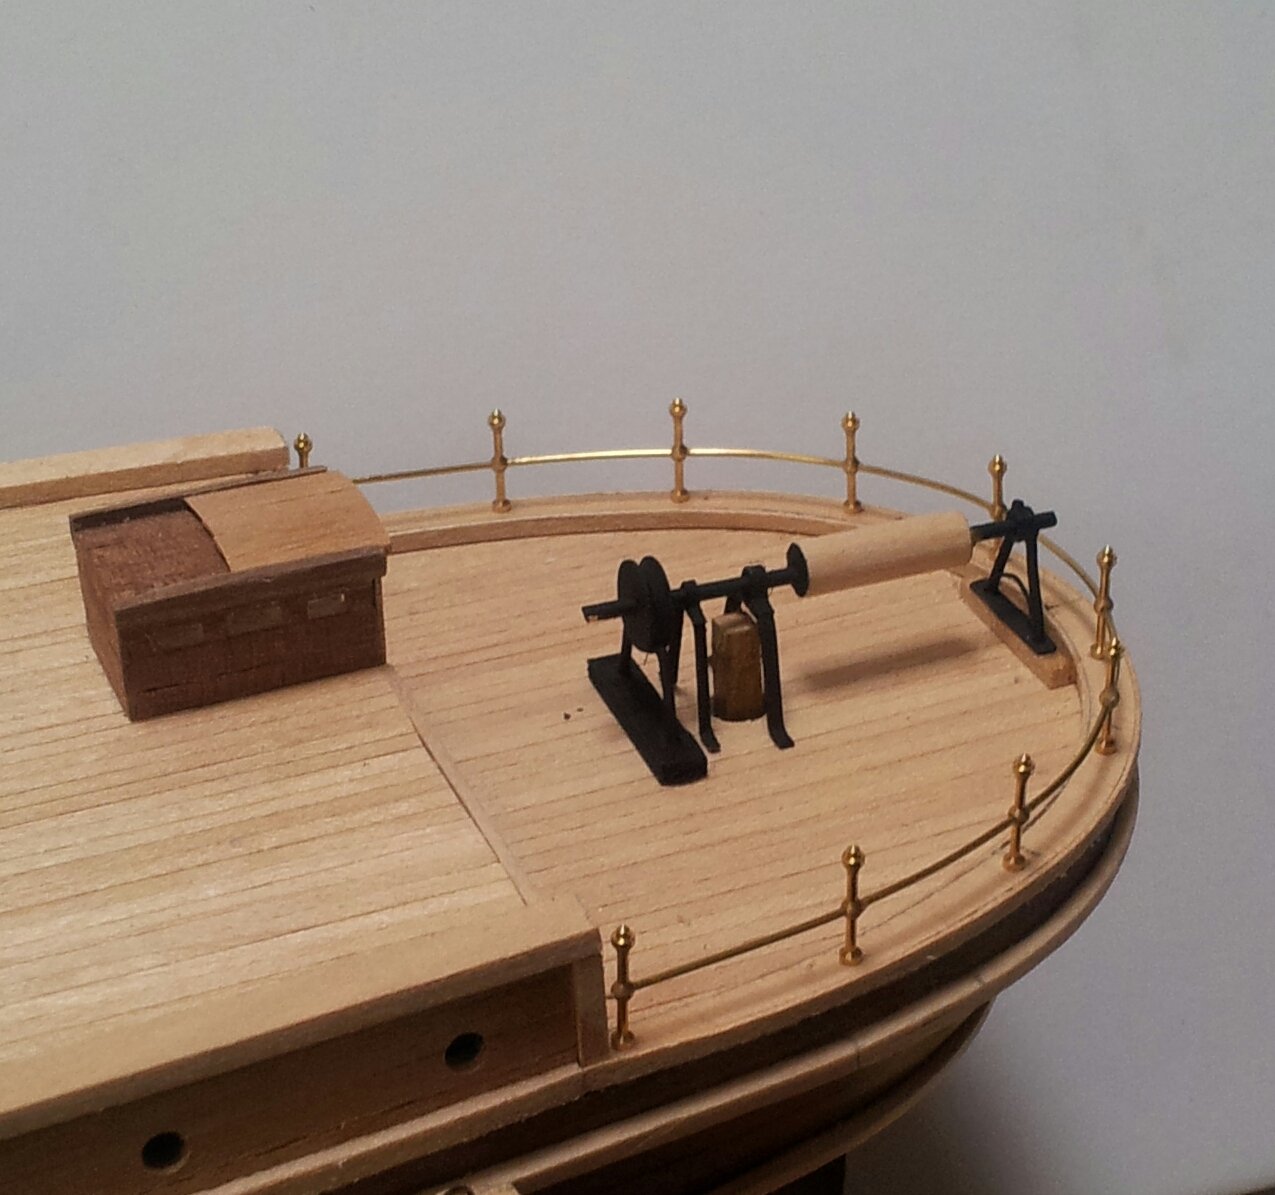
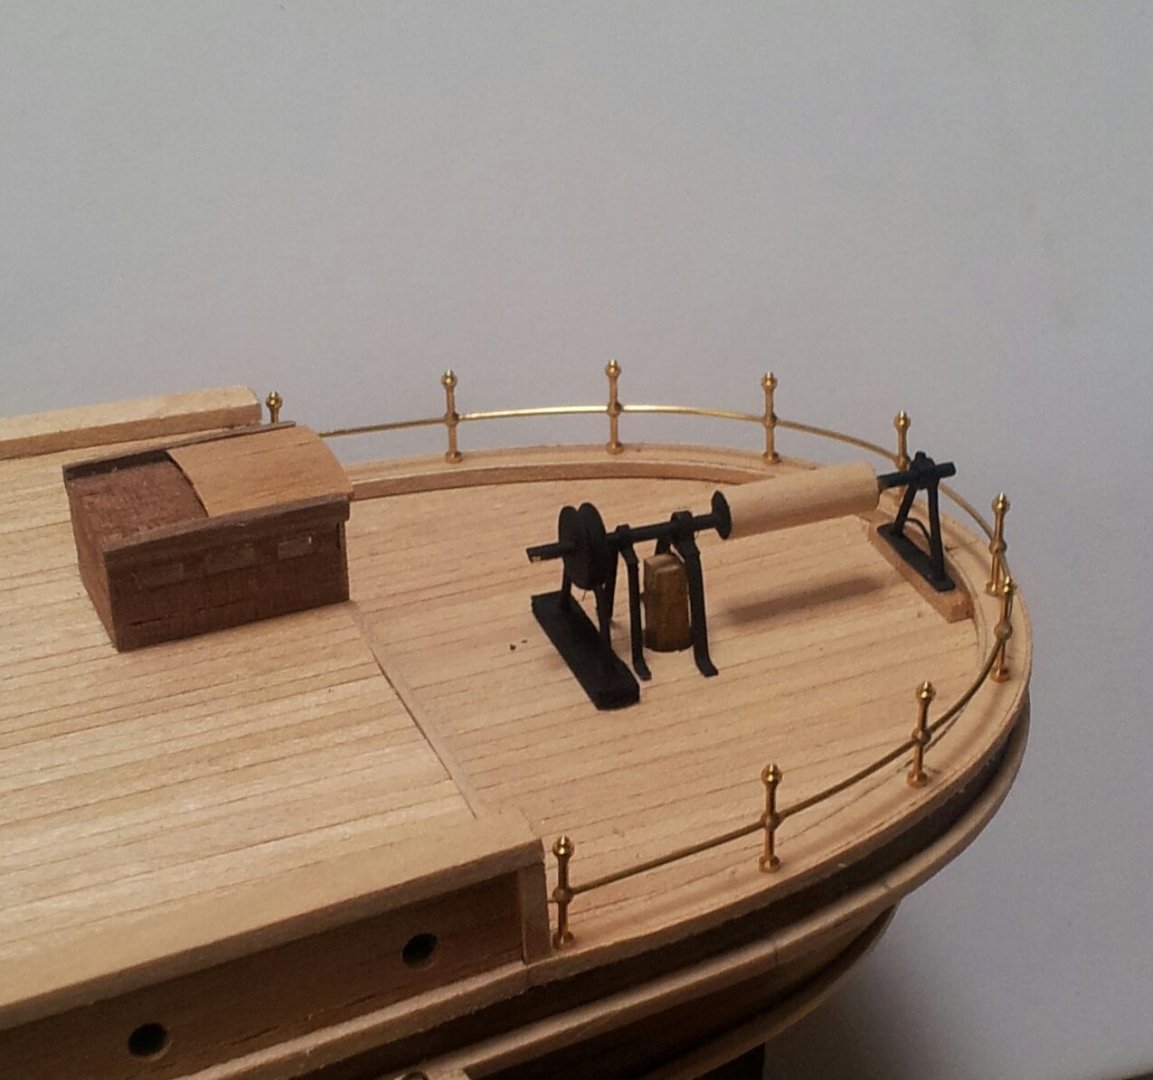
Thanks for looking in and the likes as always- work has continued with the steering with rearmost support bracket version 3- forgot to get a pic while still in the brass- all the brackets have been painted matt black and the wheel has had a coat of dark earth (Humbrol matt29). Also obtained some capped rail stanchions, single ball stanchions and some replacement engine room ventilators from Cornwall Model Boats. On the anchor deck, after looking at a good pic in Getty images have altered the catheads- weirdly enough on my plans for Polaris from the N.M.M. they are shown as Occre have them but on pic they are like mine !?!? Note the different position of the ventilators compared to Occres position- also have found a good view of the engine room skylight so that will be rebuilt. Take care all Keith

-
Hi JB- yep i start with the starboard pair first then the port, i add the deadeyes using my home made spacer on those four lines then repeat for the rest- if there is a single one left you can tie off and cut off the unwanted "tail" Keith
-
Welcome to the Endurance club- yes the Occre kit is open to a lot of improvements- i found the book South With Endurance and pics on getty images good- also Hakezou has some links to some good pics on his log 😉 Keith
-
yeah i tried to cut the cats hair once, but lets just say he let me know that it would hurt me more than him!!!- I actually have the keel/ frames and two well decks in position on the Billings kit, but will try to focus on getting the Heller kit advanced though Terror aand Endurance beckon too along with a neglected Victory and a scratch built model of a 1920s steam grab dredger that worked Whitehaven harbour till the early 1990s (still with her coal fired steam engine)! Keith