mort stoll
-
Posts
541 -
Joined
-
Last visited
Content Type
Profiles
Forums
Gallery
Events
Everything posted by mort stoll
-
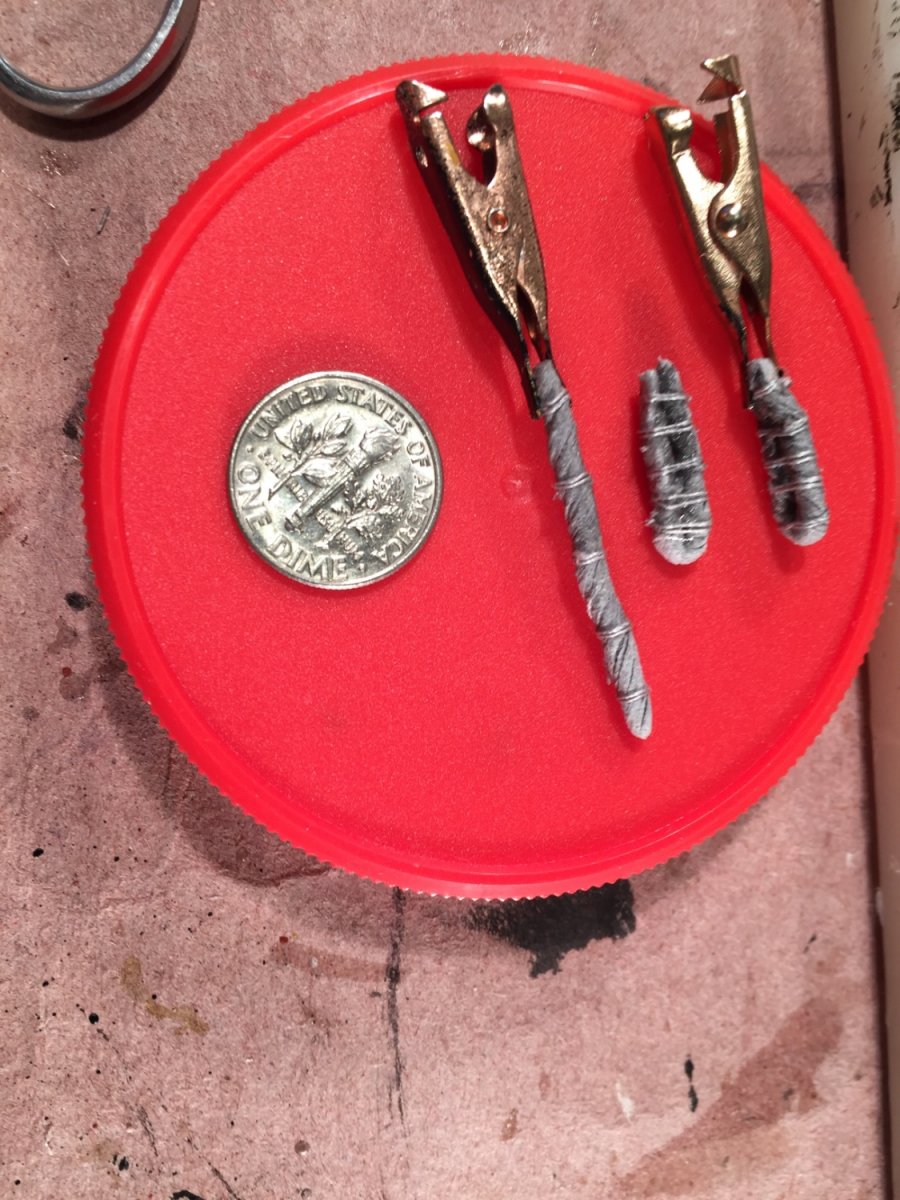
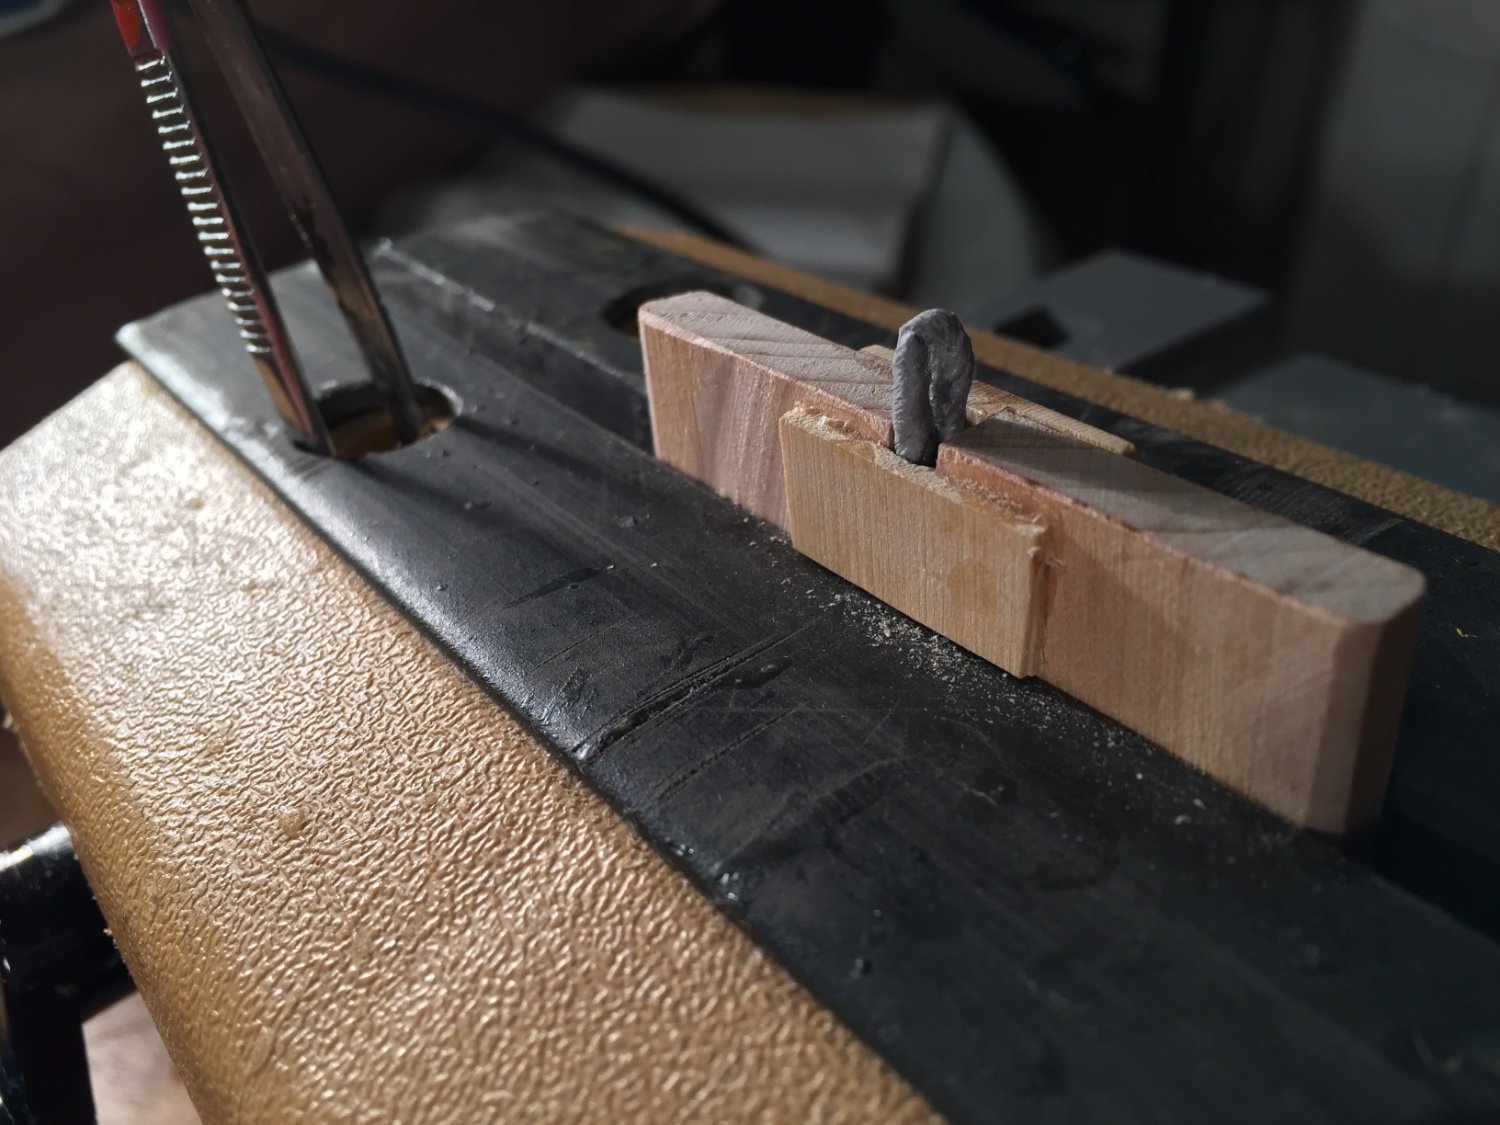
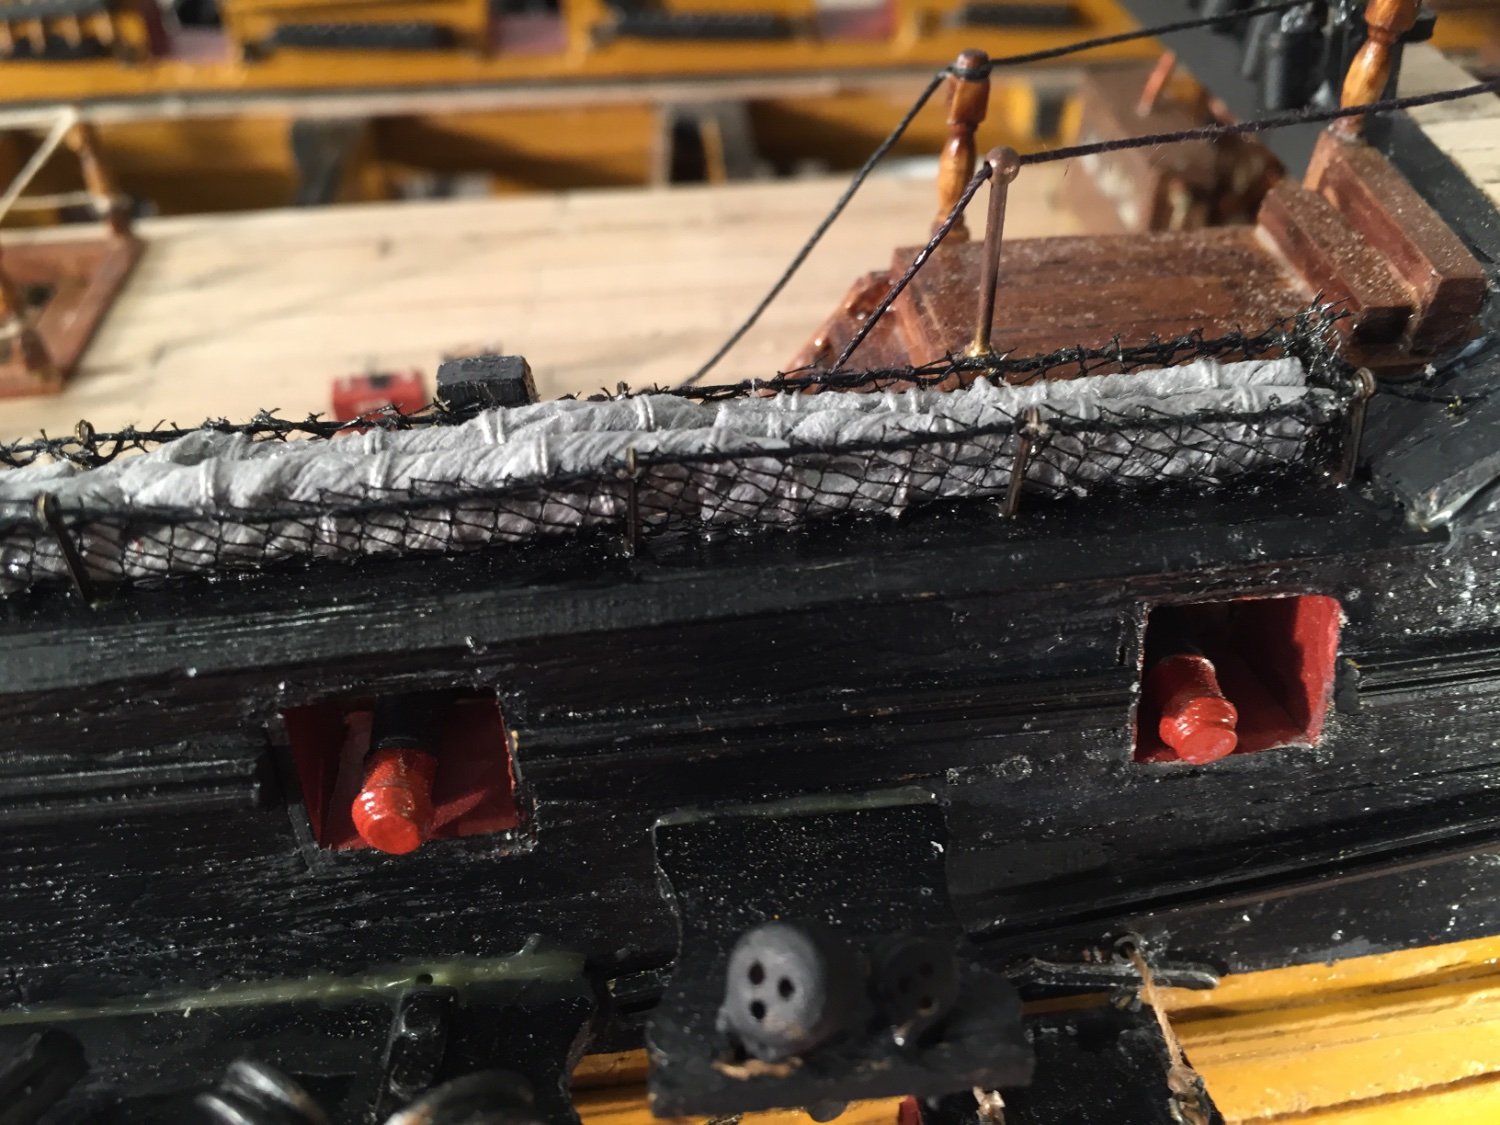
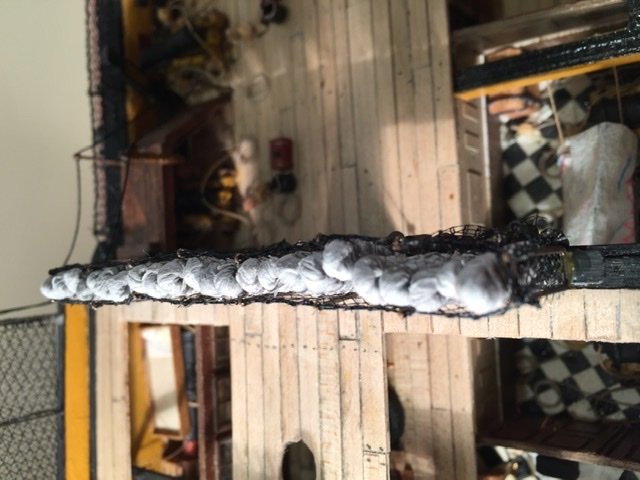
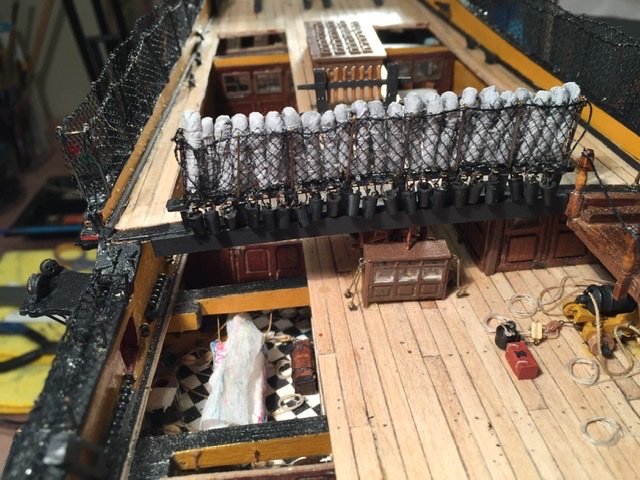
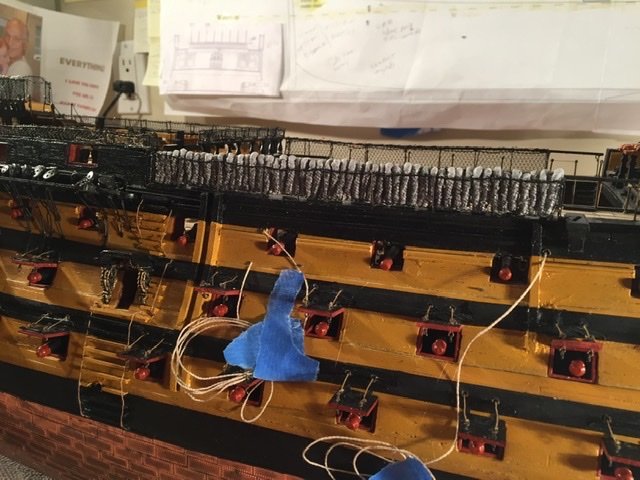
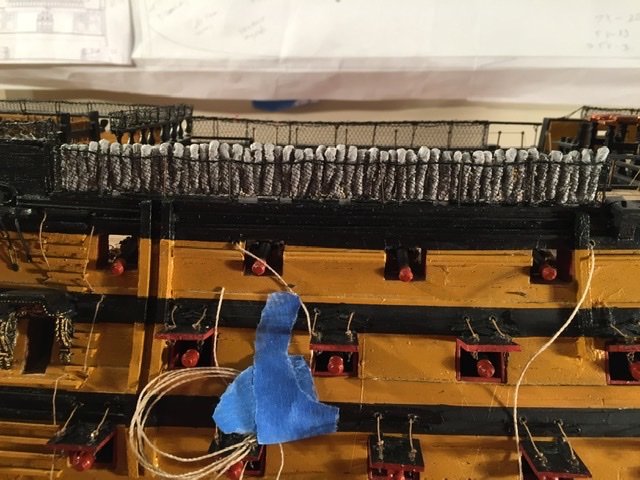
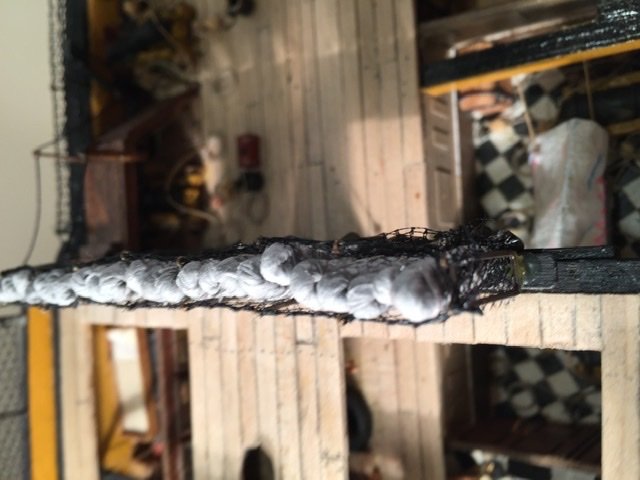
Have finished the hammocks as the above pictures show. The jig designed by a fellow club member saved me tons of time. It was a godsend. The height of the cranes varied depending on their location - quarterdeck, forecastle, break of the poop etc. Per Longridge in the “AOS” and Lavery in “The Arming And Fitting Of English Ships Of War.” It seemed more logical to have the hammocks in the cranes of lower height laid lengthwise, on their sides as opposed to being folded in half in a v-shape which was how I stowed the hammocks in the higher length cranes. In the shorter height cranes I’m sure the ships motion would have shaken them loose from the cranes. After researching the color - Lavery and Longridge - I made the hammocks from cocktail napkins purchased at Party City. Have a wonderful and safe 2022.
- 60 replies
-
- 8
-

-
- victory
- caldercraft
- (and 1 more)
-
Hi Avi, I'd call Bluejacket. I'm sure they will be happy to sell you some. Keep up the great work, Mort
-
Am making the hammocks. Have a lot more to make, and have mounted the hammocks at the break of the poop and the ones on the starboard waste. Am still unsure how if I should mount the hammocks in the smaller cranes - on their side length wise as Lavery suggests in “The Arming and Fitting of English Ships of War - or in a ushape - as I’m sure the ships motion would shake them loose if they’re mounted in a ushape. I’d appreciate your thoughts. Hope you and your families are having a great holiday season, have a wonderful Christmas and an amazing 2022. Stay safe and well. Mort
- 60 replies
-
- 3
-
-
- victory
- caldercraft
- (and 1 more)
-
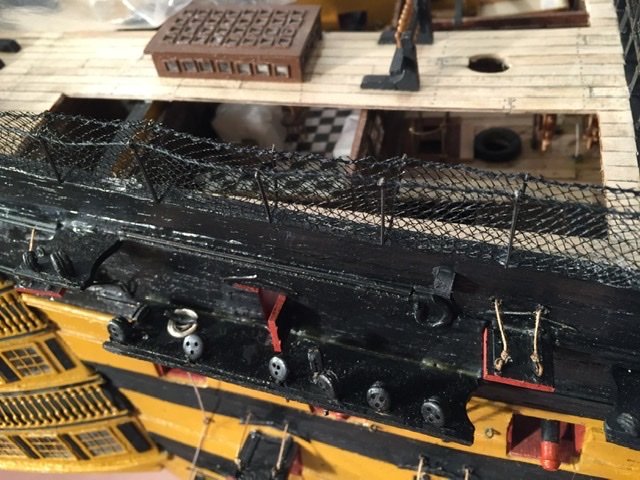
The hammock cranes are different heights. The only pictures of hammocks in the cranes I’ve ever seen show them folded in half within the cranes. I would think that the hammocks in the shorter cranes would have been shaken loose by the motion of the ship if they were folded in half. Longridge, Goodwin in “The Construction and Fitting of English Man of War” and McKay in “The AOS Victory” make no mention of their proper stowage. Only of the cranes themselves. Mondfeld shows them folded in half. Lavery in “The Arming and Fitting of English Ships of War”says that within the lower rails “they must have been stowed - lengthwise - on their sides” - which to me makes perfect sense - but he’s specifically referring to the cranes at the break of the poop and quarterdeck. The cranes at the forecastle and quarterdeck are only slightly larger than those at the break of the poop. My question is how should I stow the hammocks in those cranes, folded in half or lengthwise on their sides?
- 60 replies
-
- 3
-
-
- victory
- caldercraft
- (and 1 more)
-
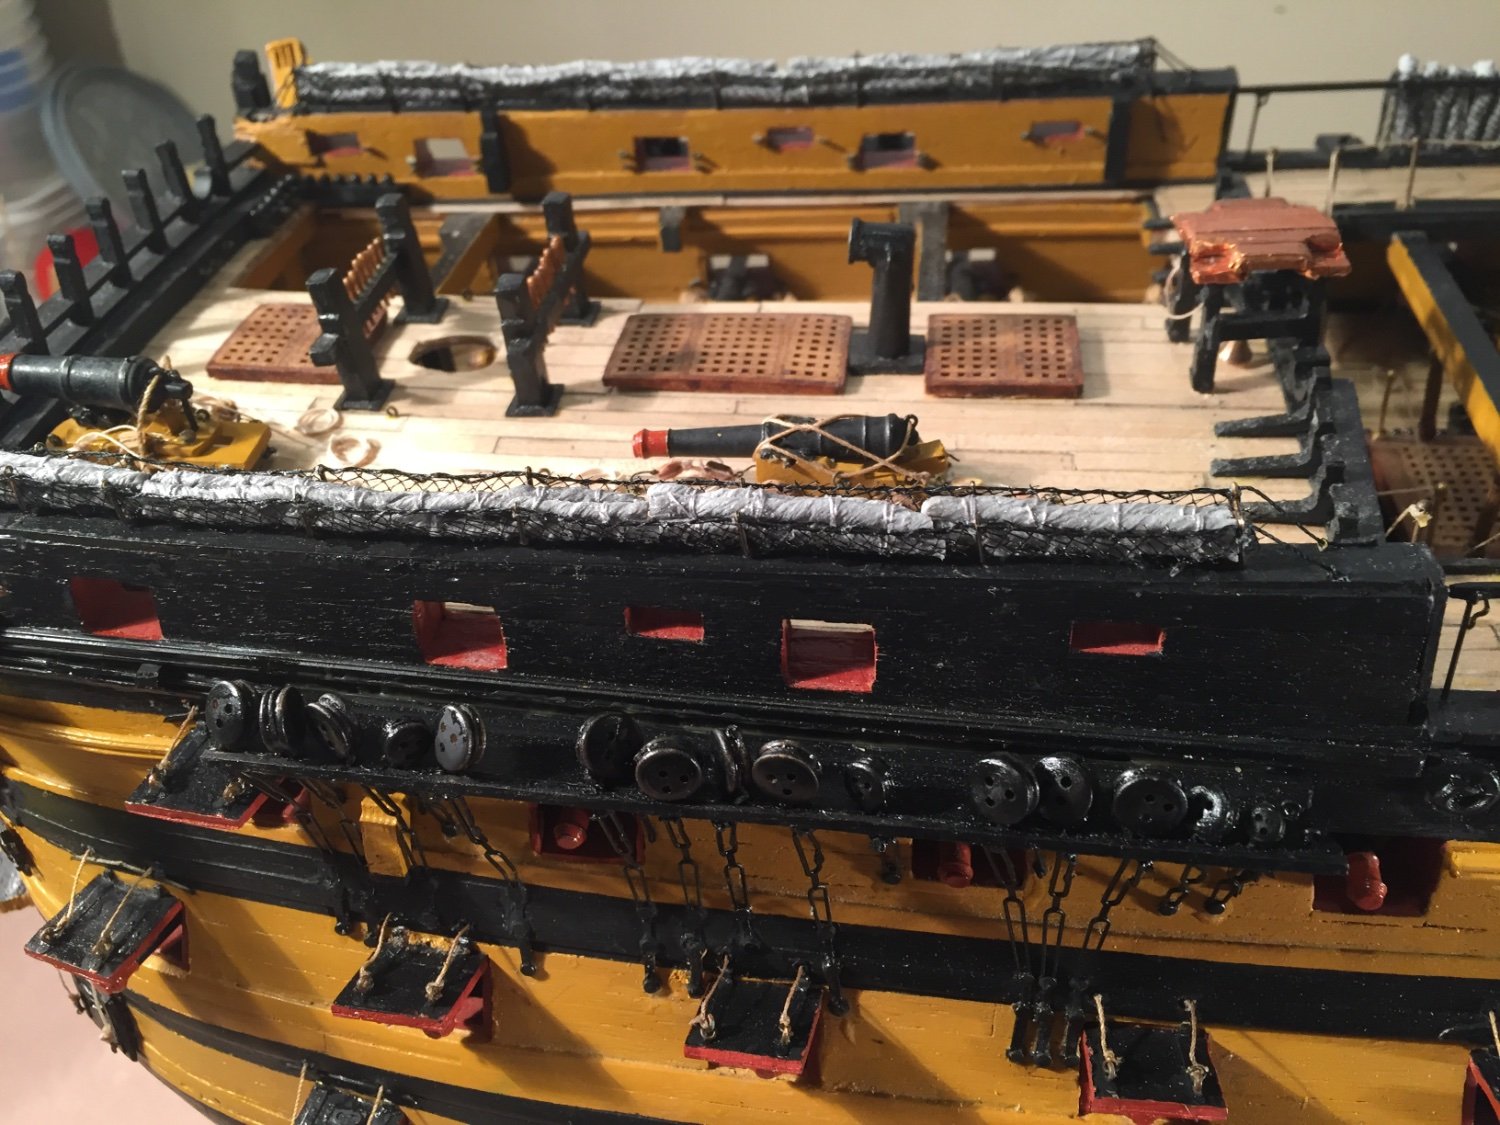
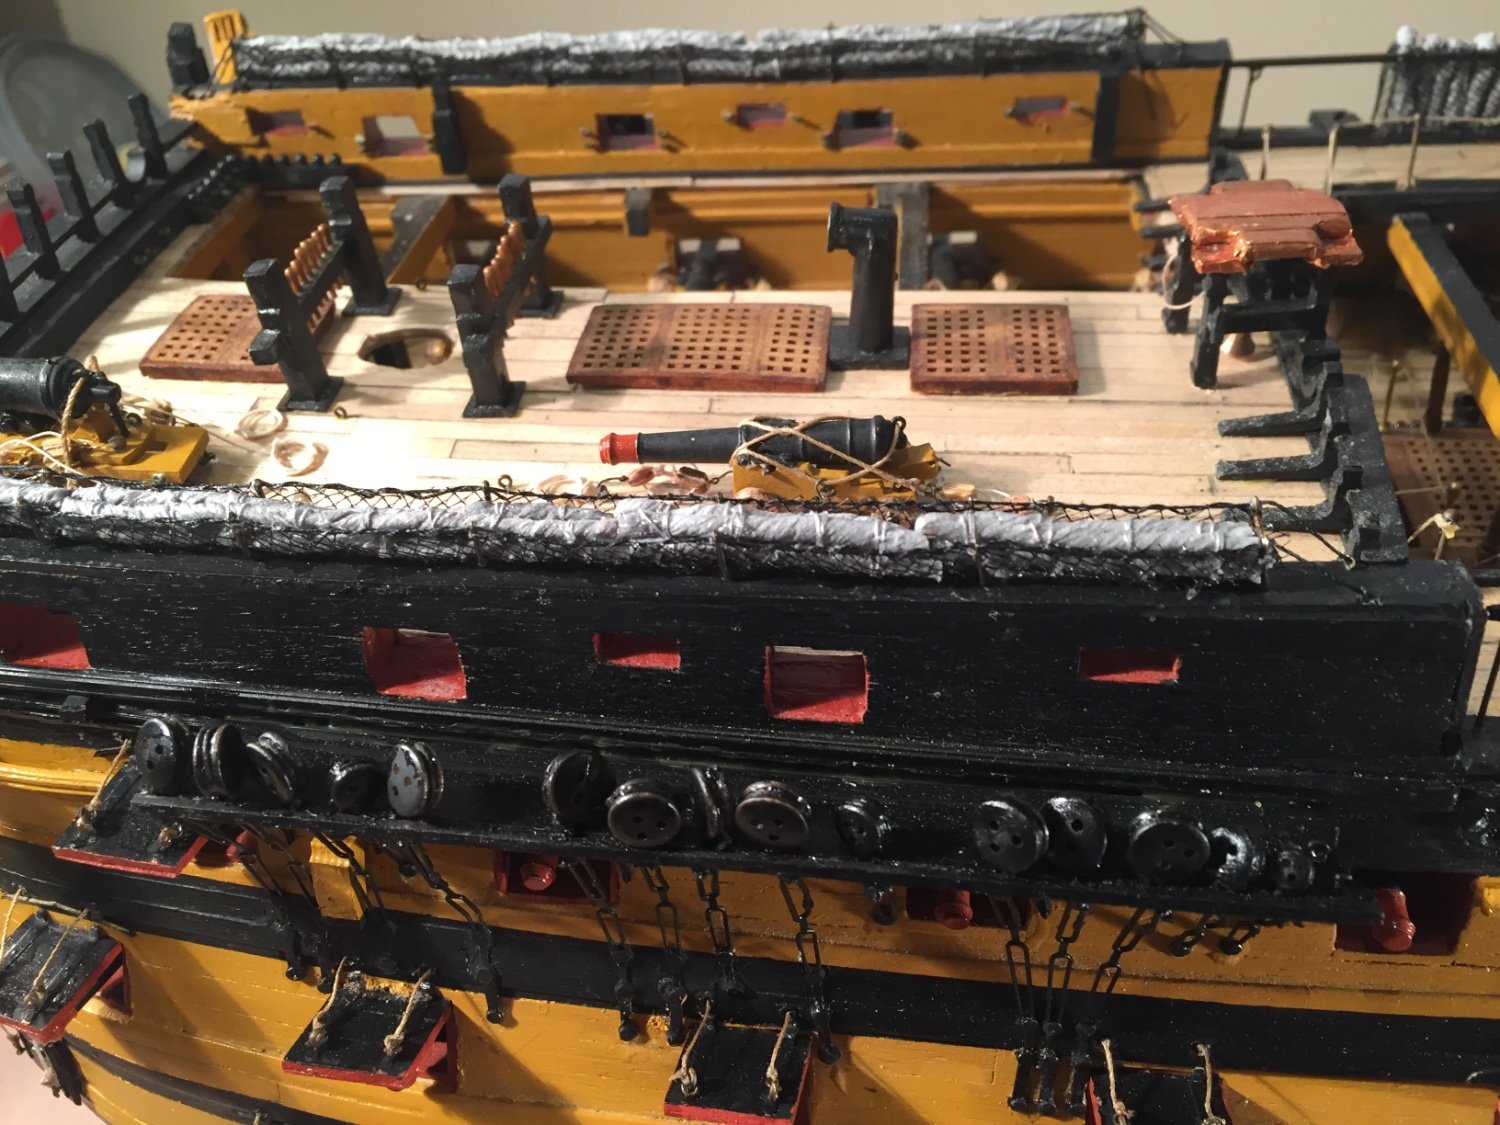
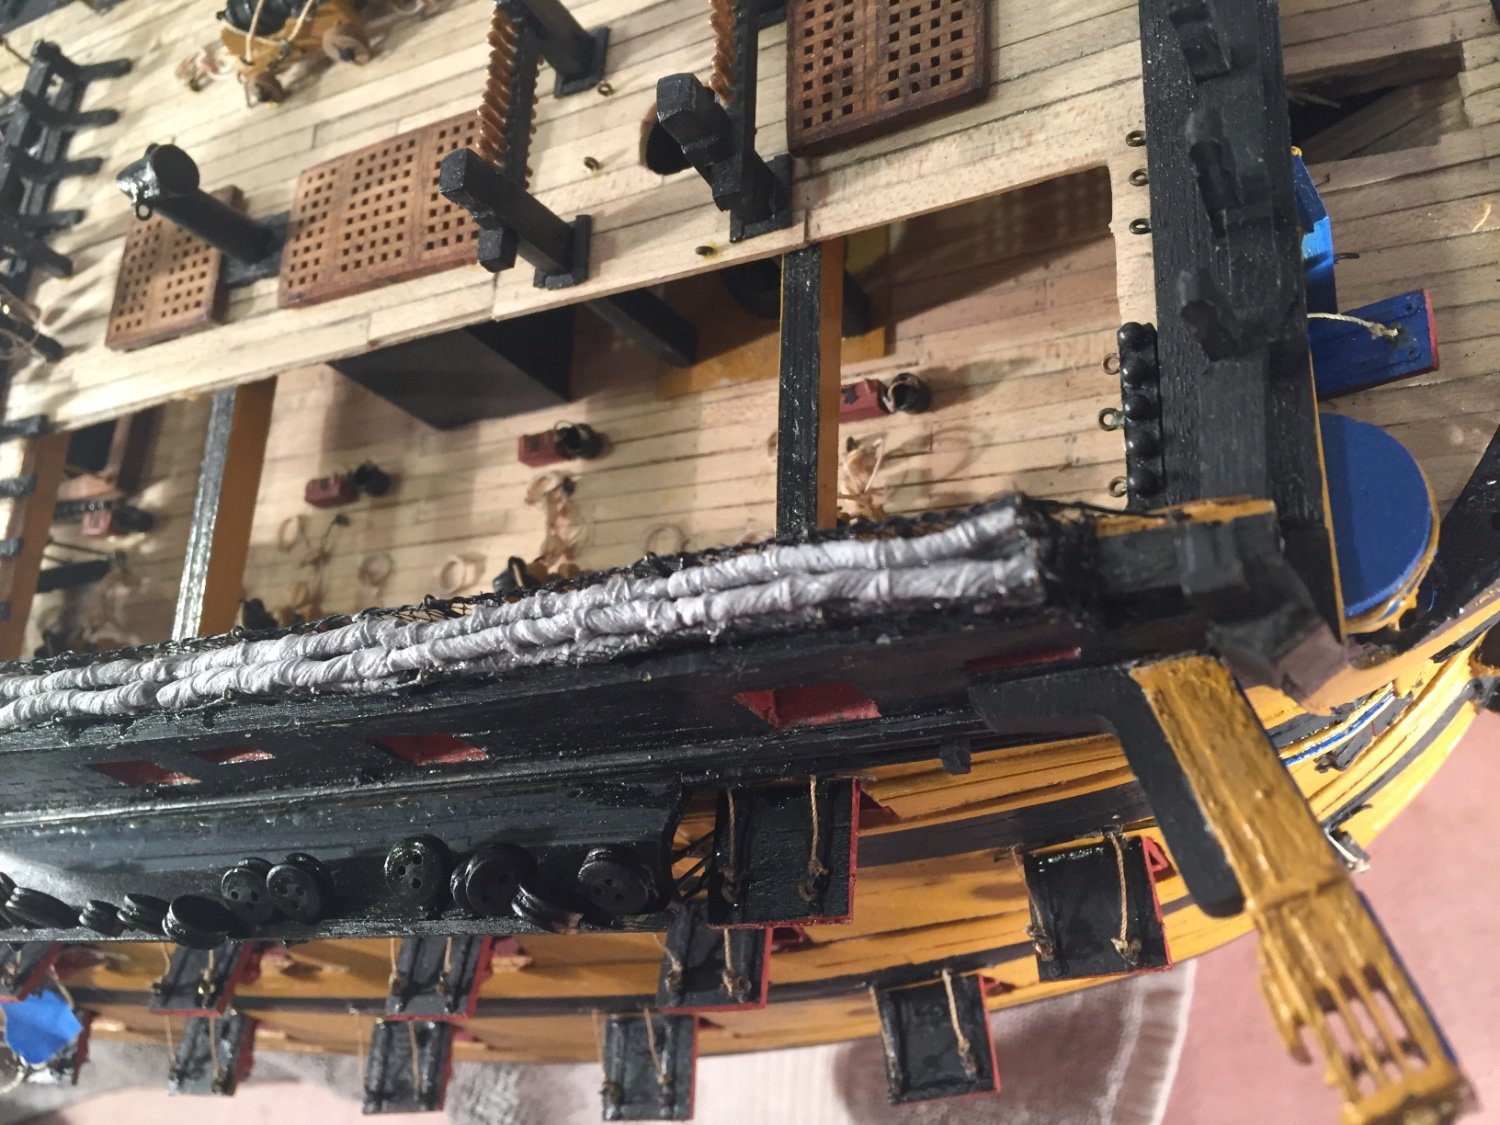
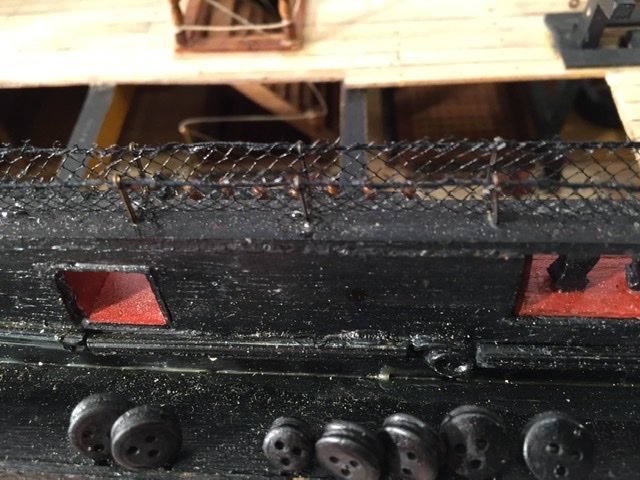
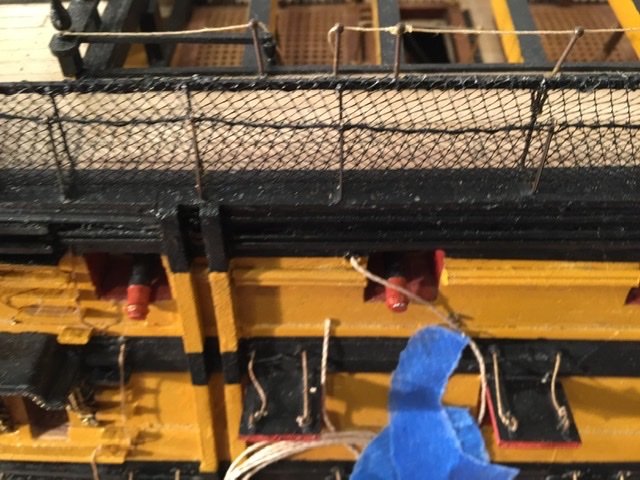
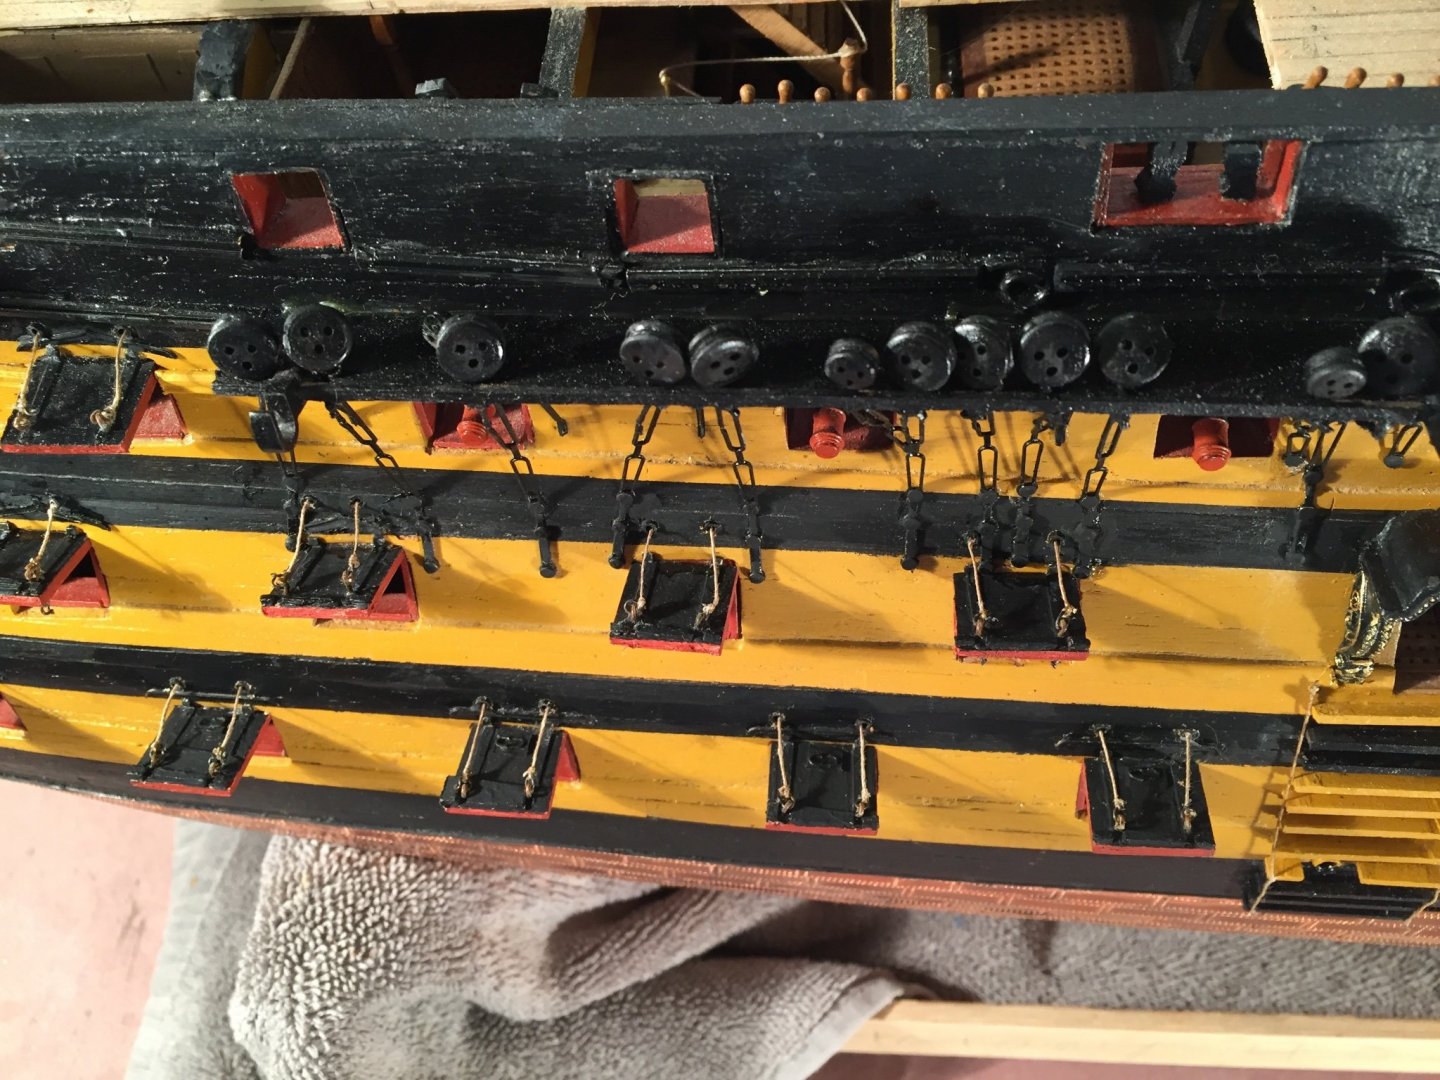
Hammock cranes mounted and nettings sewn onto .25 black line. It was very tedious and precise work. Seemed to take forever. I used black tule for the netting. Am now making the hammocks.
- 60 replies
-
- 3
-
-
- victory
- caldercraft
- (and 1 more)
-
It still looks great. Most of the planks are covered in plating and the ship is going to be painted. Keep up the great work. Mort
-
If it were me I would match the hull to the instruction book and the plans you intend to use to build the ship. Make sure both the plans and the instructions match. Hope this helps, Mort
-
I assume you made all of the furniture in the Captain's cabin yourself. It looks great as does the rest of the model.
-
Very sorry to hear that. I look forward to your new log. Main thing is that the model is still an undamaged work of art.
- 112 replies
-
- 2
-

-
-
- Bluejacket Shipcrafters
- Constitution
- (and 2 more)
-
Mark, Am very sorry to hear that. I've been following since the beginning of the build and always look forward to your posts. I'll be praying for you. Mort
-
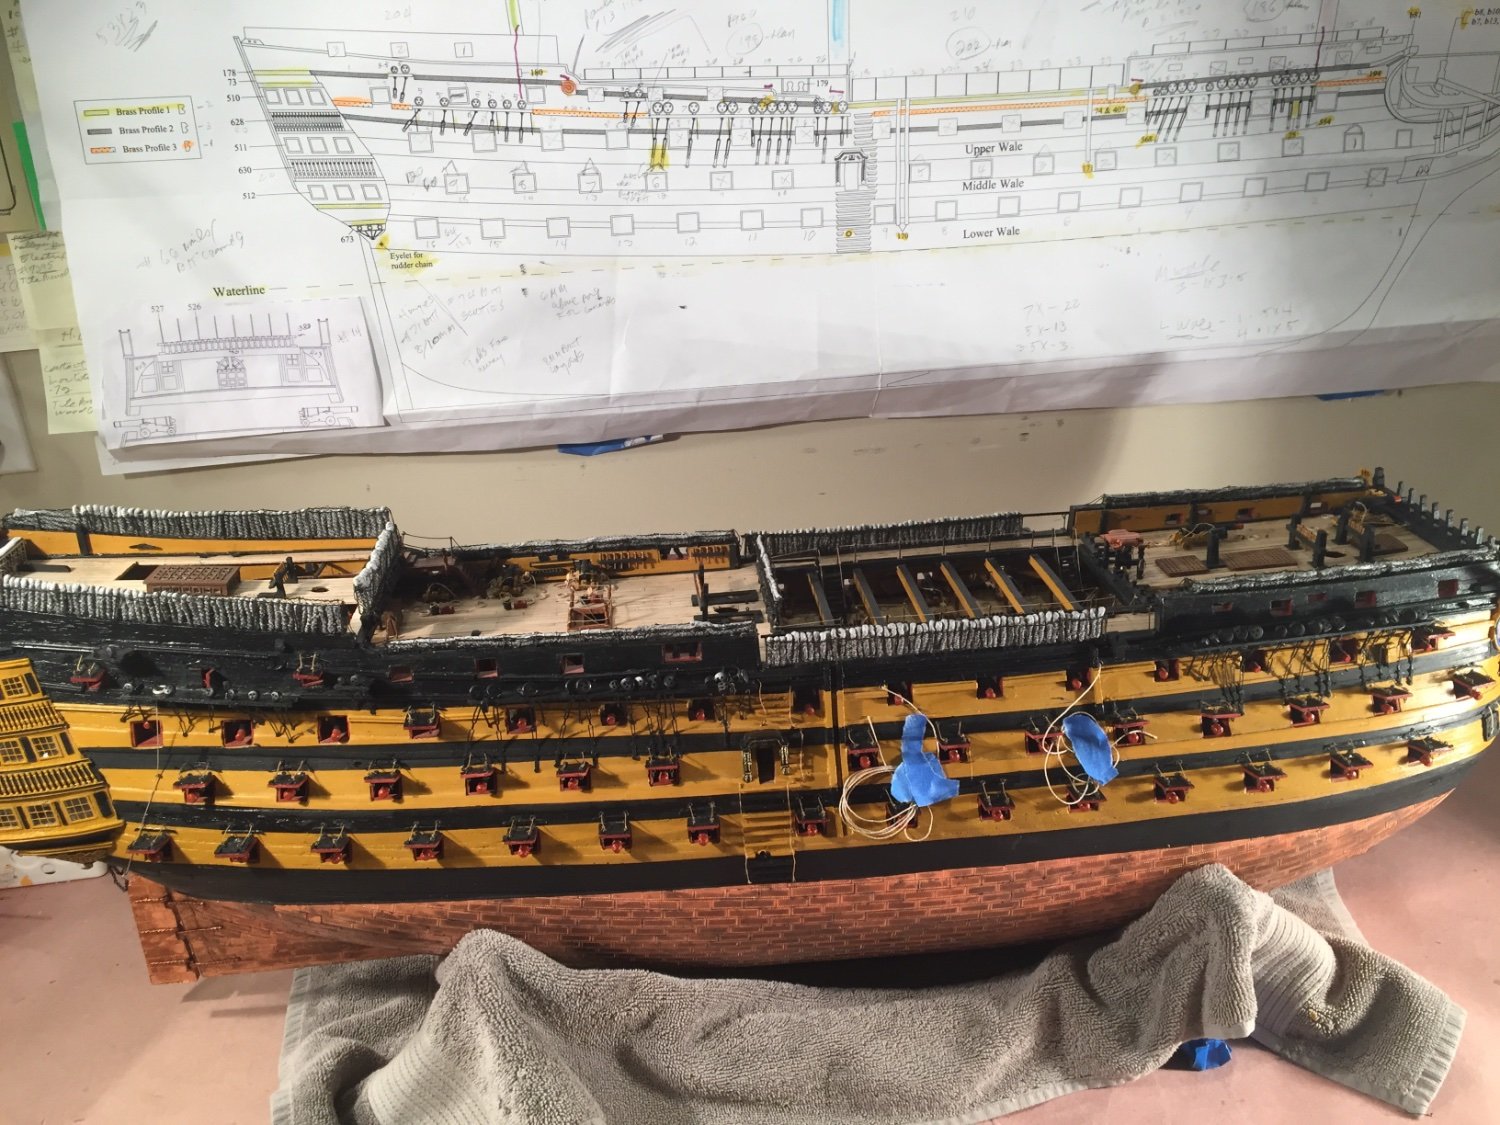
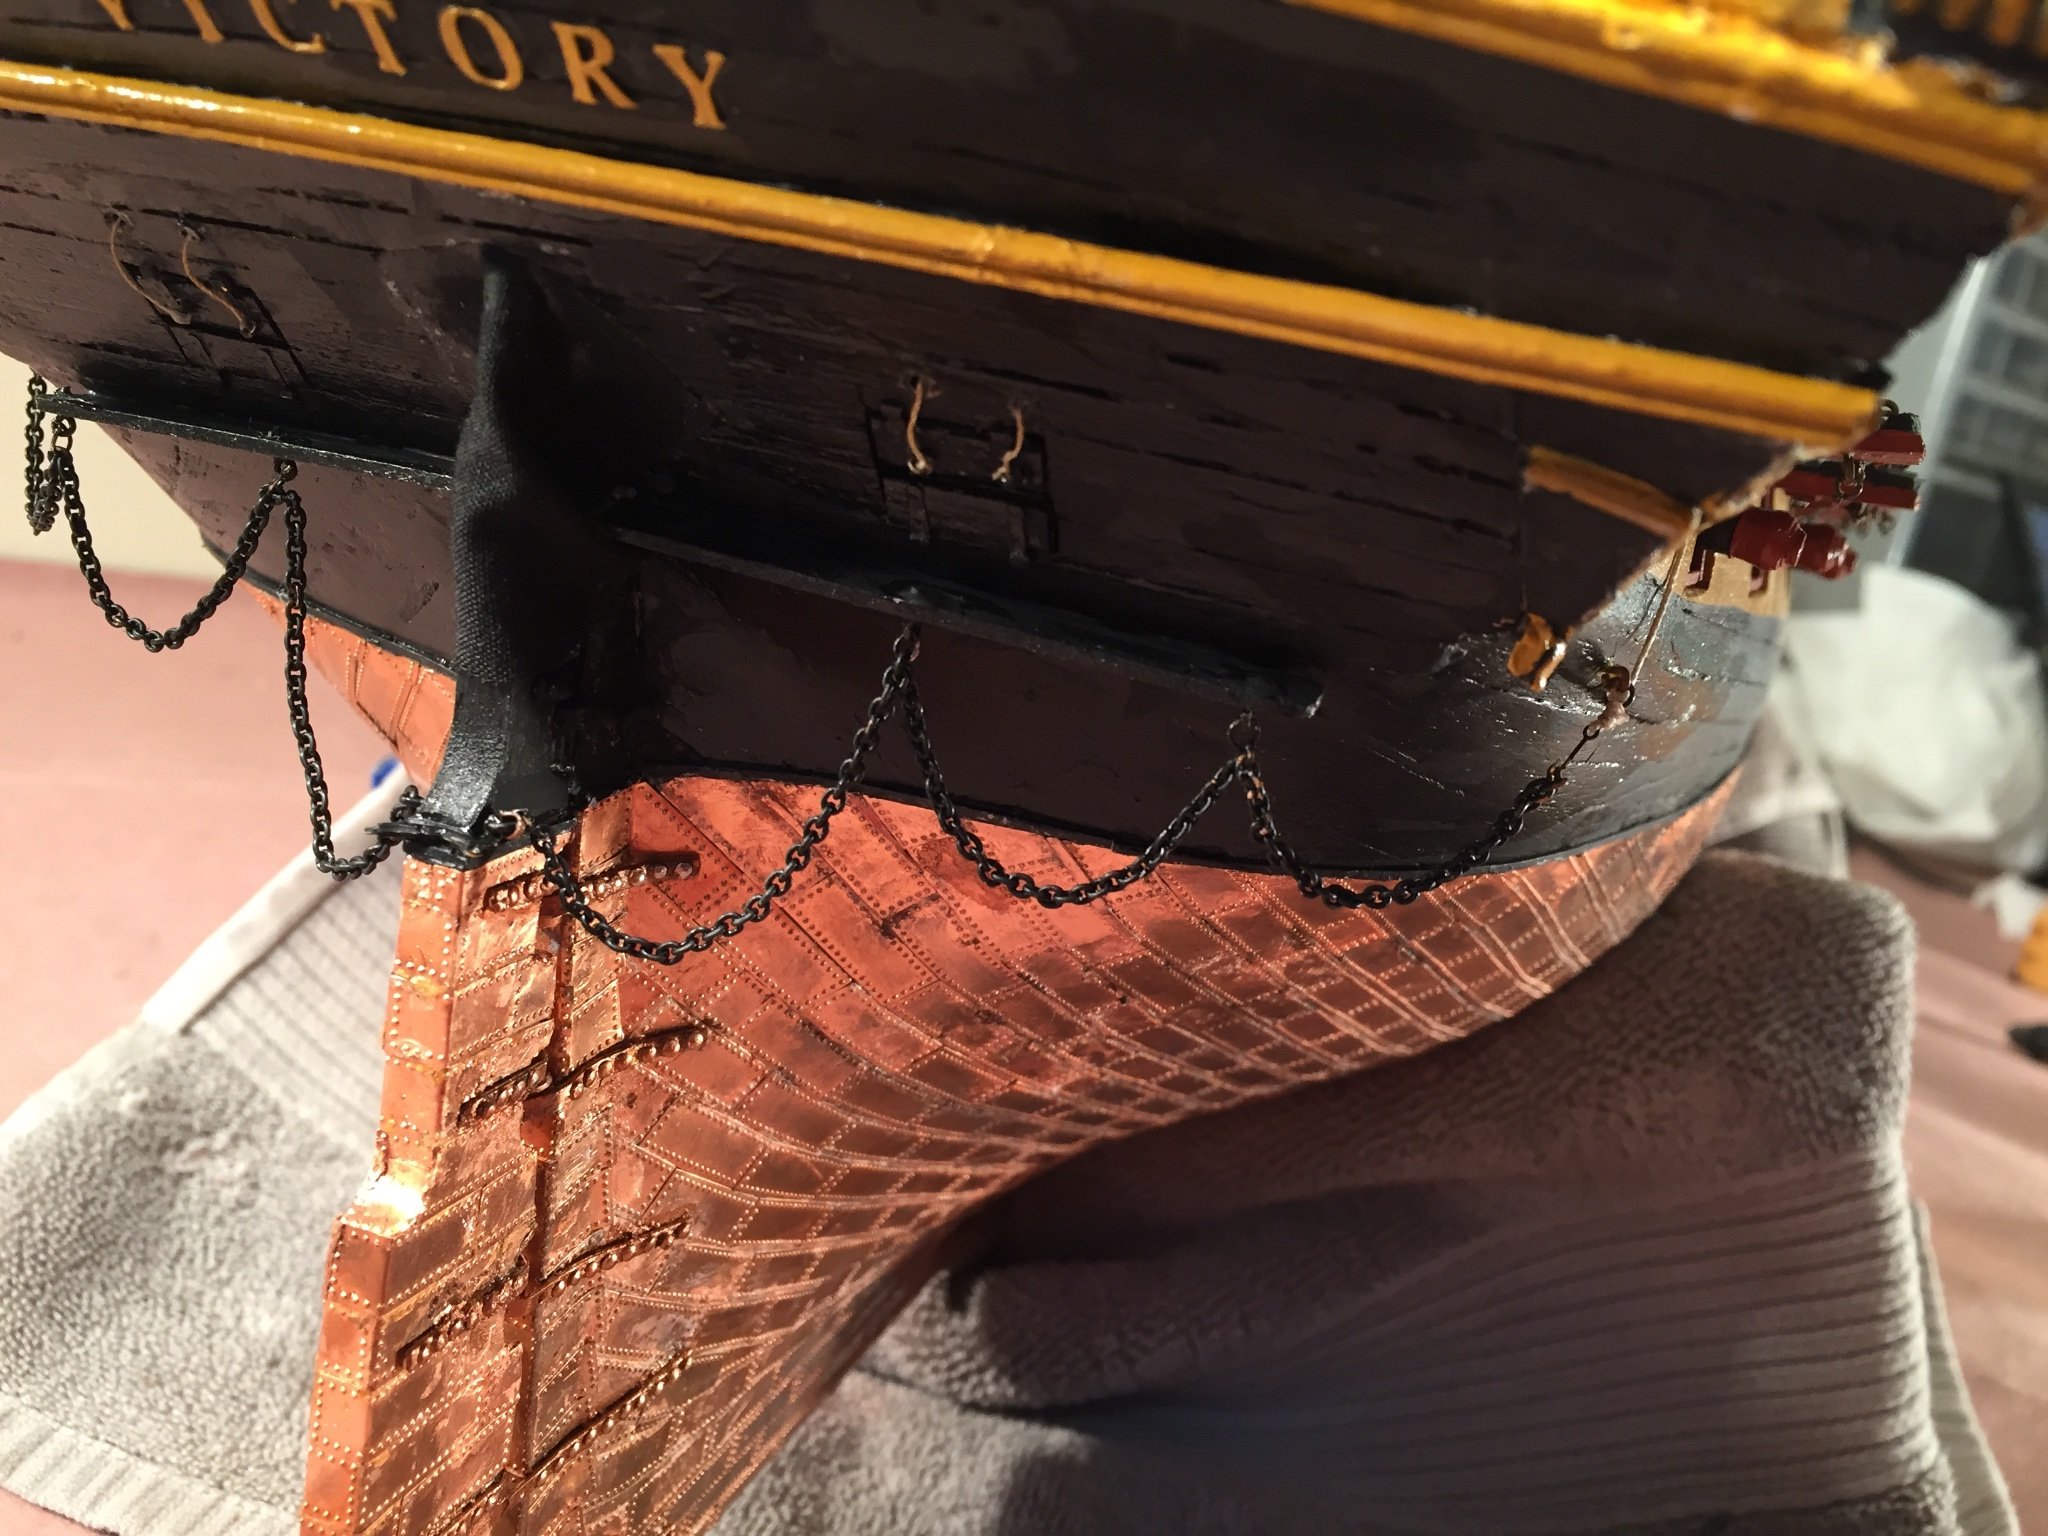
Hi everyone, Have just mounted the rudder. I used dome headed pins to simulate the rivets and added a rudder coat as per Longridge. I used .50 tan thread for the rope line to the mizzenmast channel. I couldn’t organize the stopper knot properly so I fastened the rope to a medium cleat. Happy Thanksgiving to all. Stay safe and well, Mort


- 60 replies
-
- 8
-
-
- victory
- caldercraft
- (and 1 more)
-
Yes I believe they curve upwards slightly. Could you make a copy of the plans and rubber cement the strip of the gun ports to the hull where they should be and then cut the ports out? Hope this helps. Keep up the great work.
-
Hi Paul, Amati and Mantua on the CMB site have heart and violin blocks. A few years ago I bought bullseyes from Model Shipways. Hope this helps.
-
This diagram is on page 121 in “the Anatomy Of Nelson’s Ships”. Hope this helps’ Keep up the great work.
-
Thanks Ian. That,or .75 was what I was thinking.
-
Perfect. thank you. What size rope did you use?
-
Hi Paul, I've a question concerning an earlier post, #89 on 11-19-20. Where does the rope between the rudder chain and the mizzen channel lead to, and what size rope did you use? Thanks and keep up the great work, Mort
-
Hi Ted, Where did you get the netting for your hammock cranes? It looks great. Thanks, Mort
-
I followed the "Hull Construction Manual" which I supplemented by following various other Victory builds - paulb, Robert29, Charter33, Gil Middleton, Heinz746. You're off to a great start. Mort
-
Yes David, That's how the ports are constructed and how the lids are installed on my Victory and it worked out fine. Mort
-
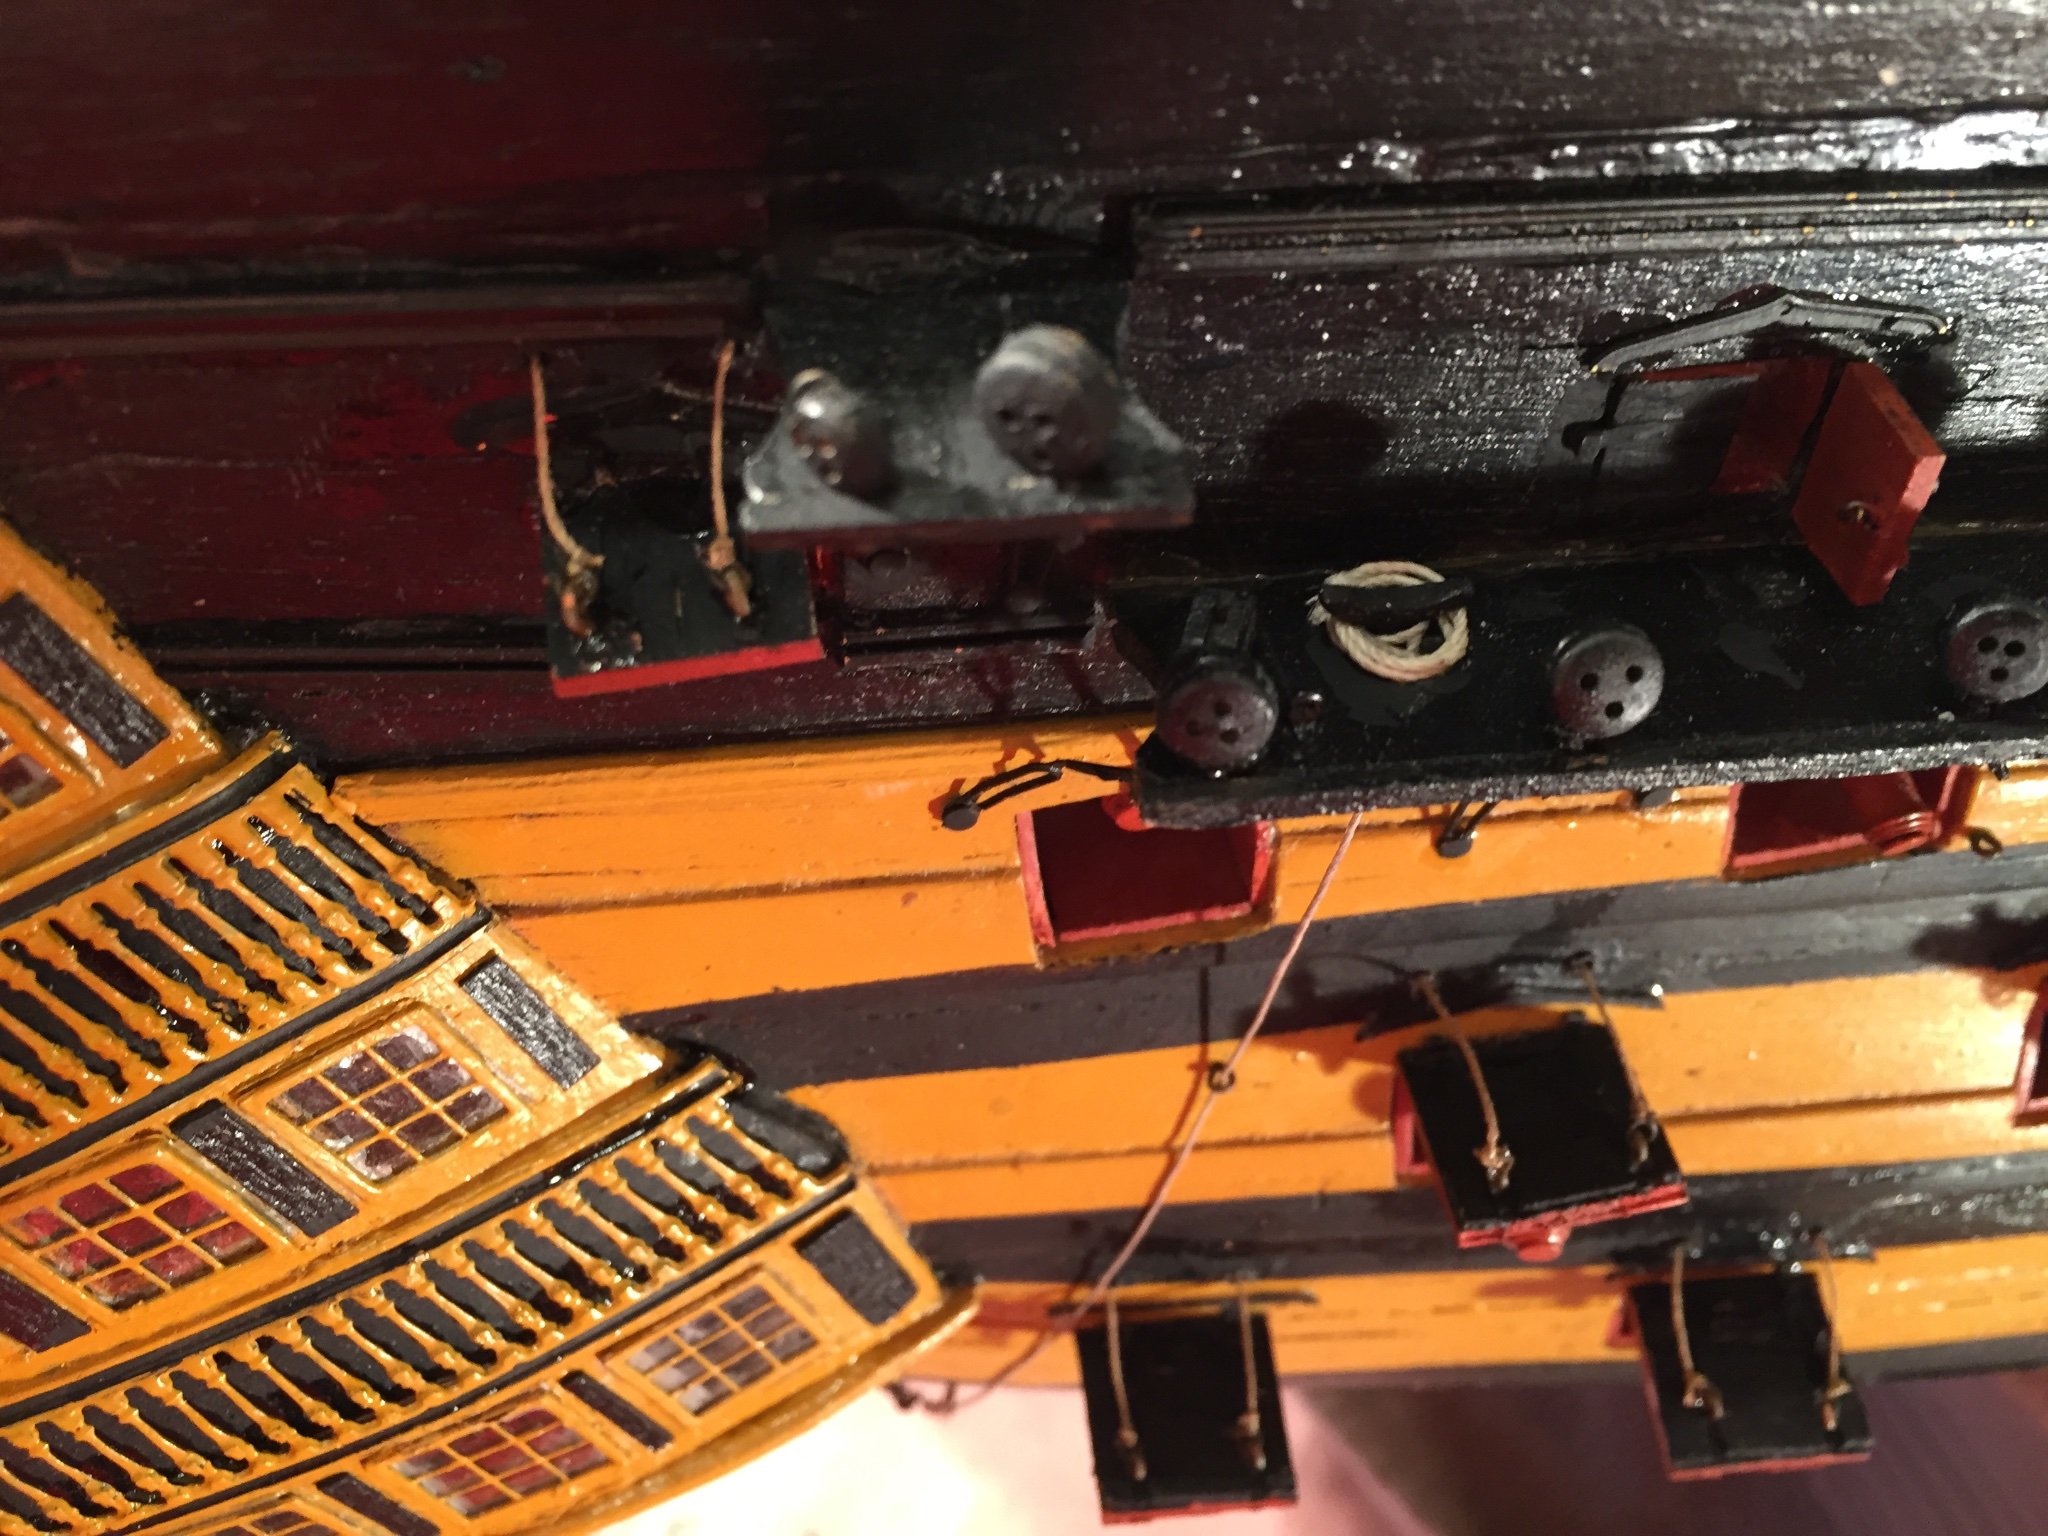
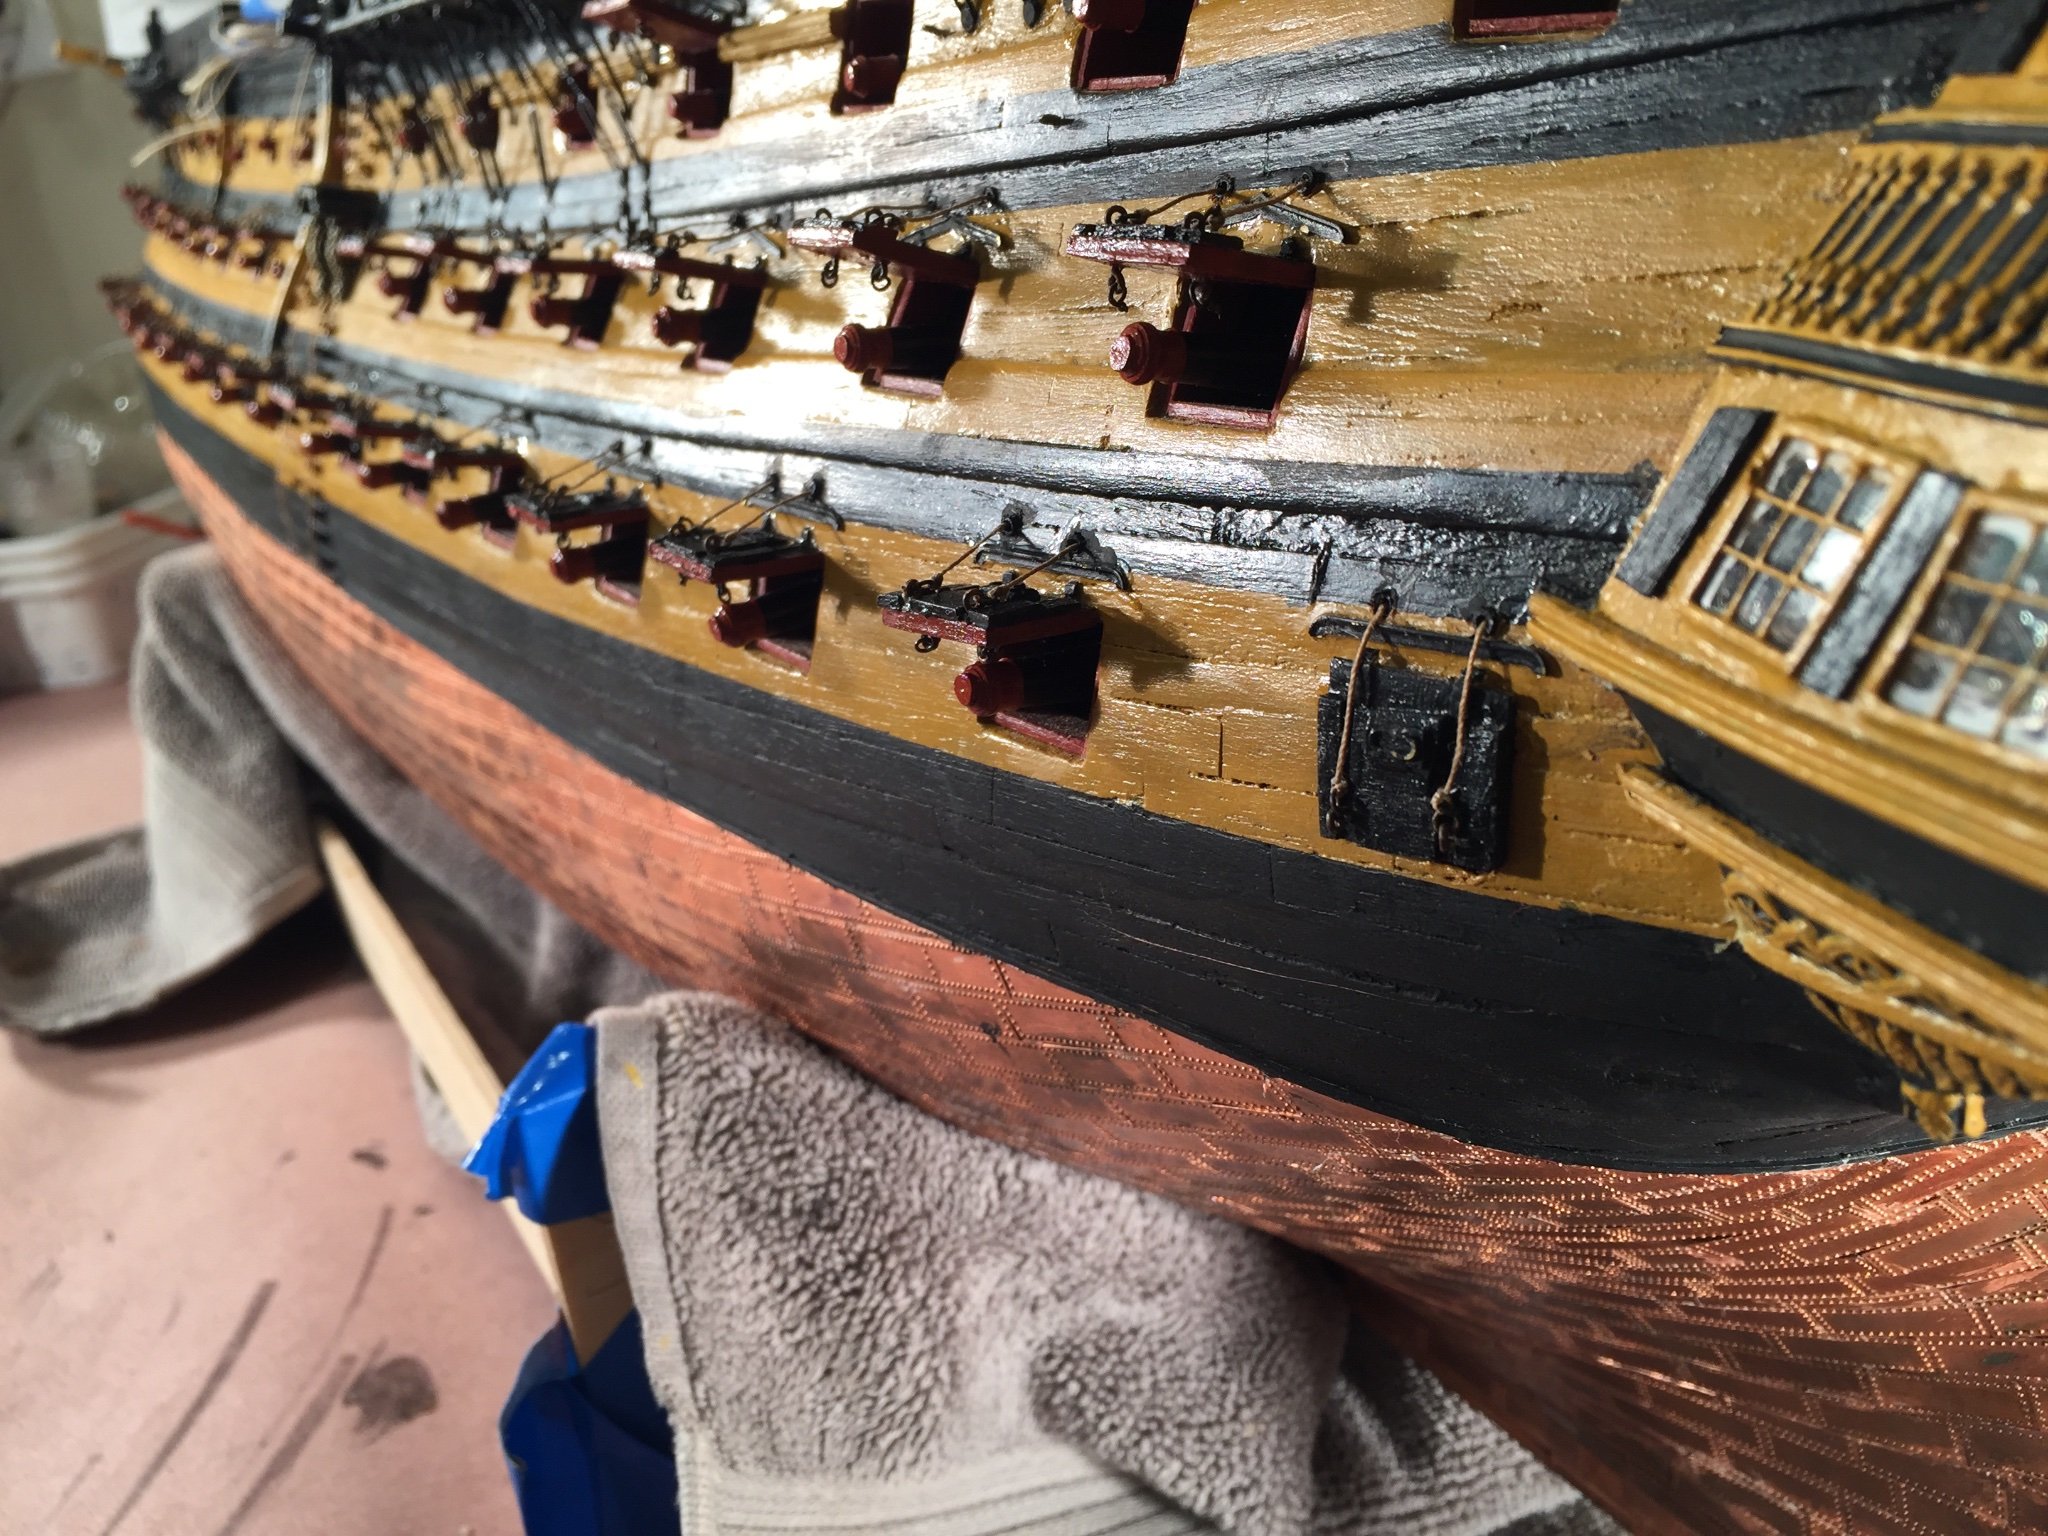
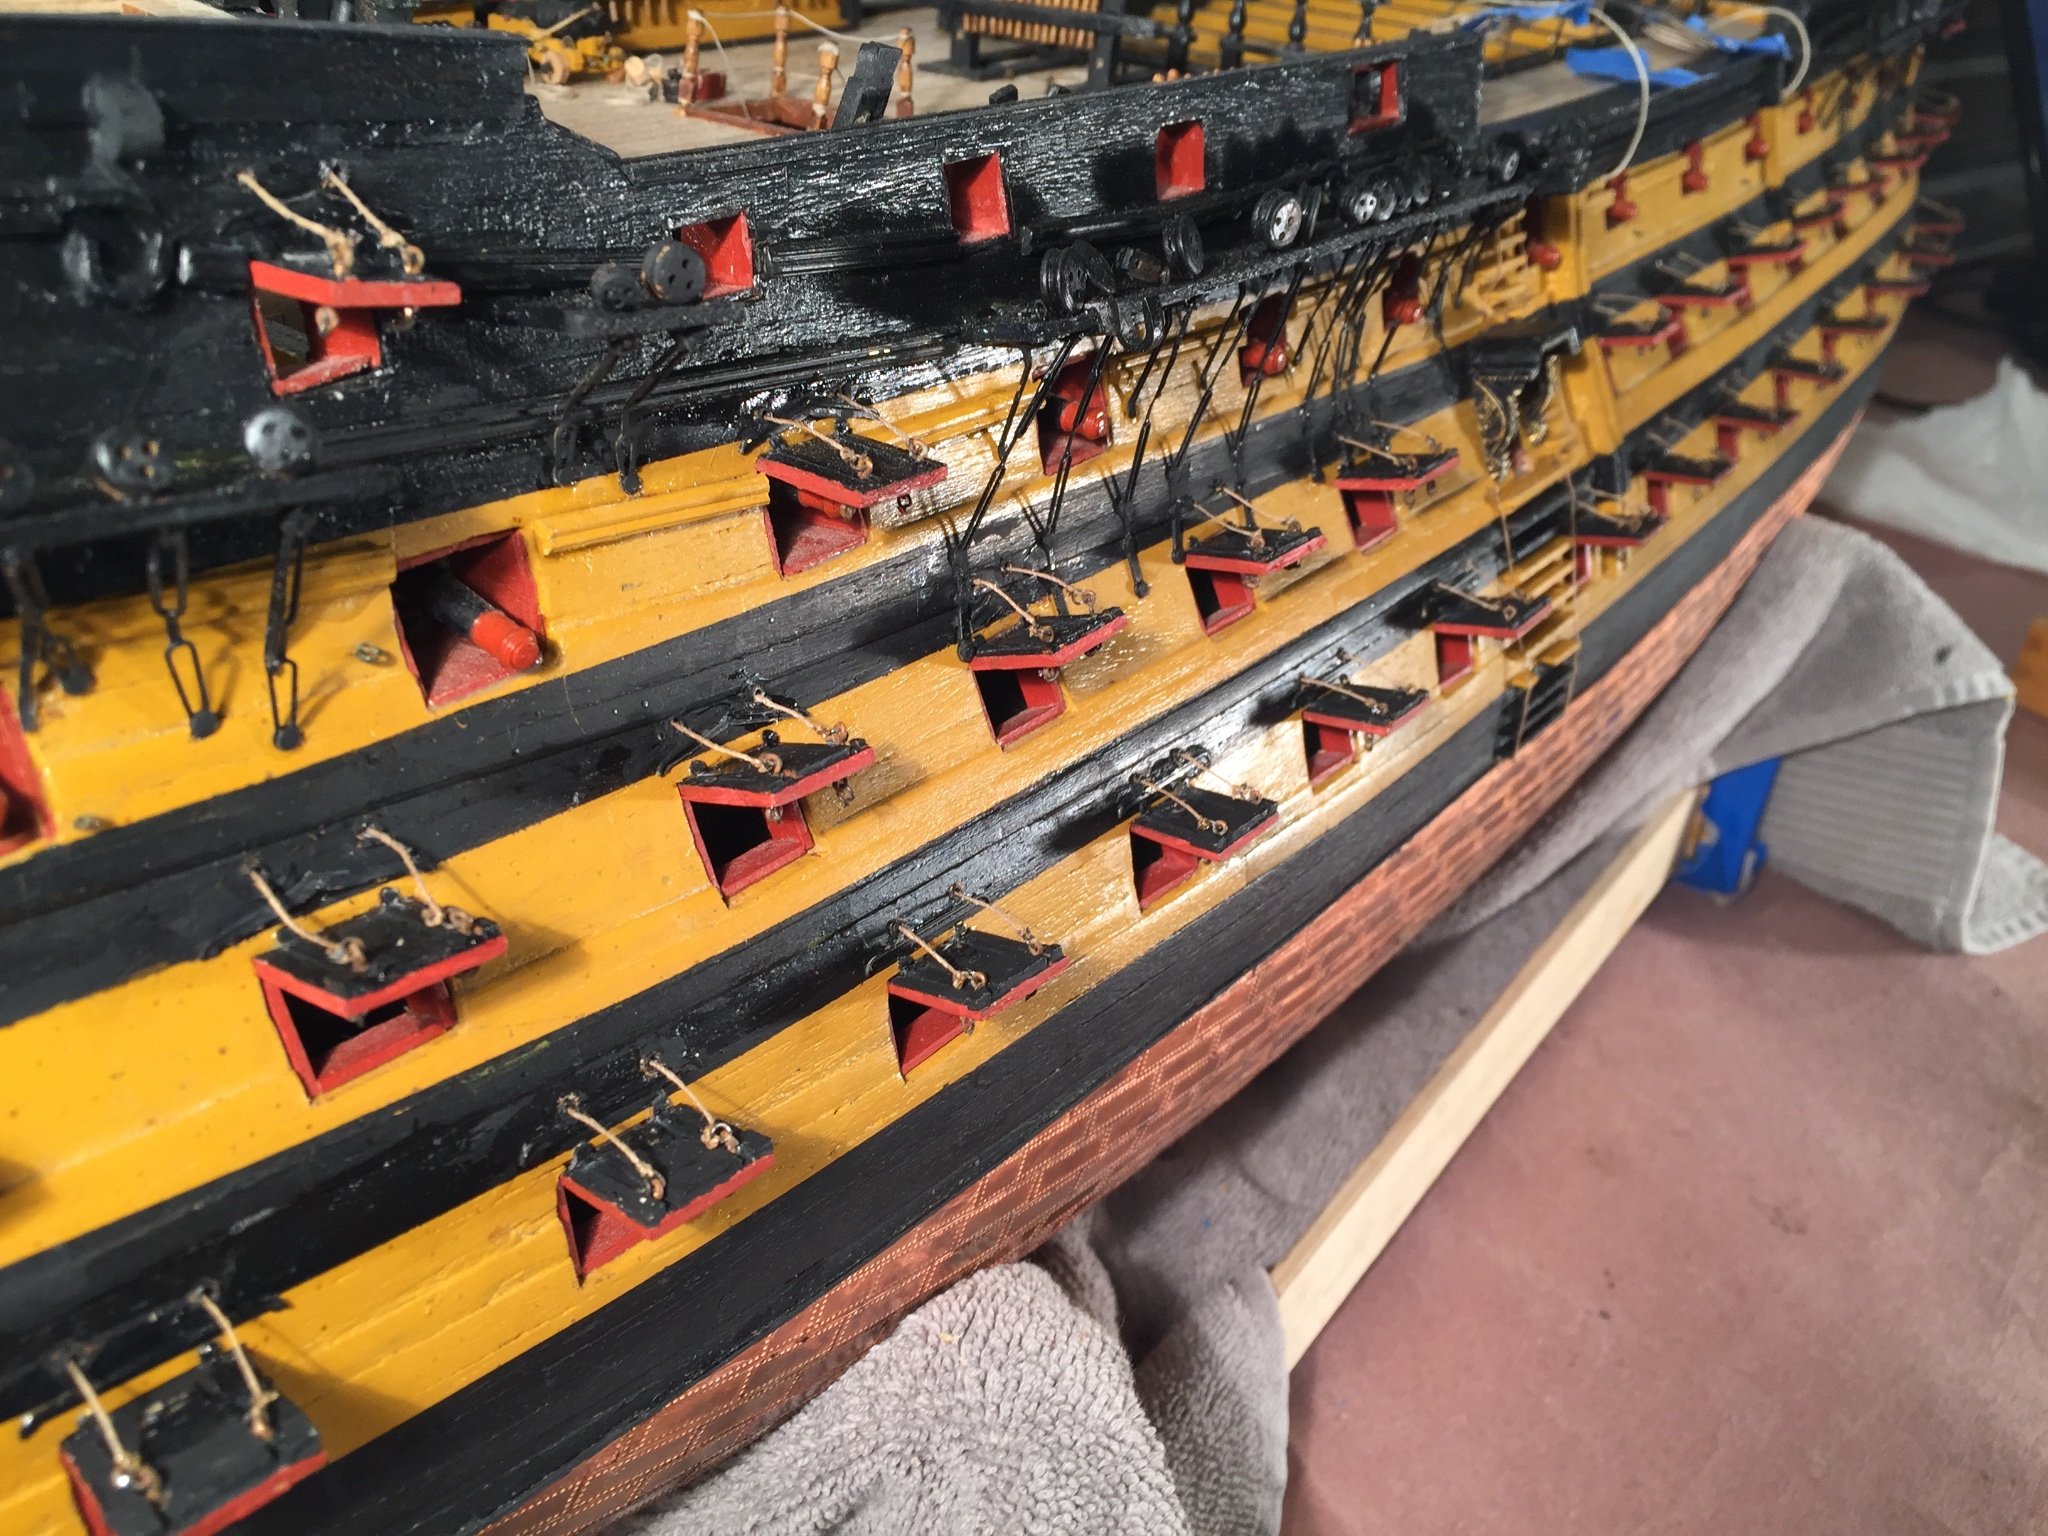
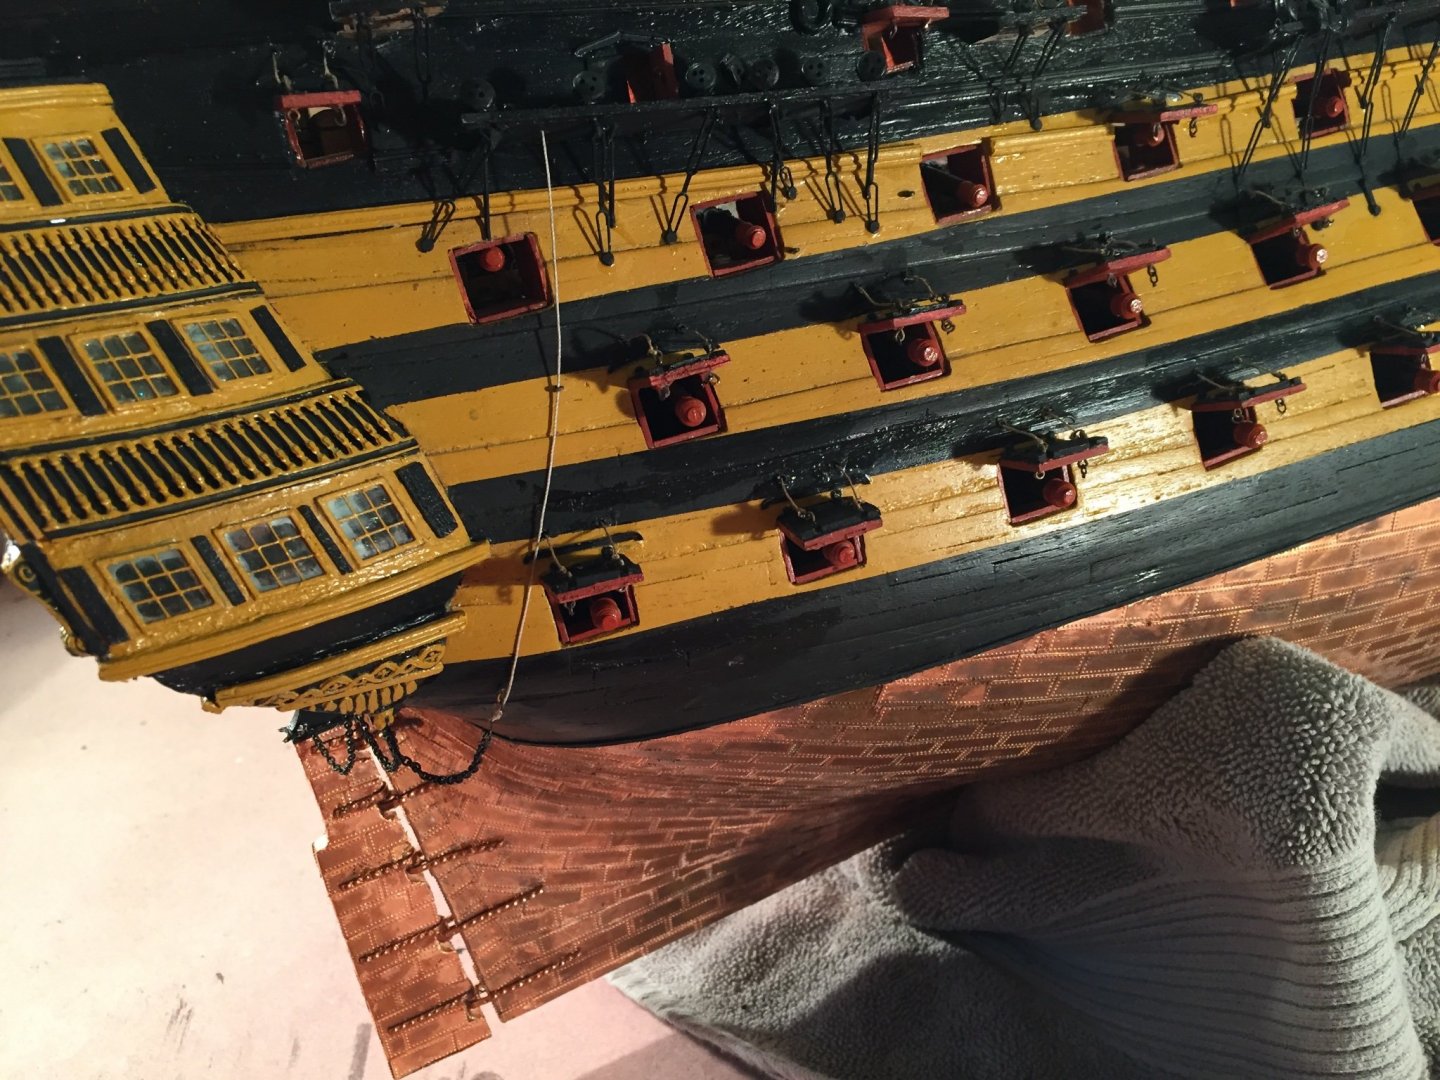
Quick update. I’ve completed and mounted the channels, their dead eyes, gunport lids and just finished installing the cannons with tampons. I made my own lids as I wanted the hull planking to be visible along with the lids interior planking. I used #28 wire for the second ring on the lids and as PaulB did I used 2 eye bolts and a piece of wire to mimic the latch on the lids inner side. Stay safe and well, Mort

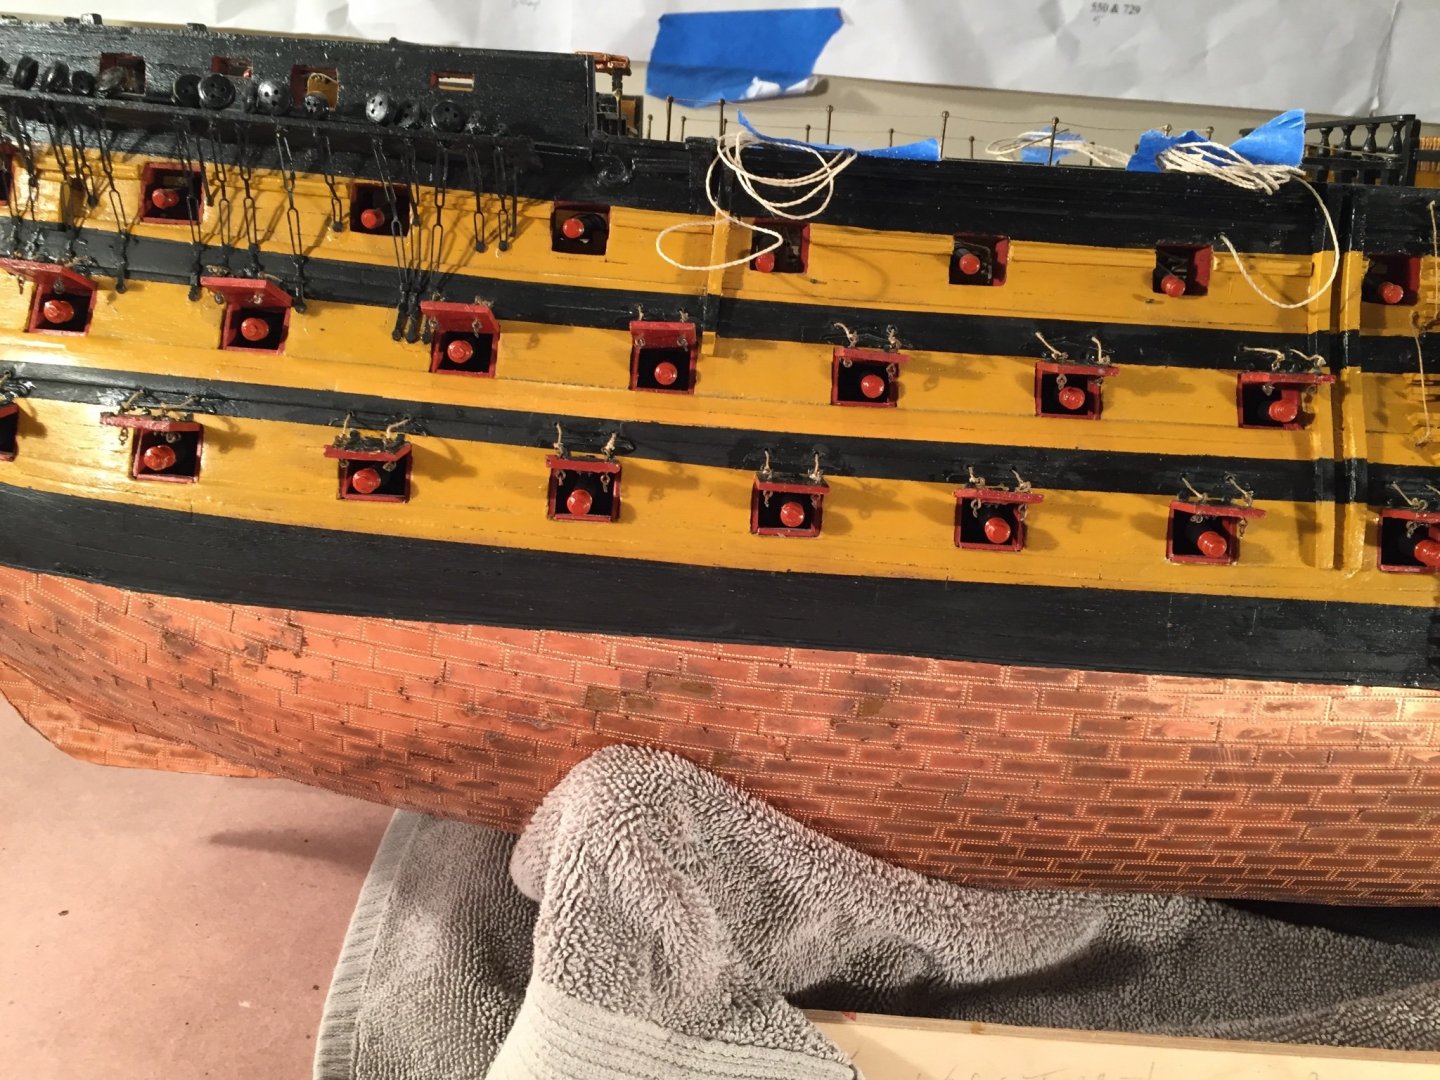

- 60 replies
-
- 7
-
-
- victory
- caldercraft
- (and 1 more)