mort stoll
-
Posts
541 -
Joined
-
Last visited
Content Type
Profiles
Forums
Gallery
Events
Everything posted by mort stoll
-
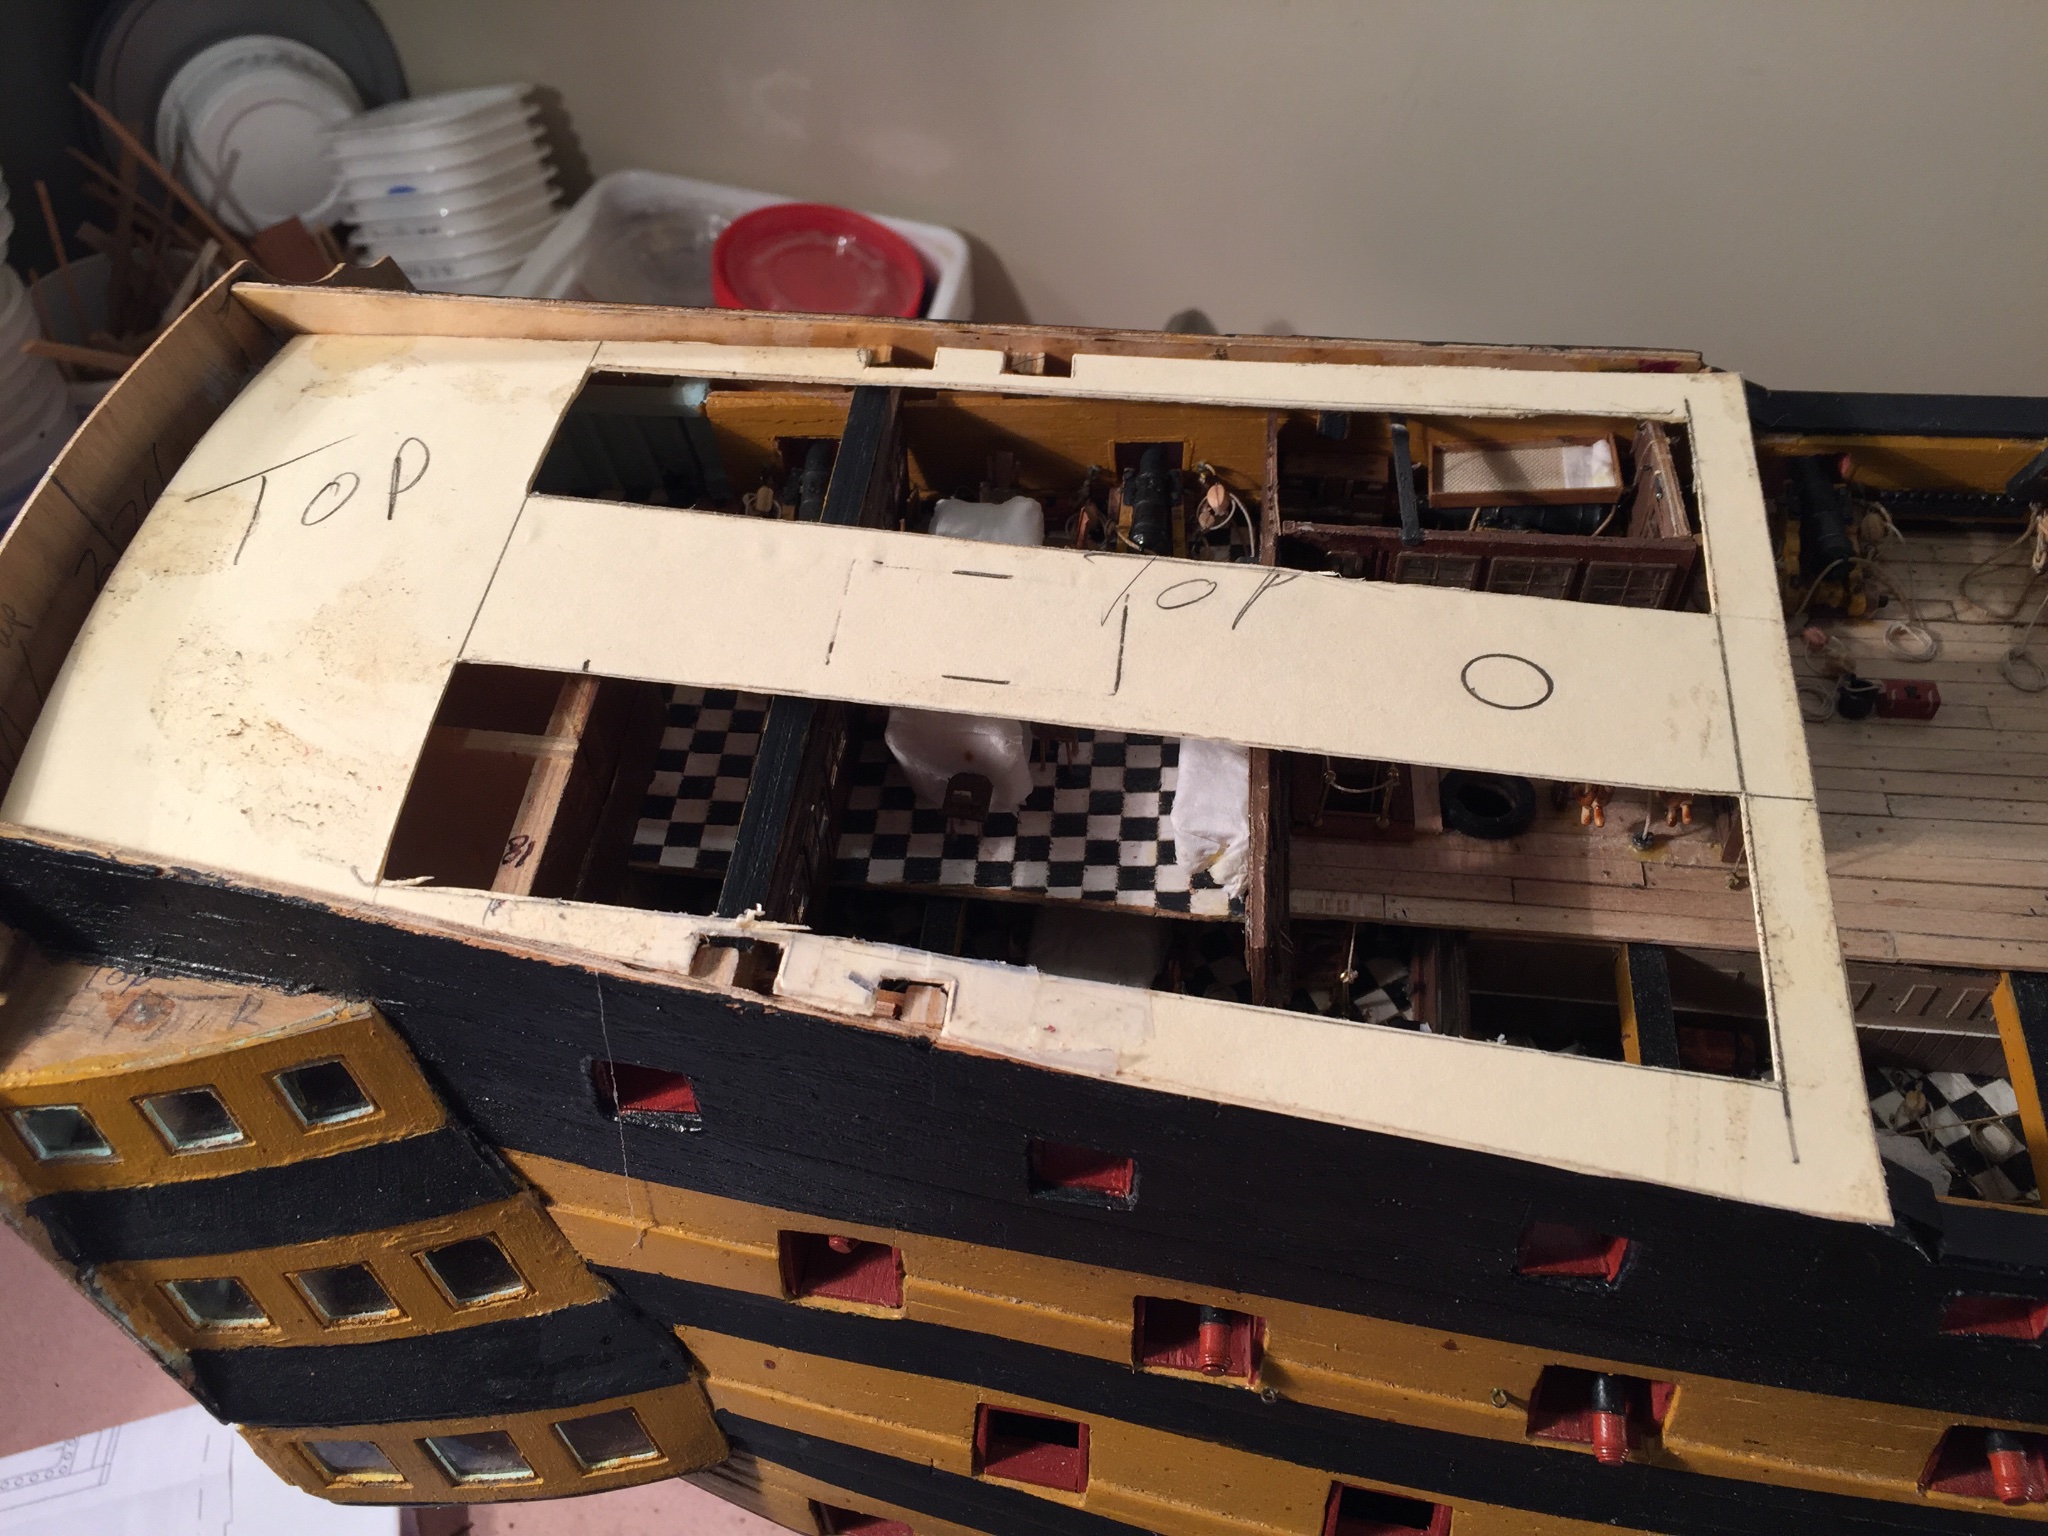
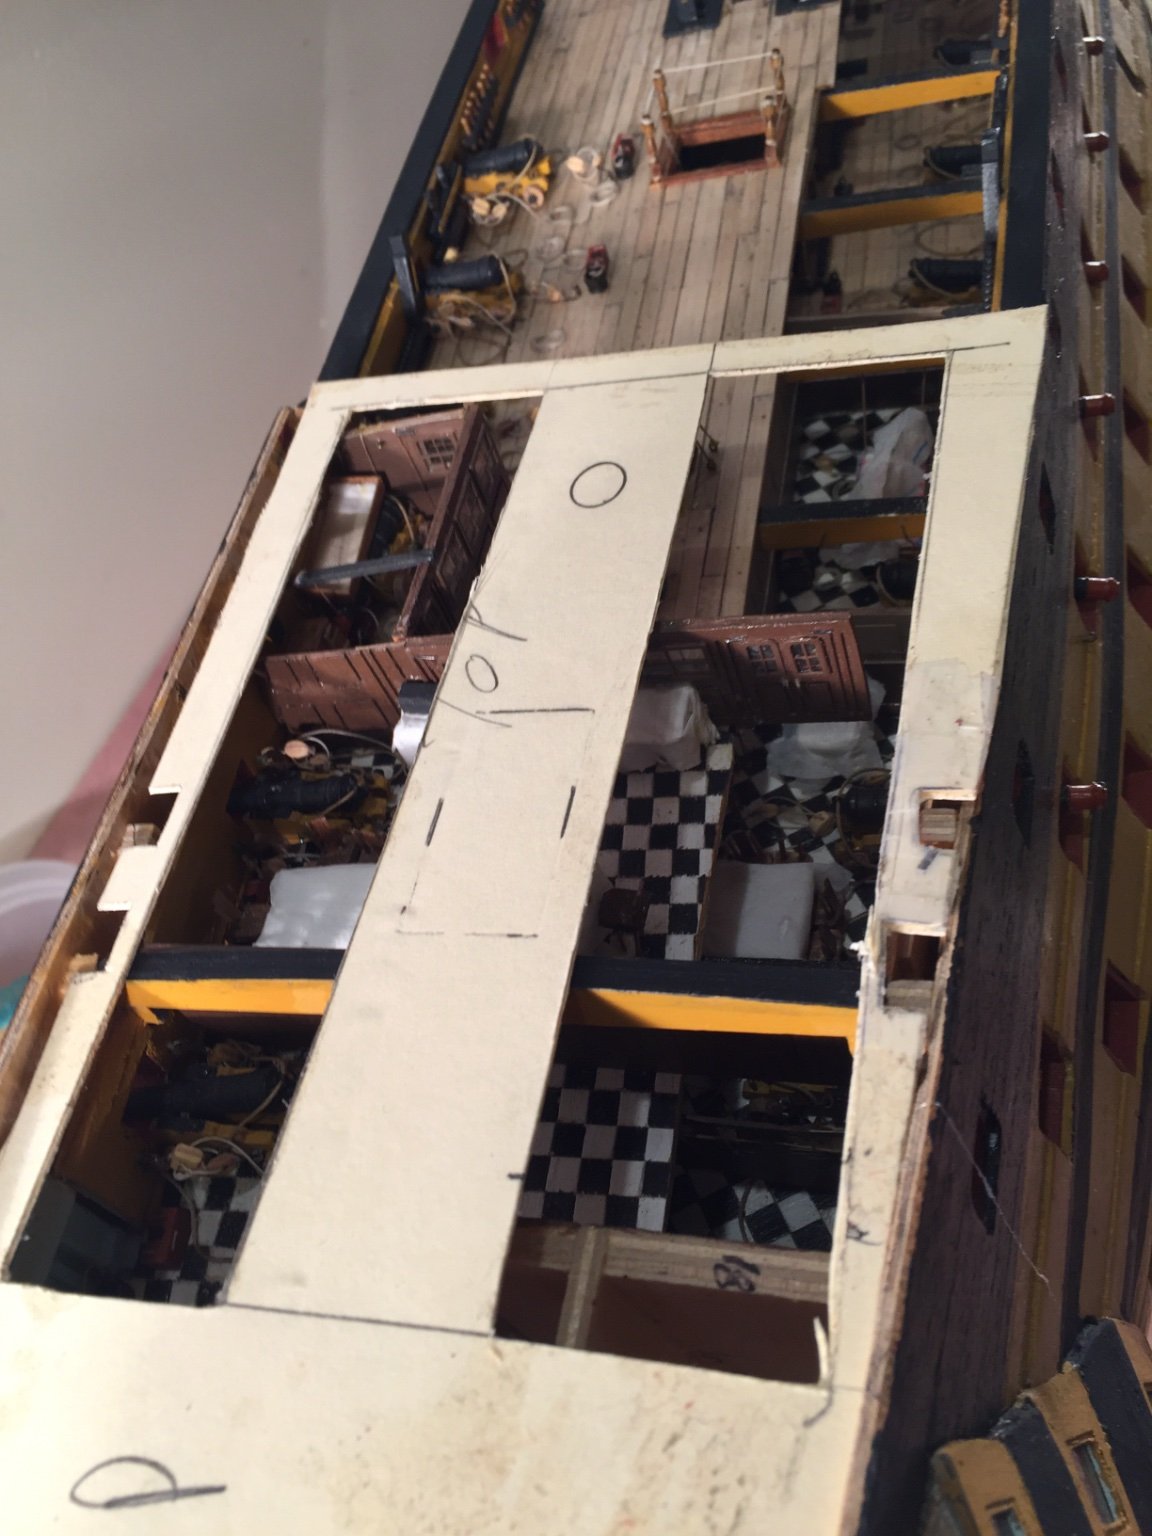
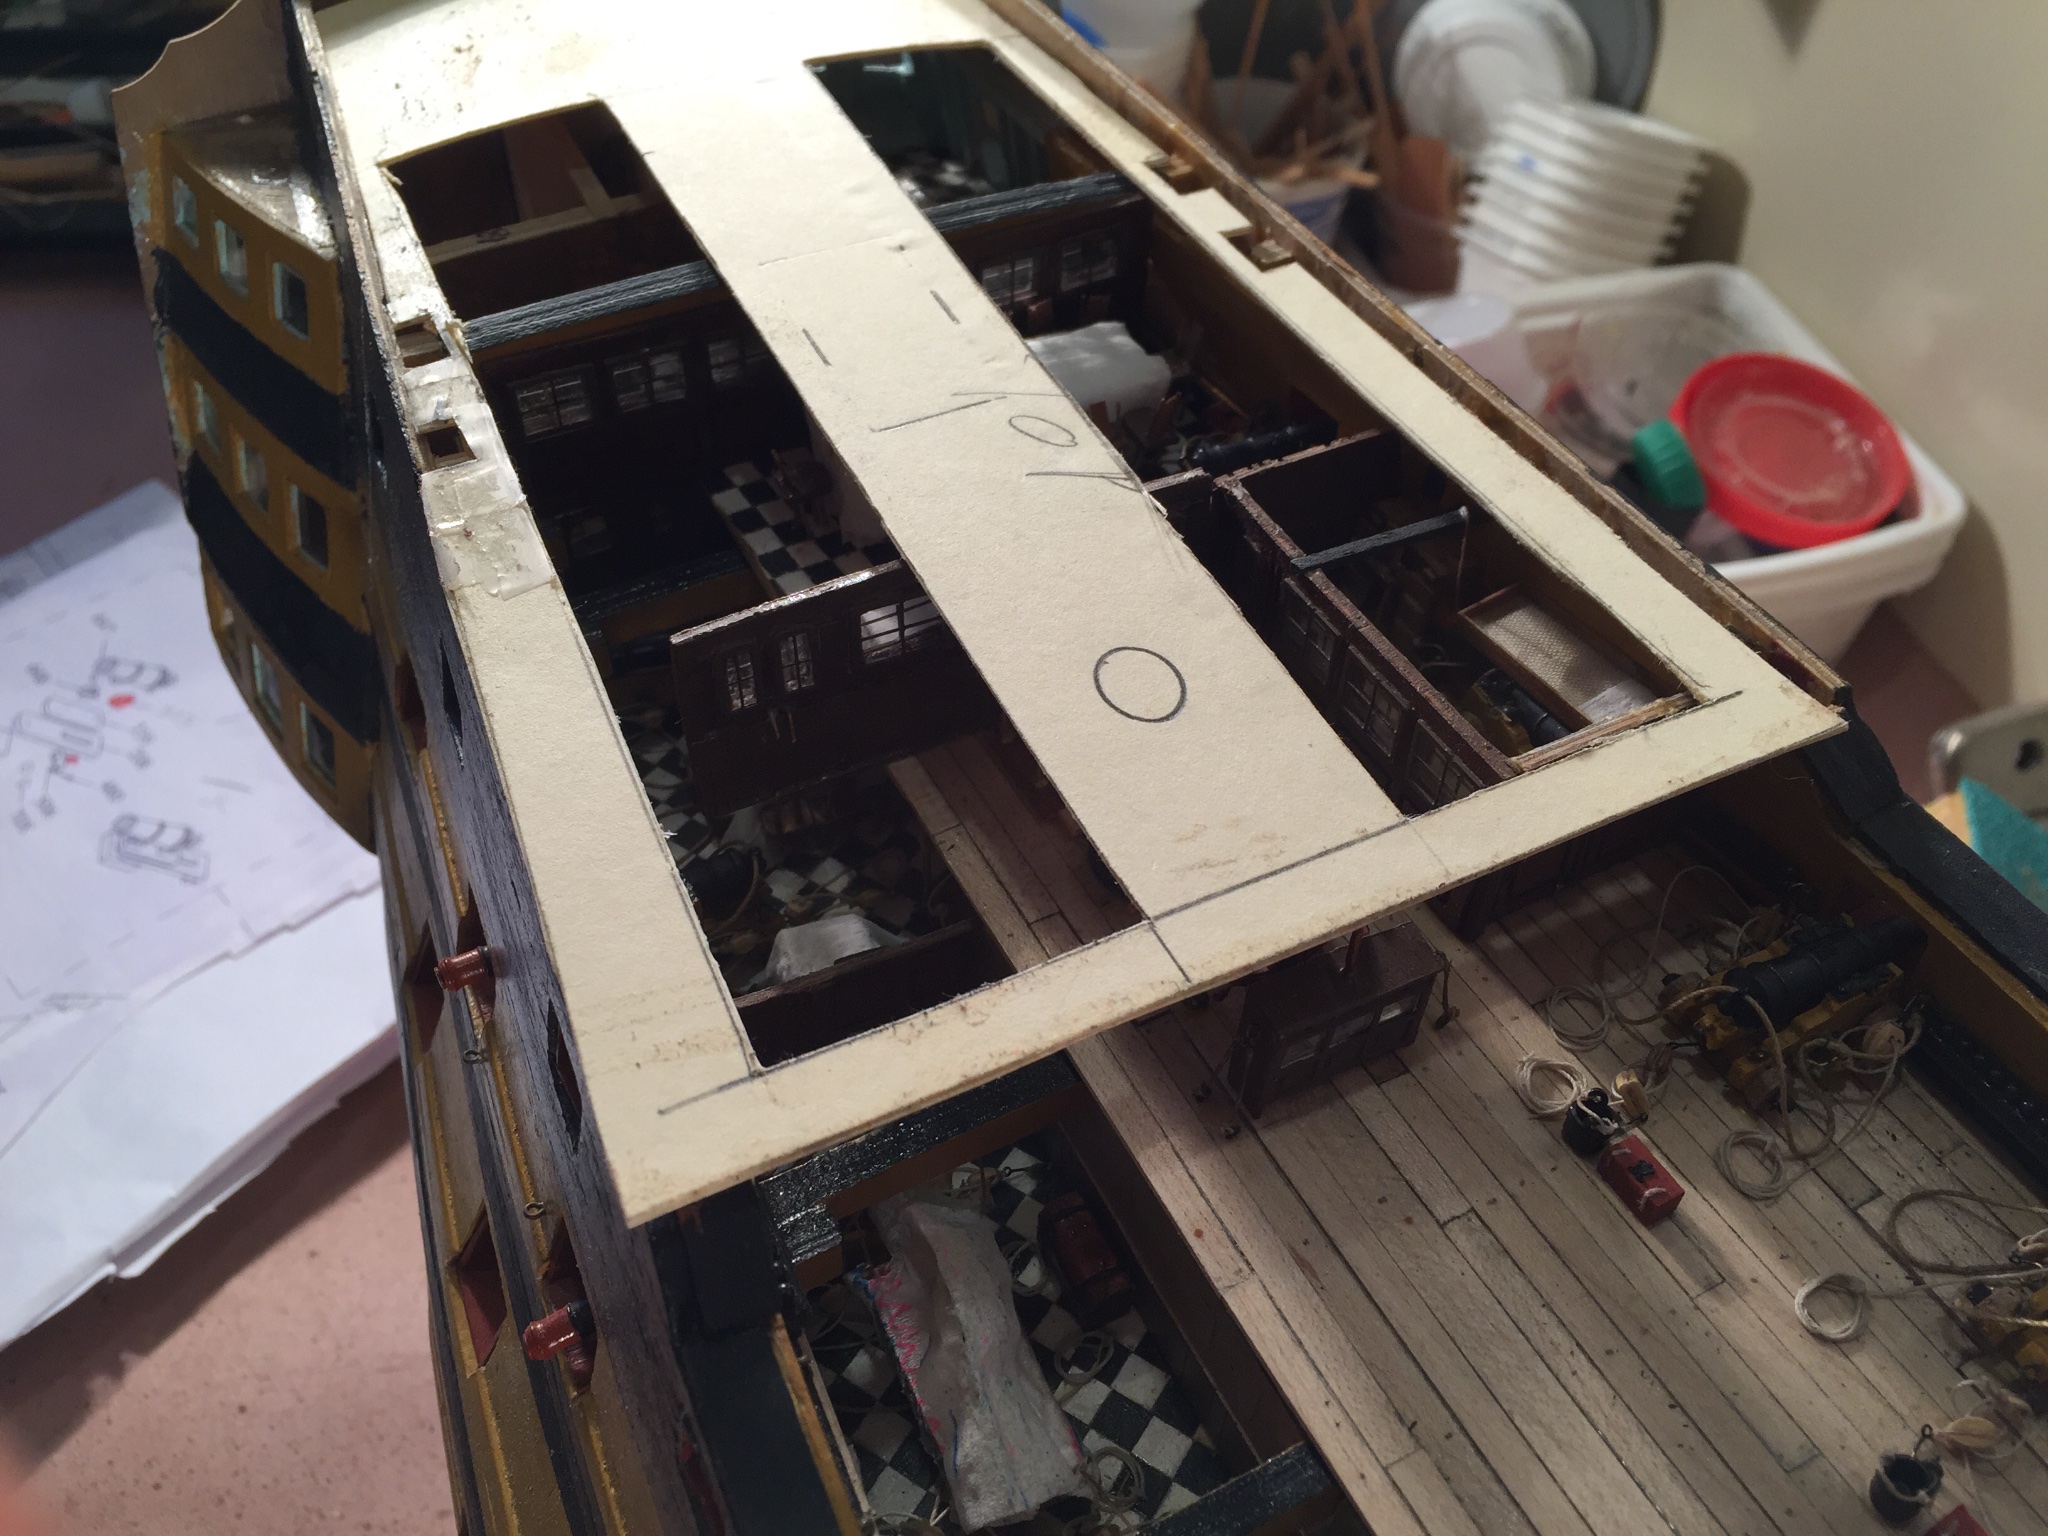
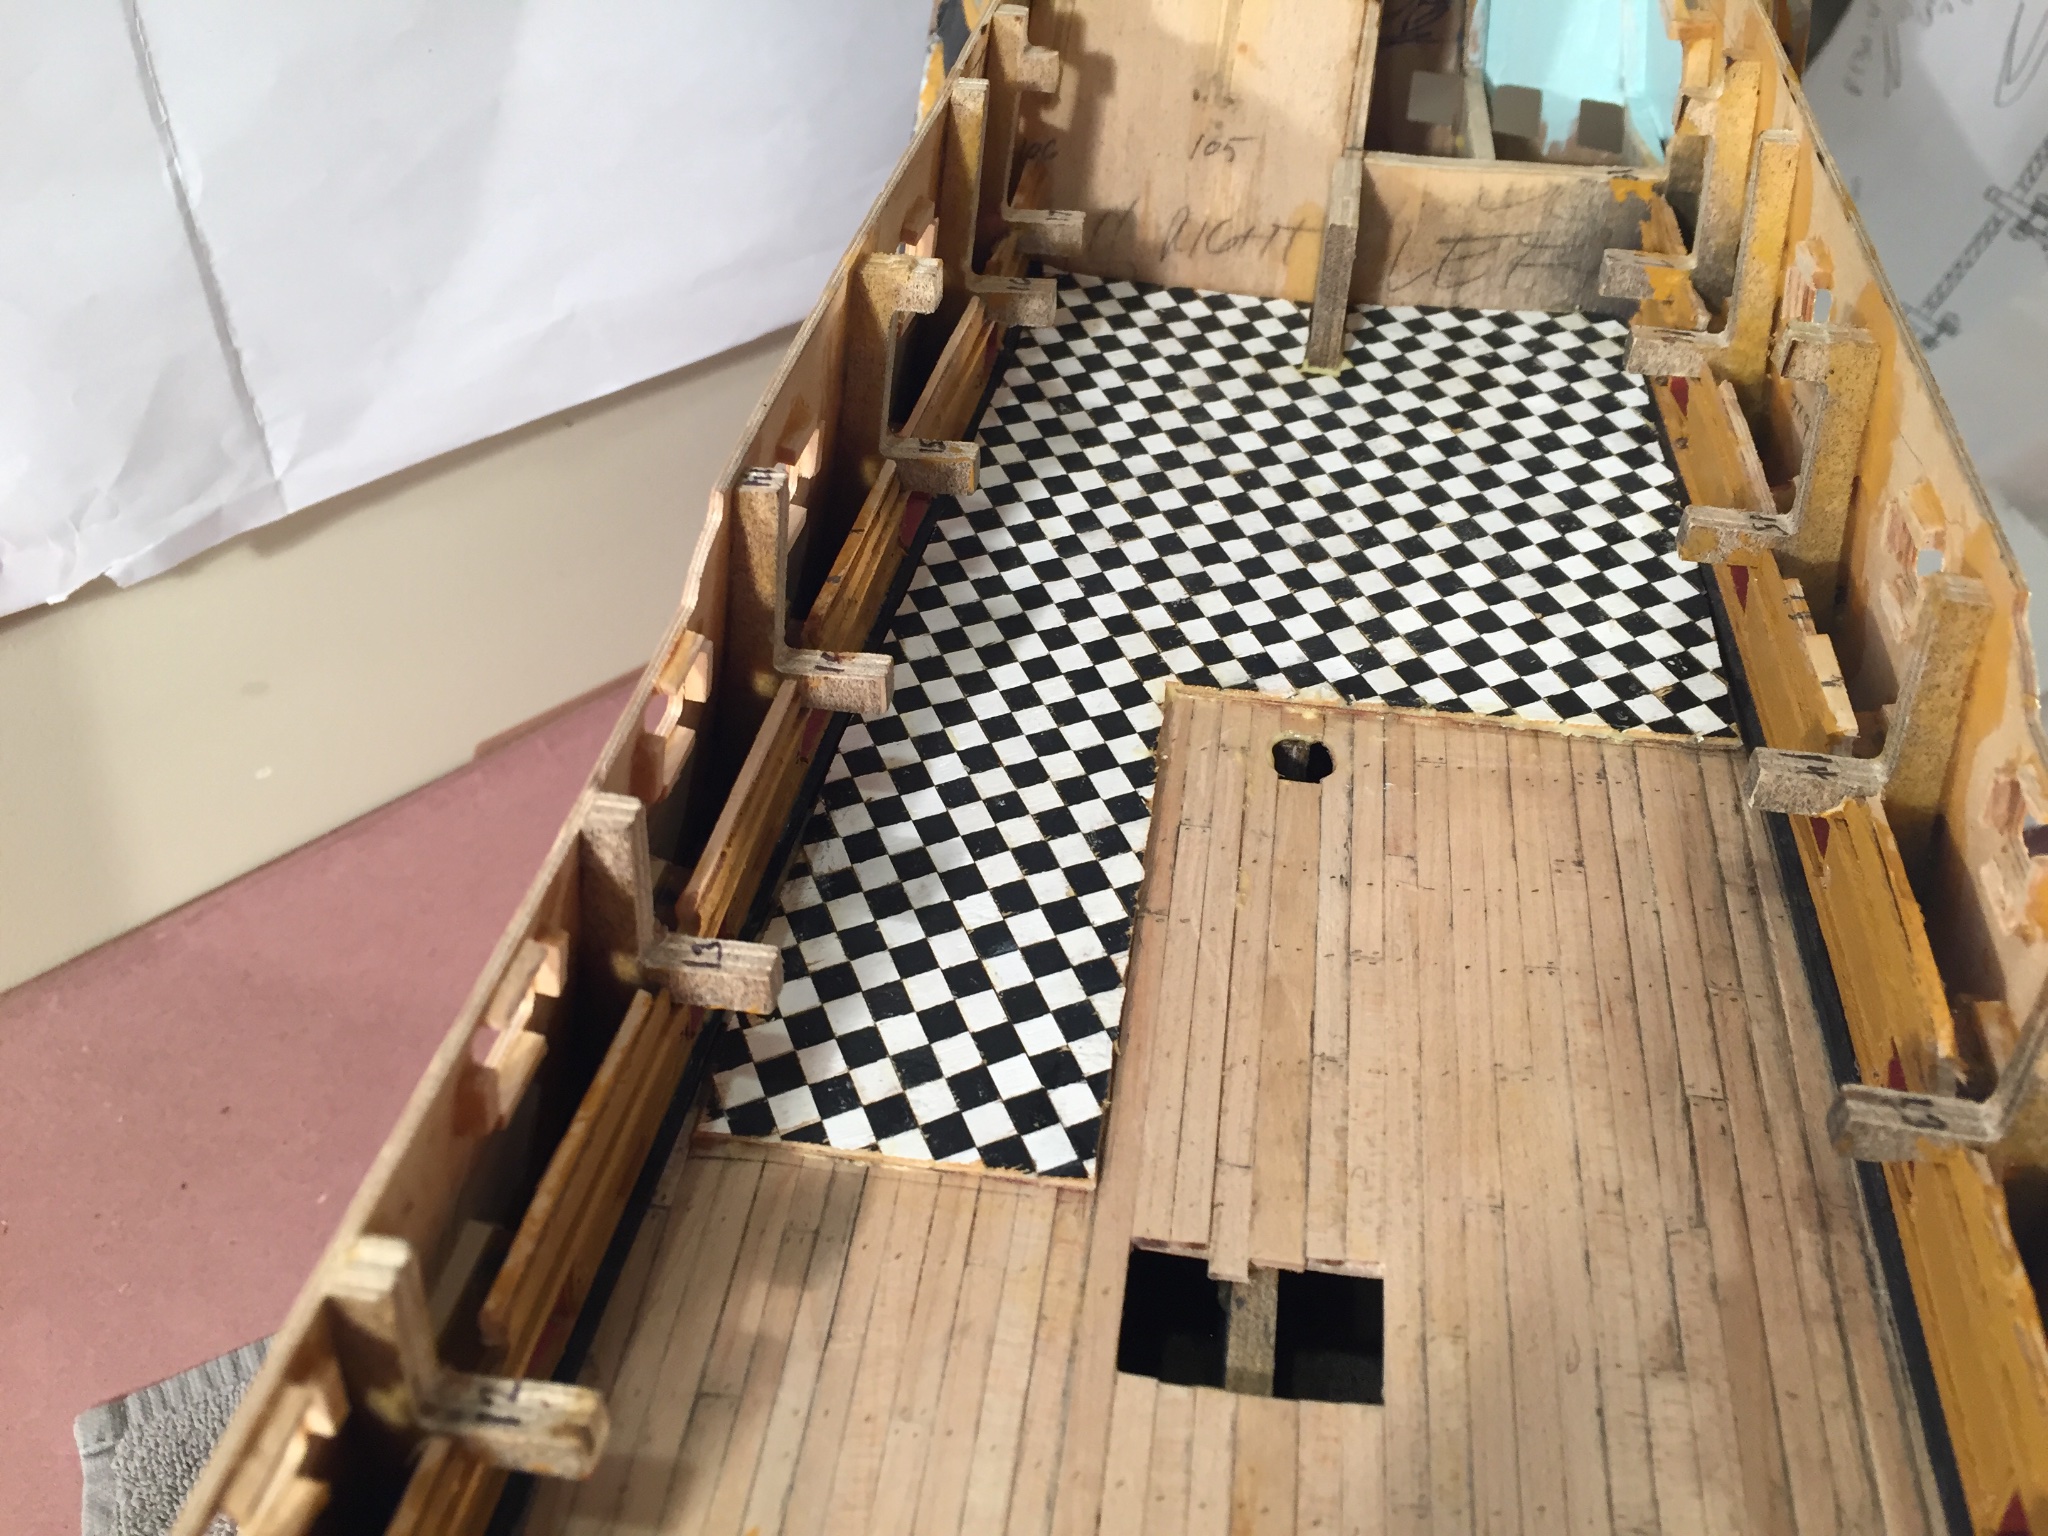
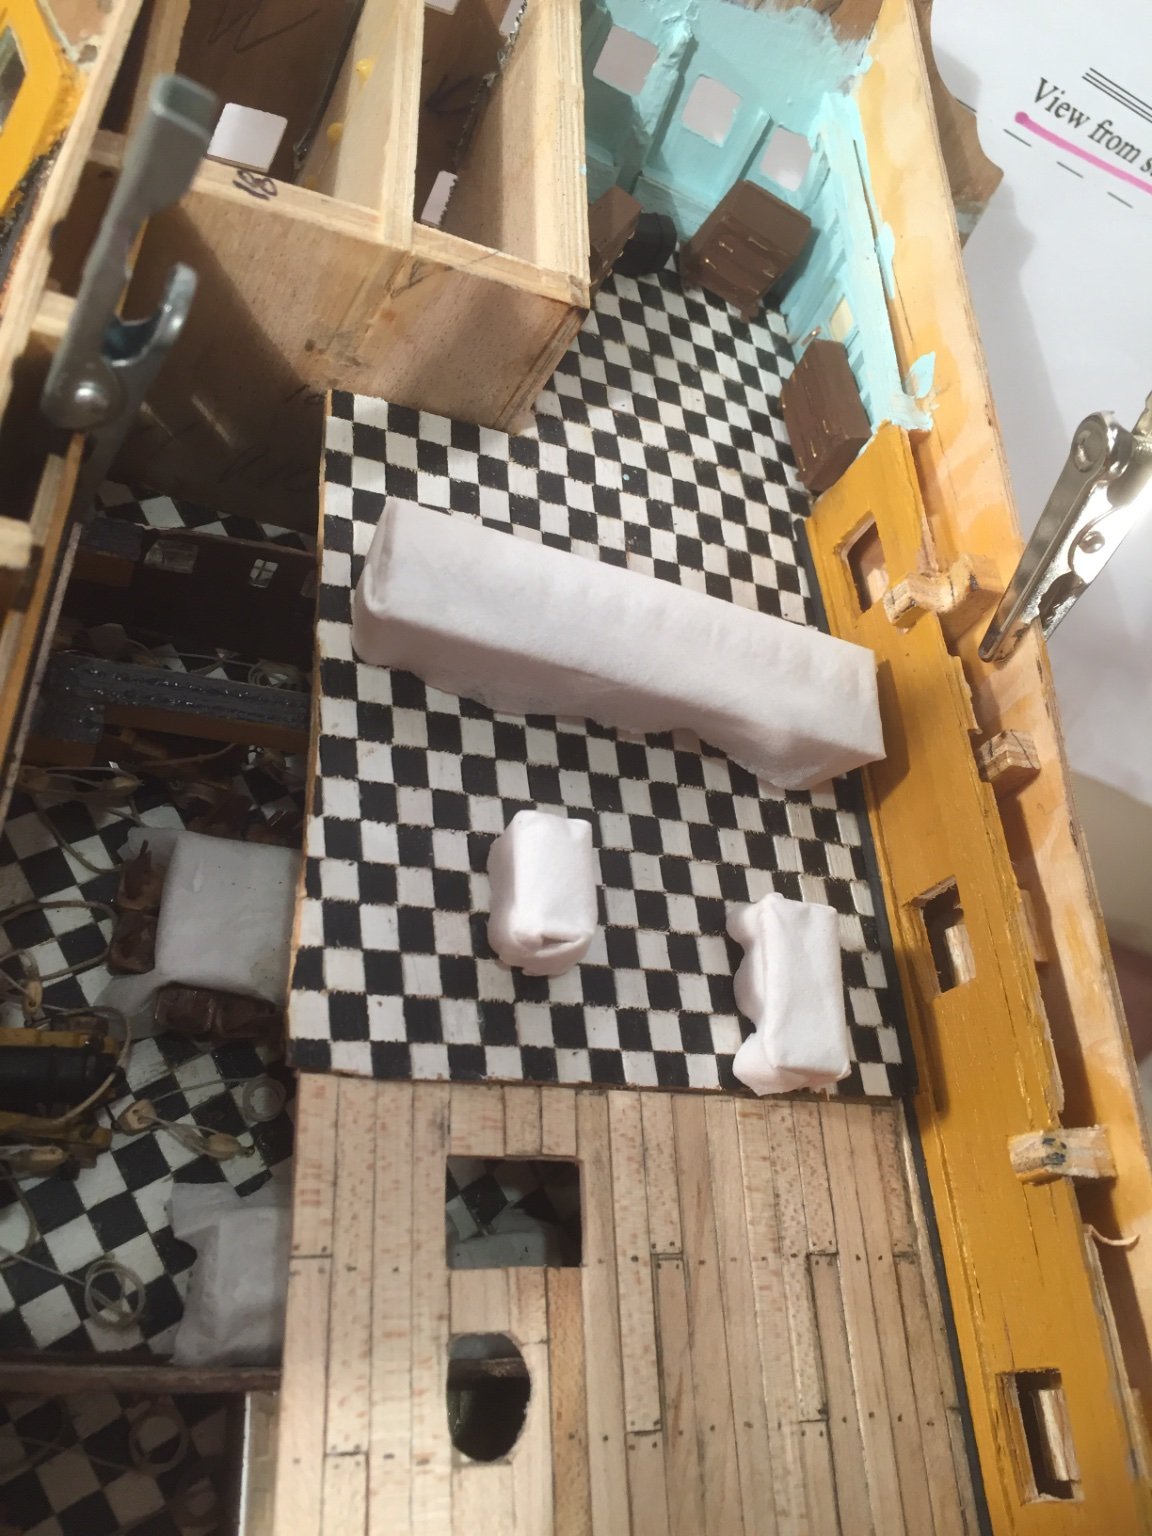
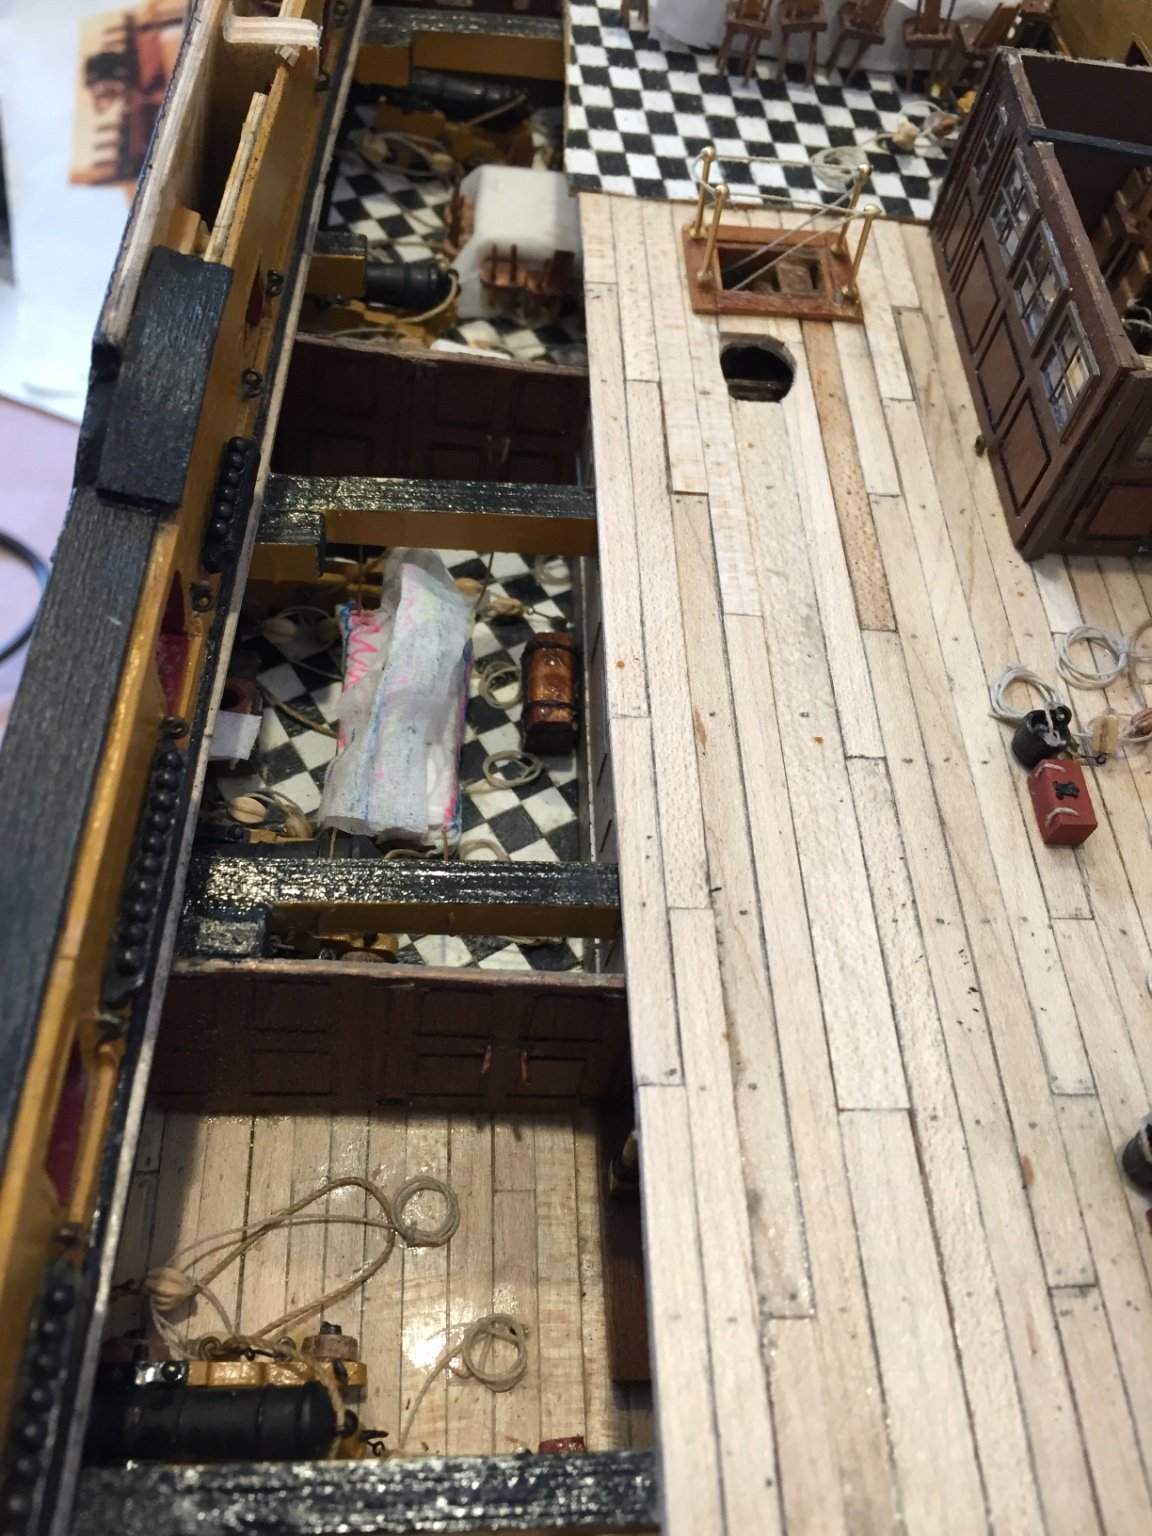
Hi, As you can see I've completed the beakhead bulkhead and timberheads. The bulkheads for the Captain's dining and day cabins are installed. I've also completed the Captain's dining and day cabin. The dining cabin has 2 side tables and a liquor box in addition to the dining table and chairs. The day cabin contains 2 clothes trunks, a dresser, a chest and a desk. I'll probably add a small circular table. I tried to remove the center keel piece and the other bulkhead # 105 thereby opening the remaining area of the day cabin, but It's too involved for my skill set. You can also see the template for the poop deck dry fitted, there exposing the Admiral and Captain's cabins. I thank you Heinz very much for your support. You're the best. Stay safe and well, Mort
- 60 replies
-
- 3
-

-
- victory
- caldercraft
- (and 1 more)
-
I think it depends on the size of the rope you're serving. I've used both sizes - Gutermann's - for years and am happy with the results. Stay safe and well, Mort
-
Hi Avi, Years ago I bought a set of "French Curves " made by Staedtler at my local Staples. That should work for you as far as the ships curves are concerned. Hope this helps, Mort
-
Hi Jason, No it won't be necessary to adjust any of the deck beams. The only adjustment is the removal of the right half of the beakhead bulkhead. My concern is amount of the upper gun deck visible when looking at the model bow on. The windows are mica. It was a gift from a fellow NJ Club member ages ago. He doesn't remember where or when he got it, but he bought it on line. I got the idea from looking the models in the "Rodgers " and "Kriegstein Collection" books. Hope this helps. Stay safe, Mort
-
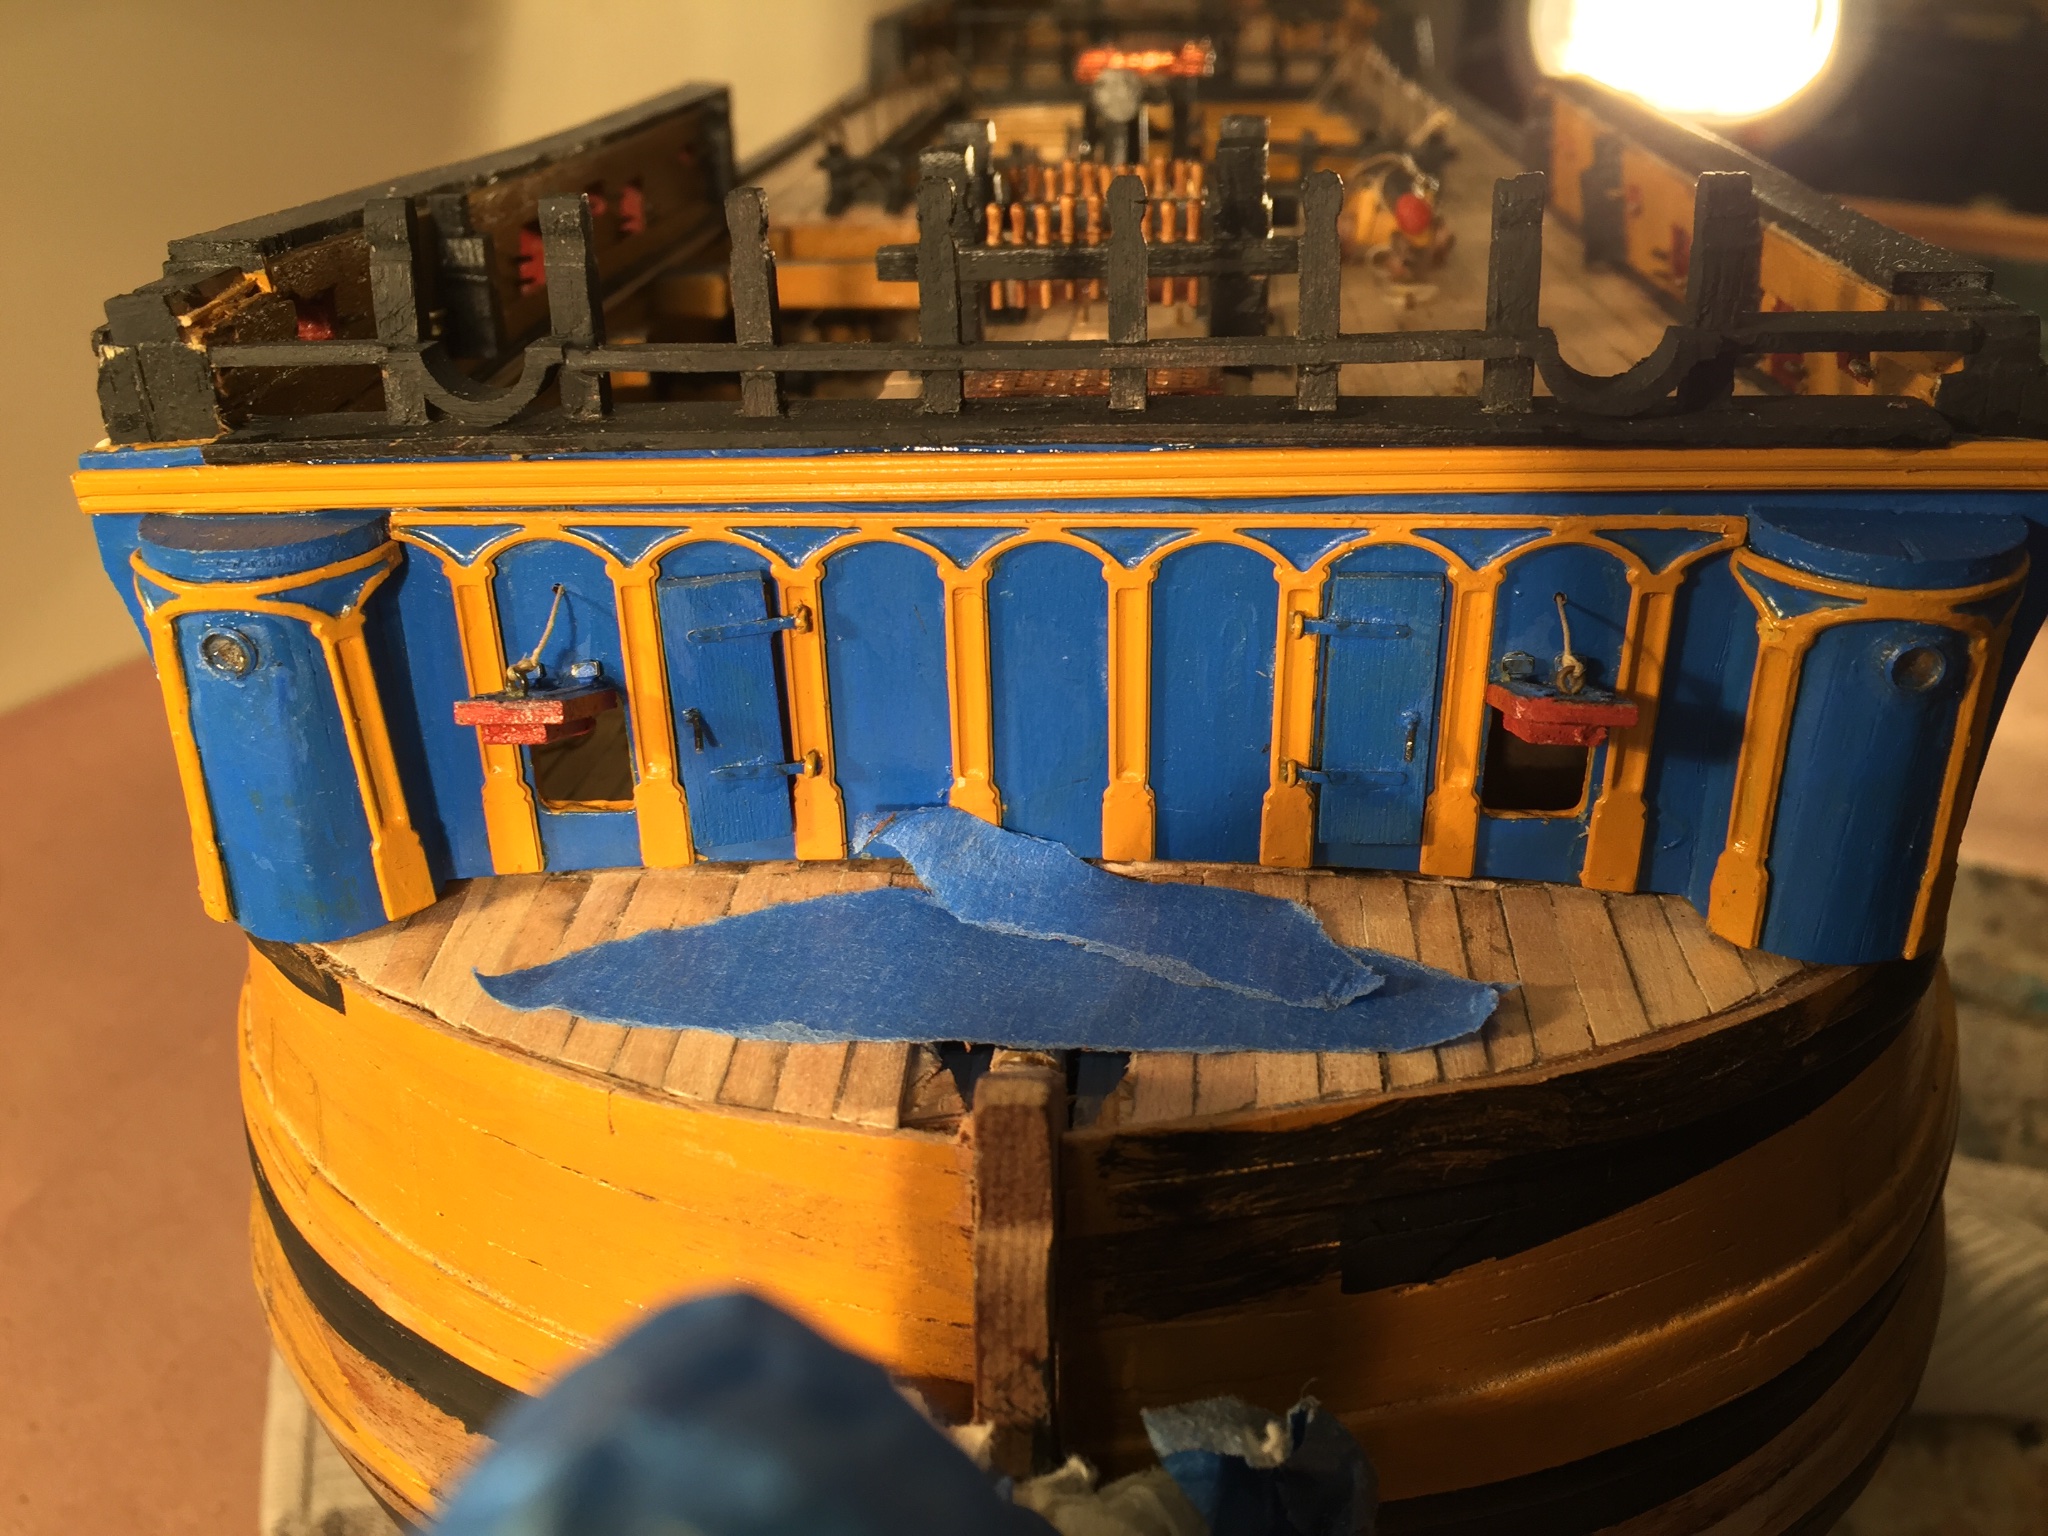
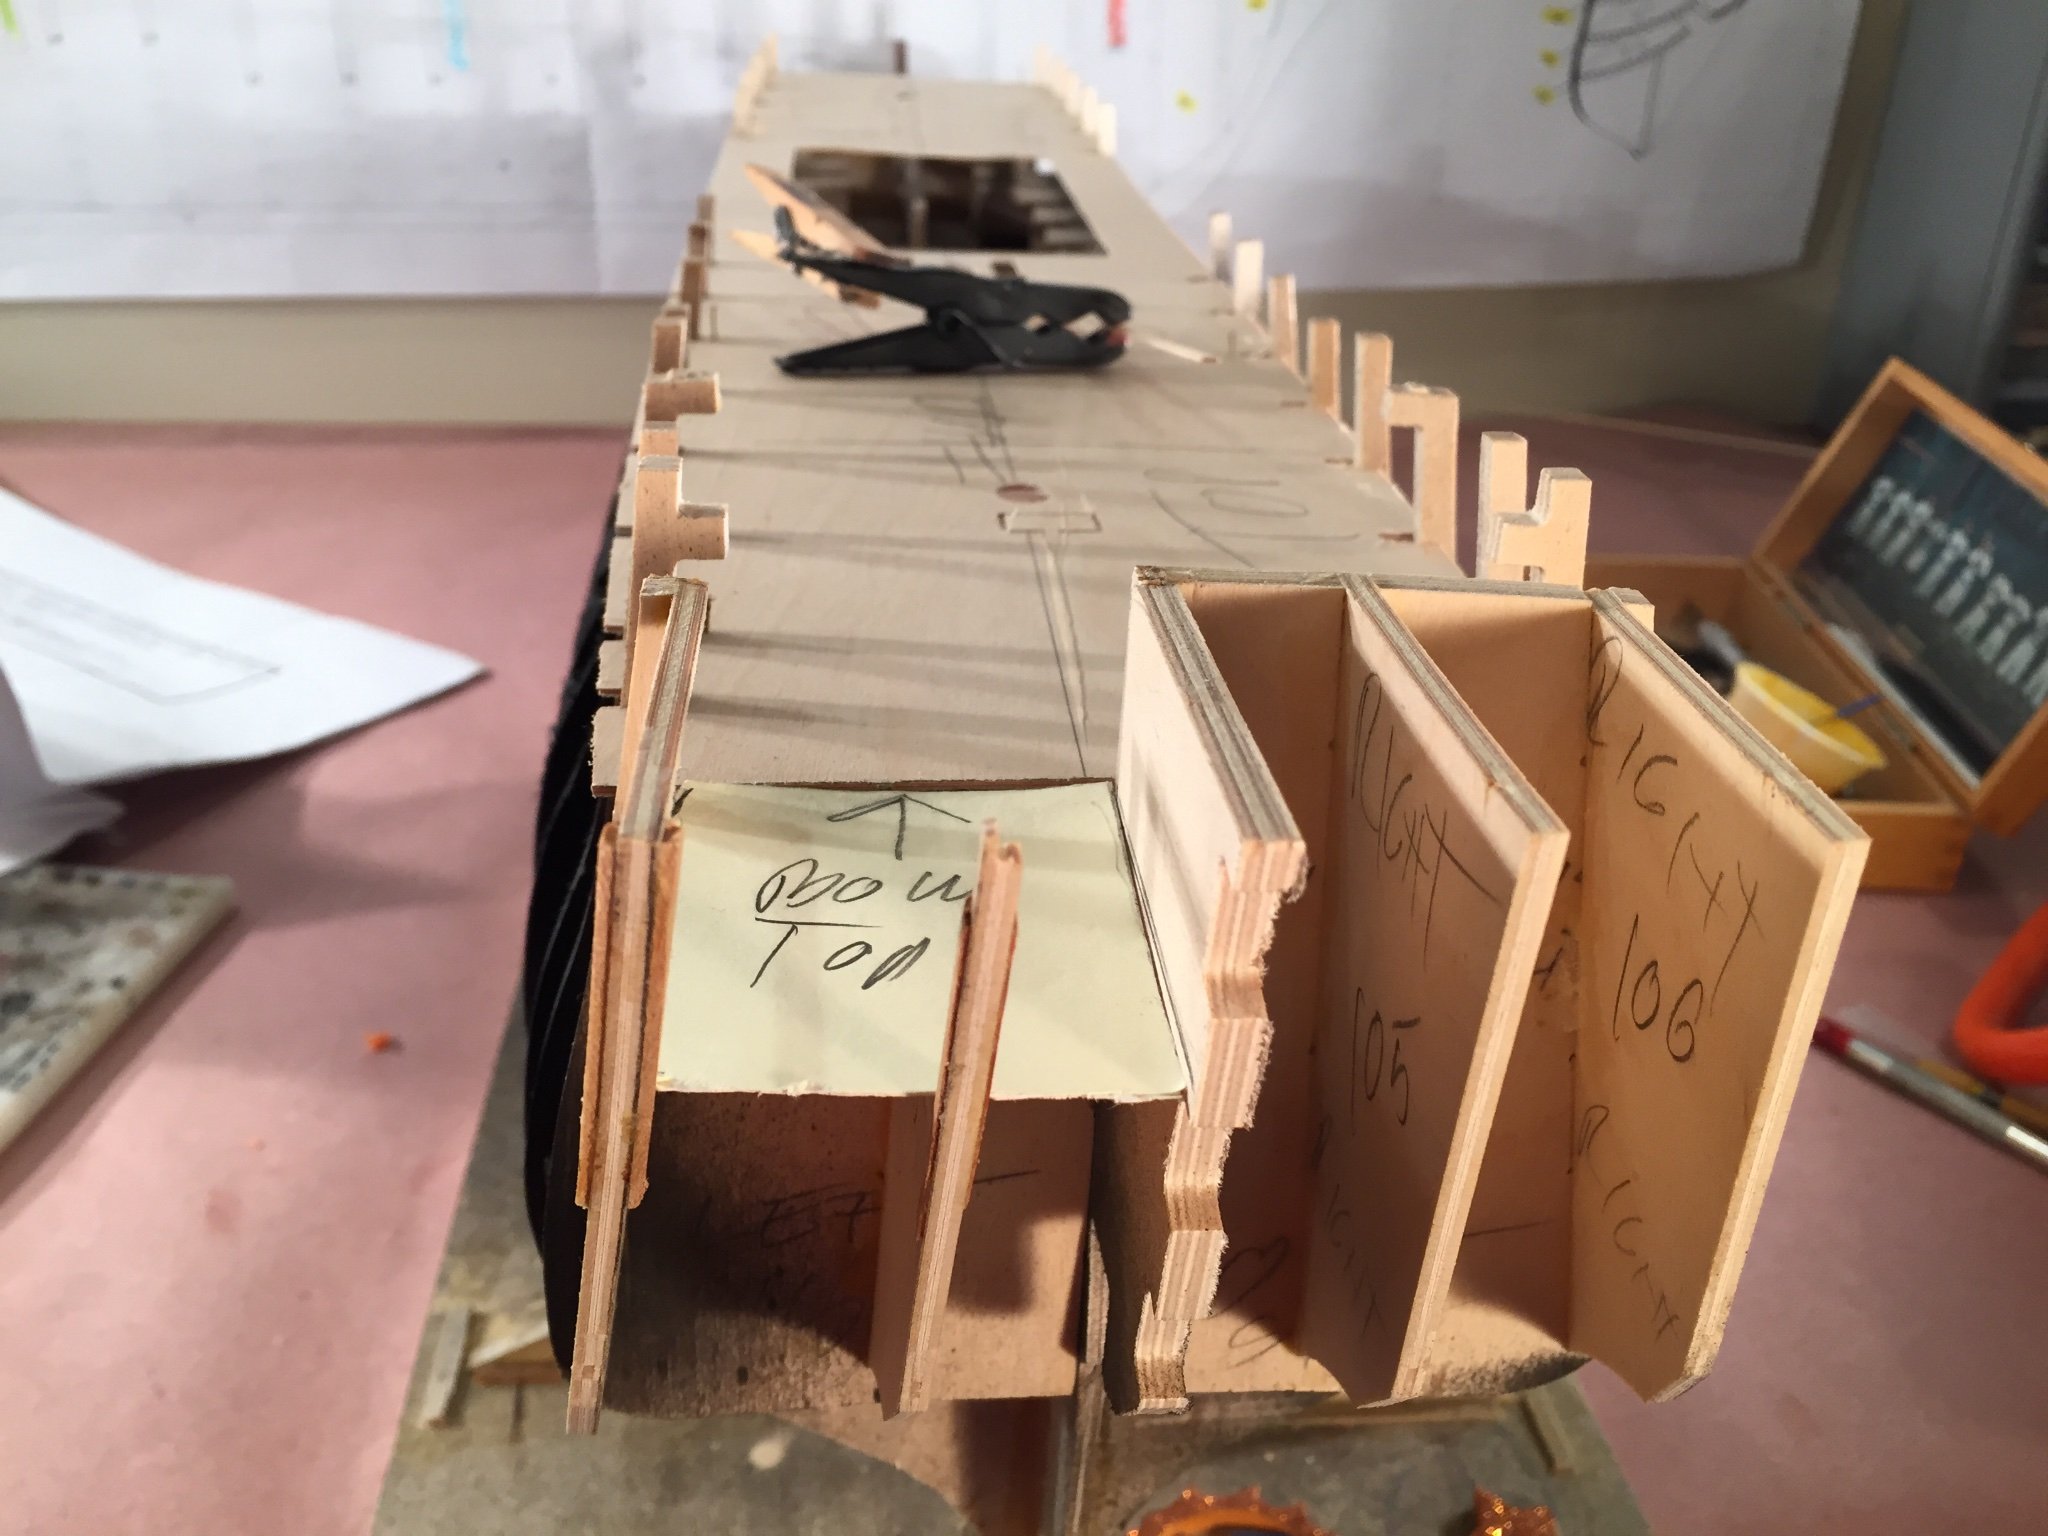
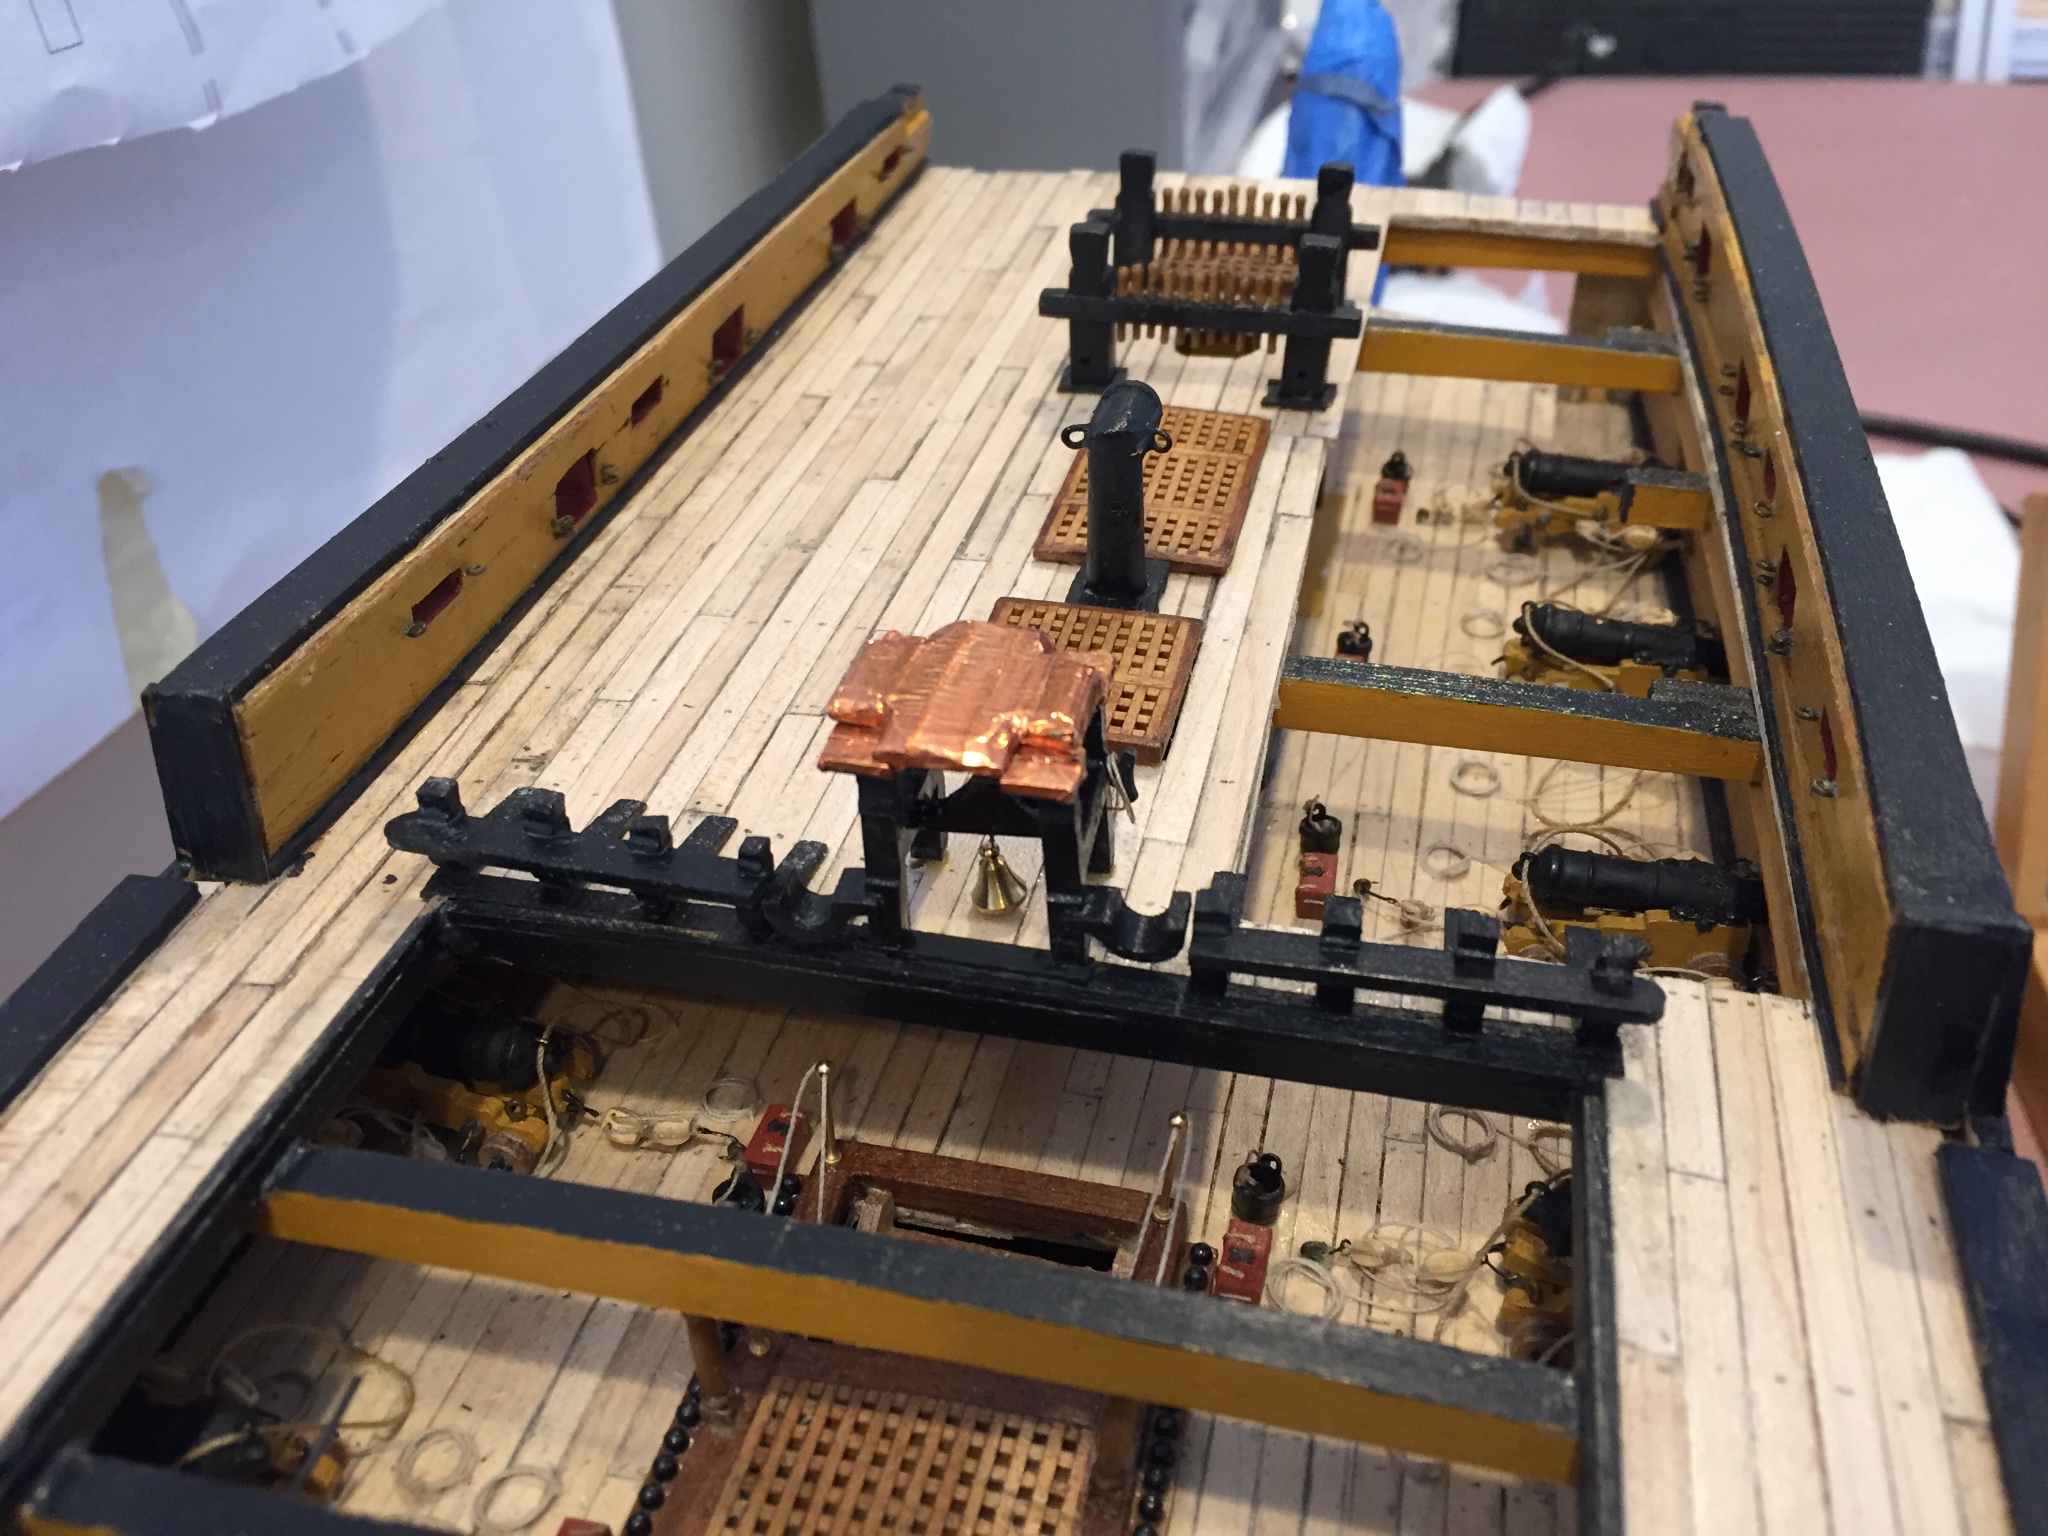
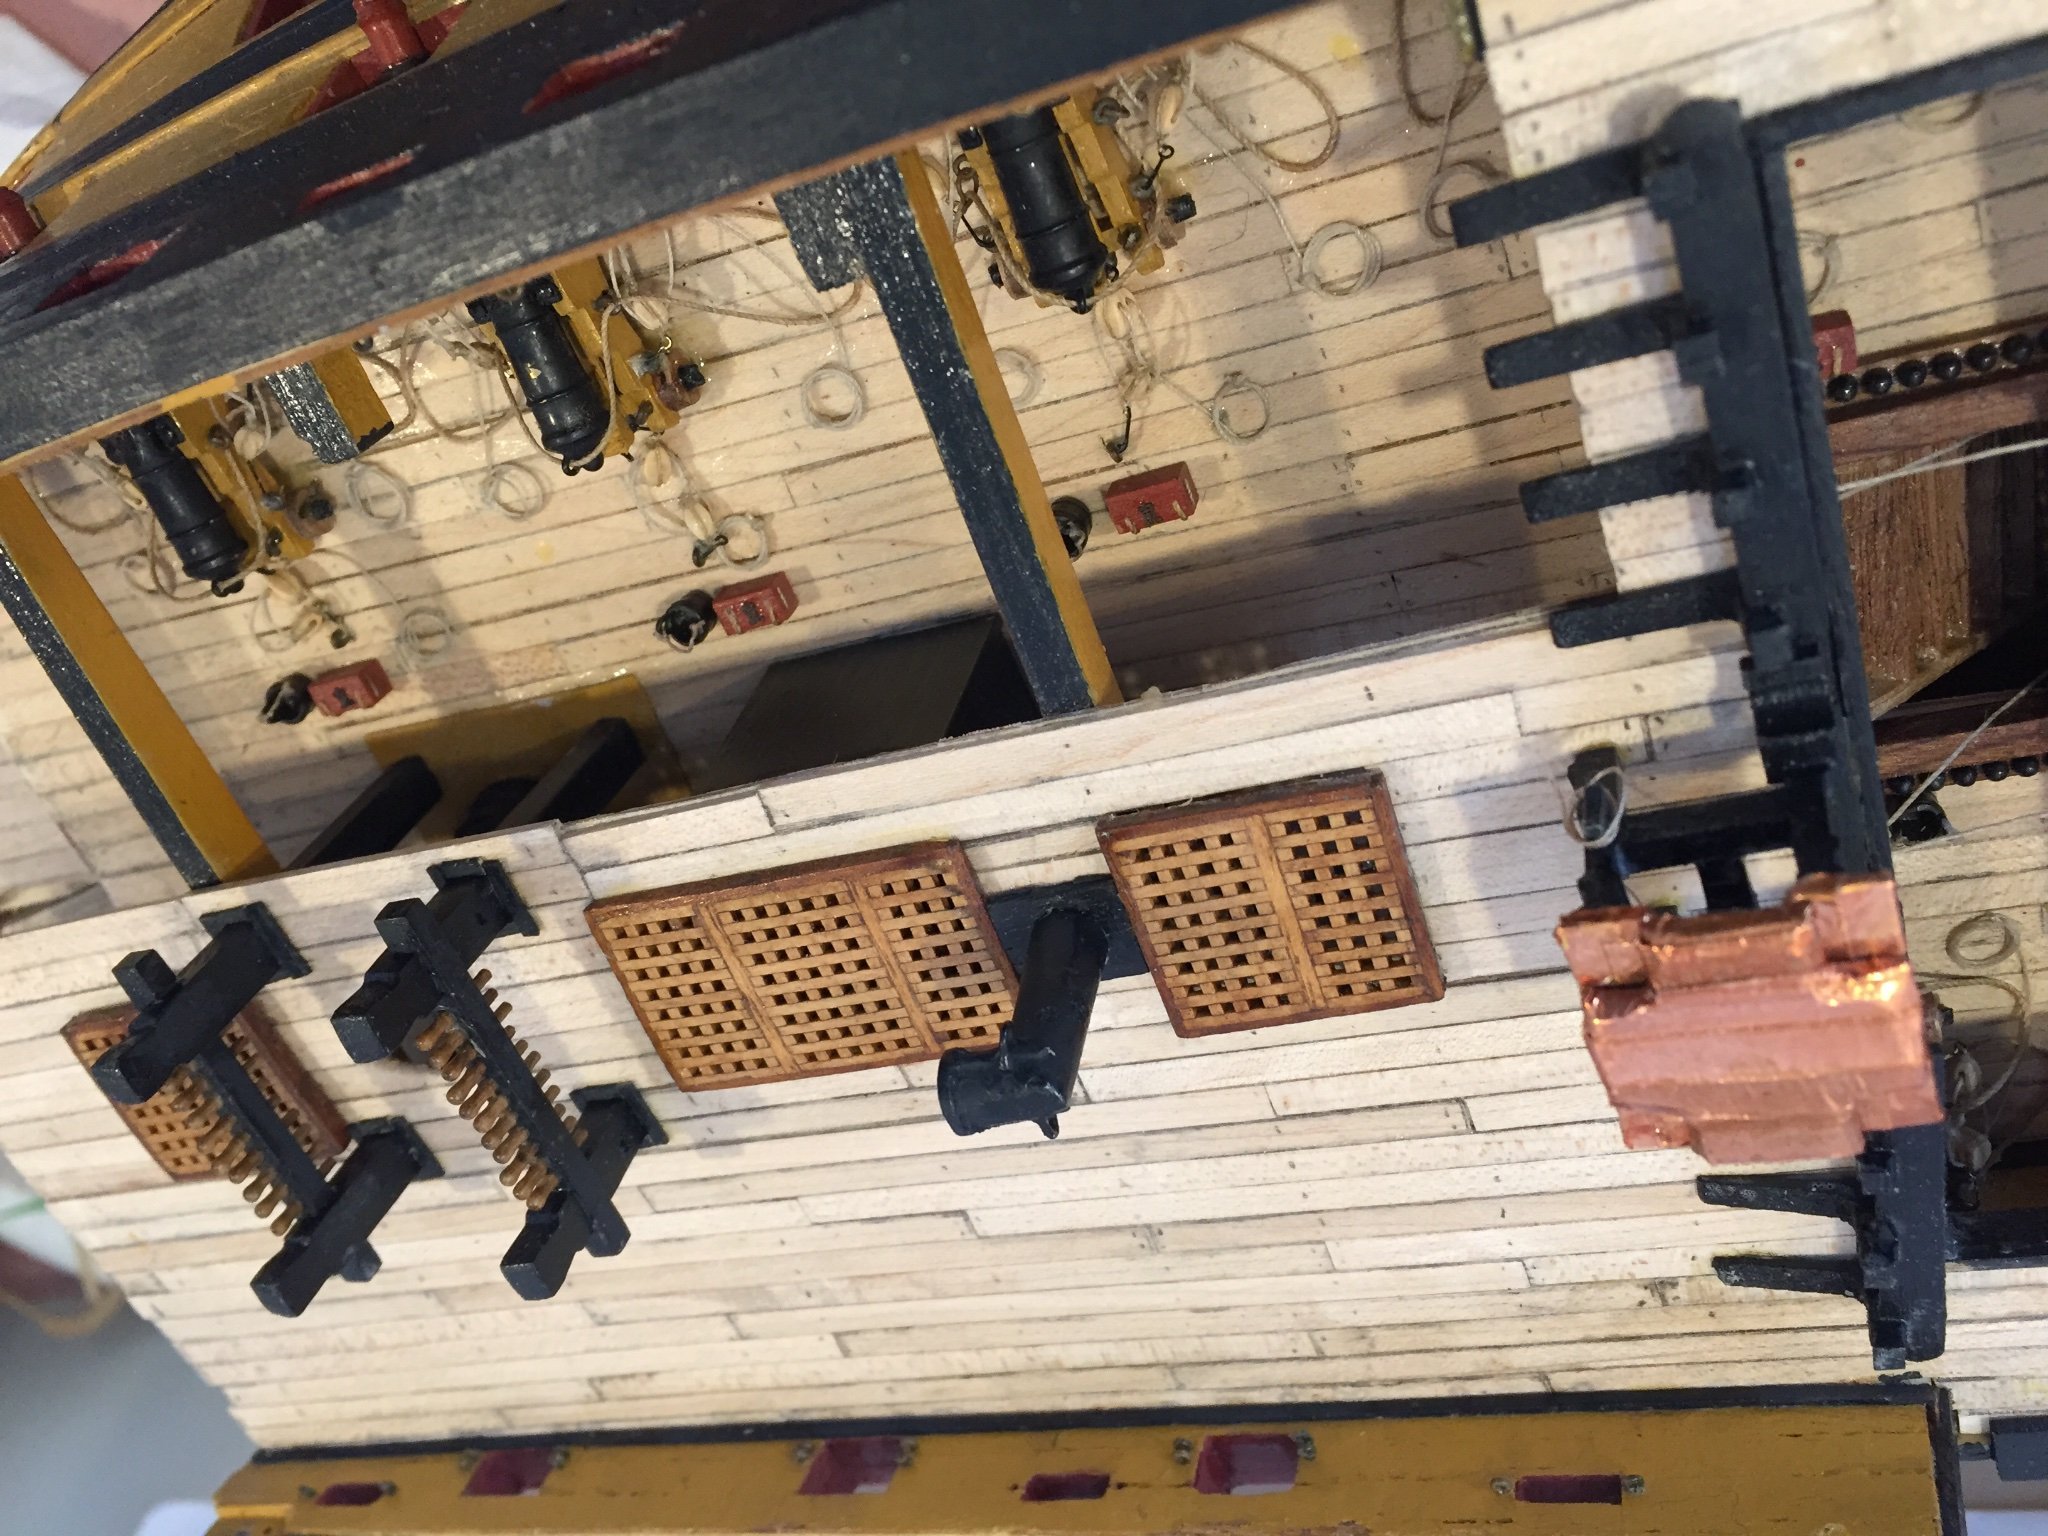
I've a question concerning the beakhead bulkhead #205. I'm thinking of removing the right side of the bulkhead in order the make the bow interior more visible when viewing the front of the ship. As you can see if you check my 2/15 post - the first picture - the starboard bow portion of the upper gun deck is exposed. With the marines walk, bowsprit etc. will removing part of the bulkhead provide more visiblity and do you think it's worthwhile? Thanks, Mort
- 60 replies
-
- 1
-
-
- victory
- caldercraft
- (and 1 more)
-
They're great. Where did you buy them?
-
Hi Lyle, Been meaning to ask - perhaps I missed it - did you post any photos on how you built your chairs? They're great. Thanks, Mort
-
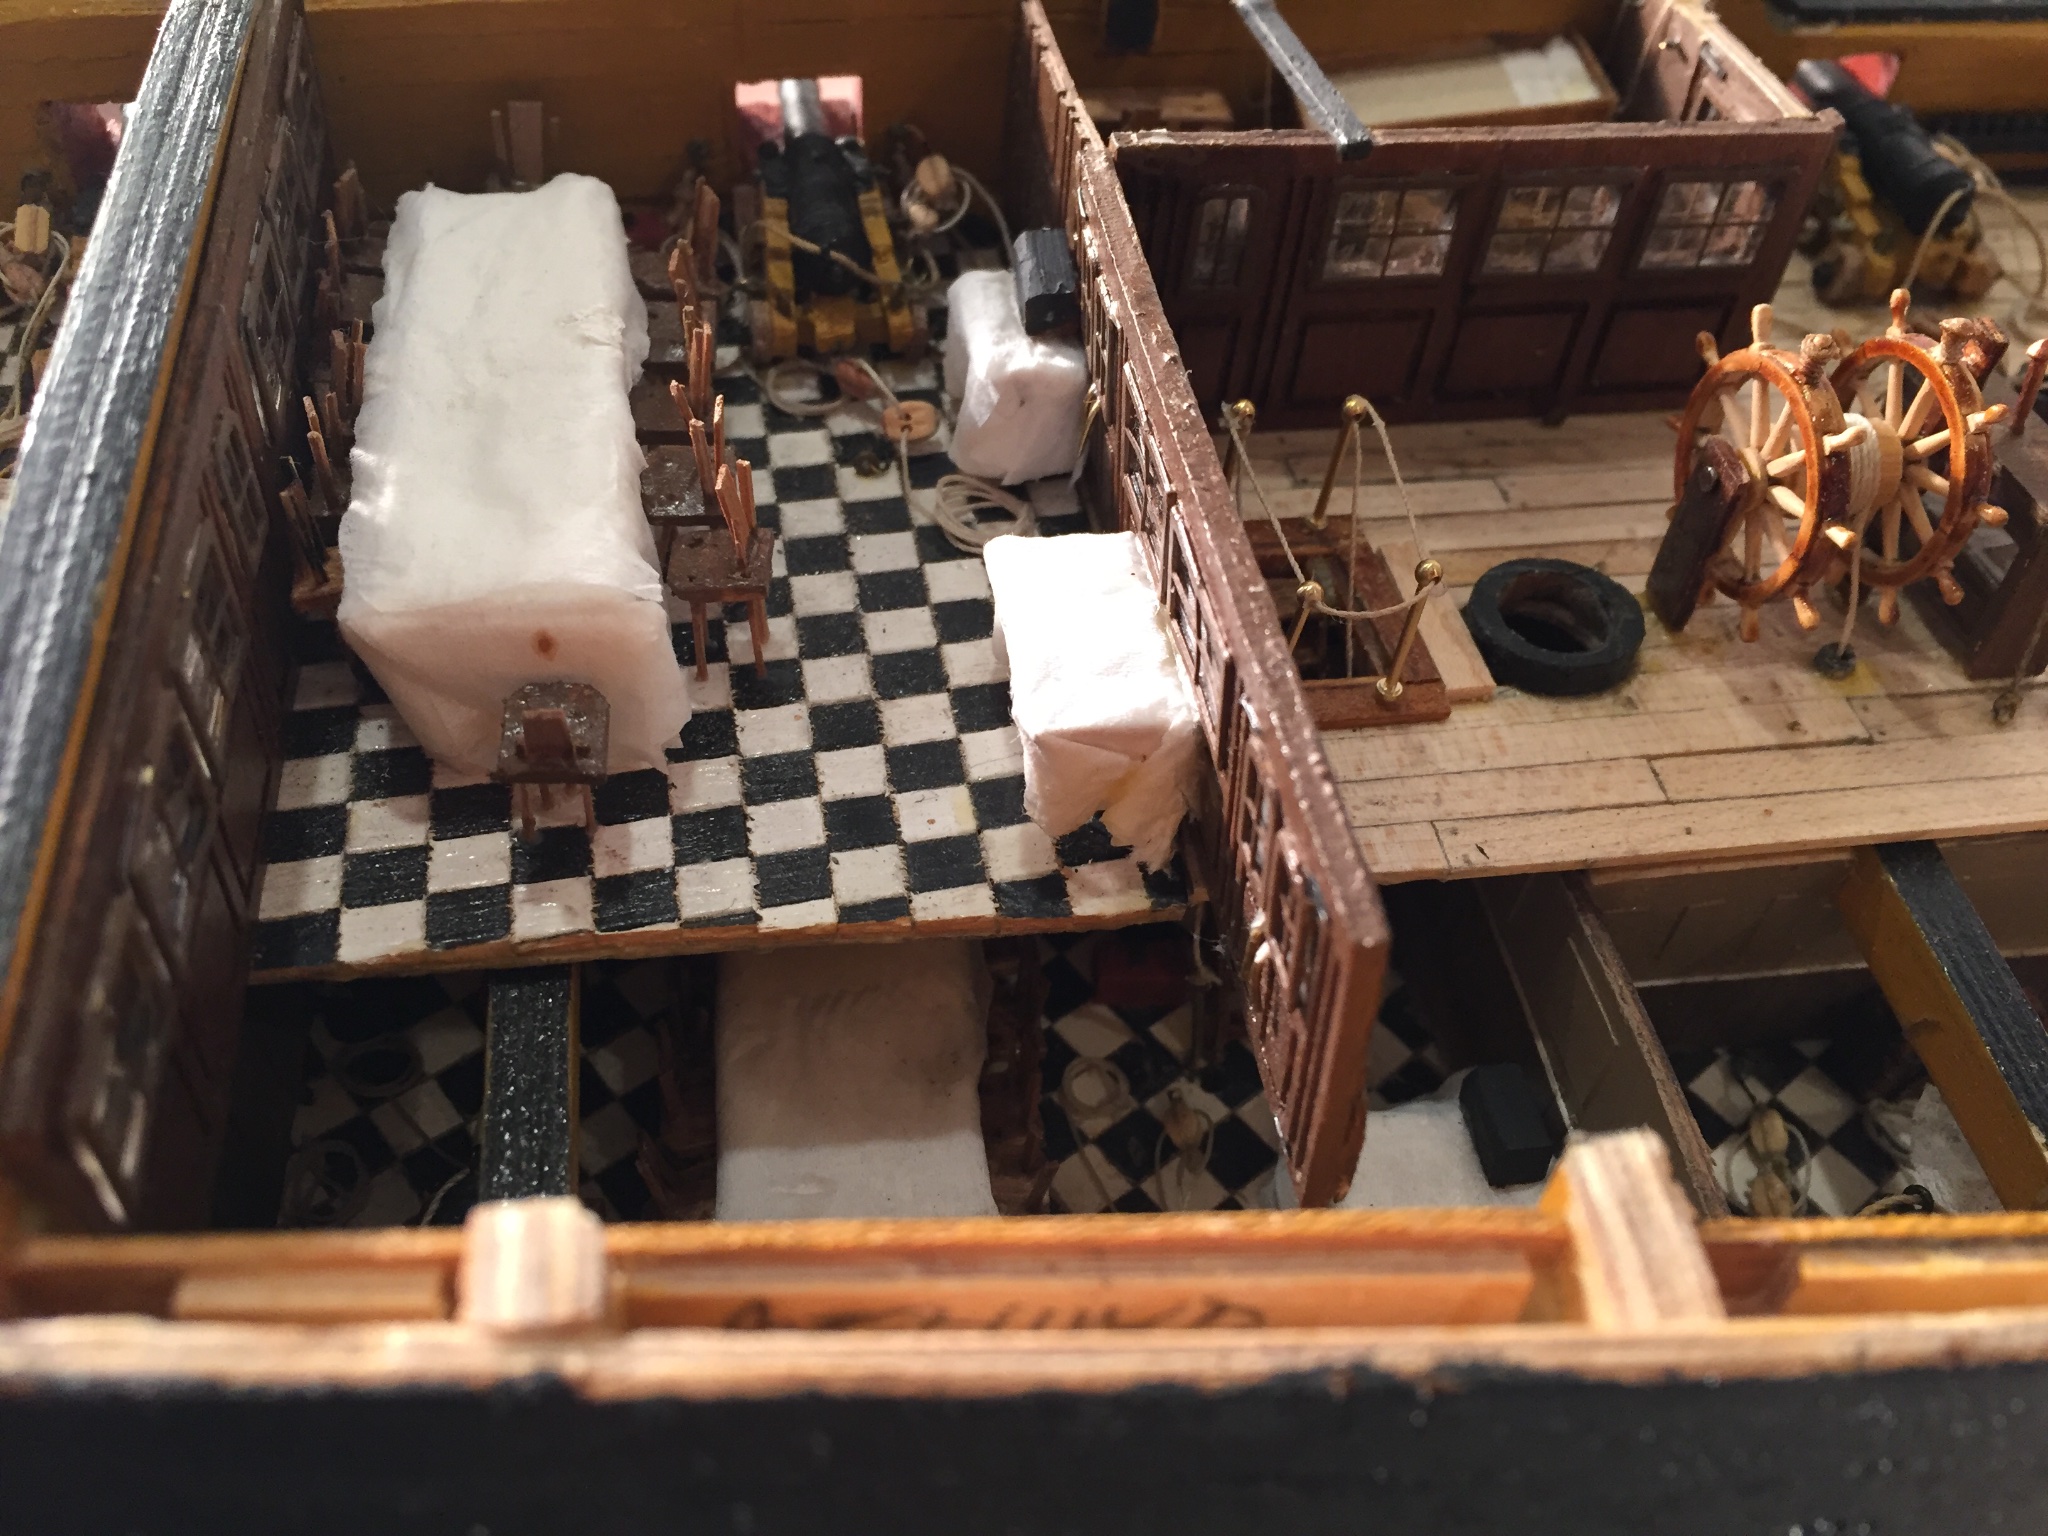
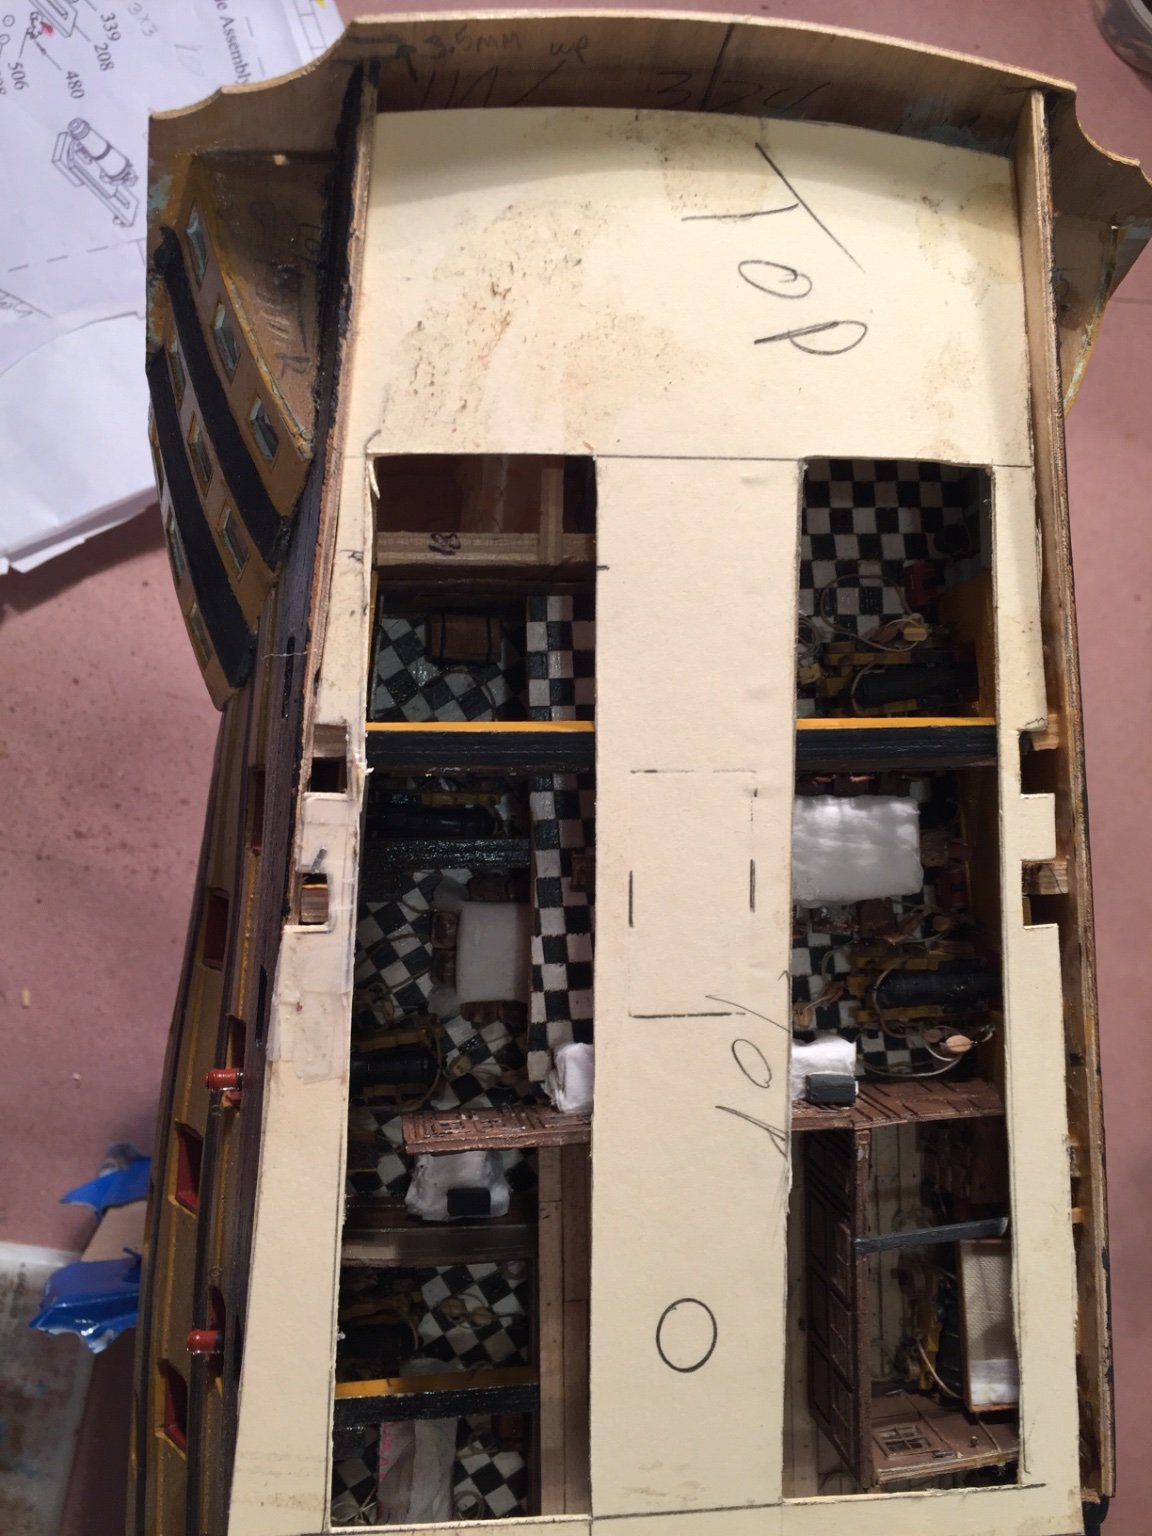
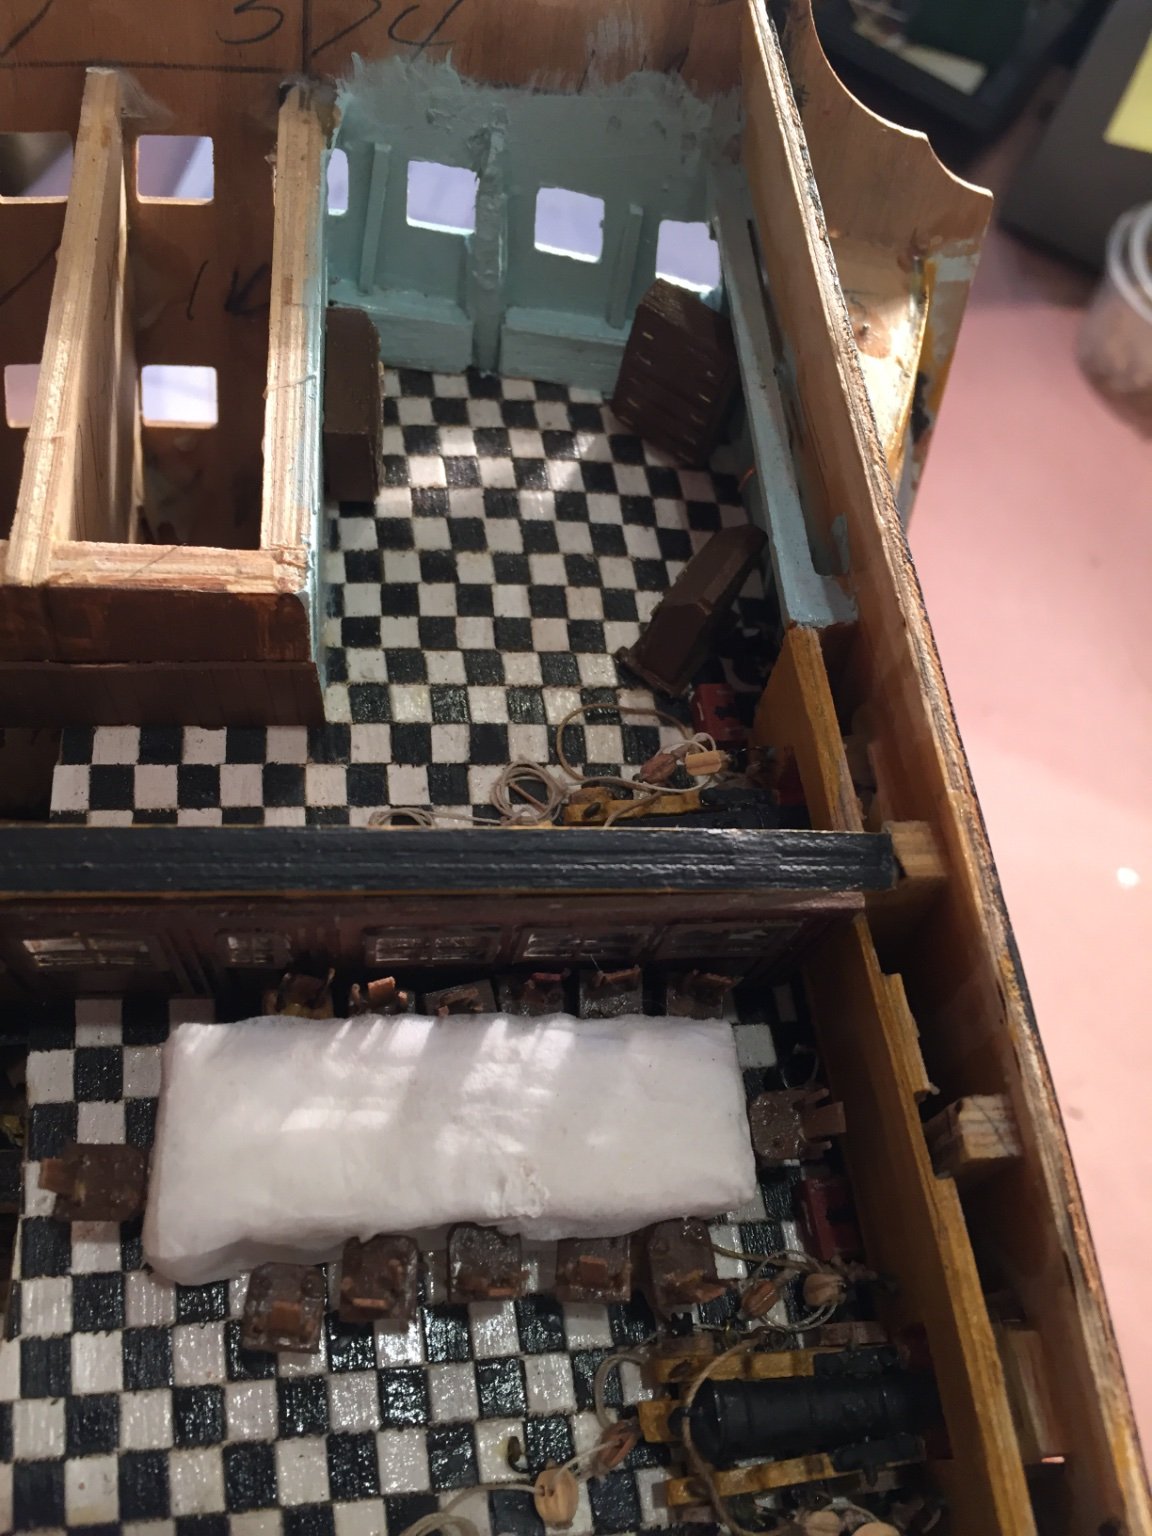
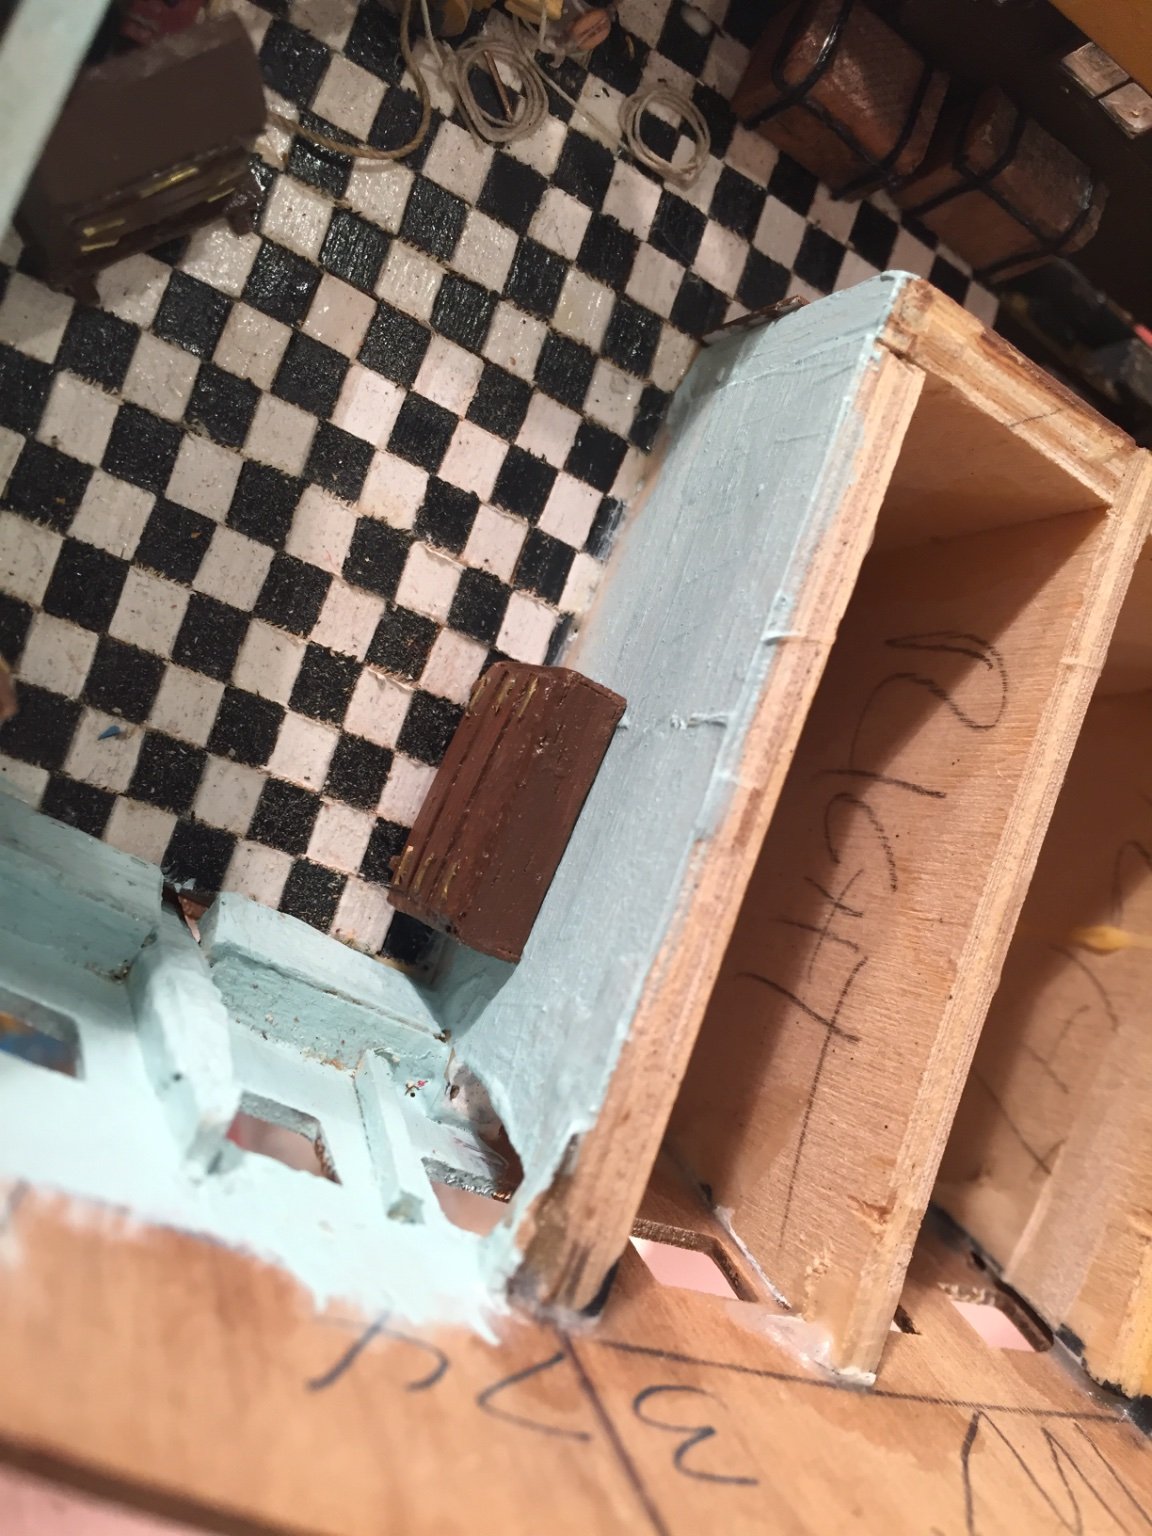
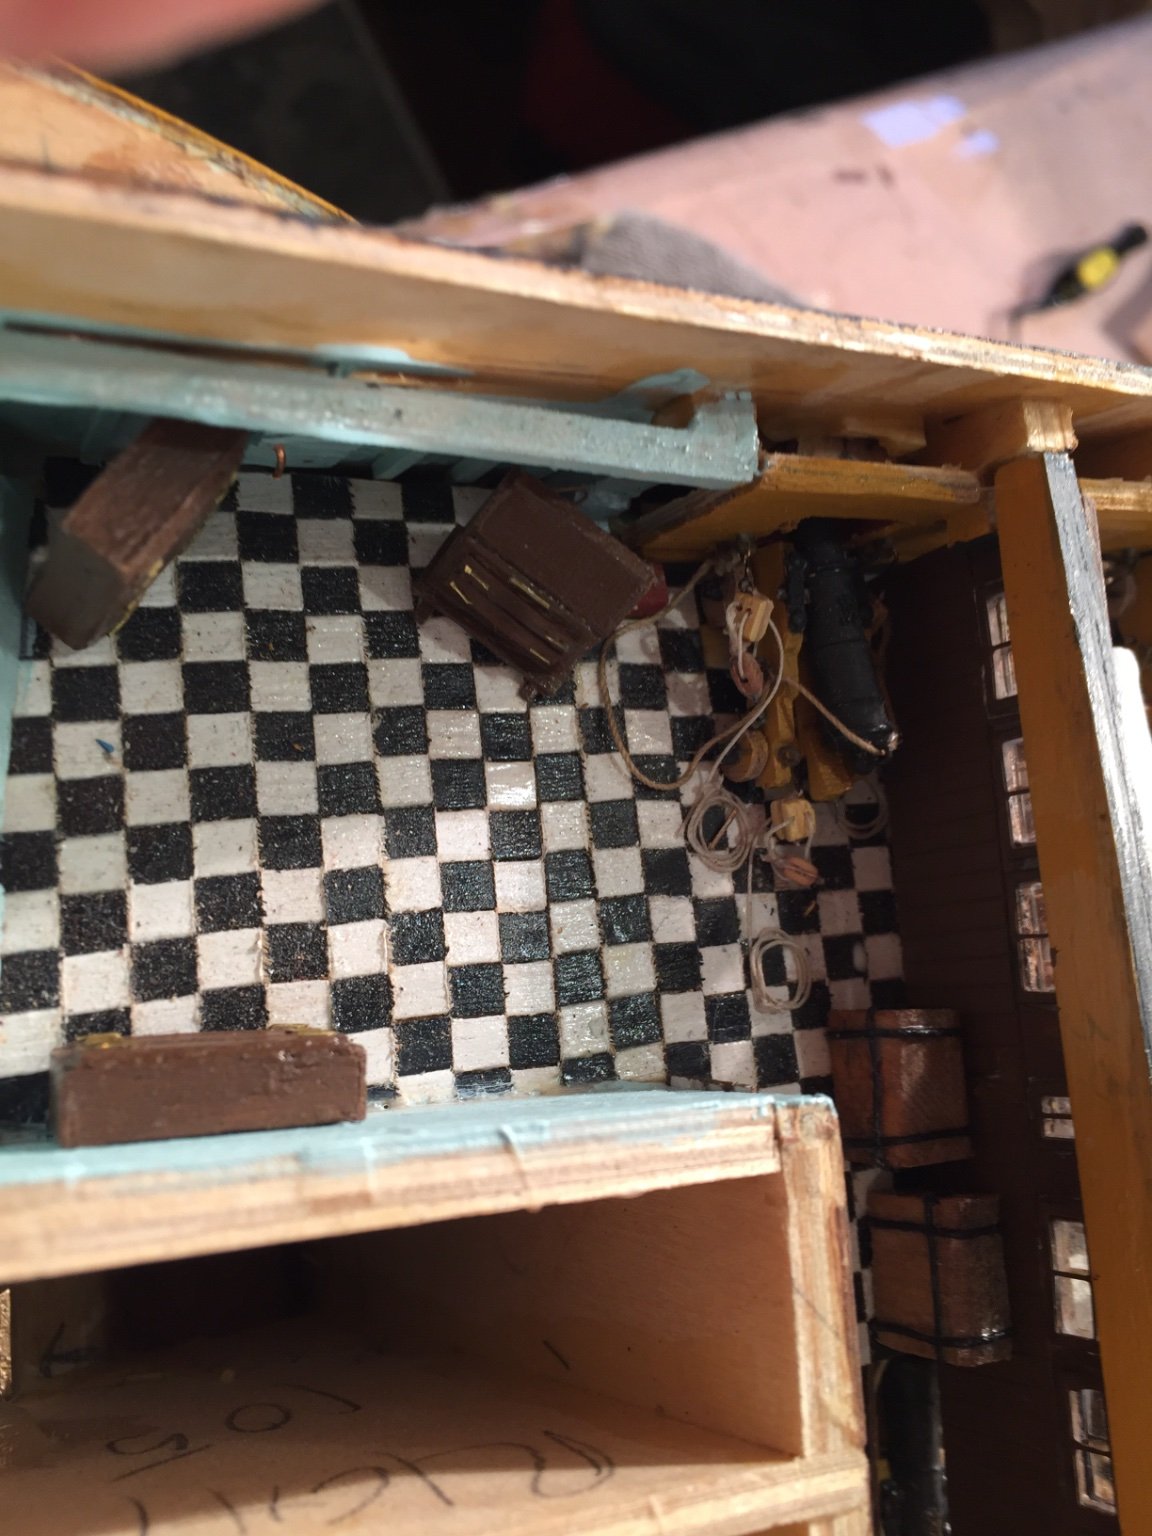
As you can see I removed part of #105 in order to build part of the captain’s area. In retrospect I should have removed both of the top parts of #105 and the keel piece but I couldn’t visualize if it would work or not if the stern fascia #374 would properly fit. The pictures show the captain’s quarter gallery with a hanging lantern and commode. Also shown are some furniture dry fitted in the captain’s day cabin.
- 60 replies
-
- 1
-
-
- victory
- caldercraft
- (and 1 more)
-
Hi, I think I've figured out how to post pictures, which don't do any justice to the real life appearance. Hopefully I can do it again. I'll try post earlier ones. The above show the forecastle breast beam assembly, with the exposed port side upper gun deck, the masters cabin - with bed, desk and clothes trunk - the admirals sleeping cabin - with wash stand, clothes trunk and bed - partially exposed admiral's dining cabin and the captains dining and day cabins. I'm awaiting more parts from Caldercraft and then I can complete the captain's dining and day cabins. Stay safe and well, Mort
- 60 replies
-
- 3
-
-
- victory
- caldercraft
- (and 1 more)
-
Well done sailor. Very, very well done. Mort
-
what plan sheet # are they shown on?
-
Hi Lyle, Where did you buy the yucca plants? Were any included with the kit? Thanks, Mort
-
Amazing start. Can't thank you enough for posting. I hope to build this kit one day. What sources have you used for referance? Thanks and stay safe, Mort
-
Help! Deadeyes and rings issue. Mamoli Constitution Kit
mort stoll replied to jfitzjr1's topic in Masting, rigging and sails
You can make your own dead eye rings out of wire or black thread. Simply wrap them around the dead eye, mount them and you should be good to go. Hope this helps, Mort -
Can't thank you enough for your posts. You have no idea how much I admire and respect your build. Keep up the great work Stay safe and well, Mort
-
Hi Robert, If it were me I would paint them black so everything matches. Be safe, and keep up the wonderful work. Mort
-
You're doing a great job. Enjoy your tour. I look forward to more posts. Mort
-
Well done sailor. Very, very well done. Mort PS Where did you get those figures? They are wonderful.