
HOLIDAY DONATION DRIVE - SUPPORT MSW - DO YOUR PART TO KEEP THIS GREAT FORUM GOING! (Only 20 donations so far - C'mon guys!)
×


Jack12477
-
Posts
5,665 -
Joined
-
Last visited
Content Type
Profiles
Forums
Gallery
Events
Everything posted by Jack12477
-
 Nice launch, Sjors. I like it.
 -
Bob, great looking case and base. Thanks for the tutorial.
- 277 replies
-
- 3
-

-
- model shipways
- 18th century longboat
- (and 1 more)
-
Thanks, Chris. I just updated mine to the new convention.
-
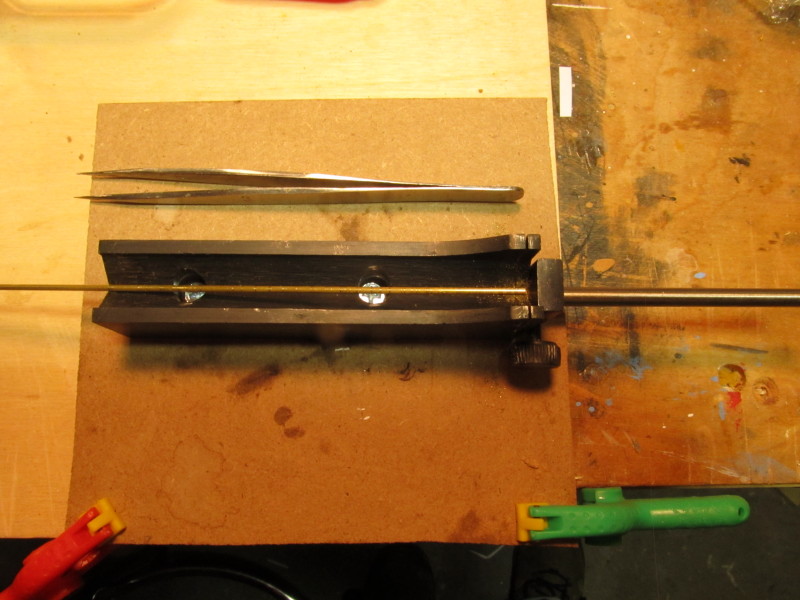
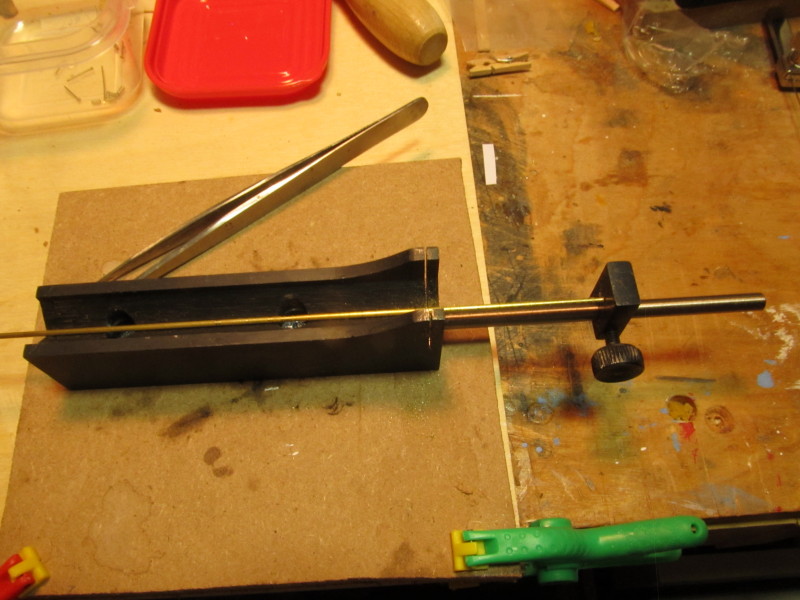
Rob, the cutting jig came from MicroMark see here. It works well. MicroMark is a good tool source, fast delivery to Northeast areas. The tubing fits in a V groove, the larger silver tube is where the slider moves in and out to set the cut length (see photos 2 <set for 3/32 cut> and 3 <set for longer cut> the material to be cut sits in the V groove, extends to the stop block <block with set screw on side>, the saw fits in a tiny saw slot visible in photo 3. The unsecured end (left side in photos) has to be held down with finger(s) or some other clamp. You can screw the jig to a larger surface as shown in the first photo (uses #6 screws). The cut off end just drops onto the work surface or in this case into the V groove because the stop block prevents it from falling out <hence the tweezers in photo> Another good miter box is this one along with the razor blade saw I get a lot of use out of both jigs/miter box. The razor blade saw is great. Check out MicroMark's online catalog. Also check out my post in the "What have you received today" forum for some additional tools. Also SRC's post a couple above mine.
- 250 replies
-
- 3
-
-
- willie l bennett
- model shipways
- (and 1 more)
-
It's been a few weeks, but progress has been slow. Working on cutting the tiny 1/16" diameter x 3/32" long brass tubes for the cap rail posts. Had to dig around in the ole toy box till I found a suitable jig to use to cut repetitive lengths of pipe. 24 pieces cut so far, about a dozen more to go. The jewelers saw was the only saw small enough to fit in the slot and tough enough to cut the brass tubing.


- 250 replies
-
- 11
-
-
- willie l bennett
- model shipways
- (and 1 more)
-
Rob, nice solution to the keelson problem.
- 45 replies
-
- 2
-
-
- model shipways
- willie l bennett
- (and 1 more)
-
Panel doors constructed not simulated! - miniature brass door knobs! - Glen impressive and magnificent craftsmanship - Your stairs look great also - look like the real thing. An inspiration to all of us.
-
I think I'll join the group, been looking at this kit for a while now
-
Ran across this article in the Rochester NY Democrat and Chronicle newspaper today.
-
- 6
-
-
Happy Birthday, "youngster"
-
Model Shipways Willie L. Bennett Questions
Jack12477 replied to FlounderFillet5's topic in Wood ship model kits
Rob, My kit parts list is dated 10/20/2010 - so more recent than yours. I'm attaching a photo of my keelson template. It's been so long since I built the keel/keelson that I don't remember if there were problems. If you slide the keelson piece along the template until the curvature of the piece matches the drawing, what happens? Does it become too long? Too short ????? Try dry fitting the piece that make up the whole keelson on the template and see how they fit together, move them around until the align with the curve of the drawing and see what it looks like. Sorry I can't be more helpful but I tend to forget the problems especially over a long time lapse.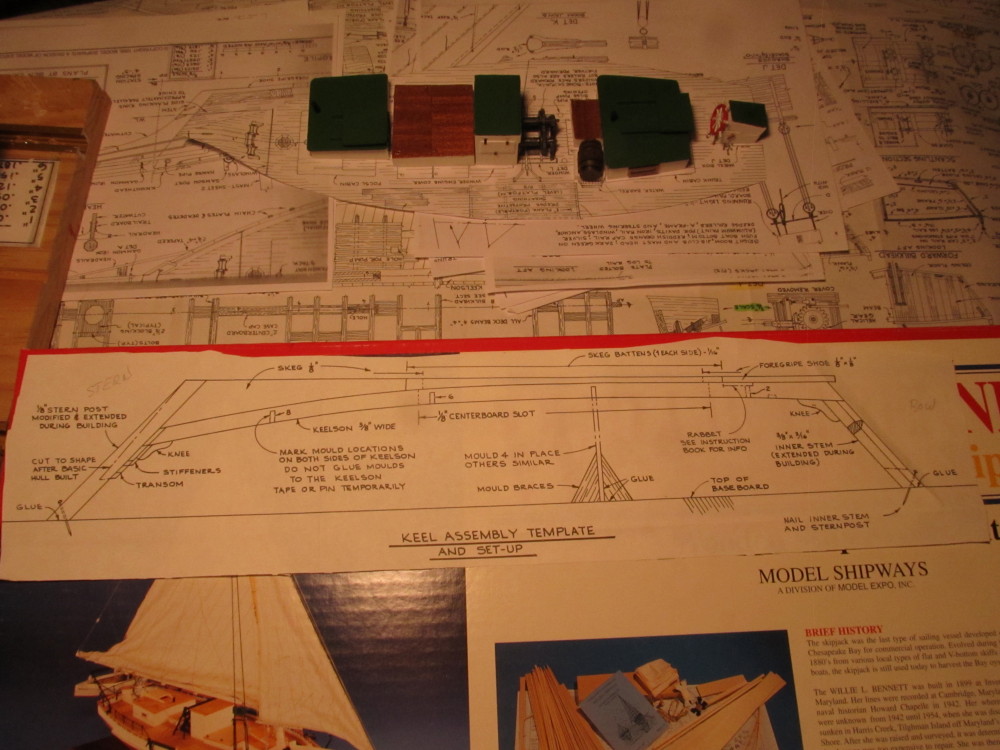
-
Model Shipways Willie L. Bennett Questions
Jack12477 replied to FlounderFillet5's topic in Wood ship model kits
Rob, I'll check my kit and get back to you. -
Model Shipways Willie L. Bennett Questions
Jack12477 replied to FlounderFillet5's topic in Wood ship model kits
Rob, I'm building the Willie also - started it several years back, put it back in box and up on shelf due to frustration over the drawings et al. Decided to pull it back of the shelf this year and begin again. But sorry, I don't recall how I got the keelson built altho I do know it was/is not quite "right" but don't remember any of the details. My build log link is in my signature below if you want to pop over and have a look at mine. I got as far as planking the bottom and installing the sides the first time before I "jumped ship" and went to another couple of models before returning to Willie. Mine had an addendum set of plane changes for the keel as I recall except my patterns are long gone now. Does yours have an insert sheet of changes ? Or was that for the build board? . -
Mobbsie, just catching up. WOW ! Beautiful workmanship. Love the contrasting wood colors on the hull and elsewhere.
- 129 replies
-
- 5
-
-
- armed launch
- panart
- (and 1 more)
-
Happy Anniversary, Denis
-
Nice looking model Chuck. Looking forward to its debut.
- 269 replies
-
- 2
-
-
- Queen Anne Barge
- Syren Ship Model Company
- (and 1 more)
-
I should probably update my post a little - my very first wooden ship model, after years of plastic models, was a Midwest row boat, made a couple of them, before tackling the Dumas Coast Guard 47 ft Utility boat model, but for this one my local hobby store owner - an accomplished modeler in his own right - gave me almost one-on-one guidance (since I bought the kit from him), from that I moved on to the Artesania Latina kits always choosing one that was in the 18 - 24 inch range finished. All of this was way before there was even an Internet or an MSW. That's the advice I give to anyone who asks me how to start building wood boat kits. Of course, Midwest in no longer in the kit business but there are probably other manufacturers who built small boat kits for beginners similar to Midwest's selection of kits.
-
Not sure I understand that response Chris. Are you a Corgi lover also ? Or ???
-
I have to agree with Skip - I too have been building models for over 60 (with starts and stops) both plastic and wood - some Military Armor and some wooden ships. And I too am not as good as many of the modelers I see here but so what. I'm learning !
- 241 replies
-
- 10
-
-
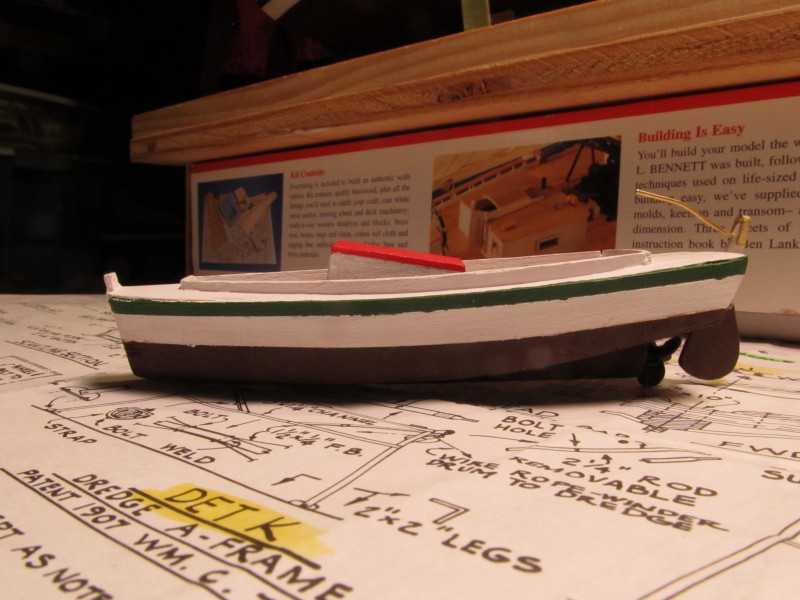
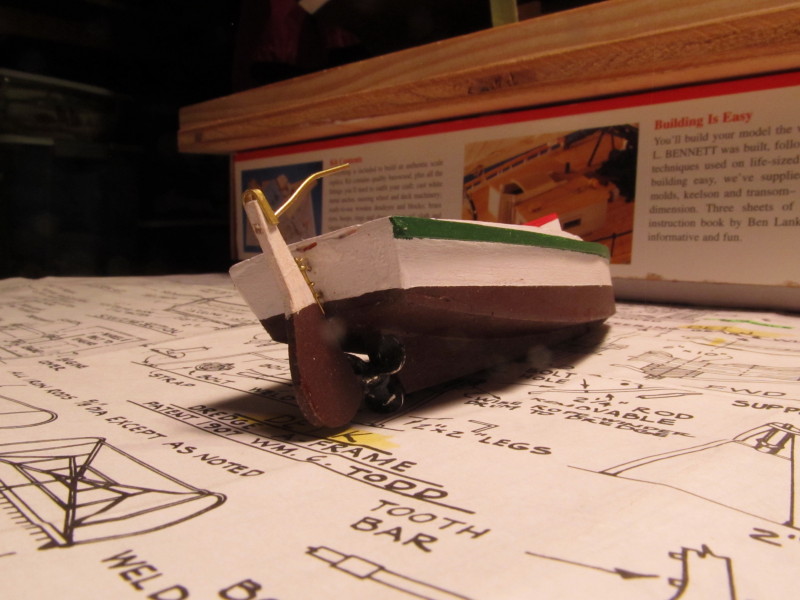
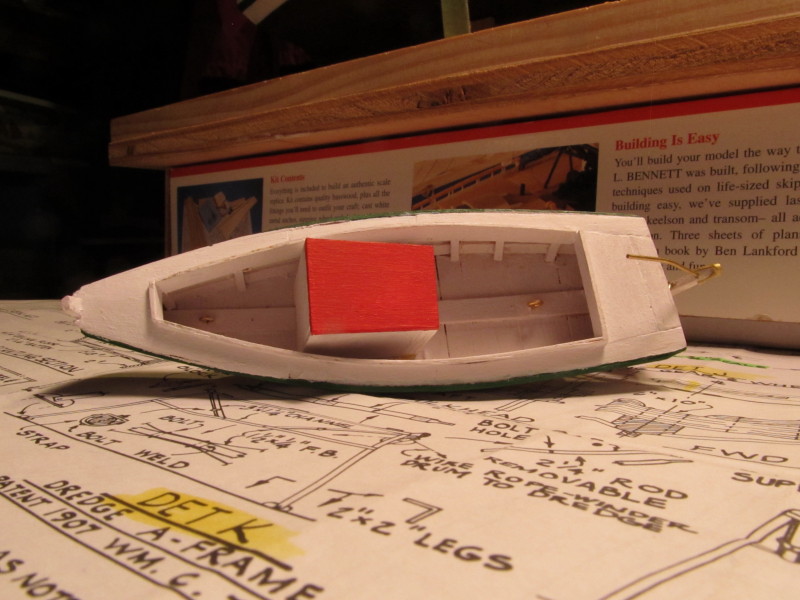
Time for a small update: Finally got the small pusher boat completed. Ran into some problems keeping the side aligned even with the aid of the frame templates. The instructions were really vague and frustrating on what size lumber to use - had to do a lot of "translating" from the plans and to find the right pieces. Mostly I eye-balled it and used what "looked correct". Results are shown below in the photos.
- 250 replies
-
- 12
-
-
- willie l bennett
- model shipways
- (and 1 more)
-
Welcome to the Skipjacket club, Rob. I too am struggling with this kit altho it is not my first kit. I started it some years back, got frustrated with the rather cluttered plans (blueprints), put it back in the box and onto the shelf for several years while I built a few more kits. Picked it back up this year. My build log is in my signature below. My memory is a little vague but I think I ran into the same issue you're having but can't remember how I solved unfortunately. There are several excellent build logs for the kit here on MSW which I have been using as reference. Use the MSW Search function and you will find the rest of them. Good luck with your build.
- 45 replies
-
- 3
-
-
- model shipways
- willie l bennett
- (and 1 more)