


hof00
-
Posts
1,622 -
Joined
-
Last visited
Content Type
Profiles
Forums
Gallery
Events
Posts posted by hof00
-
-
On 7/16/2023 at 2:15 PM, Beginner said:
Hi, just starting Marina 2 and believe your post is going to be really helpful - thanks for taking the time to share. Like the stand you built, do you happening recall where you found the plans or did you create your own.
Regards Colin
11 hours ago, downeaster said:Colin, I build my stands myself no plans. I do look around the internet for ideas. I enjoy the build of the stand as much as the model itself. Good luck with your build and I would encourage you to start a build log to share to this community.
I'd enjoy seeing another log.
I have this kit and would enjoy seeing before I dive in!!
Cheers....HOF.
-
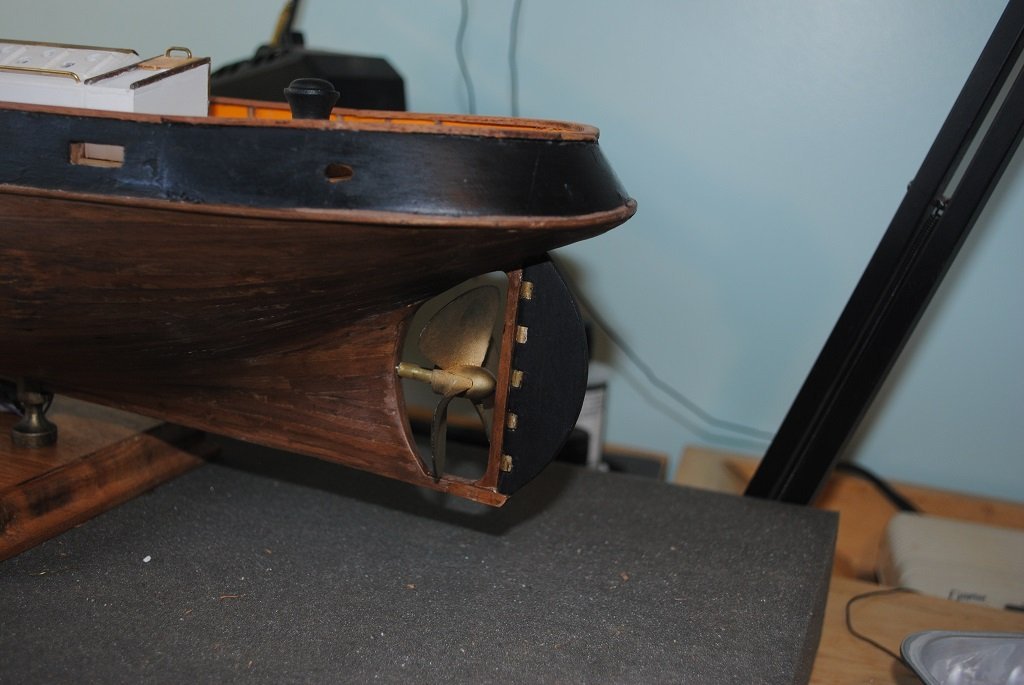
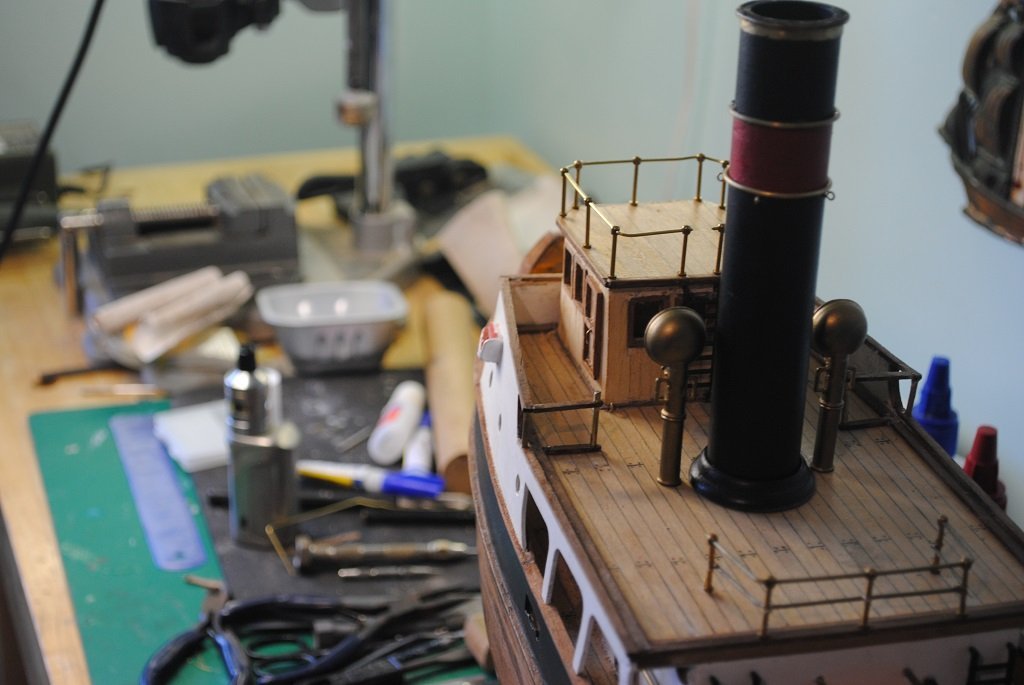
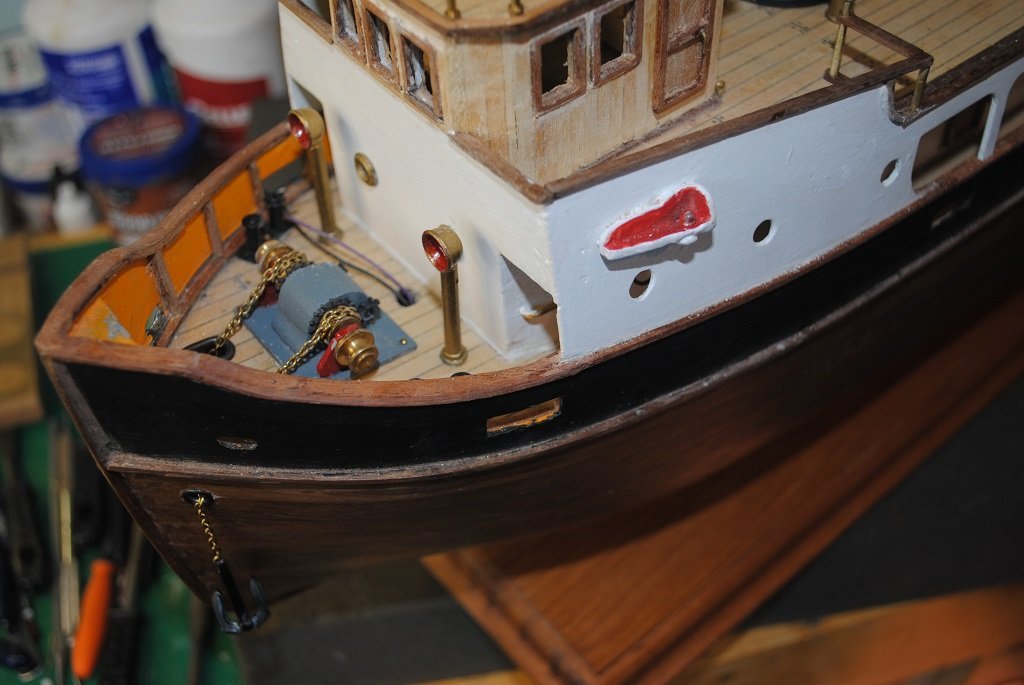
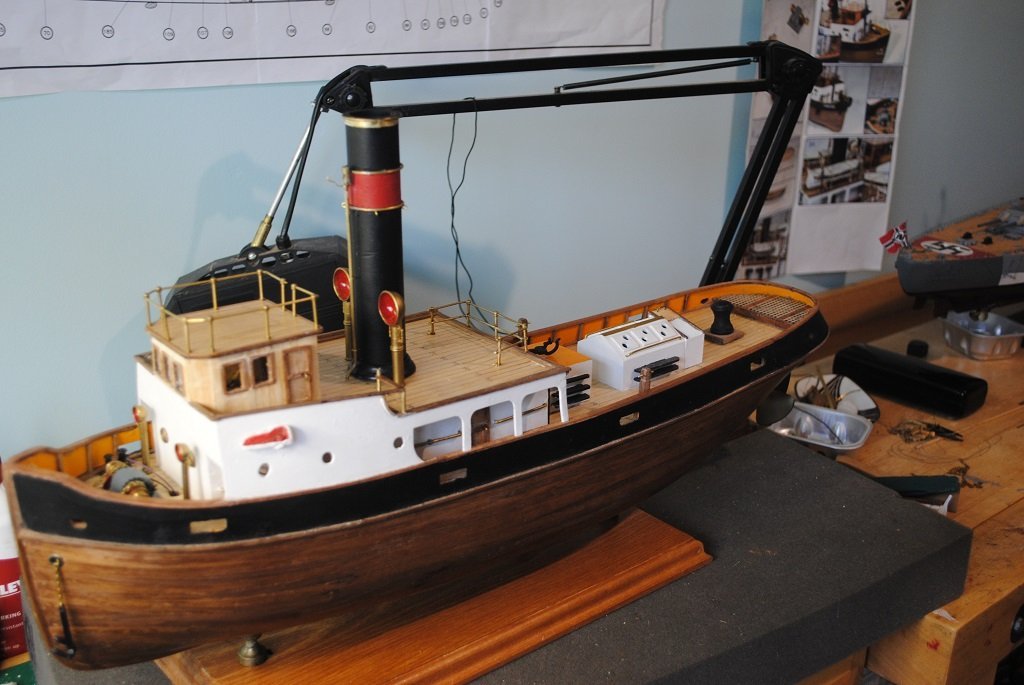
Hi All,
Update:
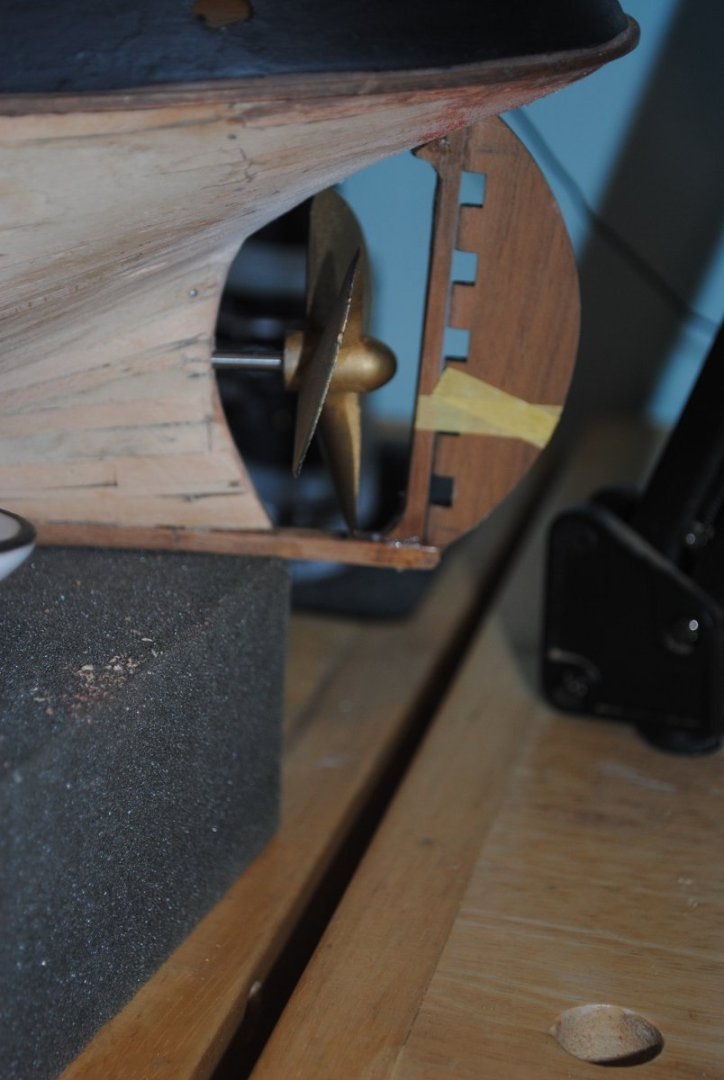
Prop and Rudder installed, both articulate. 🙂
Anchor Winch , Chain and Anchors installed, Anchors would not stow as Shafts were too long, It would have been o.k. to trim them down but I decided to leave them deployed a little.
Cap Rao for Boat deck/Wheelhouse completed.
Wooden Bitts installed.
Forward Ventilato0rs installed.
Funnell "Bling" completed.
Brass Railings almost complete, I have to install the Centre Rail on the top of the Wheel house. (A/L provided Single Hole Stanchions, unfortunate. I did consider soldering the center Rail but bound the joins with very thin Brass Wire and CA'd.
Not too much to do to complete:
The Tug has an "Antique" type feel to it, I don't mind this at all. 🙂
Cheers....HOF.
Photos:

- Diver, Knocklouder, VitusBering and 1 other
-
 4
4
-
-
14 hours ago, Javelin said:
I checked and it appears the current rules for navigation lights were only implemented from 1969, so considering the age of your tug, they wouldn't have been applicable.
Can't say anything useful on lights pre-dating that implementation, I assume it was regulated on a national (flag of registry) level.
Hi Chap,
Thanks for the information!!
Appreciated.
Cheers....HOF.
-
3 hours ago, Javelin said:
Beautiful model, one note though, the inside of navigation lights is supposed to be matt black, this is to avoid any sheen that would reflect the light out out of its regulatory angle. I'm not sure however, when this matt black was introduced into the regulations.
Towing lights are normally a combination of masthead lights, depending on the tow's length. Basic is 2 masthead lights on top of each other (tow less than 200m in length). The red-white-red means restricted in manoeuvrability (also carried by other vessels)
Thank you Javelin,
Interesting regarding the Navigation Lights, I'll have to Google this stuff.
(I was rather relieved that I did not drill through my wiring fitting the Pedestals! 🙂!)
The Nav. Lights have Brass "Cans" to cover, probably lastish to be installed.
Masthead Lights: I have prototyped the Mast/Lights and will use this prototype to complete the Mast. Wiring is installed for this just in front of the Forward Superstructure. Towing Vessel: White - Red - Red from the top down if my reading is correct....
Anyway, much yet to do but getting there.... 🙂
Cheers....HOF.
-
3 hours ago, Paul Jarman said:
Looking good. I built this same model a few years ago. Only difference is I painted mine.
Thanks Paul.
I reviewed your build not so long ago. (I too was considering paint if the Walnut was not up to par.
I also built this a few years ago, (2014 from the note I penciled in on the plan. 🙂)
It has been languishing for far too long and it'll be nice to get it completed.
Cheers....HOF.
-
3 hours ago, VitusBering said:
That's quite a beauty.
Thanks Chap,
It looks better than it did!! 🙂
(I guess that's what happens when you tear things apart and re-build them....)
Cheers.... HOF.
-
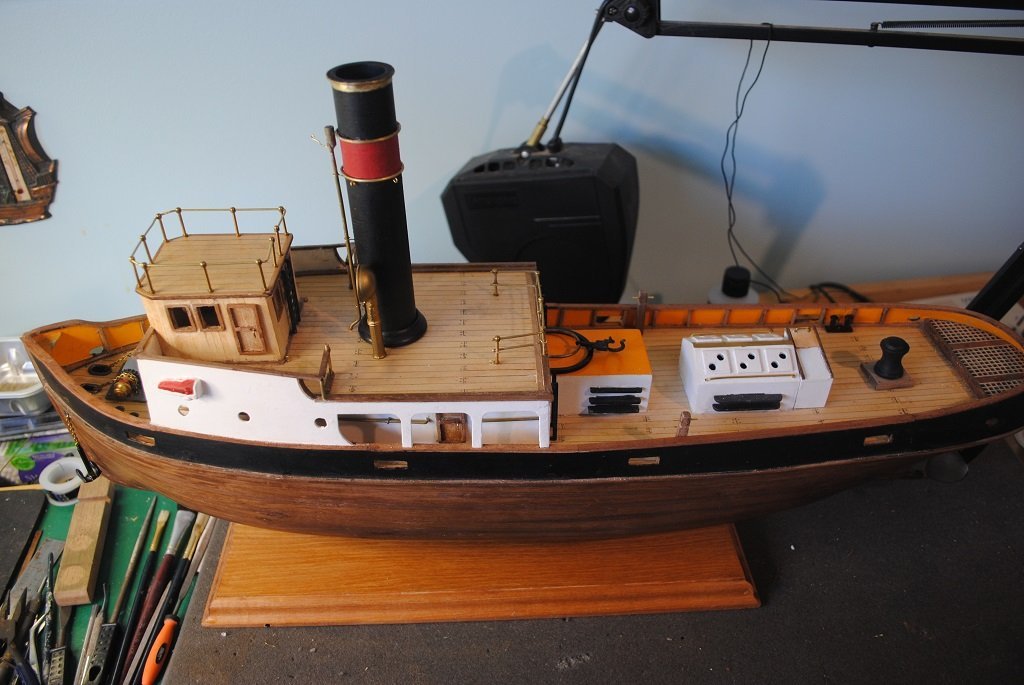
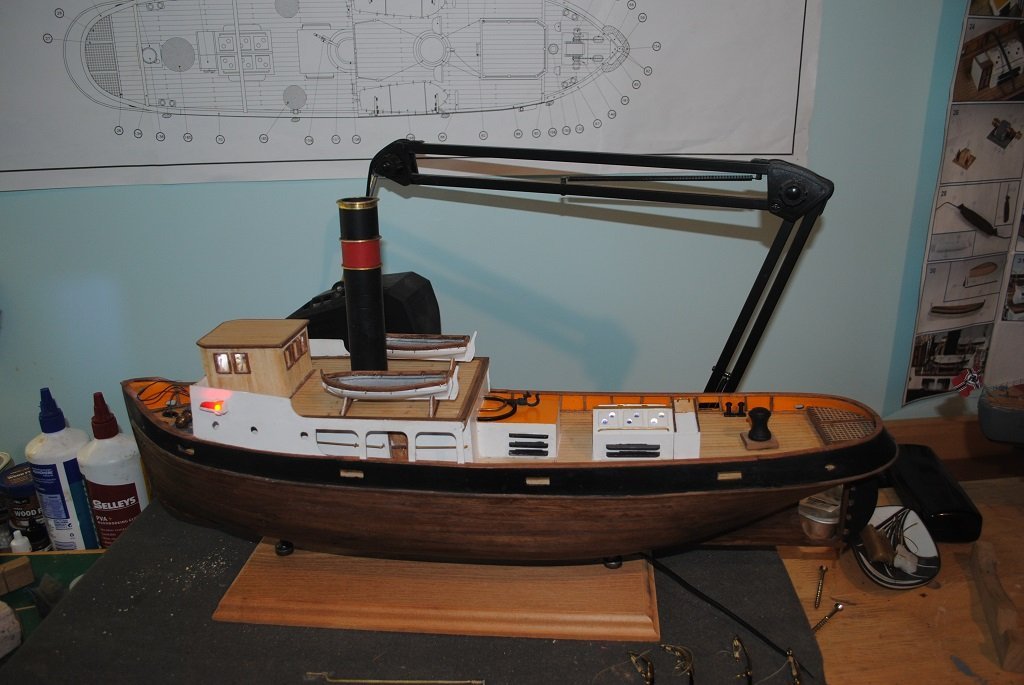
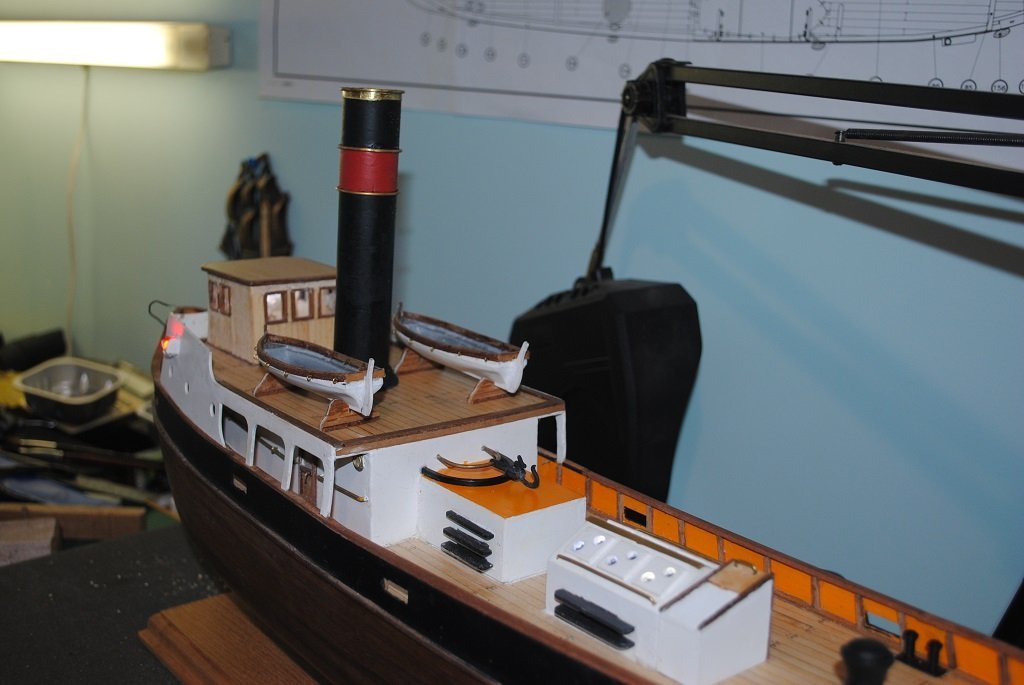
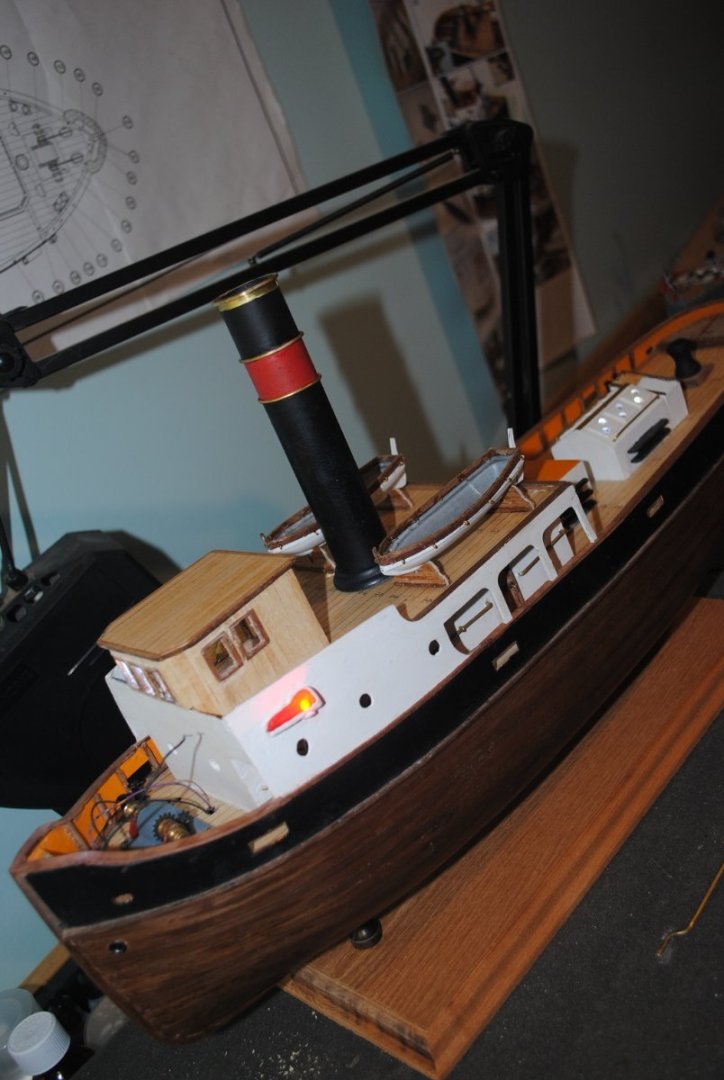
Hi All,
Bit of an update:
I got my Plinth made today, NZ Native Timber, Rimu. (My favorite.)
Work on Lifeboats continues, Covers and Grab Ropes to complete I also Planked the Skids.
Funnel almost complete, need to add the Steam Whistle and Pipe, (Assembled). and Ringbolts for Rigging.
Davits completed.
Walnut Hull sealed.
Tug temporally mounted, I can soon assemble some Topside stuff.
Cheers....HOF.
Photos:
- Mirabell61, AJohnson, VitusBering and 1 other
-
4
-
Nice!!
Some good "Logical" thinking about your processes. 🙂
Looking forward to your Planking works.
Cheers....HOF.
-
Hi Chap,
Your Cutty is looking pretty good!! 🙂
Cheers....HOF.
- FrankWouts and VitusBering
-
1
-
 1
1
-
Hi Chap,
That's very nice work!!
Cheers....HOF.
-
Hi All,
Still working to complete my unfinished project.
So, the 2nd layer of Planking is reasonably complete, just a fine sand and Sanding Sealer. (There are a couple of very tiny bits that have experienced the dreaded "Cut-Through" but I don't believe they will be noticeable after finishing the Hull. (Plan "B" is to paint the Hull if I am unhappy with it.)))
Anchor Winch, Bitts, Bollards), installed and have also been mucking around getting the Bulwark Rails finished.
I have also started the Lifeboats. These are "Muntz," (White), metal but I think they'll be o.k. once they have had a bit of love. 🙂
No need to detail the interiors as they have a material cover installed. (I have decided Green covers and purchased some material today.
Things to work on in the next few days/weeks:
- Complete and finish Hull
- Touch up paint (Ongoing)
- Lifeboats
- Davits
- Anchor Chain and Anchors
- Mast LED Lighting
- Funnel fittings
- Plinth for the Model (I don't like the MDF A/L offering)
Cheers....HOF.
Photos:

- VitusBering and yvesvidal
-
2
-
If you haven't already seen the PD videos, here's one for a cold winters' viewing....🙂
Pen Duick - Les Tonnerres de Brest et Temps Fête sur Douarnenez 2012 - Bing video
Unfortunately, the others I had as "Favorites" seem to have been removed.
- jpalmer1970 and Bryan Woods
-
2
-
3 hours ago, jpalmer1970 said:
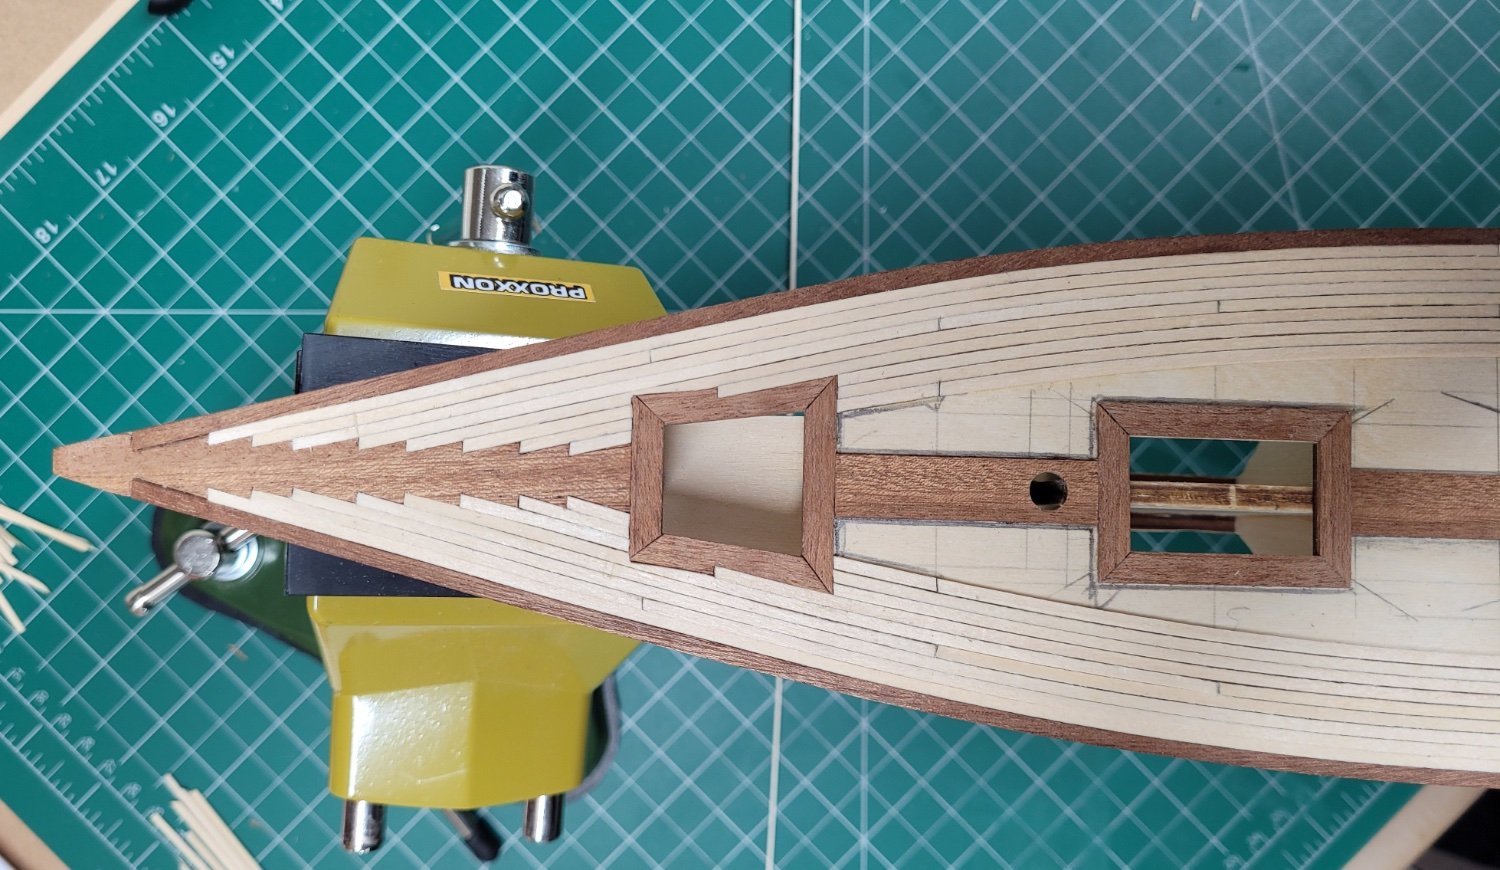
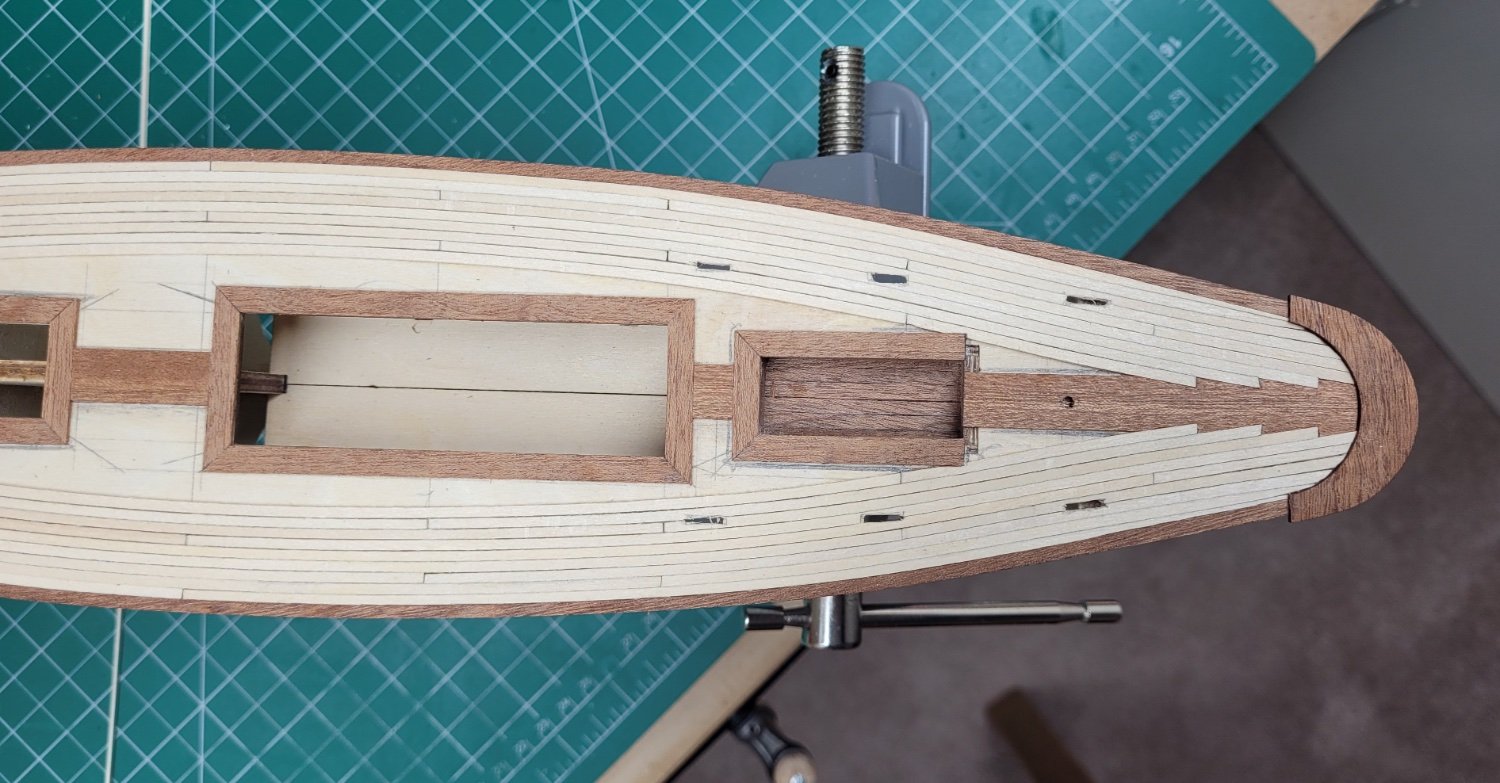
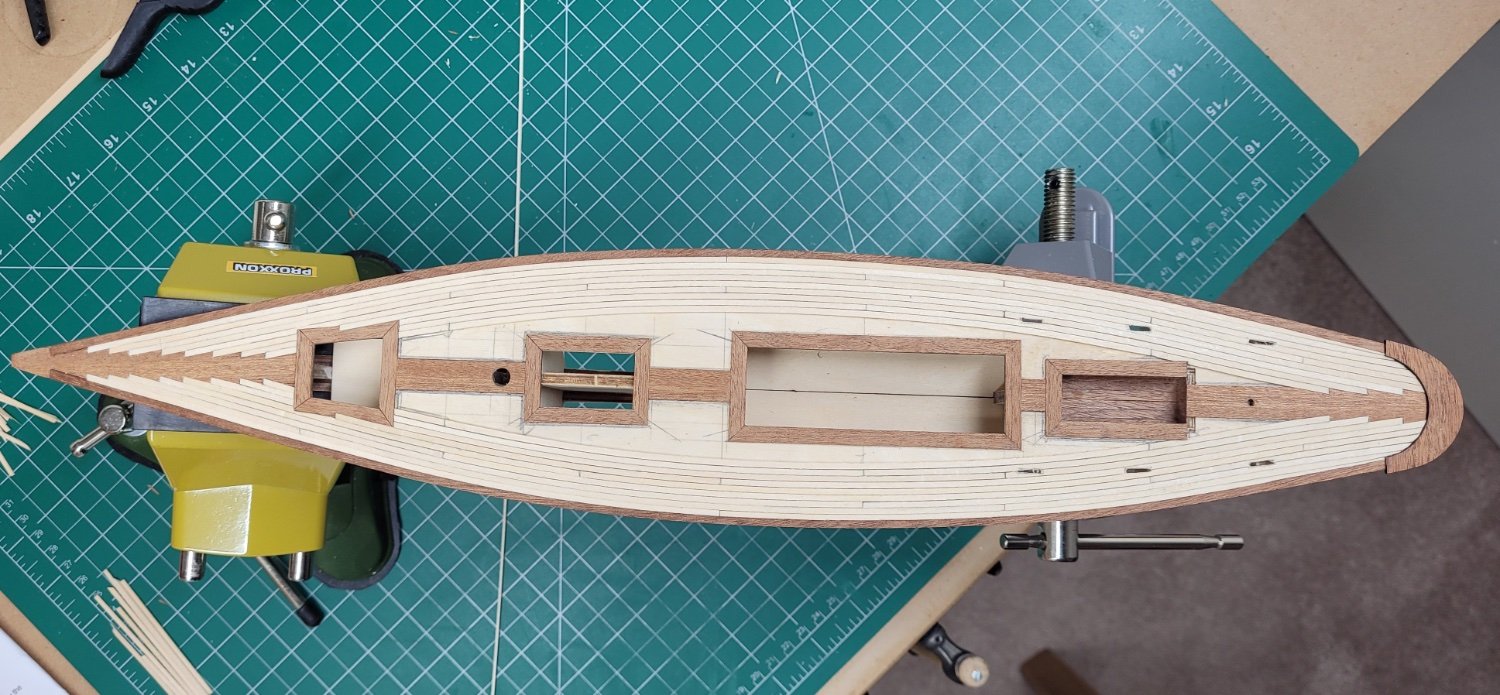
Planking the deck of the Pen Duick continues…..
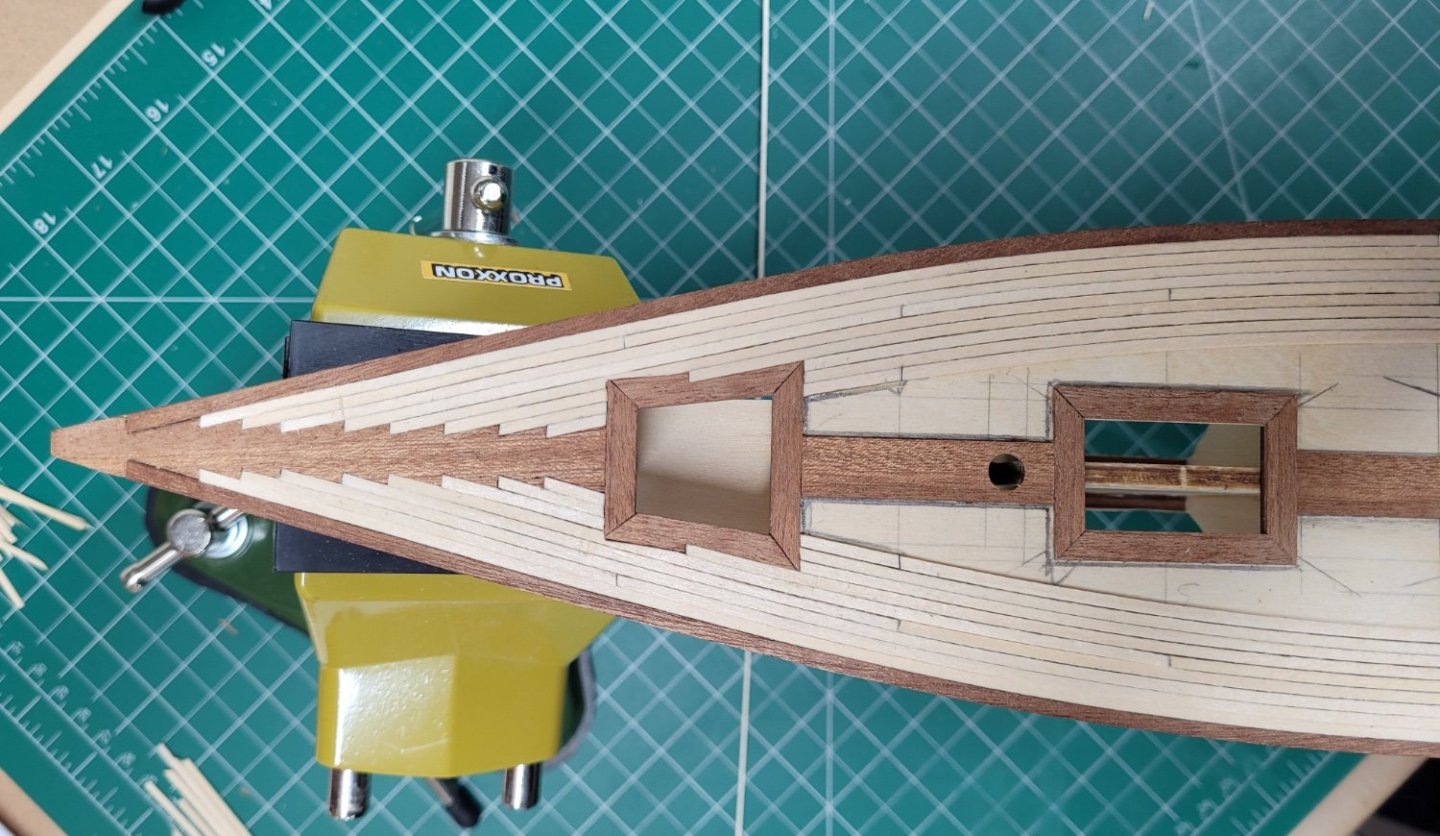
I have found that the key to making the cuts for the joggles is just to go very very slowly taking a small piece out at a time until you have removed the right amount of material. So far the mahogany king plank has been nice and co-operative with no wayward splits or shards breaking off. I did manage to scratch a couple of the planks near the bow with the point of the scalpel but I believe this will be able to be rectified when time comes to sand/scrape the deck once it has all been planked.
There is one thing that I am now doing differently compared to when I began. Initially I was marking the entire edge of each plank with the pencil to simulate the caulking prior to it being glued and fixed to the deck. However, it soon became apparent that this method led to a few dirty graphite fingerprints on the nice deck and so I quicky changed to only adding the pencil marks to the edges of the planks after they had been glued to the deck – ie immediately before the next plank was just about to be stuck down. Running a pencil along the edge of each plank just gives a very thin pencil line right on the top edge of the plank which is ideal for the appearance of the caulking. There is then far less graphite to smudge and make a mess with, especially if I have been a bit too enthusiastic with the amount of glue used.
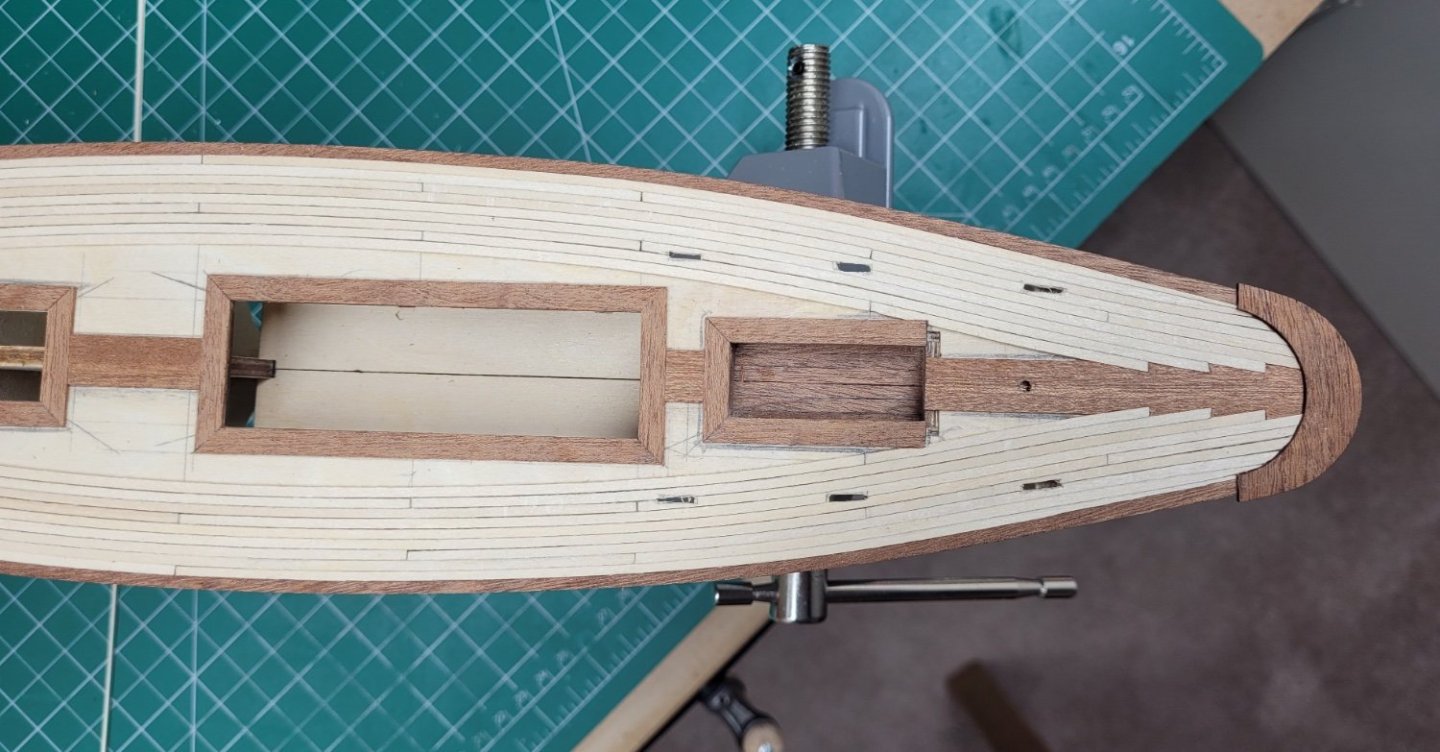
So far I have only very roughly cut out the six deck slots near the stern into which the cockpit deck beams (not quite sure what those parts are actually called?) are fixed. I think it will be easier to get these to the required dimensions when that part of the cockpit framing is being installed.
A few more sessions should hopefully see the deck completed.

Very nice work indeed!!
I think that the stuff around the Cockpit - "Coaming" - maybe?
(Are you planning on Rounded corners on this structure?)
Cheers....HOF.
-
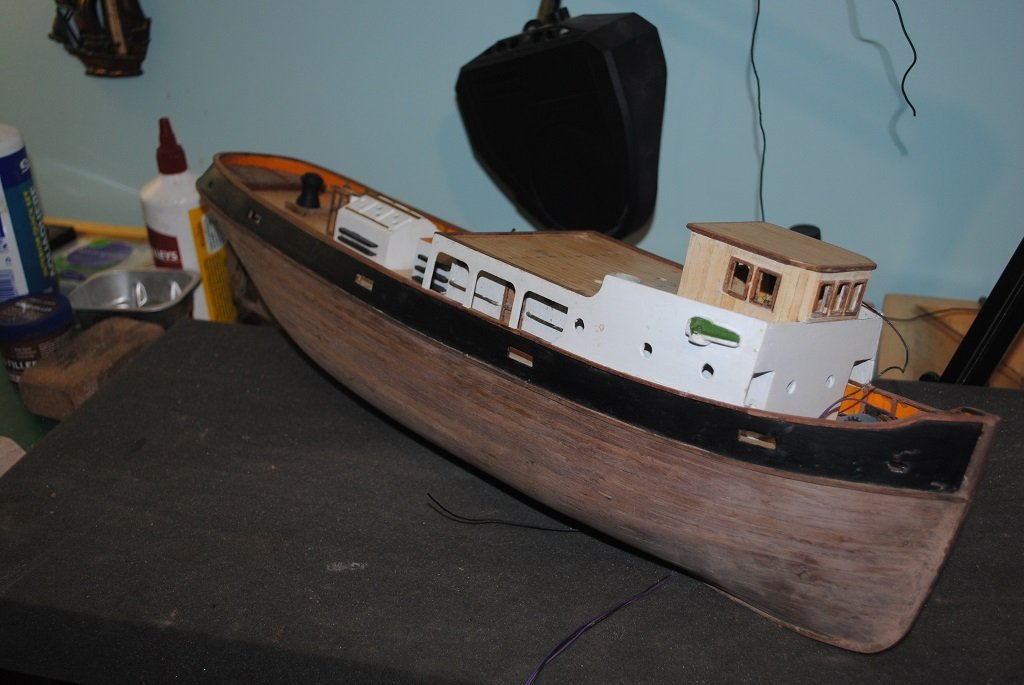
Hi All,
A bit of progress with Sanson.
- Bulwark Stanchions and Main Railing installed
- Re-Planked Wheelhouse with 0.5mm Ramin
- Upper Deck Waterways installed
- Stern Post Installed (Rudder, Prop and Prop Shaft "Placed" until second Planking complete)
- Paint touch-ups ongoing
I think that I'll do the second Planking next, just for something different.... 🙂
Cheers....HOF.
Photos:
-
Hi Chap,
Looking really, really good!!
Cheers....HOF.
-
Hi Chap,
Coming along very nicely indeed!!
I did drill a hole so that the Tiller/Rudder works. The method I employed started with a small drill bit working up. (You don't need to go through the entire thickness as subsequent bits will follow the small hole.)
Anyway, as you stated, this is not really necessary. 🙂
You are indeed lucky to have a more "Supple" King Plank.
Happy Joggling!!
Cheers....HOF.
-
-
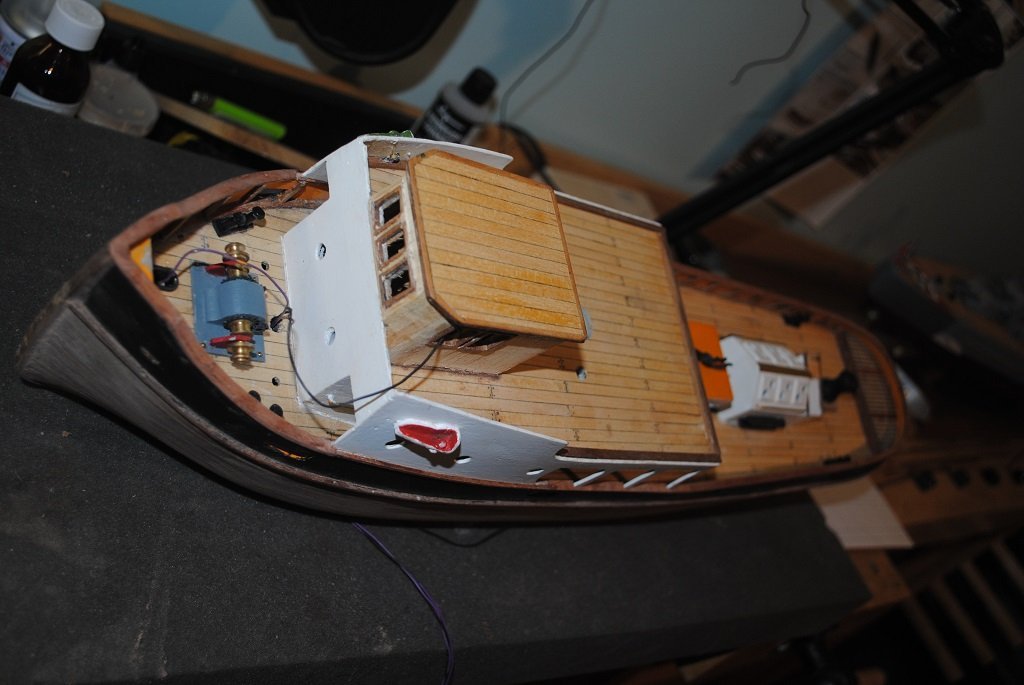
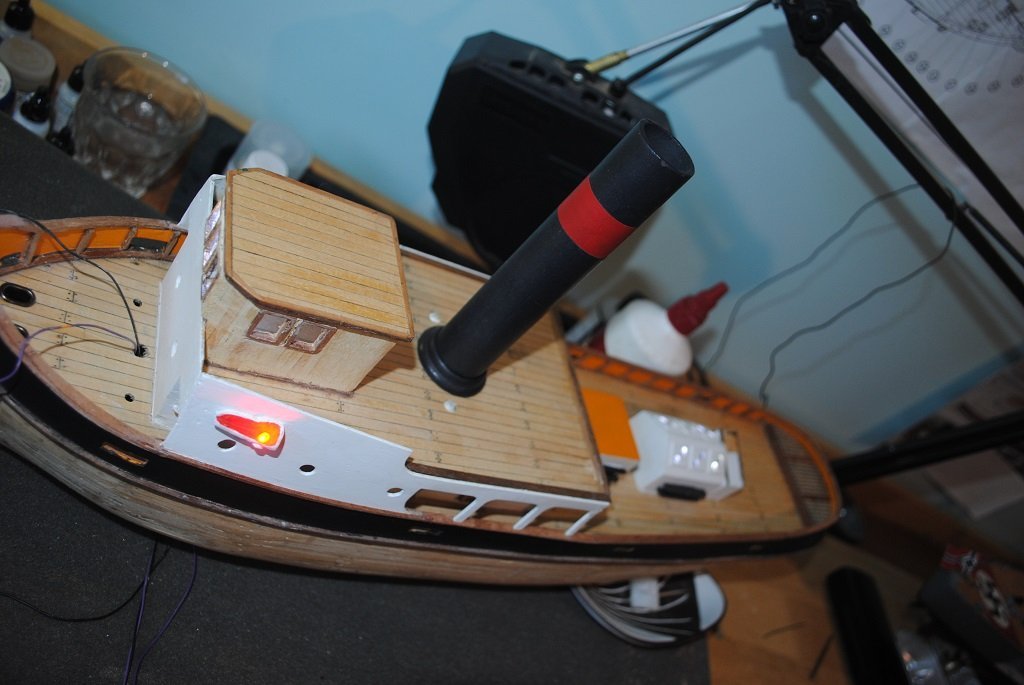
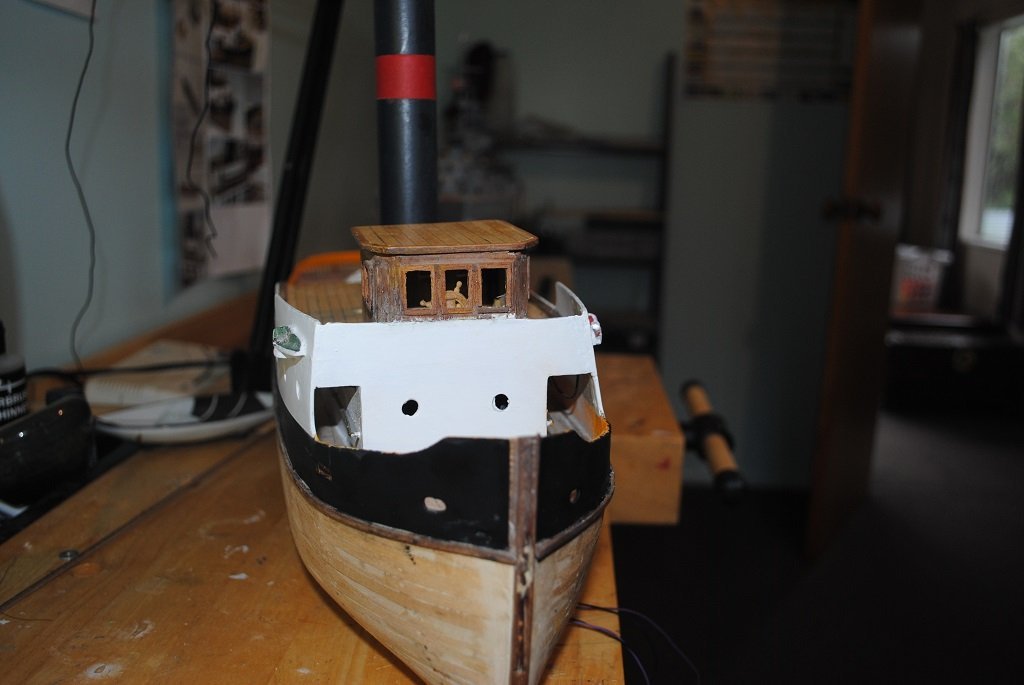
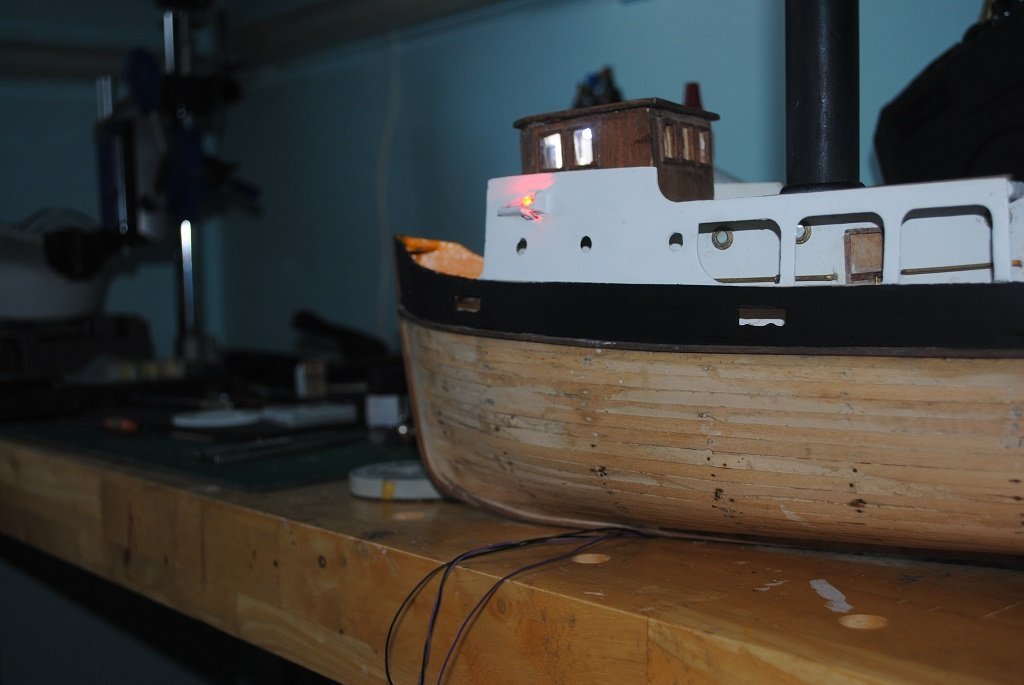
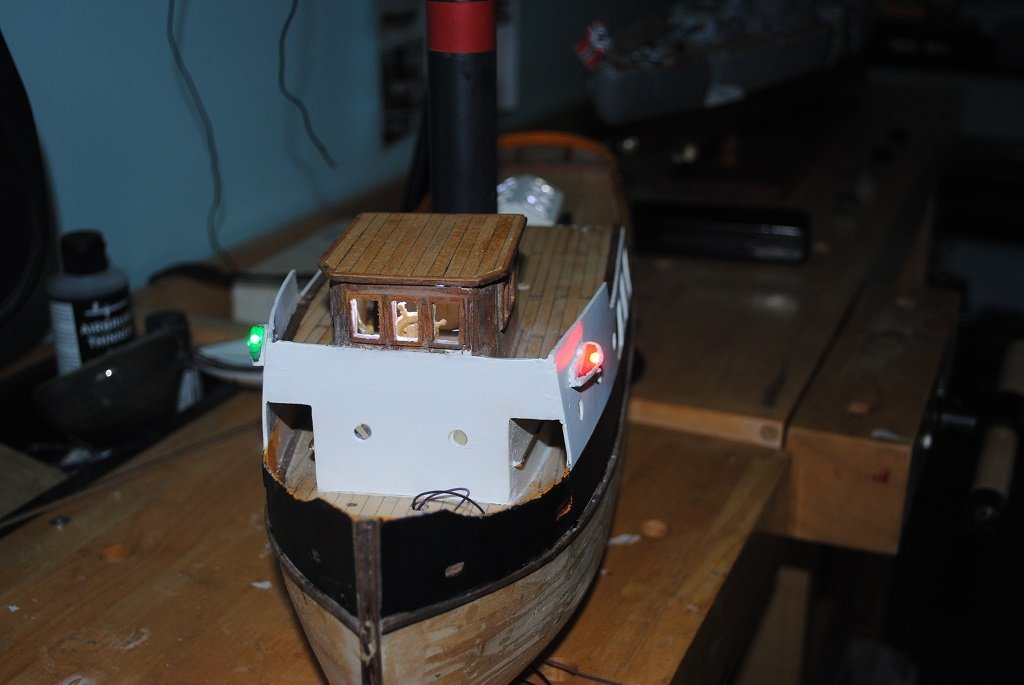
Hi All,
It's been some time since I did anything on my much-sidelined Sansom tear-down and re-build.
(I had to decide if it was worth progressing or not.)
After the Bismarck, I pulled this out to give me a little relief from the intensive nature, the complexity and tiny parts.
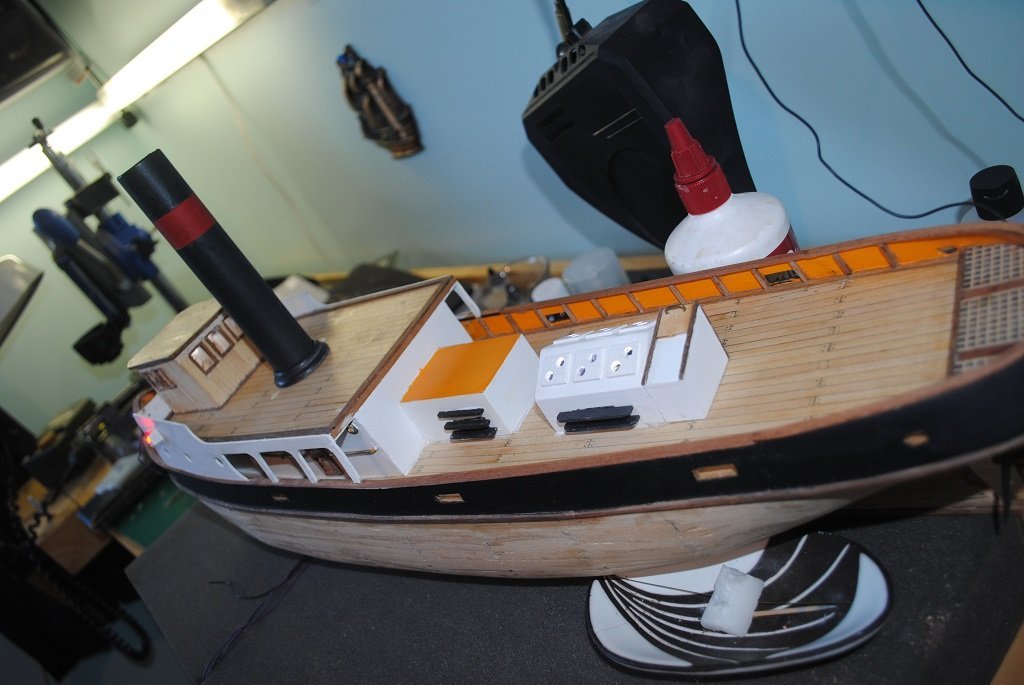
I have pretty much re-painted everything and have had to resort to brush painting everything, Airbrushing would involve far too much masking.
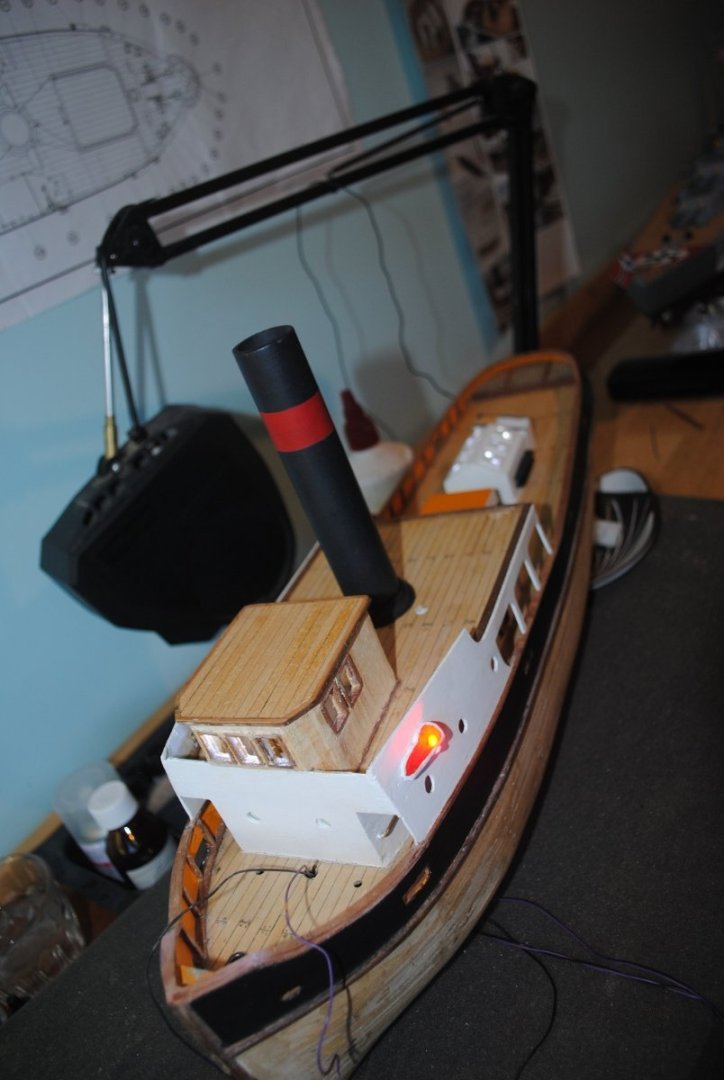
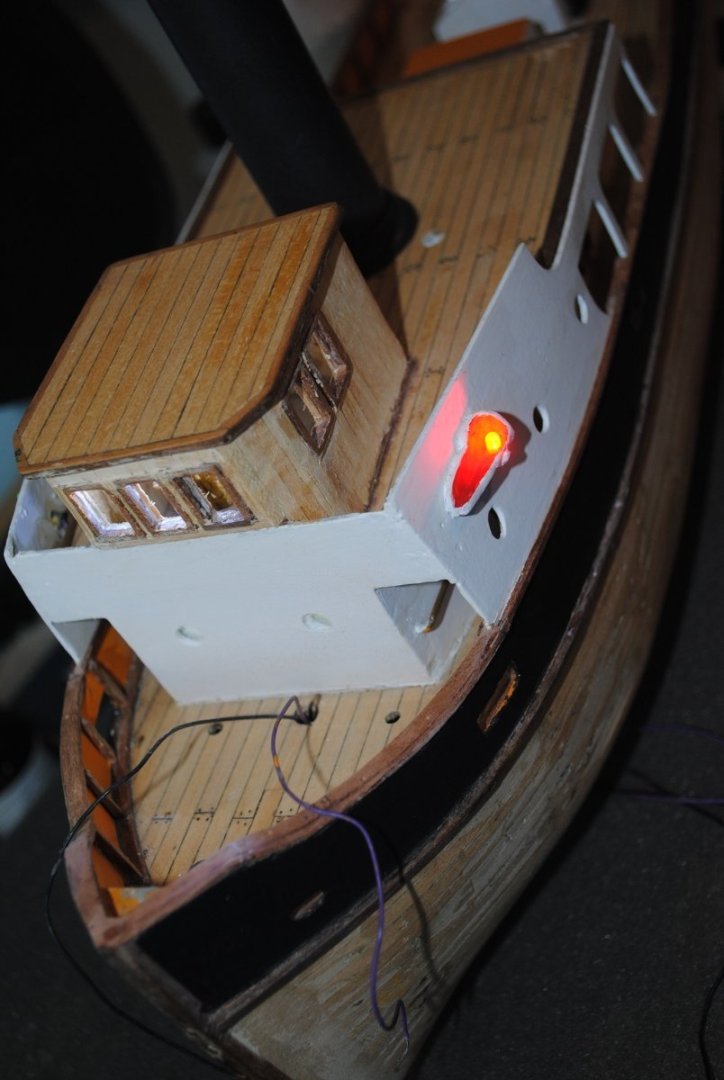
The LED's still work and I have made up a Mast with LED's attached although I need to adjust this "Prototype" to conceal associated wiring.
I also need to construct some "Cans" for these lights, I thought small lengths of Brass Tube with small cut-outs to allow the light to escape.
(I also need to give the Wheelhouse roof a bit of attention.)
Next tasks will be to fit Bulwark Stanchions and Railings, Paint touch-ups and a coat Matt clear.
Cheers....HOF.
Photos:


- Paul Jarman, yvesvidal and VitusBering
-
3
-
Nice!!
Lots of hard work there....
Cheers....HOF.
-
45 minutes ago, rvchima said:
Harry,
You did it! Congratulations on a beautiful model. I really enjoyed following your build log. You got started before I did, and I got a lot of good information from you. Please let me know when you start something new so I can follow along.
Rod
Thanks Rod,
It turned out o.k. a few errors along the way, never to mind.
The 1/200 Trumpeter version, in my cupboard is tempting, more complex.... 🙂
At the Mo, I'm trying to work on my Sanson re-build with lighting. I'll post some photos soonish depending on progress.
Wot are you working on?
Cheers and Regards,
Harry.
- mtaylor, VitusBering and Canute
-
3
-
5 hours ago, jpalmer1970 said:
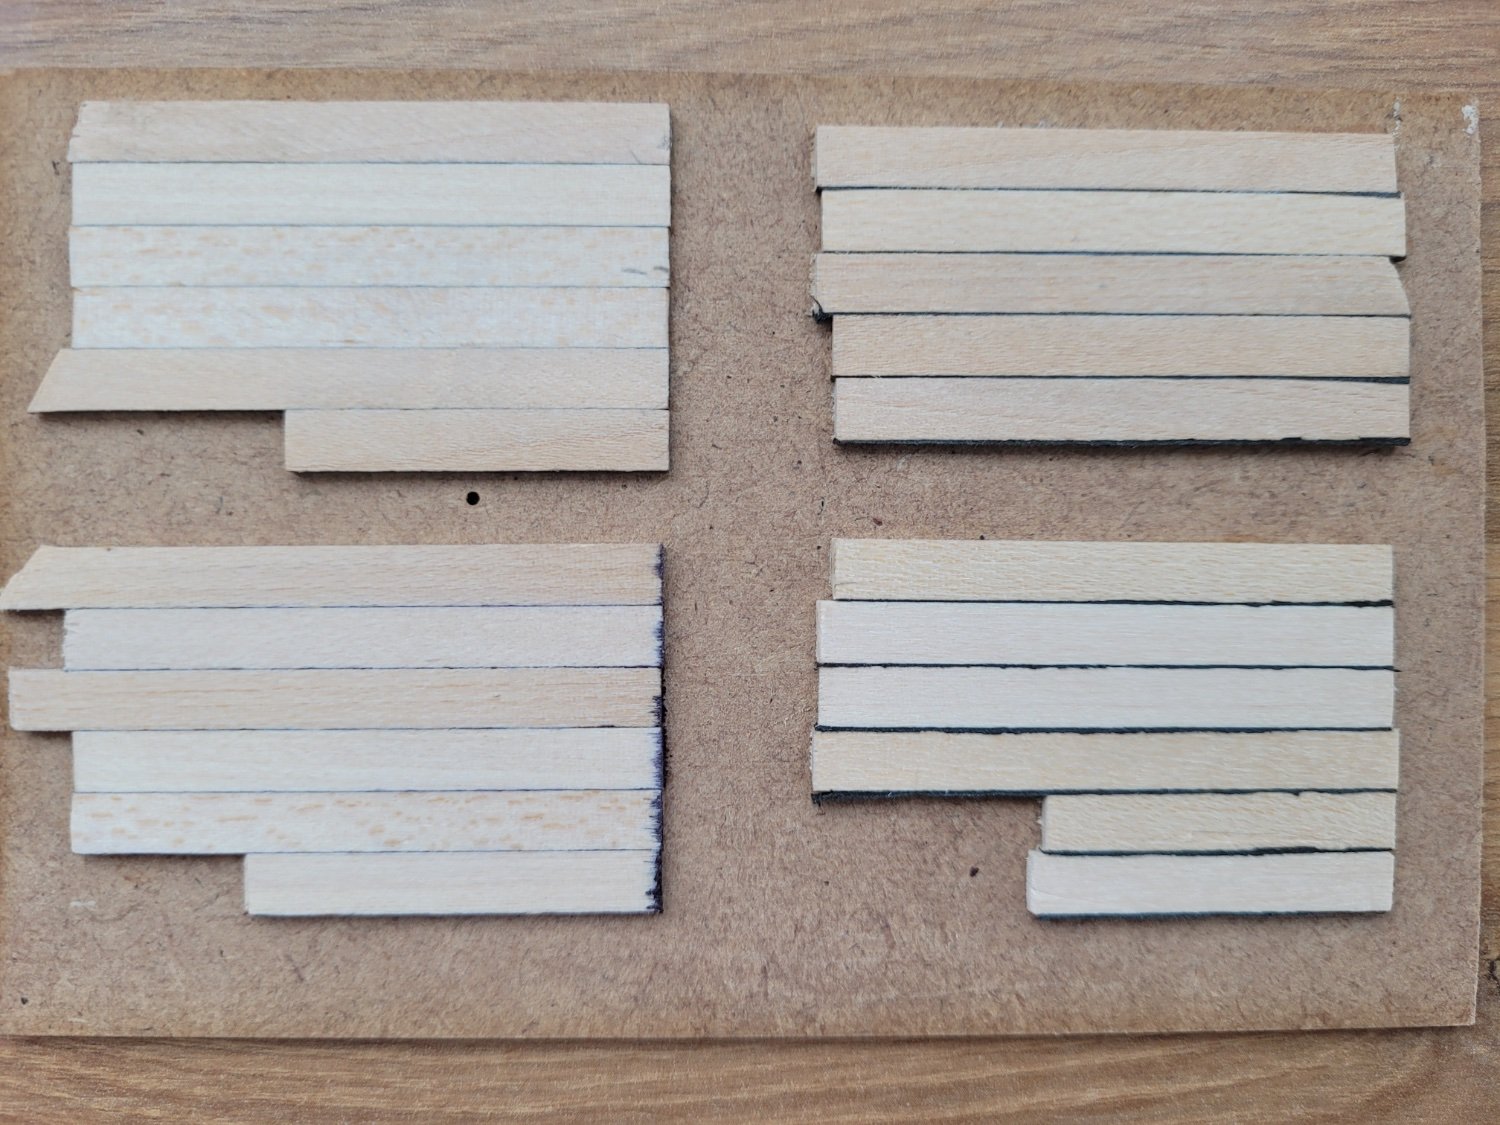
Whilst waiting to get an opportunity to work outside to continue with the fairing of the frames I spent some time considering the planking of the deck. On my previous build of HM Cutter Alert I simulated the caulking between the deck planks using a pencil along the side and end of the plank. I wanted to see how different methods of doing this compared so I put together a little trial of four different caulking alternatives.
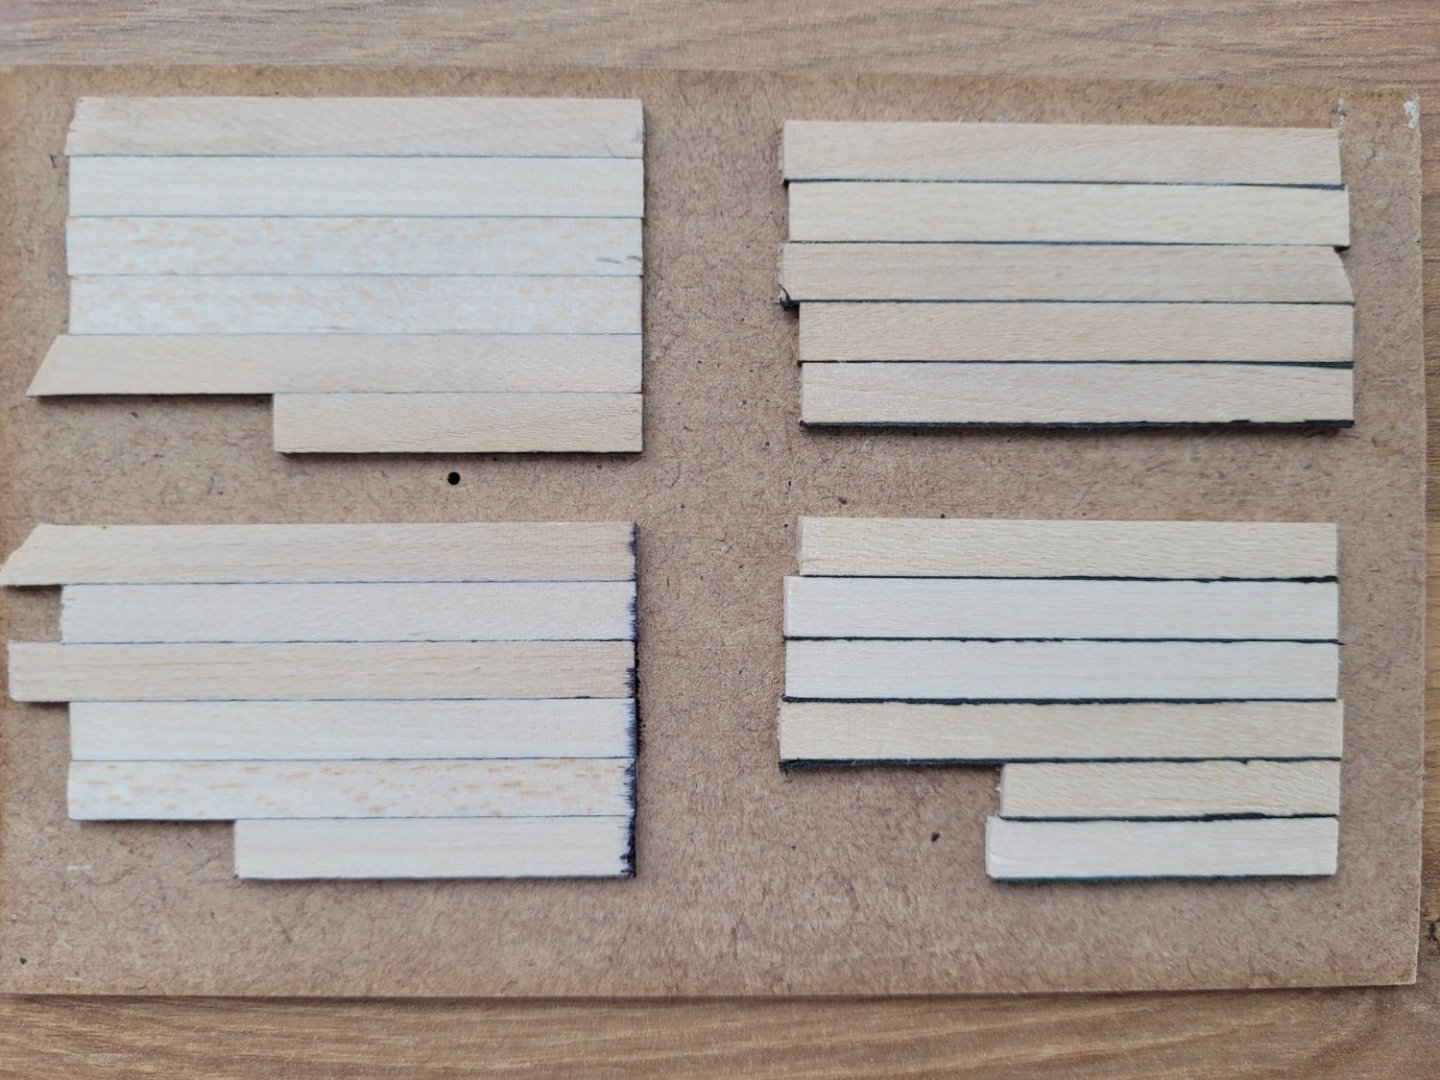
The caulking in the planking in the top left was done using a pencil as per Alert, the bottom left option used the same method but with a black marker rather than a pencil. For the top right trial piece I cut thin strips of black paper the same height as the planks (1mm) and glued these to the sides of the planks prior to putting the planks together. Finally with the bottom right section I again used black paper but cut this oversize and then trimmed it down to the plank height after the planking had been completed.
It was obvious from the outset that there was going to be a problem with the black marker at the ends of the planks where the grain was open – there was some very obvious bleeding of the ink that took place there which doesn’t look good. Of the two black paper trials it was also apparent that cutting the strips to the exact size of the plank height prior to gluing made for a neater appearance compared to trimming the paper down to size afterwards. The black paper certainly gives a more definite appearance of caulking than the pencil mark, at least at this scale – the planks I used for the trial were pieces of 5mm wide limewood. However, I am planning on using much narrower planks on the deck of the model and it is possible that the black paper would become a little too overwhelming at that scale so I have yet to decide on whether to use pencil or paper when I get to that stage. I will repeat this trial with the deck planks of the actual size I will be using later on I think.
The deck planking provided with the kit comprises 3mm wide ramin. As I mentioned in a previous post even at 3mm wide the deck planks are very oversized compared to the planking of the real Pen Duick deck and I want to scale these down to give a more realistic appearance to the model. At the widest point of the deck the kit plans show thirteen 3mm wide planks are needed on one side of the centre line. Photos of the actual Pen Duick show that there are about forty planks in that same space so planks of 1mm wide would be much more representational for the model. I think working with such narrow planks would make the job of joggling them into the king plank a lot trickier so I decided to compromise on 2mm wide planks.
I decided the easiest way to cut down the deck planking from 3mm to 2mm was with a #11 blade and with the plank clamped to my cutting mat and a metal straight edge as a guide for the cut. I experimented with three or four planks and found that it was very difficult to for me to get a consistently straight cut along the whole plank length. I also tried the same setup with some limewood planks and found that they cut much more easily and consistently so I think there must be some difference in the wood density or grain which makes the ramin more difficult to cut in this manner. Unfortunately, I don’t think I have enough of the kit supplied ramin to cover the whole deck with 2mm planks given the percentage of wastage I am going to encounter in the resizing process. If I could guarantee that all the planks could be cut down to size correctly then I should be ok but I don’t think that is going to happen. Given that the deck planking is suck a key feature of the model I decided not to risk bodging it with the resized ramin and so I have ordered some 2mm wide limewood to use instead.
3 hours ago, Thukydides said:You might want to also add whatever finish you are doing before you commit to one method or another. The calling lines were much more visible for me after i added WOP than before.
Personally I like the slightly more subtle look of the pencil lines.
Yup, I did the "Pencil" Caulking on my PD, not so much "In your face" as a Sharpie.
In my experience, to stop any Sharpie bleed, use Sanding Sealer first.
I guess it's all a matter of personal preference. 🙂
Cheers....HOF.
- Knocklouder and Thukydides
-
2
-
3 hours ago, BobG said:
That's one big, impressive model, Harry! Congratulations on completing such a complex project with such a fine result. I've enjoyed the ride and look forward to following your next project.
Thanks Chap!!
It was quite complex. The Trumpeter BM looks to be even more so.
Just tinkering with my Sanson re-build at the mo. (Something a little simpler.... 🙂)
Cheers and Regards,
Harry.
-
9 hours ago, stuglo said:
"am working on the handrails. It's all done with 0.2 mm black monofilament line,"
Was it easy to fit the CONTAINMENT rails after handrails, or better to do these first?
Your build is an excellent one. My painting with spray cans was OK for the hull but excessive for the deck fittings. Probably my inexperience and lack of patience.
Hi Chap,
Thought I'd chime in.... 🙂
I have just completed my Bissie, I am unsure what Rod did with his Interference Grids but in my experience, these are mounted first. (Mine were at the very edge of the Decking with the Main Deck Railing running along the "Gutter."
The Railing I found to be difficult....
I'll let Rod reply to his method of installing these.
Cheers....HOF.


Sanson by hof00 - FINISHED - Artesania Latina - 1/50 - 19th century tug
in - Kit build logs for subjects built from 1851 - 1900
Posted
Thanks Rod,
Yup, 100% correct, a little easier than the Bismarck!! 🙂
It is nice to be able to actually handle components and no PE.
I still need to be on my game as it were as there are a few "Foibles" as is the case with A/L stuff.
Waiting on LED's for the Mast, at the mo.
It certainly is an improvement on what it used to be.... 🙂
Cheers and Regards,
Harry.