


hof00
-
Posts
1,631 -
Joined
-
Last visited
Content Type
Profiles
Forums
Gallery
Events
Posts posted by hof00
-
-
3 minutes ago, Old Collingwood said:
Morning all, sorry this build has slowed down - life sure has a way og getting in the way of our hobbies (that keep us sain) I have struggled with my teeth all my life based from my fear of dentists, and boy have I suffered due to it, at the moment I have a few very painful absecess's giving me real grief - that kind of pain and throbbing where you feel your heart beat through the pain. Trouble is over here there are very few dentists who will treat you through the Free NHS service, so I am having to self heal myself.
I want to try to take my mind of the pain with my modeling but its so destracting.
I will be back you can guarantee that.
OC.
Hi Chap,
Good to see your posts at the very least!!
I was wondering where you had got to. 🙂
Look after yourself and get someone to prescribe some Amoxicillin perhaps?
Cheers and Regards,
Harry.
- FriedClams, Canute, Egilman and 2 others
-
 5
5
-
3 hours ago, VitusBering said:
Thanks Harry! Running rigging and braces will definitely be after standing rigging and ratlines.
Starting from aft - that wouldn't have been my first choice but when I think on it, it makes sense.
I am not sure what works for me, by the way -- I've never really done this before.
I did build this kit almost 40 years ago but it was, quite frankly, a mess.
It looked OK but only to a naïve eye.
I'm glad you folks are here and so willing to share expertise, I couldn't do it without you.
This model is not destined for a display case, either. Oh, I'll do my best and it will most definitely be better than the last but I have lot of notes about what to do and, more importantly, what not to do next time.
That being said, I am having more fun doing this than any other hobby I've ever tried.
So... onward and thank you again.
Sorry Chap,
By saying "Aft and up" I mean working from the Bow and working "Aft." 🙂
(I hope the Yards don't get in the way too much.)
Cheers and Regards,
Harry.
-
4 hours ago, VitusBering said:
Now the fun begins in earnest.
I'm unsure whether to start on ratlines or standing rigging first.
Looking good!!
My opinion for Rigging order, and my opinion only....
- Shrouds/Ratlines - Aft and up
- Standing Rigging - Aft and up
- Running Rigging
- Pendants/Braces
Entirely up to you.... 🙂
(More importantly, whatever works for you.)
Cheers and Regards,
Harry.
-
-
13 hours ago, targa4403 said:
what a great idea. I know exactly what you mean. How many sheets did you require for this task?
Hi Targa,
I have the many Stanchions, double/single, easy to space and drill, but, having pre-painted, all the tny holes are partially clogged. I don't have a drill bit small enough and a pin is too large.
So, out of sheer frustration I made the Eduard order, for Trumpeter but should be fine for Amati, same length, etc.
The Hull is about 2.5m both sides inc. so how many sheets? I don't know. Enough for 2.5m?
I guess I'll see when it arrives.
(Apologies for hijacking your thread, Ian.)
Cheers and Regards,
Harry.
.
-
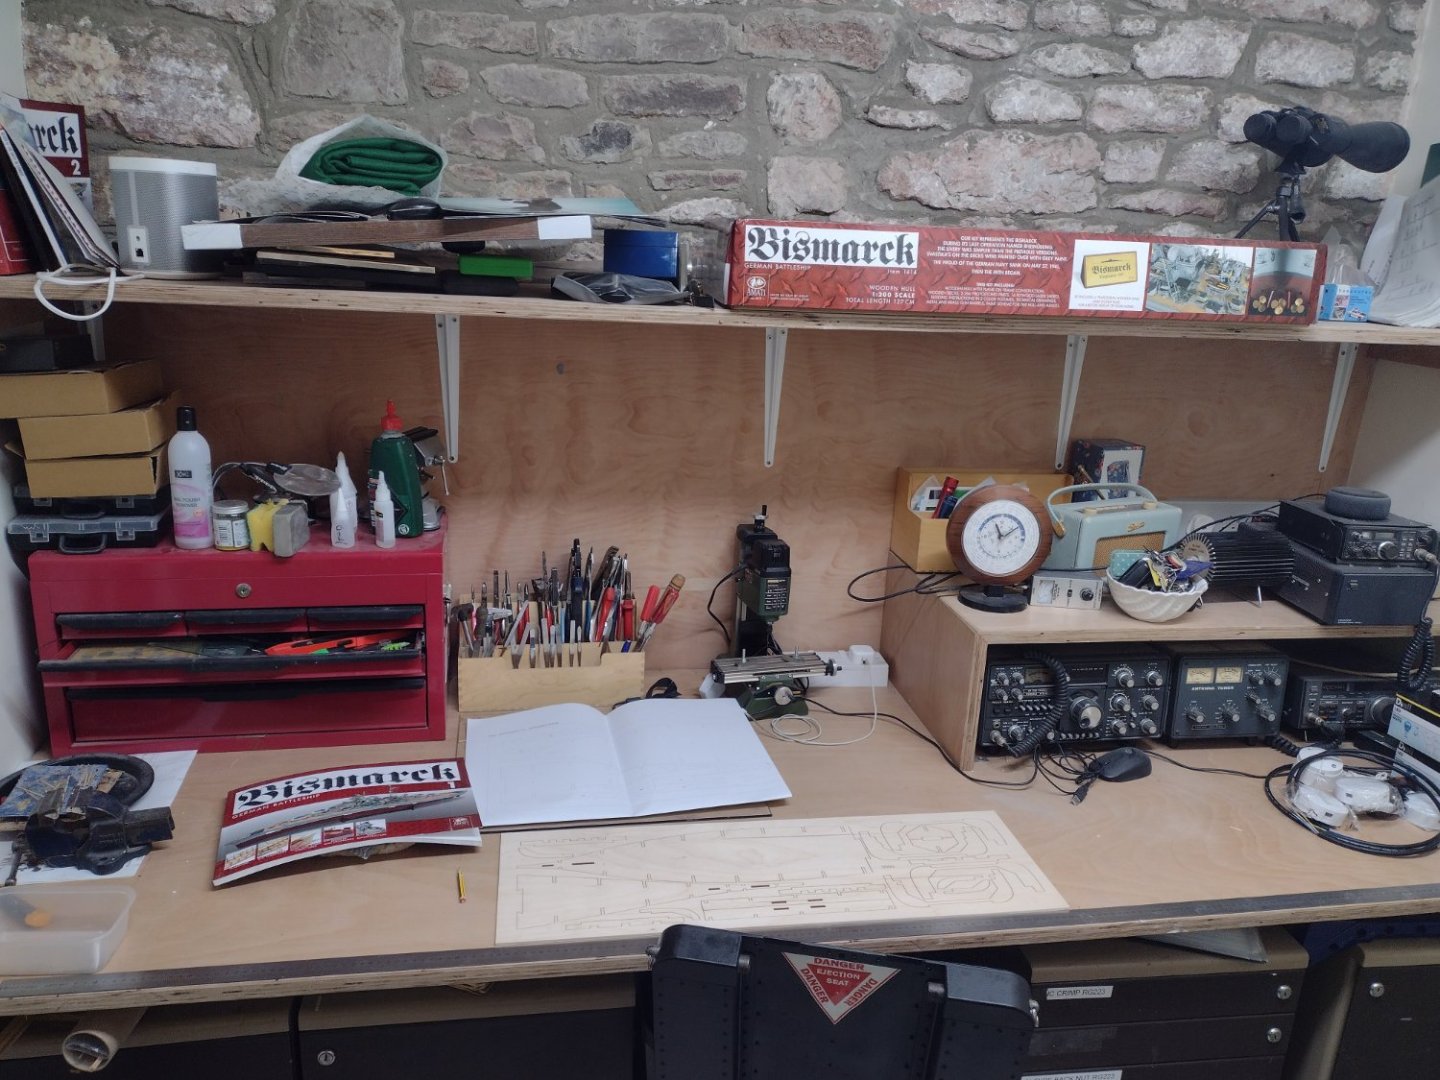
11 hours ago, Ian B said:
At last the waiting is over for me, my new workshop is ready, my last build complete, the corner of the dinning room and the table has been returned to my long suffering Wife, so a fresh start all round
") .
.
I have watched @hof00@ted99 @rvchima and @Joe100 builds and comments now its my turn LOL
So let the fun begin
Nice one Ian!!
I'll be following your build with interest.
(Ps. I'm still struggling with the Main Deck Rail Stanchions and provided "Thread."
I have ordered the Eduard 1/200 Chain Link Railing from Super Hobby out of sheer frustration. The photos of this stuff look good anyway. I will post my experiences when I receive this in two - four weeks, hopefully....)
Cheers and Regards,
Harry.
-
7 hours ago, Canute said:
Harry, hope you have a small powered drill. Doing it with just a pin vice may be excruciating.
Thanks Ken,
Yup, I hear you!! 🙂
I have my Pin-Vise.... I feel that I have better control and the holes are only about 1.0 - 2.0mm deep.
Cheers and Regards,
Harry.
- VitusBering, mtaylor, targa4403 and 1 other
-
4
-
9 hours ago, Ian B said:
Happy drilling lol 🤣🤣
Thank Ian,
A 0.5mm drill should cut it, I'm thinking I'll need a few more Drill Bits perhaps.... 🙂
Cheers and Regards,
Harry.
- Canute, mtaylor and VitusBering
-
3
-
8 hours ago, targa4403 said:
Hello, are there any indications on the false deck as to where to drill these holes?
Hi targa4403,,
No, no indications on the Deck, this is a pre-production Amati "Subscription" thing.
There was a paper template. that was laid over the ship prior to installing the Deck veneer.
I am finding it almost impossible to find the pencil "Tick" marks.
It is my understanding that the Amati Production version has marks on the Deck veneer.
So, the best that I can do at this stage is to use my Dividers....
(The Template is long gone....)
Cheers and Regards,
Harry.
-
1 hour ago, Ian B said:
Hi Harry
Are you now using the original ones from the kit?
Hi Ian,
Yup!!
I am, the Aber Railing looked good but the Stanchion spacing was just "Out to lunch!!" (For instance. from the Hawse Holes to the end of Decking at the Bow is 50.0mm There are six Stanchions that occupy this space, two "Double" and four "Single" in between, so 50.0mm divided by four - 12.5mm)
I have decided on a default spacing of 10.0mm but there are places along the length of the Deck where this will change, Fairleads, Cleats. etc.
I'll space and "Pilot" with my trusty Dividers. (Set Type Dividers??)
That's the plan anyway.
I'll be drilling lots of small holes.... 🙂
Cheers and Regards,
Harry.
-
Very small update:
I'm still here and so is the Bismarck.
I'll be pre-painting the Rail Stanchions shortly for the Main Deck.
(The PE Railing that I purchased was not suitable at all.... I thought I was going to make my life less complicated, but I should have known better. 🙂)
Anyway, I now have to mark-out and drill a couple of hundred holes for the individual Stanchions.
(Needs must I guess. 🙂)
I hope to have something "Positive" in the next few days.
Cheers....HOF.
- Old Collingwood, Canute and mtaylor
-
3
-
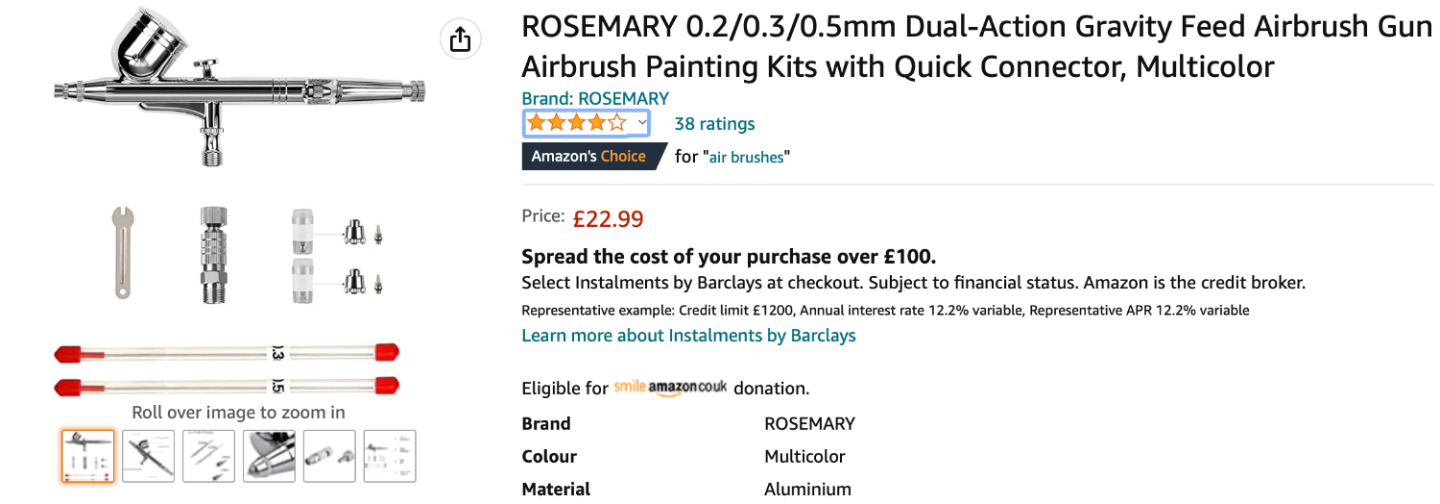
1 hour ago, BANYAN said:
I hope it arrives soon Harry; hopefully all in good working order -- no trouble with mine as it was well packaged.
cheers
Pat
Hi Pat,
The Item arrived yesterday a week before the scheduled delivery date. 🙂
It looks really good, well packaged and well engineered. but I am yet to use this.
Cheers....HOF.
- BANYAN, thibaultron and mtaylor
-
3
-
38 minutes ago, BANYAN said:
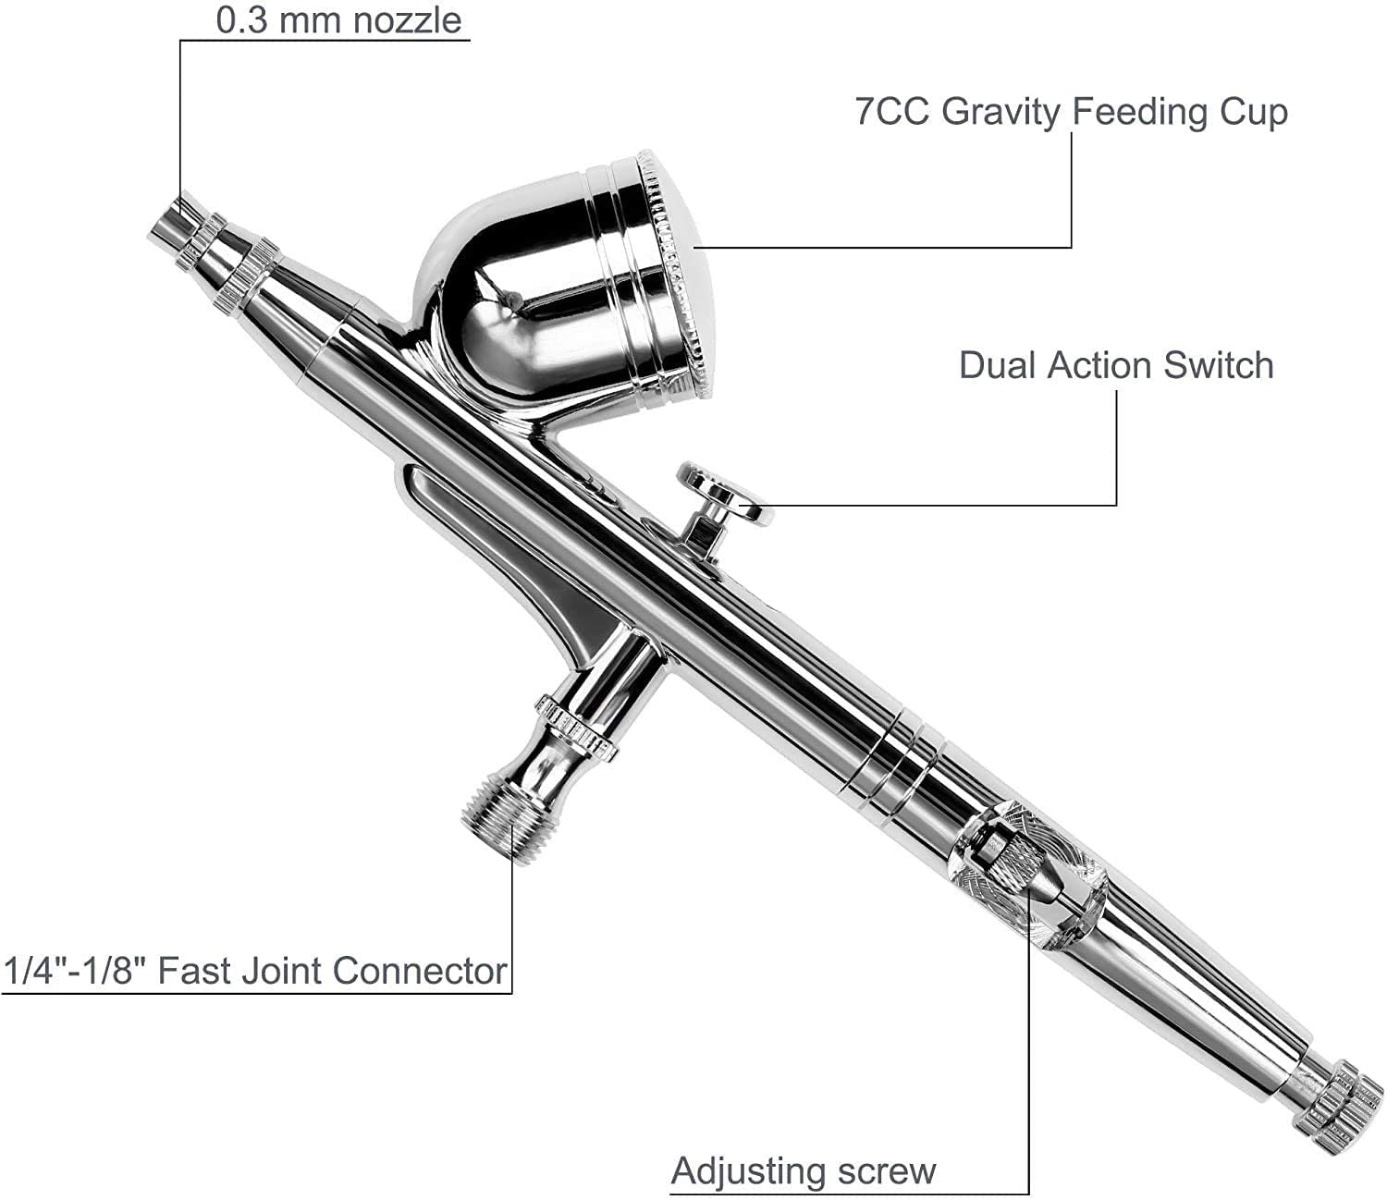
That's the sort of approach I am also looking at Keith. If I restrict its use to simply laying down primer then even if I only get 10 uses out of it, then that is probably 10 models as I use my high-end one (H&S) for the finer and smaller parts. The big 'seller' for me was the interchangeable larger volume paint cups which is what I needed.
Roger, I agree, there is not much fine detail work I do with an airbrush. If I was an artist or doing heavy weathering of a plastic model then there is no other way but to go for a better quality brush.
Harry, I think you are in an even more restrictive situation than me. I put some water through the other day it it worked fine with the two larger needles. I'll be putting some [aint down soon using the large cup, and that will be the real test. I wouldn't want to drop the thing though, it is very light weight.
cheers, and many thanks for all of the comments and feedback.
cheers
Pat
Thanks Pat,
I am very careful with my Airbrushes, I have learned quite a bit about the devices and do thorough "Maintenance" after every use.
I'm hoping that it will last the "Distance" and should do with care and respect. I have used "Gravity Feed" with one of my older airbrushes and find it preferable to the "Siphon" machines.
I think next week, if I'm lucky, I'll be able to have a play. 🙂
Cheers and Regards,
Harry.
- BANYAN, mtaylor and thibaultron
-
3
-
On 2/20/2023 at 12:20 PM, BANYAN said:
HOF - I will see if I can find some Harry, I think the best bet would be to contact the guy that runs the Barbatos Rex YouTube channel as he seems to have an inside run with these guys. Will let you know if I find anything.
Kurt, James et al. The great pity of all this is that I only became aware of a local guy (Scale Model Supplies - SMS - who lives just up the road from me) who makes great paint, but I just found out he also makes / has a range of airbrushes called DragonAir (probably made off-shore though) a few days after posting this. If I had known of him earlier, I would have ordered one of his airbrushes instead. Just to clarify, I wanted something cheap, with a larger needle and had an extra-large cup option simply to lay down primers. I did not want to spend the sums some of the 'brand names' charge for this purpose. I will stick with my H&S for fine work though.
The problem with some Brand names however, is that to buy them or to get spares etc down here is SUPER expensive due to the high postal rates from the US and some other countries these days - this has done no favours for US companies we typically use in this hobby, and I have had to stop purchasing from the likes of Sherline etc as the postal costs are just not sustainable (the postal charges are the same if not MUCH more than the items). As an example: I wanted a glass bottomed airbrush cleaning pot. I very recently looked on Amazon and found one at a very good price (less than US$25), but only available through Amazon US - that price was inviting until they added US$83 for postage for quite a small item - GO FIGURE!
For this very reason, while it is great to be able to support local businesses (and I fully support this intention) those kinds of fees/charges just do not make it viable to order from the larger companies. Prices within the US may be okay, but for us international customers to buy say a Badger, you can double or triple the prices down here for such items. That is why we look at these cheaper options occasionally.
I am not trying to start a flame war here, nor to belittle any products or such, and actually agree with the sentiments expressed - its just that in reality it is hard to put into practice when these sort of prices affect people whom may be on a budget? This post, and the original, was simply intended to try and help out others in a similar situation - buying 'Branded' is sometimes simply not an option; it would help if these 'big brands' tried to do something about the exorbitant postal costs sometime applied.
cheers
Pat
On 2/20/2023 at 1:27 PM, Oldsalt1950 said:Pat,
I hear you. We all live within certain budgetary restraints, and would like to support our local businesses. I'm retire and live on a modest fixed income. I try to buy local and since I am in the States, buy American. Prices for certain items are just way out of my range, so bargain hunting I go. I can't always find something American made or even in Tiawan. Sometimes you just don't have a choice as to where your item will come from, if you need it you are buying it from a source that fits your budget. I am slowly replacing some of my equipment withbetter quality items, but that is on a "It doesn't work anymore" basis.
Jim
7 hours ago, JKC27 said:Well, sure enough, it appears that my barely used Amazon special has broken. I cleaned it up good each time with airbrush cleaner, and made sure to take care of it. I went to use it the other day, and when I attempted to spray my parts I was painting it kept wanting to back up out of the tiny hole in the tap of the cap for the paint reservoir (I guess you can call it), or try to push the cap off and paint sprayed everywhere but out the tip of the nozzle. After cleaning up my mess and taking the airbrush apart, it looks like the threads on the small part that tip of the needle goes into where the paint comes out are stripped, and the nip of the needle would push this out essentially blocking the nozzle. This is my best guess as far as diagnosing the problem goes. I can screw the tip back in, but it just pulls out, so I think it is done.
Goes to show you.....if the price looks too good to be true, it almost certainly is. Some things it's worth spending the little bit extra on.
Good thing it's my 50th birthday coming up!
")
Hi Pat, Jim & JKC,
Good to see considered opinions on the "Good, Cheap and Quick" stuff
Yup, I get the shipping cost thing, I looked at a $11.00 bottle of Brass Blackening solution from Amason but shipping was three times that!!
I agree very much with support local, only problem, I do not see many "Specialist" companies here that make things like Airbrushes or much else for that matter for the serious hobbyist, NZ is just too small perhaps.
So, I feel that I have not much option other than look further afield for just about everything apart from paints and things of a basic ilk.
There are companies here that support IWATA as I have found but the prices for spares are "Out to lunch."
(NZD$50.00 for a nozzle to "Maybe" fix my IWATA is $50.00 I'd rather spend on something that works.)
Anyway, I am looking forward to receiving the "Valur for money Airbrush" I can then get back to doing some, (Hopefully), quality work.... 🙂
Cheers and Regards,
Harry.
- BANYAN, mtaylor and thibaultron
-
3
-
On 2/22/2023 at 1:59 AM, Pete Frith said:
Hi HoF00
i was searching for PDF’s of the assembly instructions and came across an old post of yours from 2021 saying you’d downloaded them from the Model space page and posted the link.
the link no longer exists.
I don’t suppose you still have these files do you?
best regards
pete
Hi Peter,
As discussed by E-Mail, you should now have in your possession all 140 installments of instructions.
Please let me know if I can be of any further assistance.
Ps. Are we going to see another Bismarck build anytime soon? 🙂
Cheers and Regards,
Harry.
- Old Collingwood, Canute and mtaylor
-
3
-
4 hours ago, VitusBering said:
I hope to be learning from you for a long time to come, though I'm not certain I can attain your skill level.
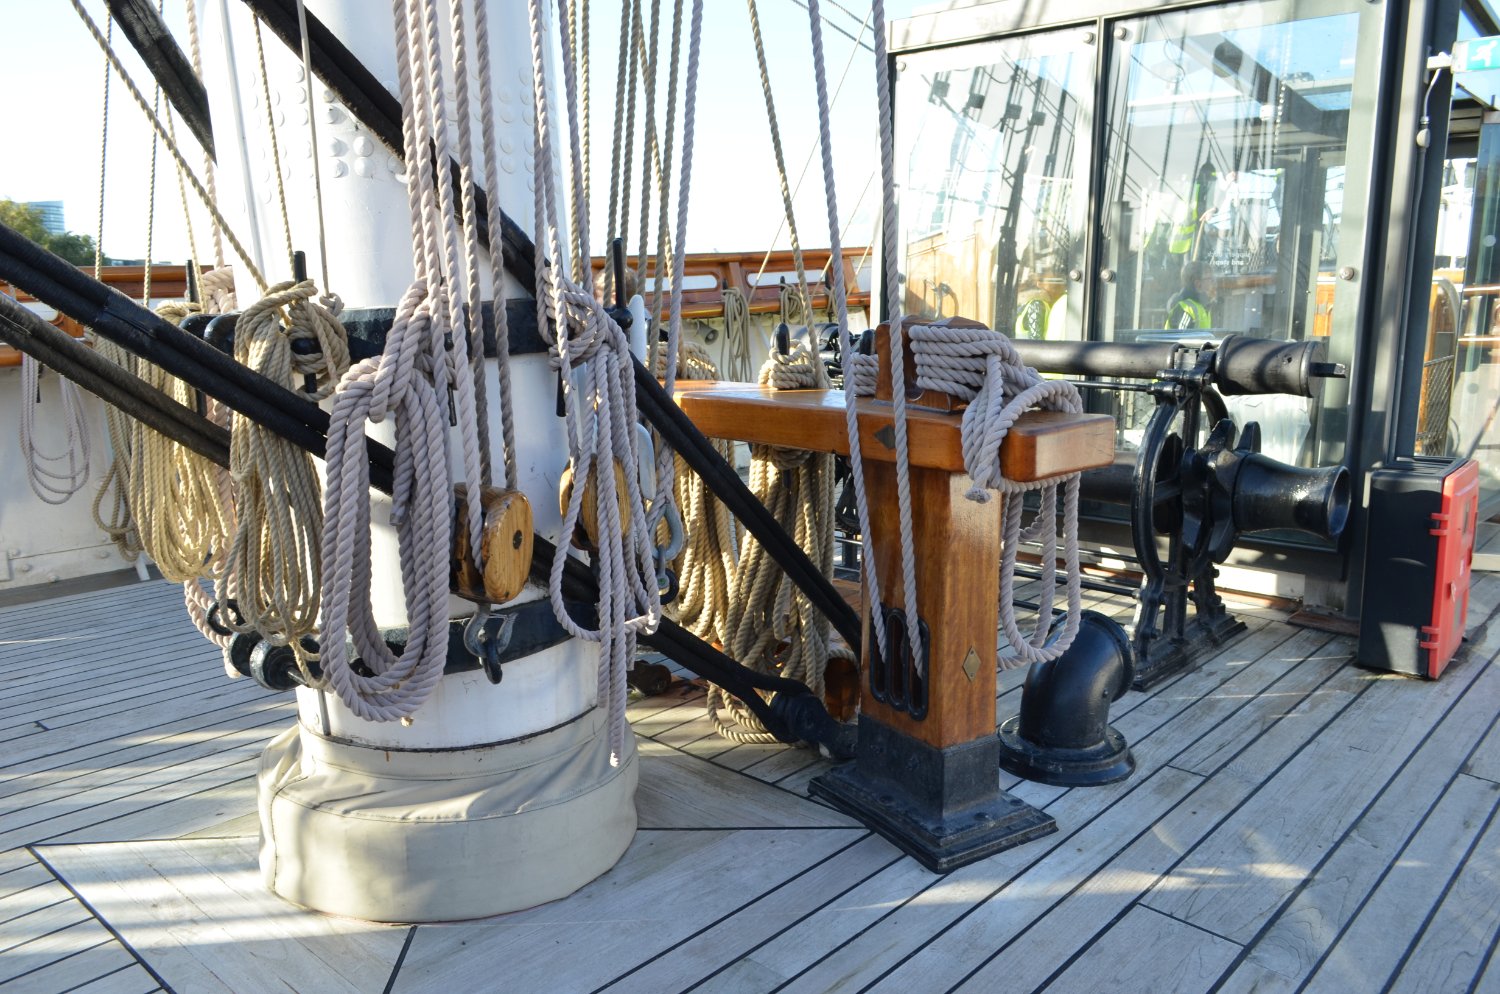
Here's an example of the question I asked in Bruma's build log about clearing the holes in fife rail legs.
This is the front and back of one of the rails, two others are similar. The forth, inexplicably, has round legs.
I'm not sure what, if any, material should be removed here.
There are very small through holes (covered by flash initially) that I've cleared with a micro drill bit.
I haven't seen the legs used in the rigging detail I have, though bear in mind I'm still waiting on Longridge and Underhill books.

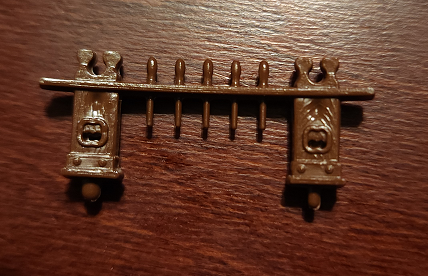
It is a bit blurry 'cause I took these with my phone but the small round things in the holes on the left are ejector pin cruft.
Cleaning these out to the edges of the outline would be quite a pain.
It appears that only the smaller already-existing holes are appropriate.
[edit] there is this, from images posted here

I can't yet find where those lines come from (yet). Still researching.
I would not know where the lines go without referring to the plans.
Main Mast Fife Rail Sheave holes.
There are heaps of Running Rigging lines that terminate on these.
I'll have a look at the plans tomorrow and see if I can identify these for you.
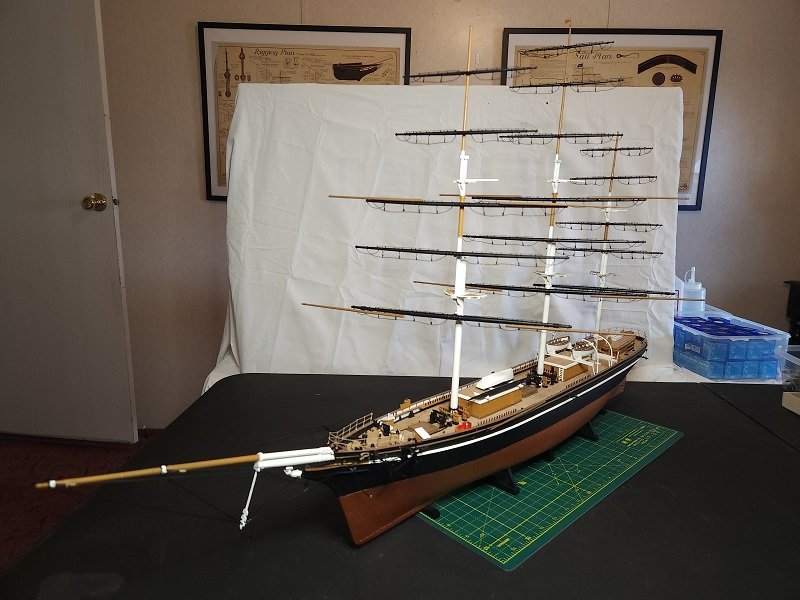
A couple of photos included of the Fore and Main Fife Rails of my CS under construction.
(I know full well that they are not 100% accurate but the "Best I could do" at the time given the constraints of the kit. 🙂)
Cheers and Regards,
Harry.


-
9 hours ago, VitusBering said:
Yours is awesome too, Harry - just a different kit and you have done a stellar job of it.
Thank you, that is too kind.
After 10+ years of this hobby, I'm still prone to stupid mistakes, and still keep making them!!🙂
A quote that I picked up on a model ship site, now sadly closed....
"There is no such thing as a bad ship model only better ones."
(There are many better ones here than my simple efforts. 🙂)
Cheers and Regards,
Harry.
-
4 hours ago, Ian B said:
Nice touch 🥳
Thanks Ian.
Flags were a "Maybe."
Onward with the Main Deck Railings....
Cheers and Regards,
Harry.
-
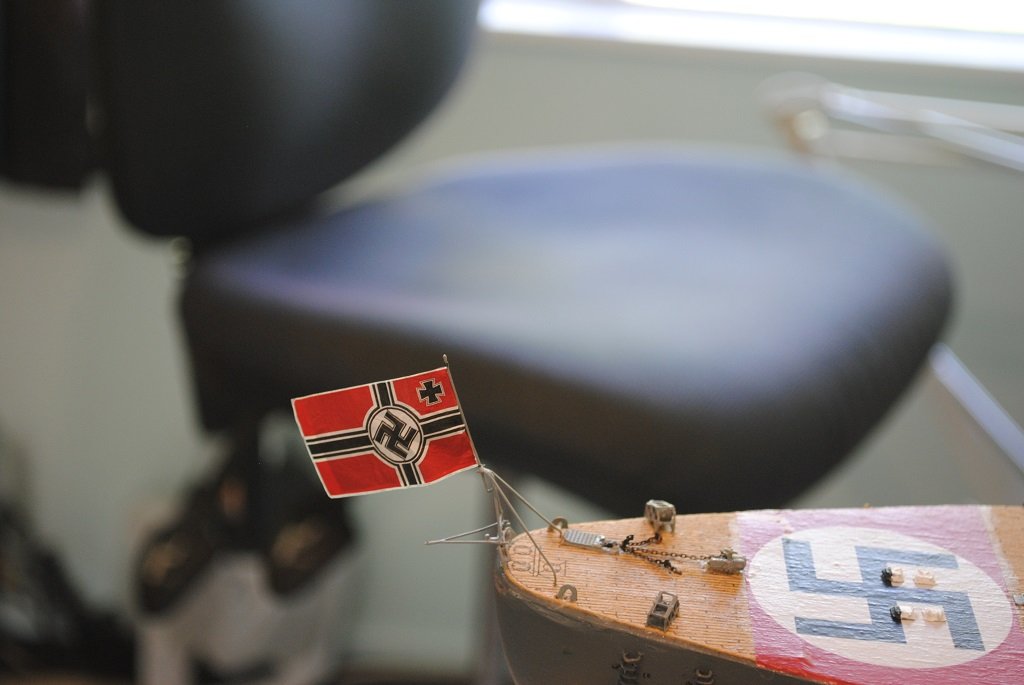
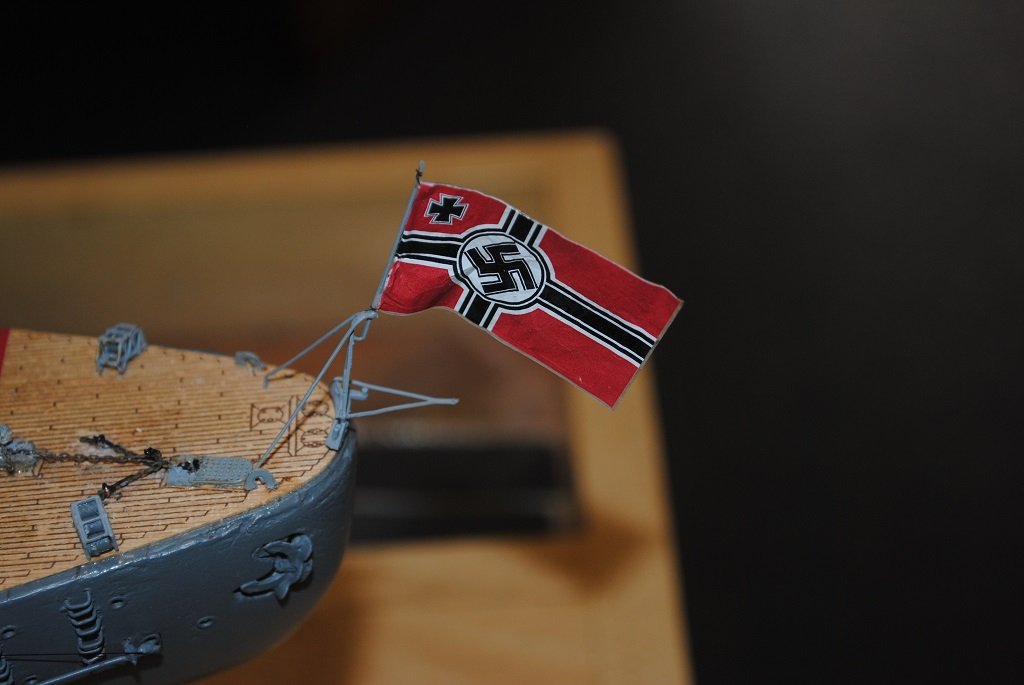
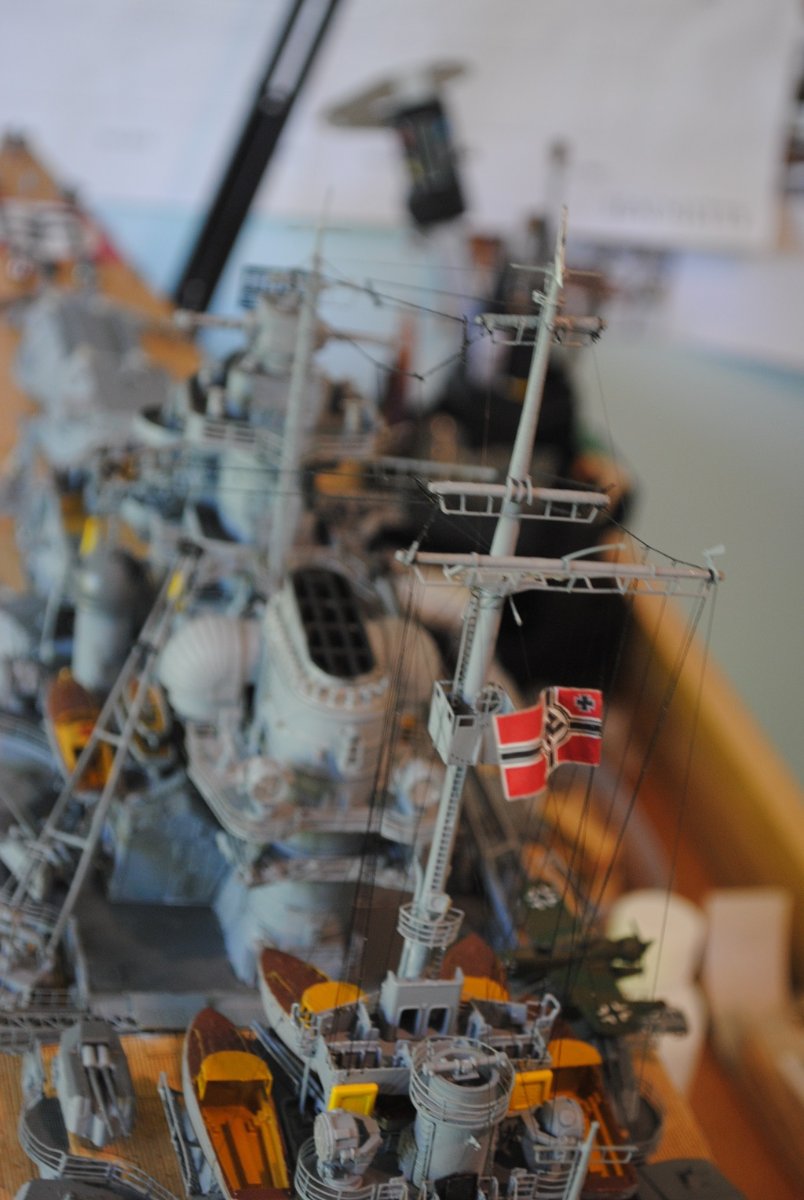
Hi All,
Small update:
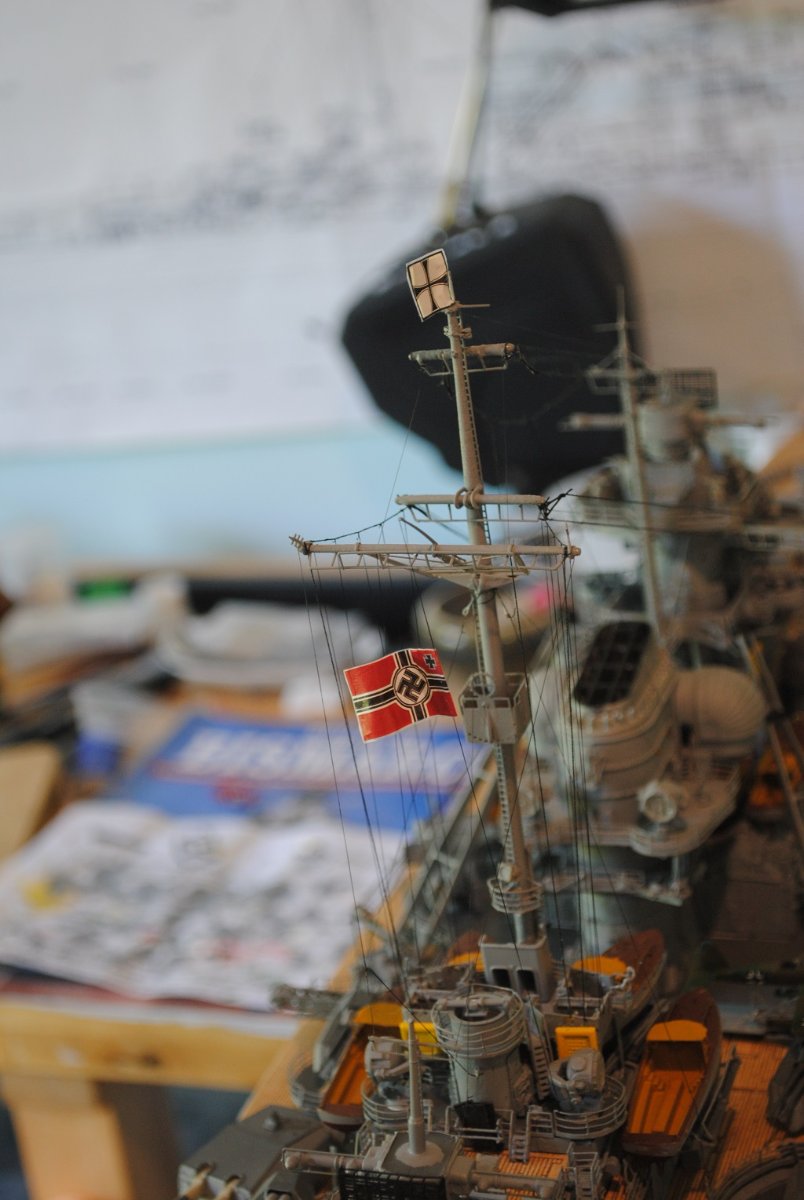
Admirals Flag, War Flag and Stern Flag completed.
The War Flag does not to align itself with the ship, never mind.
Stern Flag test fitted.
I'll give the Admirals Flag and Stern Flag some "Creases" later.
So, I guess it's time to get some courage and install the Main Deck Rails.
Cheers....HOF.
Photos:


-
3 minutes ago, VitusBering said:
Thanks shipman - I did look around at online photos of the ship and also archives here (wow Kevin-the-lubber posted a ton of 'em) and I'm afraid I got a bit lost. My fault, surely, so I fell back on the tried and true method of asking the experts. I think my confusion stemmed from the dearth of overhead or vertical views of the head rigging. Lots of side views but they obscure some detail. Again, I'm sure I simply missed the obvious and I'm also sure it won't be the last time ;-}
Hi Chap,
I found the CS "Complex" to say the least!!
It took me quite some time to understand and recognize all the vagaries of Masts/Yards/Rigging.
Once you really get into the "Swing" of things, it will all become more "Logical."
Cheers and Regards,
Harry.
-
4 hours ago, kurtvd19 said:
Harry:
I one buys a brand name there isn't a need to find a source of parts.
Kurt
1 hour ago, rshousha said:Our industry is very small, whether buyers, sellers, or manufacturers. If we want to encourage some small manufacturers to invest in machinery to make products locally, we have to lead by example, and buy locally-made products. Otherwise, if we are always looking for the cheapest solution, manufacturers will have little incentive to invest, create jobs, innovate, and feed our industry.
1 hour ago, James H said:My main airbrushes are an Iwata HP-CH and an Iwata HP-C+.
I run these on an Iwata Studio Series compressor. These are what I have tended to use for both my magazine work and also my Vanguard Models prototypes.
However, with Indefatigable and her size, these airbrushes weren't as friendly, so I splashed out a 'small' fortune on a new airbrush. The larger needle allows me to give a good wetting to the hull with polyurethane varnish.
Ta da!!
As long as it does the job, all is good.

Thanks Gentlemen,
I am well aware of the sensibilities of purchasing a "Branded" Air-Brush. (If I could, I would!!)
I do have an Iwata but this is not working well, I purchased a 0.5mm replacement needle but not much improvement. (When I am a little more "Solvent" I'll look at a Nussle.)
So, purely a case of economics purchasing a "Value for money" Air-Brush kit.
The most important thing is that it will do what I need it to do. 🙂
A saying I picked up a few years ago: "There are three things in life, Quick, Cheap and Good, in reality there are only ever two." 🙂
Cheers and Regards,
Harry.
-
On 2/12/2023 at 2:26 PM, Joe100 said:
Since your model depicts the ship on operation, you only need two flags. The ensign and the admiral’s flag.
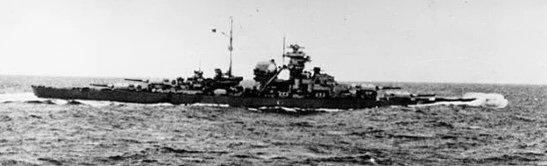
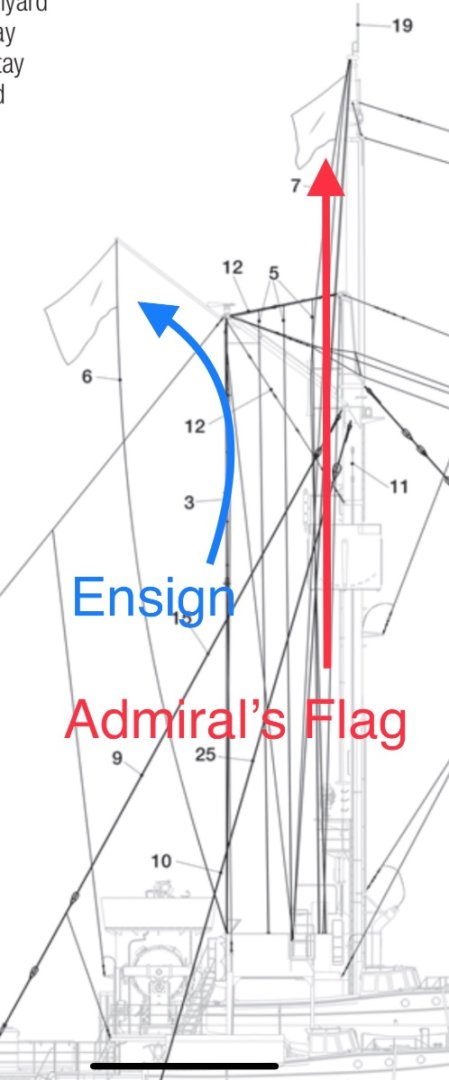
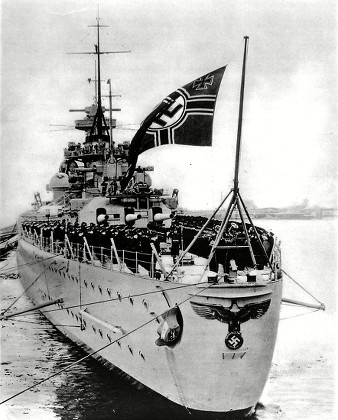
If you decide to add the flag at the stern, it will be rigged like this: However, Bismarck was only flying 2 flags while at sea unless she was signaling PG. In Norway, since the flagstaff and jackstaff were removed, only the ensign and admirals flag were being flown.
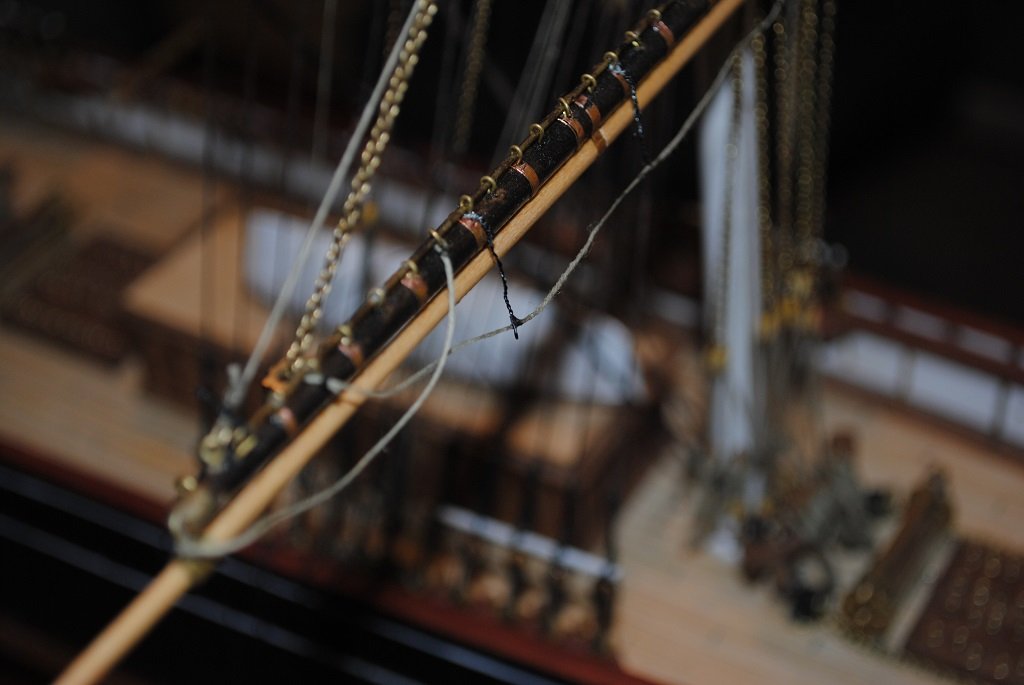
As for creating the flag, I make mine by either custom painting them on silkspan for larger models, or painting directly onto primed aluminum foil. You can wrap the decal around some aluminum foil, that works too, but I don’t think it gives the best results. Make sure you prime the aluminum well if you do this, as the decal needs something to bite onto. I find that flags that hang down, as if in little to no wind, not only look the best but are easiest to place since their weight is directed downward instead of out and down.
This is the flag Admiral Lütjens would have flown:

Thanks for that Joe.
I have created two of the three flags using a piece of Aluminum Foil sandwiched by the Decal.
I run a piece of rigging through this first for a Lanyard. (Longer for the Ensign.)
(The madness for the method, (Making Flags), was a link sent to me by OC in the build log.)
Article provided by OC:: http://www.modelwarships.com/features/current/flags/flags.html
I don't particularly like the Bow Flag, I think it looks a little "Cheap."
With my "Lanyard" for the Stern Flag, it'll be attached something like the photo. 🙂
Cheers and Regards,
Harry.
-
On 2/13/2023 at 11:53 AM, BANYAN said:
Cheers HOF, thanks. I just received one with the intention to see how it performs also. Everything in the box looks OK, and surprisingly of better quality than I had thought it would be, but have yet to test it. One note of caution, the needles seem extra fine/slim (not the tip, but overall) so they may be prone to damage quicker than for a name brand version. It may pay to find a source for replacement needles (I will let you know if I find a source) as I am not sure if other brand needles will fit through? I have yet to test for spray pattern, atomising etc but even if I don't use the airbrush, the parts alone cover the cost. I intend to have it permanently set-up with the 0.3 or 0.5 needle to use for putting down my base/primer coats, and use my H&S for finish coats and detailing. That way I am not constantly changing needles, and for primer coats, if the atomising works as well as the guy claims in the online test, then it will be just fine for this purpose.
cheers
Pat
Thanks for that Pat.
I'll be using mine for pretty much the same task as yourself.
If you could please advise a source for spares, it would be very much appreciated.
Cheers and Regards,
Harry.
-
6 hours ago, VitusBering said:
It appears I'll be on hiatus for a while (2-4 weeks) awaiting delivery of paint.
The entire planet seems to have run out of black and white Revell acrylic paint.
I've said before I detest this brand of paint but I'm too far into the project to switch horses now.
I've ordered from a supplier who claims to have a stash but has to pick it from a warehouse.
Errgh. These paints do not store well over long periods of time so I hope they haven't been stored for too long.
Some of the boxes I have contain paint the consistency of peanut butter.
I've been mostly able to restore those to a usable state with a few exceptions where I've simply discarded them.
I'll touch up what I can, and tinker with cleaning flash on upcoming parts, and keep myself sort of busy in the mean time.
I'm exploring ideas for making jackstays, too. I have found some material that may fit the bill nicely.
I think I will re-rig the boat davits. I used some of those marvelous wooden blocks but the ones I used are too small, I think.
I am also still waiting on books and drawings. I did receive the Noel Hackney book and that's been interesting reading.
I'm waiting for Longridge and Underhill, and for sets of drawings from the Royal Museums Greenwich.
All have been shipped, finally, but the process is very slow.
Hi Chap,
It's not all bad having to wait for stuff.
I've done plenty of that. (Waiting)
I find it gives me time to think about things and plan for next steps....
I look forward to your next chapter.
Cheers and Regards,
Harry.


Bismarck by Ian B - Amati - 1/200
in - Kit build logs for subjects built from 1901 - Present Day
Posted
Looking really good!!