


hof00
-
Posts
1,622 -
Joined
-
Last visited
Content Type
Profiles
Forums
Gallery
Events
Posts posted by hof00
-
-
14 hours ago, VitusBering said:
I think the thread will work out OK.
I'm still shopping for very thin and stiff brass wire though but I'm not having much luck.
Harry, do you possibly have a link to where I might find that?
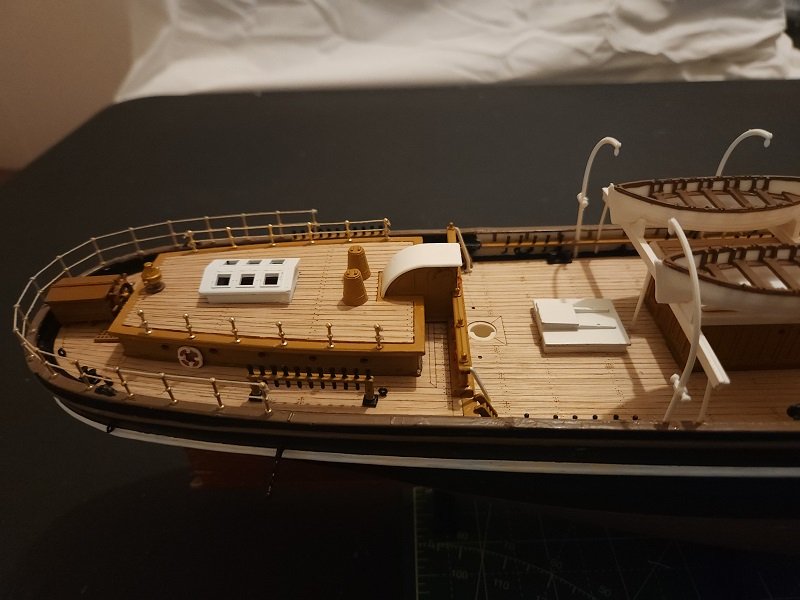
Next up - rigging the boat davits. The 2017 kit instructions have them rigged each to its own, but I'm going to do it the way the full scale ship and the 1974 instructions show, in an X pattern.
Sorry Chap,
I don't have a link for K&S, I have purchased from NZ Model shops in the past.
(Just a thought, you could do davits from Brass Wire as well.... Aneal and flatten the "Boat" end of things and drill holes for the Boat Lines, sorry, not intended to overwhelm you.)
Your Cutty is looking good!!
Cheers and Regards,
Harry.
-
4 hours ago, VitusBering said:
I think some explanation is in order. I started this build as a nostalgic exercise. I built this kit (hastily) more than 35 years ago and my wife happened to find that exact version last year and gifted me (bless her soul). I didn't intend at the outset to make a museum quality model and, indeed, did not think it was possible that this kit could be built in any realistic fashion.
Then I came here, and saw these astounding build logs and realized the potential in this model. The talent on display here - not just this model but across the board - is phenomenal.
So this has been, so far, a very fun thing to do. It is good for my well being - retirement has been uncomfortable for me. I putter with home improvement but that is not very fulfilling. Building this model, however, is great for my mental health. I say that before starting the rigging, of course :-}
As I get further into this, I've come to realize that this build may just be a trial run. Sure, it is a wonderful thing to do and the result will be an aesthetically pleasing model worthy of display on a shelf. But I've learned so much - mostly from folks here and some from my own bumbling - that I now know that with some concerted effort I could produce something worthy of a display case. This is not a throw-away build. I've invested a lot of effort and will continue to do so and I hope to end up with a much-better-than-average example of this marvelous vessel.
I am, though, taking notes about what I may do differently if I do it again. Whether I will actually do it again is unknown, but it is rattling around in my head.
Until then, I'll find a lot of joy and fulfillment in the building and especially the learning, Thank you all for all you are and do.
Hi Chap,
Good on you!!
That's a great attitude.
Personally, I find the whole process very therapeutic including the frustrations that come with it and the solutions to fix those frustrations.
It is also good to know when to "Walk away" from the task at hand and carefully consider.
Take your time and it'll work out just fine. 🙂
Cheers and Regards,
Harry.
- shipman, Cirdan and VitusBering
-
 3
3
-
On 2/5/2023 at 3:22 PM, gsdpic said:
Thanks again for all the likes.
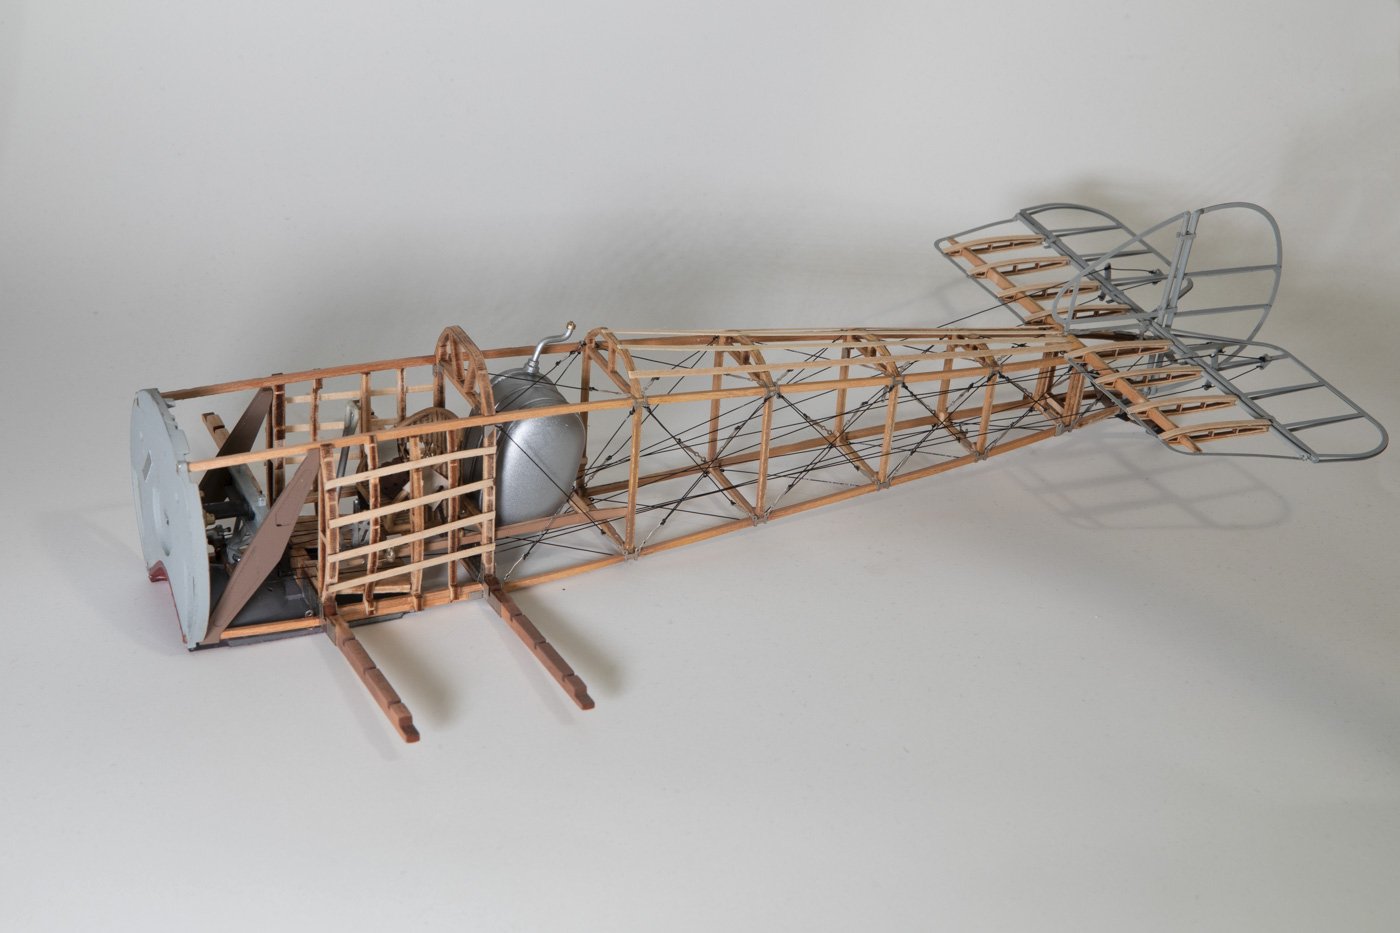
I realize these recent pictures pretty much look the same. But, I am now done with the 40 diagonal bracing wires on the fuselage. Who would've thought that a Sopwith Camel model would have more "rigging" than the yacht America?
")
Another example of the dubious order of steps in the instructions....do you see the four lengthwise wood strips across the top/back of the fuselage? The instructions had you glue those in place before doing the diagonal braces directly below them. That's just nuts, and fortunately I noticed and left those off until after the braces were in place.
So with that I am through step 17. Next up is some braces between the horizontal stabilizer and the rudder. For some reason, the kit shifts to recommending black cotton thread for these and the braces on the main wings, instead of the black fishing line that has been used so far. The cotton thread is a bit thicker, making it more difficult to feed through the holes in the photo etch bits that serve as end points. So, I am not sure if I will follow the instructions or just continue to use the fishing line for everything. I don't see the fishing line or the cotton thread as particularly representative of the real thing.
Hi There,
You may have already considered this but thought I'd mention anyway....
Regarding cotton Thread, Have you tried making a "Bodkin" using the thread?
I use this quite a bit with Rigging and it makes things much easier to run lines through tiny holes.
Take you thread and coat 20mm or so in CA, run your fingers over the Thread with ca.
This should stiffen that end.
Finish the "Bodkin" by cutting the very end of the CA coated thread at a shallow angle and you have your "Bodkin."
If the "Bodkin" gets bent, more CA and cut the end again.
(I don't know if you are a fan of running the thread through a Beeswax block, but that may help also if the thread is to move within small holes.)
Hope this makes things easier for you.
Cheers....HOF.
-
19 minutes ago, shipman said:
I posted pics of brass stanchions and wire on one of the previous CS build logs.
The wire looks much more authentic than any 'thread'.
Admiring this crisp build, thank you.
Yup,
That's what I used on my Mantua/Sergal version. (Cutty Sark - HOF00)
I liked the look of the Brass next to the wood.
The Rail ends can also be formed very nicely where they terminate on the wood..
In saying so, thread will still suffice quite adequately.
Cheers and Regards,
Harry.
- Bob Fraser and VitusBering
-
2
-
Hi Chap,
That Hull is looking really good!!
(I am a Brass Stanchion fan as well. 🙂)
Have you considered using Very Thin and stiff Brass wire? (KS products?)
(Just an idea. 🙂)
Cheers and Regards,
Harry.
- VitusBering, shipman and Cirdan
-
3
-
19 minutes ago, Ian B said:
Thanks Harry-- very kind of you.
No Worries,
I'll keep them aside.
Cheers and Regards,
Harry.
- Ian B, Old Collingwood, Canute and 1 other
-
4
-
18 minutes ago, Old Collingwood said:
Harry have you got any of that cooking foil we use to cover roated foods to stop them burning in the oven, that will do the trick.
OC.
Thanks OC,
Yup, got plenty of Aluminum foil.
I'll get my "Treat" tomorrow, I can then compare foil thickness. 🙂)
Cheers and Regards,
Harry.
Cheers and Regards,
Harry.
- mtaylor and Old Collingwood
-
2
-
Hi All,
Small update:
I "Farted" around for a couple of hours today getting tthe Starboard Arado installed.
RV Chima, (Rod), drew attention to mounting the aircraft on Catapults.
The aircraft "Skid" needs to be higher.to sit properly.
I ended up putting a 1.5mm "Spacer" between Skid and Catapult I then had to insert a 2.5mm temporary spacer under the Floats to obtain correct aircraft orientation.
Once happy with it, CA Skid and removal spacer under the Floats.
I'm still thinking about the second Arado.... Since it has folded Wings, I think I'll "Park" it in front of th Port Hanger.
(It makes the model a little different perhaps.)
Any opinion on this?
Another point of note, the 10.5cm AA Guns do not fit the "Barbettes." (The "Peg" on the Turret mounting is too long by 1.0mm or so)
I am unsure if this just relates to my Amati Version.
To fix the issue, I filed down the plastic Peg on the Turret Base that fits into the "Barbette" cup.
Cheers....HOF.
![DSC_0834[1].jpg](https://modelshipworld.com/uploads/monthly_2023_02/344939062_DSC_08341.jpg.4abab6bdc040dbb45381a45c41c795cc.jpg)
- BobG, Old Collingwood, yvesvidal and 2 others
-
5
-
1 hour ago, Old Collingwood said:
Thanks OC,
That's awesome!!
(Now all I need is some sort of foil wrapped treat.... 🙂)
I'll give it a go!! 🙂
Cheers and Regards,
Harry.
-
1 hour ago, Old Collingwood said:
What I would do Is to make up your flag with the foil and lanyard rope trapped inside then glue and form the shape you want before attaching to the flagstaffs/mast.
OC.
Thanks OC.
I am thinking around the same solution as you describe.
My thoughts, (I don't know if they are viable), is to cut the foil to size attach to the Lanyard and "Sandwich" the Decal around both sides of the foil.
Sae for Flagstaff's?
I especially want to do this, (Something), to the Flagstaff's before attaching these items.
It would be an absolute nightmare to attach the Flagstaff's first, decal after. (With the Decal/foil sandwich, I thought that the Flag could also be given some shape....)
What do you reckon?
Cheers....HOF.
-
4 hours ago, Louie da fly said:
Wish I could answer this one for you, but it's always had me stumped as well. Strictly, a flag is a separate piece of fabric that is (I think) attached to the hoist (i.e. the rope) at top and bottom corners and hauled up with the hoist going through a block. But that's in the real world. Depending on the scale of your model that may be completely impractical. And the fact that it's a decal, not a piece of cloth or paper makes it even further outside my experience. All I can do is wish you good luck with it.

Steven
Thanks Steve.
Appreciated.
Cheers and Regards,
Harry,
-
Hi All,
I have a question for the Forum and am hoping for some advice.
I have 3 DKM Flags, two for Bow/Stern Flagstaffs and one "War Pennant" that has a lanyard from the Deck to the Main Mast.
So, do I form the Deal around the Flagstaff's/Lanyard, or do I wrap Foil around and then the Decal? (I seem to recall foil being used somewhere....)
I wish to put the Decals on prior to installing Flagstaff's/Lanyard.
Any sage opinion/advice would be very much appreciated.
Cheers....HOF.
-
3 hours ago, Ian B said:
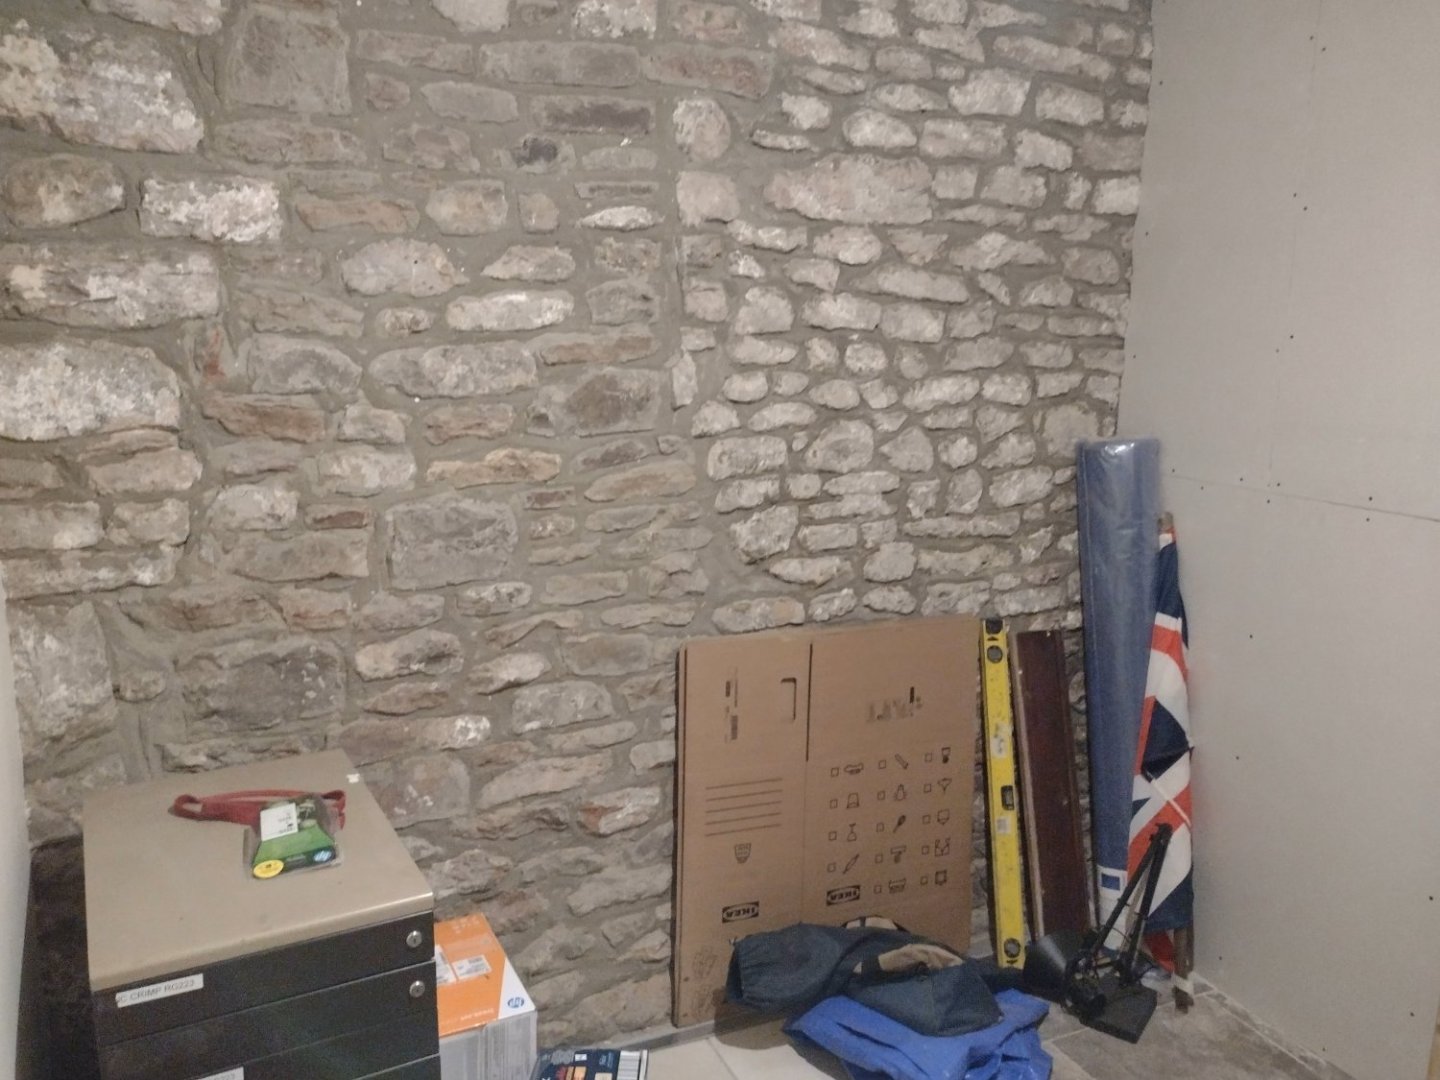
I hope to start in around two weeks..just waiting for the builders to finish what will be my very own workshop ..very excited 🙂🙂🙂
Hi Ian,
You have some pretty major work going on there!!
BTW: When you "Embark" on your BM build, I do have some spare tiny Plastic and PE bits.
If you loose anything, drop me a line and I'll help where I can.
Cheers and Regards,
Harry.
- mtaylor, Canute and Old Collingwood
-
3
-
7 hours ago, Canute said:
Harry, this keeps getting better and better. Rigging looks great and the aircraft turned out nicely. Sorry I can't help with your flag question.
Hi Ken,
Thank you for your kind comments.
I notice a deformed Rail on the Starboard Service Boat Skid.... I think this needs to be fixed. 🙂
No worries about the Flag thing.
I'll either post on the forum under a different subject heading or ask Mr Google nicely.
Cheers and Regards,
Harry.
- mtaylor, Canute and Old Collingwood
-
3
-
I have a question for the Forum and am hoping for some advice.
I have 3 DKM Flags, two for Bow/Stern Flagstaffs and one "War Pennant" that has a lanyard from the Deck to the Main Mast.
So, do I form the Deal around the Flagstaff's Lanyard, or do I wrap Foil around and then the Decal?
I wish to put the Decals on prior to installing Flagstaff's/Lanyard.
Any sage opinion/advice would be very much appreciated.
Cheers....HOF.
- Canute, mtaylor and Old Collingwood
-
3
-
Next Update:
Completed and installed the 10.5cm AA Guns. (The AA Turrets traverse), (As do the rest of them), I may fix the AA Turrets permanently in place.)
Installed the 20mm AA Gun on Turret Bruno. (I think that the poor sod manning this Gun would have a suicide wish when Bruno's Guns Fired!!)
Placed Arados, only placed at the mo as I am unsure about thier final positions.
Interference Grids almost ready for installation.
Enough for one day.... 🙂
Cheers....HOF.
Photos:
![DSC_0829[1].jpg](https://modelshipworld.com/uploads/monthly_2023_02/737084882_DSC_08291.jpg.8299e0d27f639d5ce7436724d0605835.jpg)
![DSC_0830[1].jpg](https://modelshipworld.com/uploads/monthly_2023_02/1544175718_DSC_08301.jpg.e709e637711020c71fa4ccf486f9bd4f.jpg)
![DSC_0831[2].jpg](https://modelshipworld.com/uploads/monthly_2023_02/294647240_DSC_08312.jpg.716b0492e0009e137c07f42447af3b38.jpg)
![DSC_0832[1].jpg](https://modelshipworld.com/uploads/monthly_2023_02/843766731_DSC_08321.jpg.eefbdf4cf71bf9401a05d0ef2b3588f1.jpg)
![DSC_0833[1].jpg](https://modelshipworld.com/uploads/monthly_2023_02/595774400_DSC_08331.jpg.e460ccee44afac92c1aa545b3c8d4205.jpg)
![DSC_0834[1].jpg](https://modelshipworld.com/uploads/monthly_2023_02/1739499117_DSC_08341.jpg.7f455727b0c8d6032fcaaad901958b89.jpg)
![DSC_0835[1].jpg](https://modelshipworld.com/uploads/monthly_2023_02/1633493411_DSC_08351.jpg.9cbe483ac091a2c7b8d6a11441ab0cce.jpg)
![DSC_0838[1].jpg](https://modelshipworld.com/uploads/monthly_2023_02/1690210149_DSC_08381.thumb.jpg.095bee7efb824b60887491320f1ed47a.jpg)
- Prowler901, Old Collingwood, BobG and 3 others
-
2
-
 4
4
-
Hi All,
A couple of updates:
The first is simple, RV Chima, (Rod), wanted to know what the ABER 1/200 Chain-Link Railings looked like.
Thay look very fragile.... 🙂
Cheers....HOF.
![DSC_0827[1].jpg](https://modelshipworld.com/uploads/monthly_2023_02/491520850_DSC_08271.jpg.351a93832aac00fadb5a66b5370f097b.jpg)
![DSC_0828[1].jpg](https://modelshipworld.com/uploads/monthly_2023_02/2076121808_DSC_08281.jpg.f359a03ec31532d6ed5dffa784a6330f.jpg)
- Old Collingwood, BobG, Prowler901 and 2 others
-
3
-
2
-
1 hour ago, Joe100 said:
Well now that Bismarck can transmit/receive, on the Shortwave, Longwave, and Mediumwave bands, what’s next??
Hi Joe,
Thanks for that!! 🙂
I am pleased that the Beastie is Rigged, not as complex as the diagrams you so kindly sent me but ever so slightly simplified.
(I'll be prototyping the Accommodation Ladders soon enough.
Cheers and Regards,
Harry.
- mtaylor, Canute and Old Collingwood
-
3
-
4 hours ago, VitusBering said:
Absolutely beautiful work, Harry. Well done.
Thanks Chap!!
Cheers and Regards,
Harry.
- Canute, VitusBering, mtaylor and 1 other
-
4
-
2 hours ago, Ian B said:
As everyone said .super work
Thank you, kindly Ian!!
II am looking forward to your Bismarck build. when you get to it of course. 🙂
Cheers and Regards,
Harry.
- mtaylor, Canute and Old Collingwood
-
3
-
3 hours ago, Old Collingwood said:
Amazing work Harry, every aspect of it - so much fine detailing.
OC.
Thanks OC,
Muh appreciated.
Agreed, the model is definitely not short on the detail side of things... 🙂
My thoughts are beginning to turn to Cabinet. options.
Cheers and Regards,
Harry.
- mtaylor, Old Collingwood and Canute
-
3
-
2 hours ago, BobG said:
Looks awesome, Harry!
Thanks Bob,
I think I am "Almost" finished.
10.5cm AA Guns tomorrow and I'm sure that I'll find some other bits to keep me suitably occupied.....🙂
Cheers and Regards,
Harry.
"
- Old Collingwood, Canute, mtaylor and 1 other
-
4
-
Hi All,
Apologies for the bad lighting in the above photos.
The next round, I'll ensure some better lighting.
Cheers....HOF.
- mtaylor, Old Collingwood and Canute
-
3
-
Hi All,
A reasonable update:
So, Rigging is now complete with the exception of the Propeller Guards.
I tried so hard but could not perform Rigging satisfactorily without assistance. (Still dealing with the right Rotator Cuff thing....)
So, my lady stepped up and gave things her very best, I am so very grateful and very happy with the result!
It took about 4 days to complete in +30.0 C temperatures.
HOF busied himself with directing operations, passing Tools/Glue as required. 🙂
Joe 100, (Joe), had provided me with Rigging Plans, (Thanks Joe), but I ended up going with the "Kit" instructions, perhaps a little simplified but these I felt were enough. (Instruction sequence was really good and ensured that one did not "Paint yourself into a corner," so to speak.
For the majority of Rigging material, I used "Infini" 110 Denier Lycra Thread and Polyester Cotton for Rigging intersected by other pieces under tension.
I gave the Boats a bit of a touch-up and the rest of the Ship and gave the Superstructure a dose of air-brushed Vallejo Satin Polyurethane. (The effect was fantastic blending in all touch up paint.
Boats installed on thier Skids.
Currently finishing up the eight 10.5cm AA Guns and I may get these installed today.
Getting there....
Things left to do:
- 10.5cm AA Gun Installation
- Interference Grids
- Aircraft installation
- Main Deck Railing
- Bow/Stern Flagstaff installation
- Accommodation Ladders and Davits
- Propeller Guards
- Anchor Buoys
(I think that's it.... 🙂)
Cheers....HOF.
Photos:
![DSC_0817[1].jpg](https://modelshipworld.com/uploads/monthly_2023_02/940012566_DSC_08171.jpg.366140f9dc09d6dcb2ef1d17f47431a8.jpg)
![DSC_0818[1].jpg](https://modelshipworld.com/uploads/monthly_2023_02/135069551_DSC_08181.jpg.bf1076446e52a8318353416131907aa4.jpg)
![DSC_0820[1].jpg](https://modelshipworld.com/uploads/monthly_2023_02/437087926_DSC_08201.jpg.a362619ffe99ce6abebcbd95d01e7a55.jpg)
![DSC_0821[1].jpg](https://modelshipworld.com/uploads/monthly_2023_02/347070959_DSC_08211.jpg.bd92ee1f0853b769d1ea21c6dee7e662.jpg)
![DSC_0822[1].jpg](https://modelshipworld.com/uploads/monthly_2023_02/1155708738_DSC_08221.jpg.c936d94b232d4f42bdcfa38f65cb009d.jpg)
![DSC_0823[1].jpg](https://modelshipworld.com/uploads/monthly_2023_02/1092907977_DSC_08231.jpg.7df9127b422e37482f33c5abbf253cec.jpg)
![DSC_0824[1].jpg](https://modelshipworld.com/uploads/monthly_2023_02/1255042152_DSC_08241.jpg.0feff7e1652086773faed270fc51f03c.jpg)
![DSC_0825[1].jpg](https://modelshipworld.com/uploads/monthly_2023_02/155846690_DSC_08251.jpg.9dd7b04ef05746fa258e7170352ef55b.jpg)
![DSC_0826[1].jpg](https://modelshipworld.com/uploads/monthly_2023_02/190793997_DSC_08261.jpg.8d0abefdcfad025637194aafcd638da1.jpg)


![DSC_0838[1].jpg](https://modelshipworld.com/uploads/monthly_2023_02/2126866209_DSC_08381.jpg.fb1201f0b9d2f0e13c786ede735e0d77.jpg)
1941 Chris-Craft Barrel Back by ESF - FINISHED - BlueJacket Shipcrafters
in - Kit build logs for subjects built from 1901 - Present Day
Posted
Awesome result!!
Cheers....HOF.