HOLIDAY DONATION DRIVE - SUPPORT MSW - DO YOUR PART TO KEEP THIS GREAT FORUM GOING! (89 donations so far out of 49,000 members - C'mon guys!)
×


Louie da fly
-
Posts
7,989 -
Joined
-
Last visited
Content Type
Profiles
Forums
Gallery
Events
Everything posted by Louie da fly
-
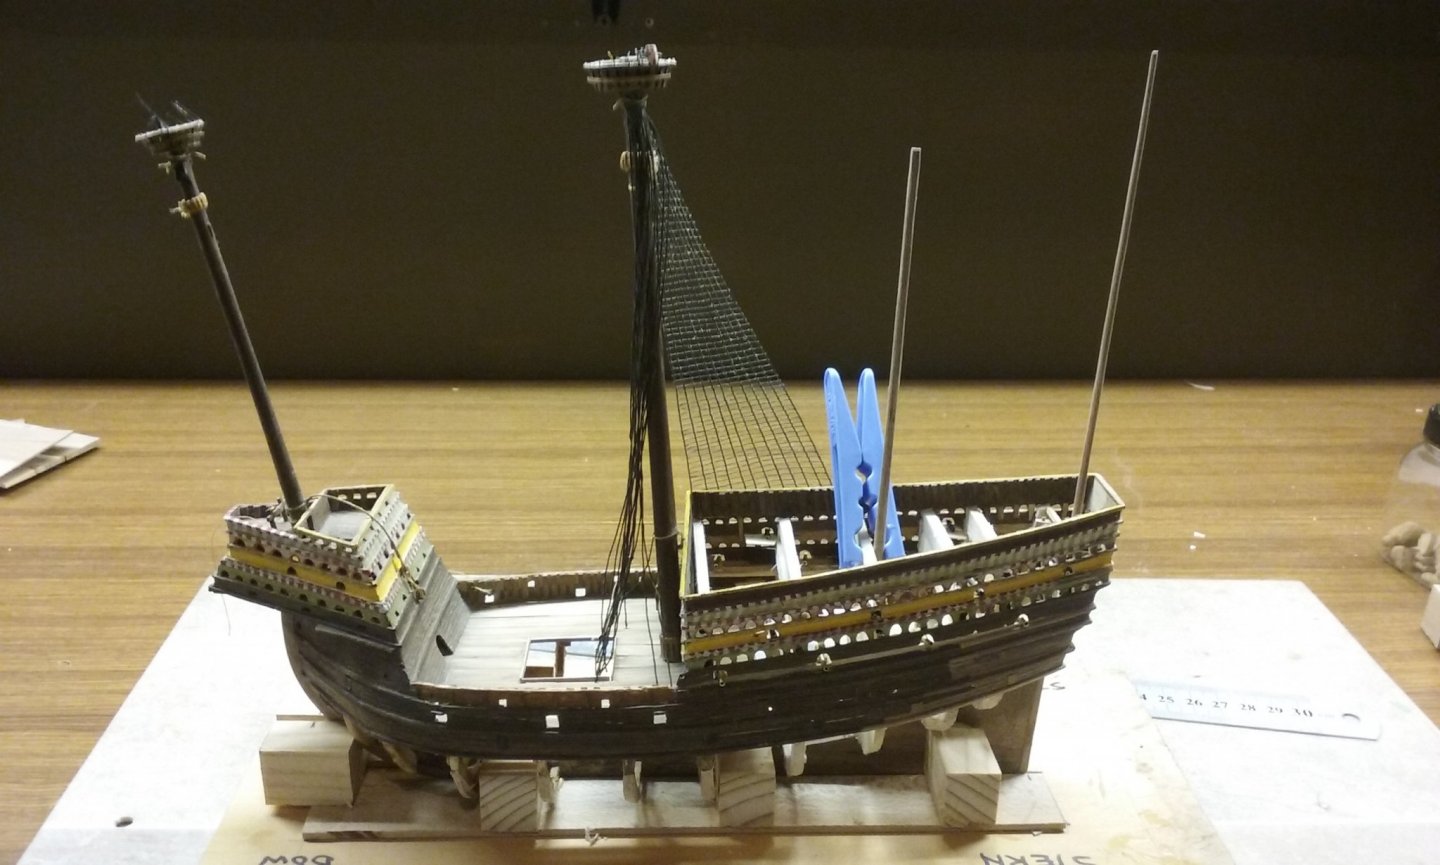
 I've finished the top for the bonaventure mizzen mast: Steven

- 740 replies
-
- 10
-

-
- Tudor
- restoration
- (and 4 more)
-
A rather bad place to get a knot in your piece of wood. Filled the holes with a mix of white glue and sawdust. Trimmed it down. I'm leaving the final smoothing off for the moment - I'll do that as a separate action when all the figures are made. Steven
-
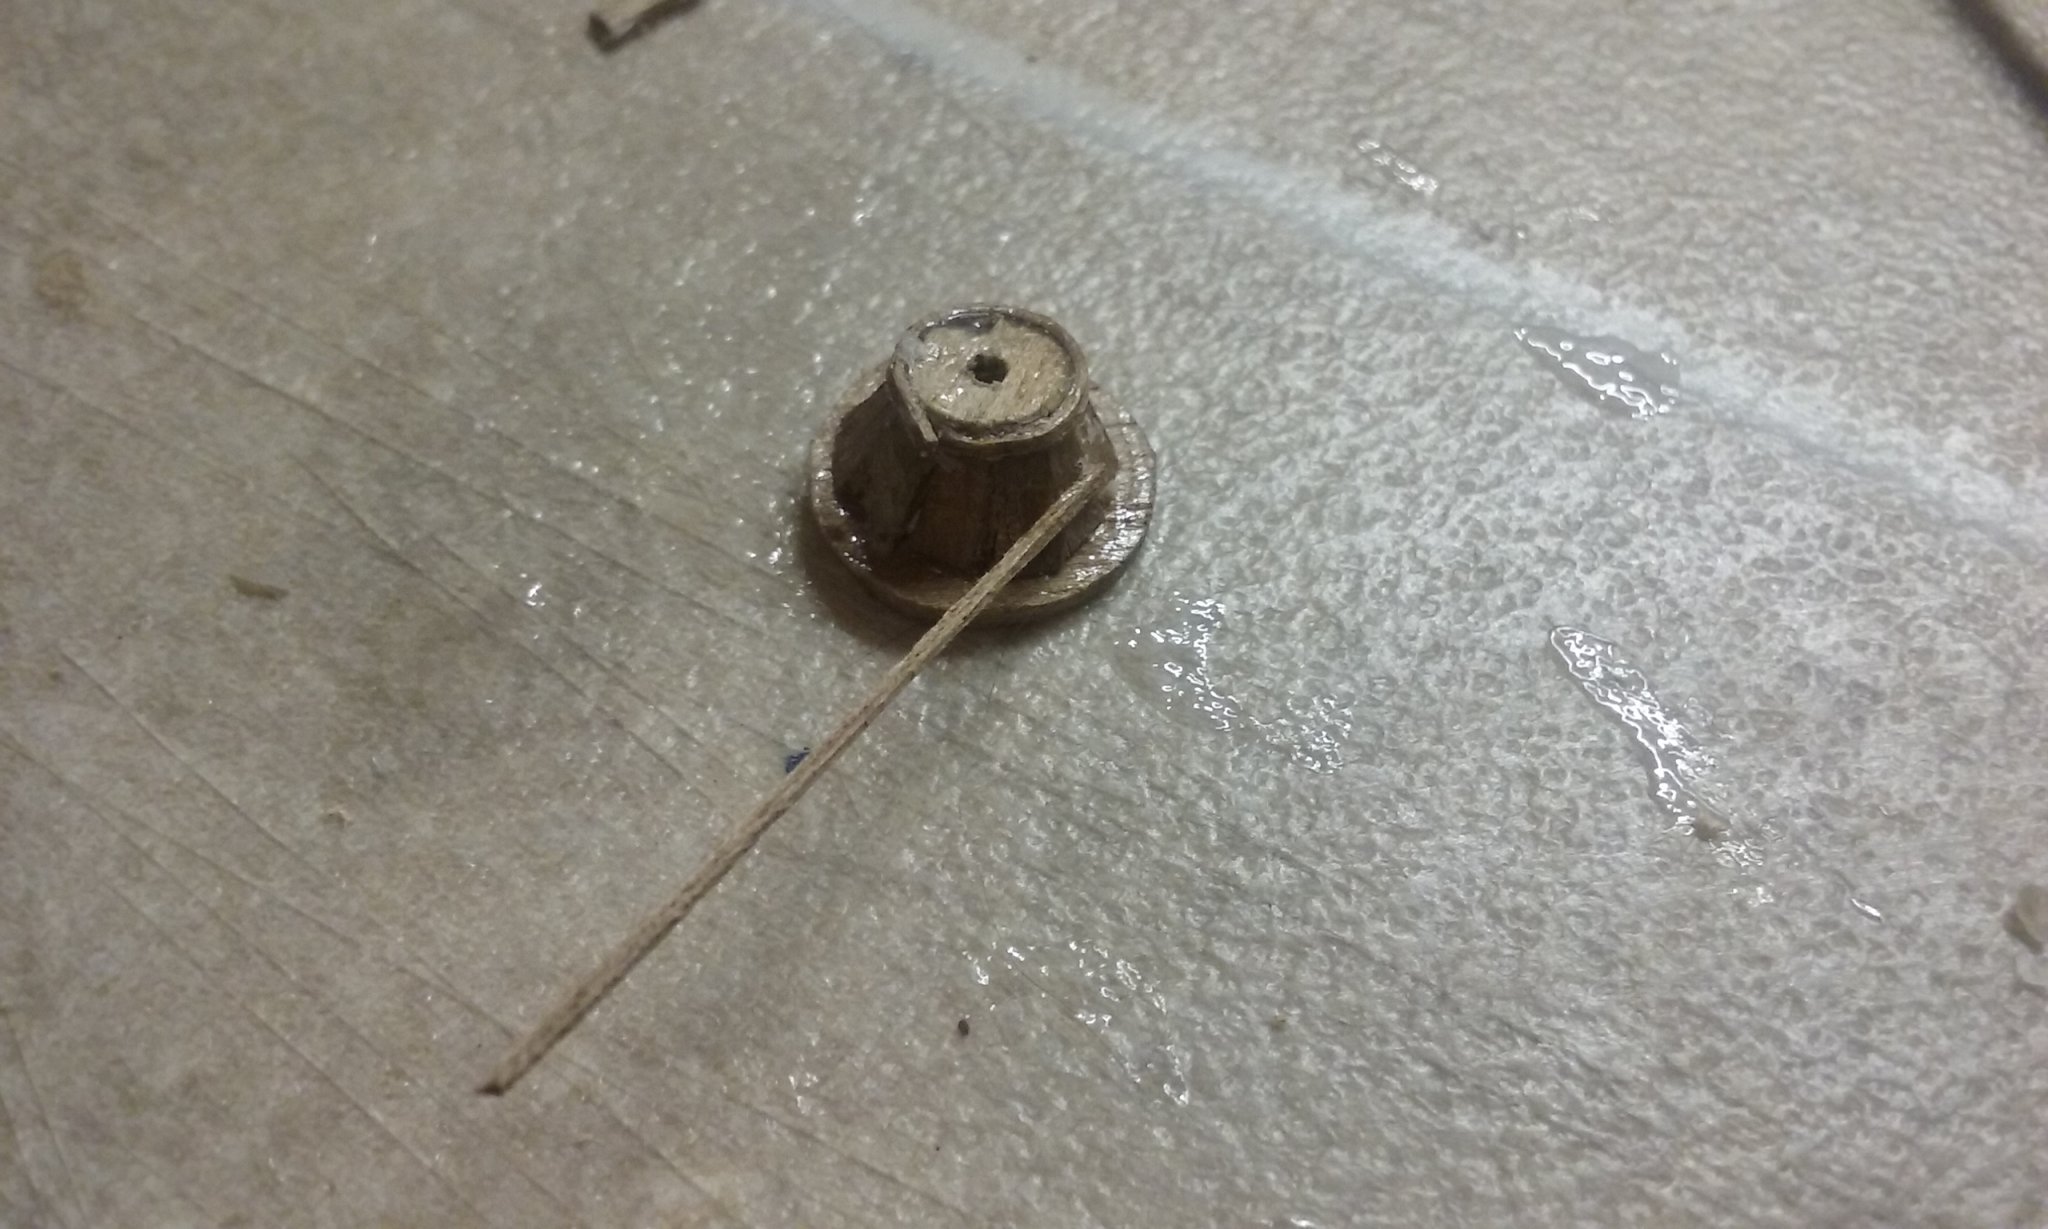
Thanks for the likes and comments. Druxey in particular - having seen the painted decoration on your hospital barge oars, I regard that as high praise. Quite possibly, and I might end up using it (them) for that purpose. I'd like to know why it has that narrow flange all around one edge, though. Steven
-
Mostly - how on earth did you manage to do that at the age of 17? If I could do it then, why can't I do it now? Perzakerly. Otherwise I'd have had to come up with some other solution. Thanks for the likes, everyone. More photos in due course, but today my wife and I are working on paving a parking space beside the house, so ship modelling has to take a back seat (though I managed to set up another shield for the dromon before we started - I've got it down to a fine art now - it takes maybe 5 minutes tops). Steven
- 740 replies
-
- 4
-
-
- Tudor
- restoration
- (and 4 more)
-
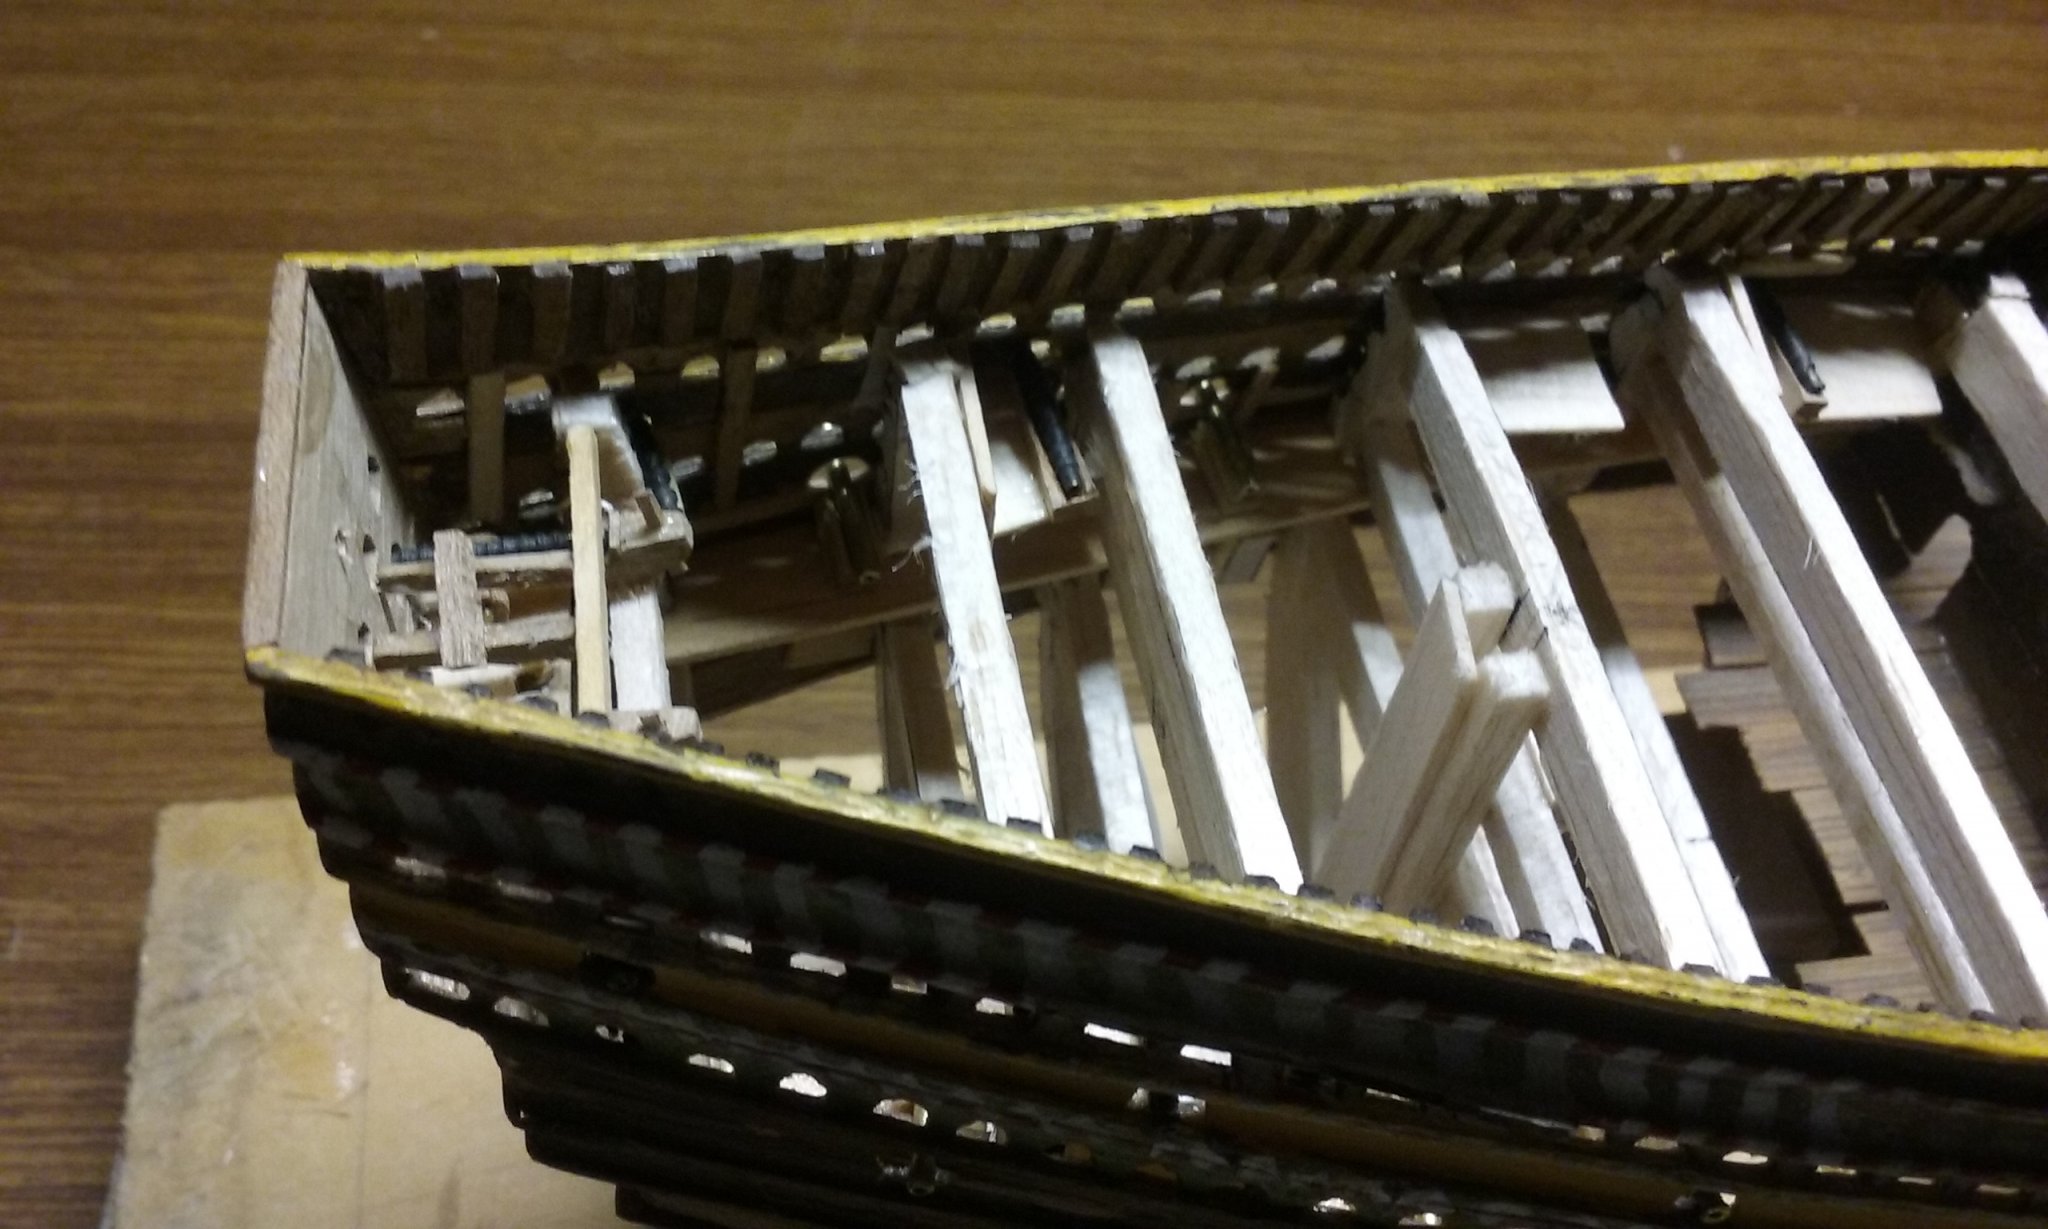
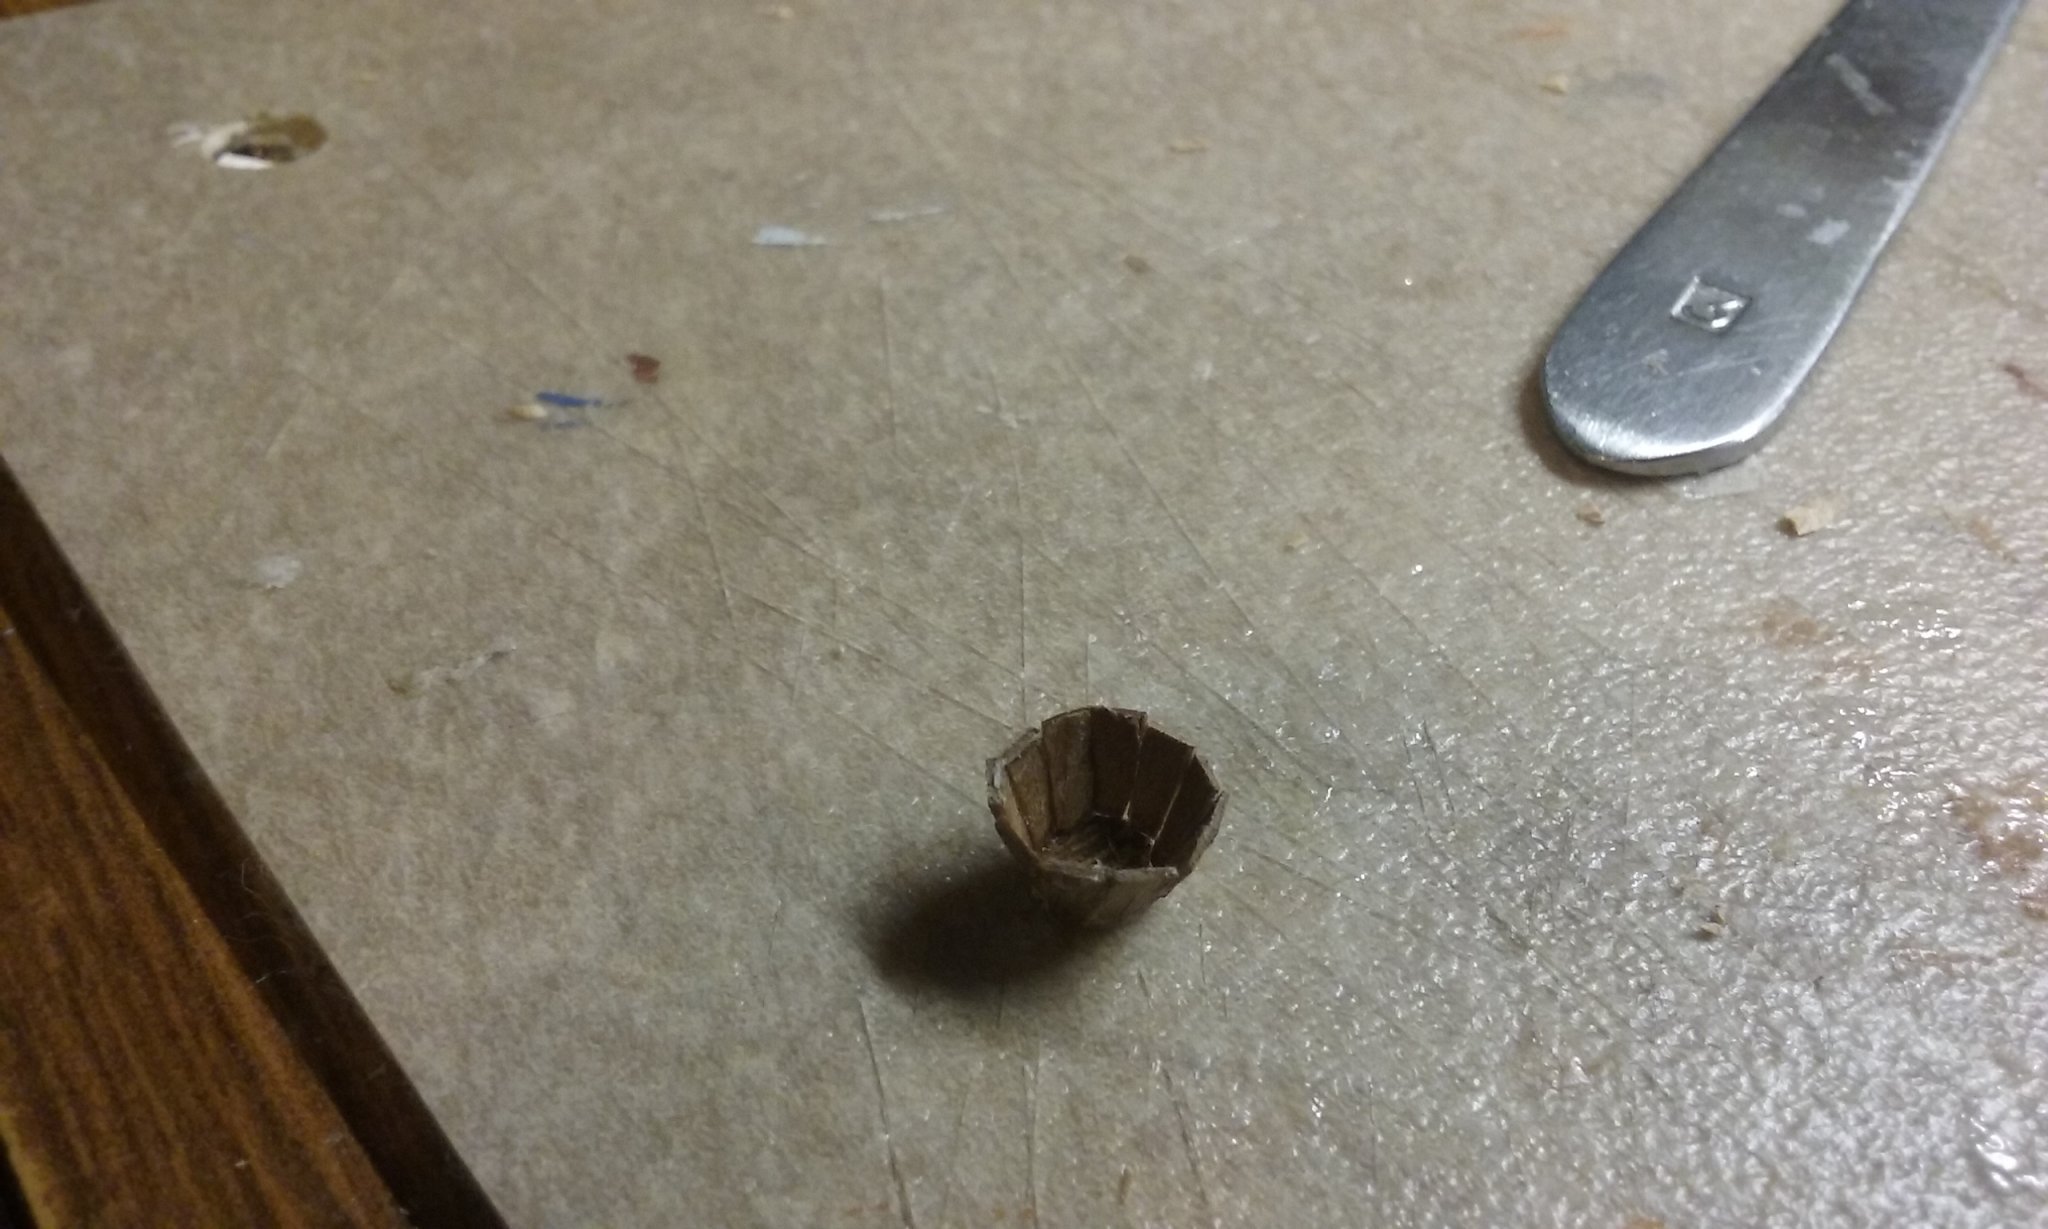
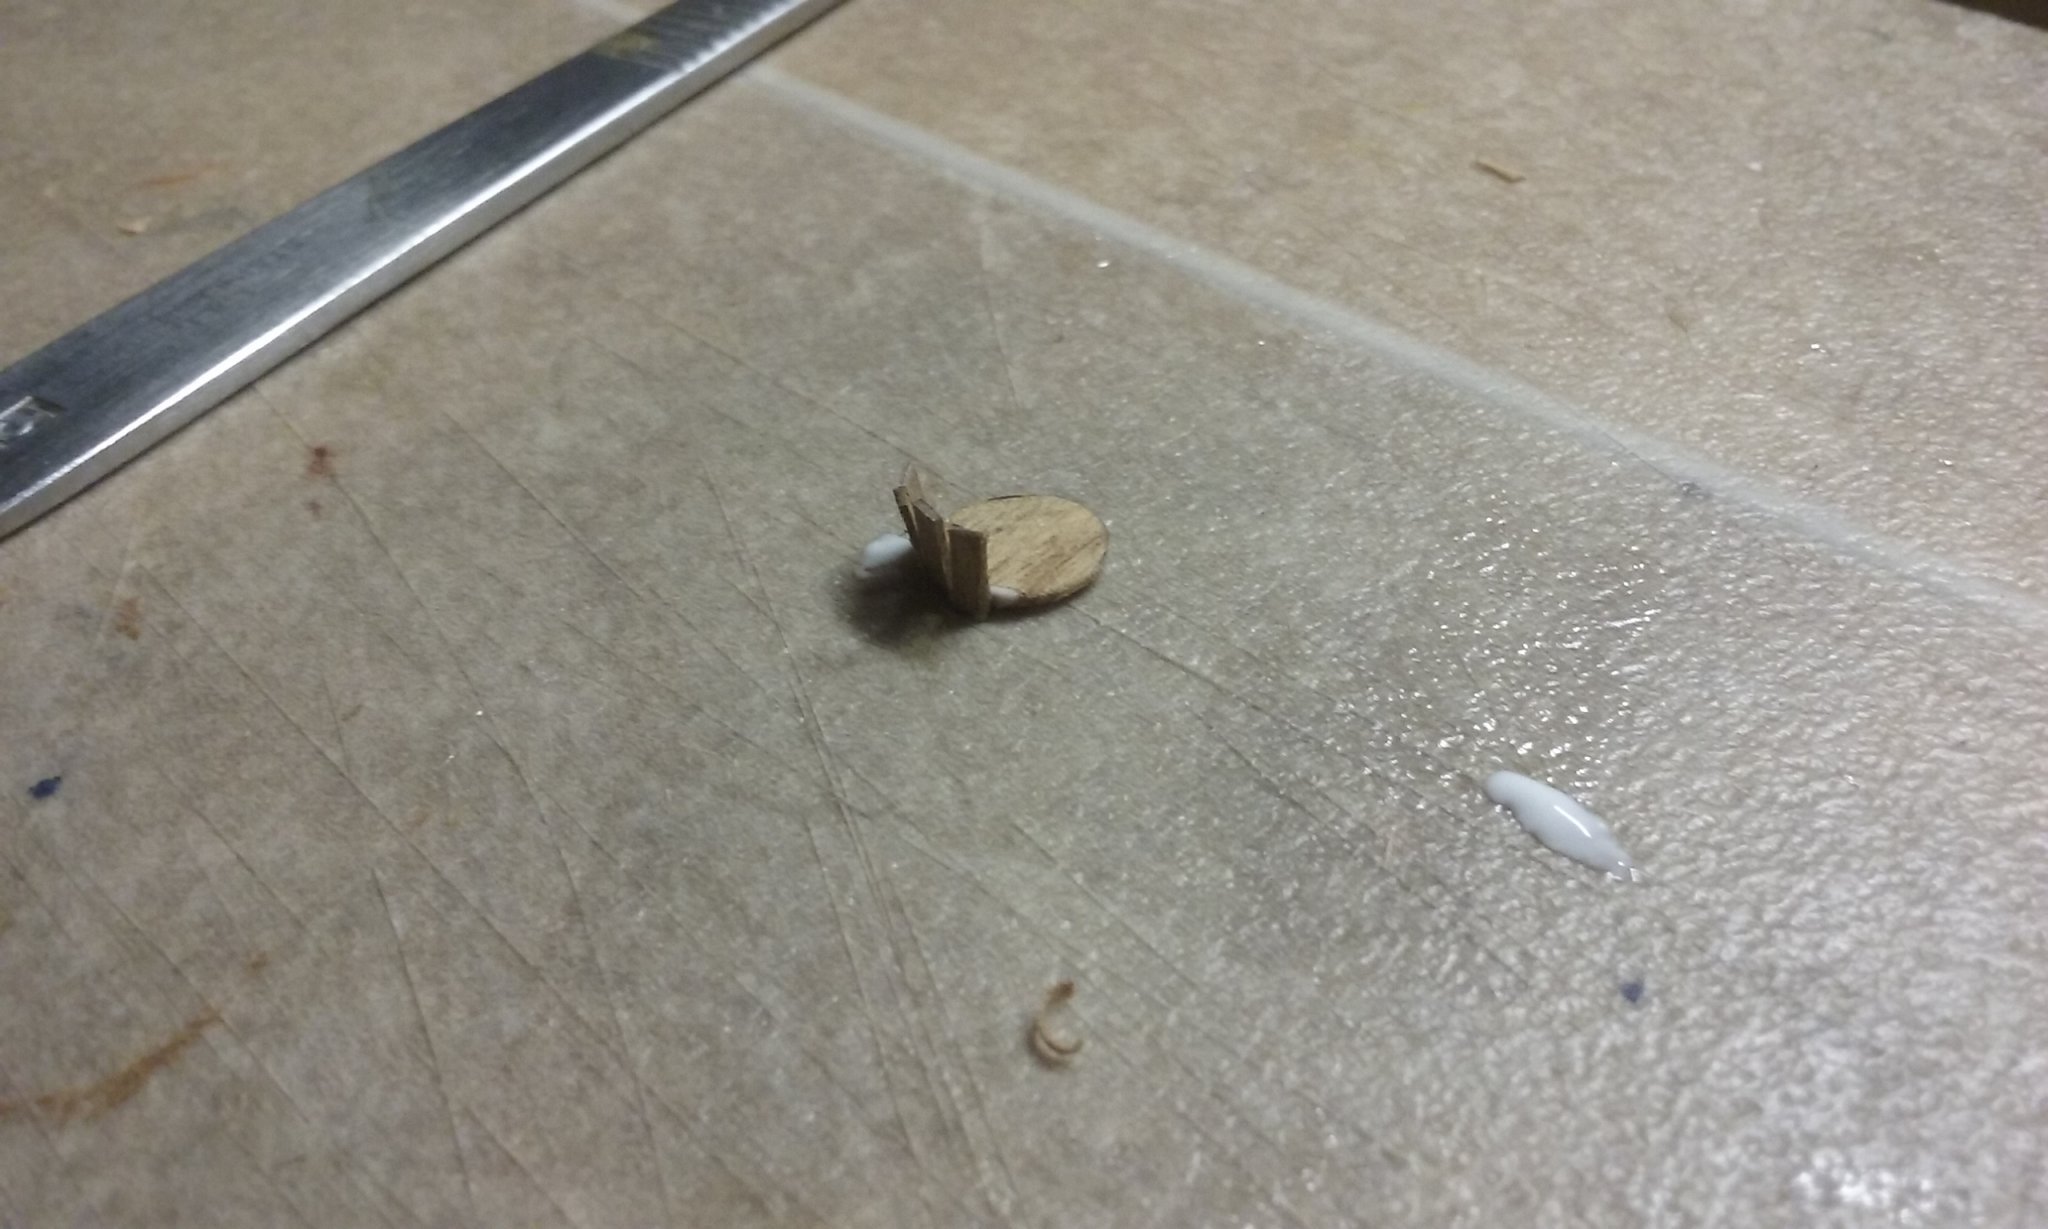
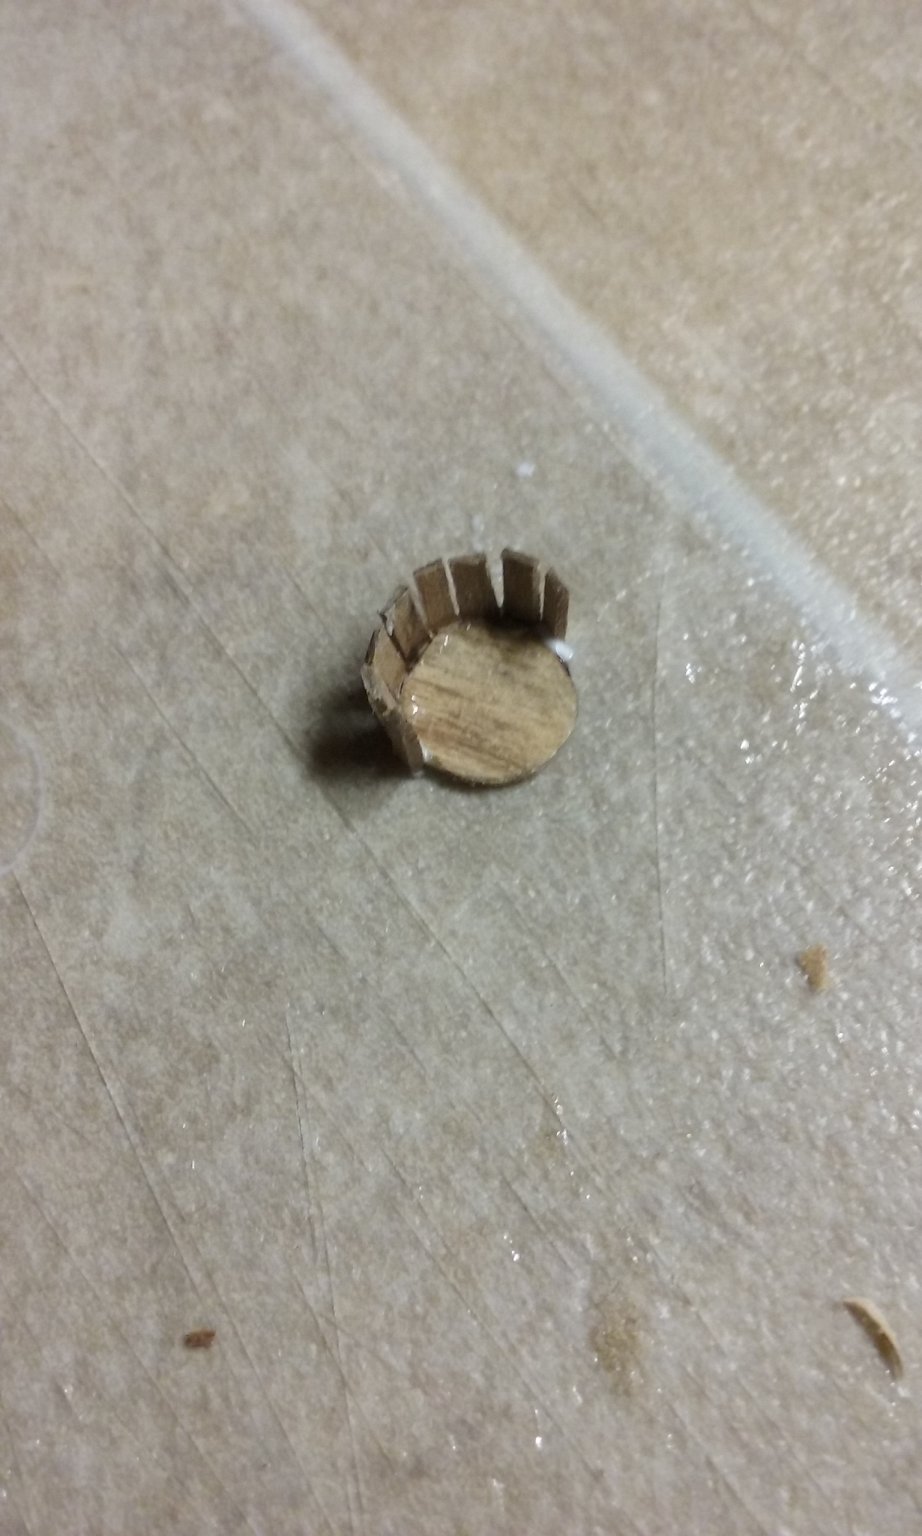
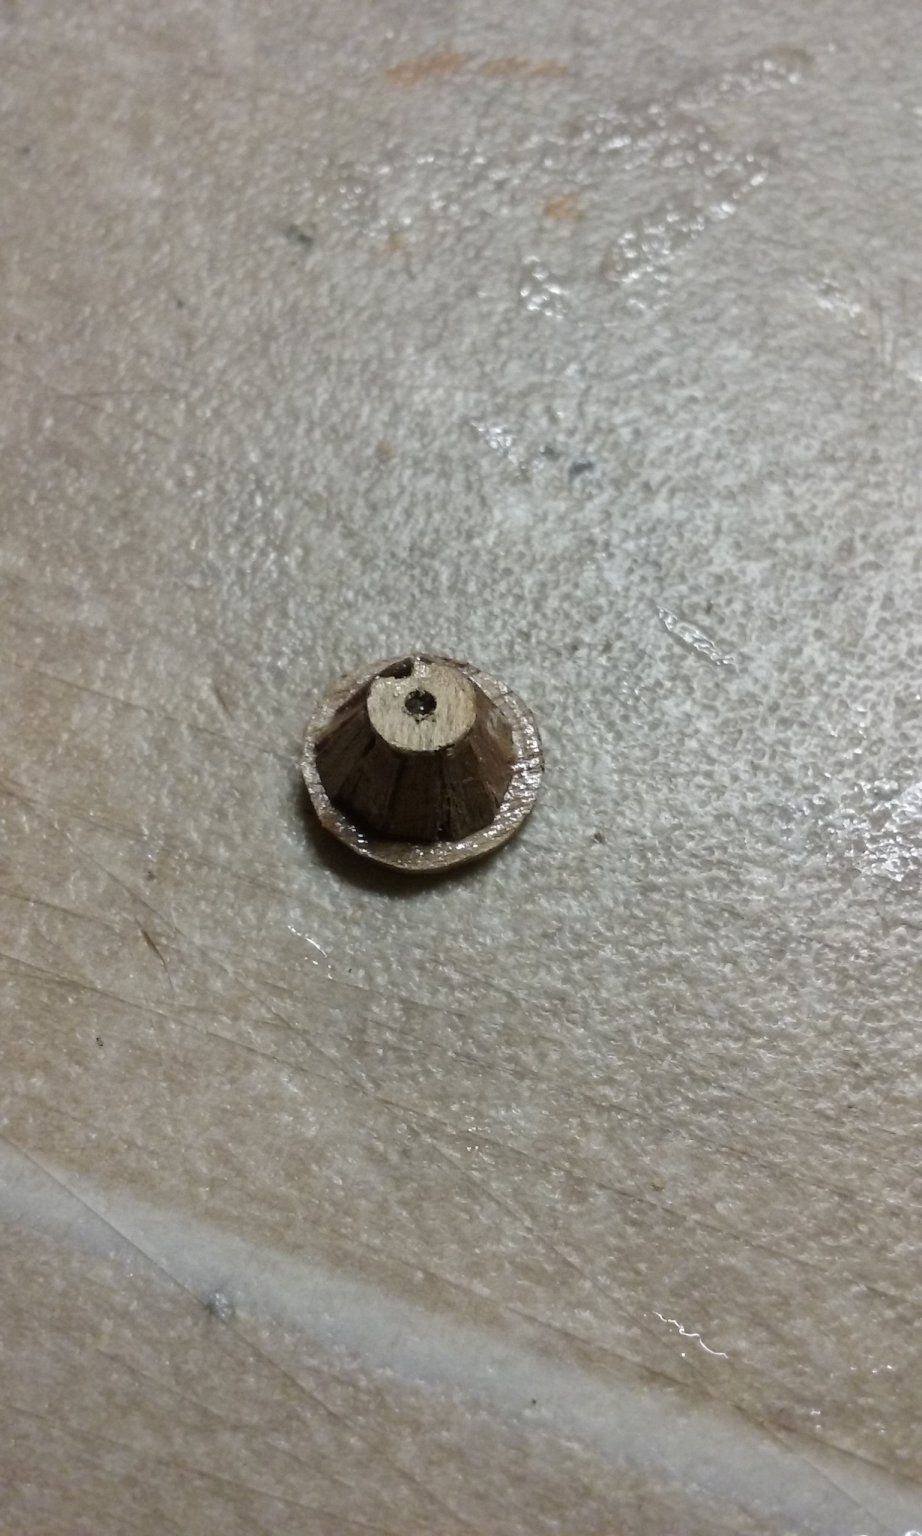
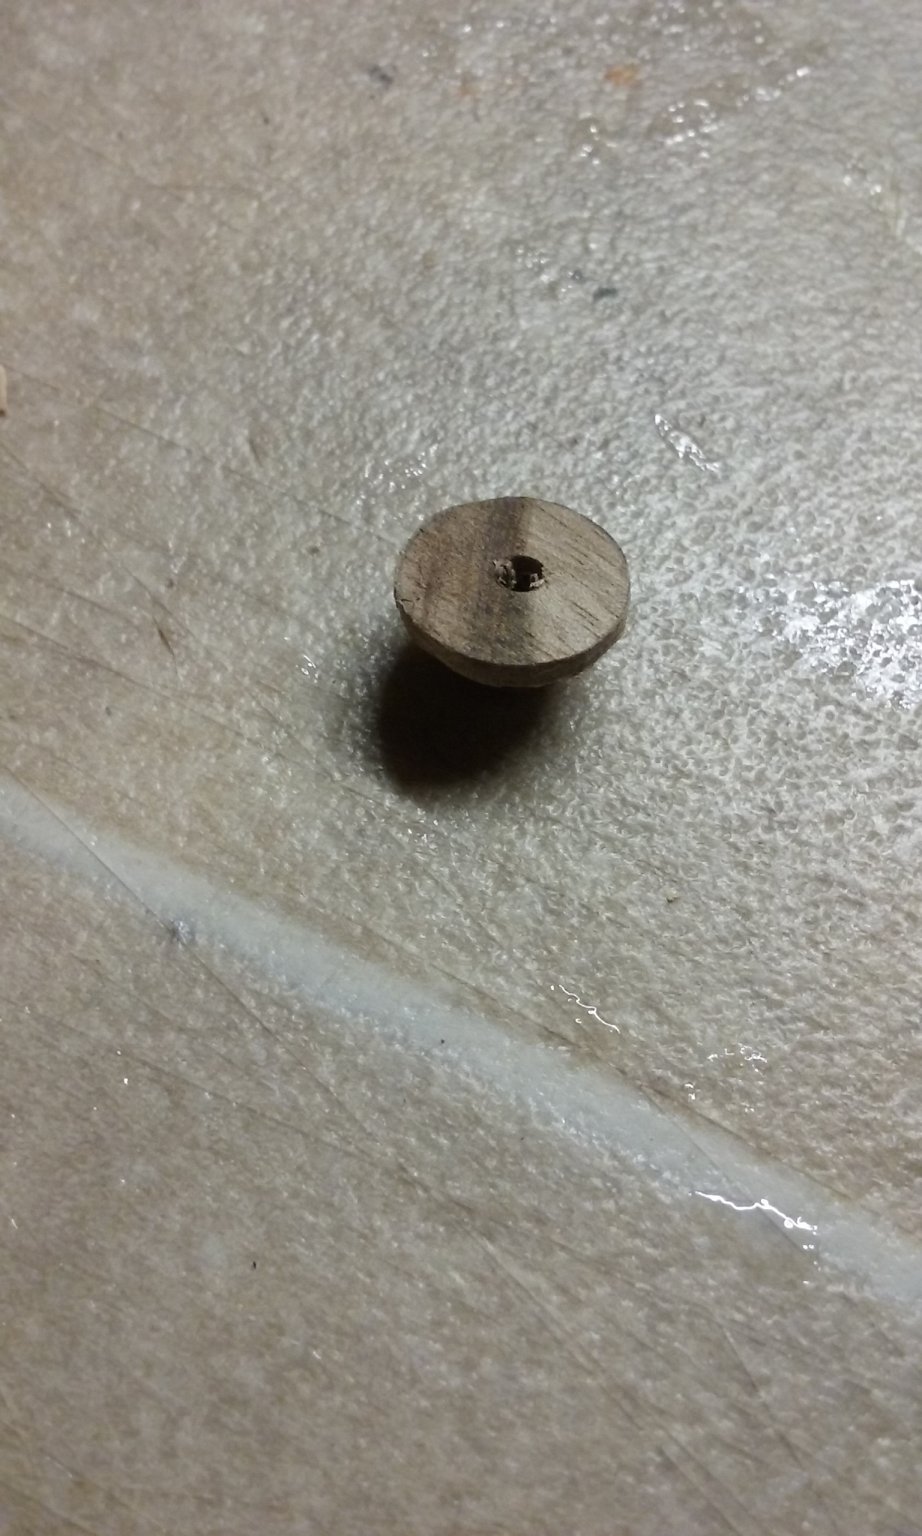
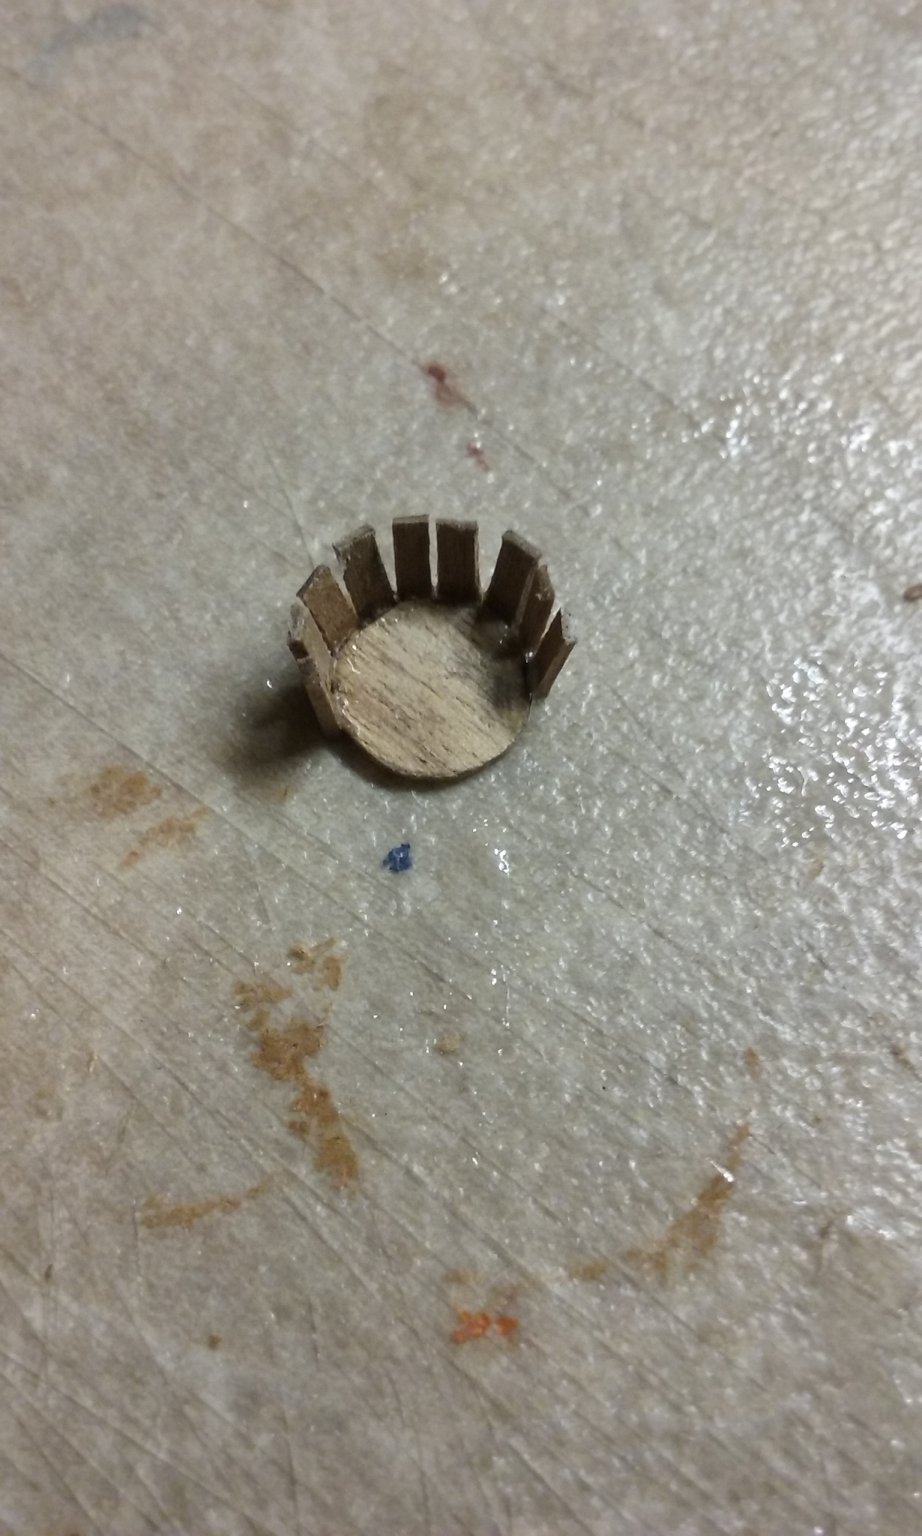
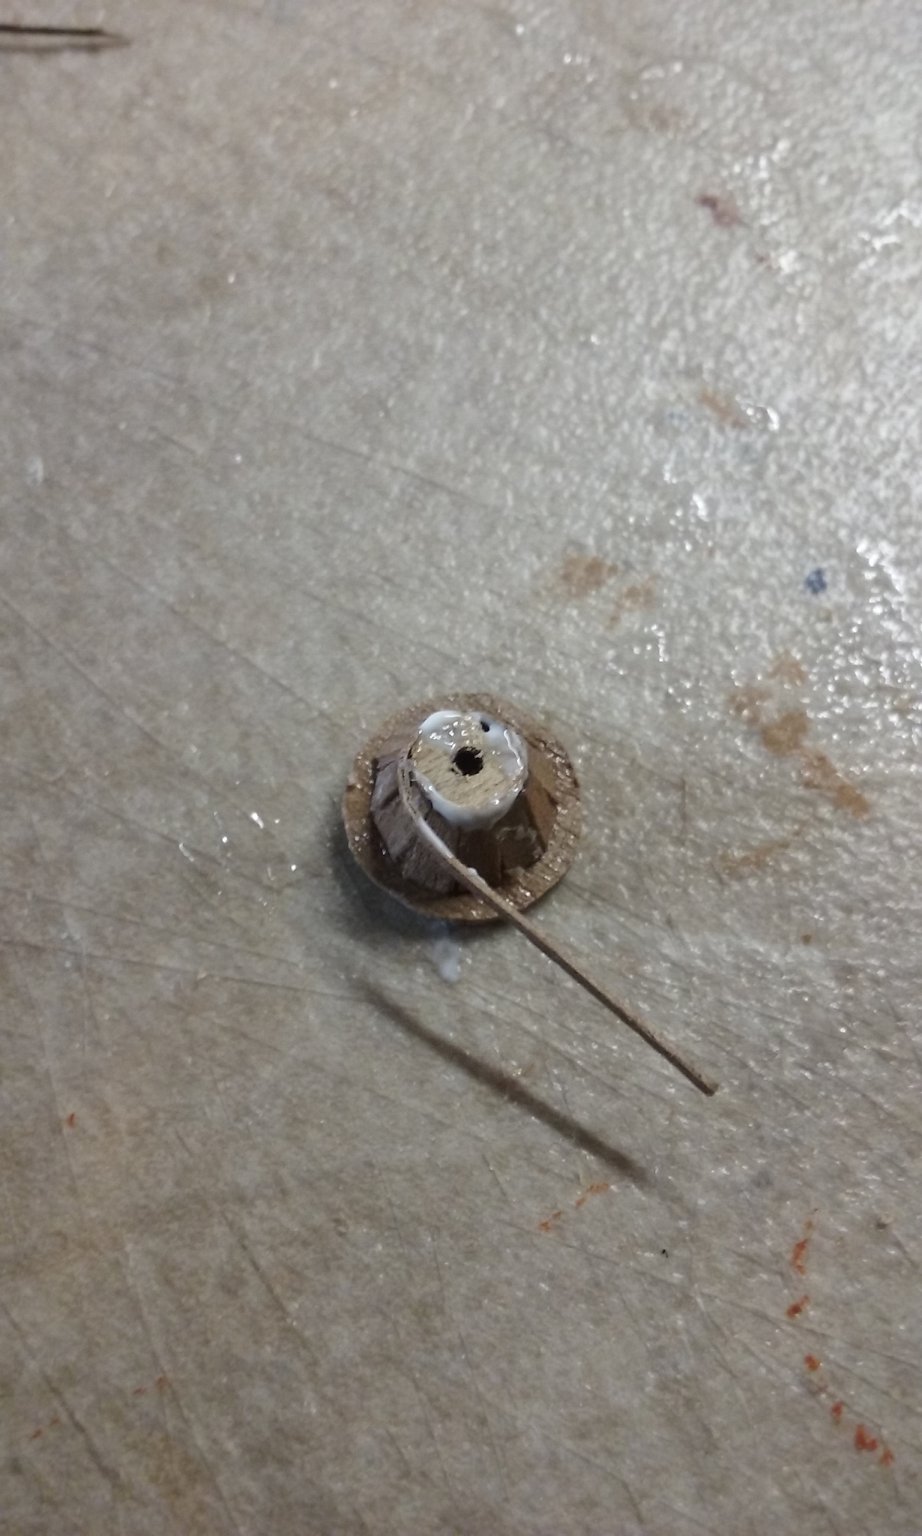
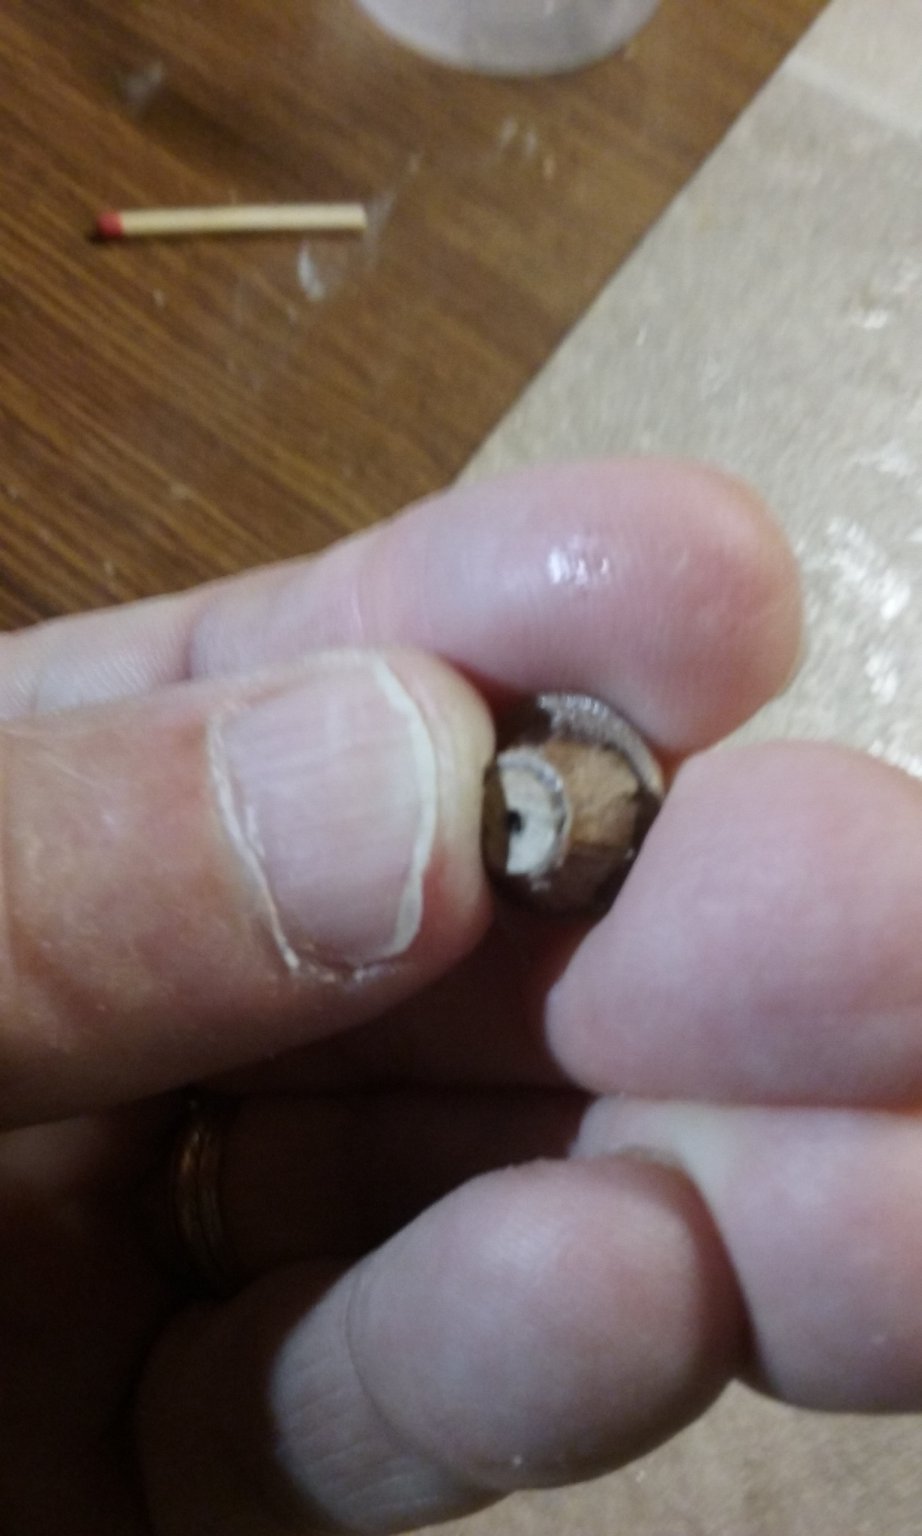
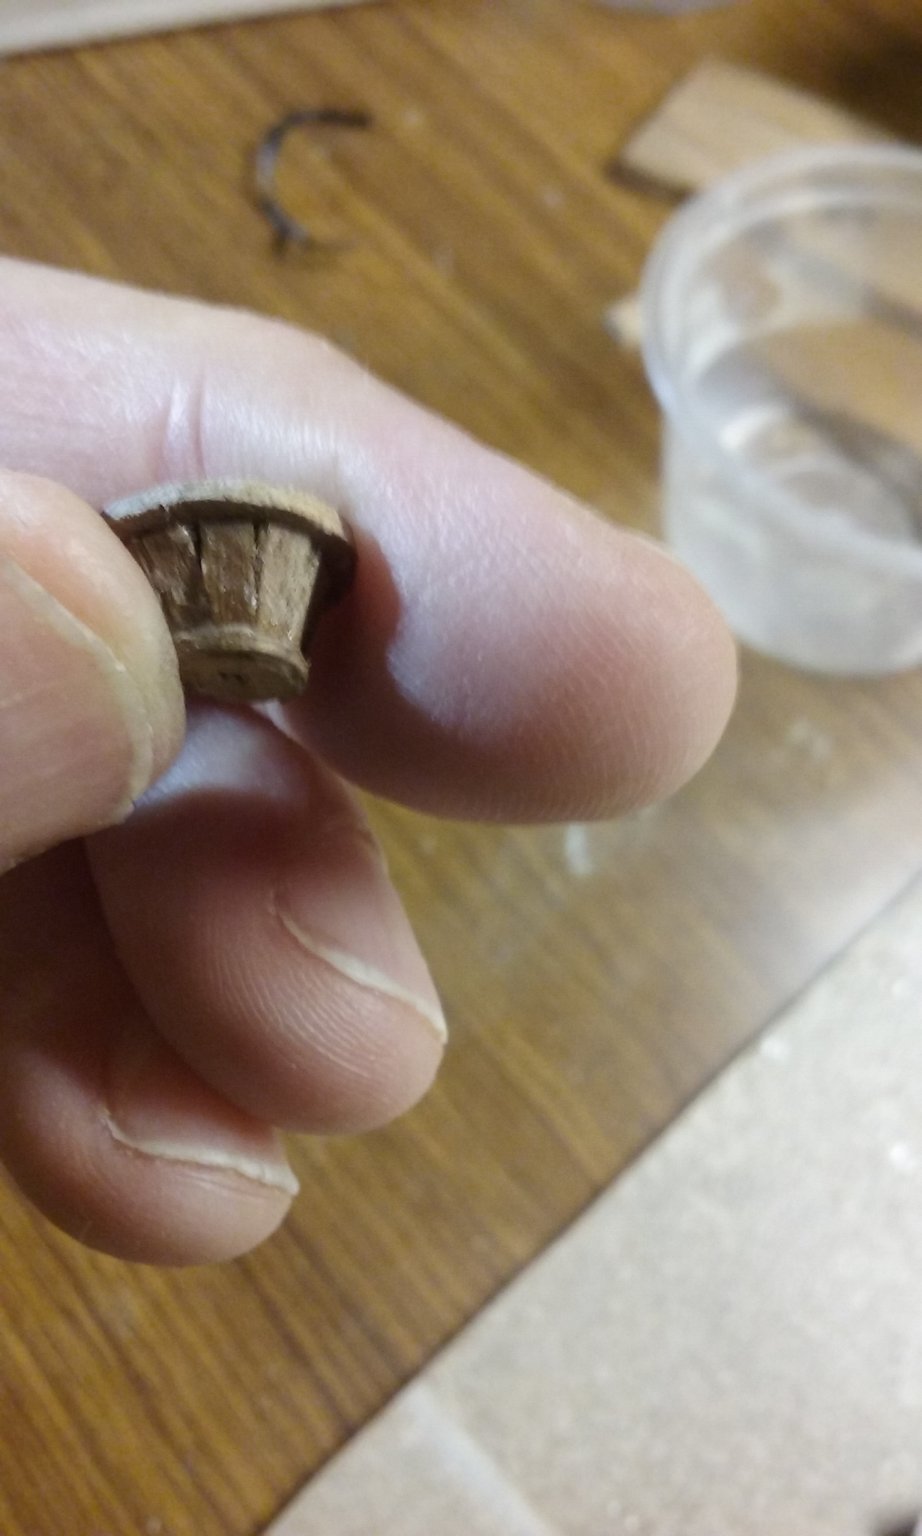
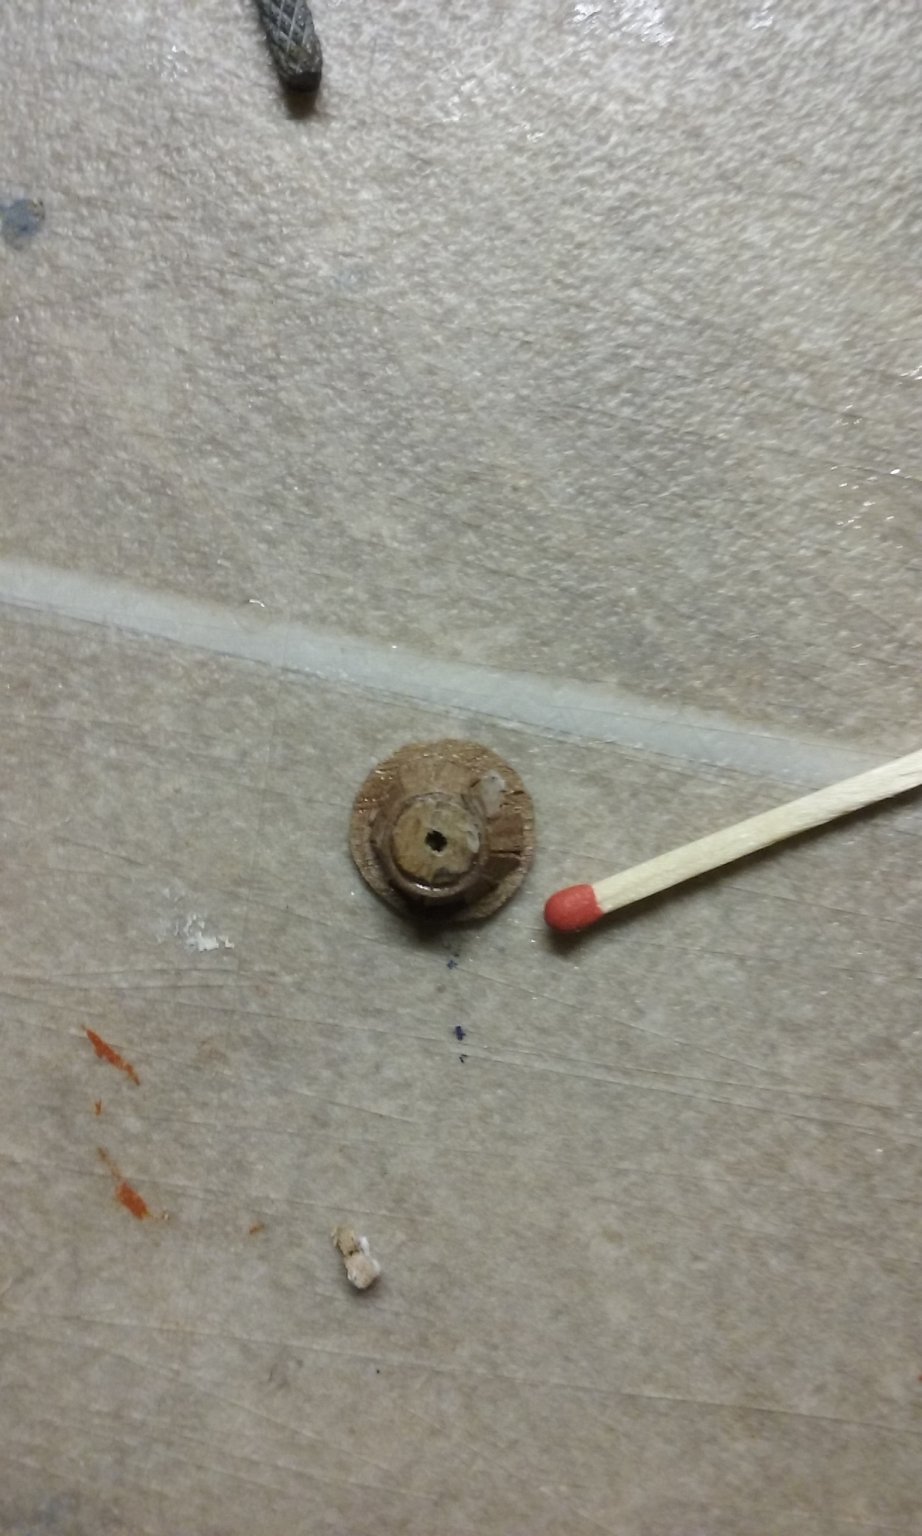
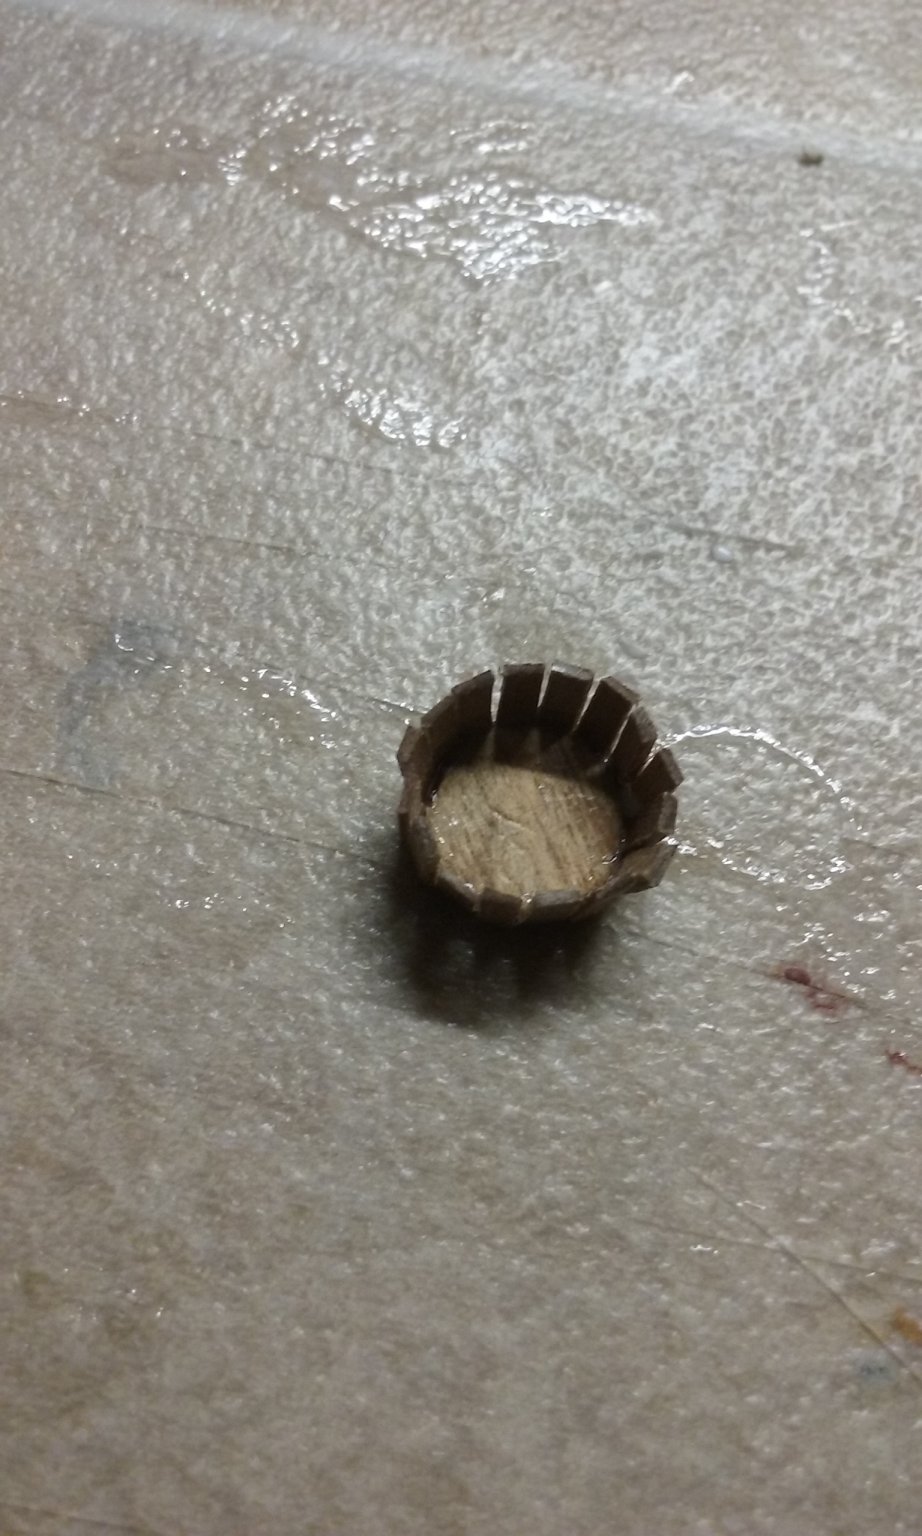
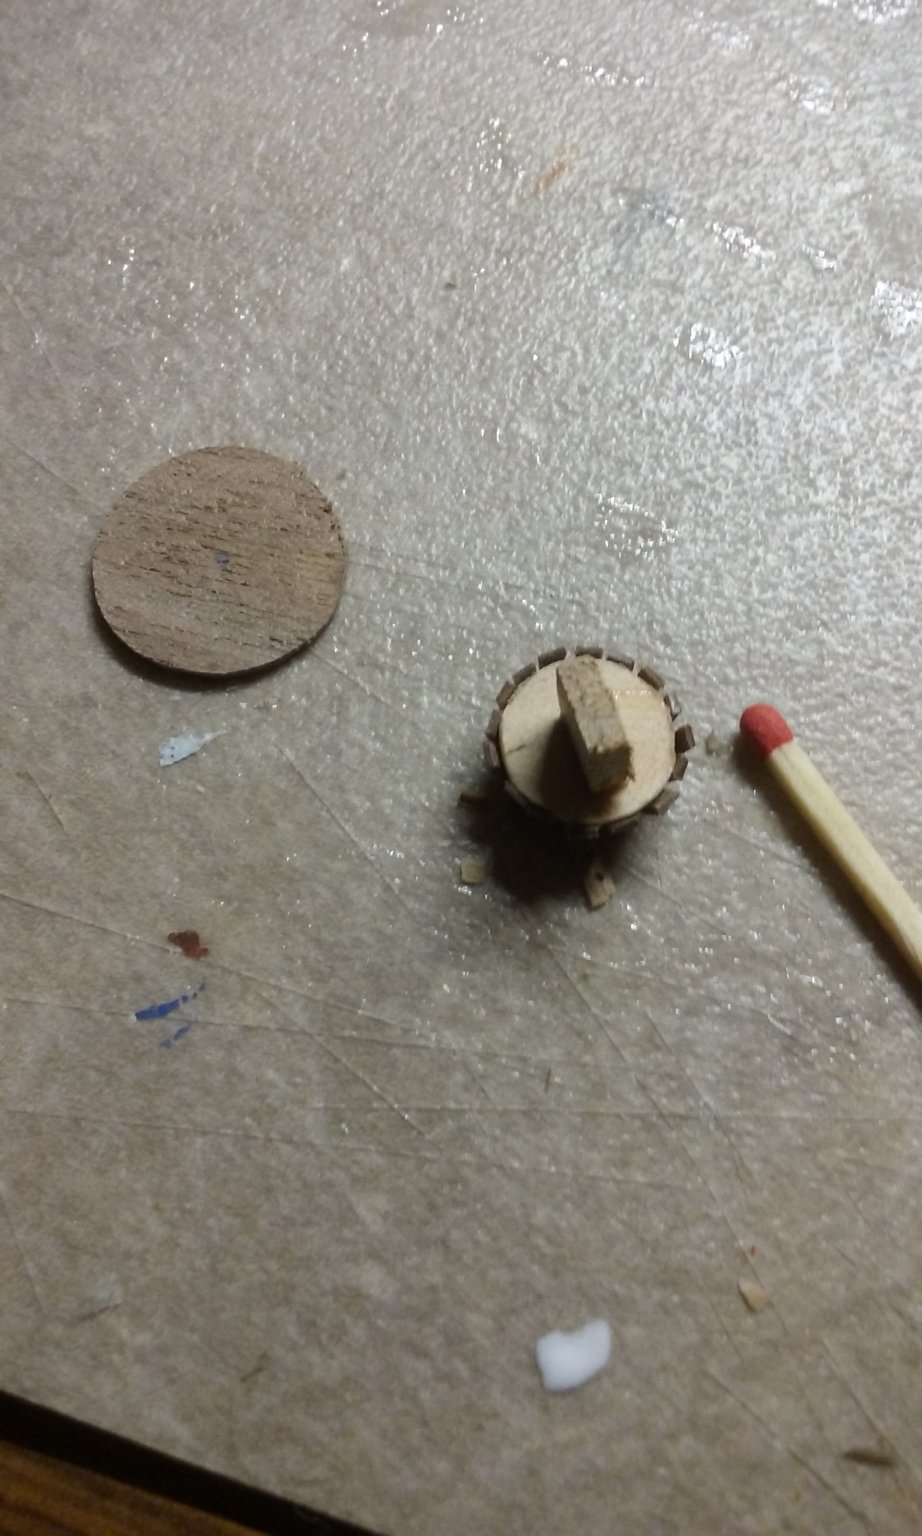
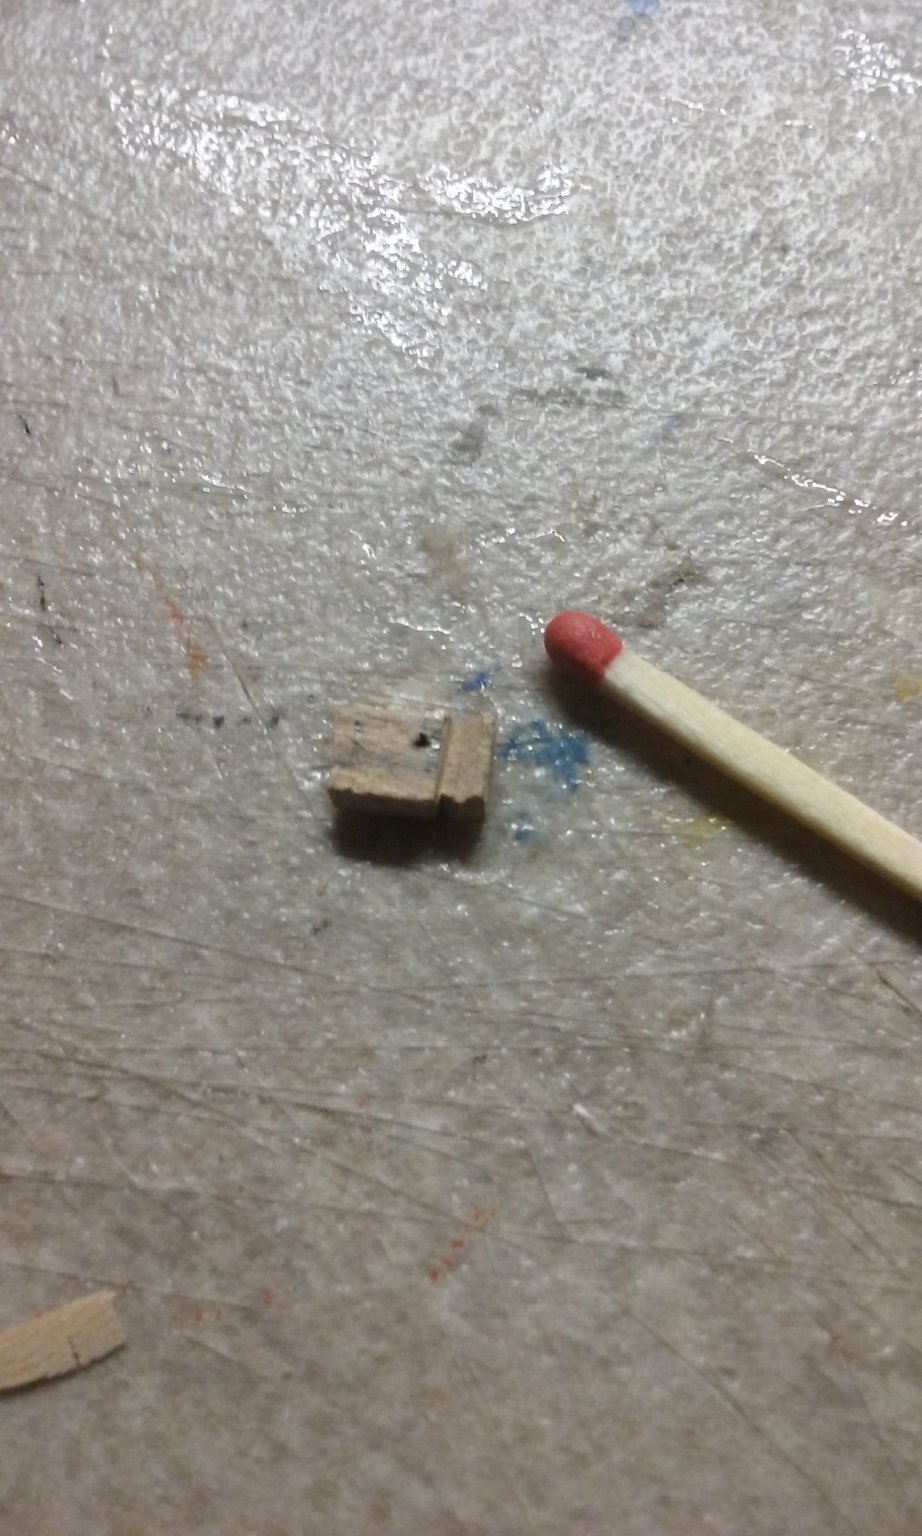
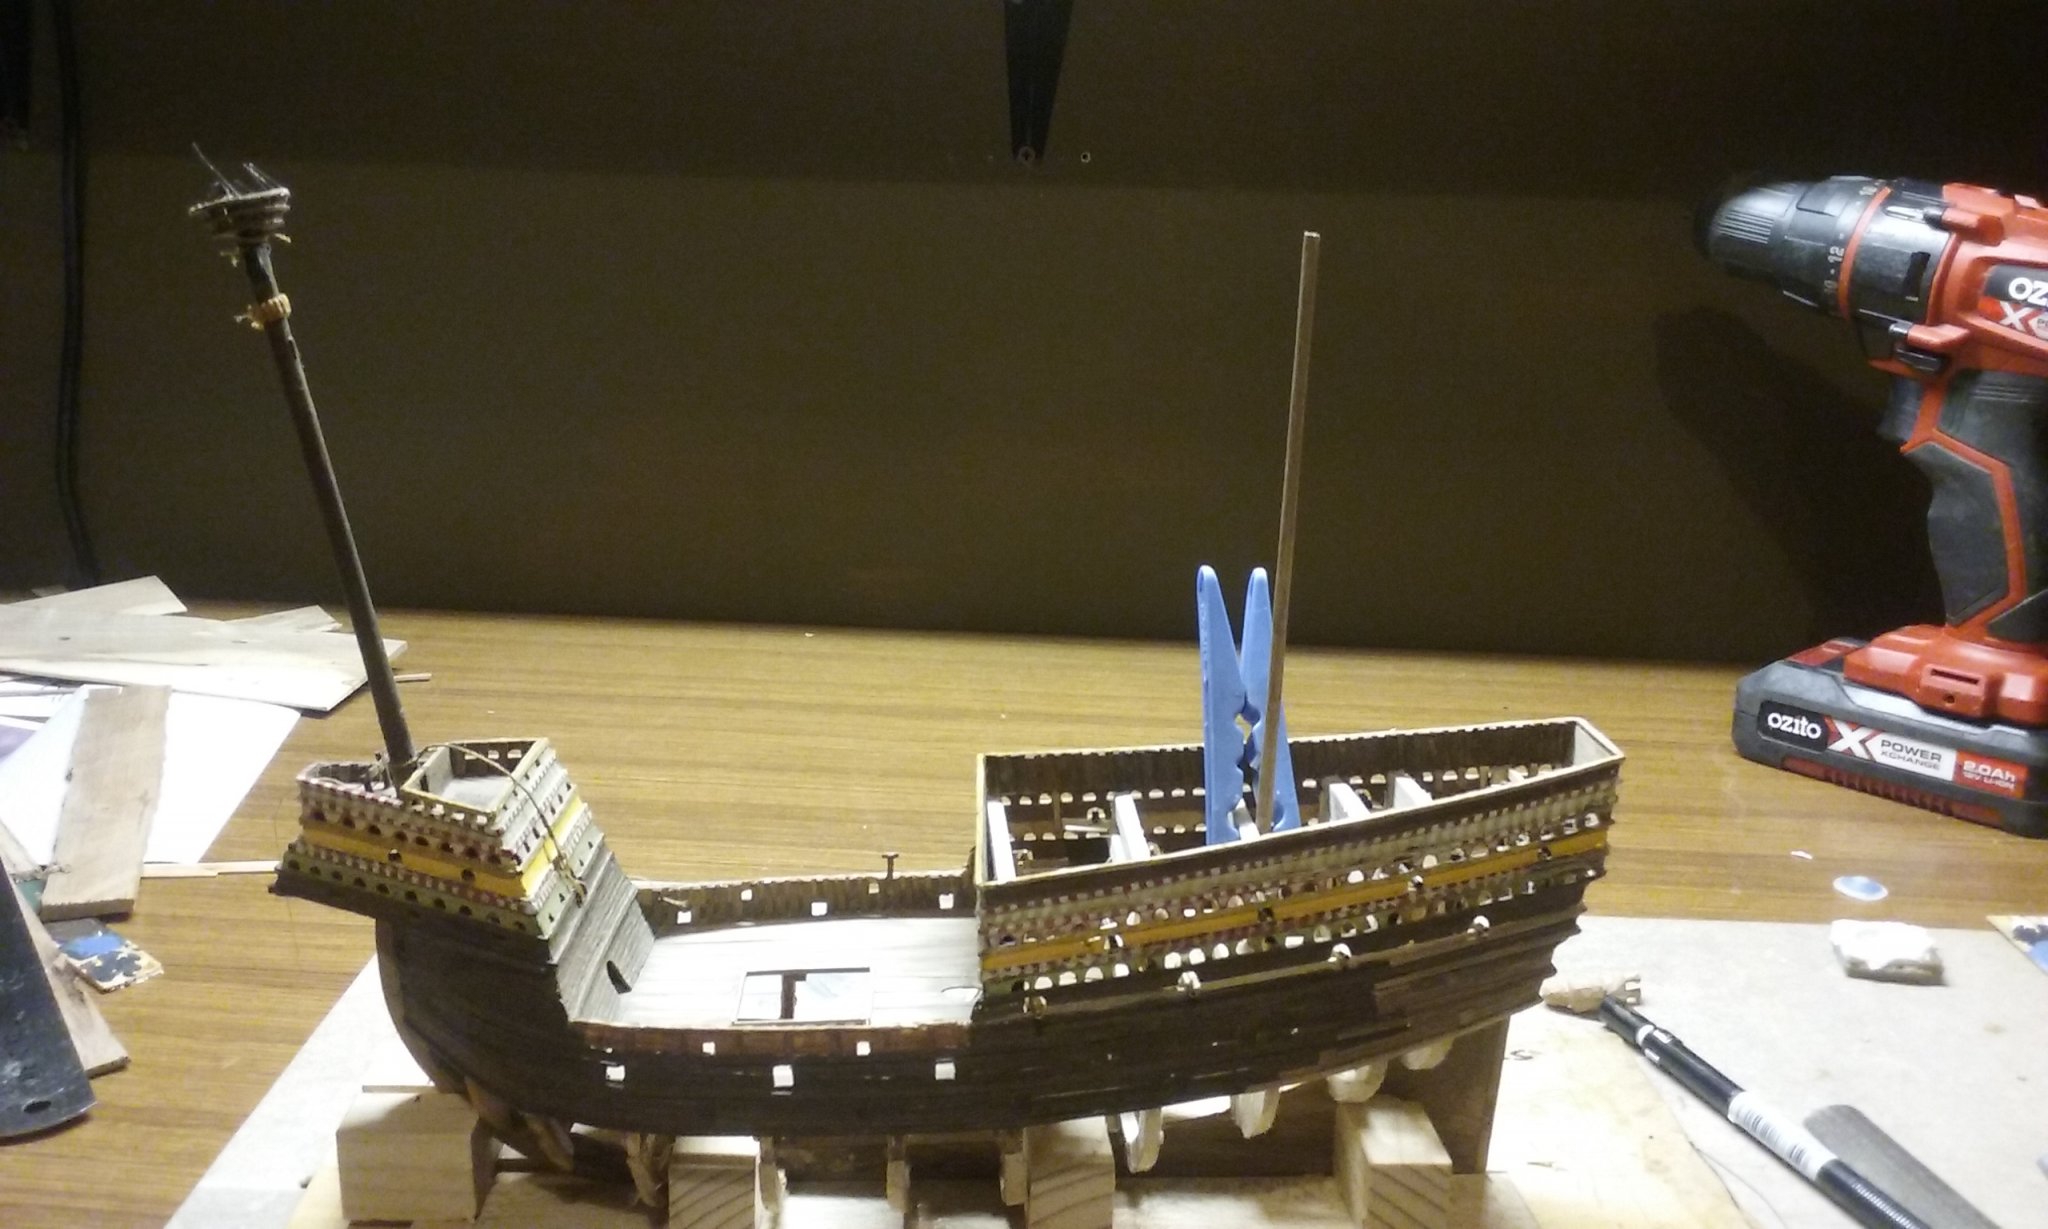
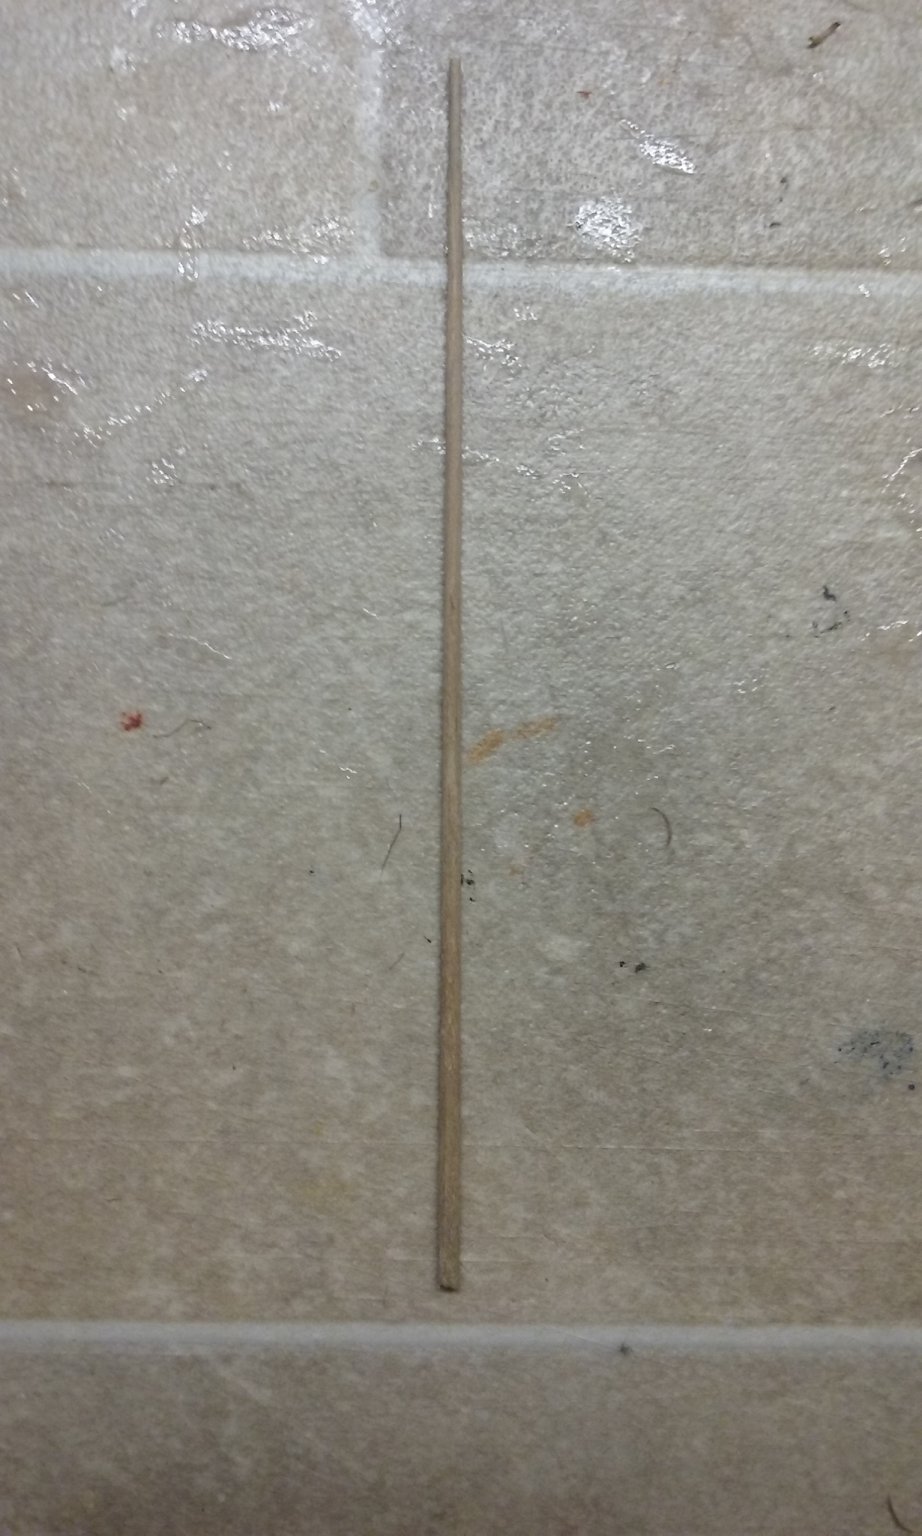
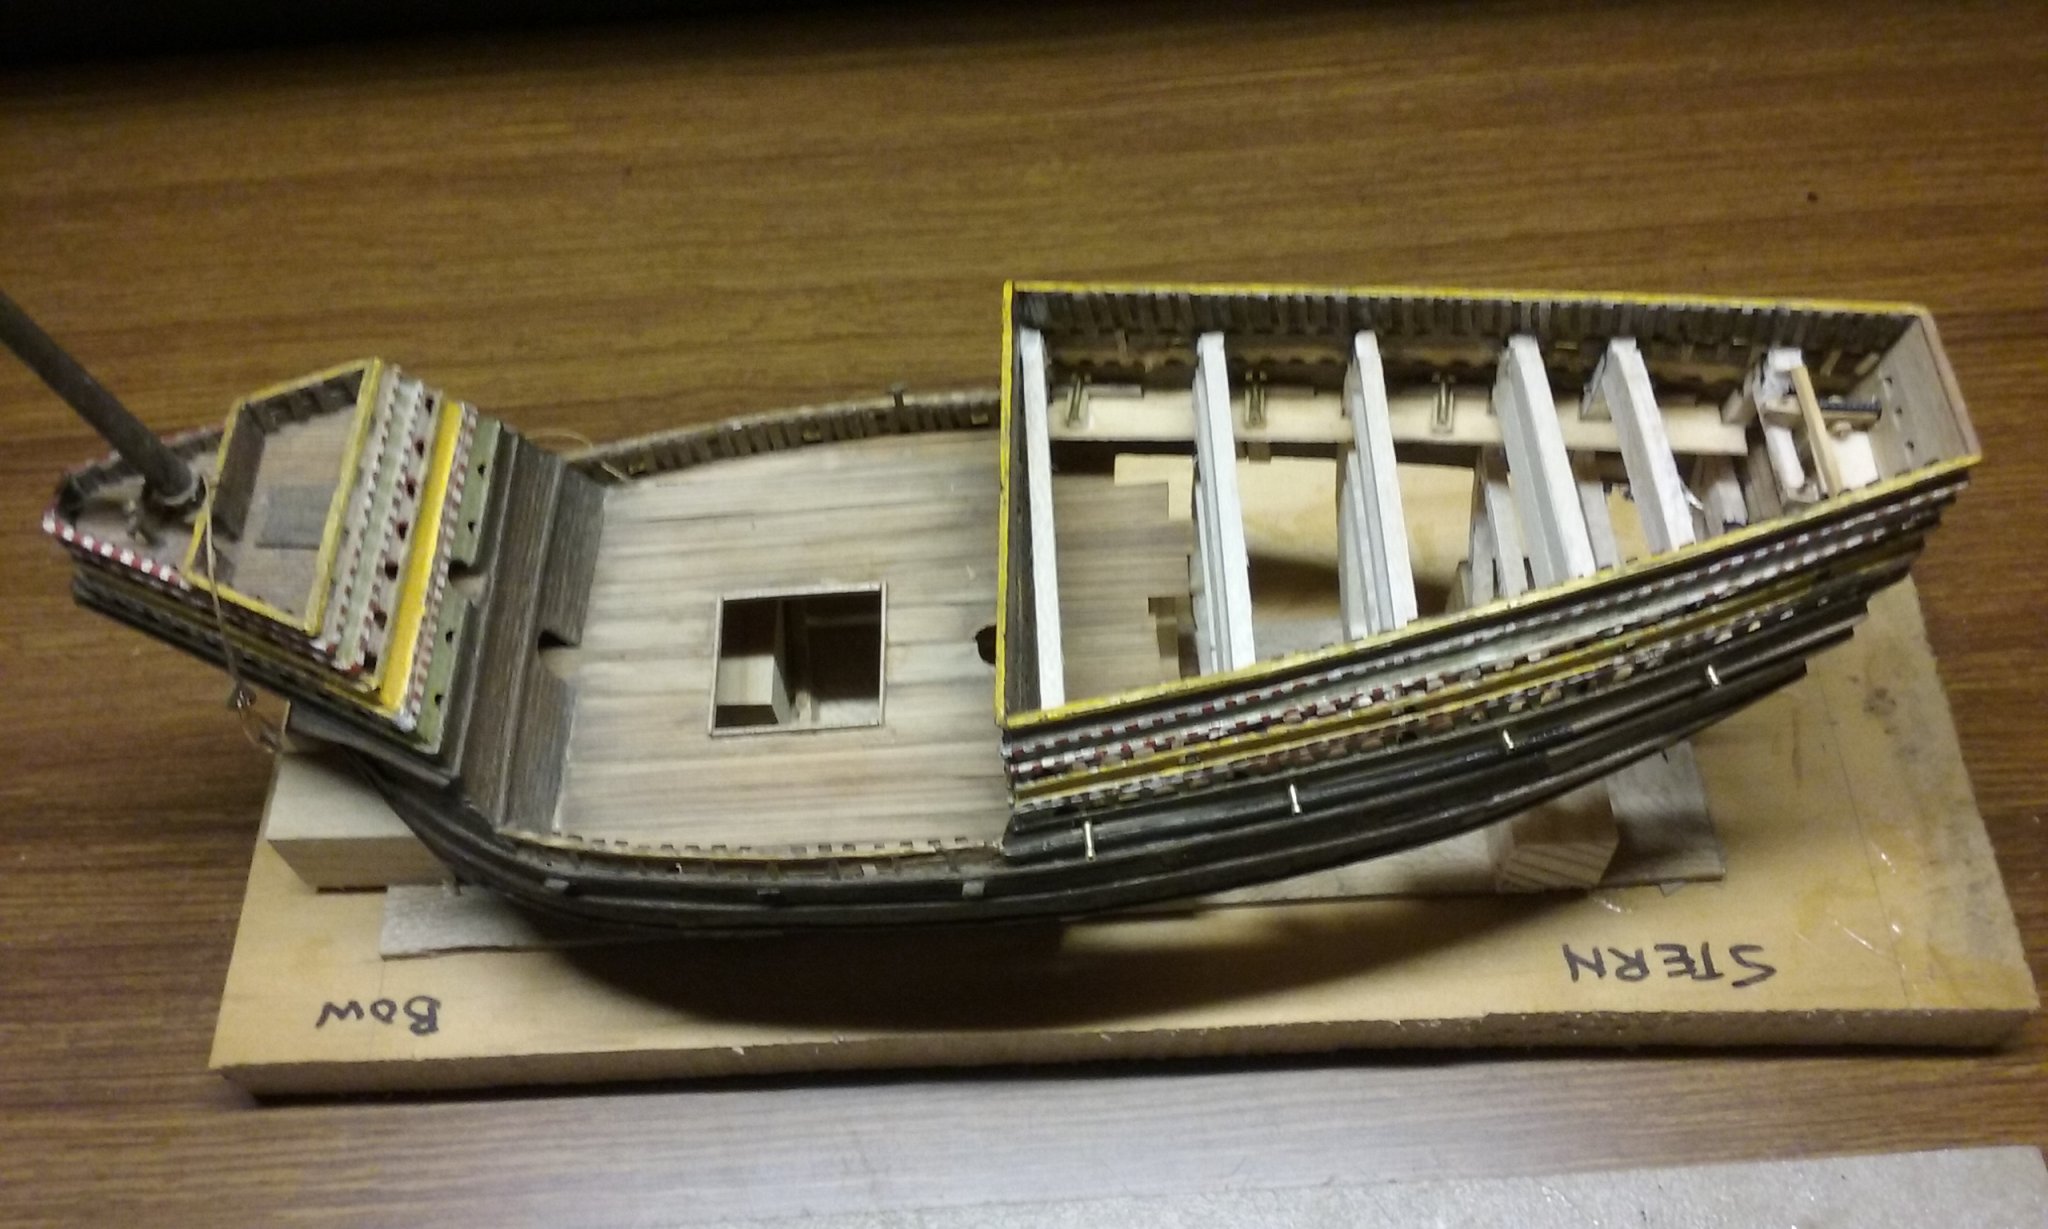
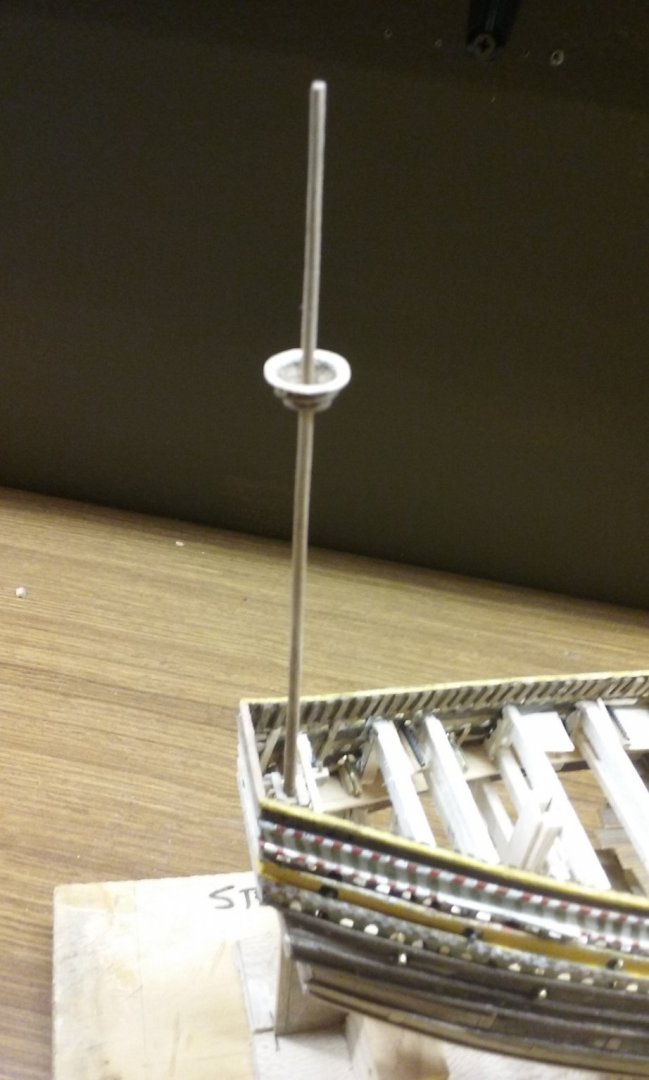
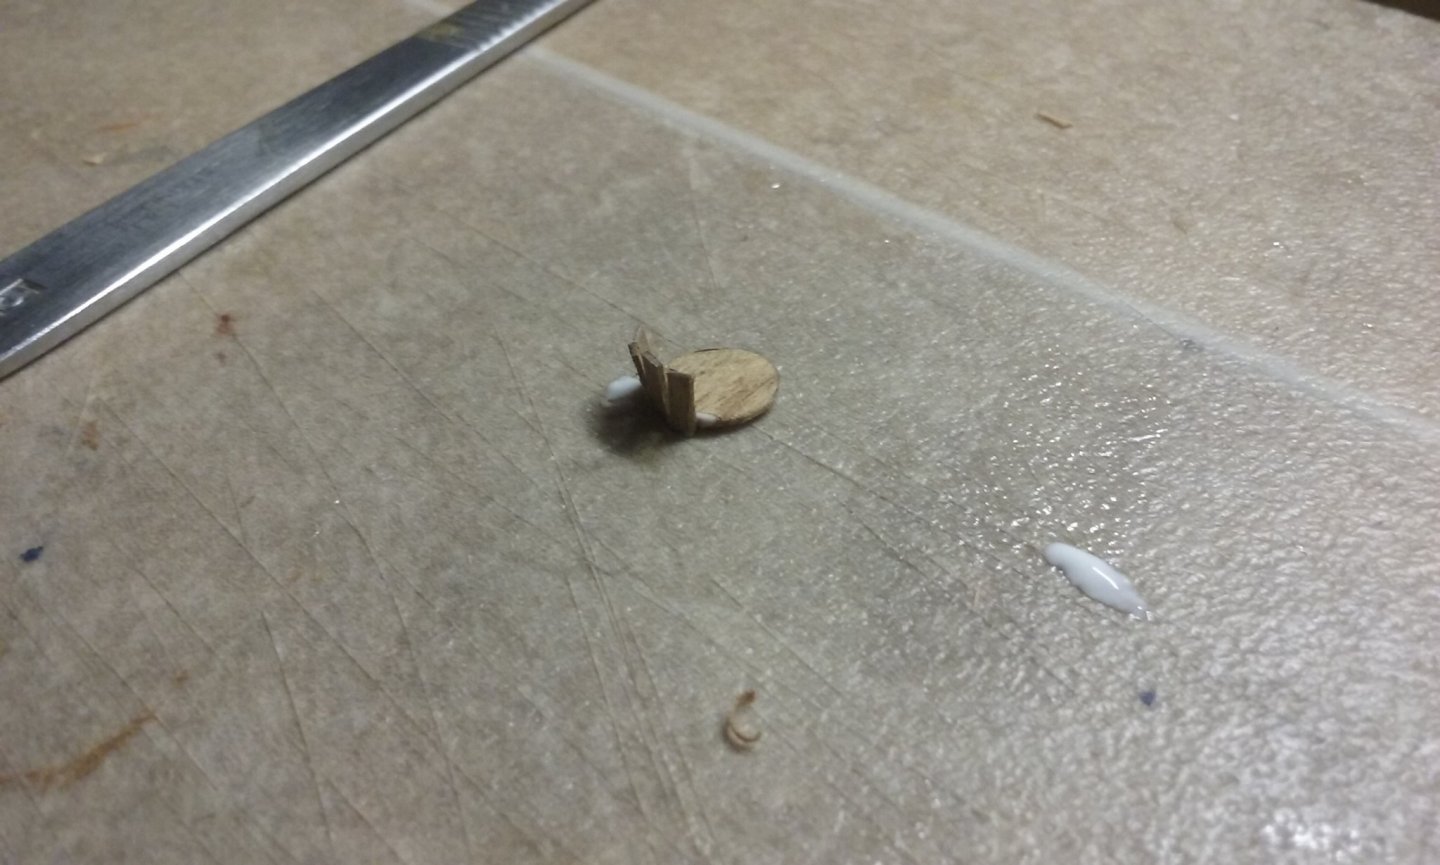
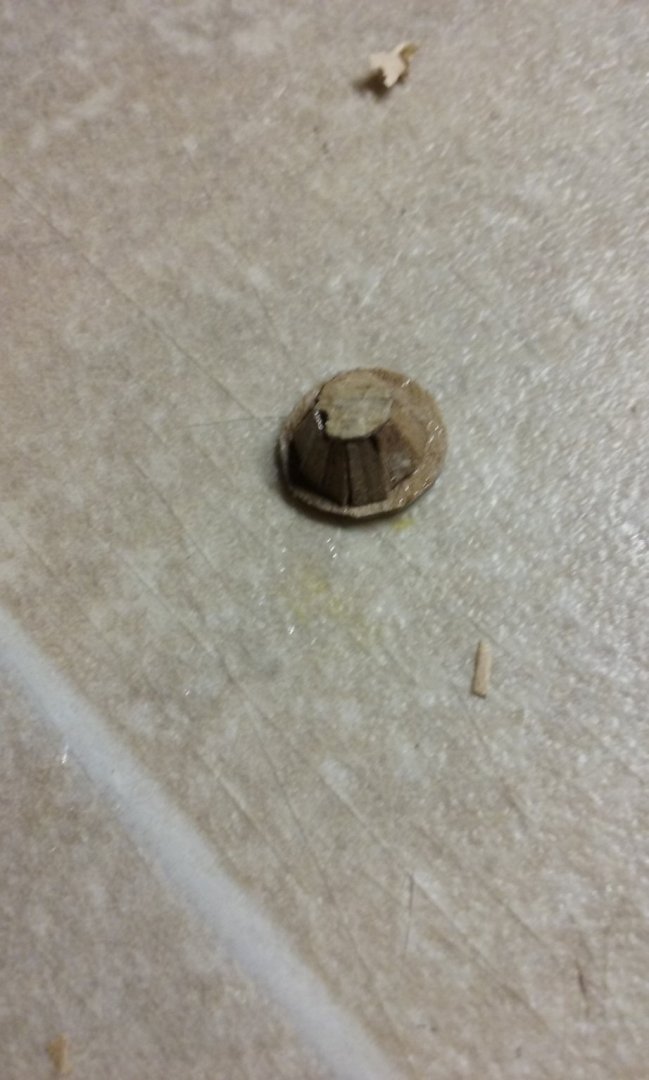
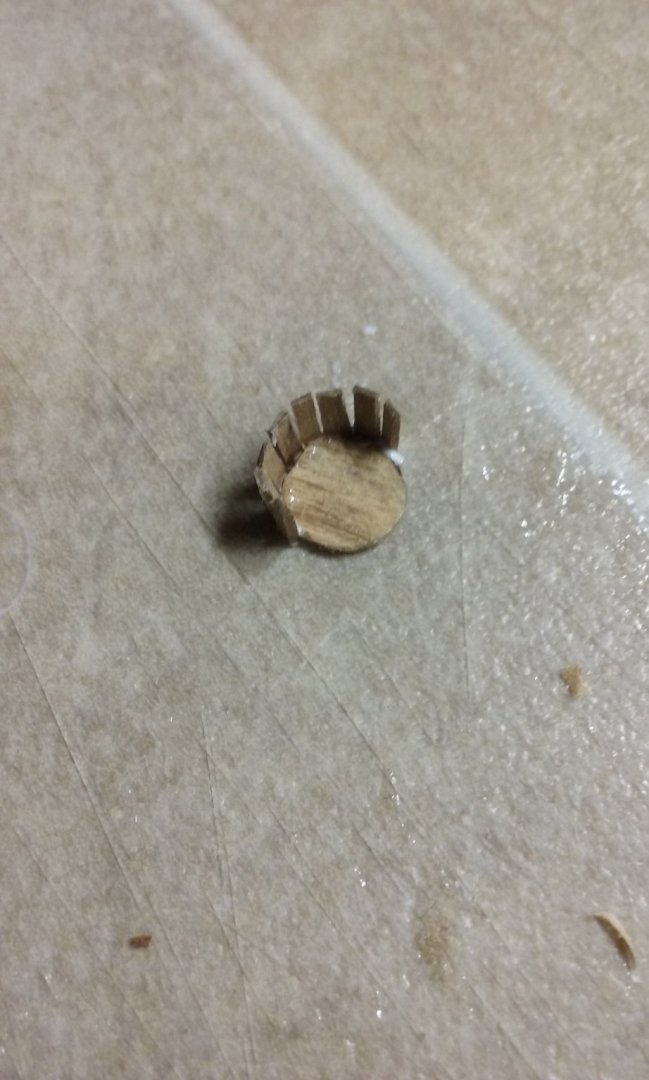
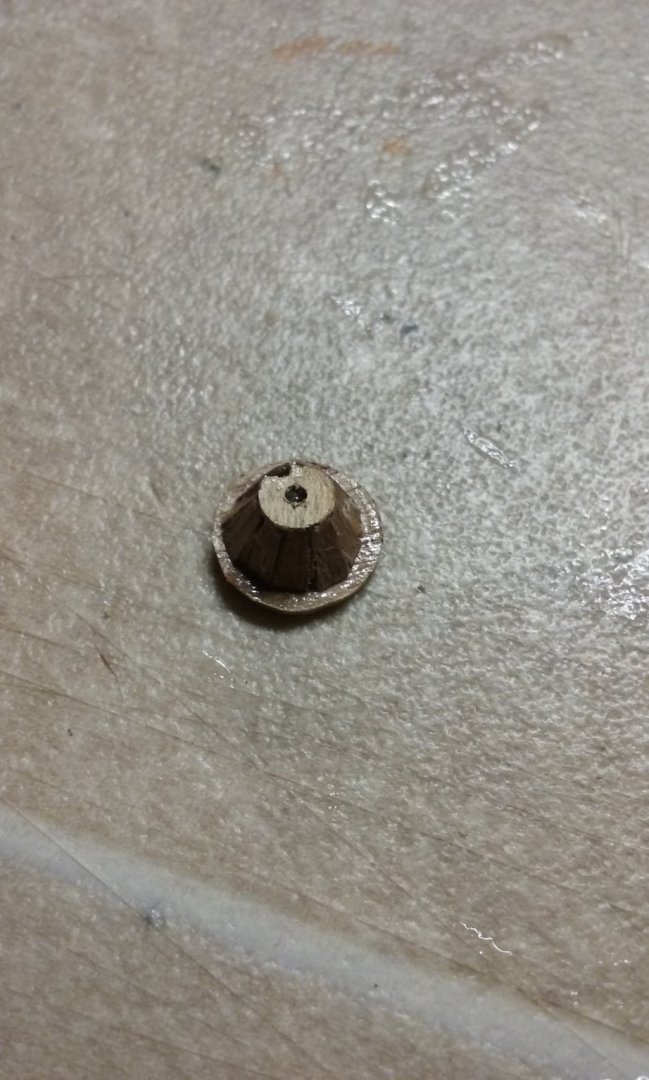
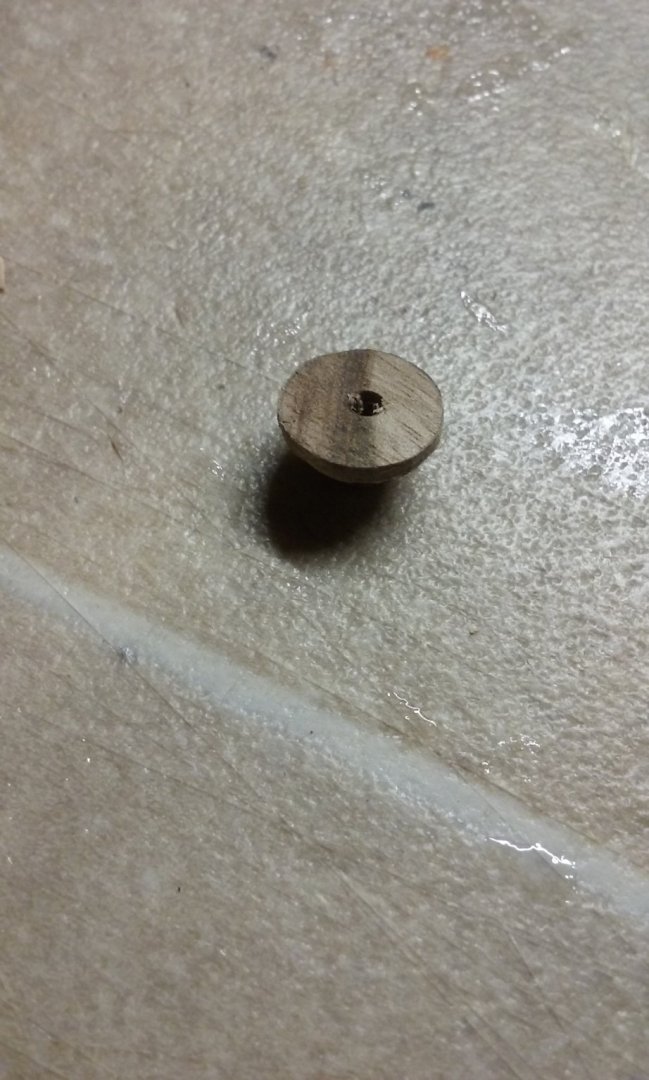
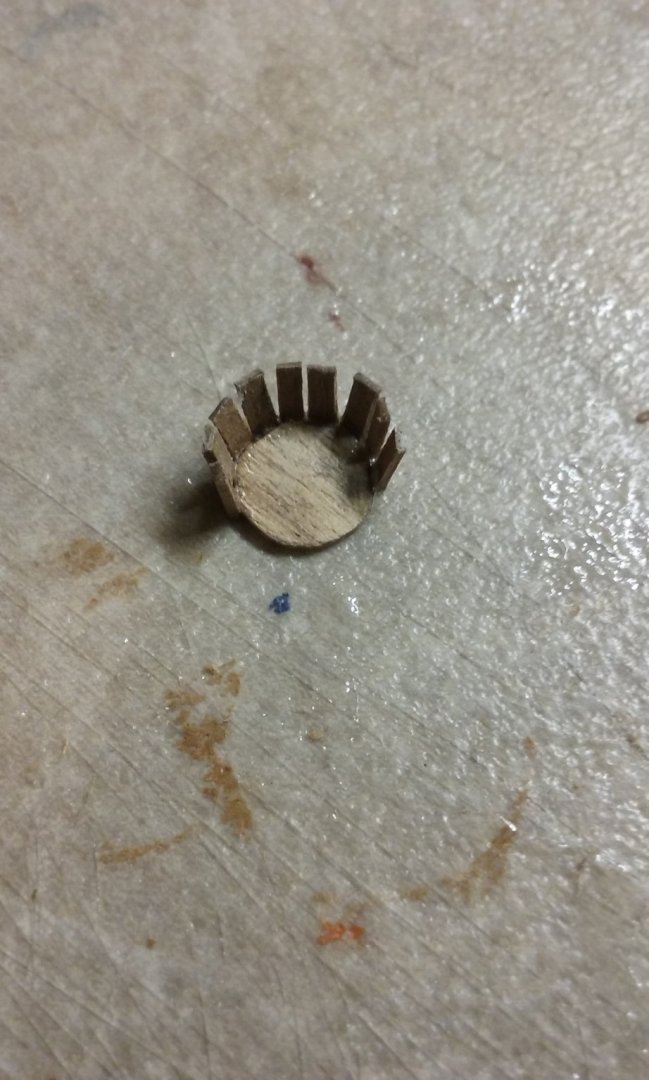
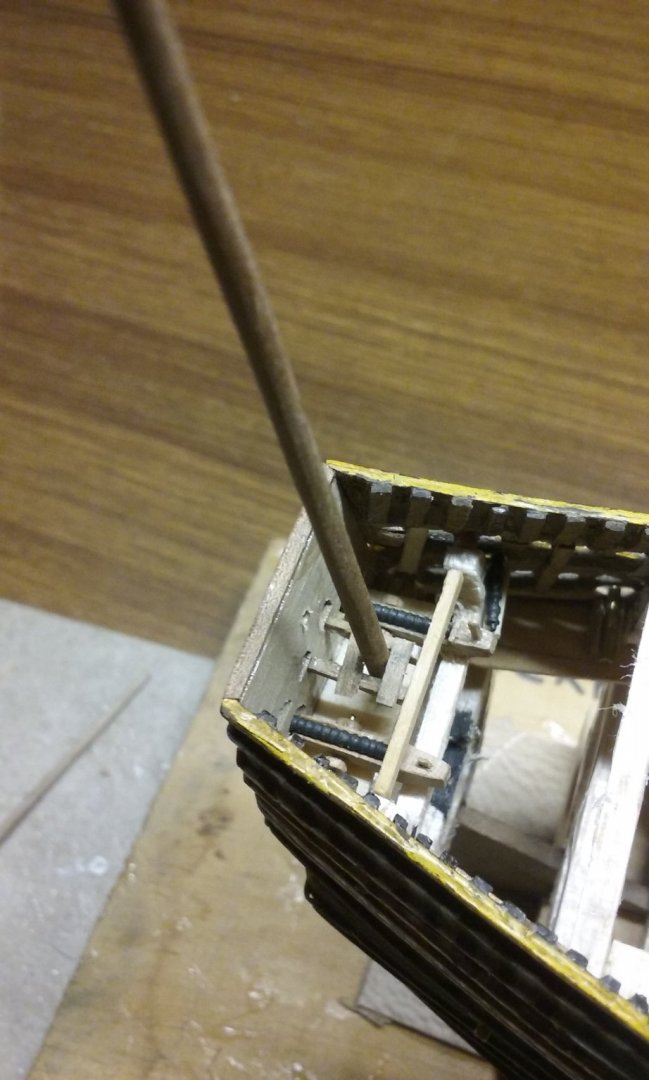
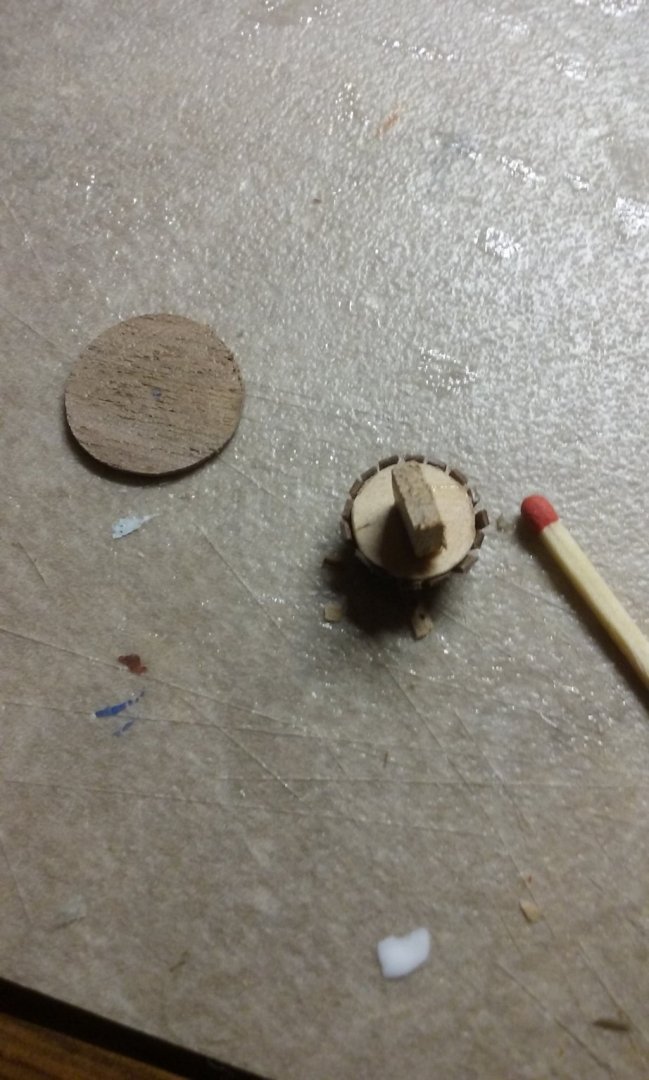
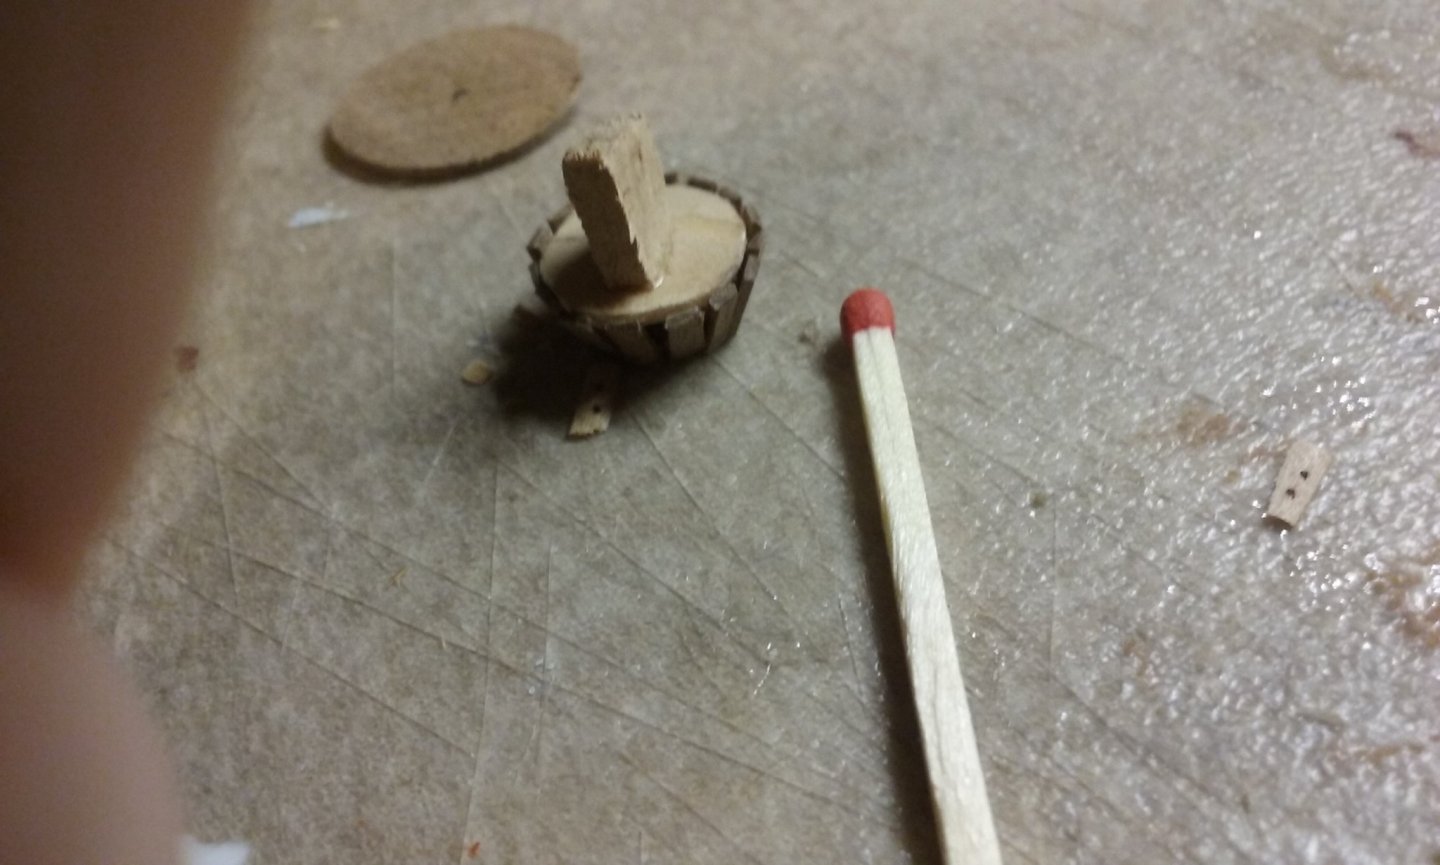
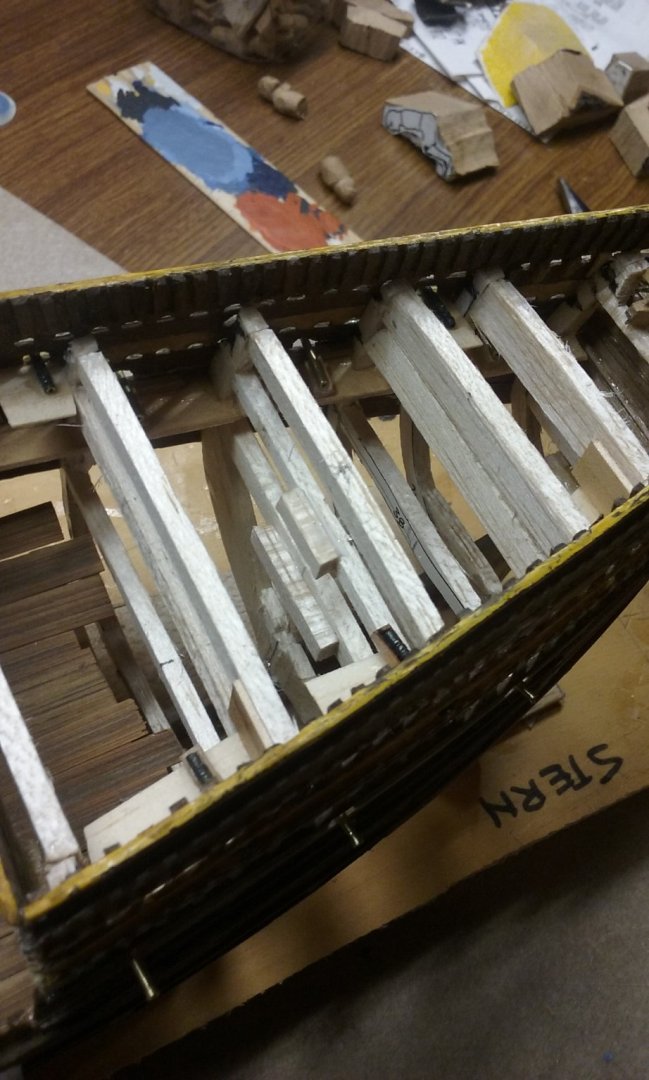
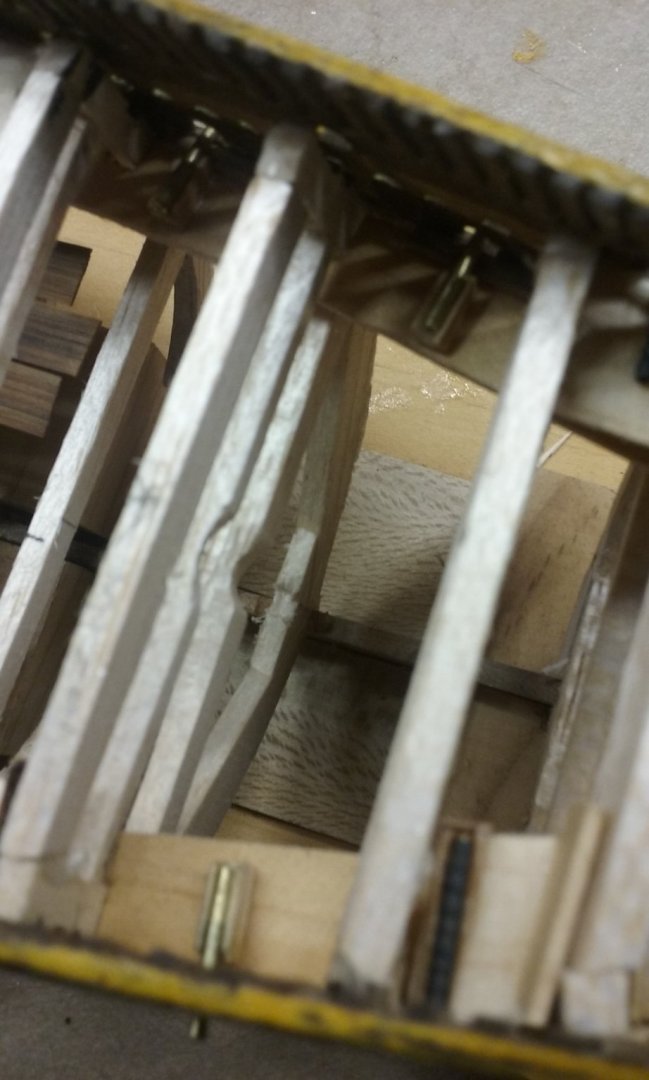
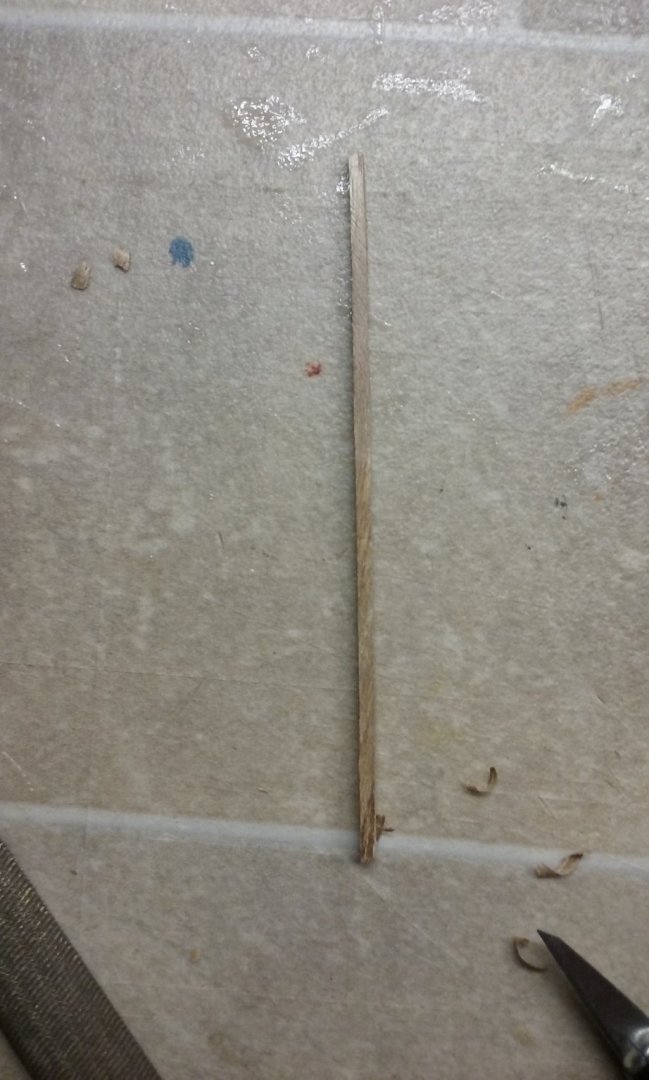
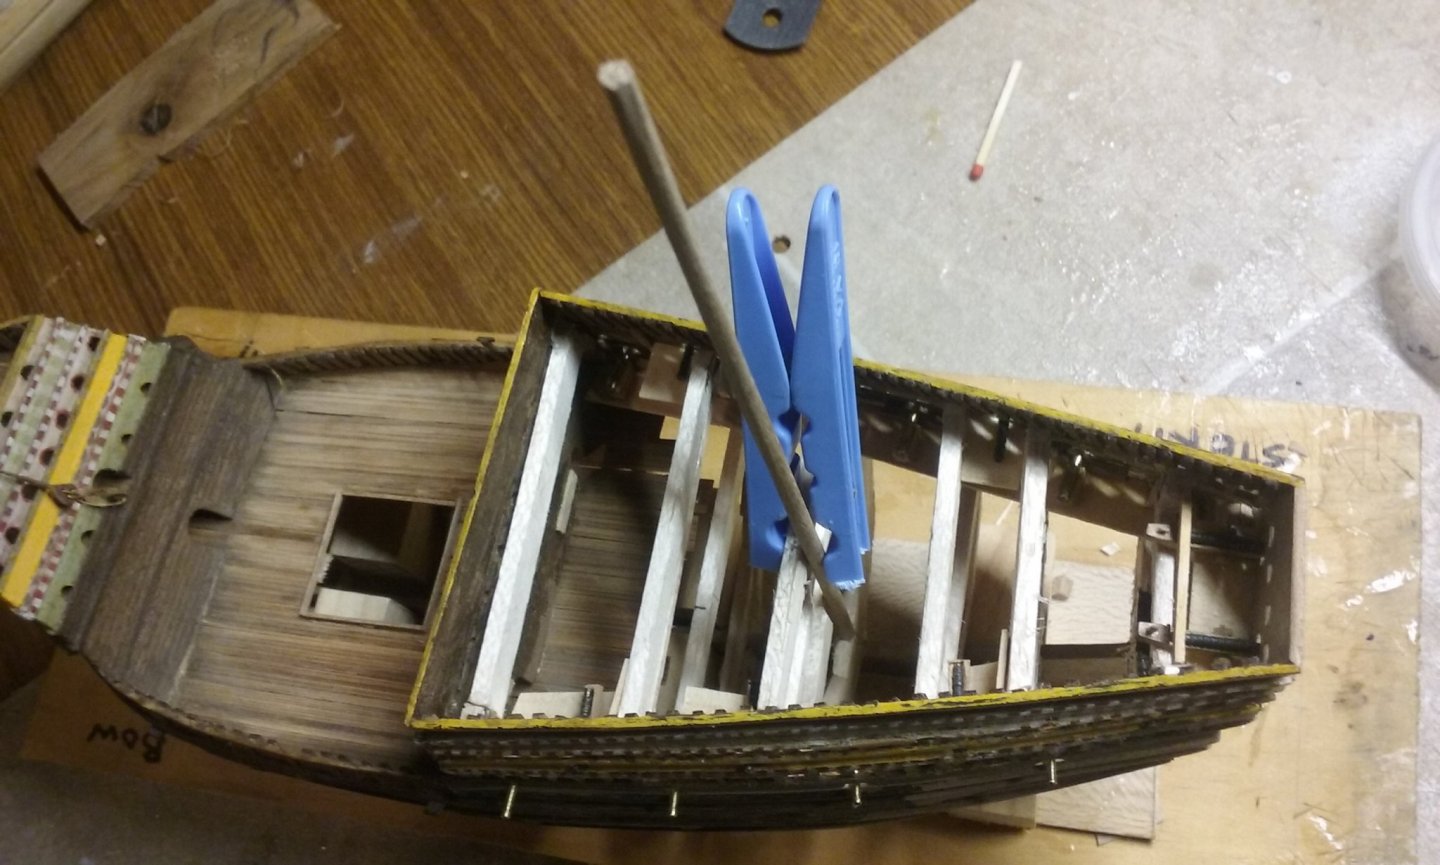
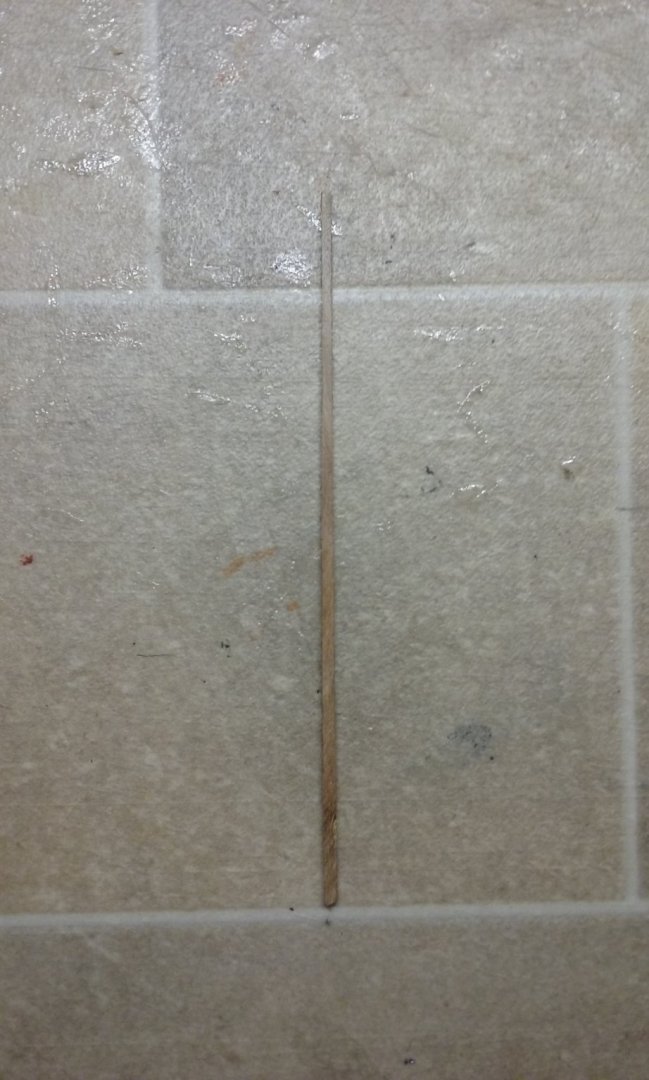
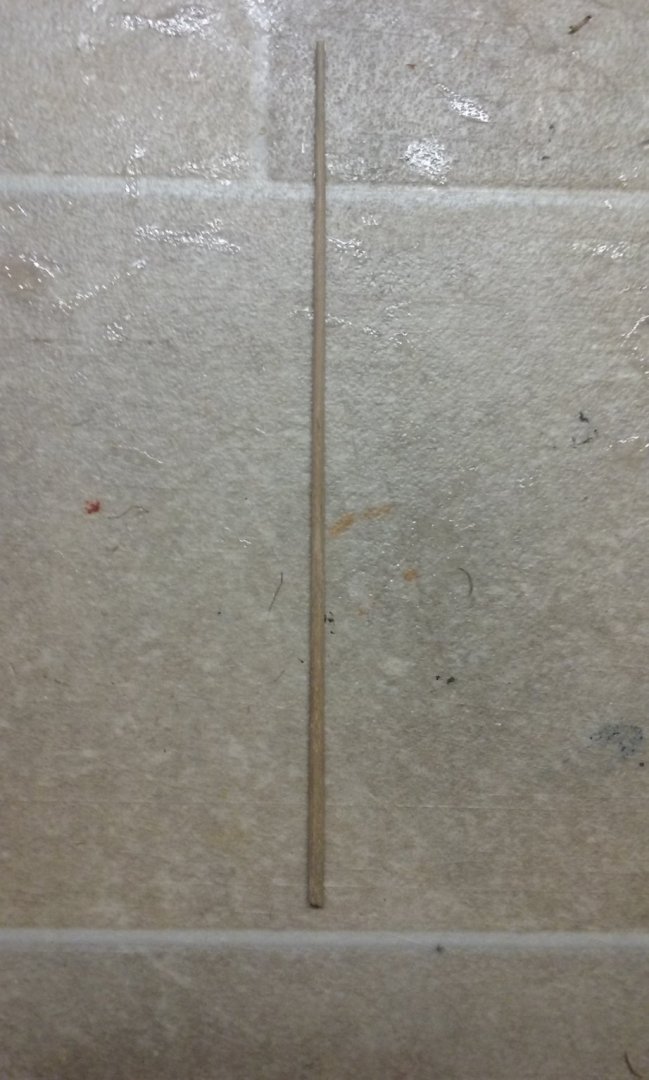
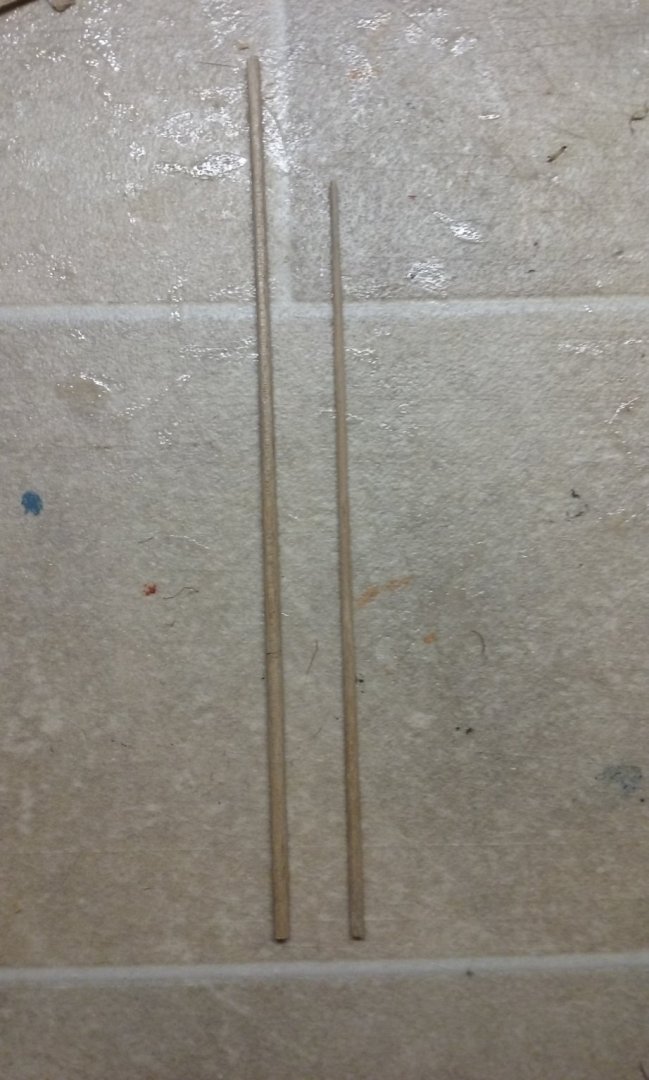
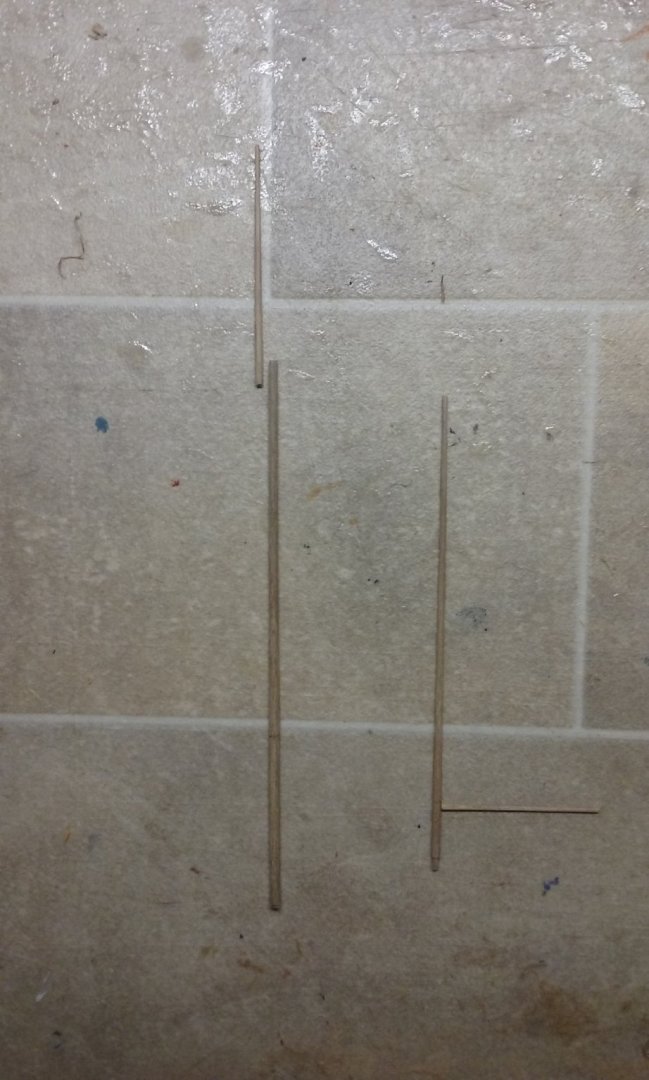
Some more progress. I really don't like fiddling around trying to get a mast to go down into the mast step once the deck is in place, so I made a sort of "channel" for the mizzen As the bonaventure doesn't go down so far I just put in a set of mast partners for it. Bonaventure dry fitted: And both mizzen and bonaventure Constructing the fighting top for the bonaventure mizzen: A hole drilled in the bottom for the mast to go through. When I first built the model I didn't know about crosstrees and trestletrees. The other (existing fore and main) masts don't have them, so I'm not putting them on the new ones. And a disc on top. I'll be carving out the middle to form a ring as the upper surface of the top. Reinforcing ring at the bottom - great gobs of glue, I'm afraid. Wiped off later: And around the middle: More photos when I've completed it. Fighting top for the mizzen: and I've made a "master" to get it circular. I'm hoping it works. That other disc will have the middle carved out to form the ring around the upper surface of the top. More to come as I make more progress. Steven


- 740 replies
-
- 13
-
-
- Tudor
- restoration
- (and 4 more)
-
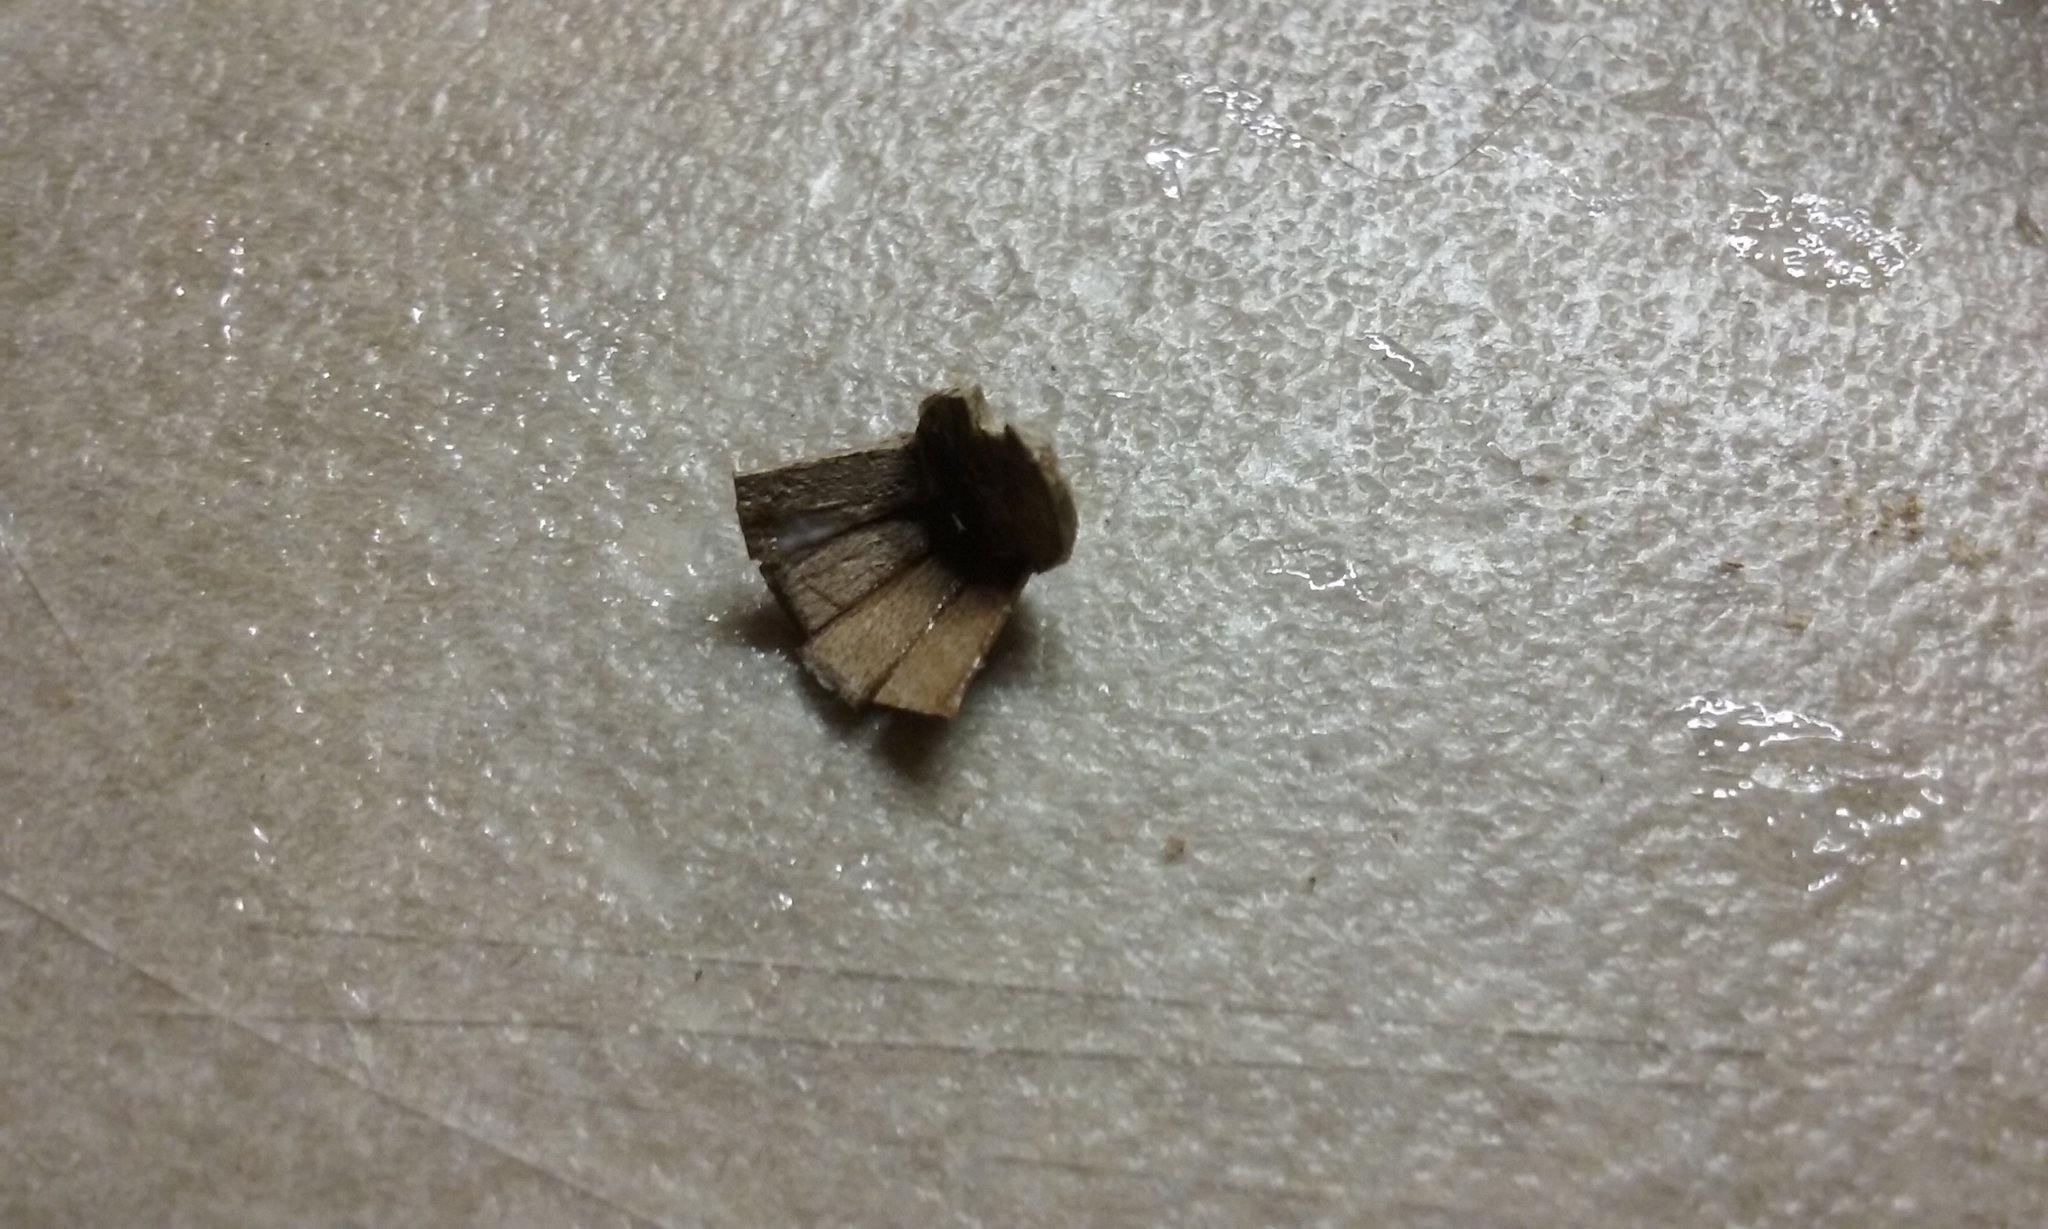
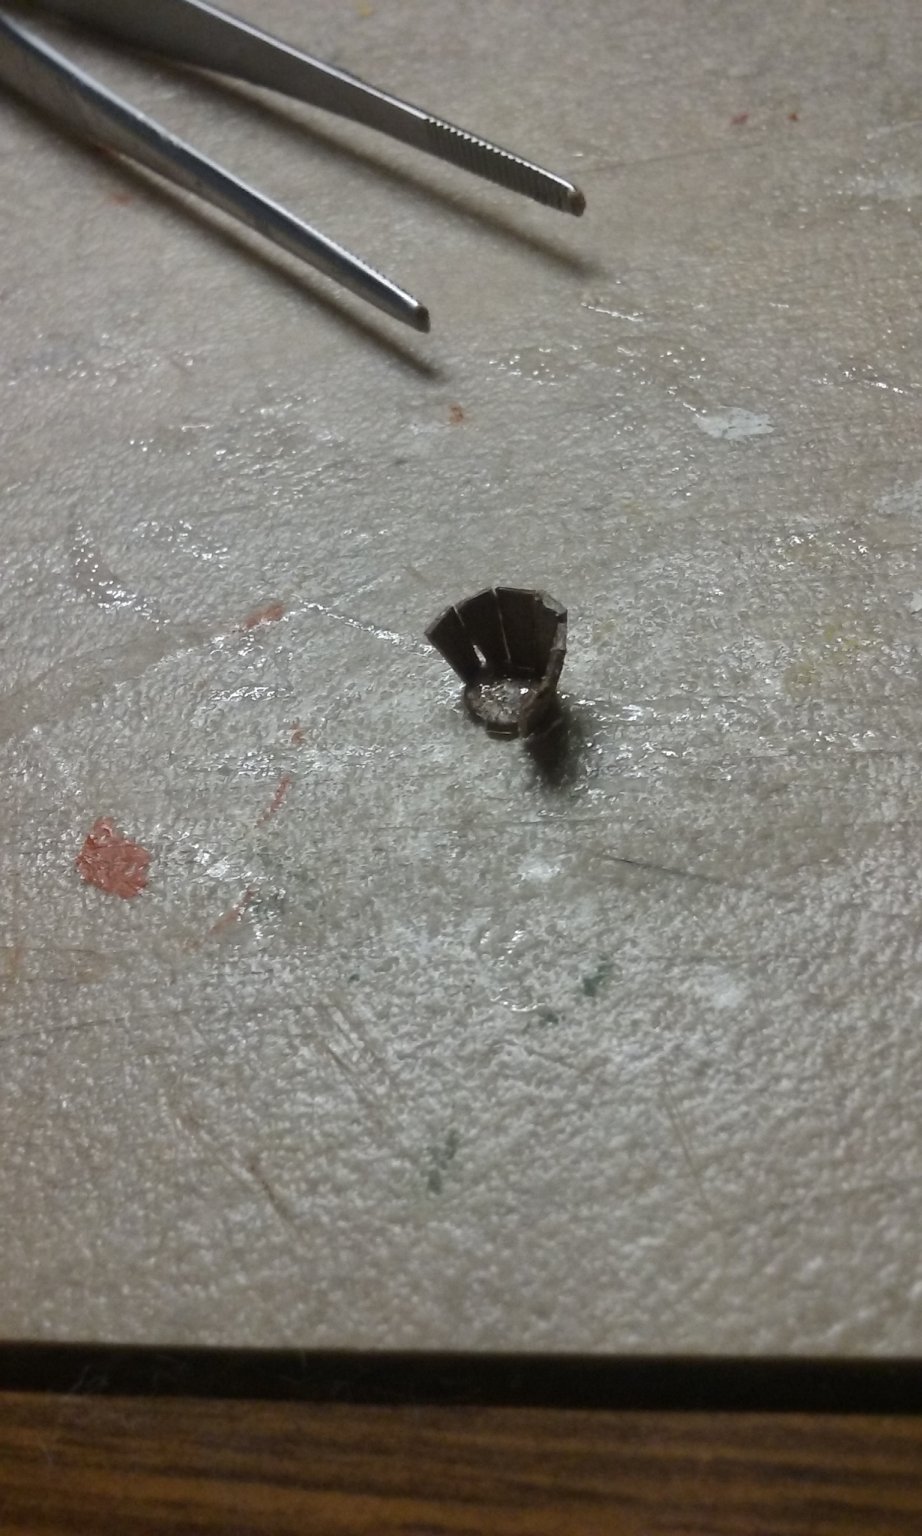
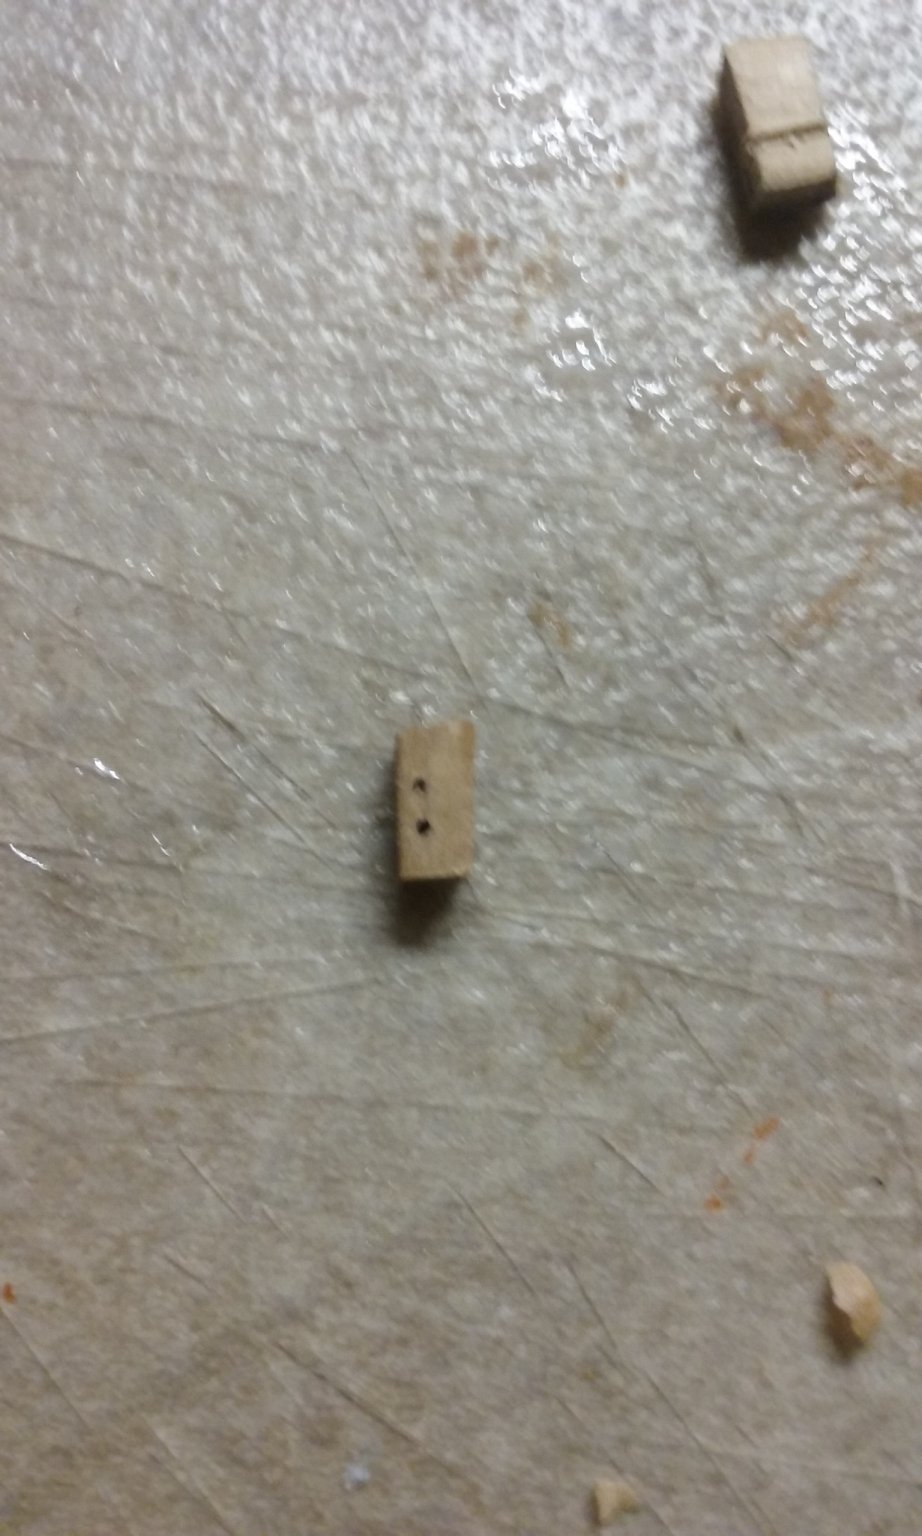
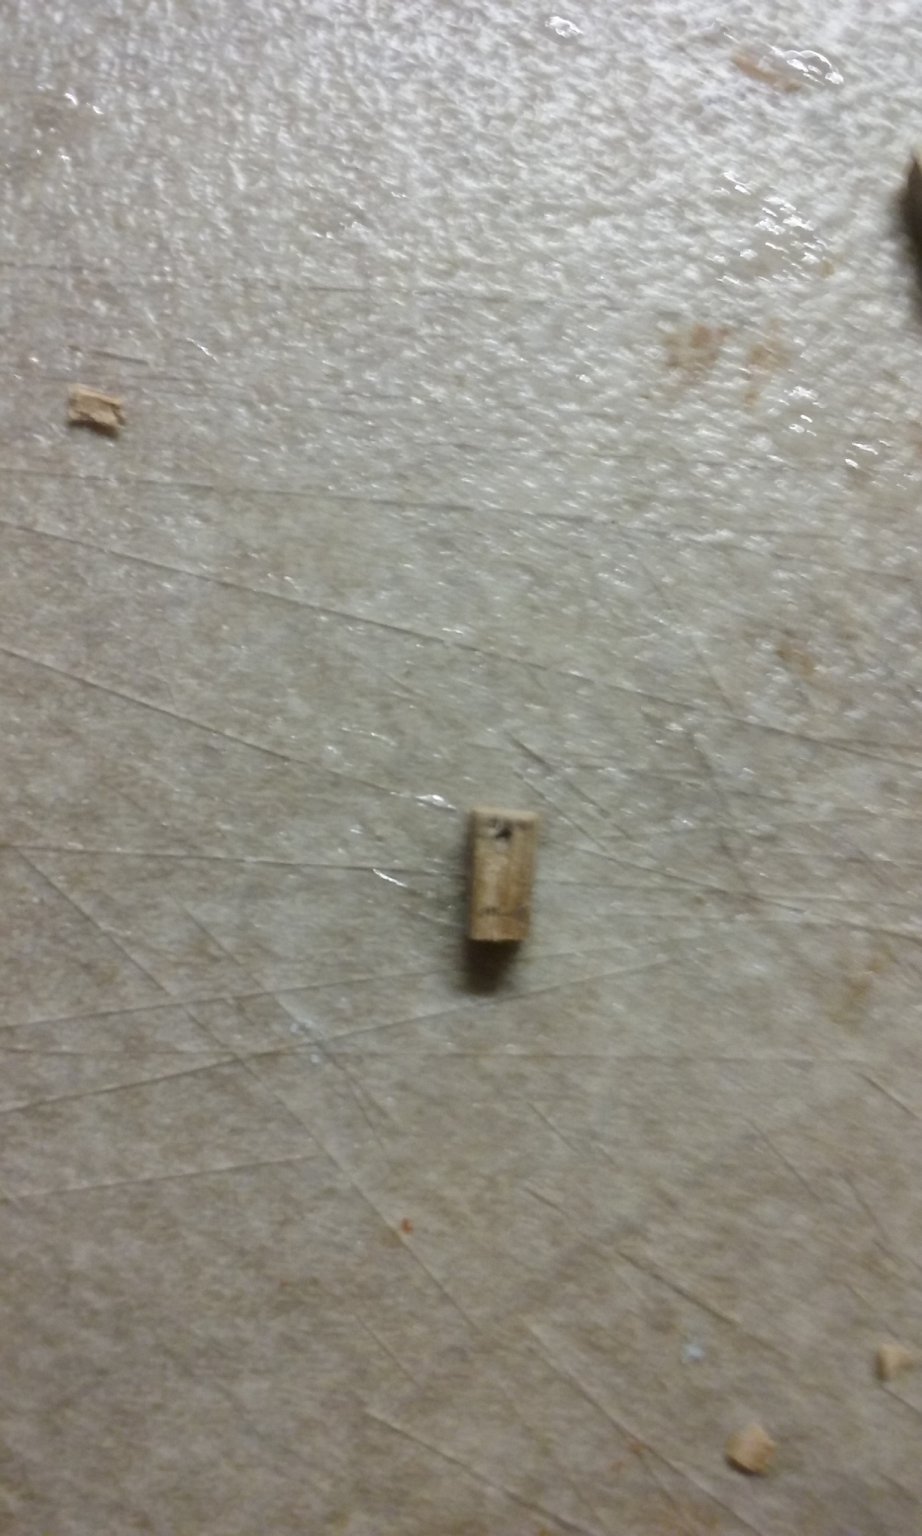
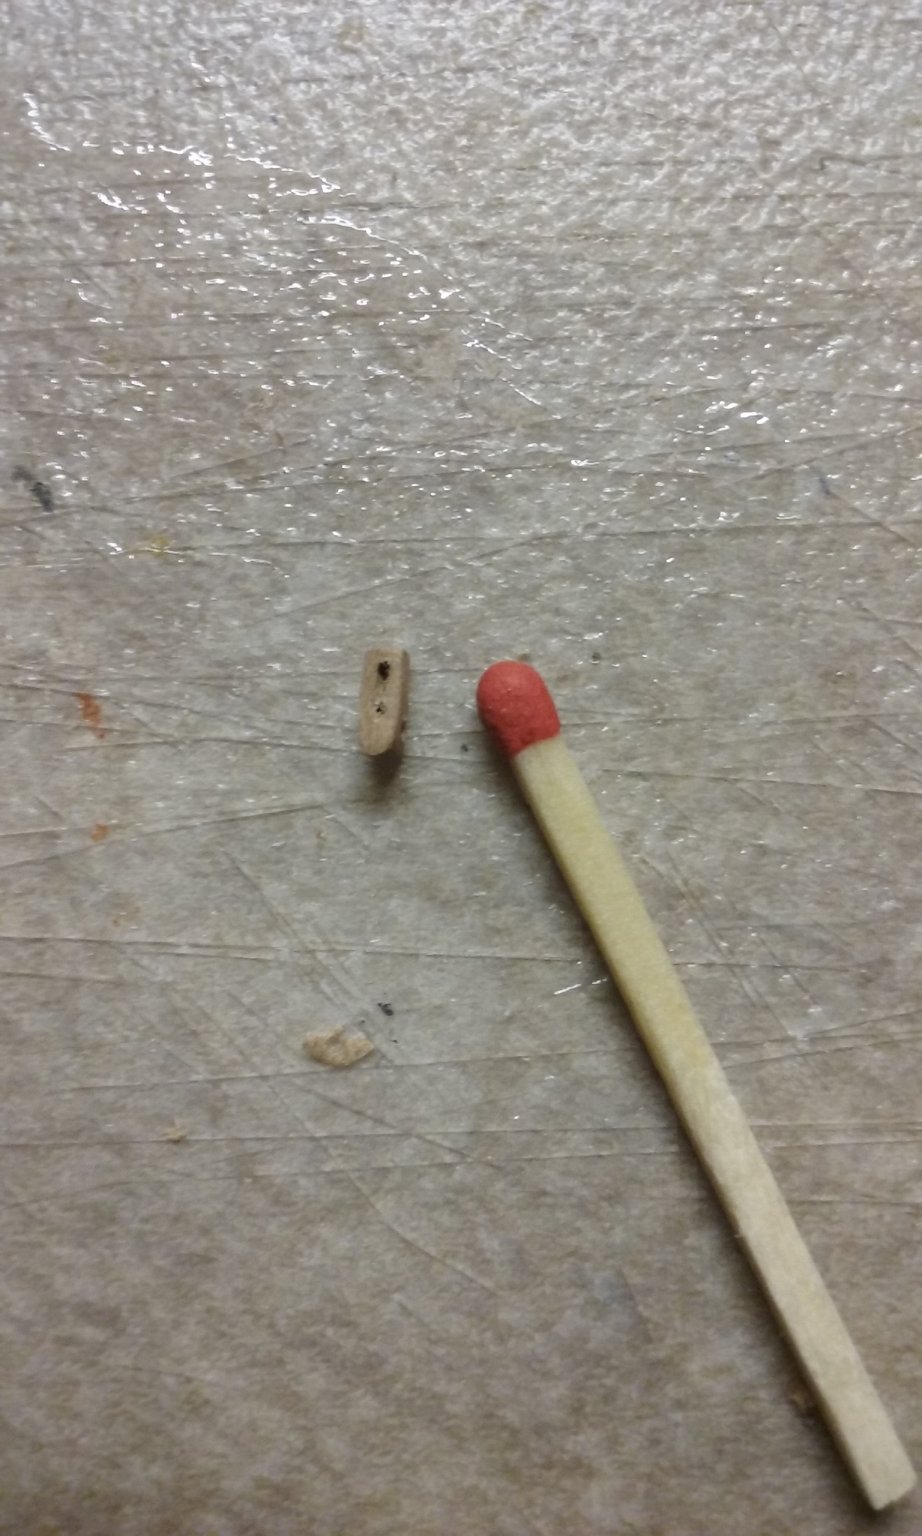
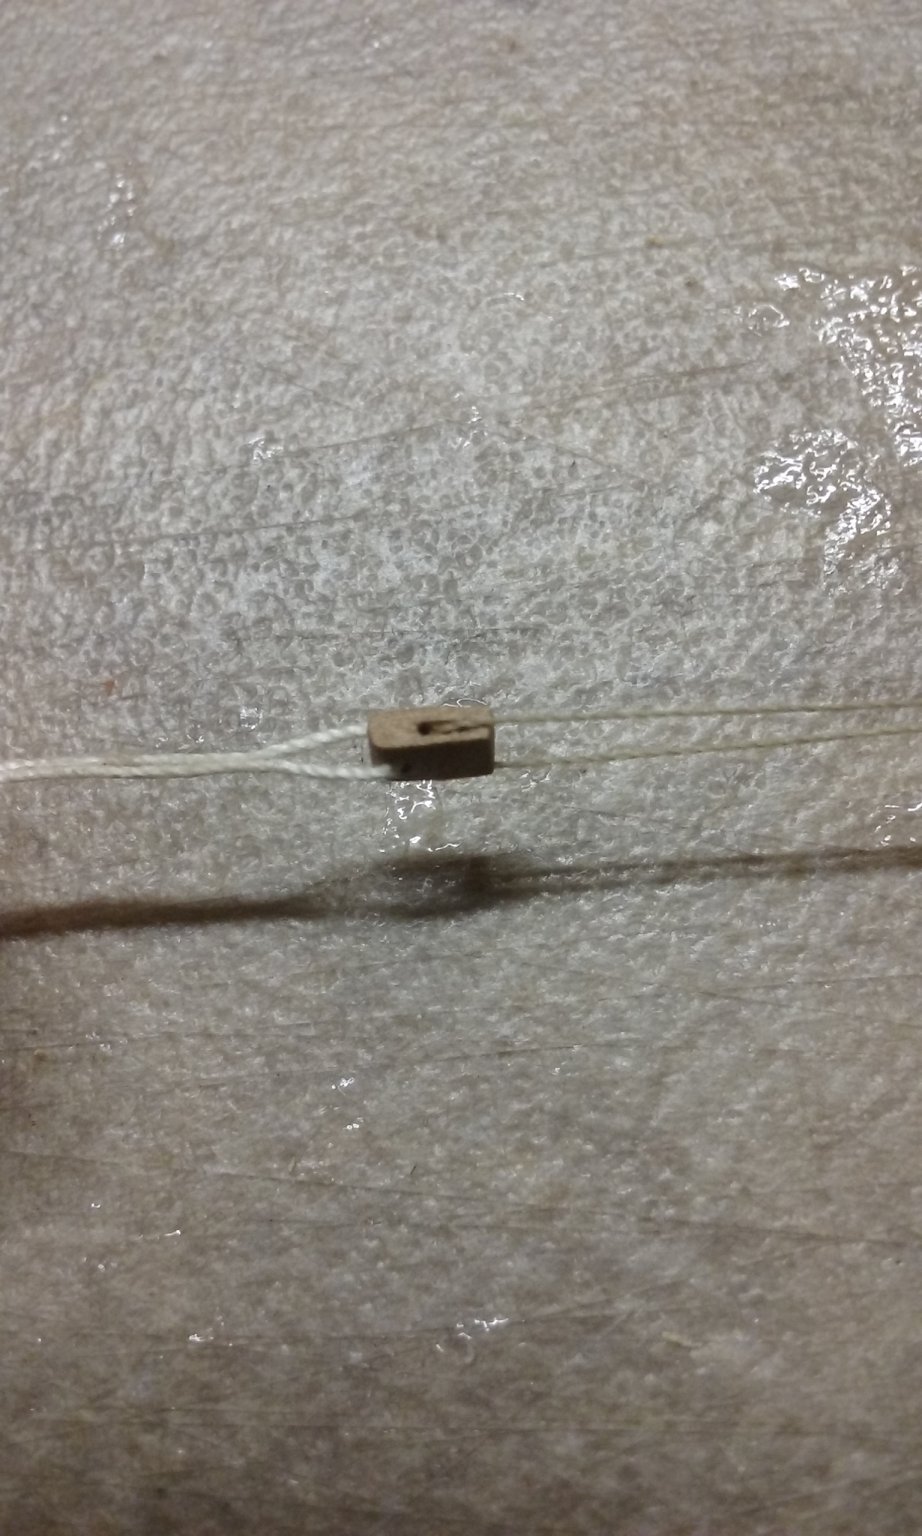
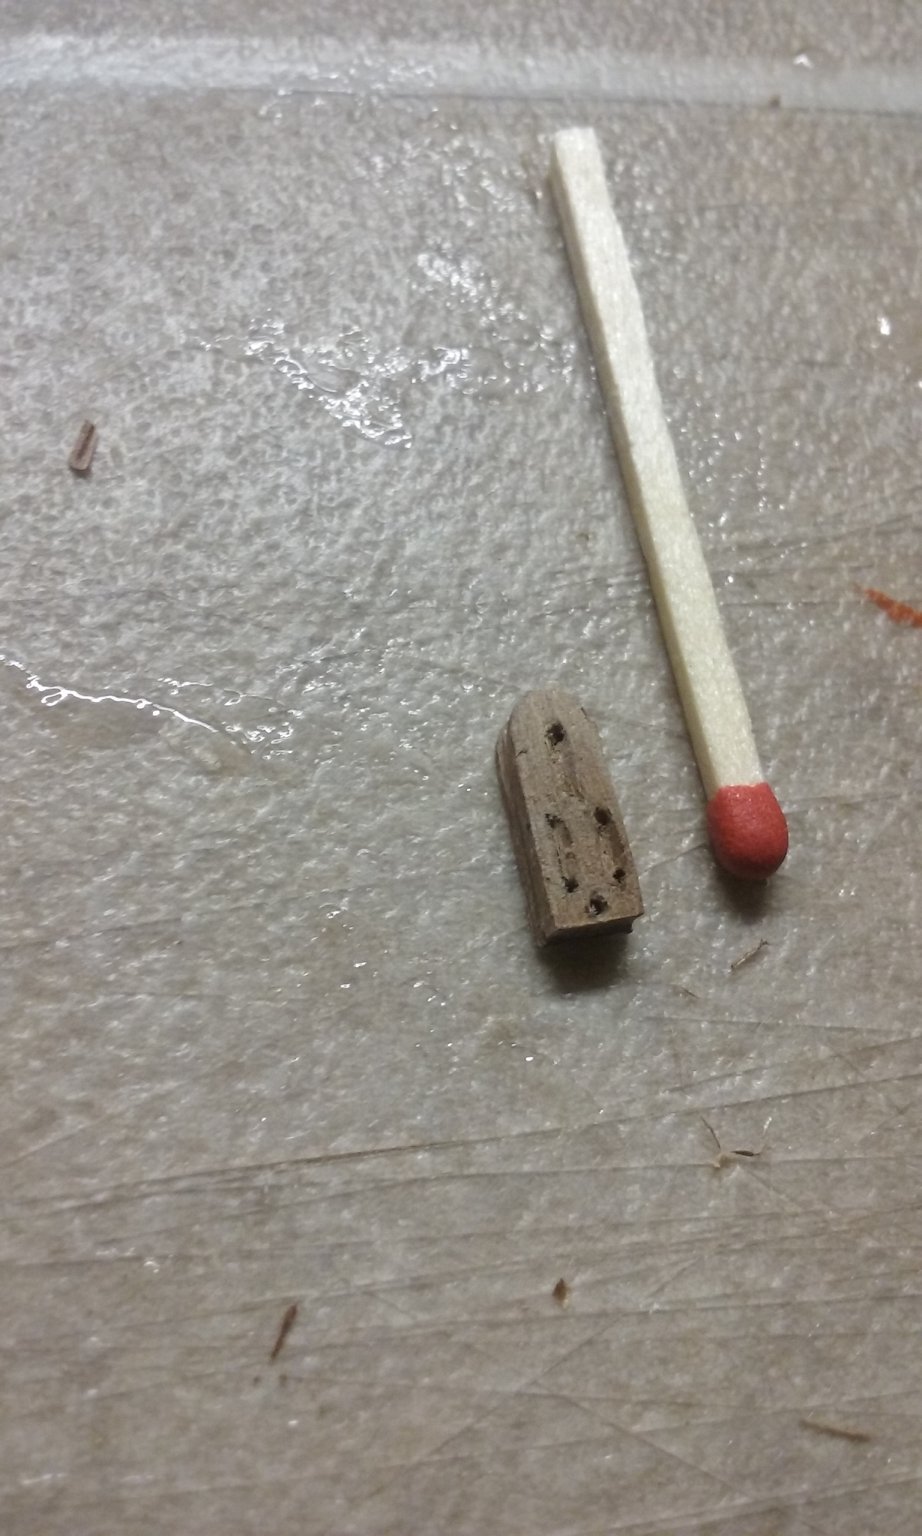
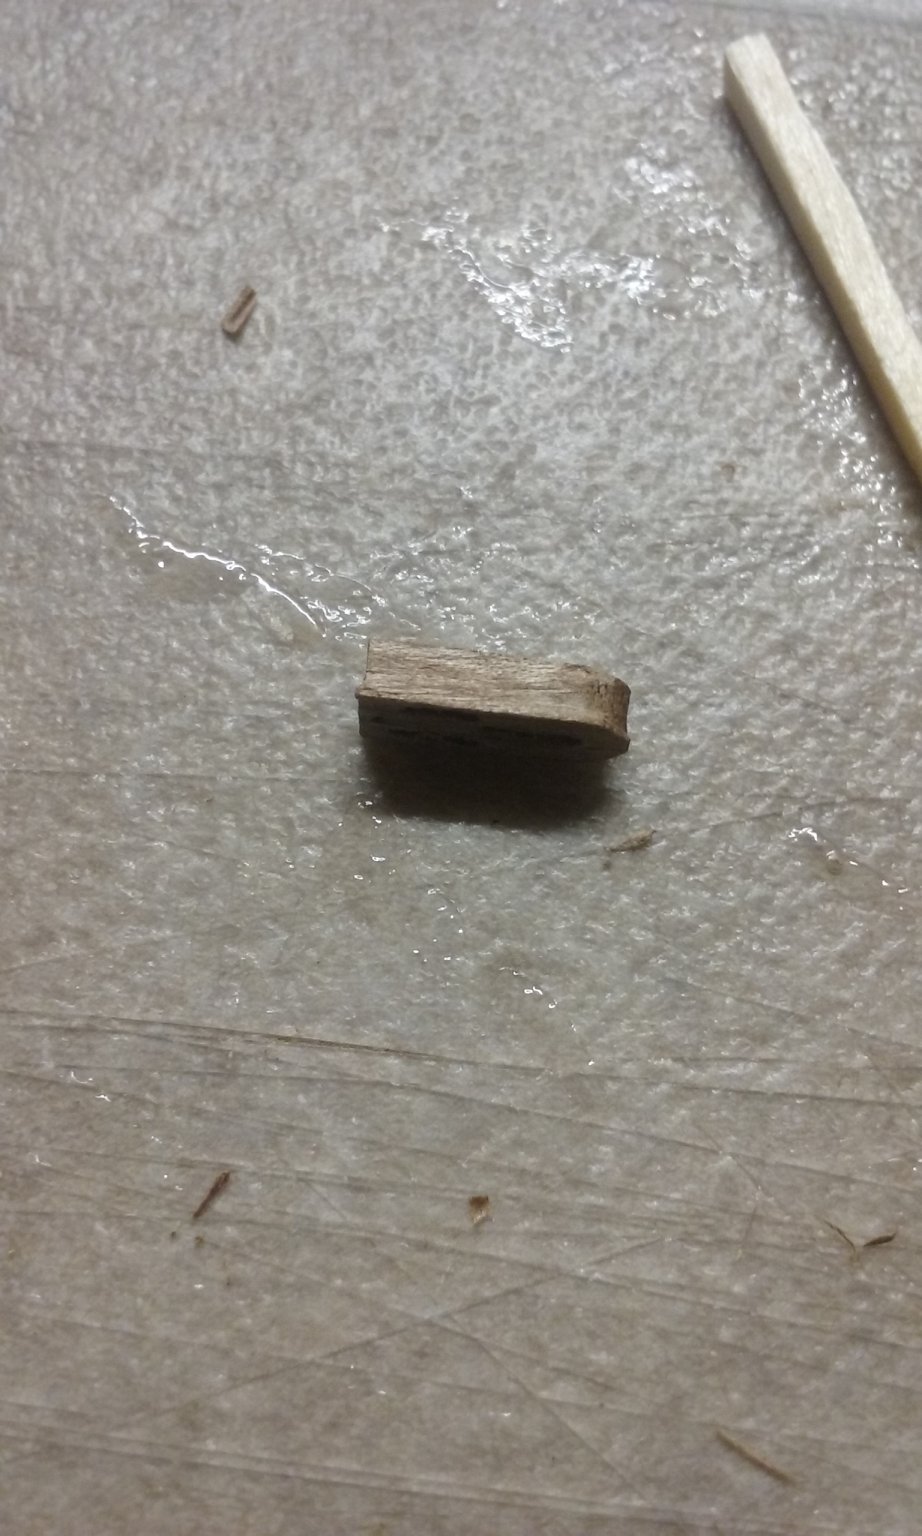
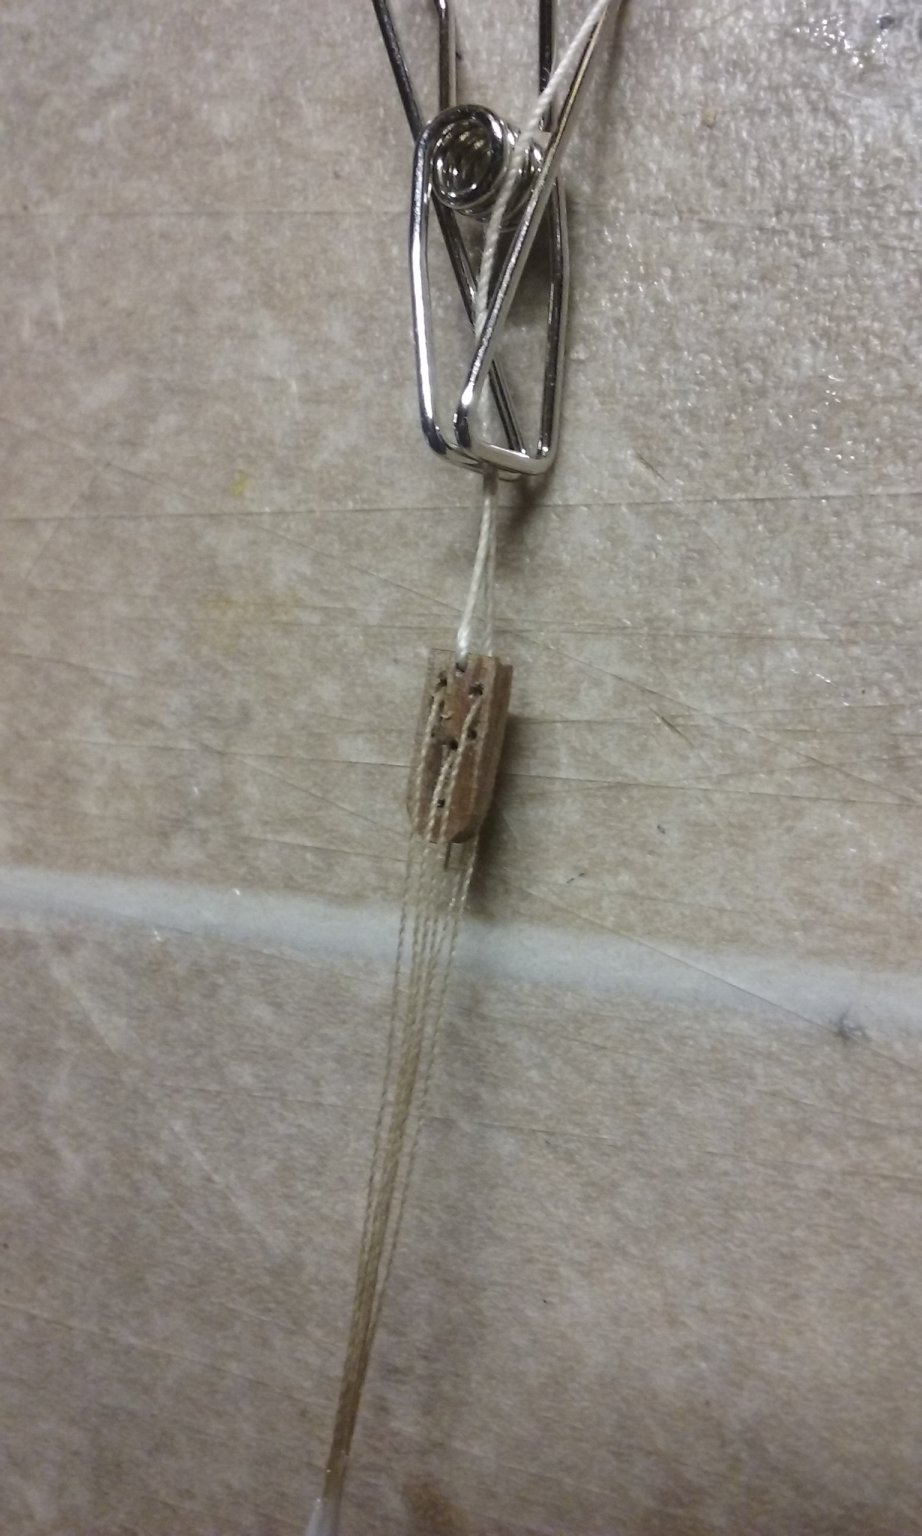
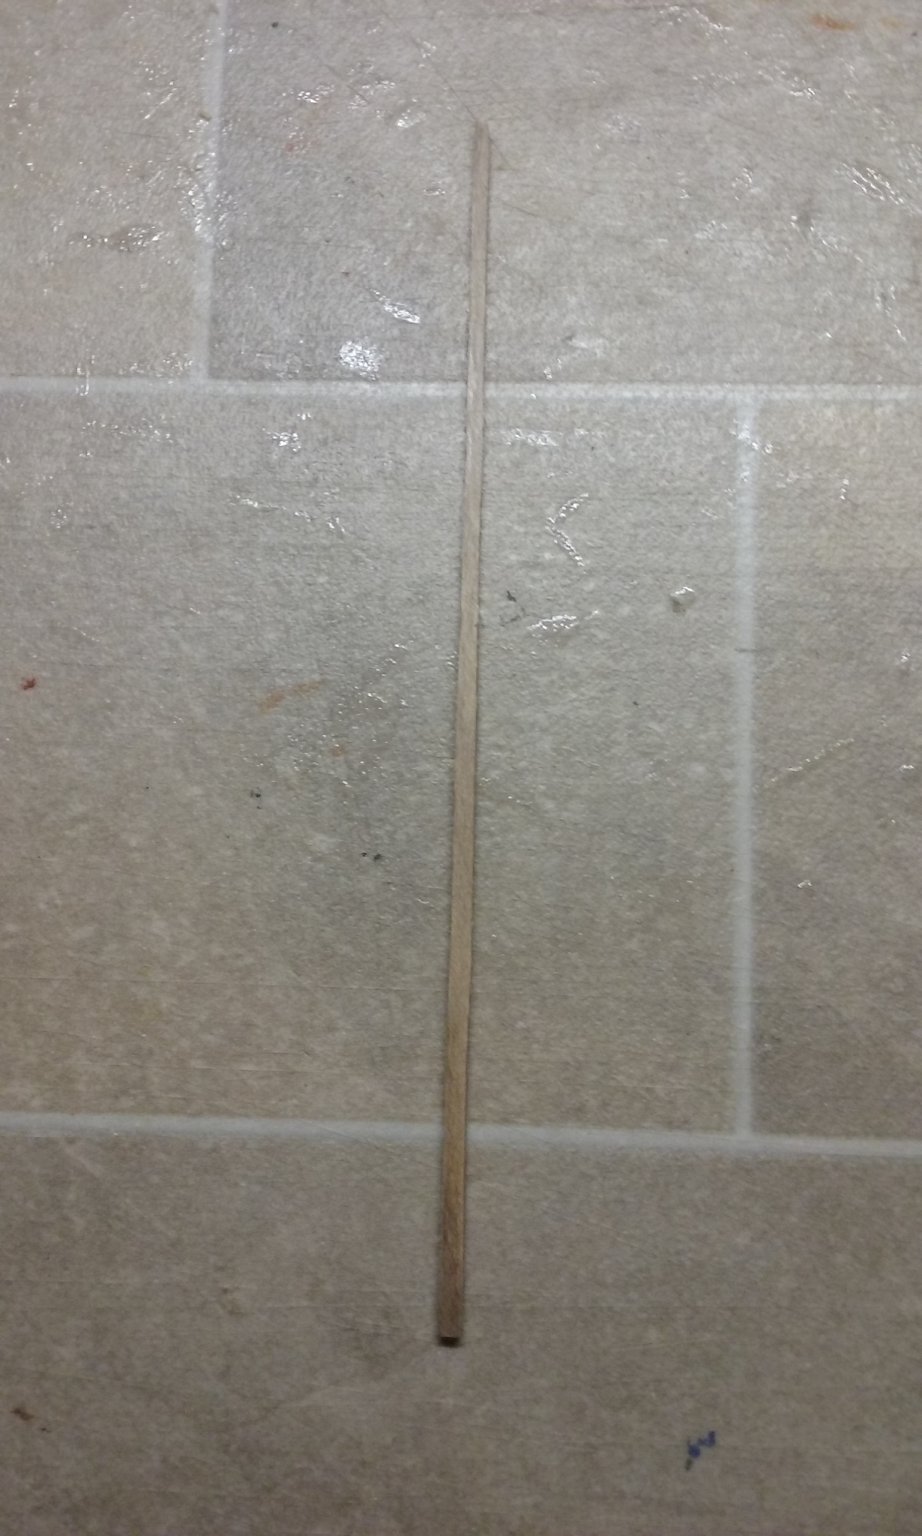
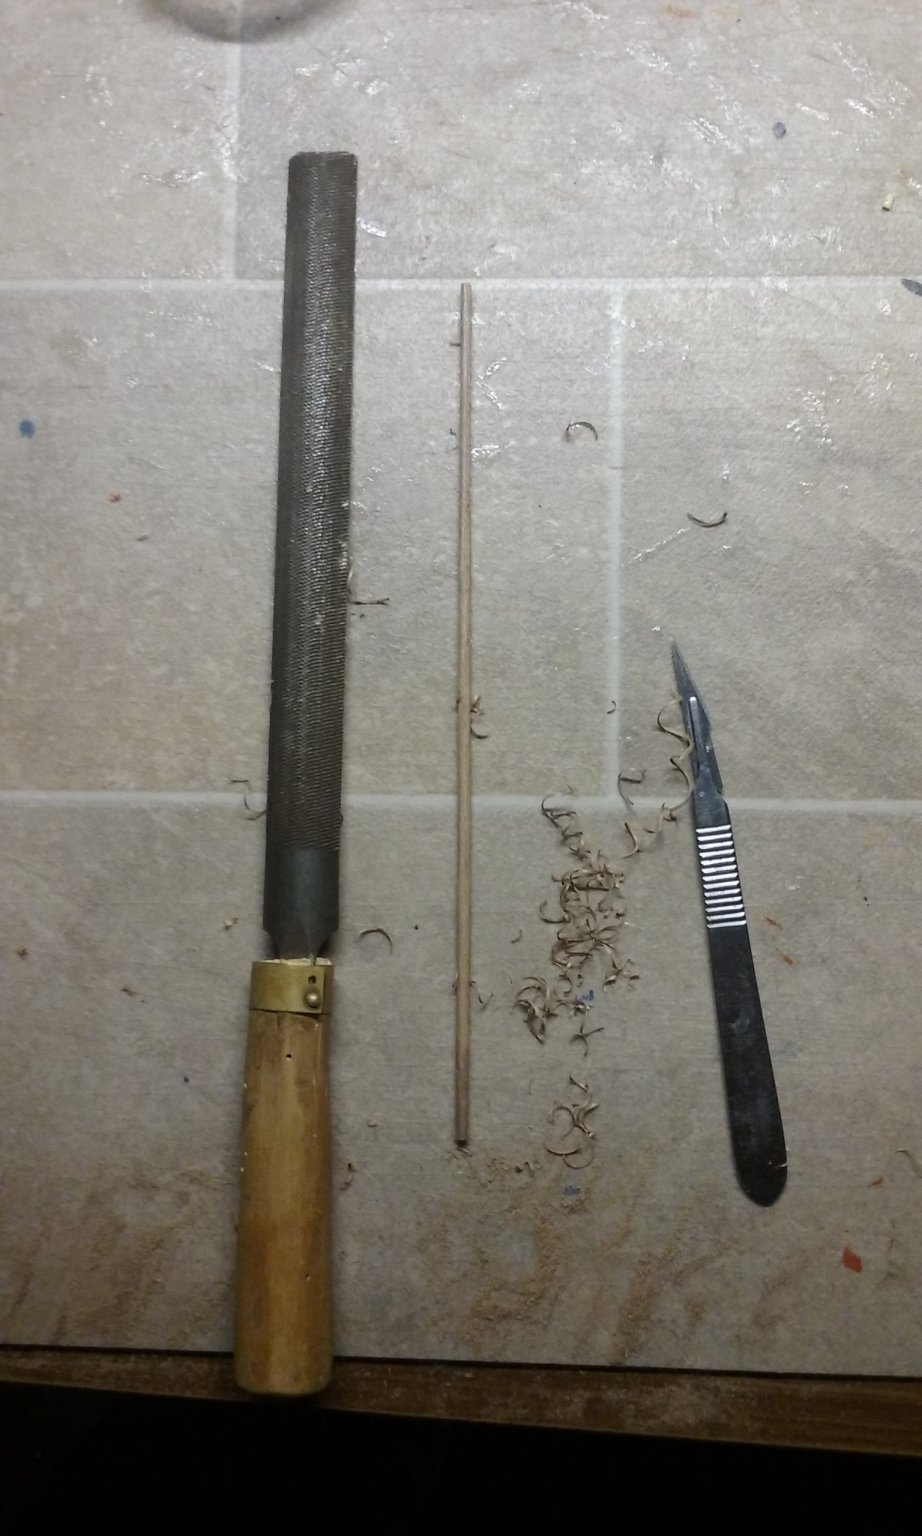
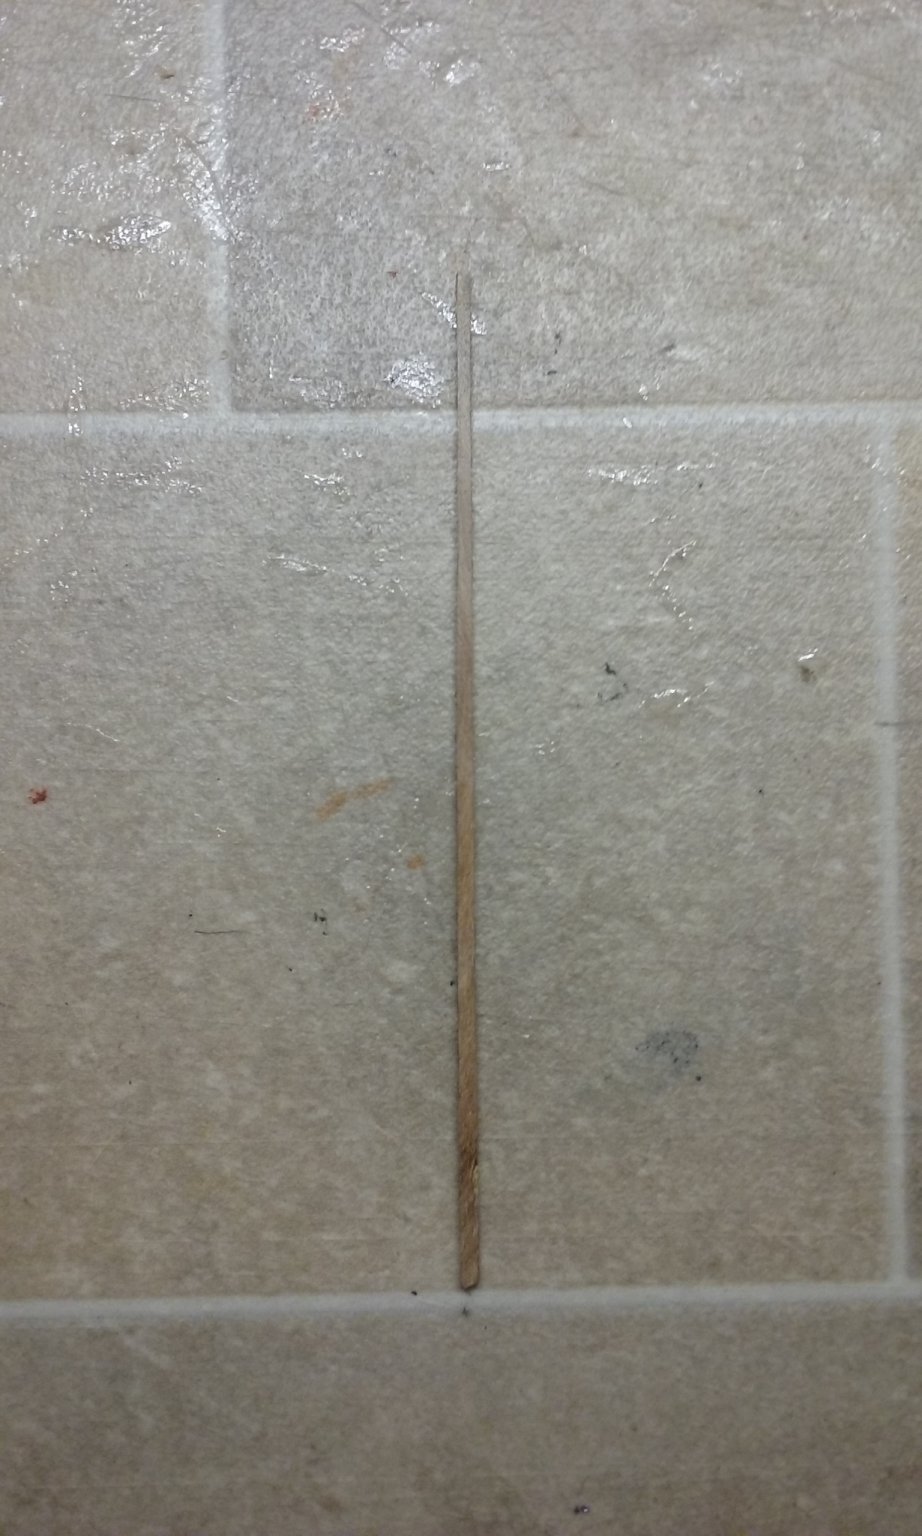
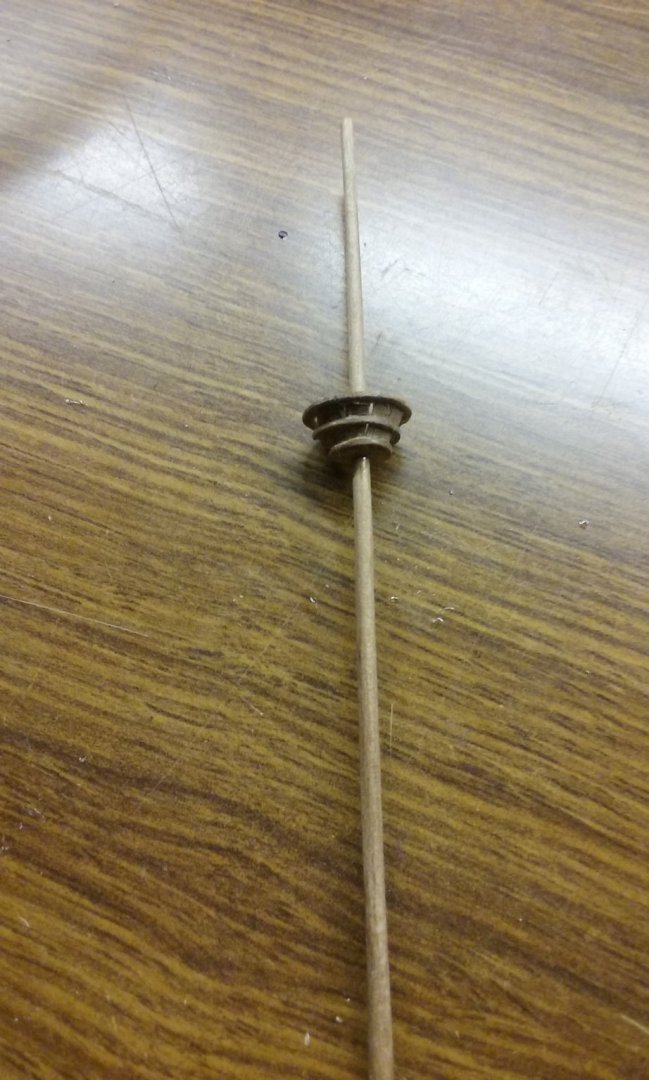
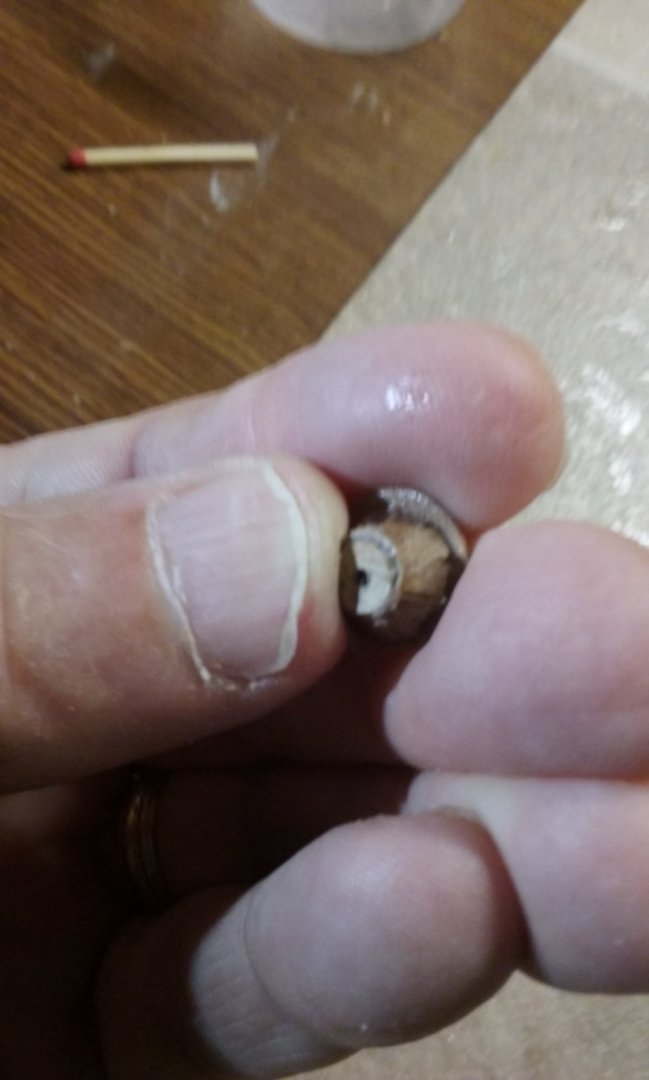
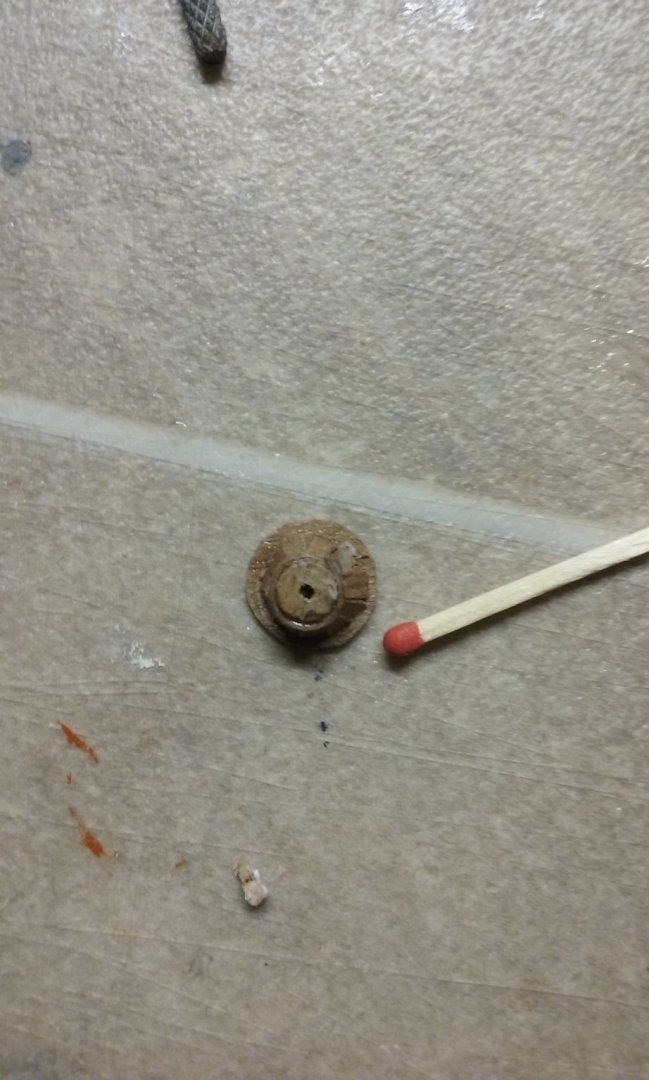
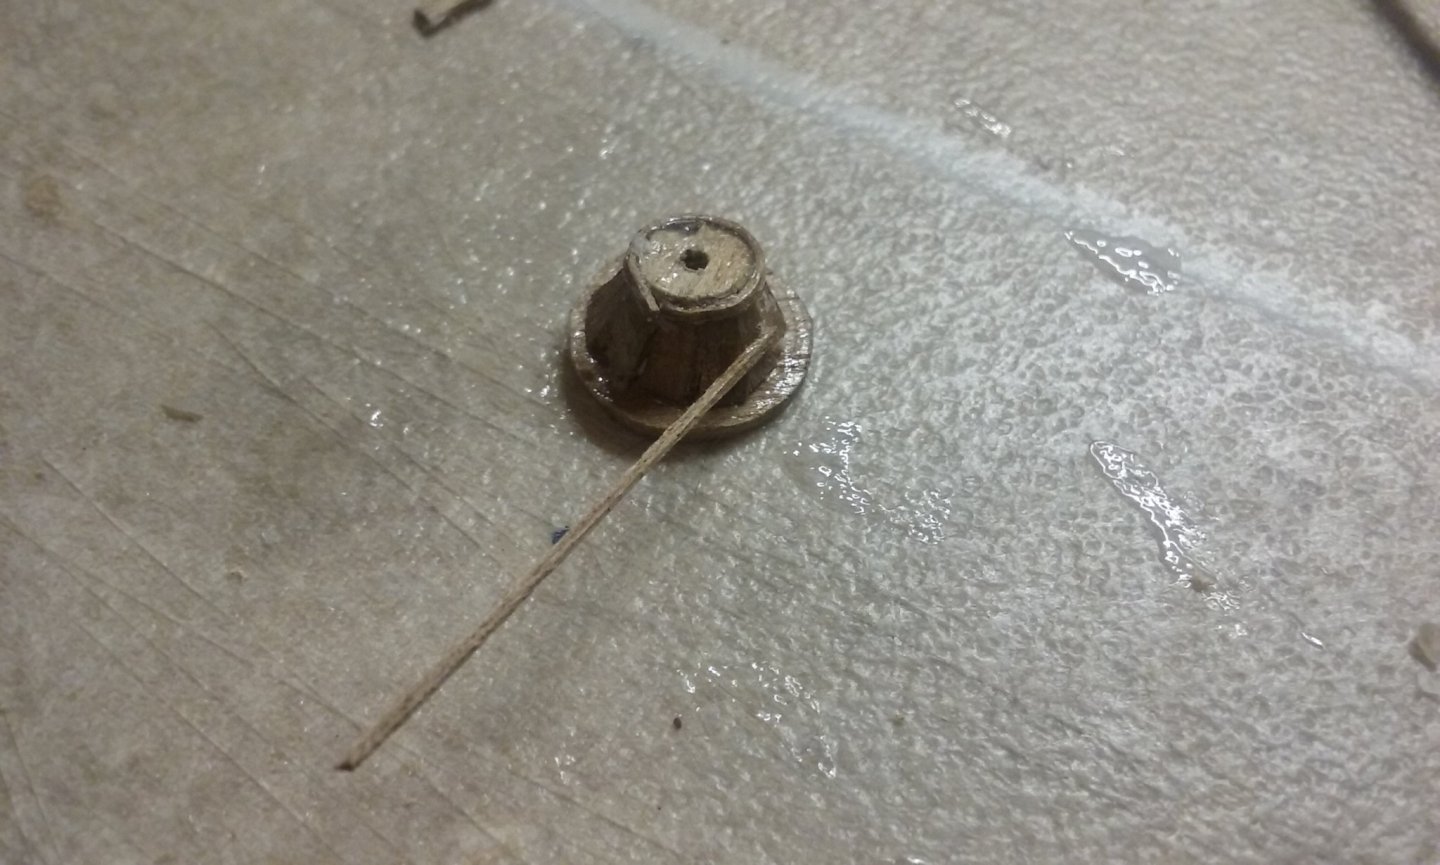
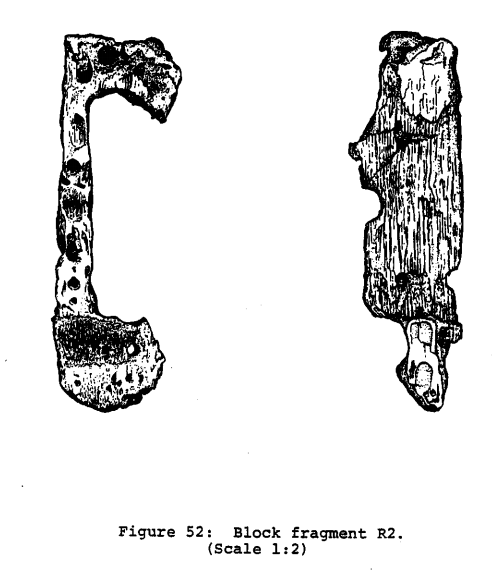
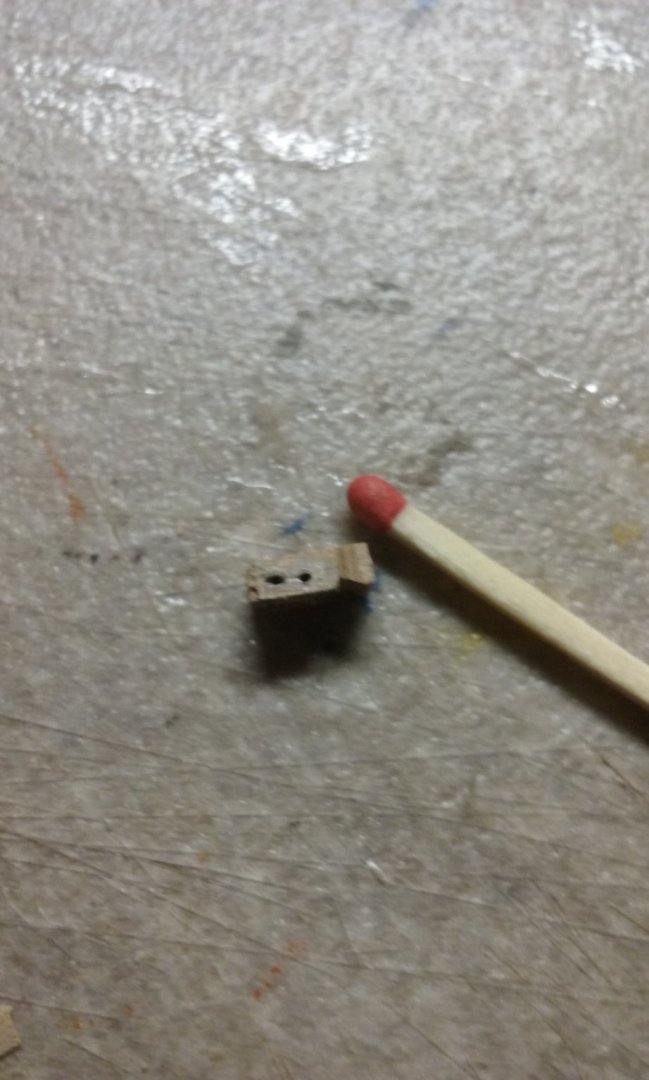
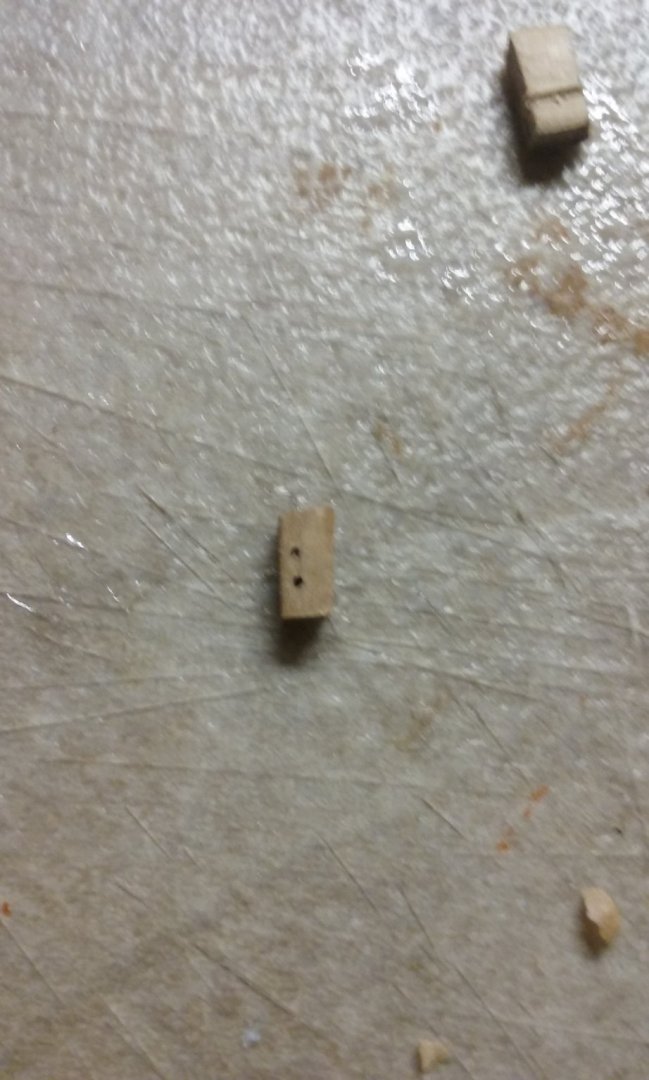
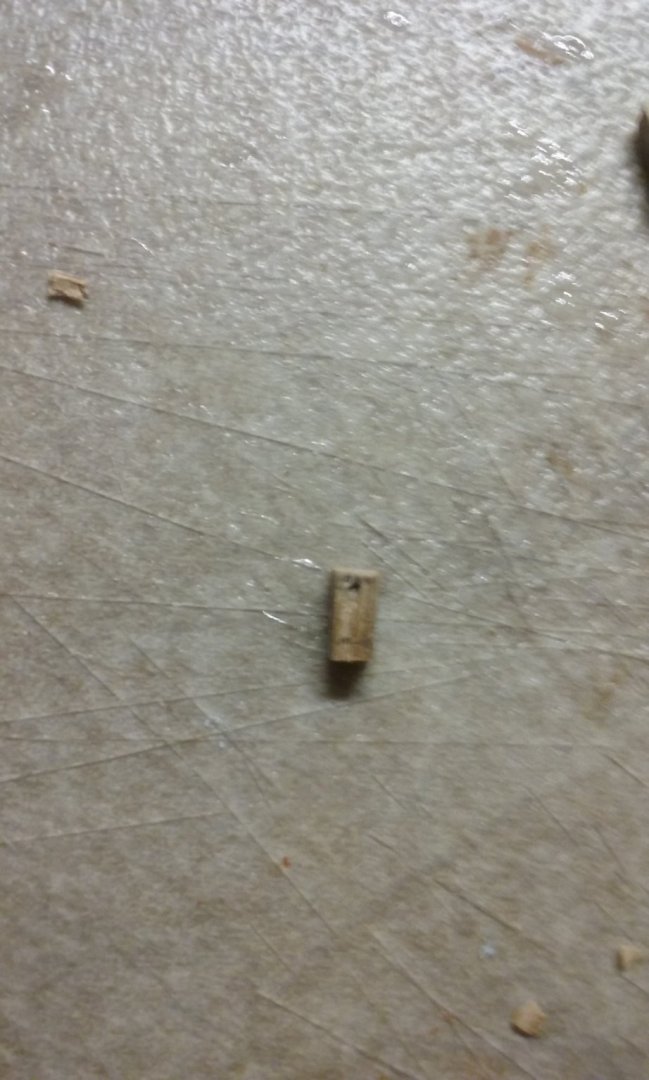
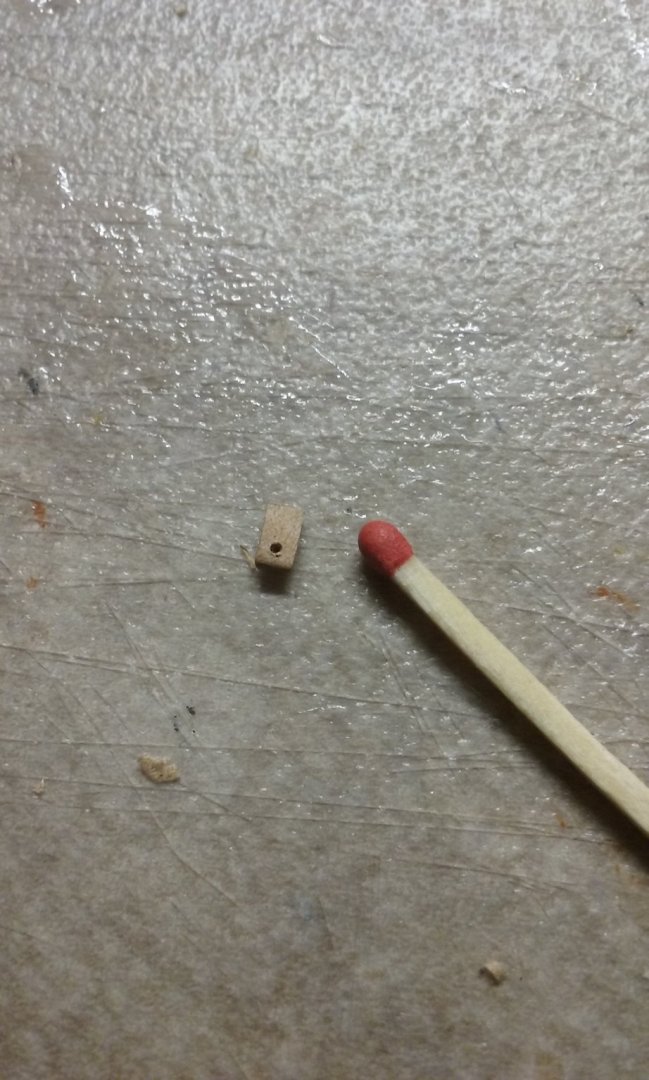
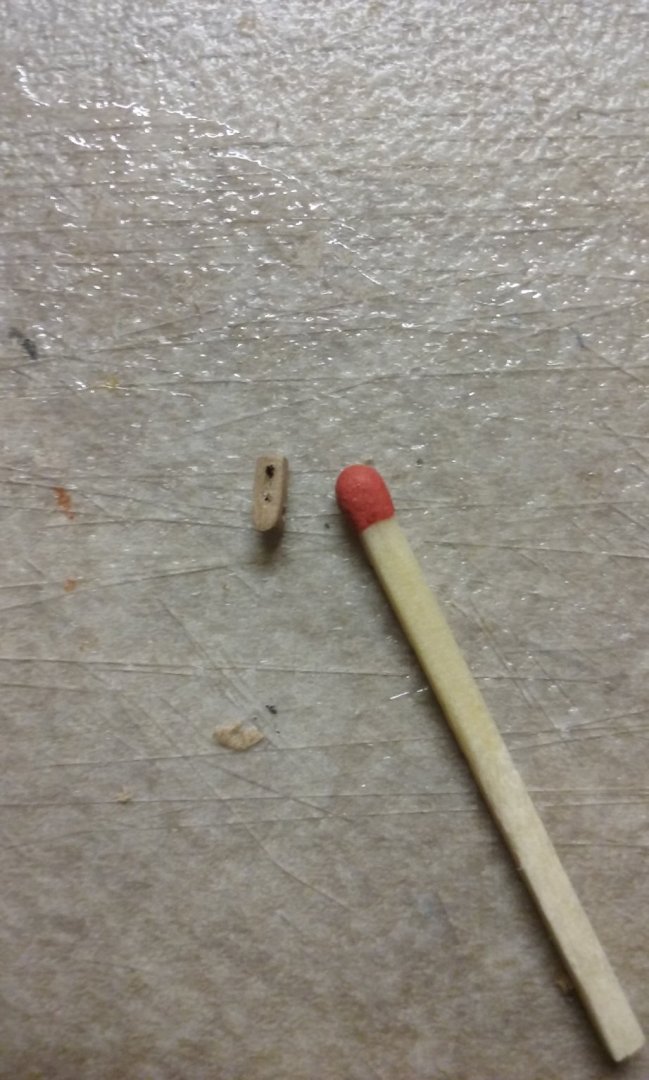
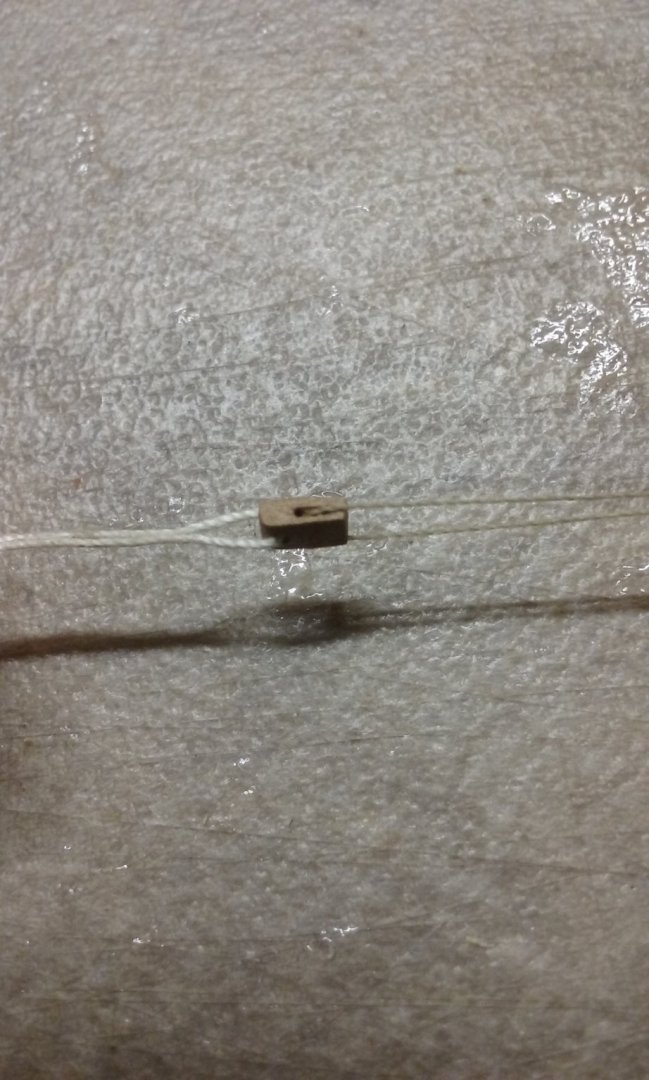
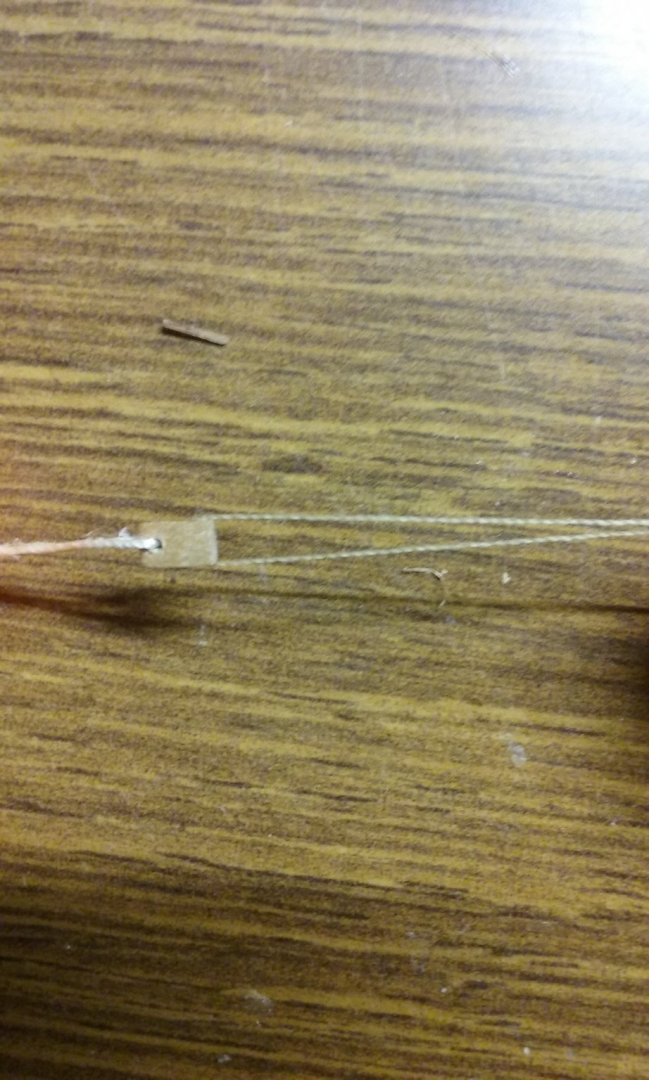
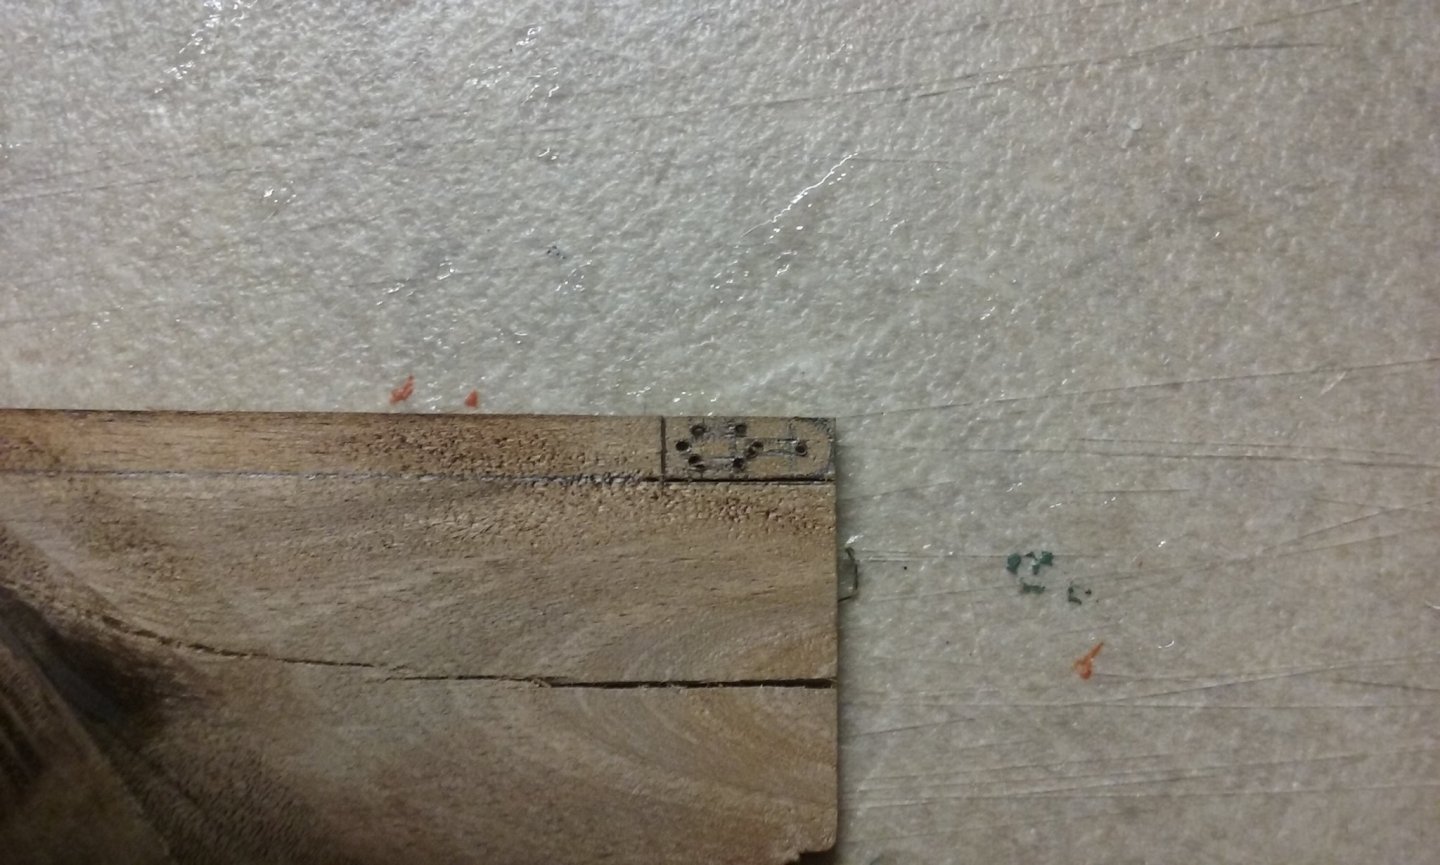
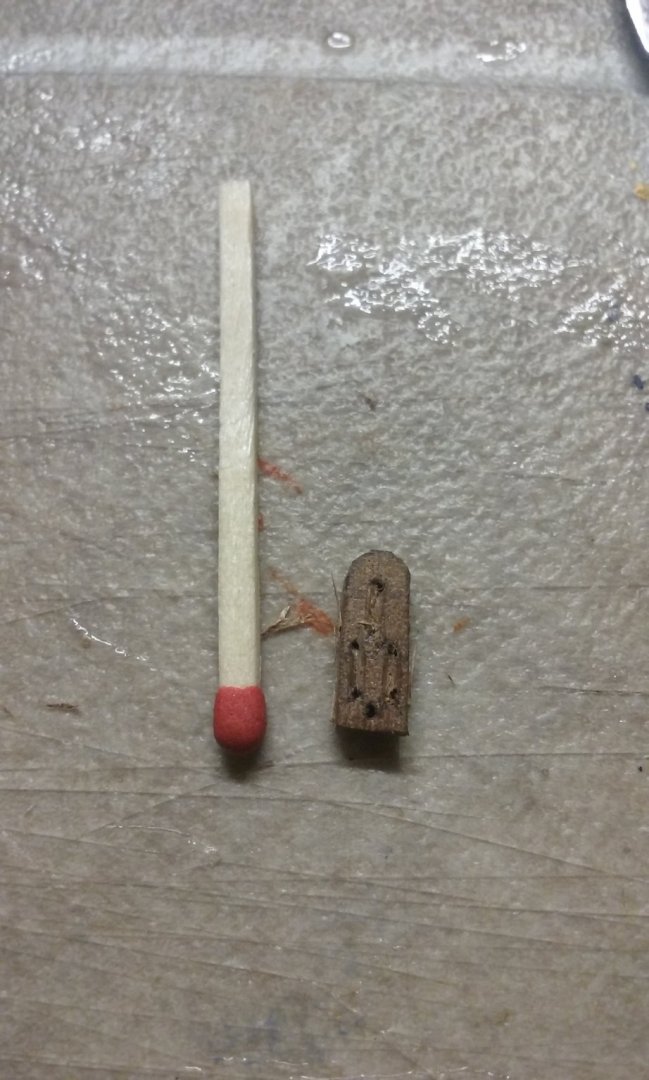
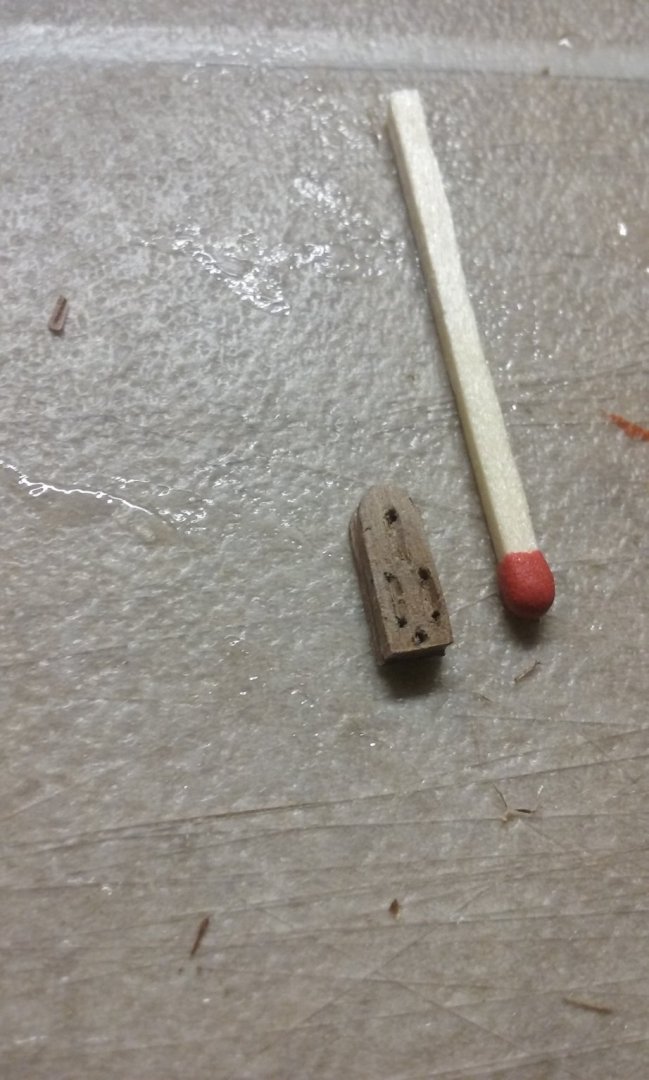
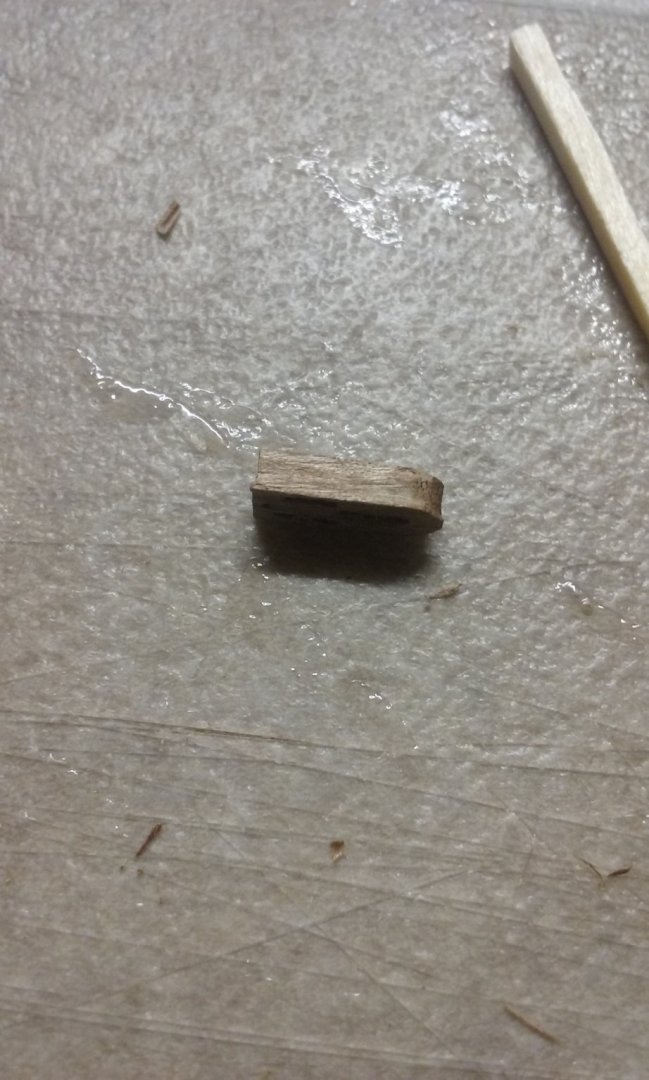
And here's another block, this time from the 11th century Byzantine ship wrecked at Serce Limani (also known as the glass wreck because of the cargo it carried). The block turns out to be very small when you make it at 1:50 scale - 4mm long, 2mm wide and 1.2mm thick. Drilling the holes was quite a challenge (it took three tries before I succeeded). Here's the original block as discovered (from The Rig of the Eleventh Century Ship at Serce Liman, Turkey - MA Thesis by Sheila Matthews, TAMU 1983: And here's my copy of it under construction: Transverse hole: Holes for sheave slot Trimming to size: Finished: And assembled, with lines in place: VERY fiddly. Now to work out where to use it! Steven

-
Hi Binho! I hope you're keeping safe and well. Any progress on the build? Steven
-
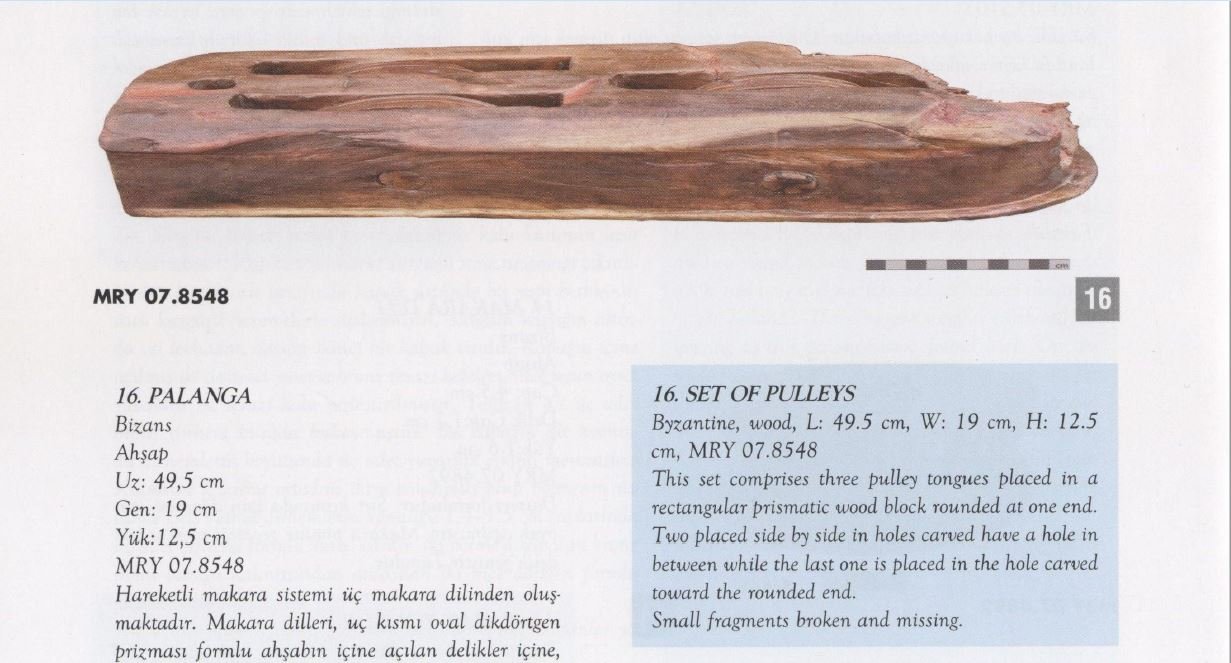
Just out of interest I made one of the blocks that's been found in the Istanbul excavations. Here's the original: and here's the model. I don't yet know what I'm going to use it for - but it does look very useful. Steven

-
No worries, mate. I can also give perhaps some more accurate ideas on what would have been on the shields (and, for that matter, on the sails) of an early 16th century Portuguese carrack, compared with what's on the kit. I've sent you a PM. Steven
-
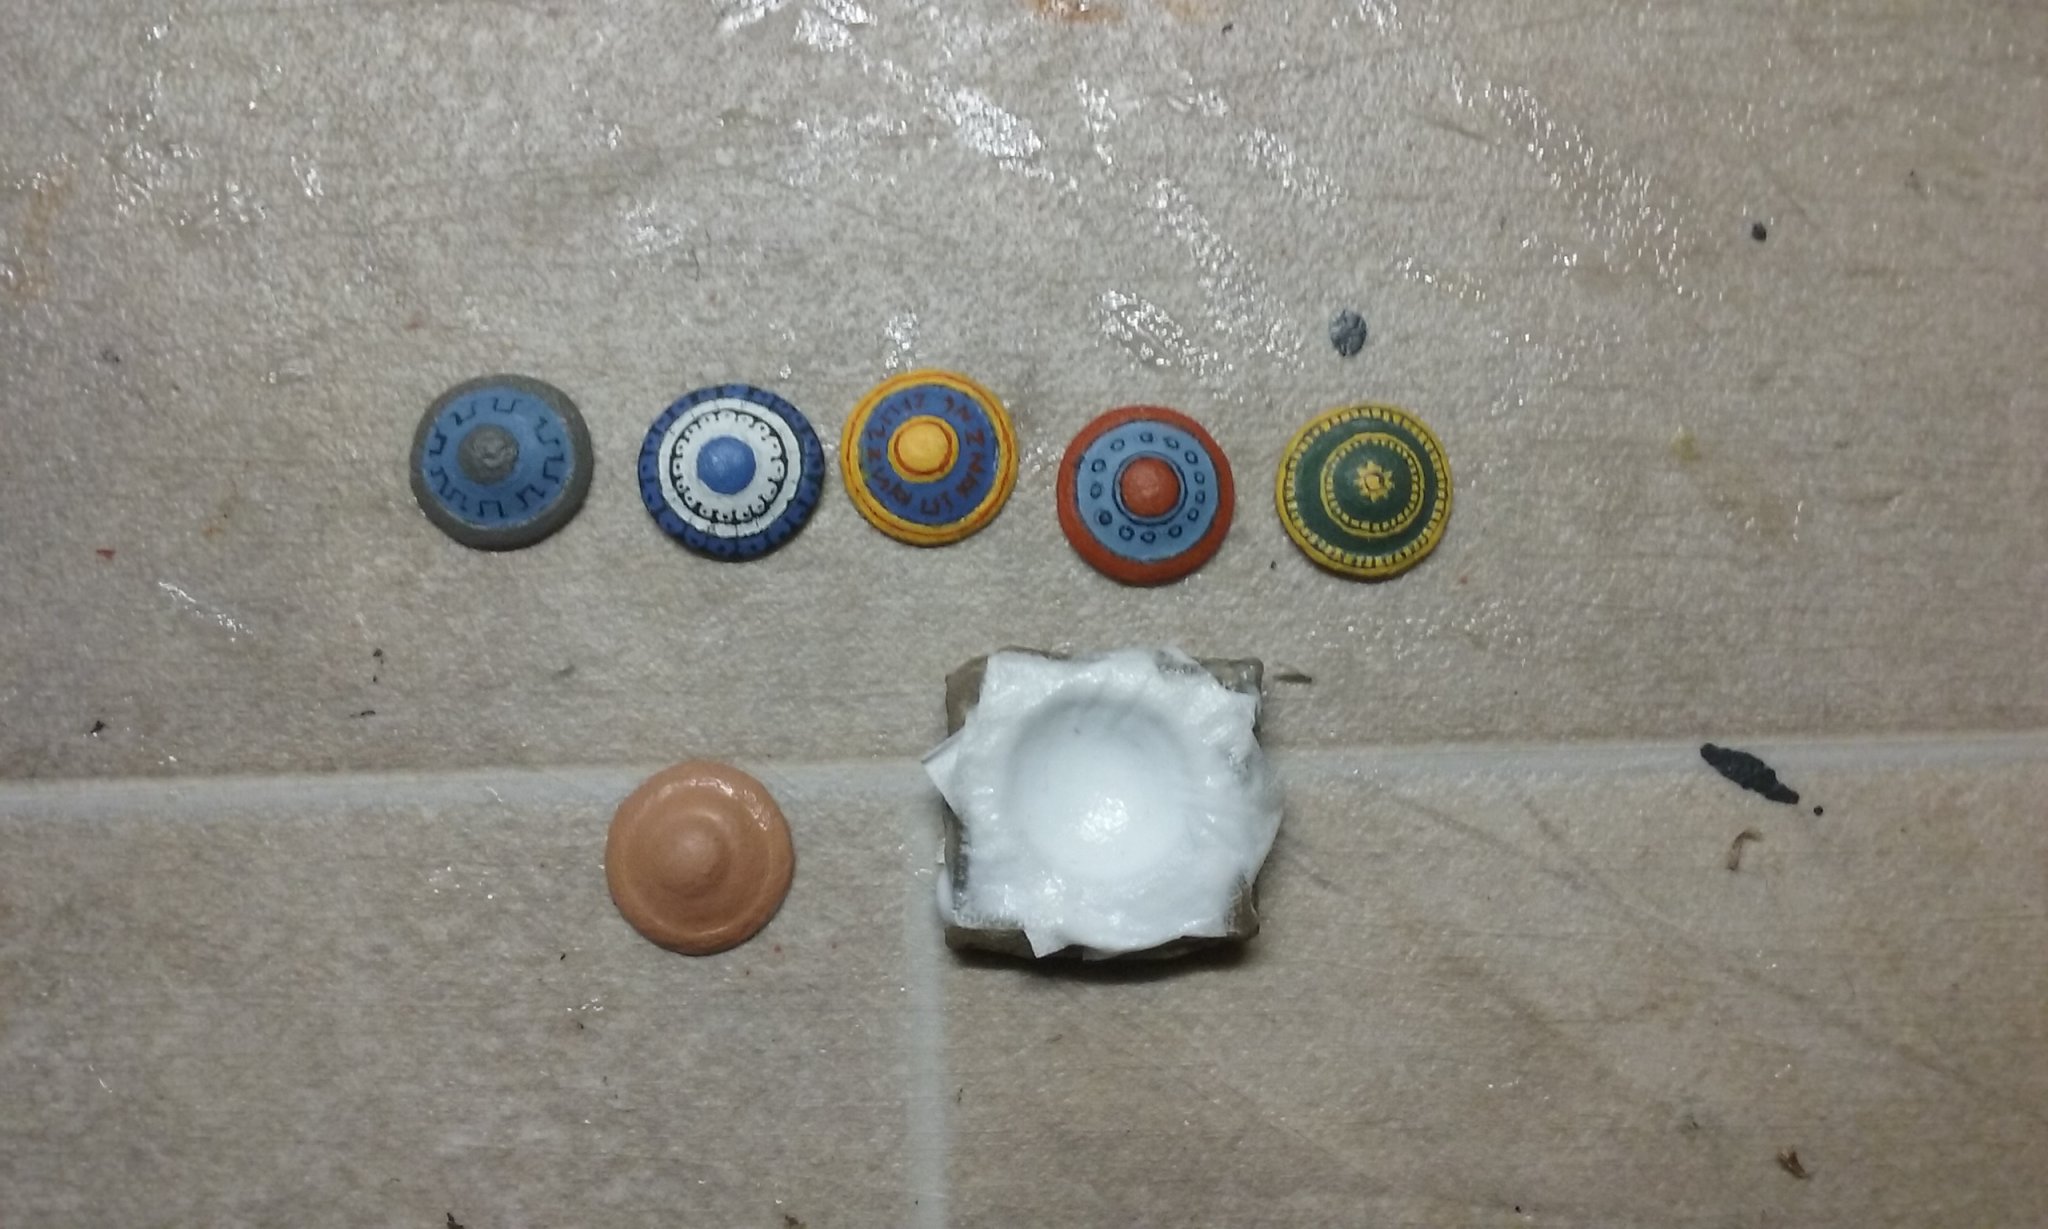
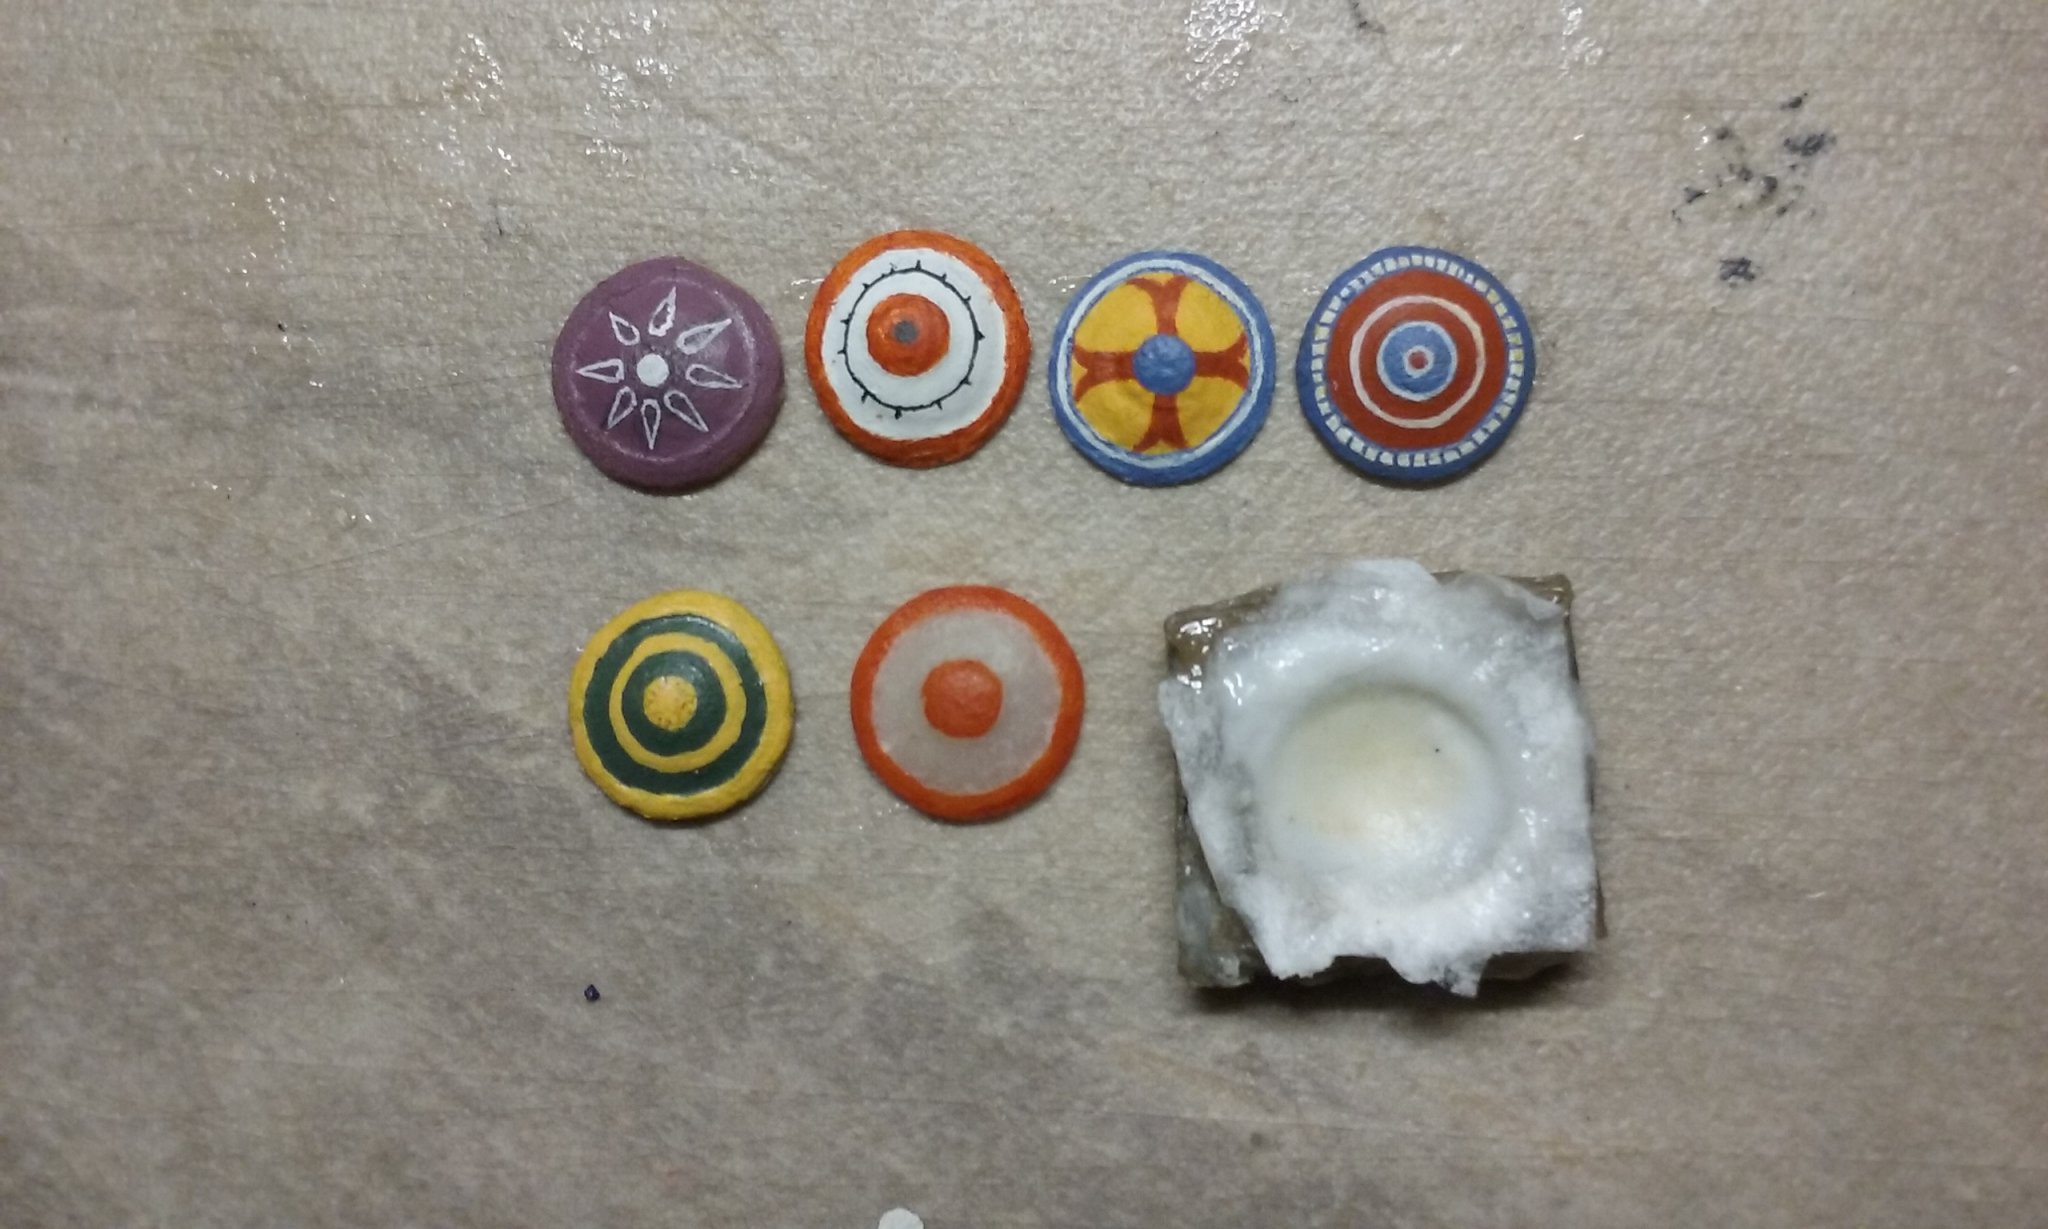
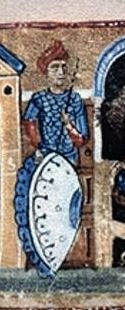
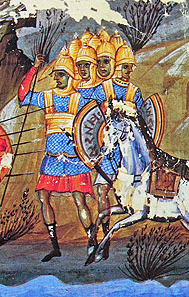
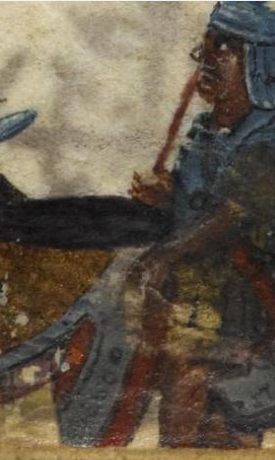
Thanks for all the likes, people, and the nice comments. Peter, I've got quite a bit of info on the shields used on carracks, which I'd be happy to share with you. And the technique I've been using to make mine should work on yours as well. It is nice to have shields that are the right thickness for the scale we're using, and this is the only way I've been able to figure out that actually works. Druxey, all these are taken from original Byzantine representations of shields - I'm just copying them. But I am pleased with the results - better than I'd been expecting (unless you use a magnifying glass). Though sometimes the colours aren't quite right - or the shields are taken from carvings so I have to make an educated guess of the colours, based on those that are common on painted representations. Steven

-
Best wishes, Jack. I can sympathise with you being so far from your modelling, but you're keeping safe; that's the main thing. Steven
- 190 replies
-
- 2
-
-
- ragusian
- marisstella
- (and 1 more)
-
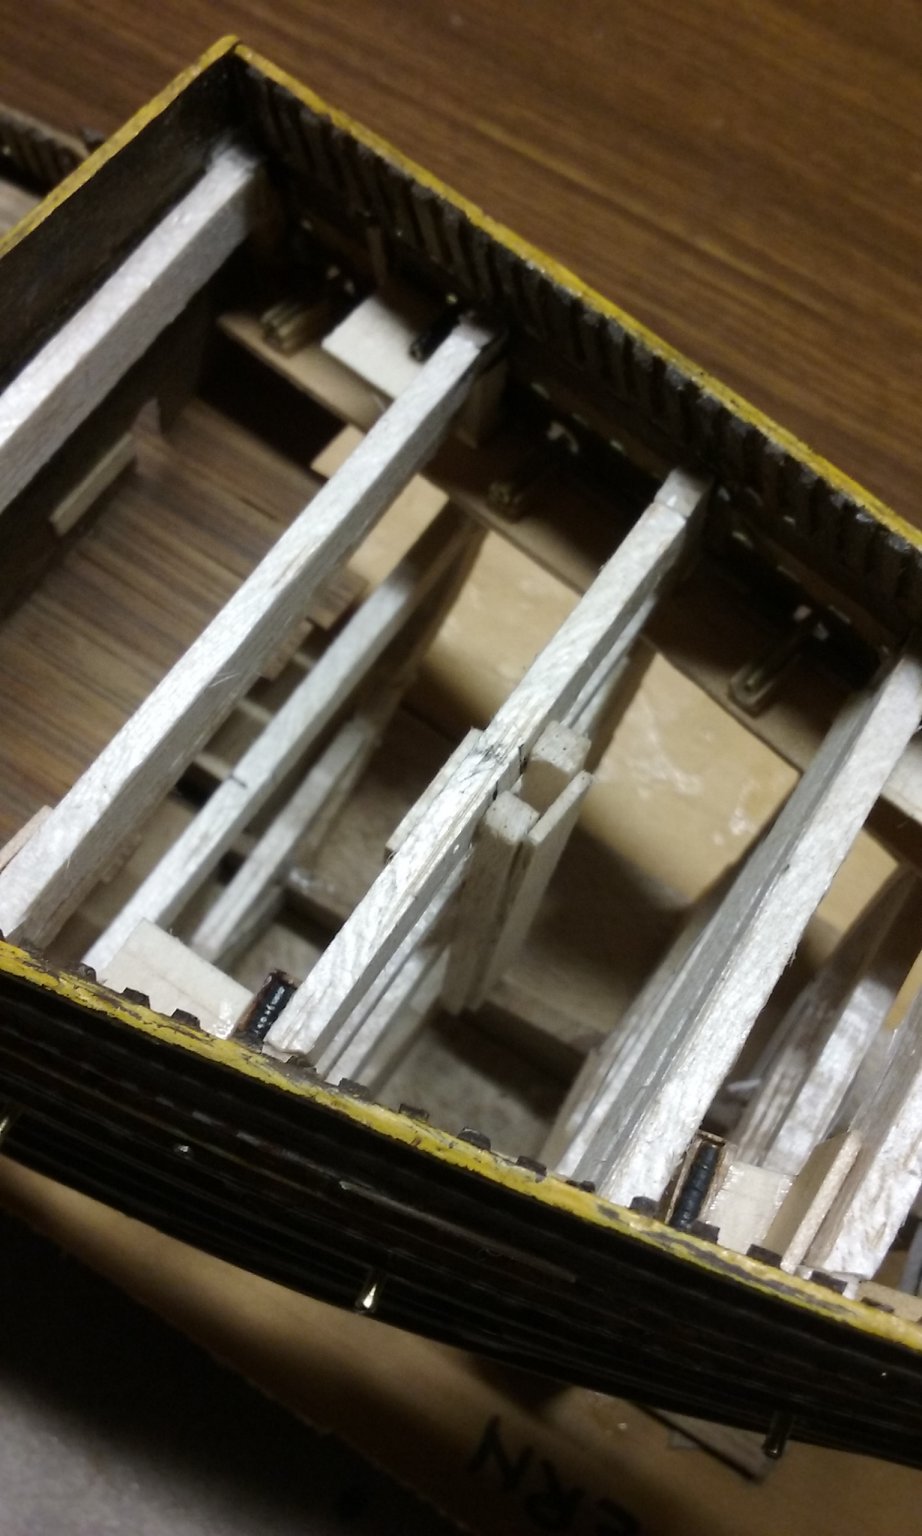
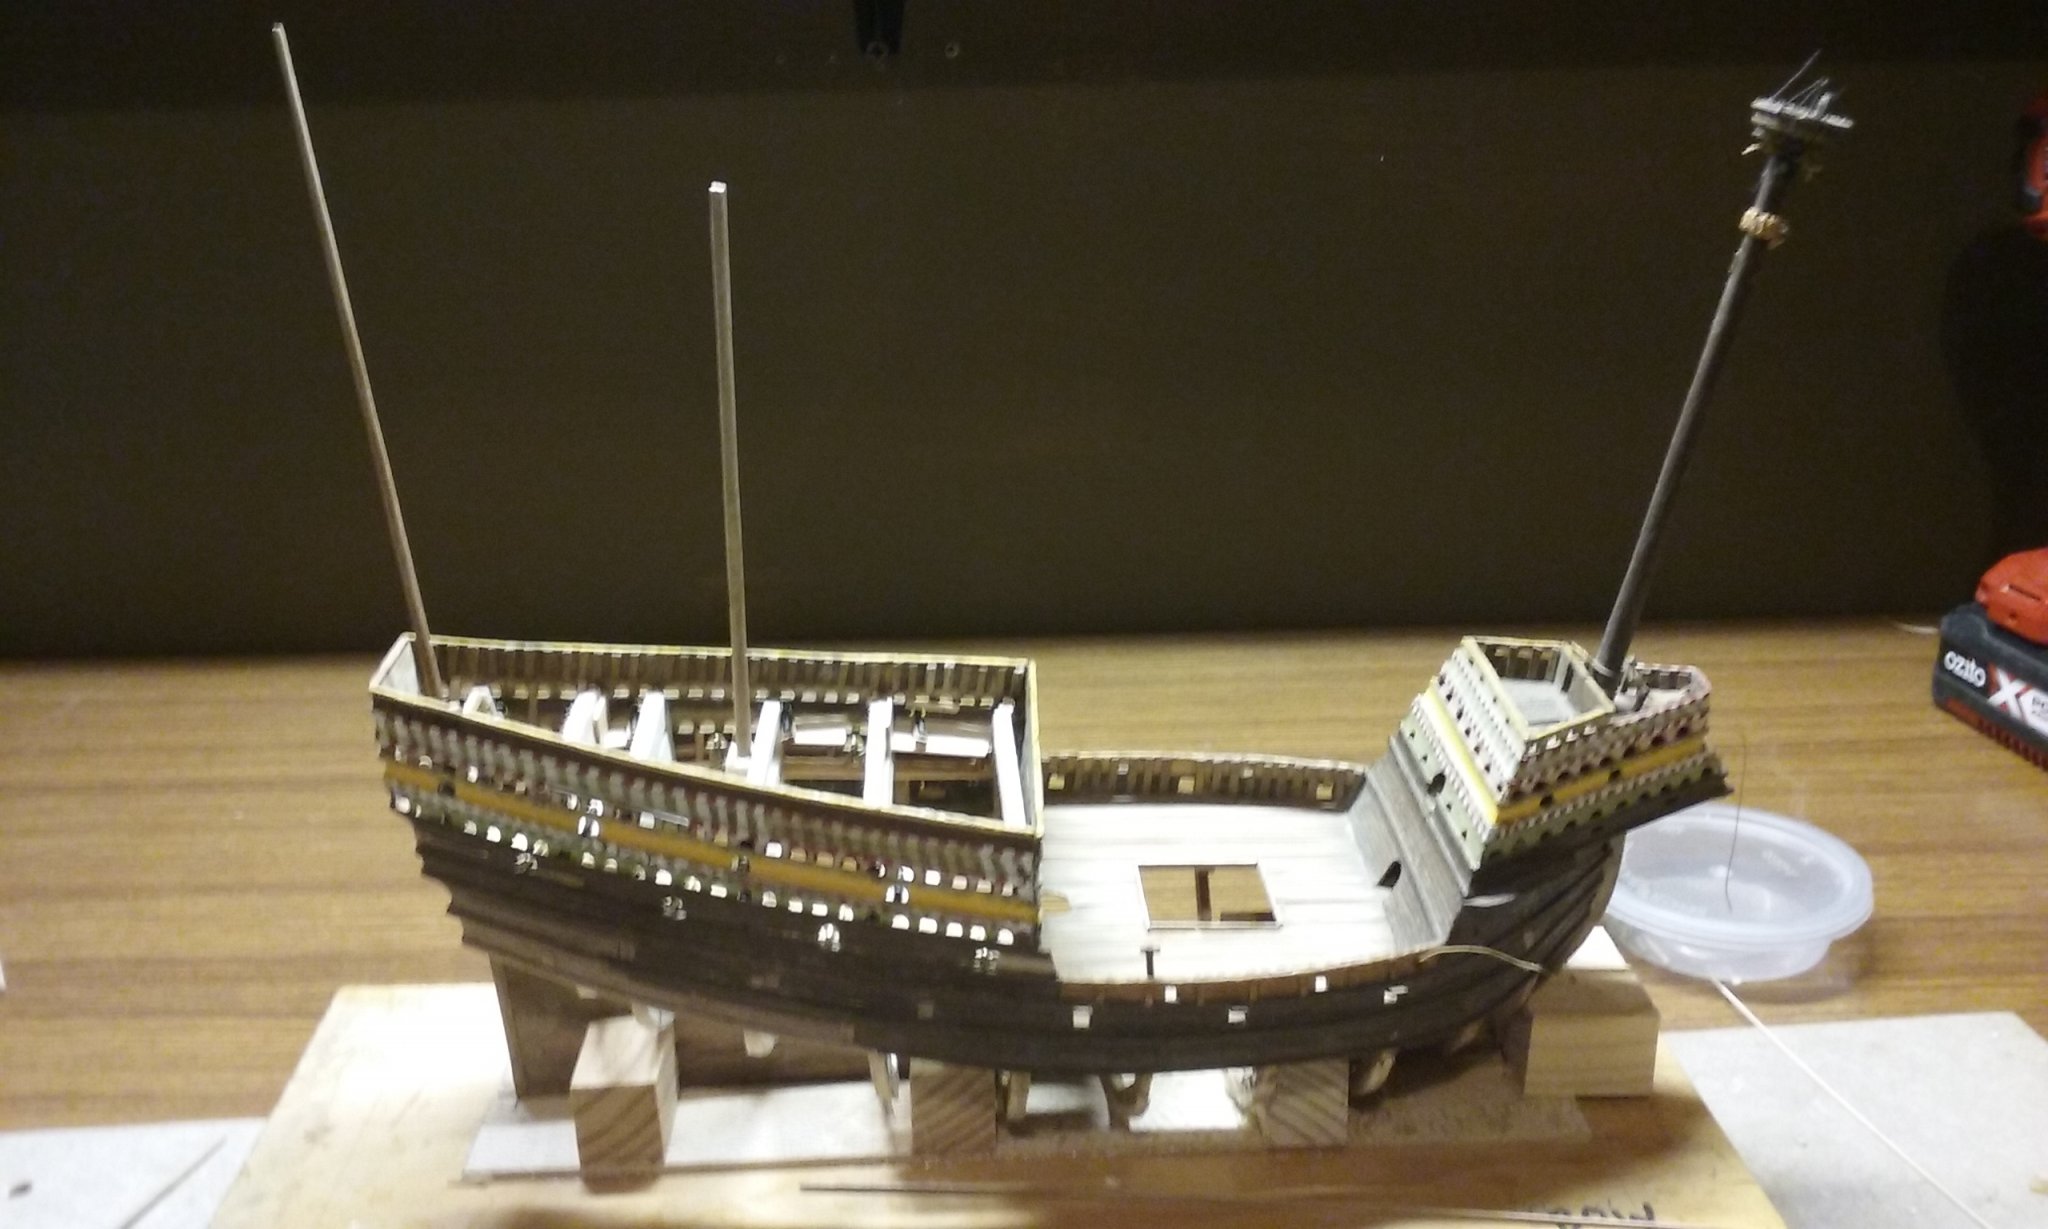
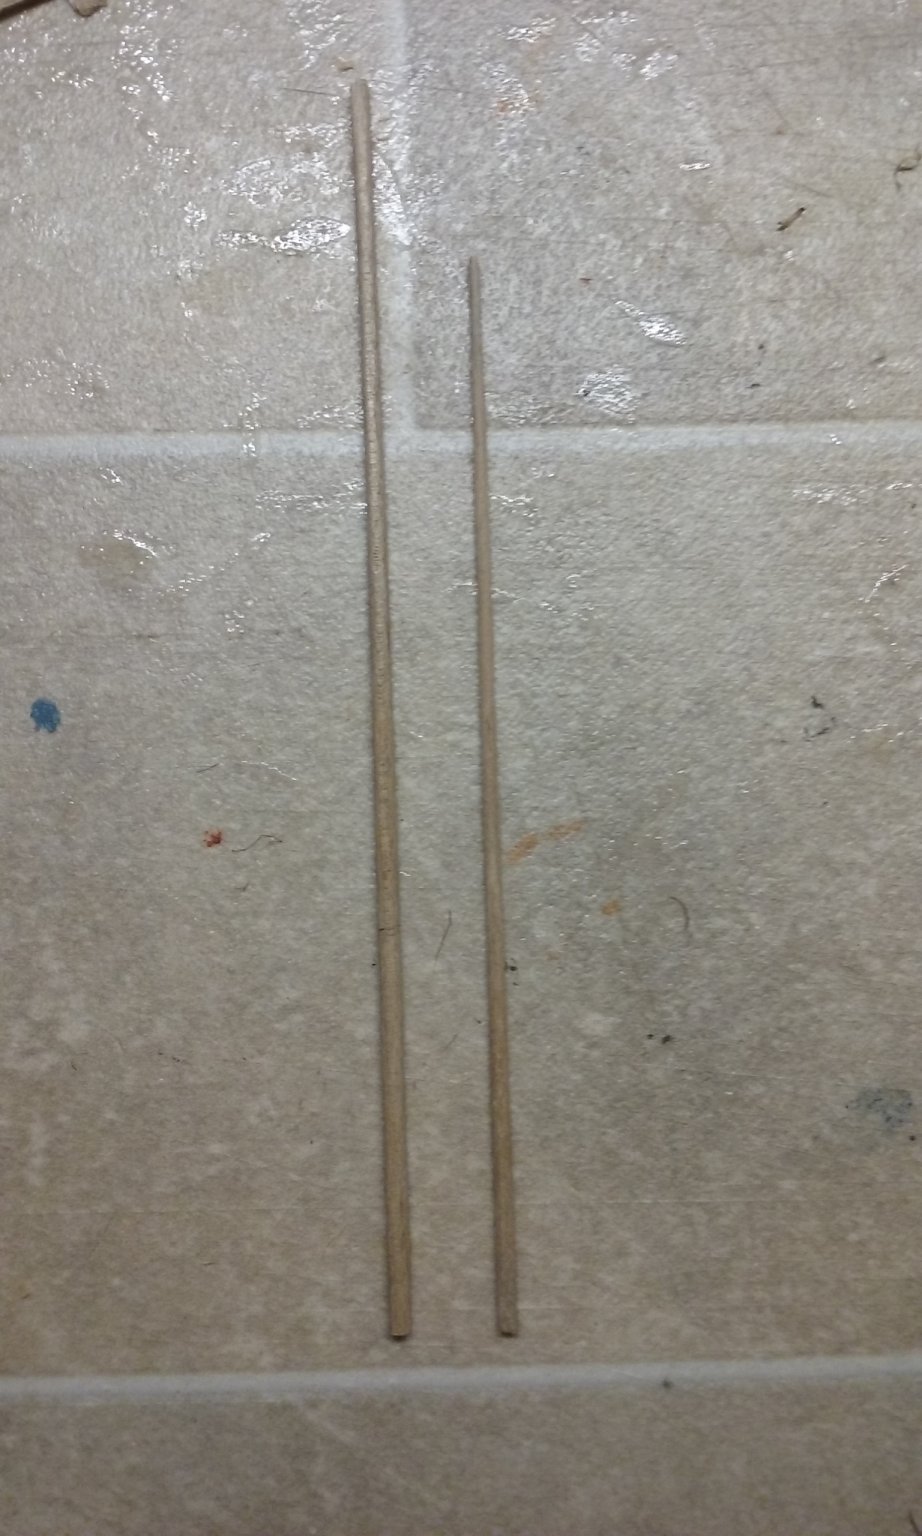
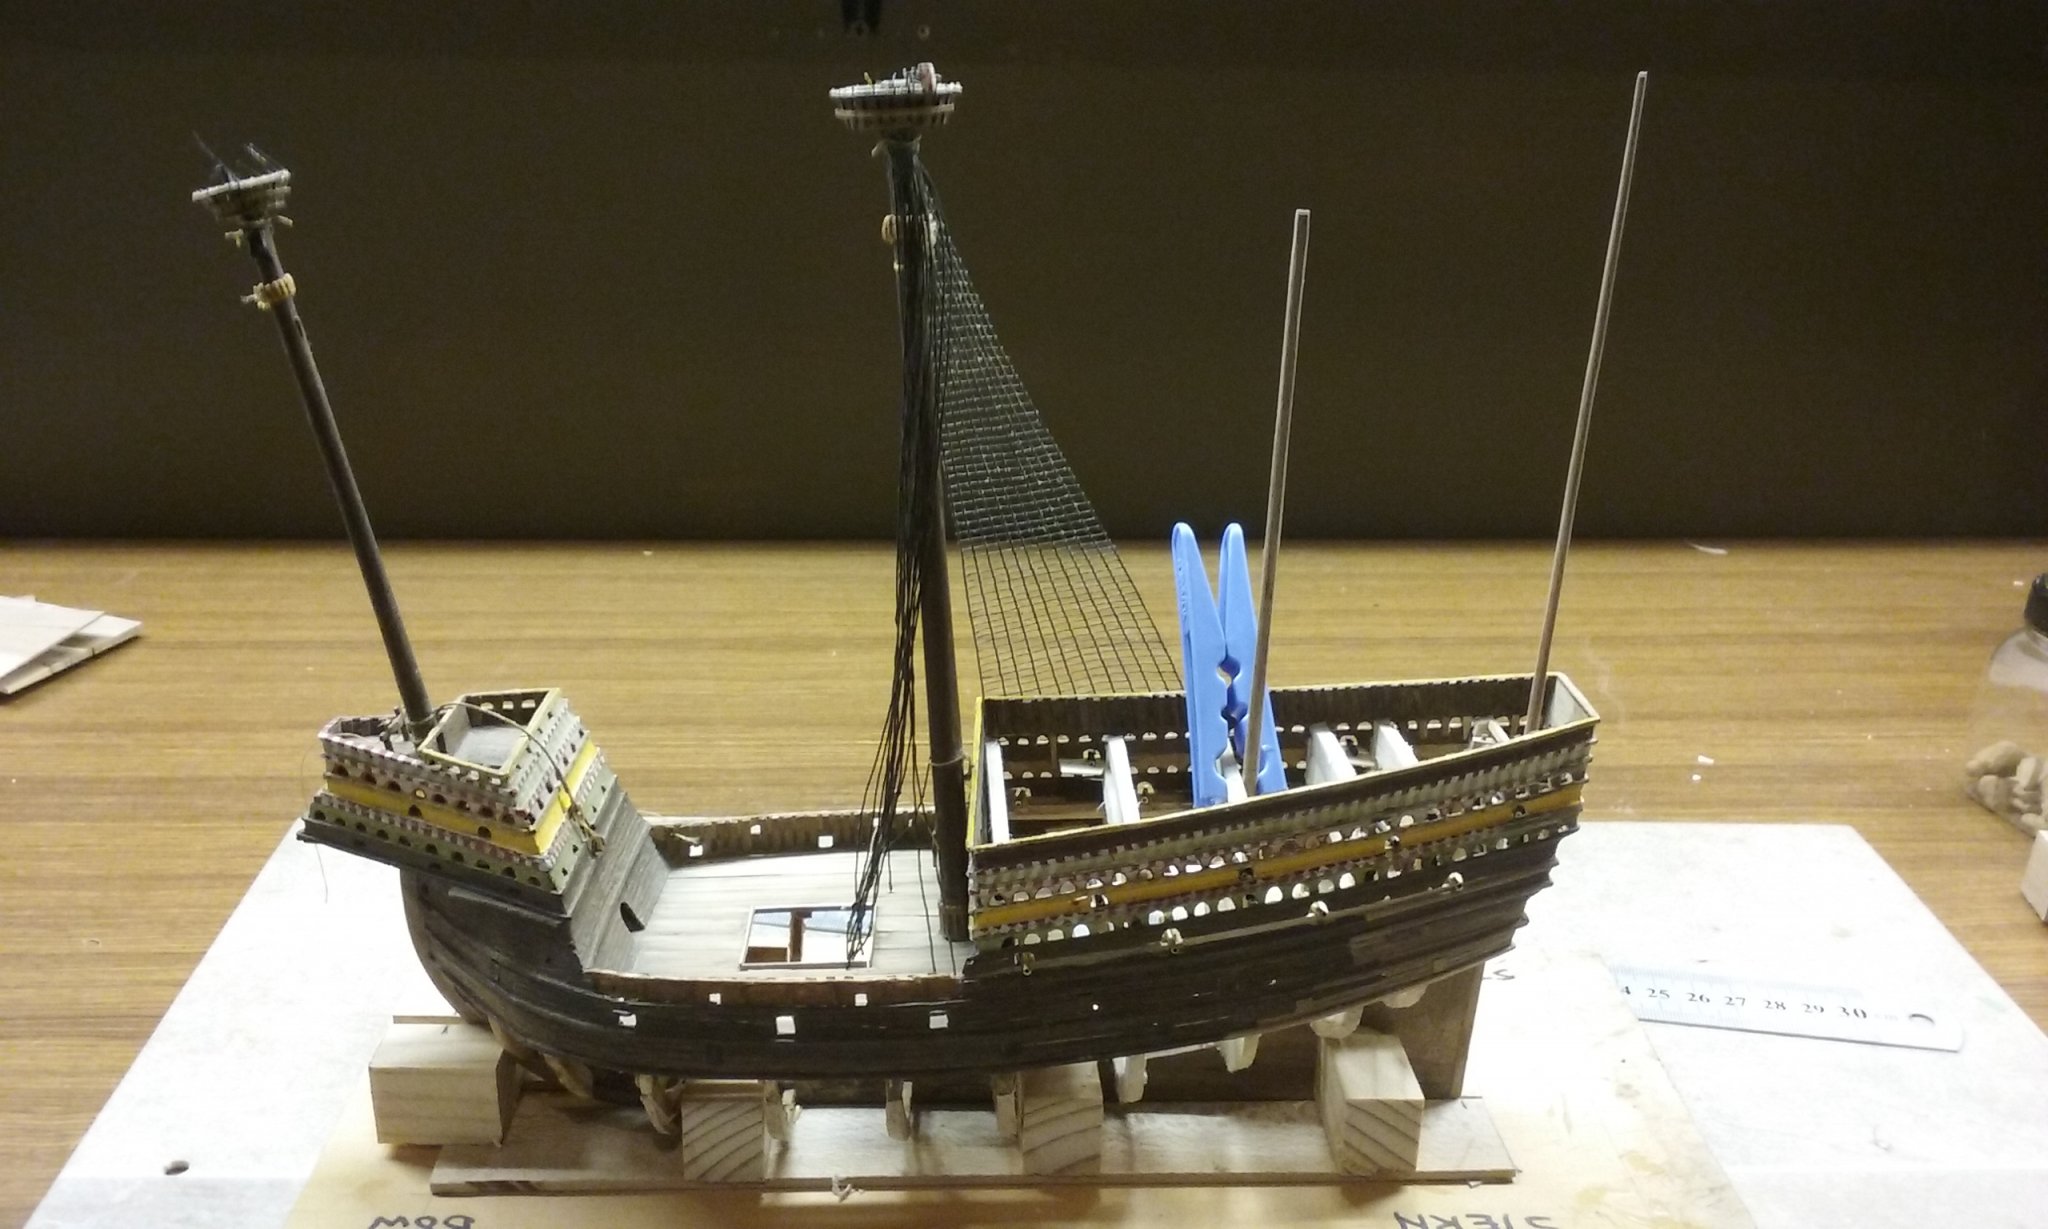
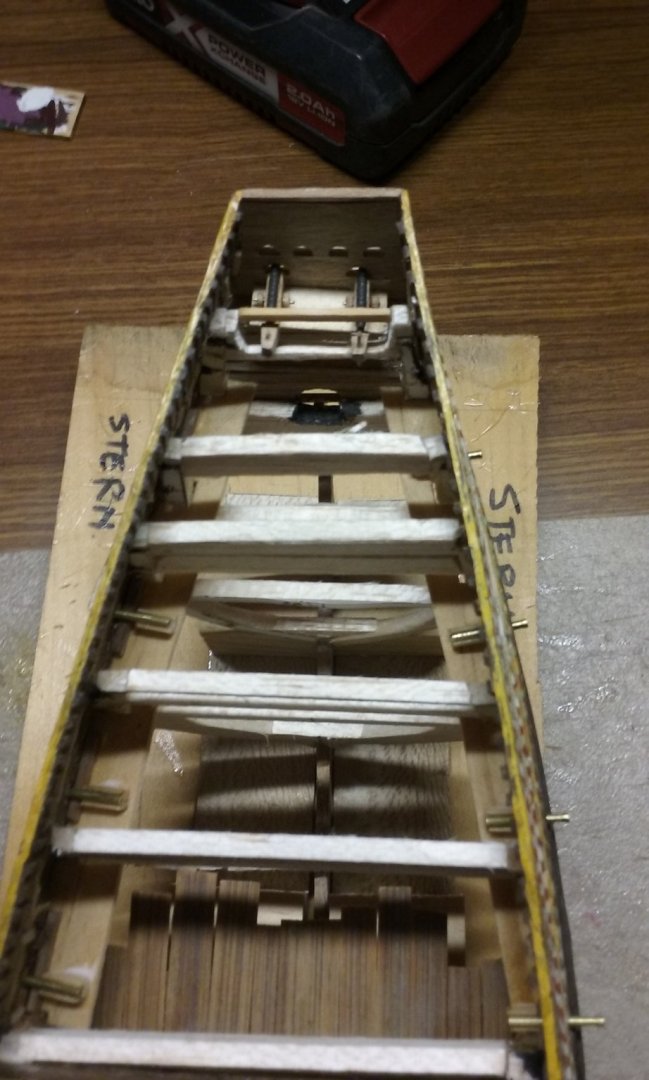
Thanks for the likes, everyone. Pat, it was like pulling teeth in reverse, but I've finally finished that part of things. Unfortunately two of the gunports were right in line with a couple of the balsa frames, so I had to drill holes in the frames and force the barrels into them. It worked, though. And I've been working on the masts. Here's the lower mizzen. I'd planned to have a mast step, but when I came to position the mast I discovered that one of the frames was right in the way, so I stepped the mast into the frame, and cut a sort of "channel" out of the crossbeams for the mast to go through, after first gluing a reinforcing piece to each. The bonaventure mizzen (these ships had two mizzen masts - the bonaventure fell out of use in the following decades). I've followed Landstrom in making this mast out of a single spar. Here are the two mizzen masts together And I ought to know the name of this spar but I don't - it's to control the bonaventure lateen. And the mizzen topmast (I forgot to take a final photo, but the procedure was the same as the lower mast). Here are the masts dry fitted, including the original mainmast which I currently have in storage, to put in place when the time is right. I'd have done the same with the foremast, but I couldn't get it out of the hull without breaking it, so I let it stay. Steven


- 740 replies
-
- 9
-
-
- Tudor
- restoration
- (and 4 more)
-
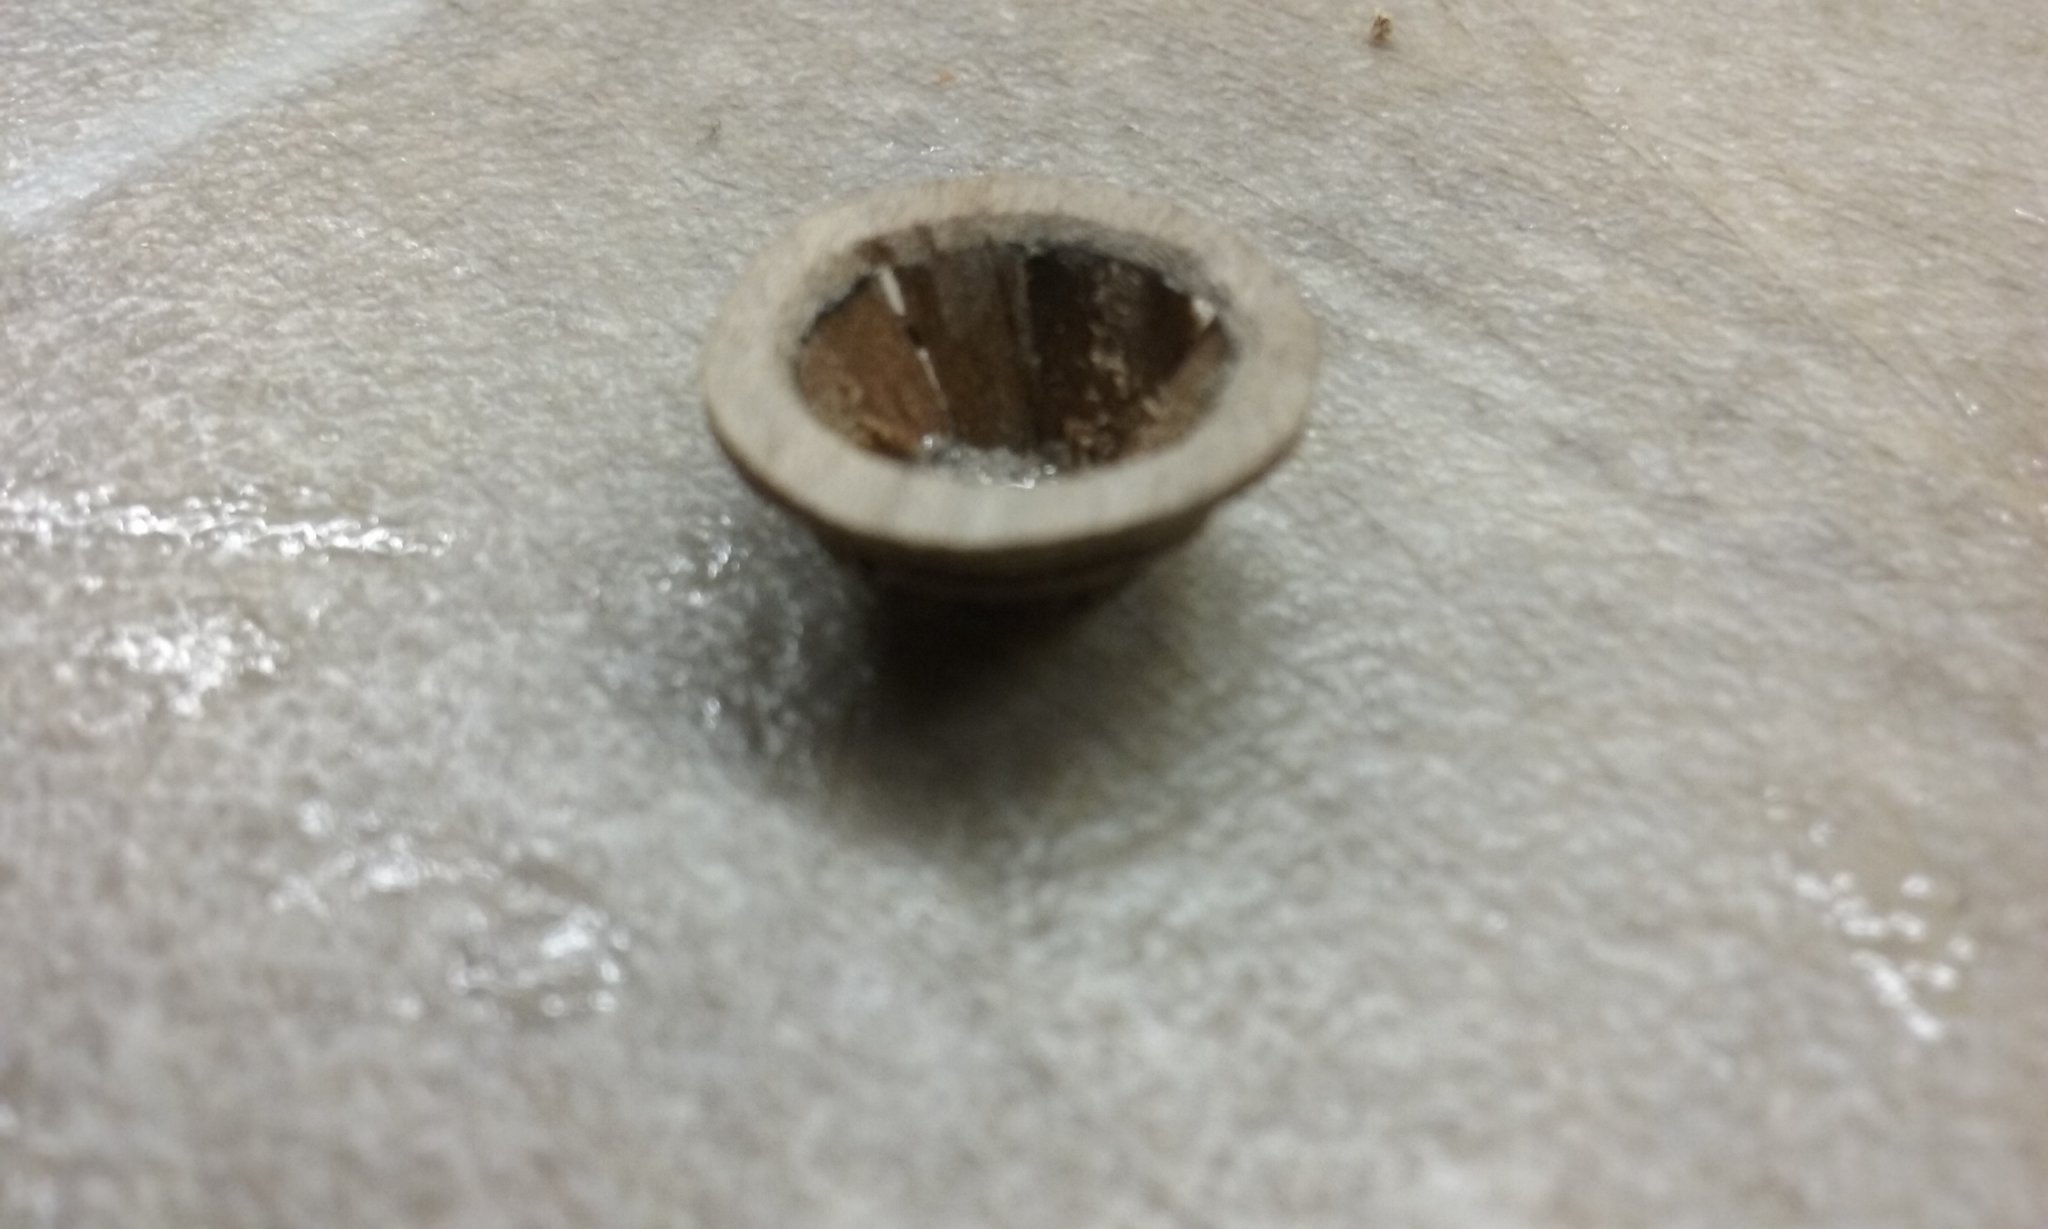
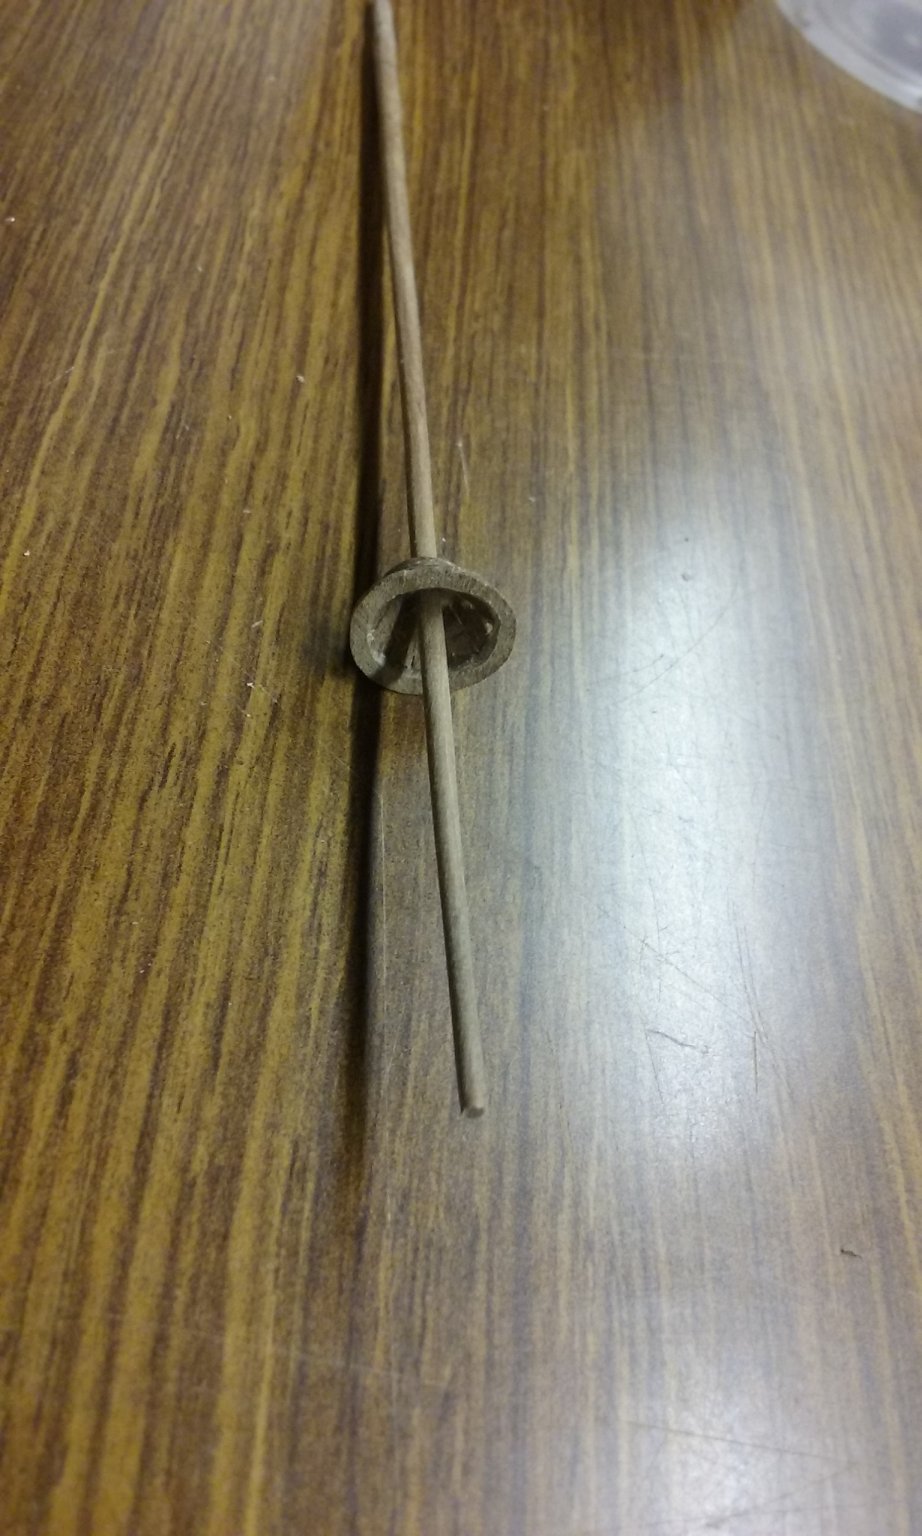
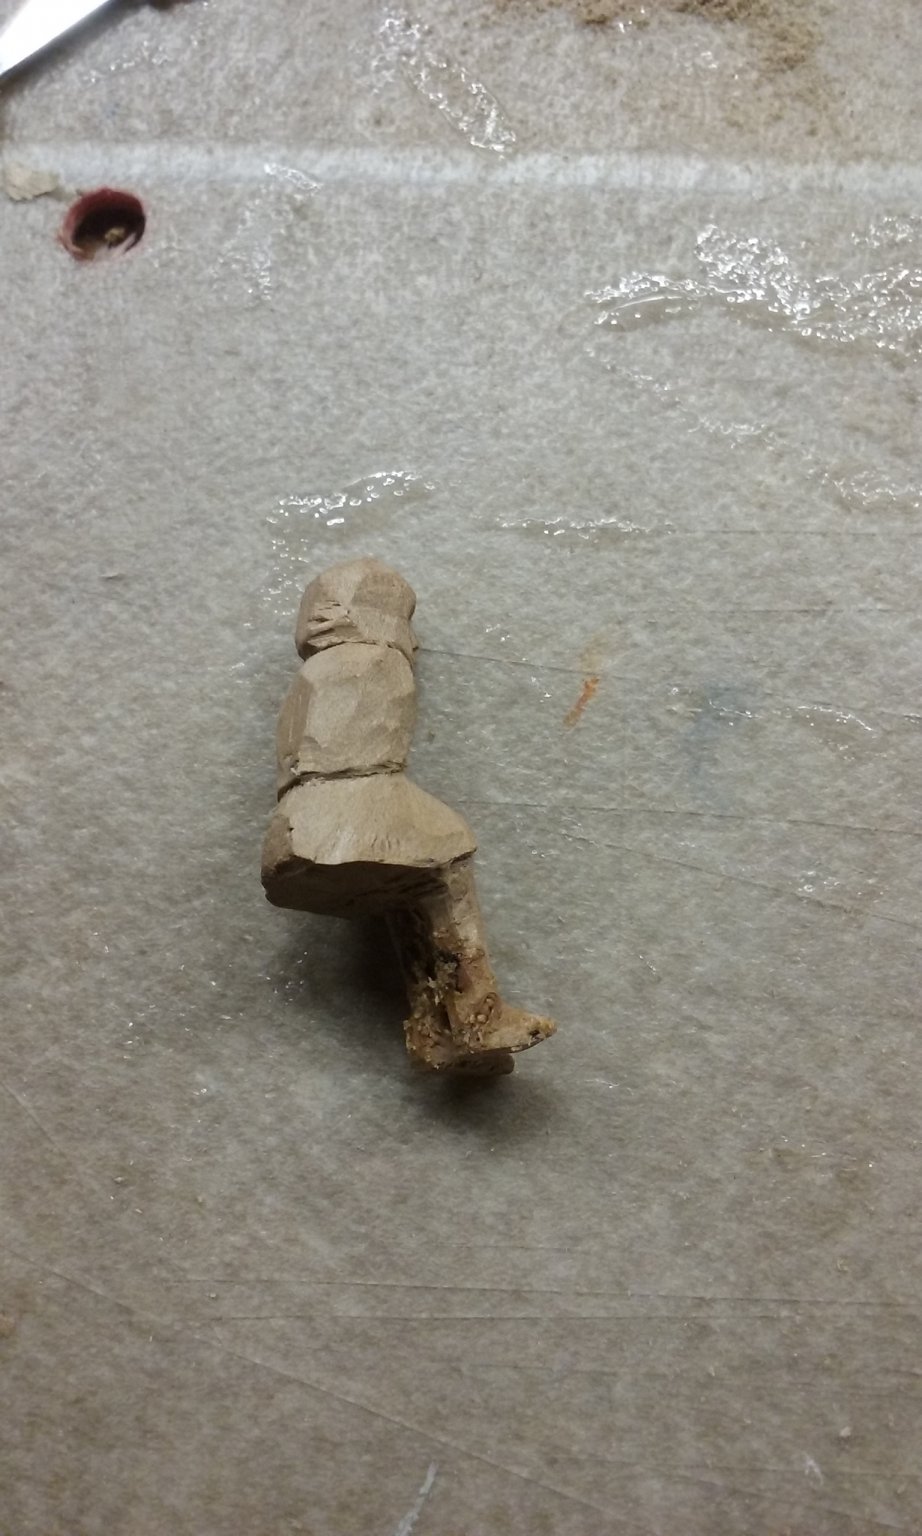
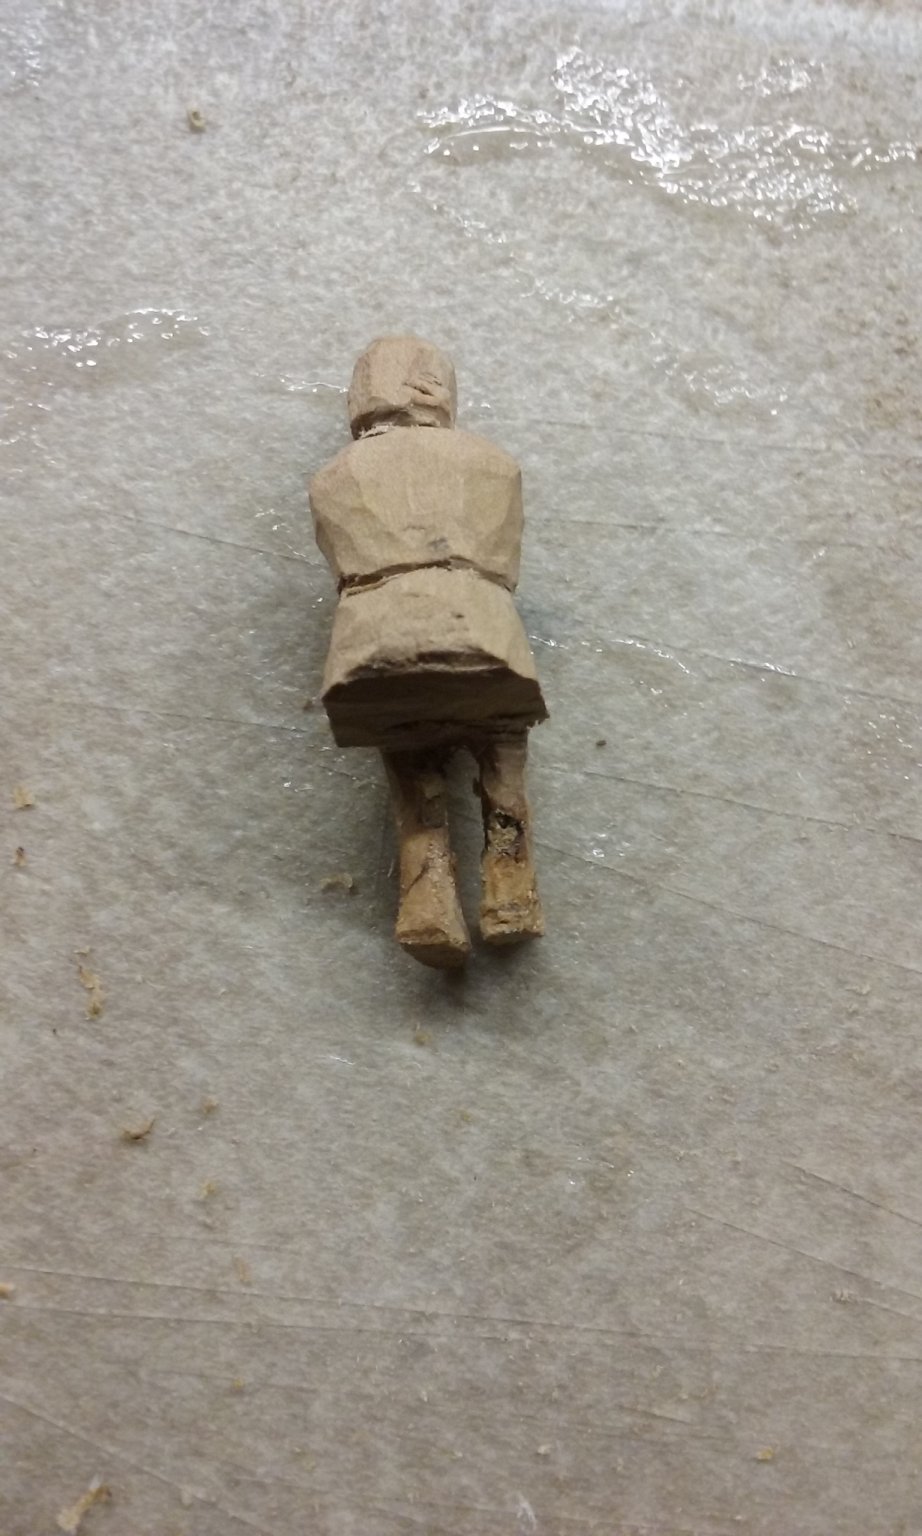
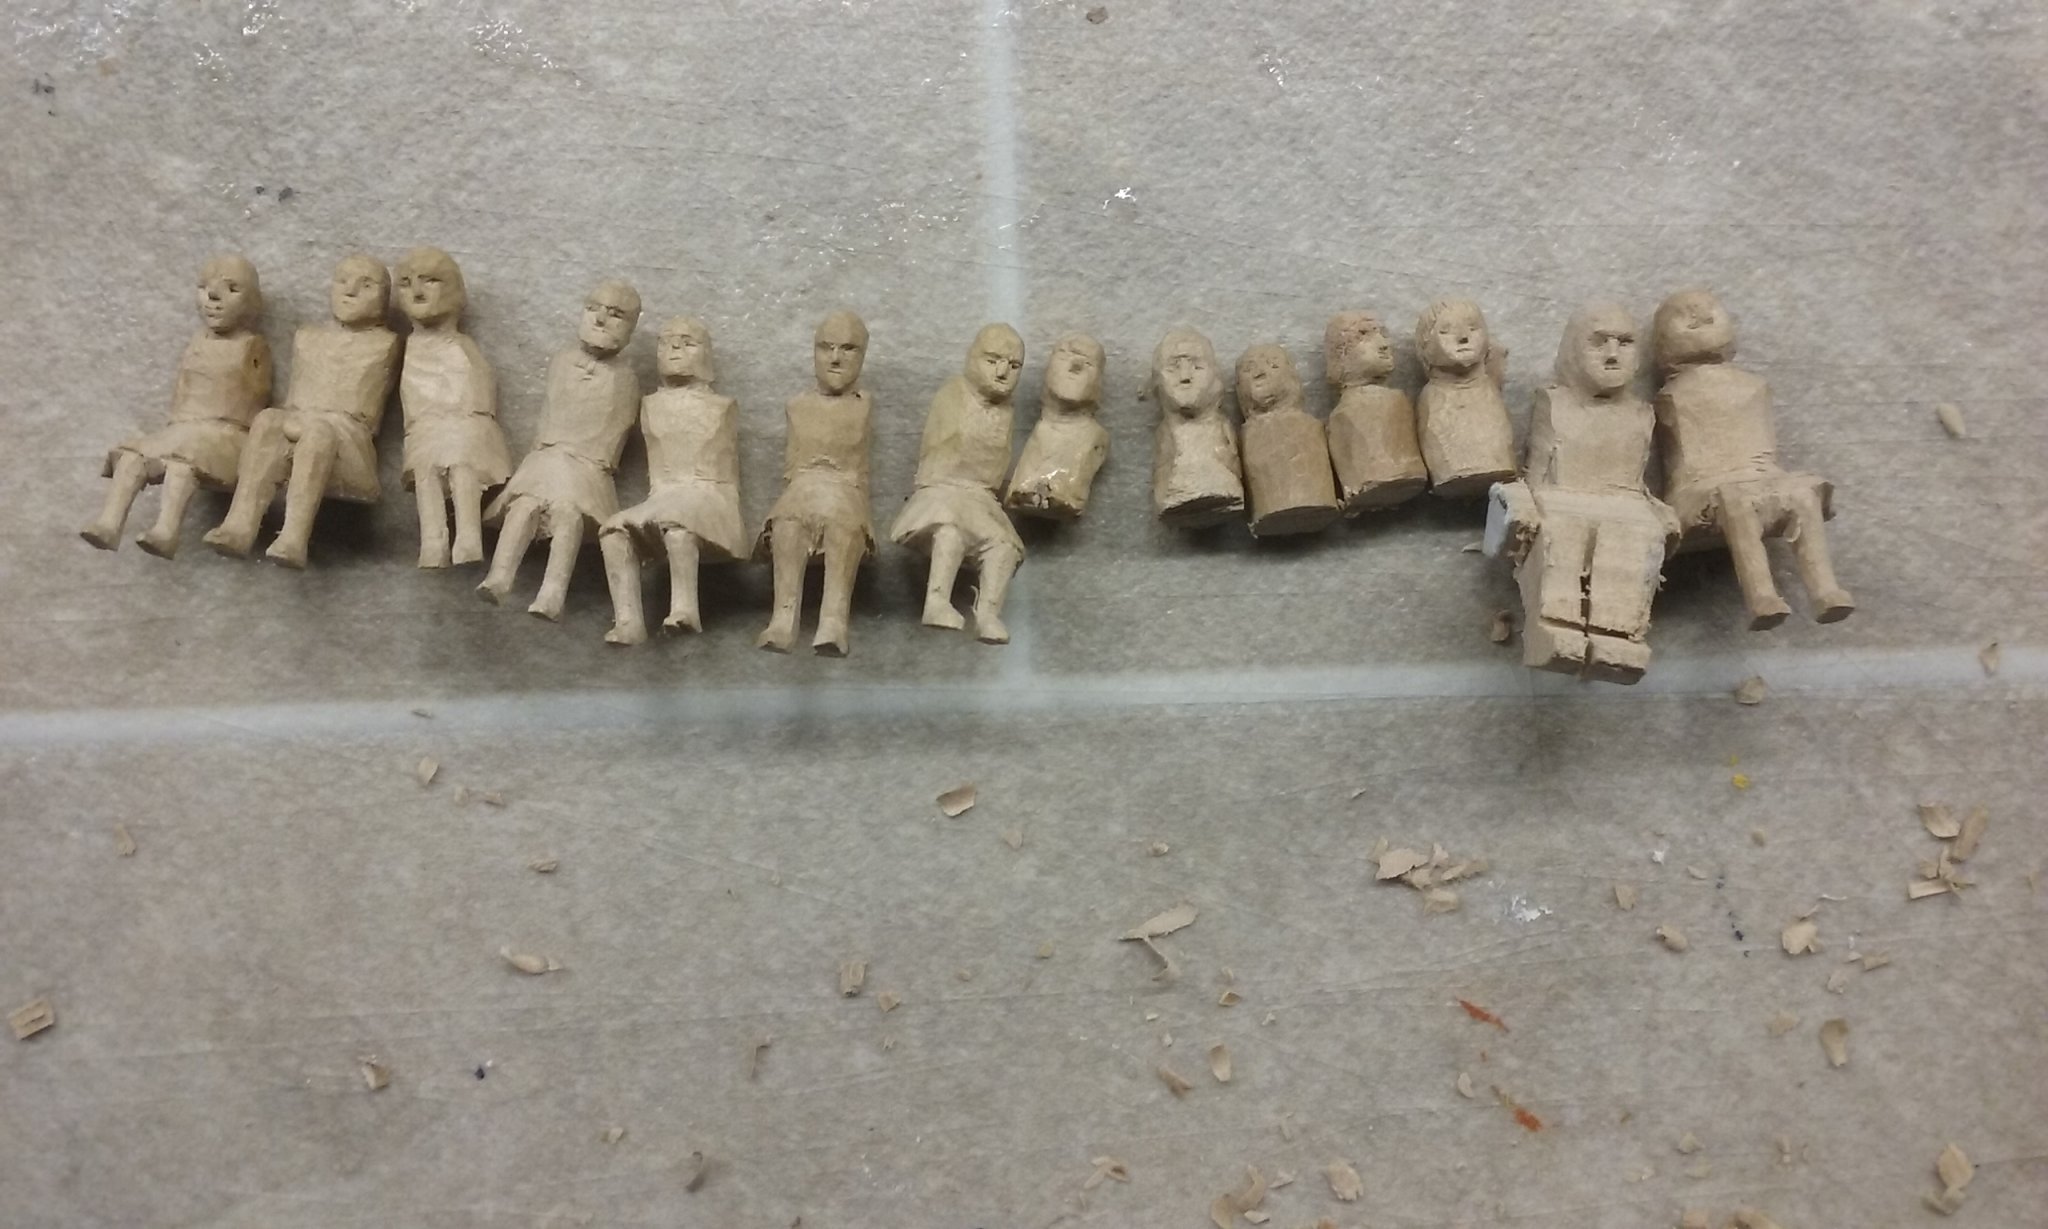
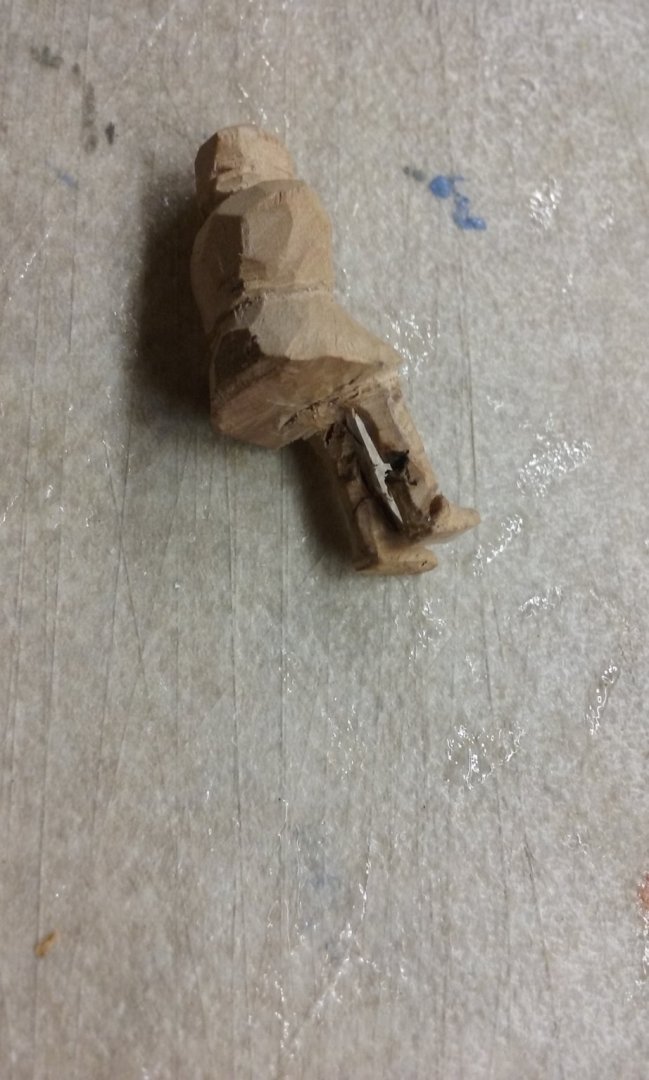
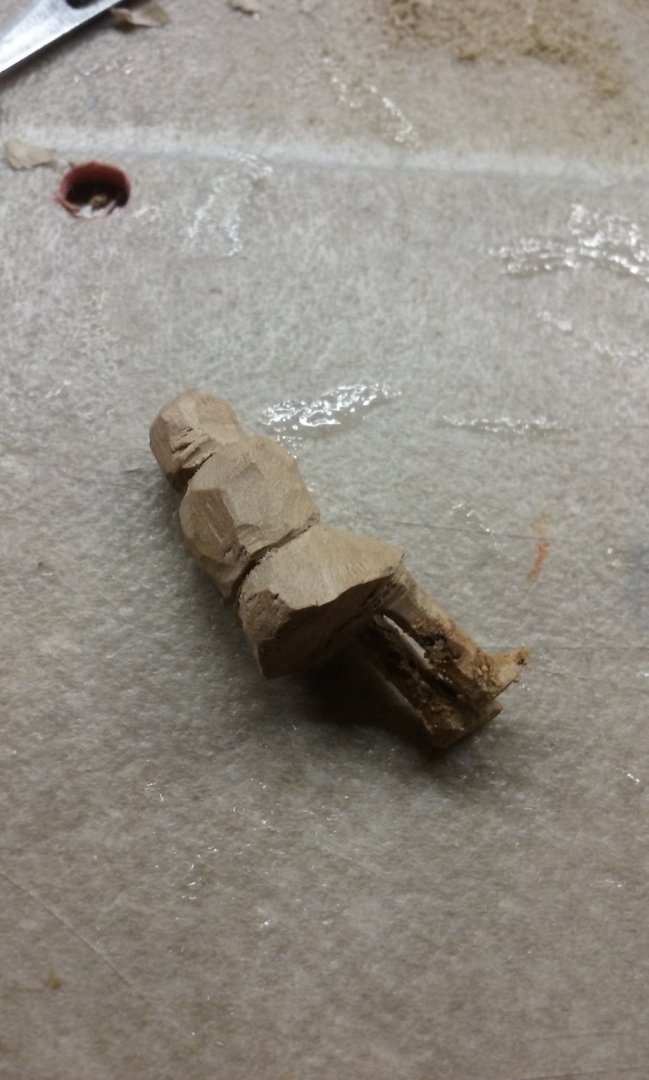
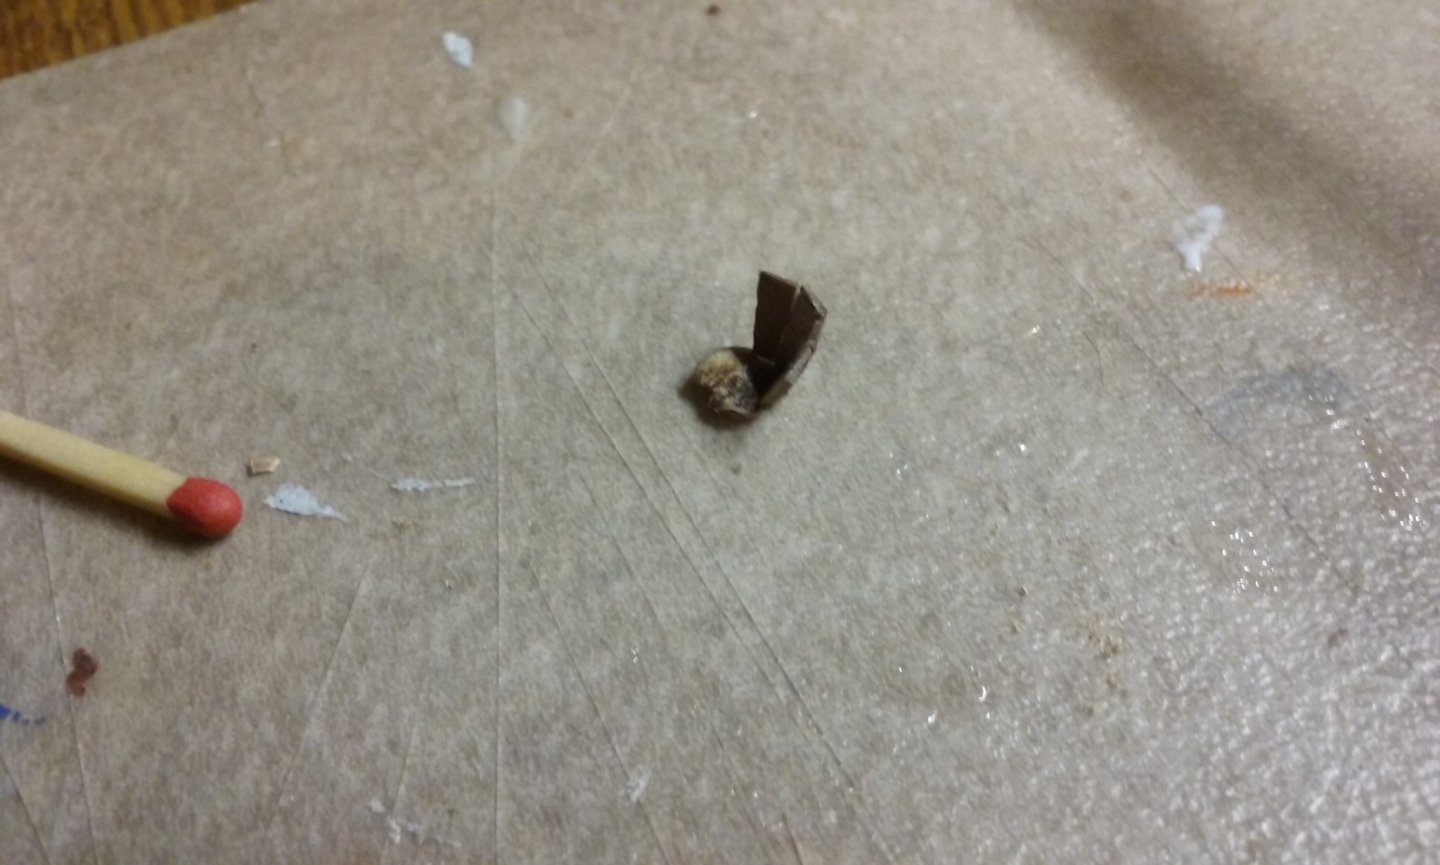
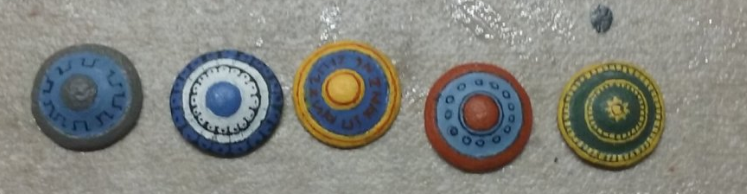
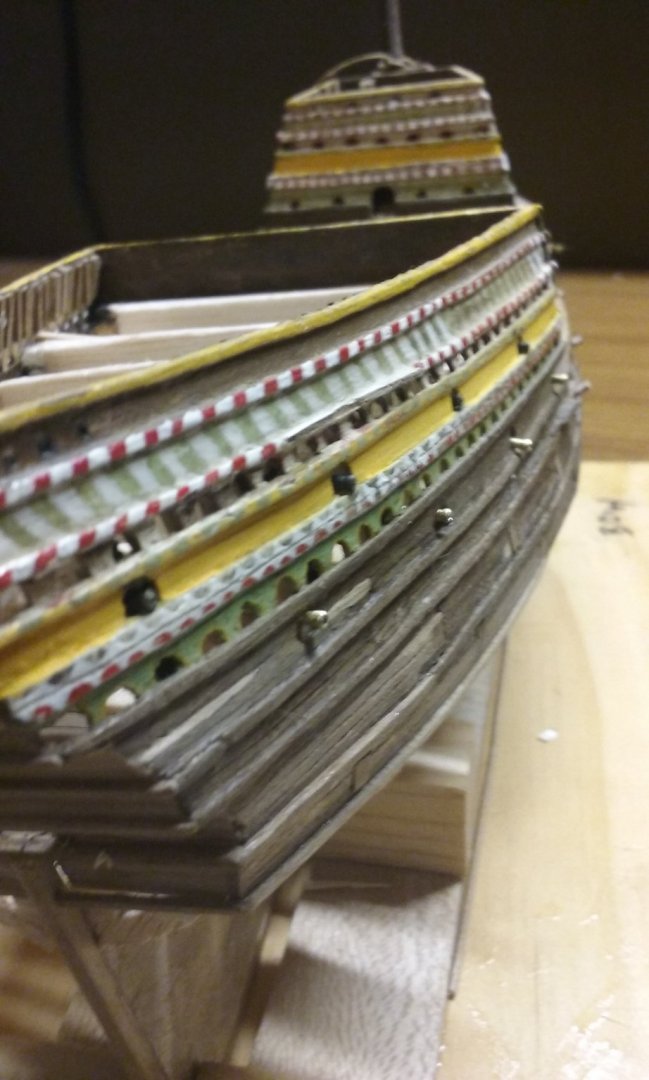
Thanks for the likes and comments. Yes, the shields are rather attractive, especially the colours. I've tried to duplicate these as closely as possible with my limited palette (keeping in mind that the people who did the original pictures also had a limited palette and might not have got the colours quite right). I think Byzantine shields are particularly beautiful and interesting - not at all like Western Europeans shield patterns, which wound up in a dead end once they started introducing rules - only a certain number of colours, only a certain number of shield motifs and arrangements. This was because they developed the subject of "heraldry", which allowed you to describe a coat of arms in words so anyone could reproduce it - in a book or whatever, and as a means of individual identification, but it also restricted the flexibility of design.This never happened in Byzantium, so you have all kinds of "coats of arms" - many of which simply couldn't be shoe-horned into the Western descriptive system. Though I've been concentrating on the Great Harry for the time being, I haven't completely dropped the dromon. Here are the next 5 shields, plus one part painted and another in the mould. And I've been carving more oarsmen. Two more so far - since I dropped the feeling of "I must get this done" the enjoyment has come back. It should be fun, not a chore. One guy had his legs too far out from the body to fit him between the oarbenches (my bad). So after a bit of thought I developed a cunning plan - I cut the legs off and glued them back on closer to the body, with dowel joints to keep them in place (you can see the dowels if you look carefully). Now he fits, but I'll be taking more care in future to try and avoid it happening again. Steven
-
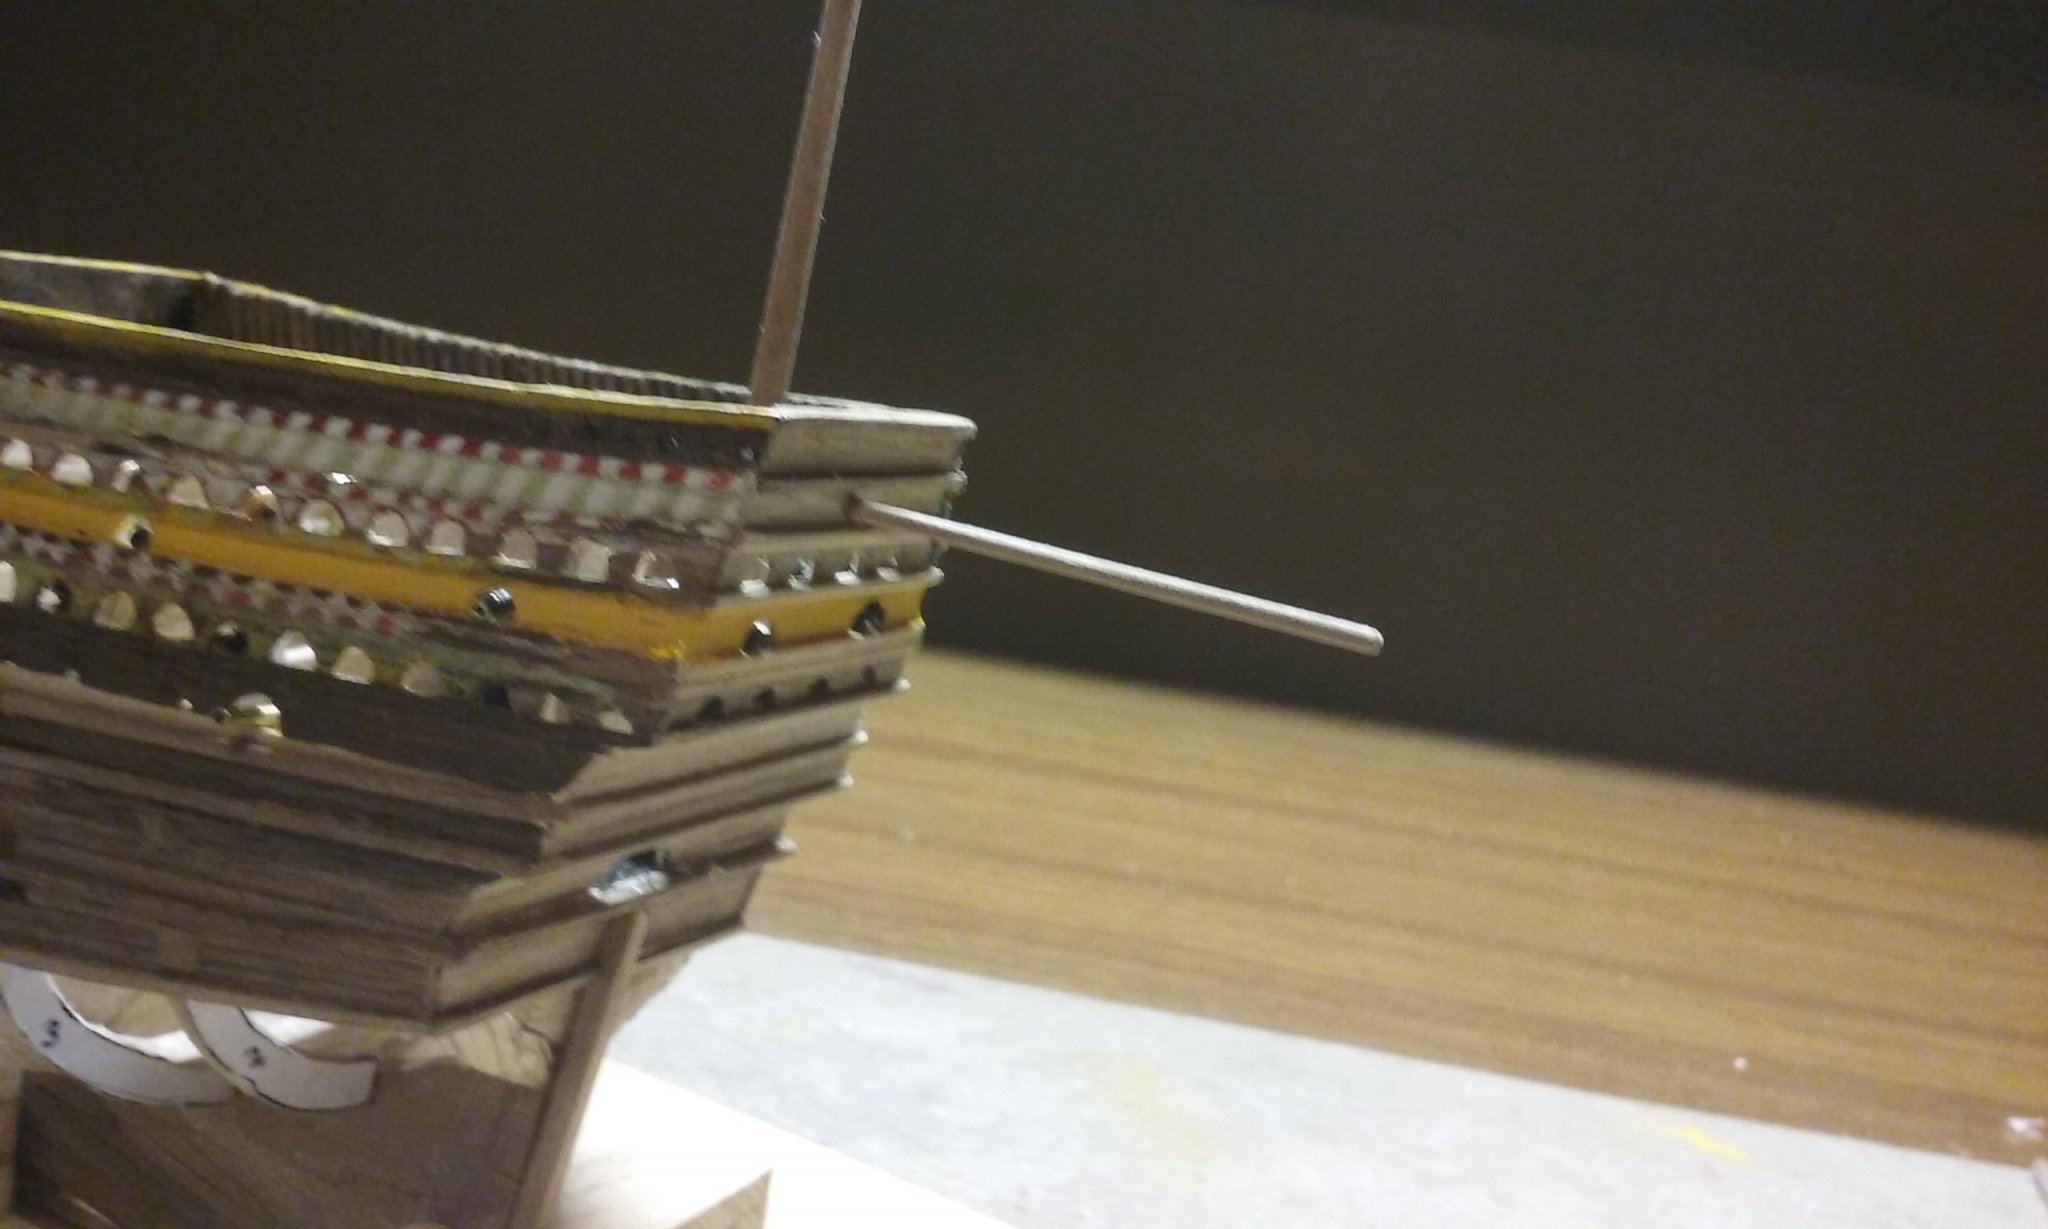
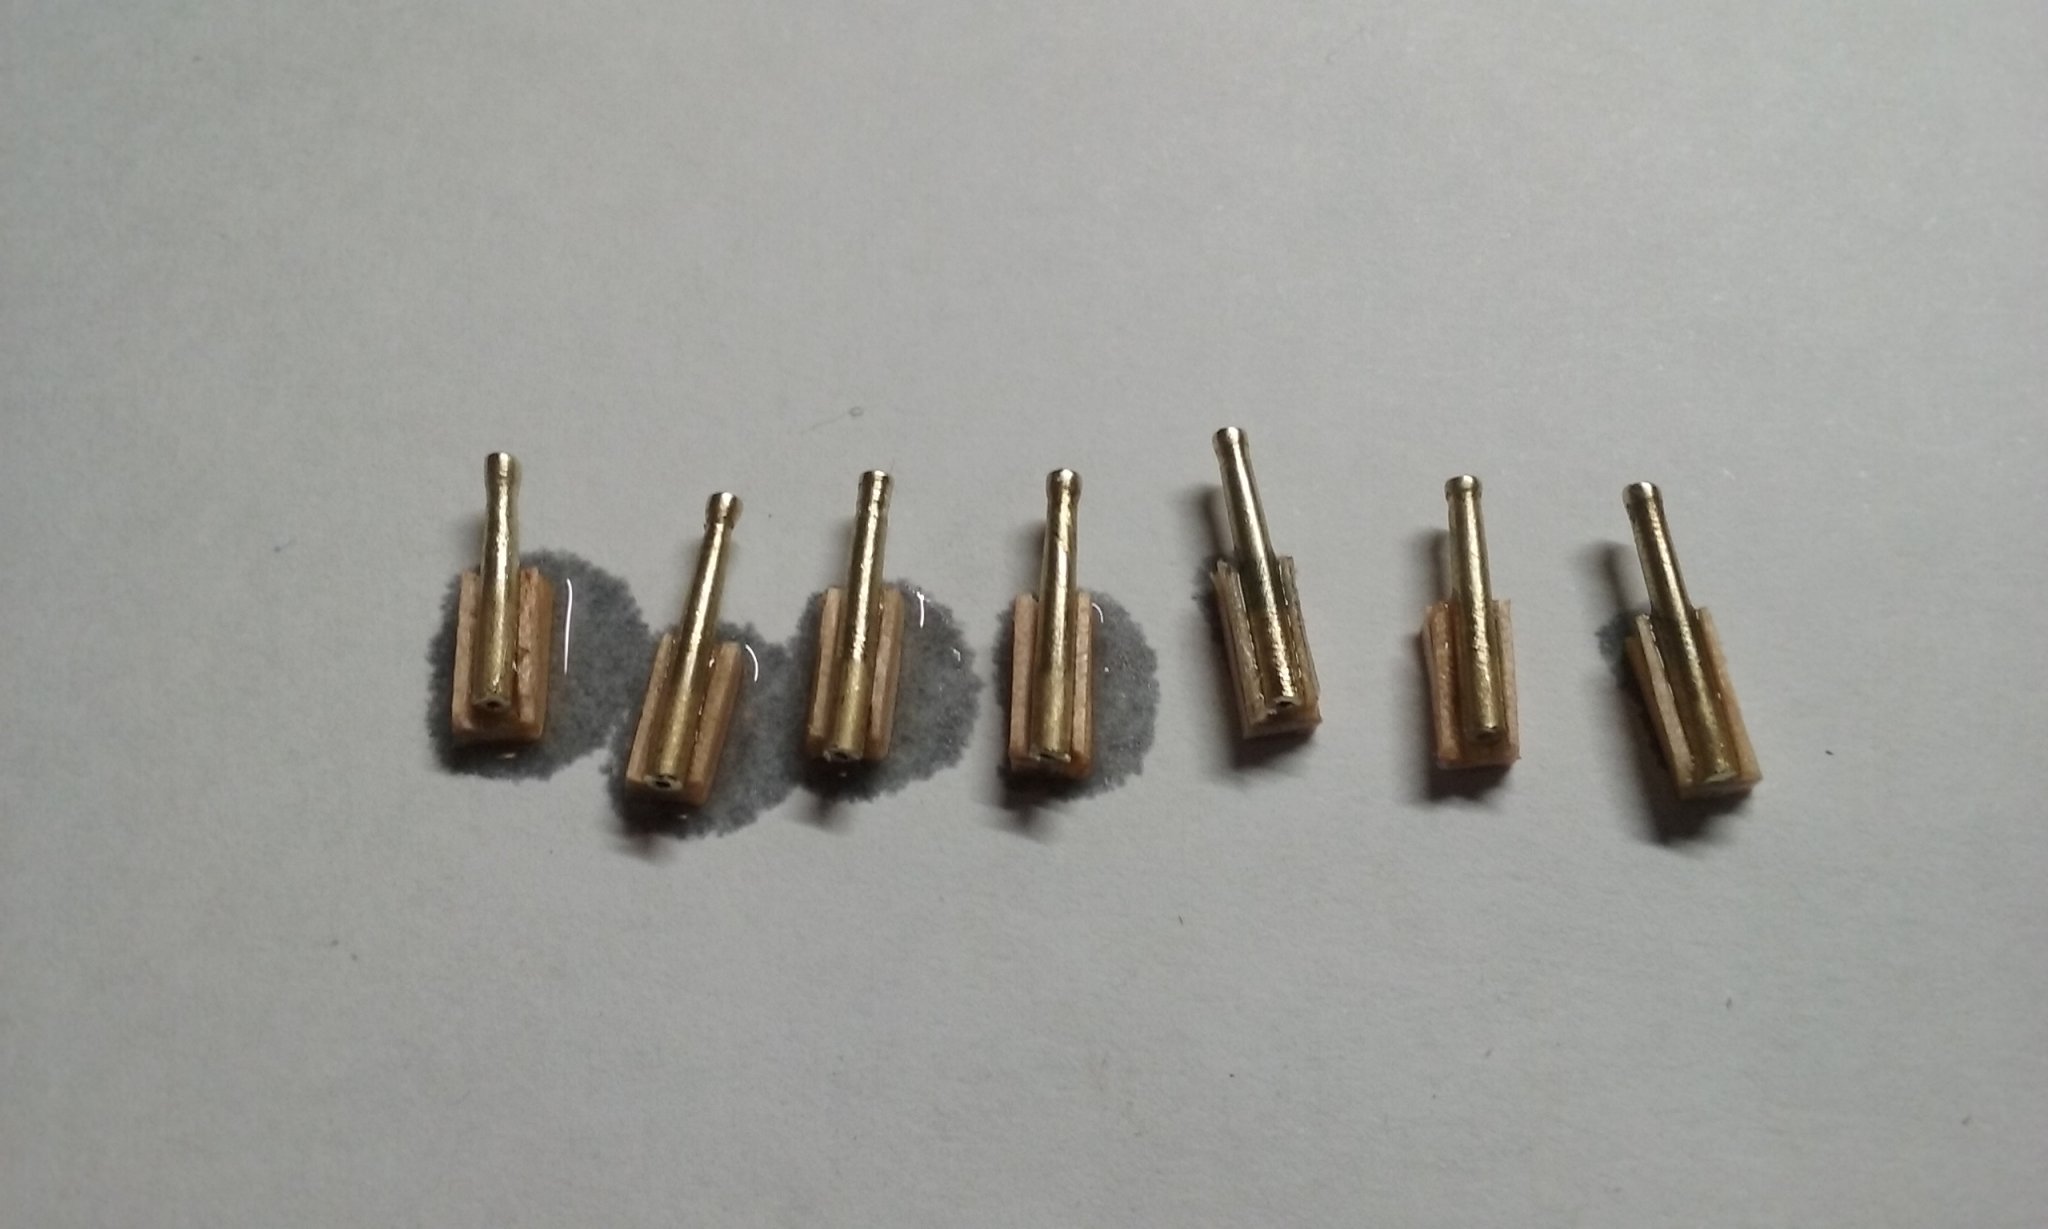
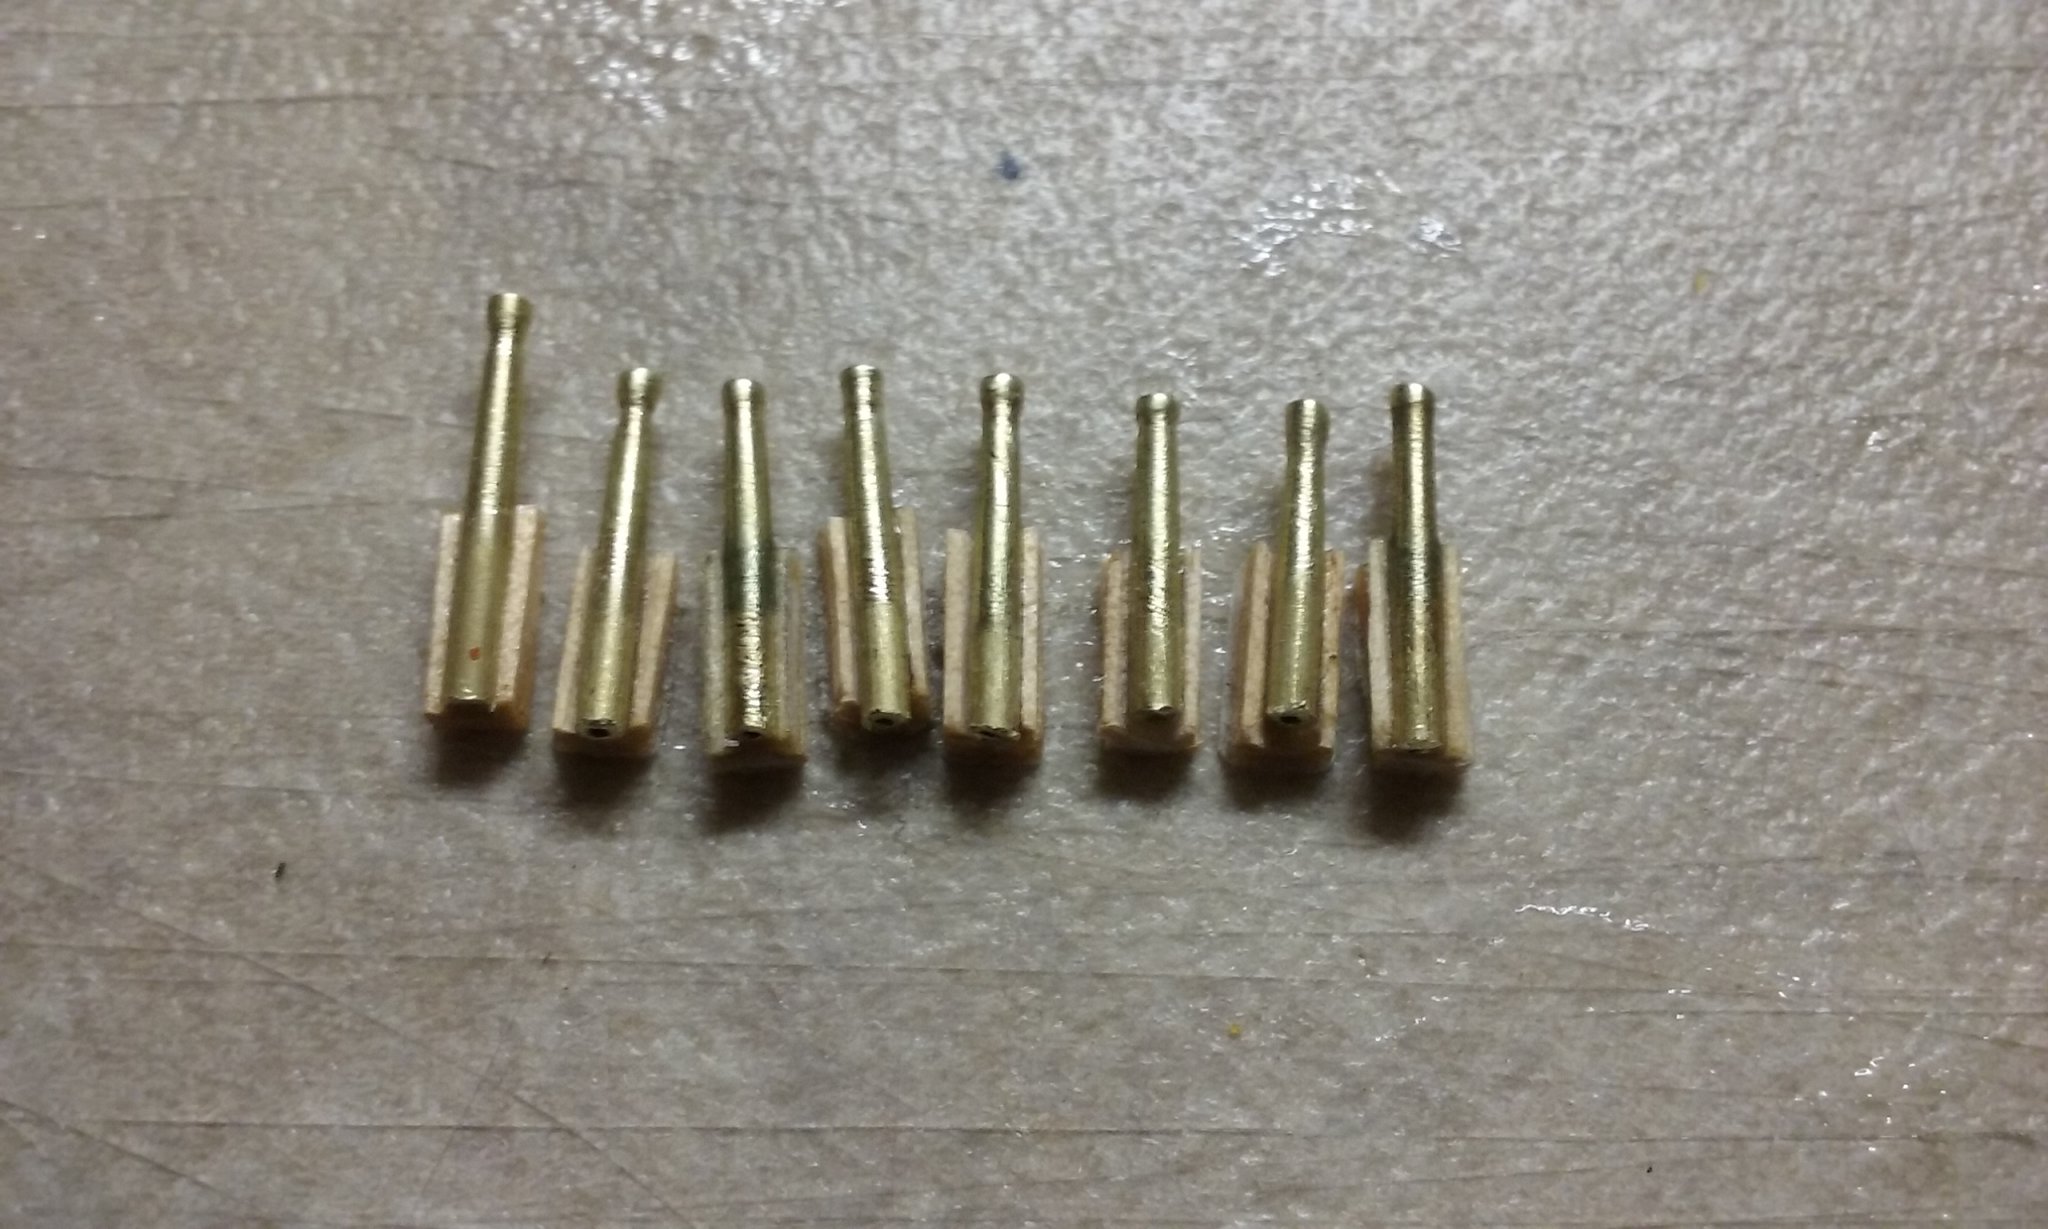
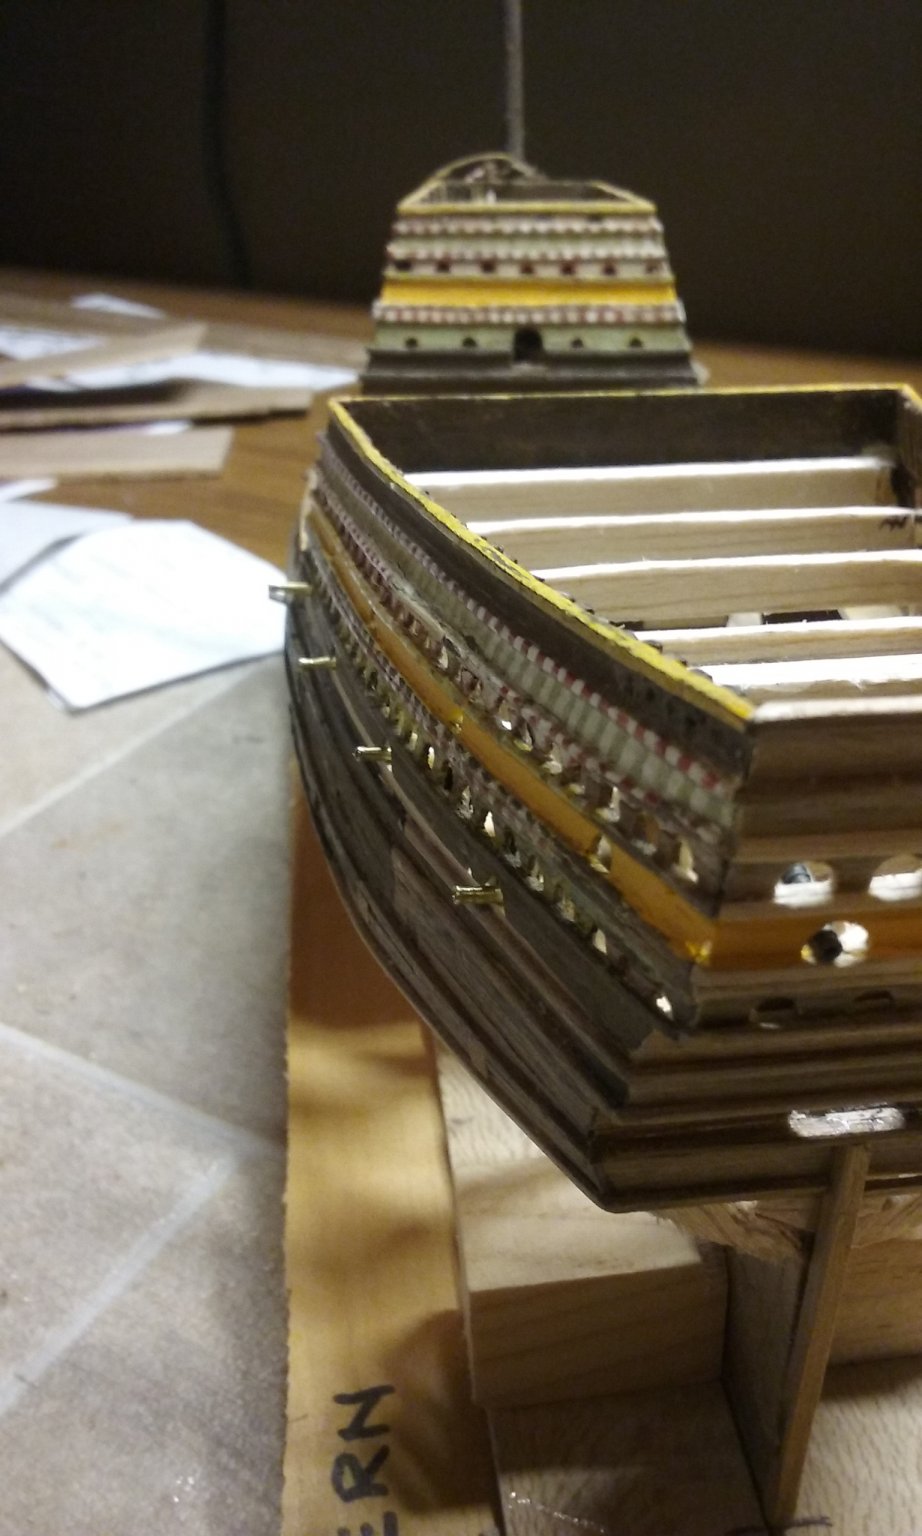
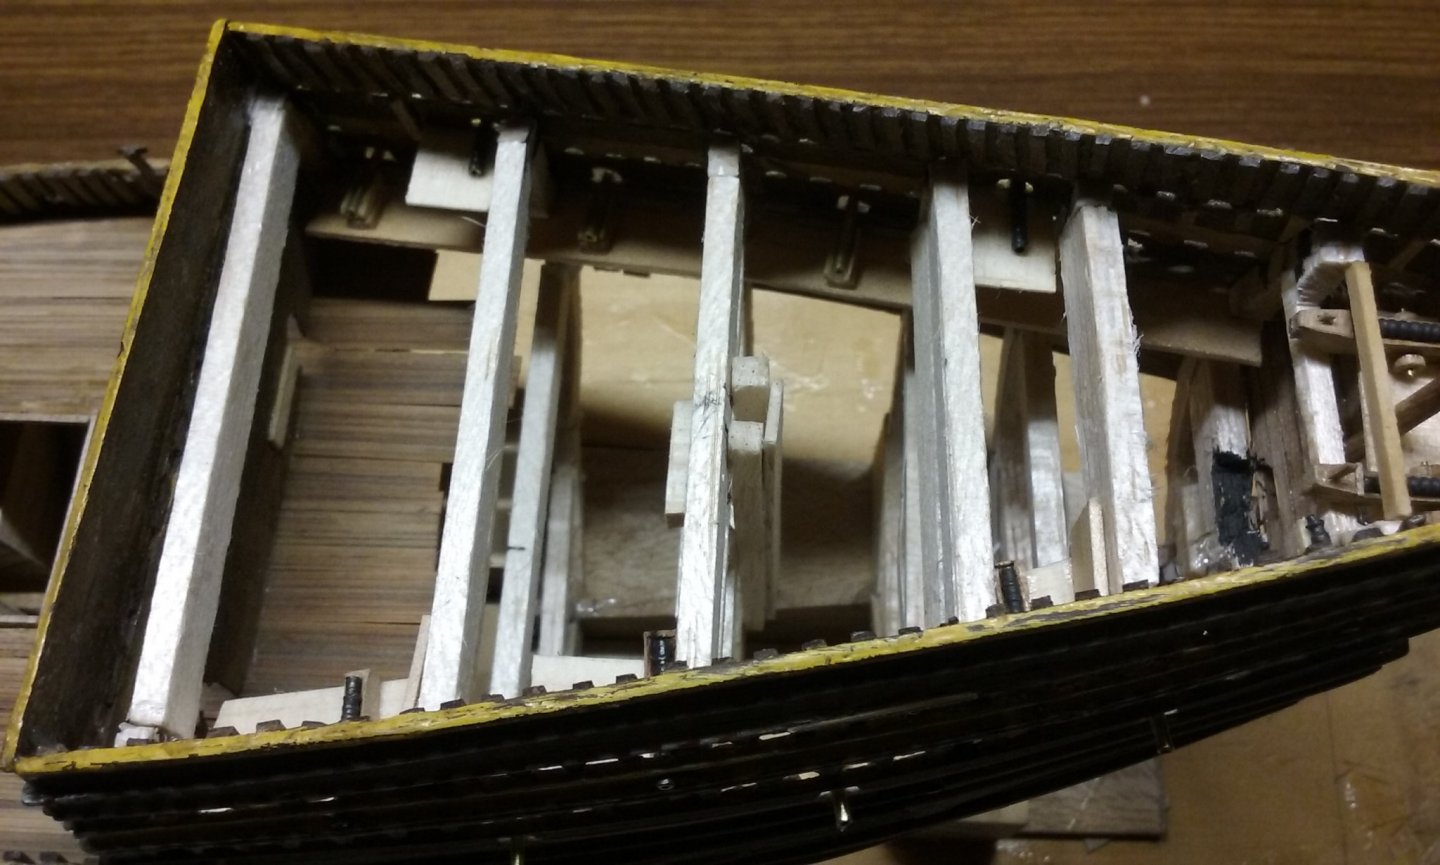
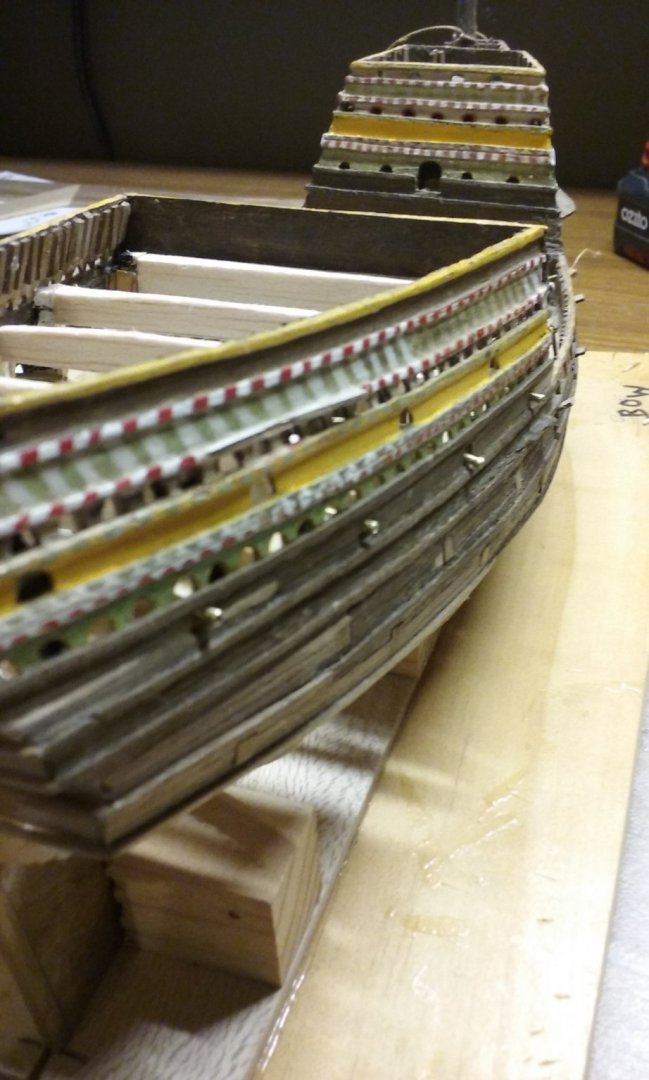
After a long hiatus while I worked on the dromon, I've come back to the Great Harry to give me a rest from the never-ending carving of oarsmen. Before I can add the upper deck of the aftercastle, I had to put in the cannons below it. As I didn't add lower decks when I first built the ship, I've had to get a bit clever and put in narrow "false decks" along the sides of the ship to put the guns on. I've turned some gun barrels from 1.5mm brass tube. A bit rough and ready but at this scale they look pretty good. As the carriages won't be seen I made them pretty basic. I glued the barrels to them with CA, which I don't usually use. (PVA doesn't stick brass very well). I rested them on a sheet of paper so they didn't stick to everything in sight/each other, and I could peel/sand it off later. And here they are on the false decks: and from outside: Steven


- 740 replies
-
- 10
-
-
- Tudor
- restoration
- (and 4 more)
-
That's a good save. And a valuable addition to your knowledge and skill-set. Steven
-
Looks like you've "nailed" it! (sorry for the pun). How about a close-up of the area of difficulty, as in your first post, for comparison? Looking good. Steven
-
Good point, Jaager. I note it also has a hardy hole for holding auxiliary tools, and the wooden "stump" has iron reinforcing rings to stop it from splitting under the force of the hammer - a good solution for something that small a diameter. Interesting - there's a "main" stump that is massive and heavy, providing lots of nice inertia, and above it (it looks to cut out of the main stump, not an addition) the smaller diameter stump. It seems to me there would be a reason for doing it that way. Perhaps there needed to be room around the stump for things that went over the edge of the anvil - perhaps the reinforcing hoops for the oil barrels?. The 'main stump' also has a ring in it, perhaps so it could be hoisted easily. Steven
-
Well, I'll be keeping on with the shields. One a day, and I have about 13 to go to get the 48 I need. The "boys" can take a back seat, though I expect I'll still be able to saw the rough blanks to shape even if I can't take them any further. So I won't be giving up totally on the crew. In the meantime I re-looked at http://forums.armourarchive.org/phpBB3/viewtopic.php?f=16&t=179436&p=2733651&hilit=longship+oar+length#p2733651 What I hadn't noticed back in 2015 was this: There was a famous 19th century experiment in France where they decided to recreate a Greek Trireme, and they laid the hull out so that they used three different lengths of oars. It proved impossible to keep all the oars in stroke. It was sort of like a clock with three different lengths of pendulums trying to keep time. But there was also a considerably larger variation between the thalamites near the waterline, the zygians part way up, and the thranites at the top in the 19th century French model. (From memory, I think the bottom oars were about nine feet long (2.74 m.) at the lowest level and maybe 20 feet (6.1 m.) long at the highest level. . . The most recent trireme reconstruction uses all 170 oars of the same length, and rearranges the seating of the oarsmen, with satisfactory results. . . . the difference in oar length on the 19th century French model was much greater than the variation on the longship; so some scholars who have belabored this point probably have not spent a lot of time rowing. I'm currently following up on this information. The French trireme appears to have been built by Stanislas Henry Laurent Dupuy de Lome in the time of Napoleon III (1860's). Unfortunately all I've been able to come across is the first page of the reference, at https://onlinelibrary.wiley.com/doi/epdf/10.1111/j.1095-9270.1982.tb00069.x If anyone subscribes to the International Journal of Nautical Archaelogy and could provide me with the full article I'd be very grateful (I'm not a university, so as far as I can see I can' get access). The thing is, I followed the oar lengths in Pryor's Age of the Dromon, with the lower oars 3.395 metres long and the upper oars 5.178 long. I've agonised about whether I should cut the upper oars back to duplicate the lower ones, but I really think I should take the attitude "I worked with the best information I had at the time" and move on. Additionally, the difference between the upper and lower oars is nowhere near as much as it was in the French trireme, so it may not have had all that much effect on performance in the "real world". Steven
-
I agree. It looks just like an anvil. But I'm surprised it doesn't have a horn, as that would allow more flexible working of metal. Perhaps it only has a limited number of uses on shipboard. Steven
-
Sounds like a plan, Arjan. My original question on that thread was because Renaissance galleys all seemed to have long straight sides, so all the oars would hit the water at the same distance from the side of the ship, whereas the dromon had a hull shape more like a longship, narrowing toward the ends. As Cap'n Atli had experience actually rowing a longship, I thought he, if anyone, would know whether oar length in a ship of that shape was a problem. As it turned out, it apparently isn't. Steven PS: Your model looks very elegant.
-
You might be interested in this discussion regarding the relative length of oars in oar-driven ships - http://forums.armourarchive.org/phpBB3/viewtopic.php?f=16&t=179436&p=2733651&hilit=longship+oar+length#p2733651 I found the statement about inability to keep different length oars in synch enlightening - particularly as I've made the length of oars different for the upper and lower banks for my dromon. I wish I'd noticed this before . . . (I post as Egfroth on the Armour Archive) Steven
- 23 replies
-
- 1
-
-
- oseberg
- billing boats
- (and 2 more)
-
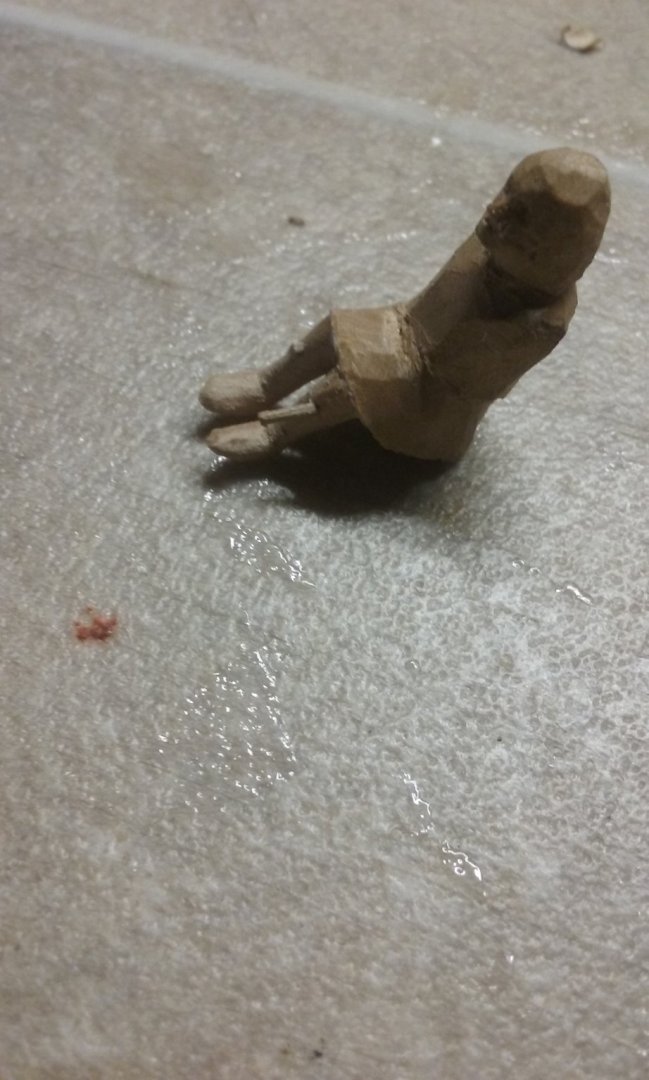
"Too small - throw him back!"
-
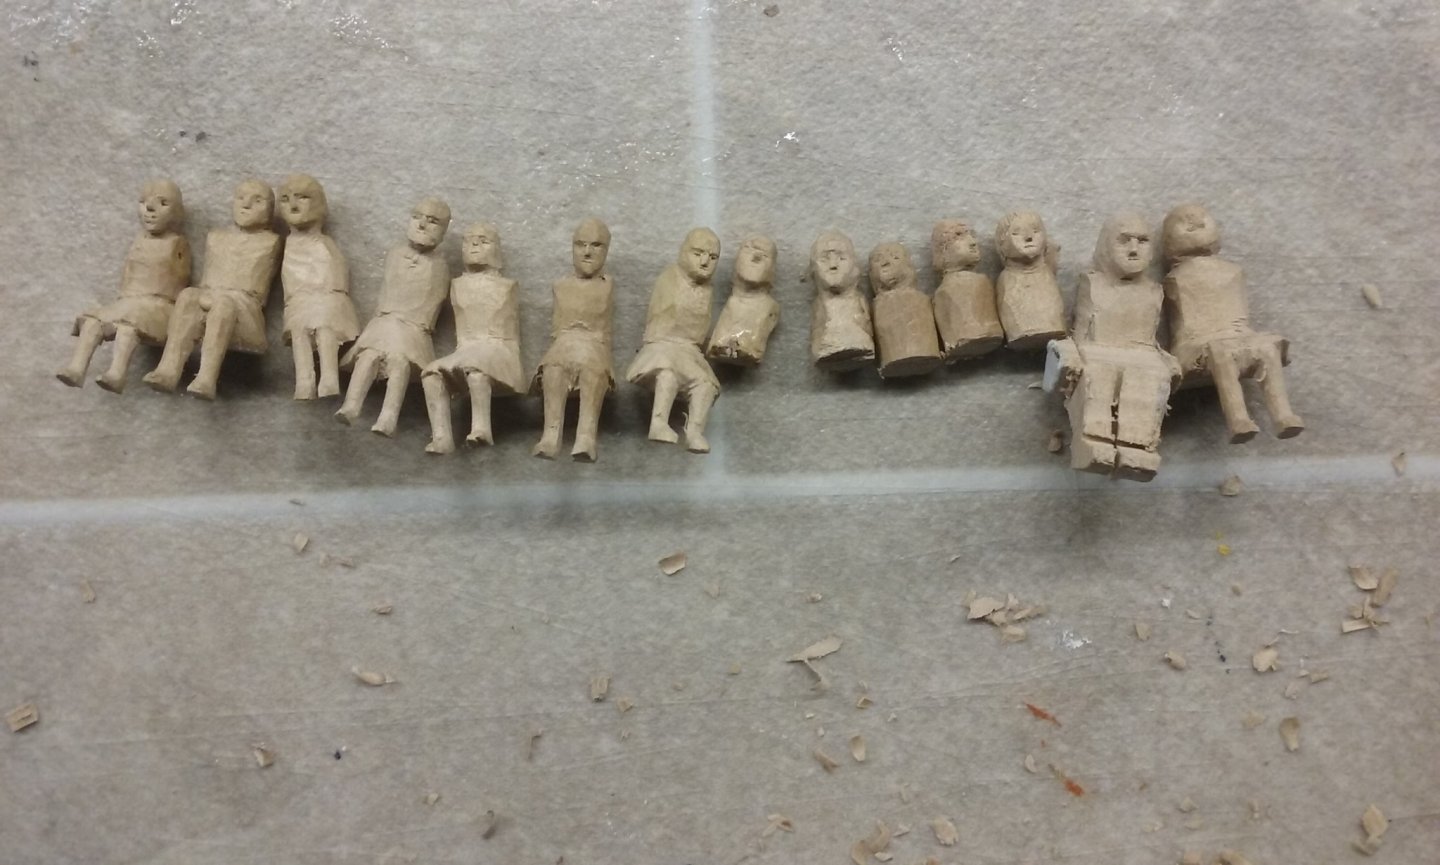
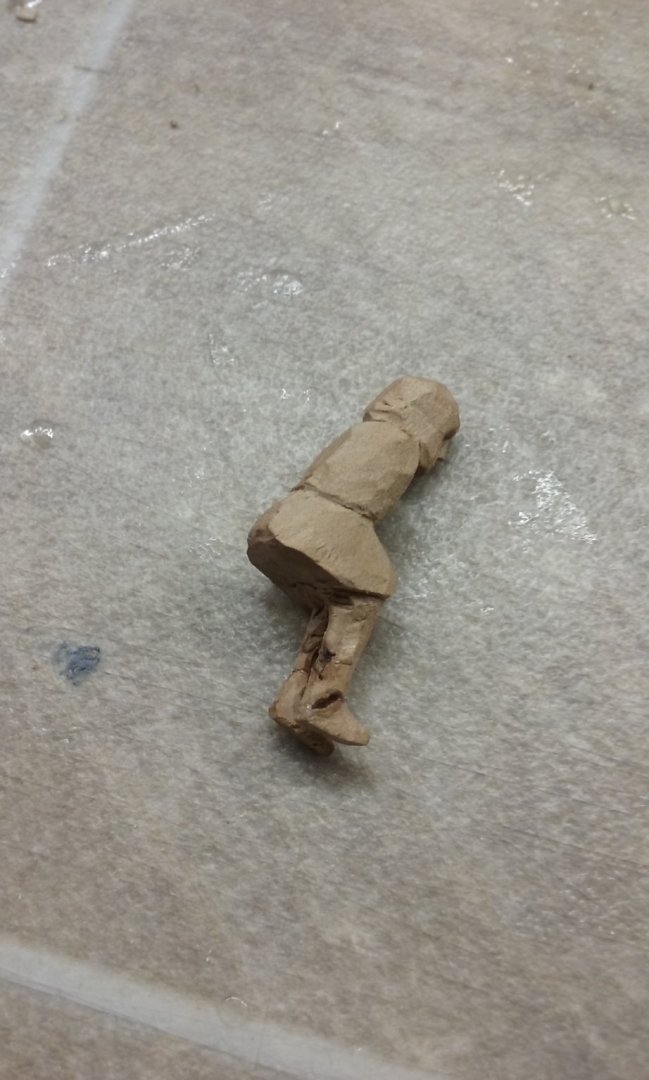
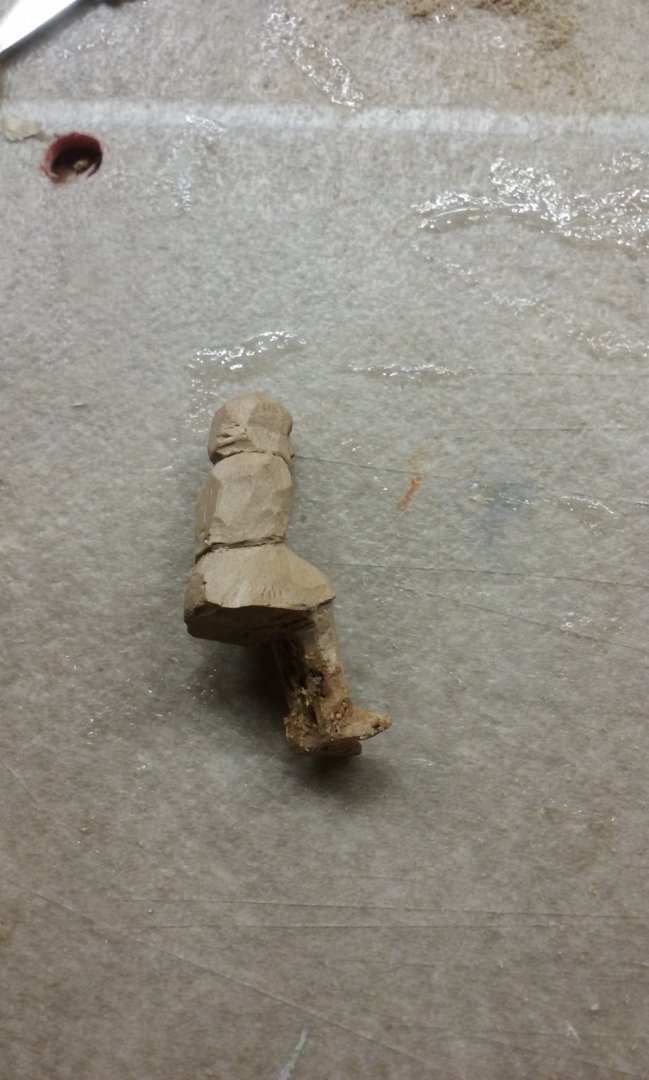
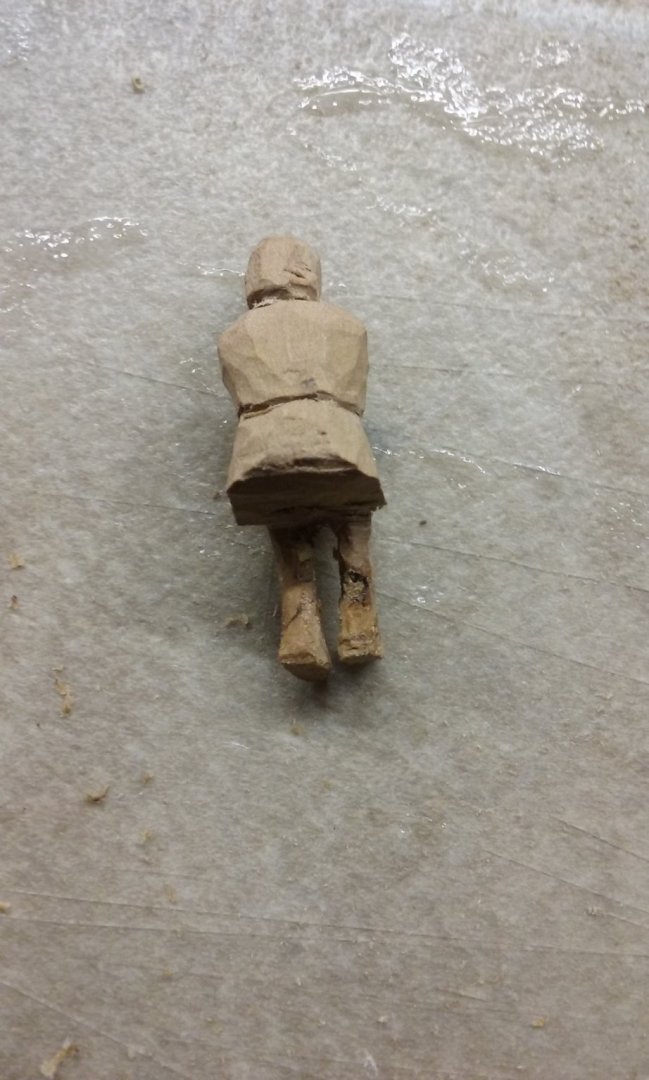
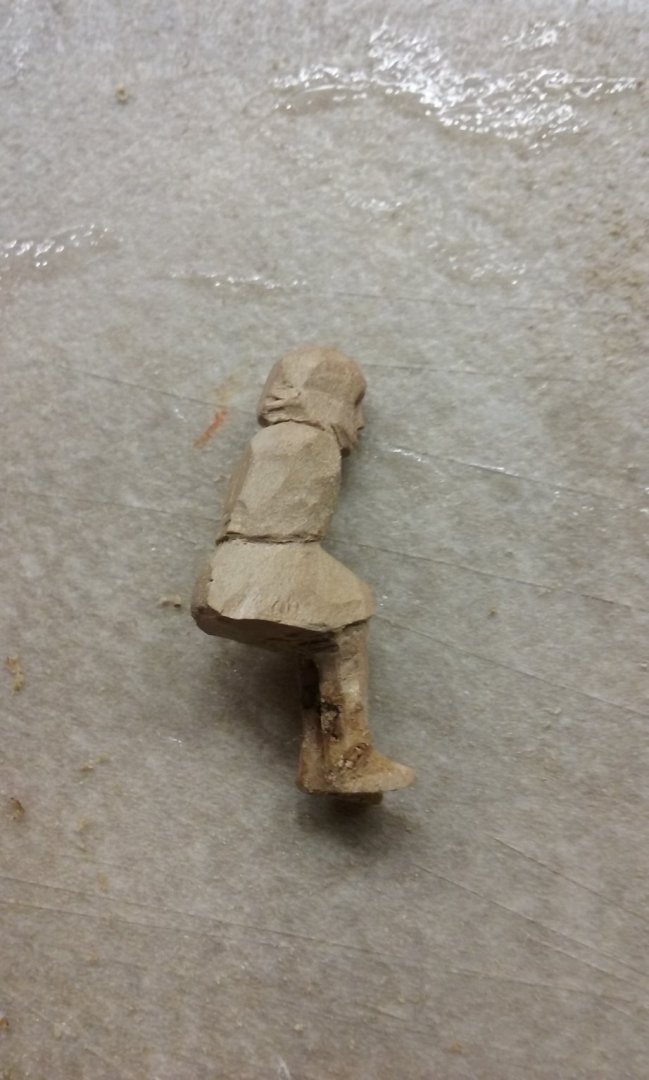
Here are the latest shields. Top row are complete, the lower row are part done. And here are "the boys" so far. I've been carving them roughly to shape and when they're all done I'll go back and do the arms for each one, then smooth them off and make them all pretty. Note the lack of social distancing. Also the 5 who have been cut off at the torso, because I realised I'd done the legs wrong for them to fit onto the benches. I'll have to go back and make lower bodies and legs for these guys, but not till I've got all the rest done. I thought about throwing them out and starting them again, but from the torso upward is ok. I have to say, though, that I'm getting pretty jack of all this wood carving. I have fourteen oarsmen at various stages of completion. I need a total of 48, so I'm not yet 1/4 the way through. There's almost nothing else I can get on with - everything else has to wait on these oarsmen. Add to that I've somehow wrenched my left thumb, so it's getting painful to hold them as I carve. I think I'll take a break from all this and do some work on the Great Harry, which has been languishing unloved for quite a while. Steven