Louie da fly
-
Posts
7,993 -
Joined
-
Last visited
Content Type
Profiles
Forums
Gallery
Events
Everything posted by Louie da fly
-
 It's been a while since I've checked on this project. Beautiful work. I particularly like your machicolations, but everything is really well done and amazingly lifelike! Steven
 -
New Member in New Zealand/Australia
Louie da fly replied to StuC's topic in New member Introductions
Well, just down the road from Hedland (in terms of North-west distances). I can think of few things better designed to take a person's mind off work and lockdown than ship modelling. The Lady Nelson is a very attractive ship, well worth the effort. Looks like you've already got a good start on her. Steven -
Sorry you haven't been able to the instructions so far - I see masa might be able to provide them. You might also care to look at which though it's of the earlier version of Bluenose II might be of help to you building the later version. Steven
-
New Member in New Zealand/Australia
Louie da fly replied to StuC's topic in New member Introductions
Hi Stu, and welcome. Where are you? I used to live in Port Hedland in the north-west of W.A., but it's a big State so you may be nowhere near there. Looking forward to your build log. Steven -
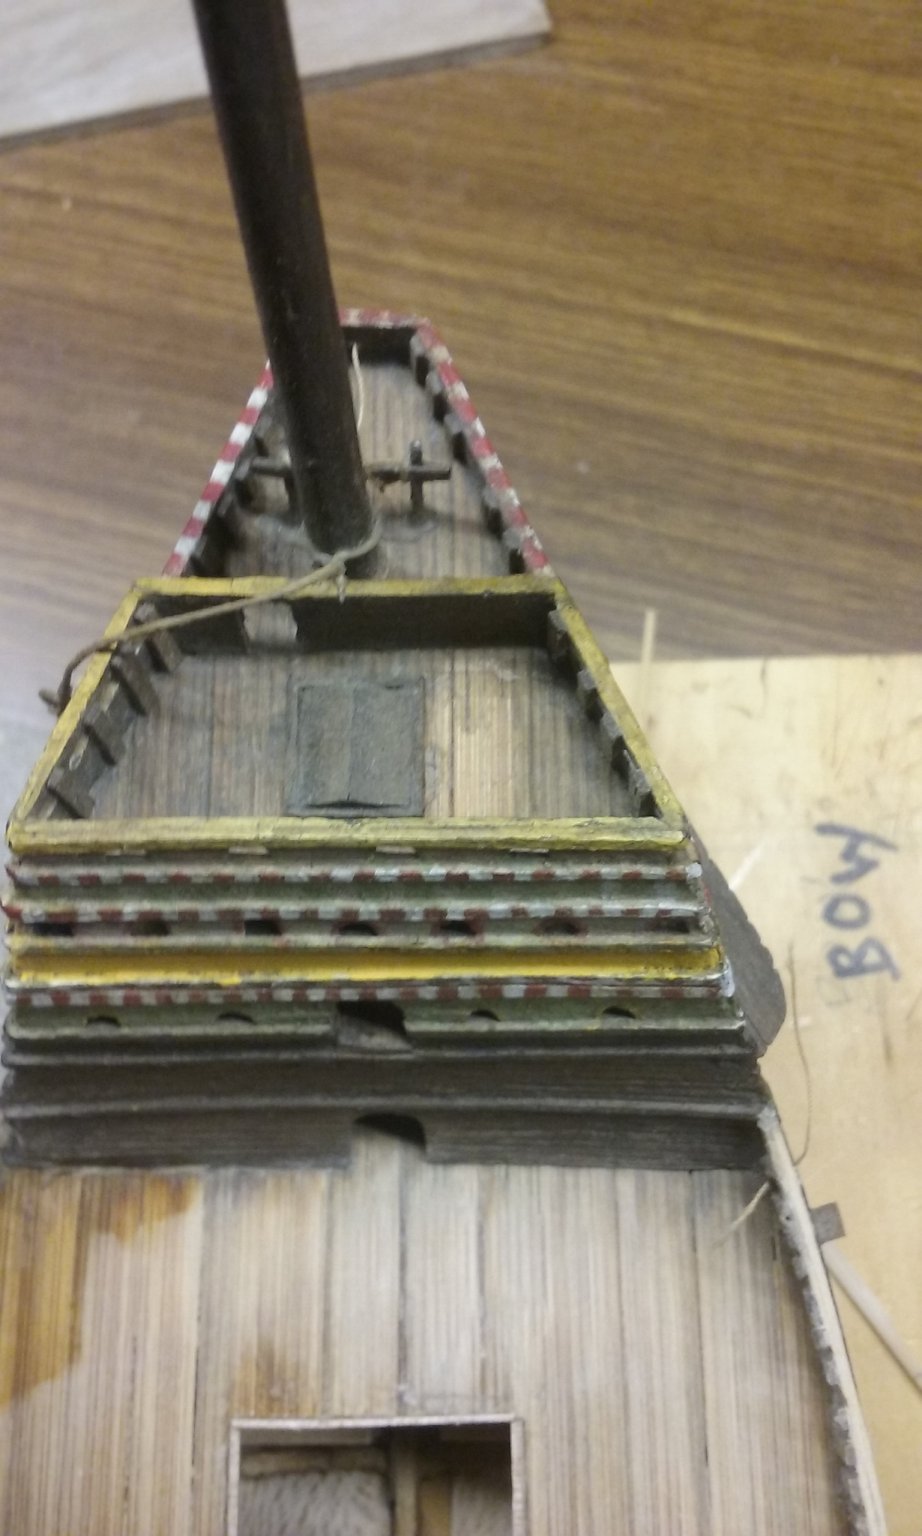
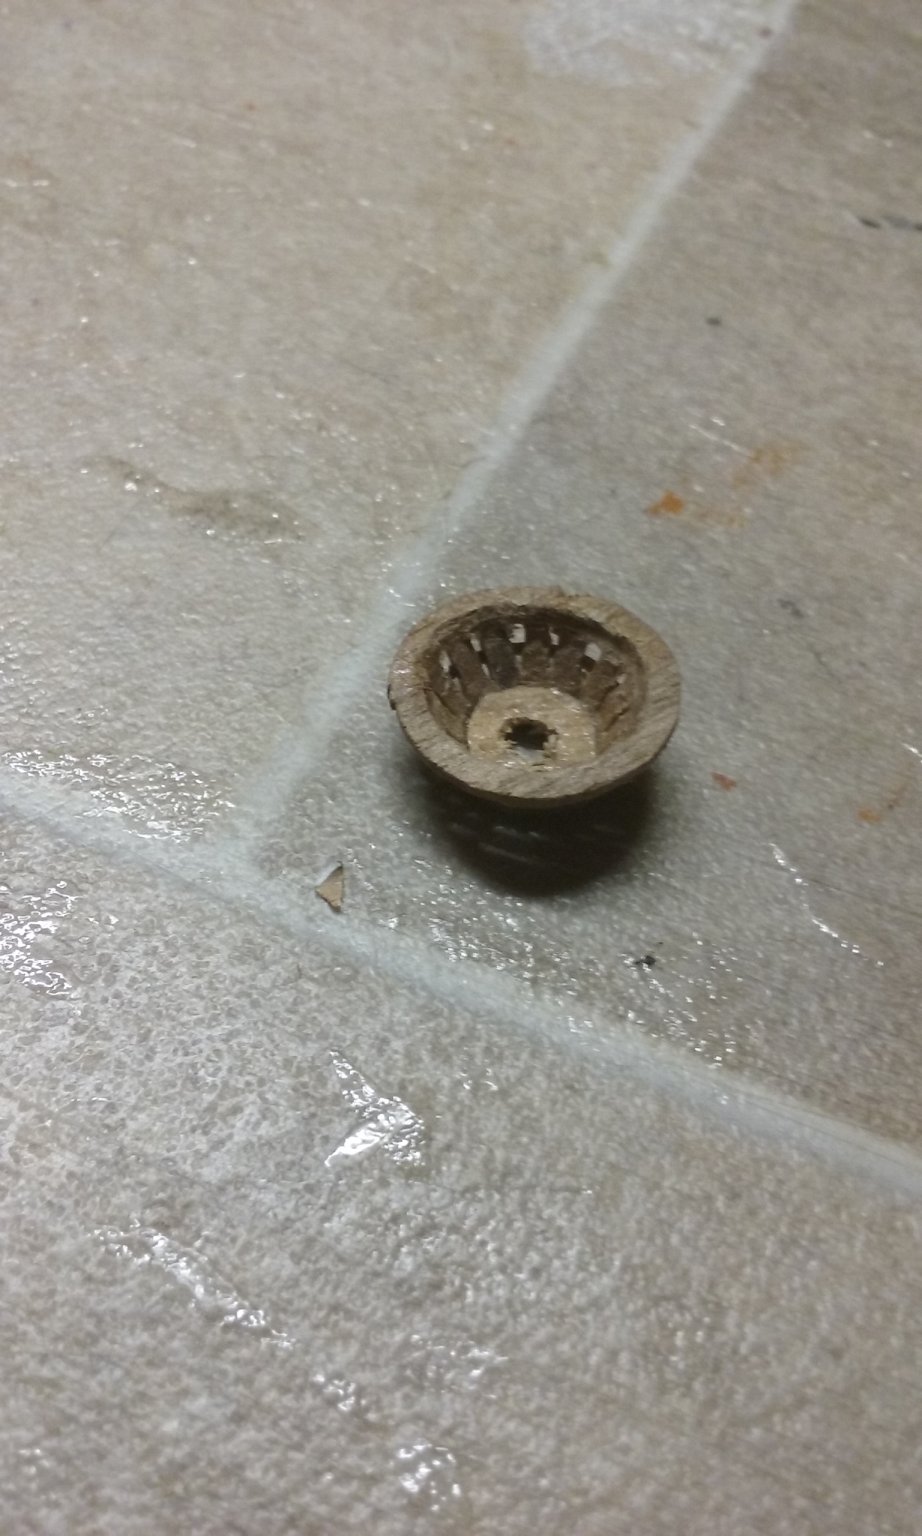
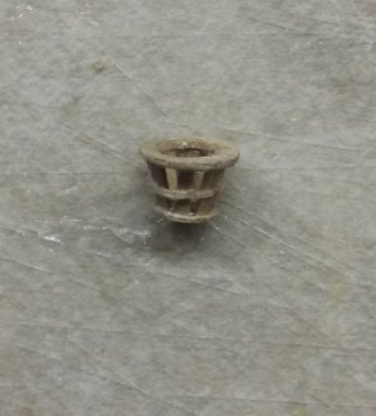
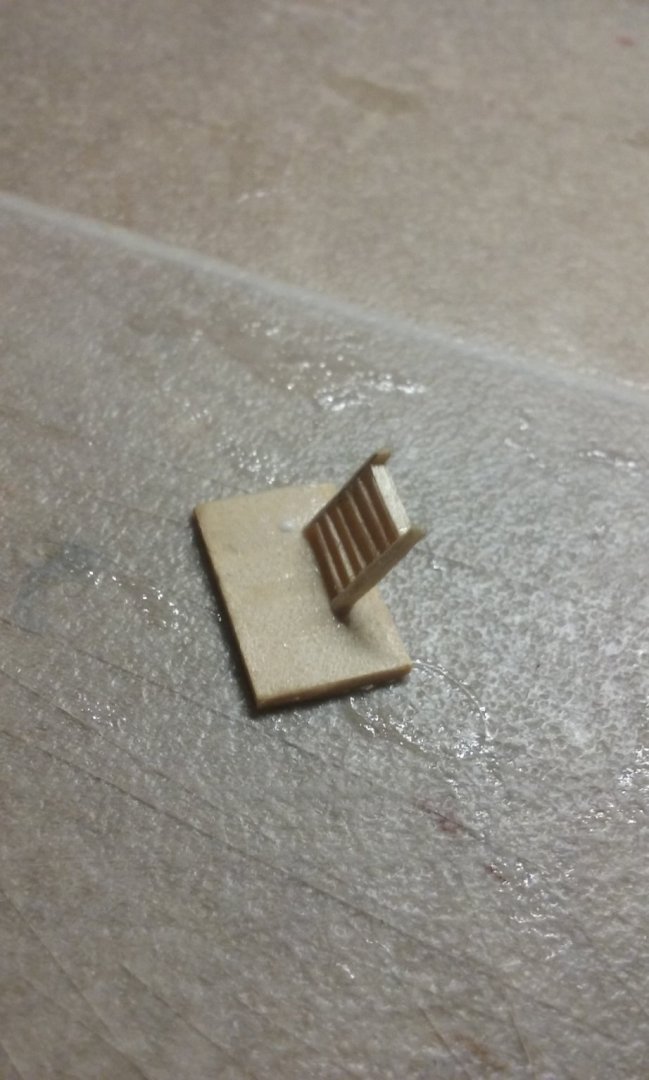
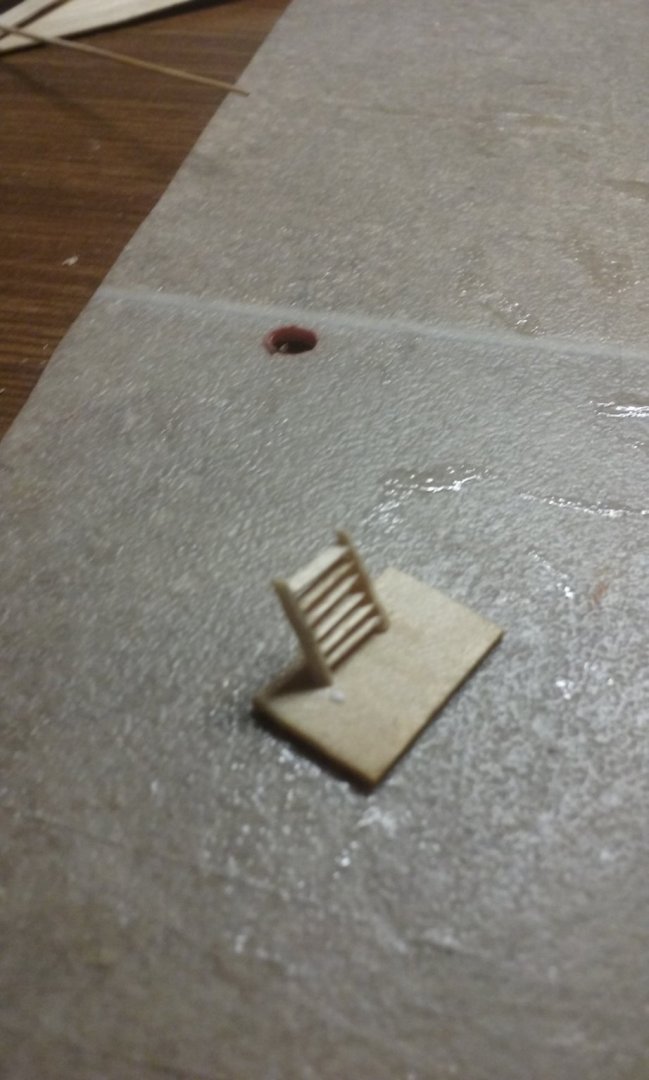
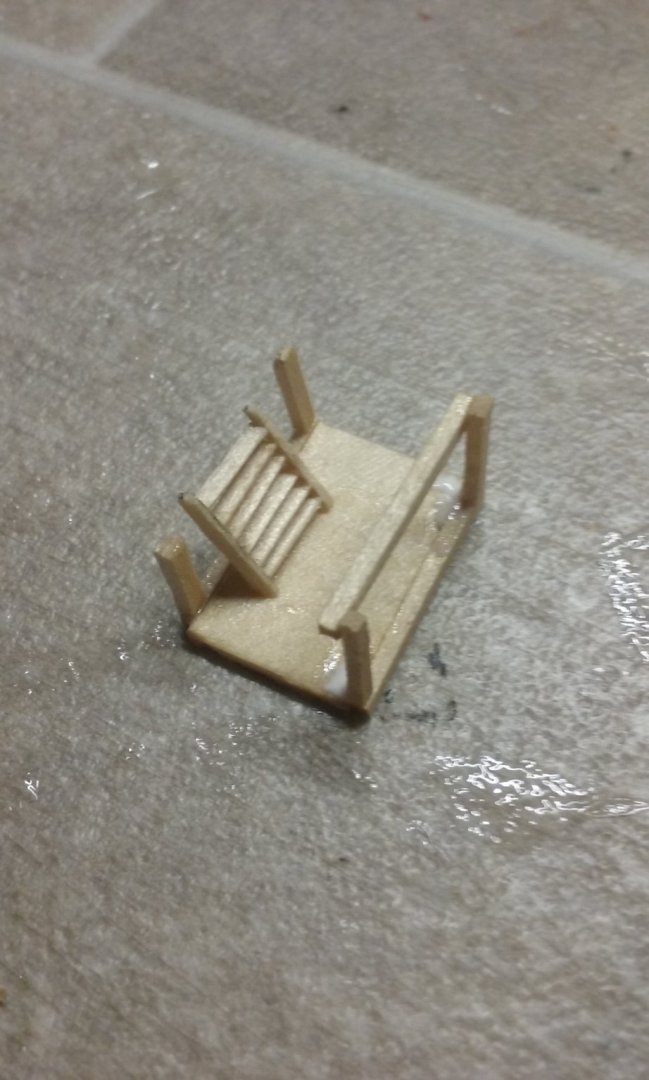
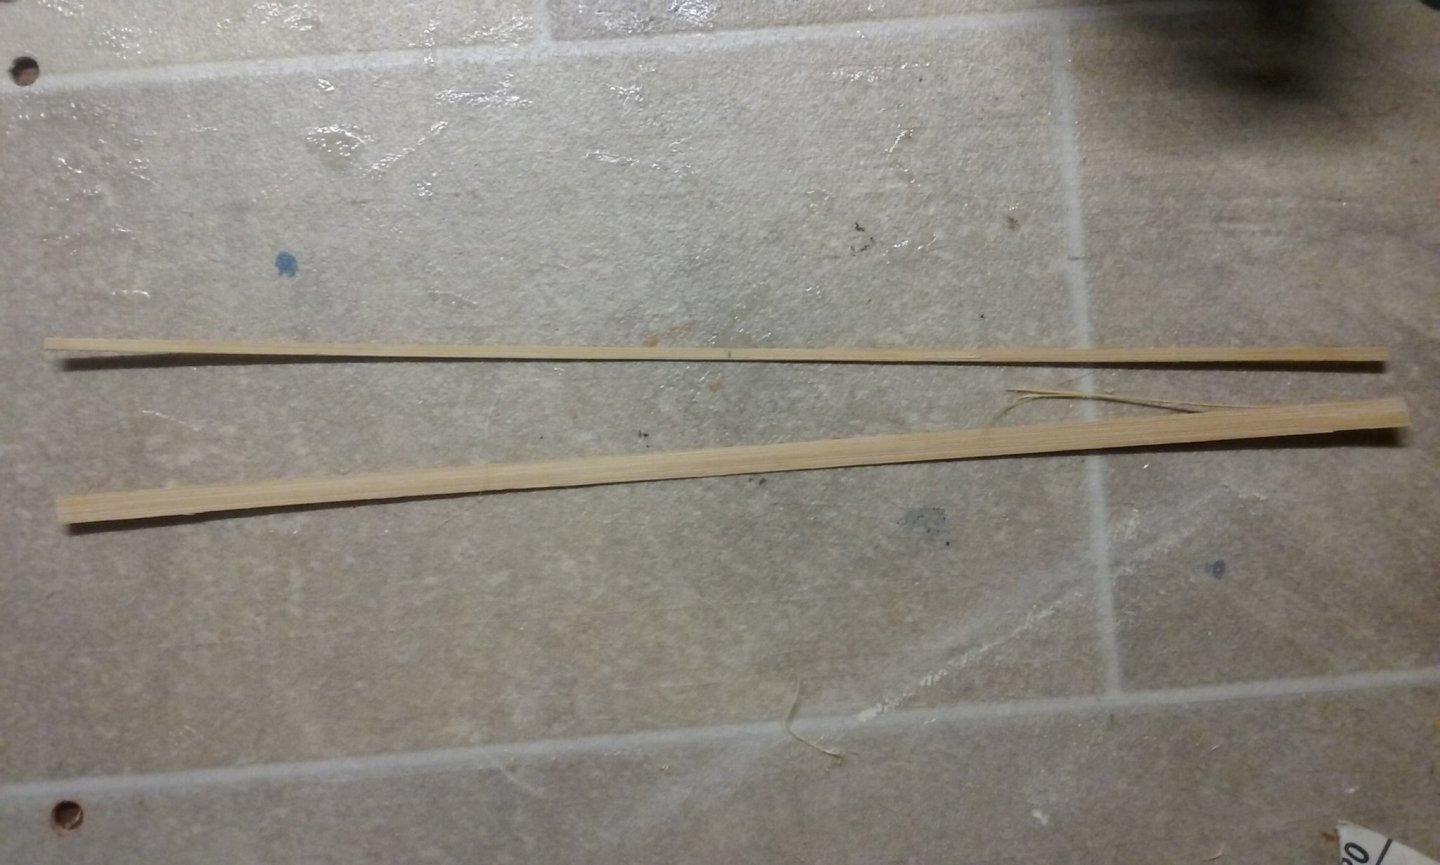
Continuing to add the upper deck. Bamboo is a dreadful thing to make deck planks out of - the grain forces your blade to go where it doesn't want to, so getting parallel sides to your plank is quite difficult. The only reason I'm using bamboo is that I'd used it when I first made the model. I thought it looked cool, and the grain made it seem that there were lots of narrow planks instead of a few wide ones. Never again. Nearly finished. More on this in due course. Here is the last of the new tops - this one is for the mizzen topmast. The central wooden rod kept it together better than in my previous attempts, and was removed once the top was finished. Still not a perfect method and if I wanted to make more I think I'd have to work out a better way of doing it. Lateen yards for the mizzen and bonaventure masts. And I've started cleaning the existing decks. I've been using sandpaper for the main gundeck, but the forecastle deck is too small for that to work, so I've turned to the use of cotton buds and saliva. You can see the clean patch compared to the rest of the deck which is still dirty. Yuk! Assuming the rest of the ship is equally dirty, it looks like I've got my work cut out for me. Steven


- 740 replies
-
- 9
-

-
- Tudor
- restoration
- (and 4 more)
-
Coming along nicely, Termi. But it looks like the lower gunport frame fourth from the right is a little out of square. Might be worth checking. And it might also be worth making sure that they "run" in a smooth line with respect to each other, to avoid problems further down the track. Corel's method of doing gunports seems rather strange, but if it works . . . Steven
-
Jacques, here is a French-English "Dictionnaire des Termes de Marine" which I have found very useful with translations. https://archive.org/details/dictionnairedes00tiregoog/page/n4/mode/2up I know automatic translations can sometimes be very wrong, particularly with maritime terms - for example the French term "cap de mouton" becomes a "deadeye" in English (because the holes look like the eyes of a skull). I hope this helps. Steven
-
That's a beautiful model, JR. Start a build log so we can all follow along. There are quite a few restorations among the build logs that might help you as you go. And don't forget to ask questions. There's bound to be someone out there who's been in a similar situation and can give advice if you hit a problem. Steven
-
Bienvenu Jacques! Votre maquette est déjà belle. Go to the page "Build logs for SCRATCH SHIP MODEL PROJECTS" and follow the instructions at the top of the page to start your build log. I look forward to seeing your log on our forum. We have many members who use a translator to post on their logs. Feel free to ask questions. The members are very helpful. Steven
-
Good news - this has been a fascinating journey so far and I for one am looking forward to seeing more. Steven
-
Yes, but the crew is obviously made up of pixies, so you could fit more of them in than if they were full-sized people . . . Steven
-
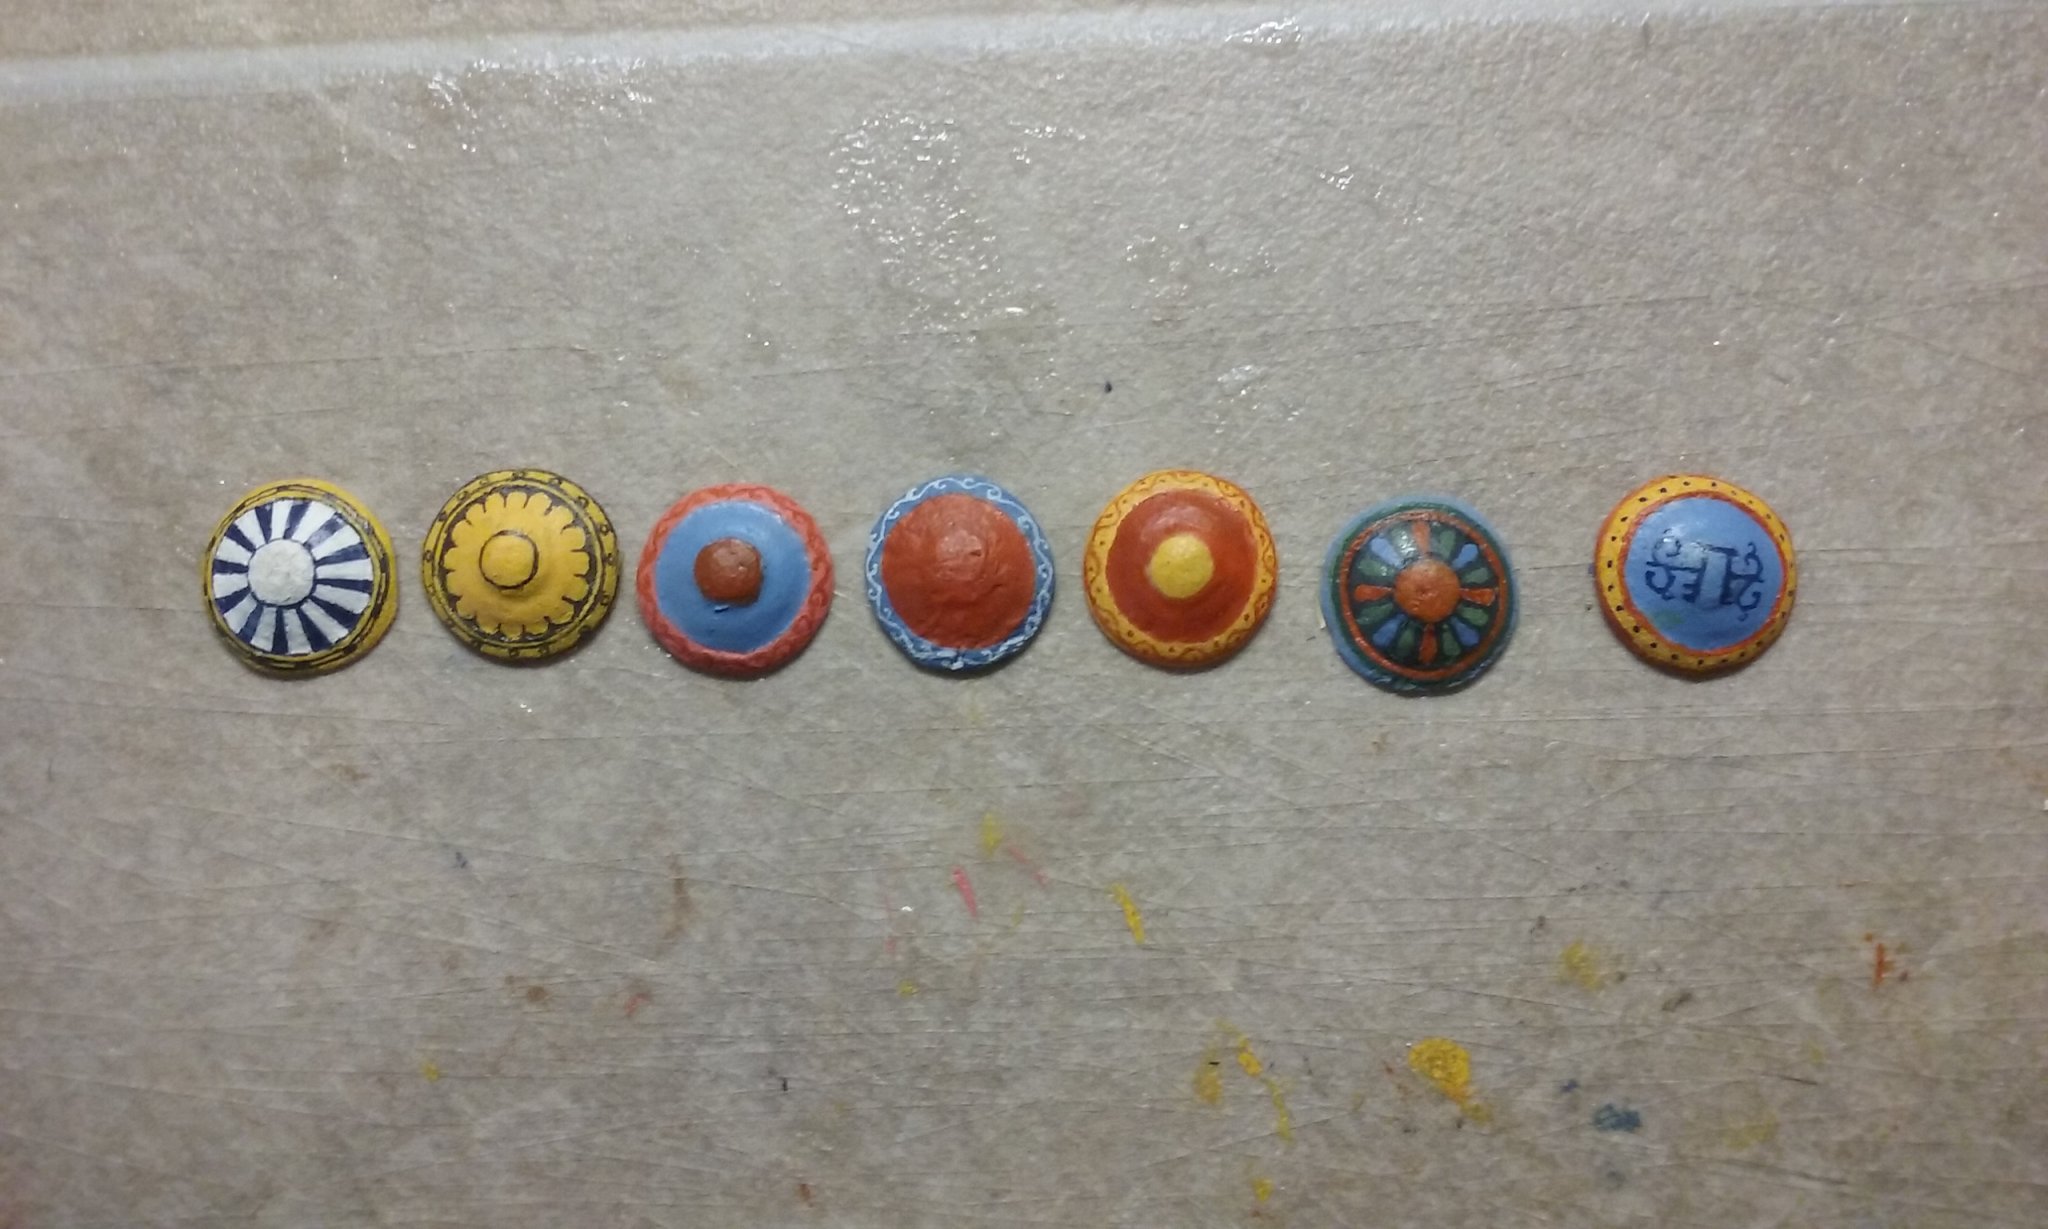
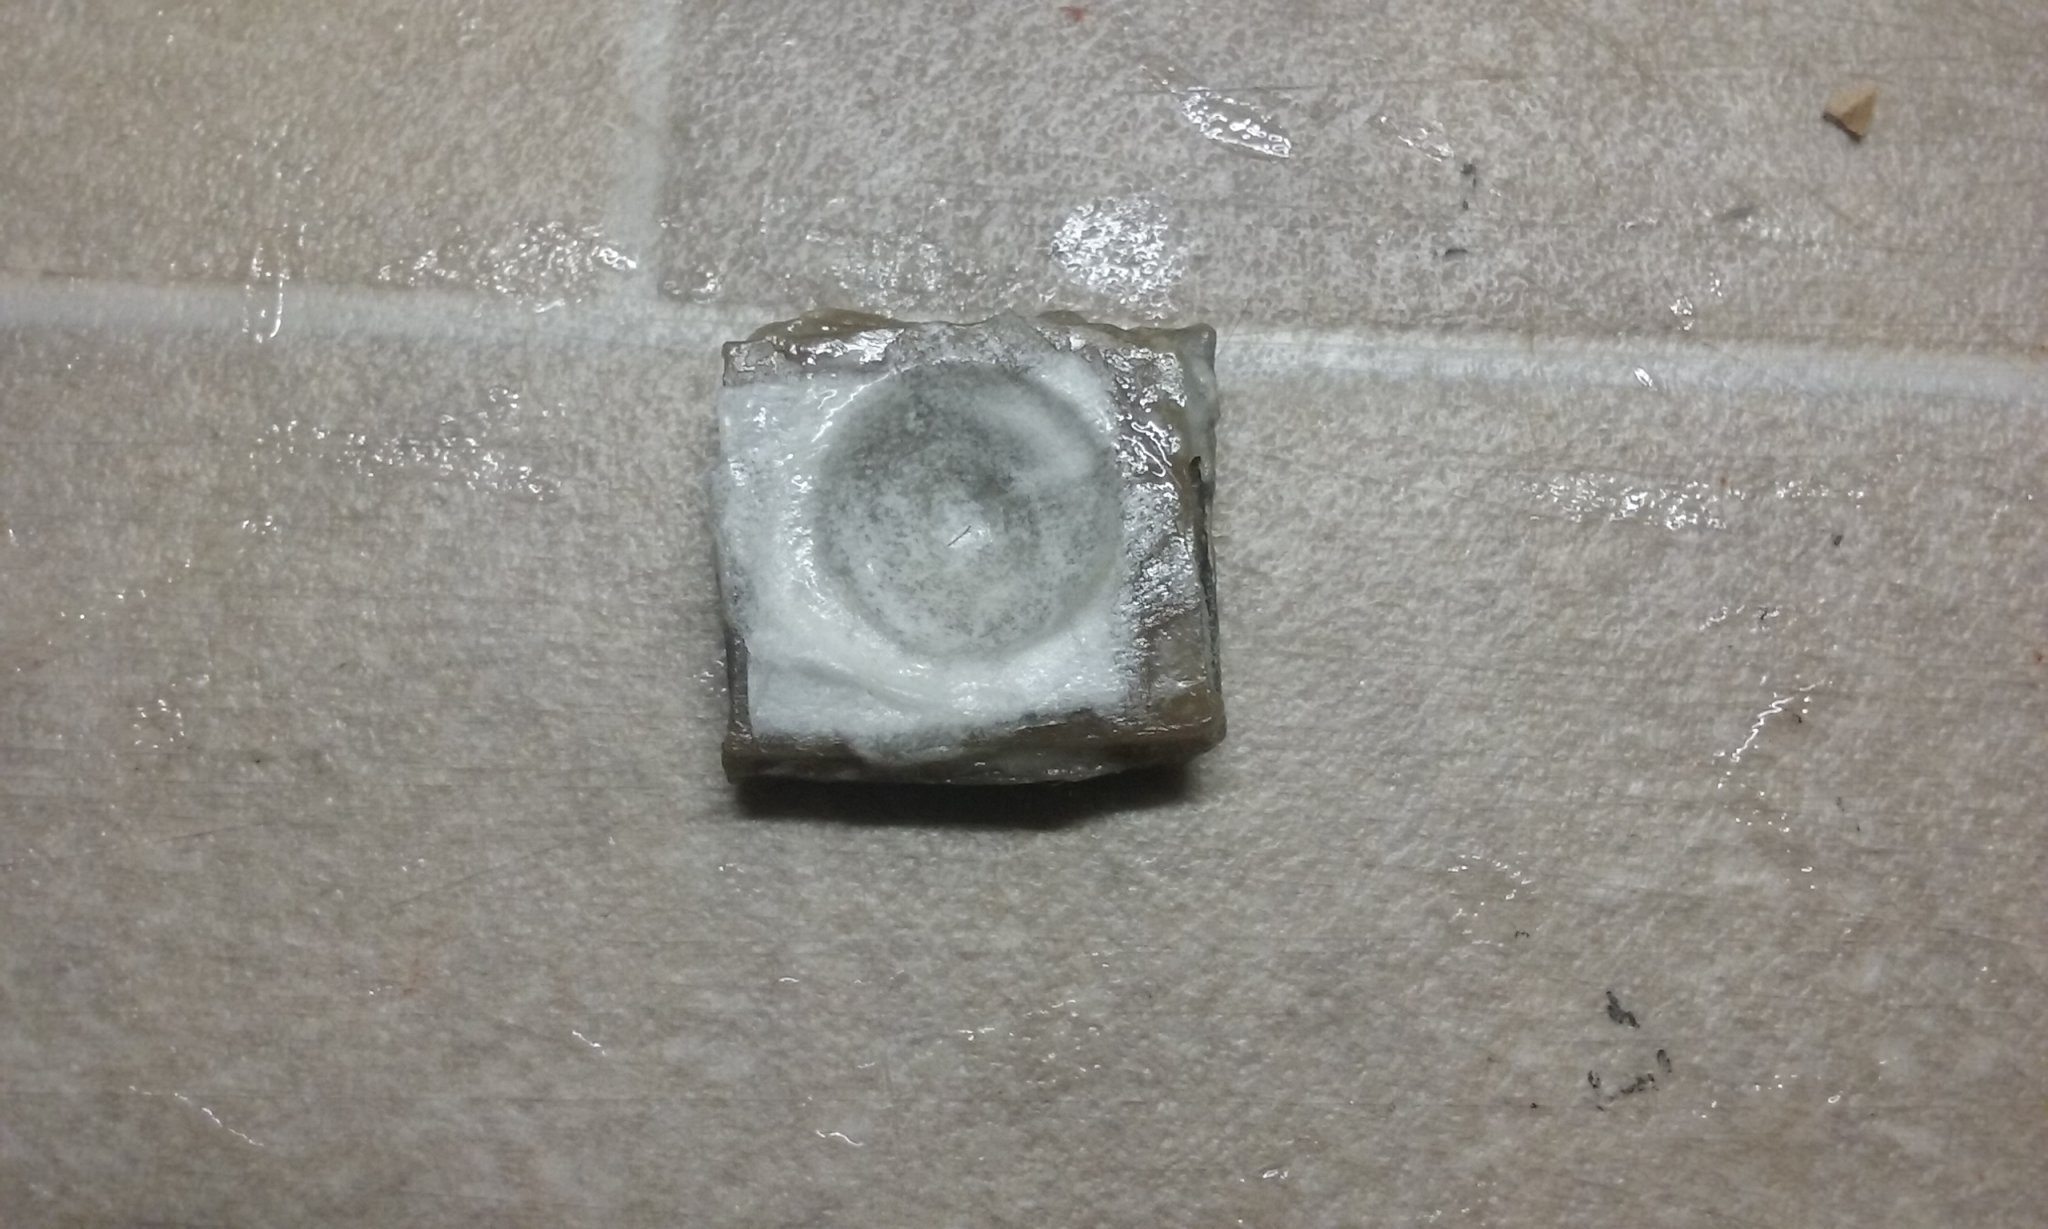
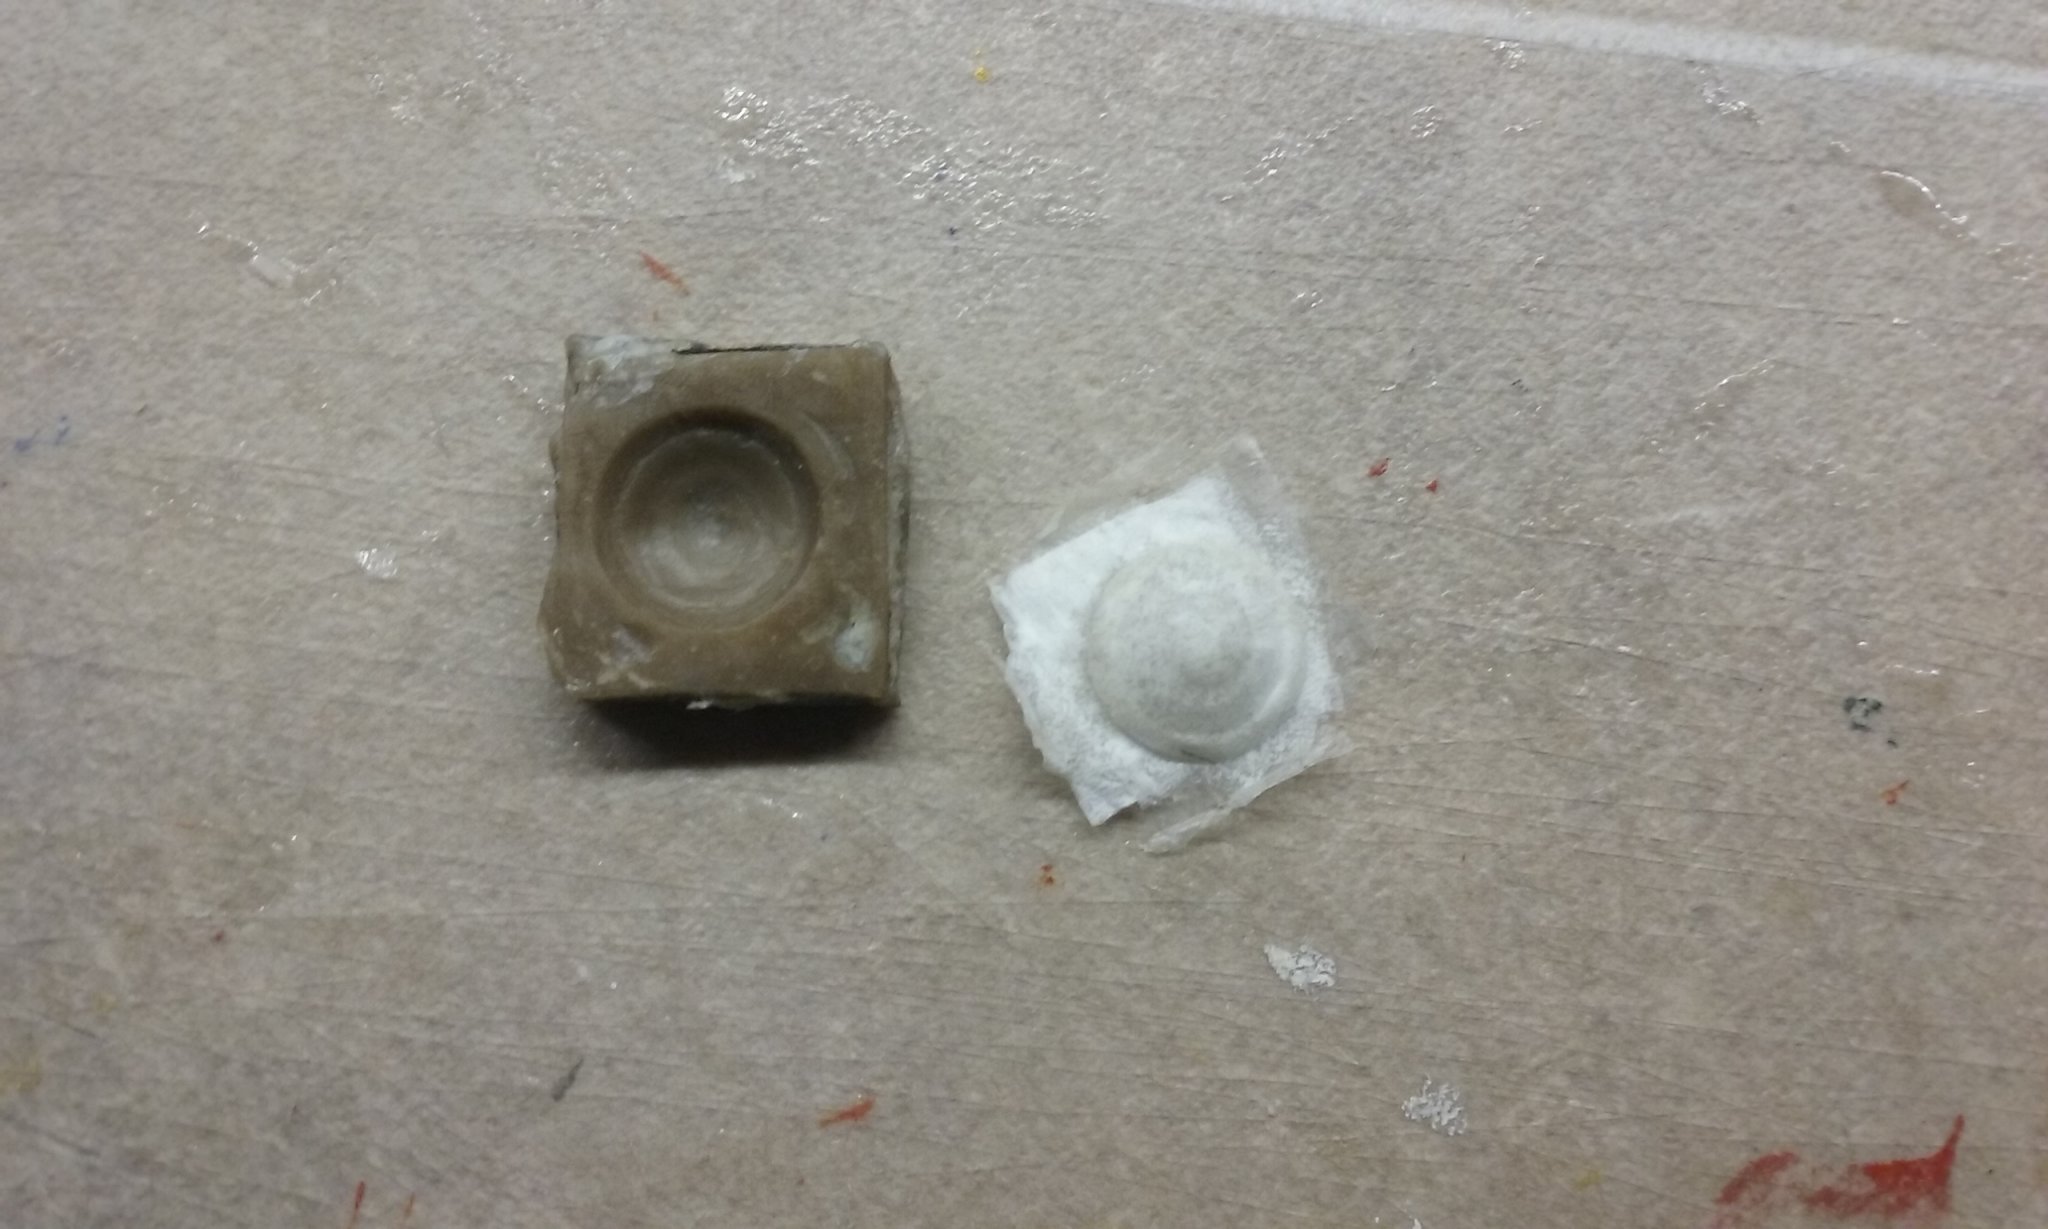
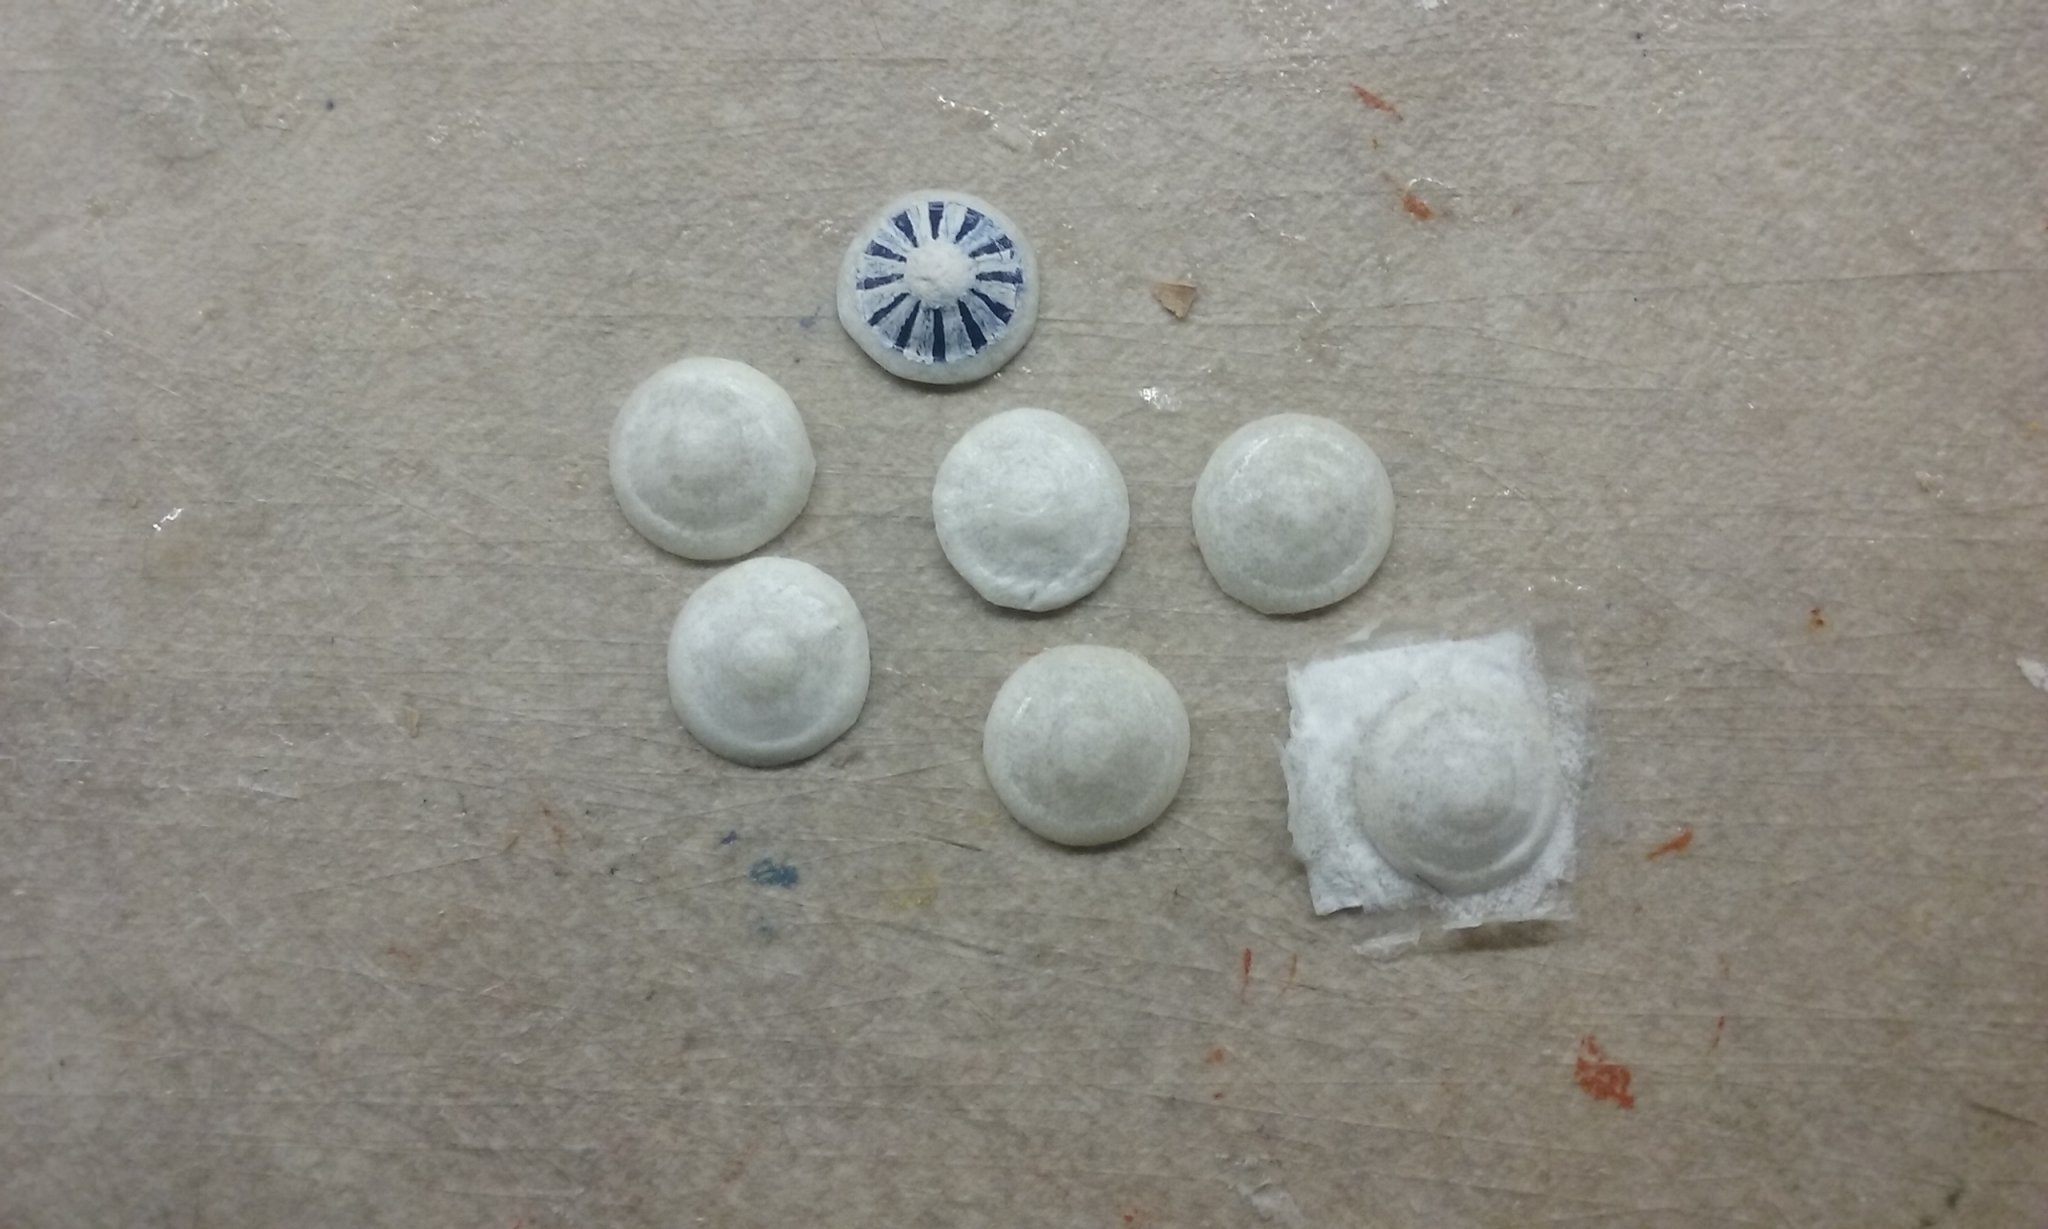
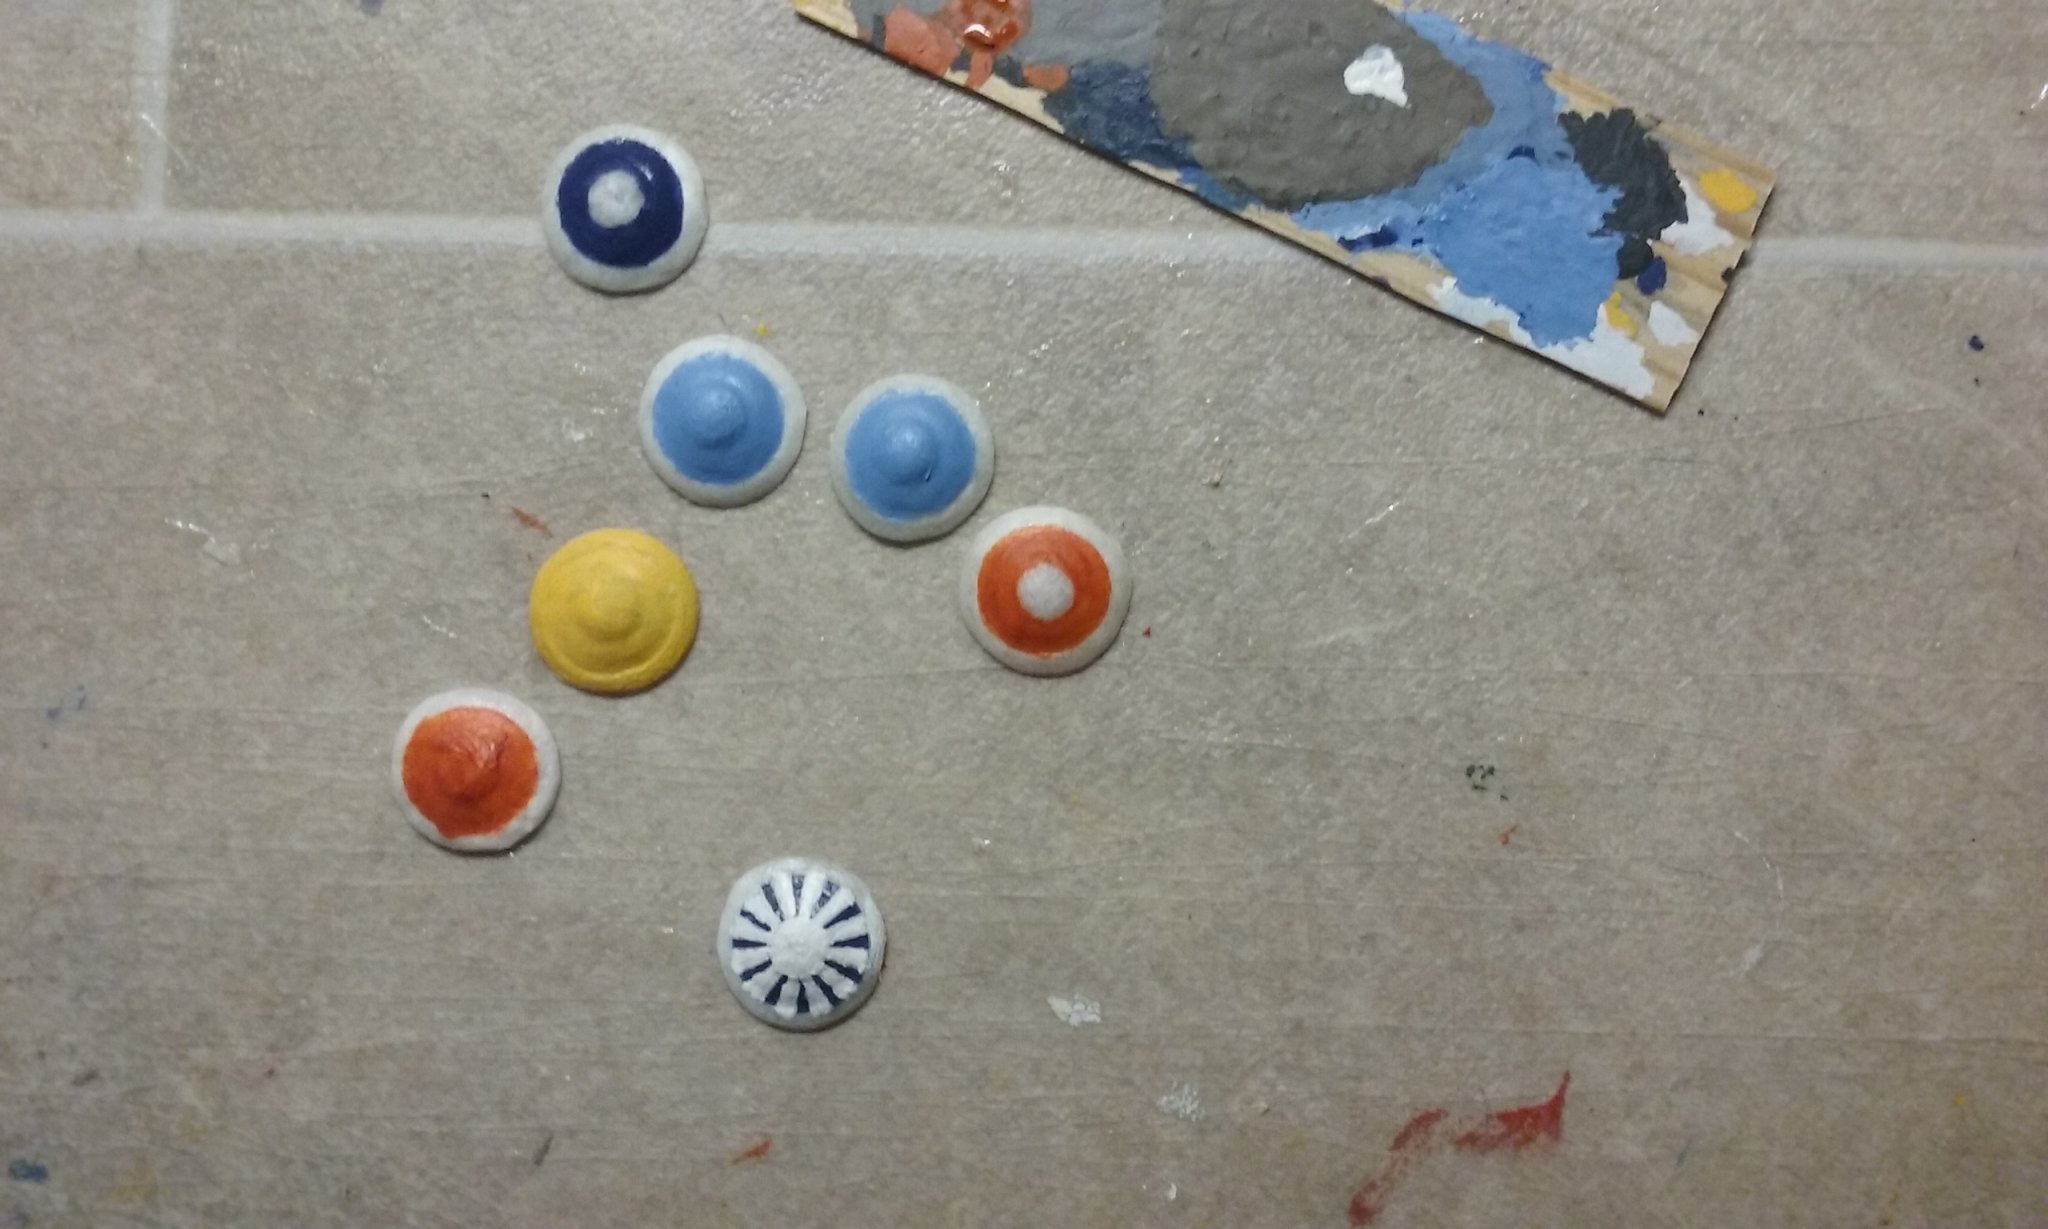
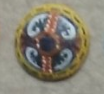
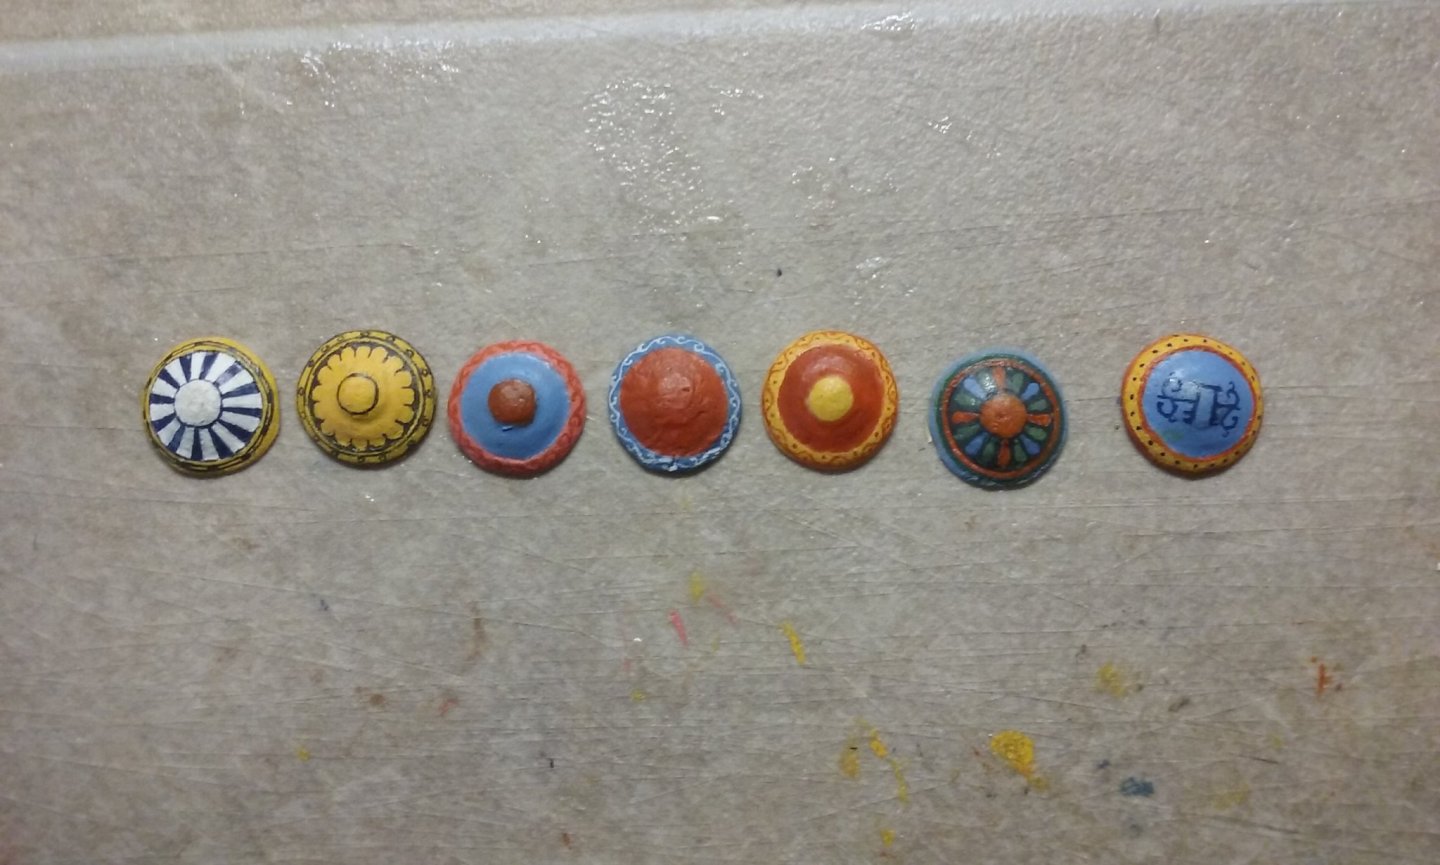
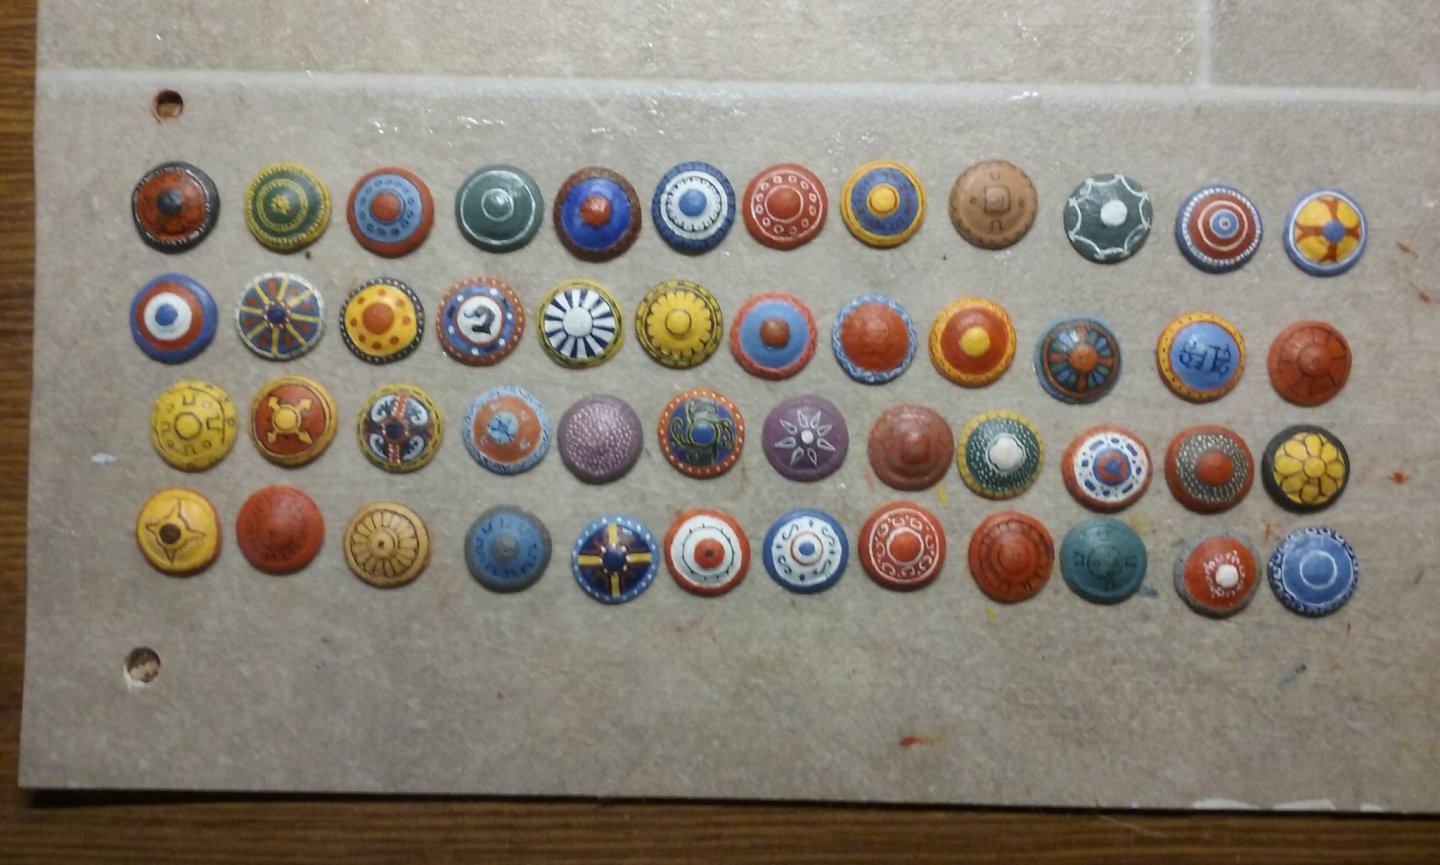
Thanks. Just a supplementary note: some of the shields were rather difficult to work out. For example, there's no way of knowing the correct colour scheme for the shield mentioned above: In the original manuscript illustration the shield is shown as gold, which I have interpreted as yellow. But it's more likely to have been multicoloured - because the illustrator used gold leaf for everything - clothes, armour, shield, shoes - what the "real" colours of the shield should be, we'll never know. And my favourite shield had its own difficulties: The picture on the original ikon I took it from is pretty tiny. Try to get closer detail and it goes all fuzzy. Plus the shield is shown in 3/4 view - partly side-on - so I had to change the proportions (stretch it out sideways) and guess what's on the bit you can't see: Well, I did say I liked the detective work as much the build itself, and for me this diversion into shields has been a fascinating journey, as well as a bit of a respite from the carved figures. But now - back to carving . . . only 24 oarsmen to go . . . Steven

-
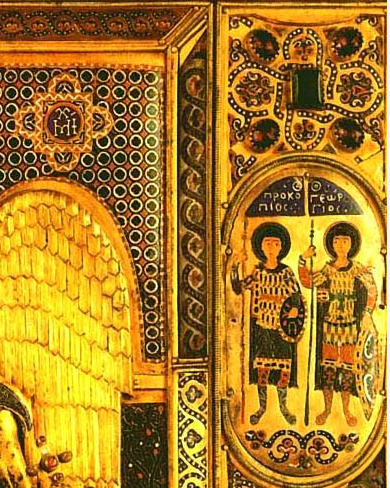
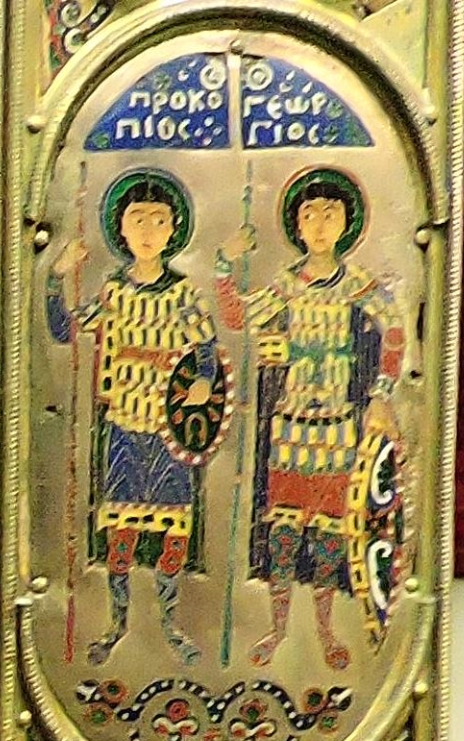
Thanks for all the likes and encouraging comments (blush). I'm rather fond of it, too. It comes from a picture of David and Goliath in a 9th century manuscript called the Sacra Parallela. That "rosette" motif recurs over and over again in Byzantine decoration and often appears on shields. I have my own personal favourites, of course - probably the one I like most is the third row, third from the left. That's from a big 3D gold ikon of St Michael currently in St Mark's, Venice. Very colourful (and very difficult to paint!) Well originally he was going to be the captain and would be sitting on the kravatos (day-bed) under the awning on the poop deck. That was before I decided to change it from just a normal dromon to the Emperor's personal skaphos. I carved an Emperor figure (Alexios the First, actually, based on a picture of him from the time), and a portable throne, some courtiers and a couple of bodyguards. And painted the ship red and yellow, as befits the Emperor's personal ship. Which meant the captain had nowhere to sit. So he's unfortunately at a bit of a loose end. I'm really not sure what I'm going to do with him . . . Steven
-
How about as an e-book? Almost no outlay to publish . . . Steven
-
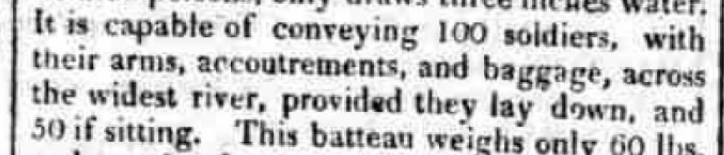
I'm having trouble getting a mental picure of this - did they lie on top of each other? Let me see: allow 6 feet in height per soldier, and say 18 inches wide - that's 9 square feet per person. Then divide that into 17 feet long and five feet wide, which is 85 square feet; as I calculate that, there's room for probably 2 soldiers long and 3, maybe 4 wide. Which makes 6 or 8 soldiers. Divide that into 100, makes it 12 layers of soldiers high! Can someone check my maths? It just doesn't seem to work for me. I didn't know you could get fake bone back then . . . Steven
-
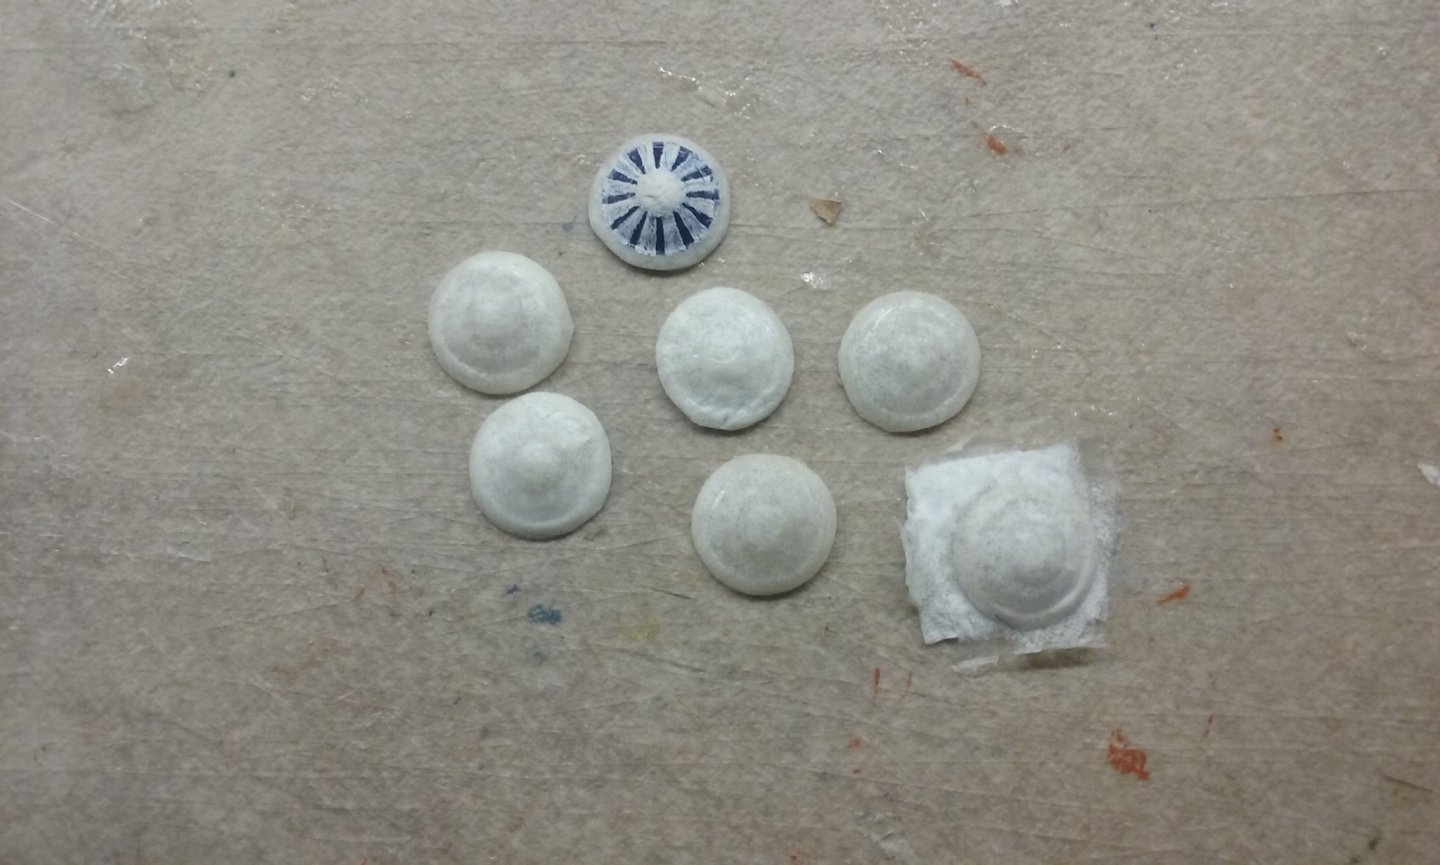
And . . . FINISHED! Here are the last seven shields: And here they all are together - 48 of them. Another thing to tick off the list. Nice to have them all done. Steven
-
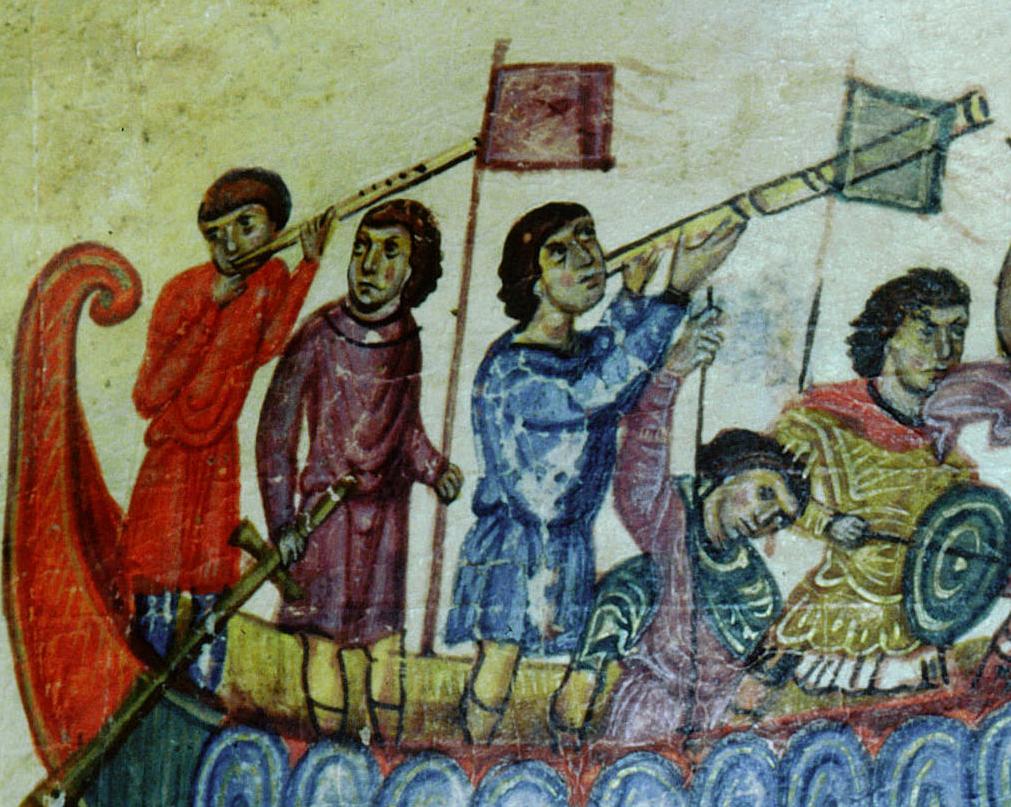
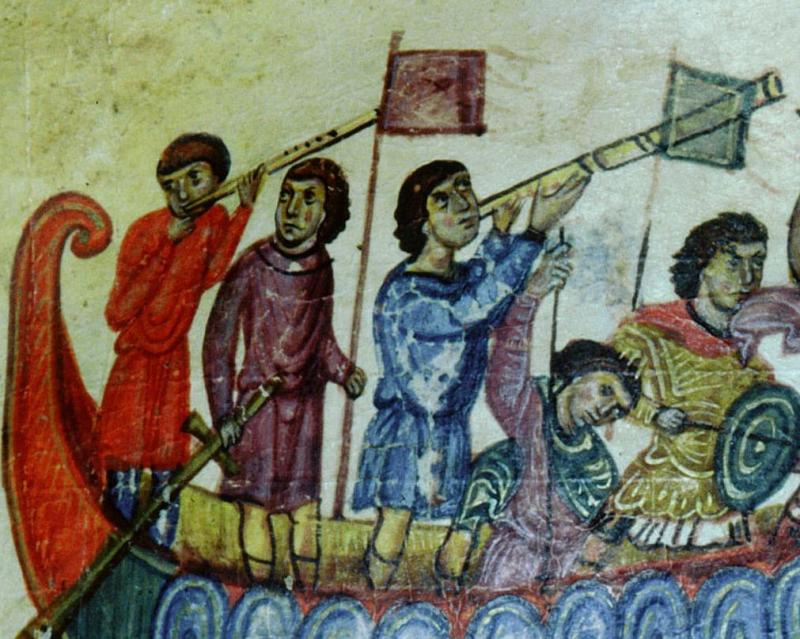
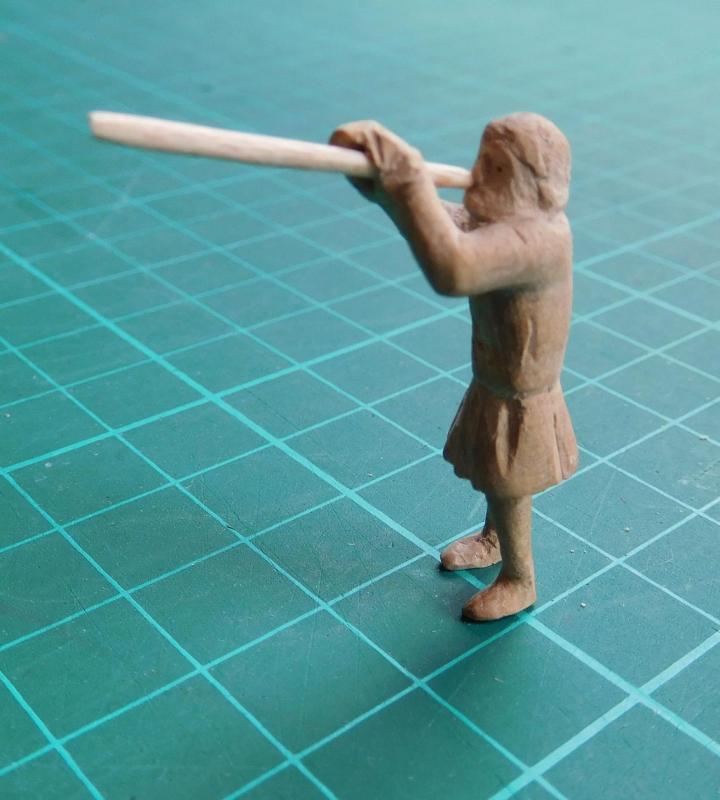
Thanks for all the likes and comments. Already made: Apparently they used flutes to mark the time for the oarsmen. The high pitch is easier to hear over all the creaks and groans of a wooden ship under way. Steven

-
HMCSS Victoria 1855 by BANYAN - 1:72
Louie da fly replied to BANYAN's topic in - Build logs for subjects built 1851 - 1900
Looking very good, Pat. I think in the absence of evidence to the contrary, you are right in going with the larger vents. That they "look" too big is more a matter of our own expectations from over 100 years away, not necessarily to do with the reality of the time. Beautiful detail work. Wonderfully crisp and precise. And the more fittings you add, the better she looks. Steven- 1,021 replies
-
- 6
-
-
- gun dispatch vessel
- victoria
- (and 2 more)
-
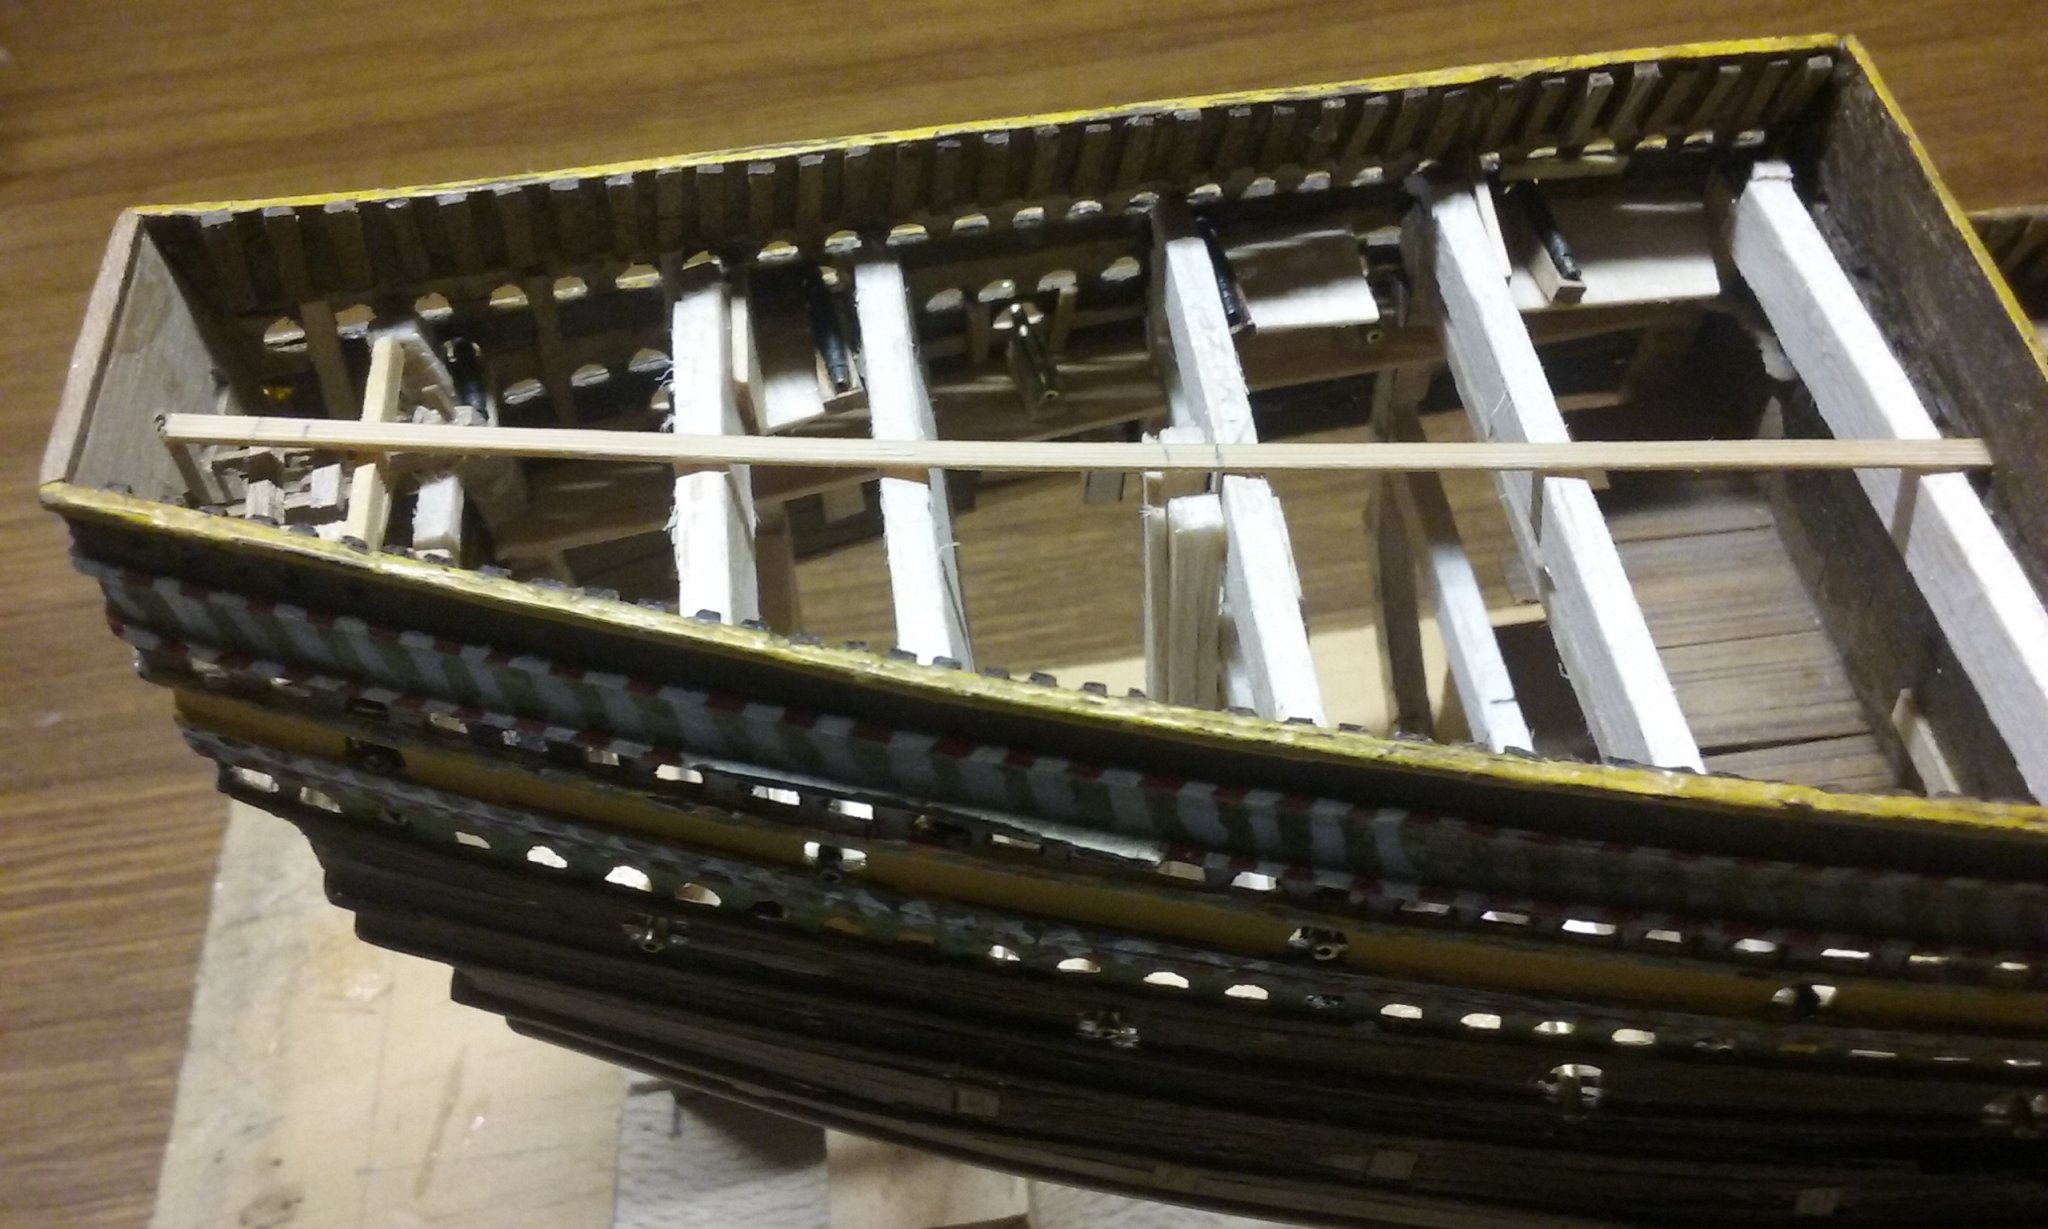
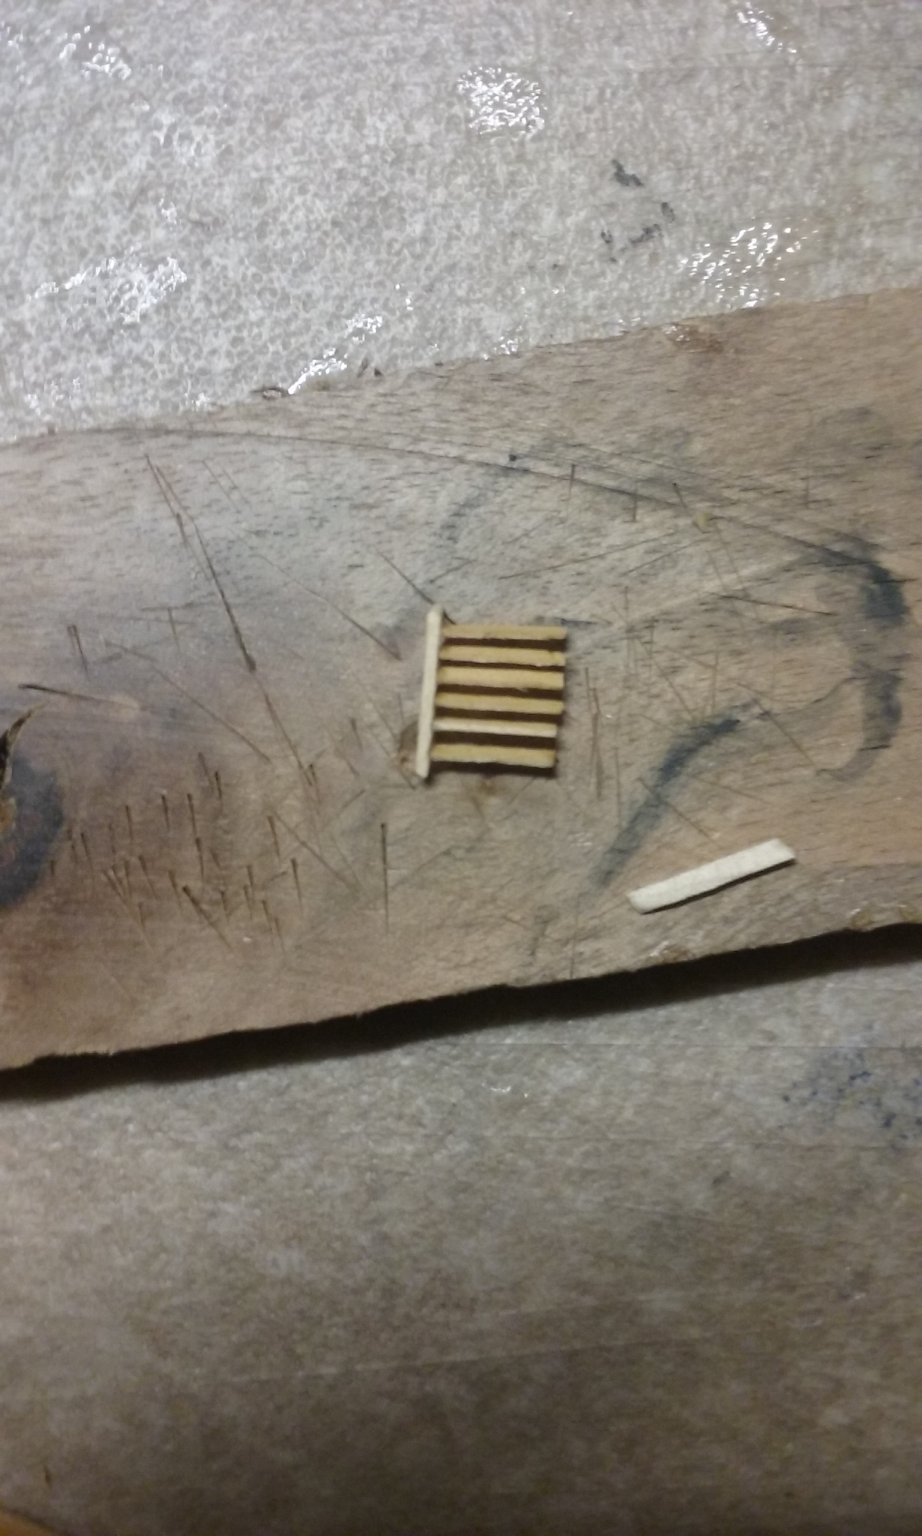
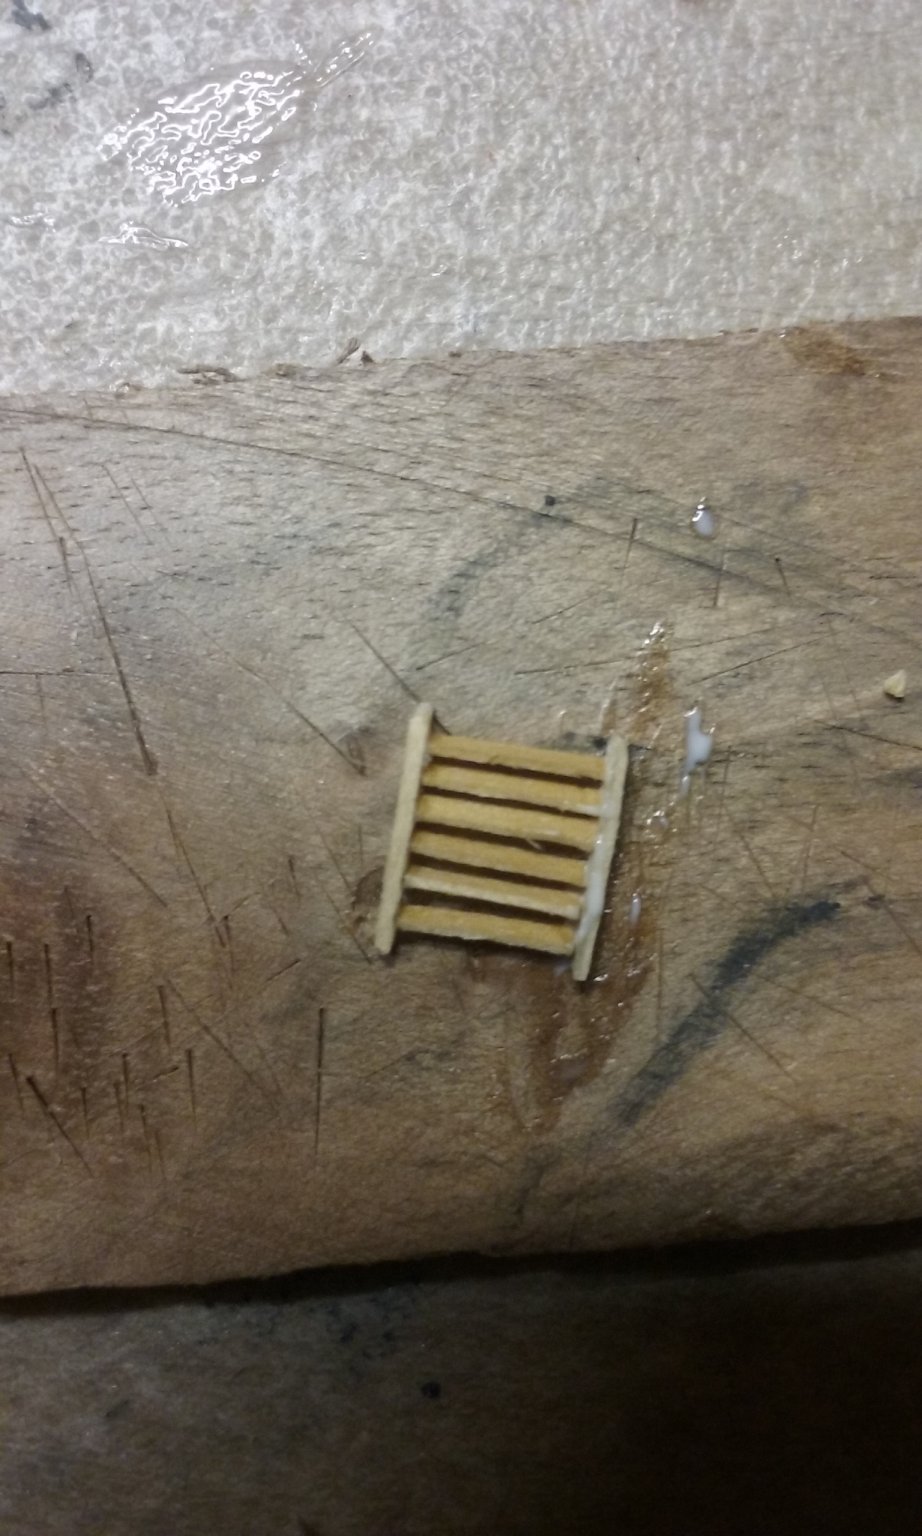
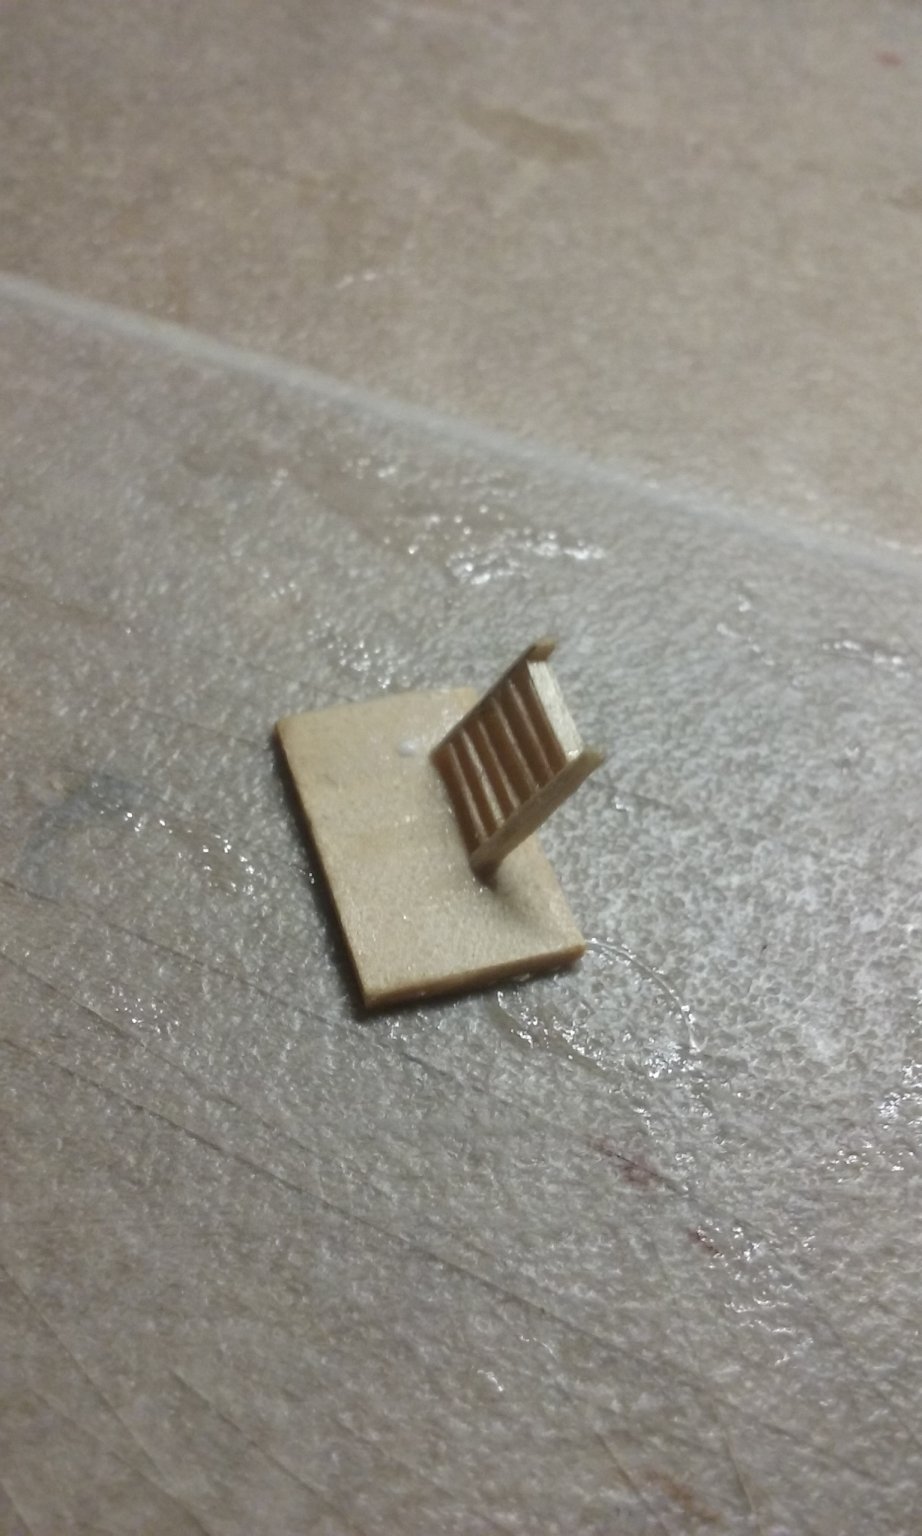
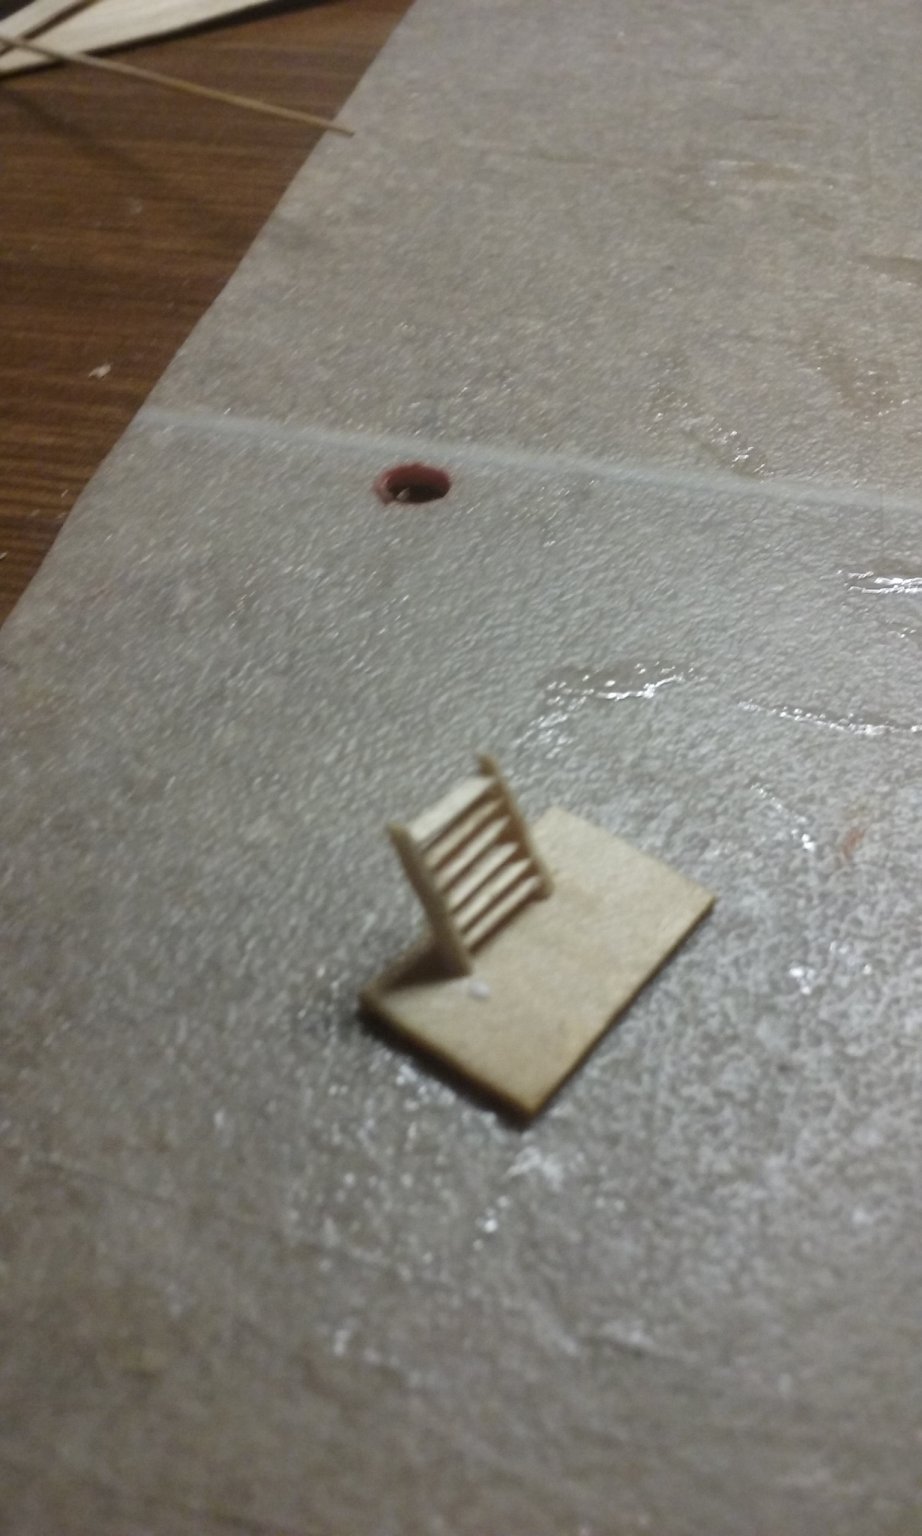
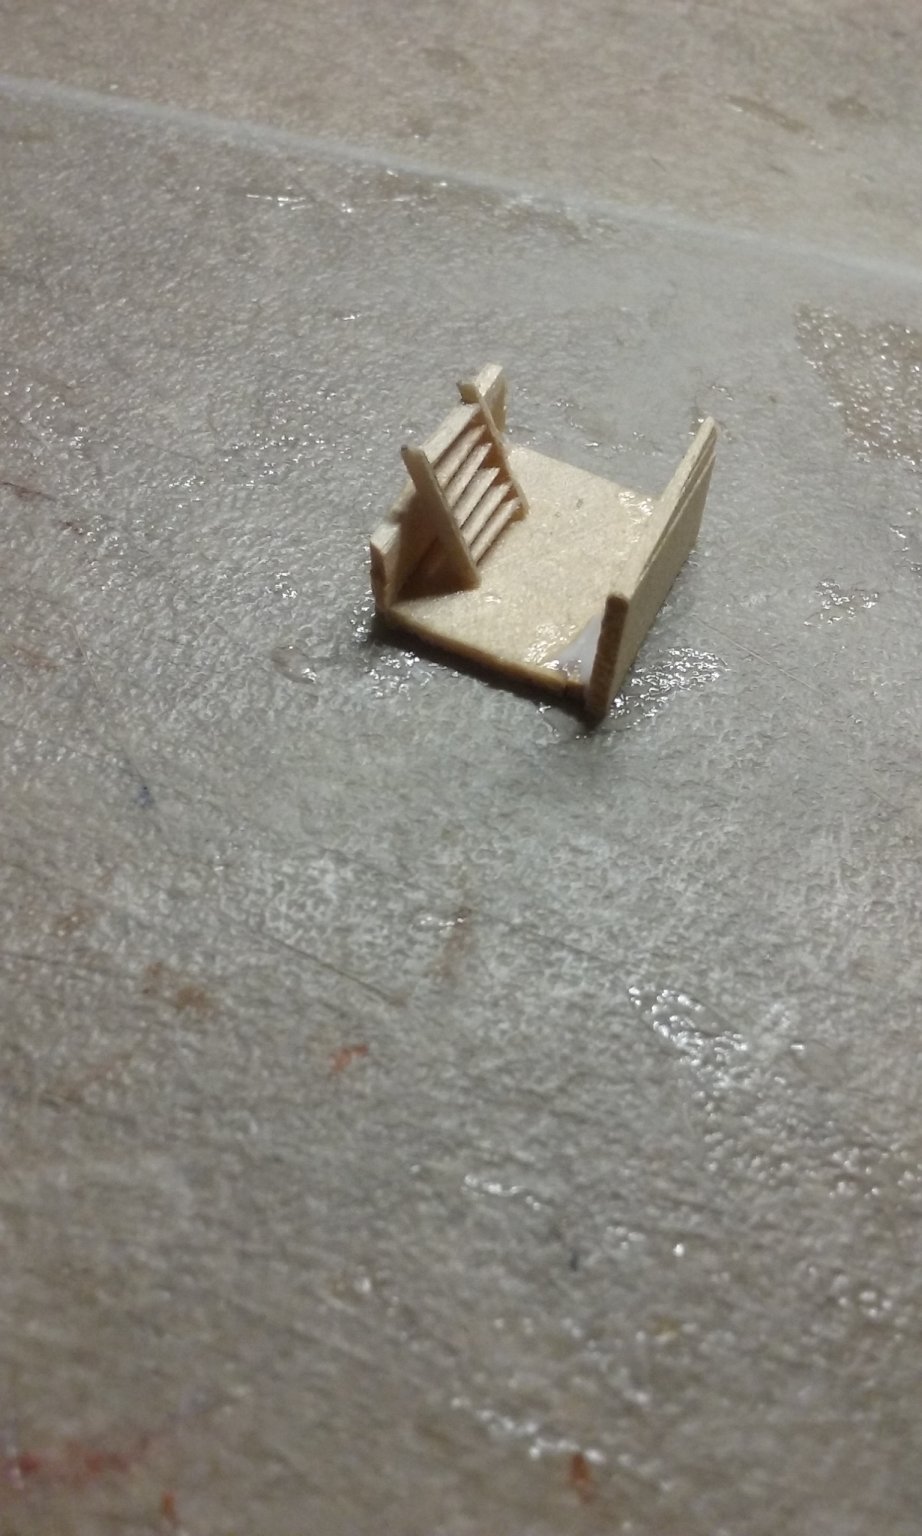
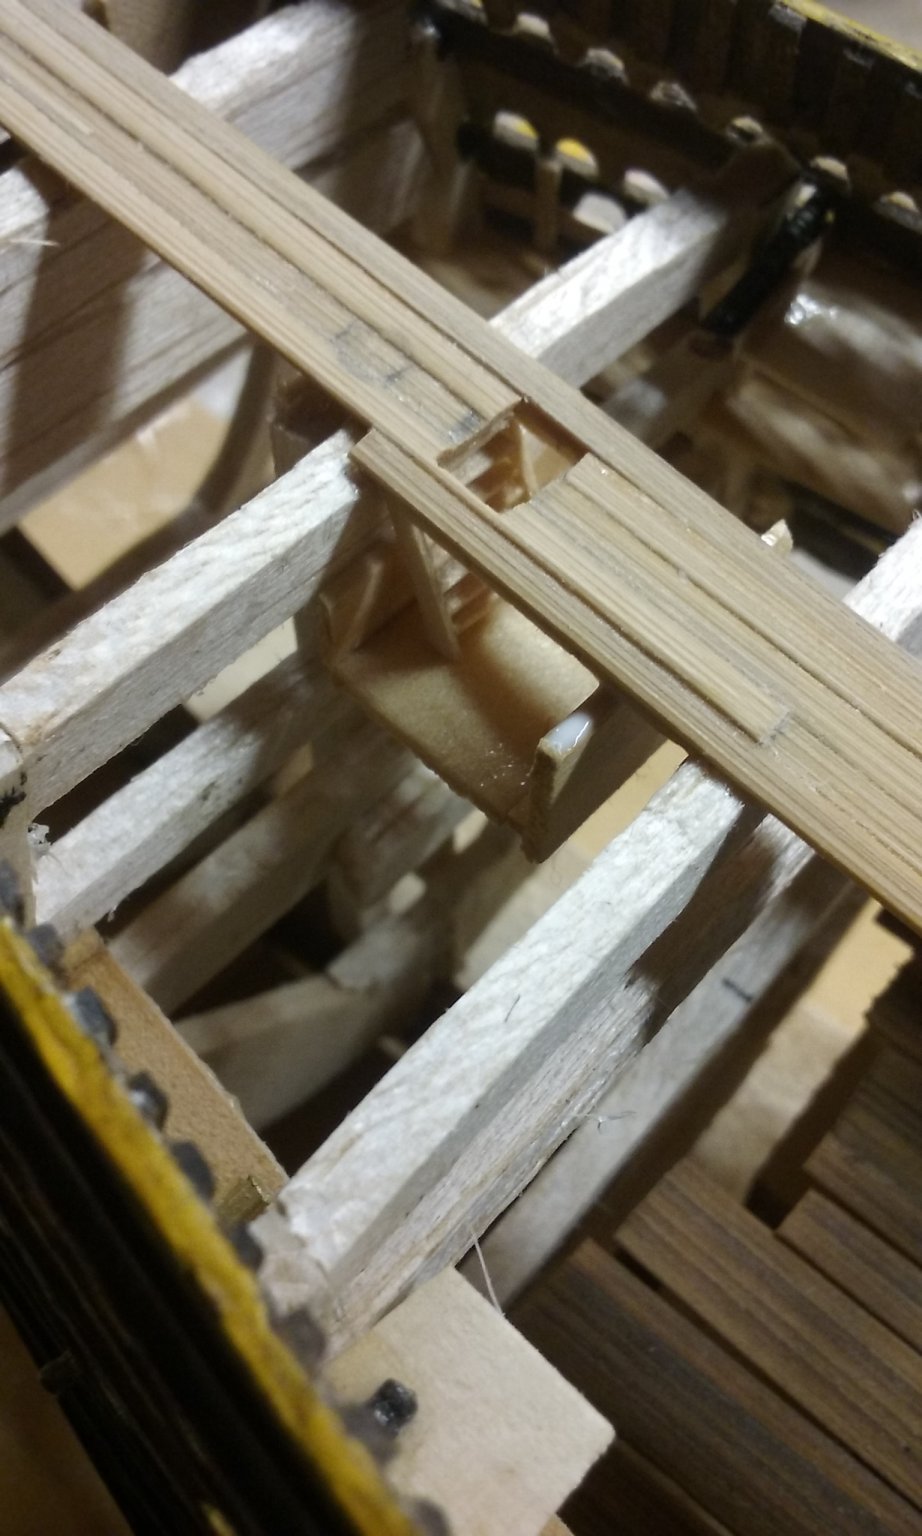
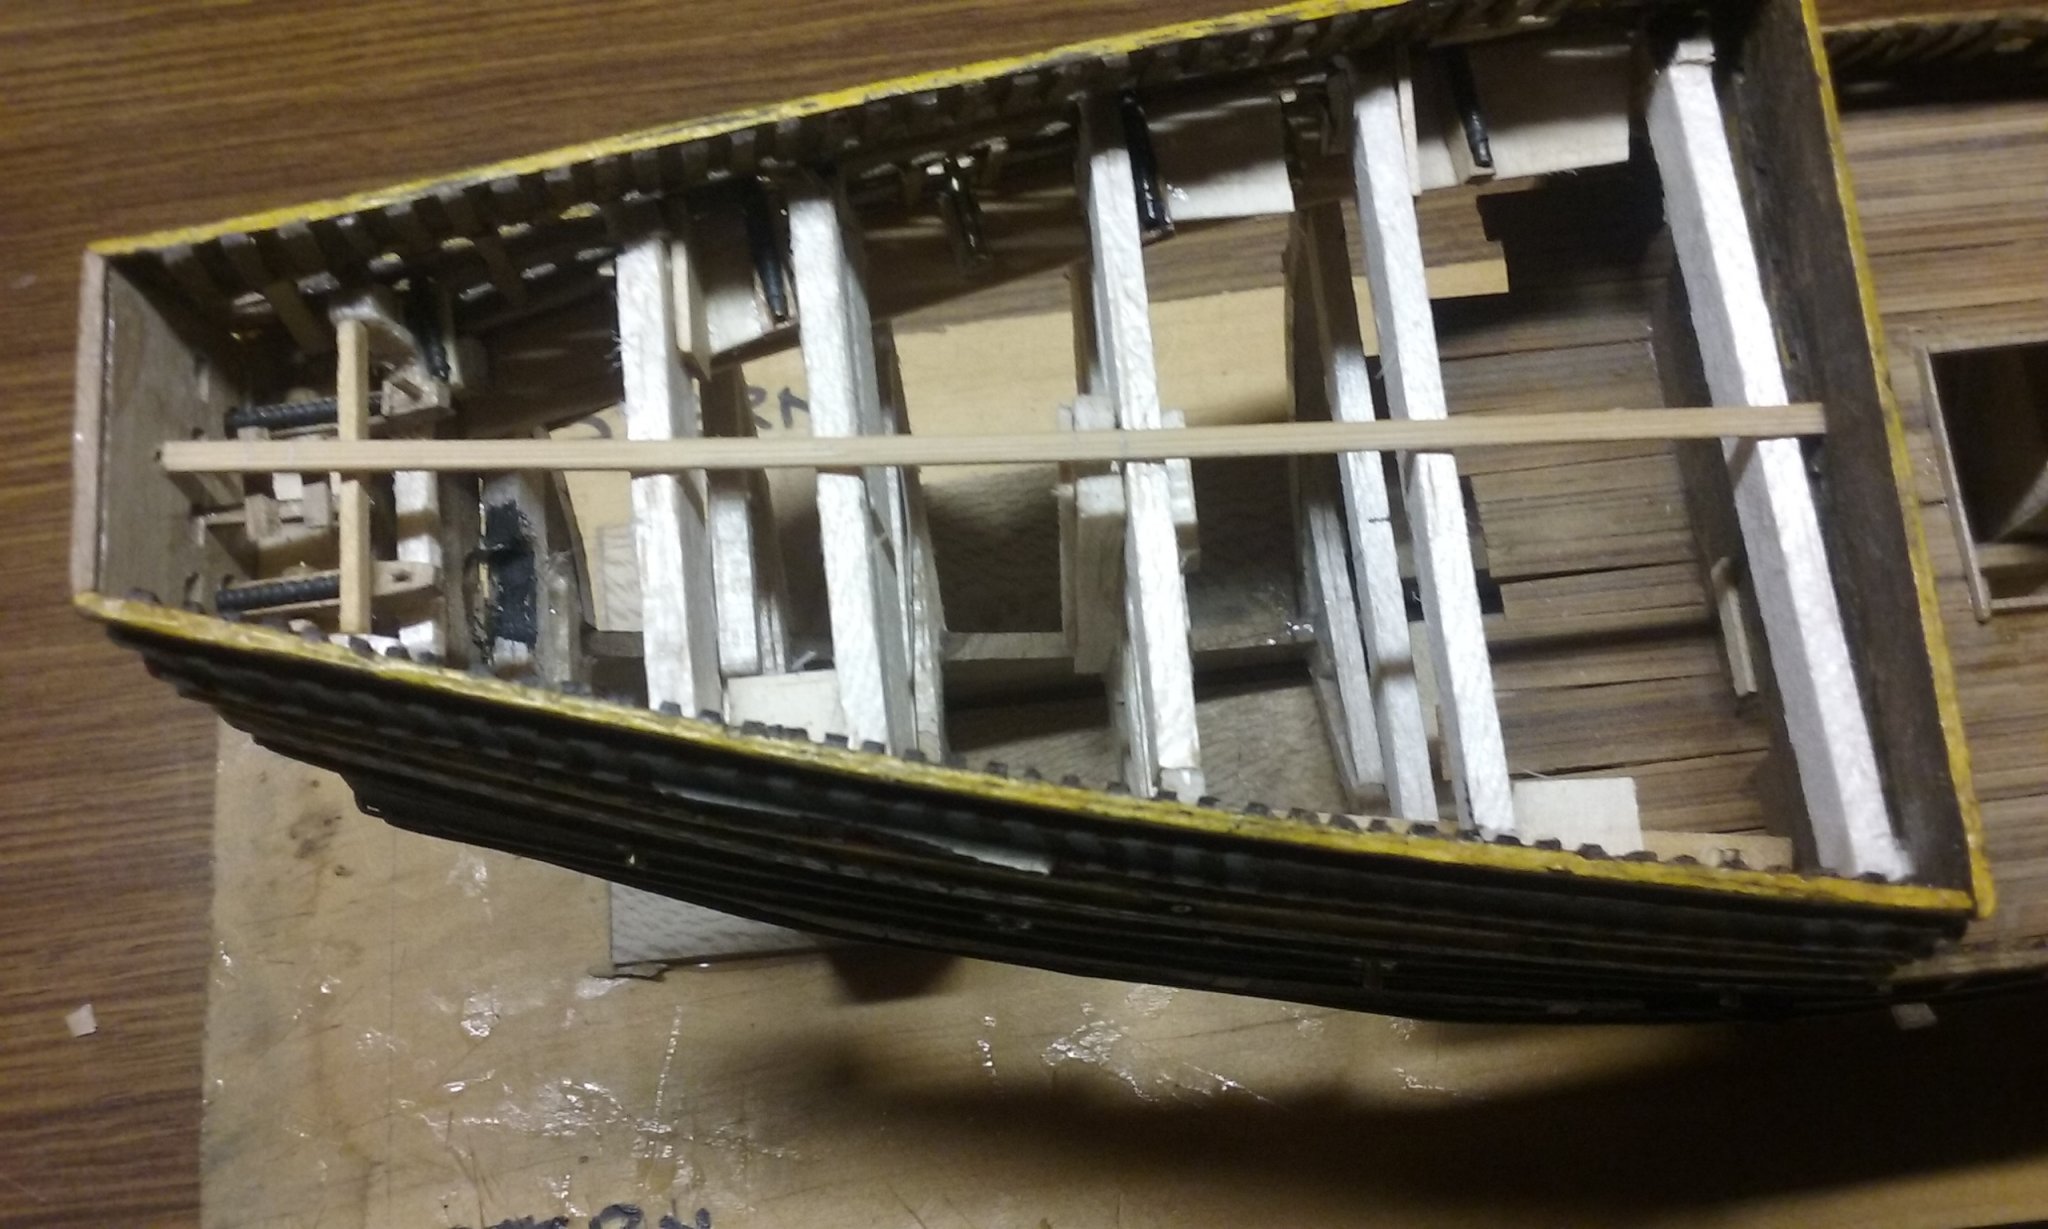
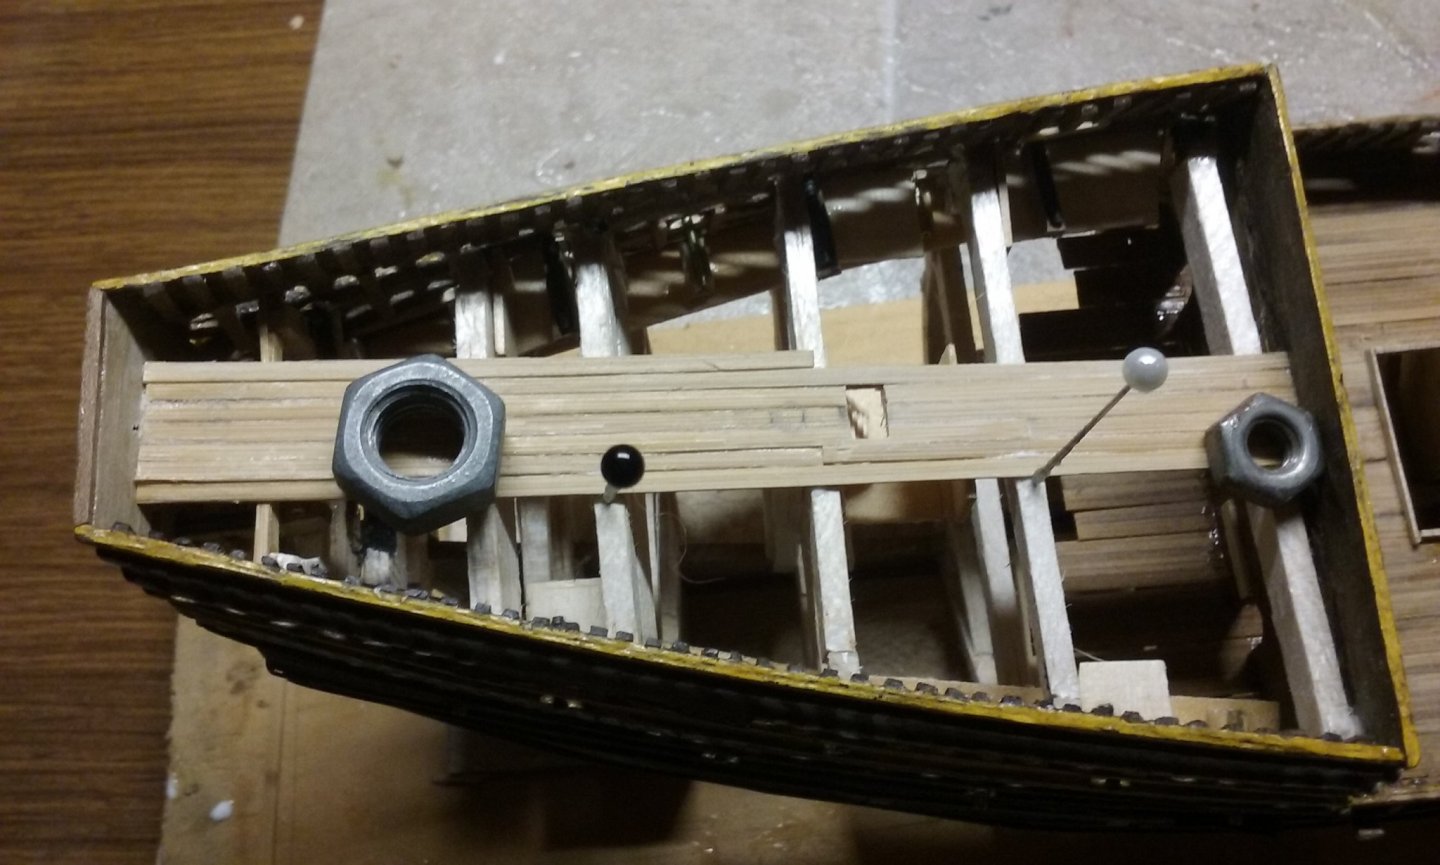
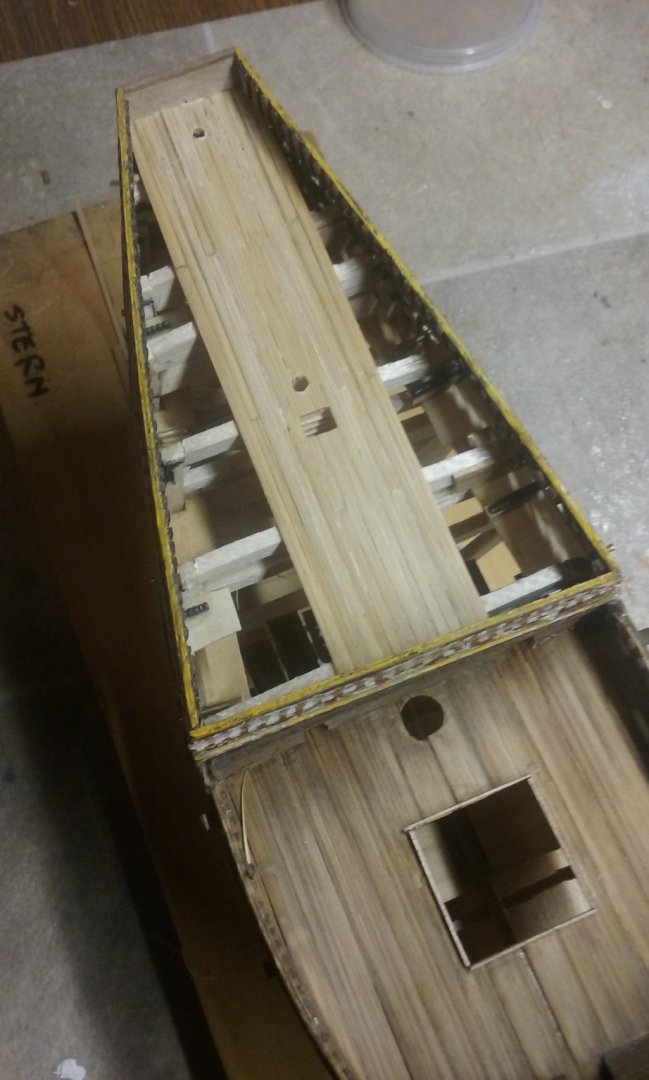
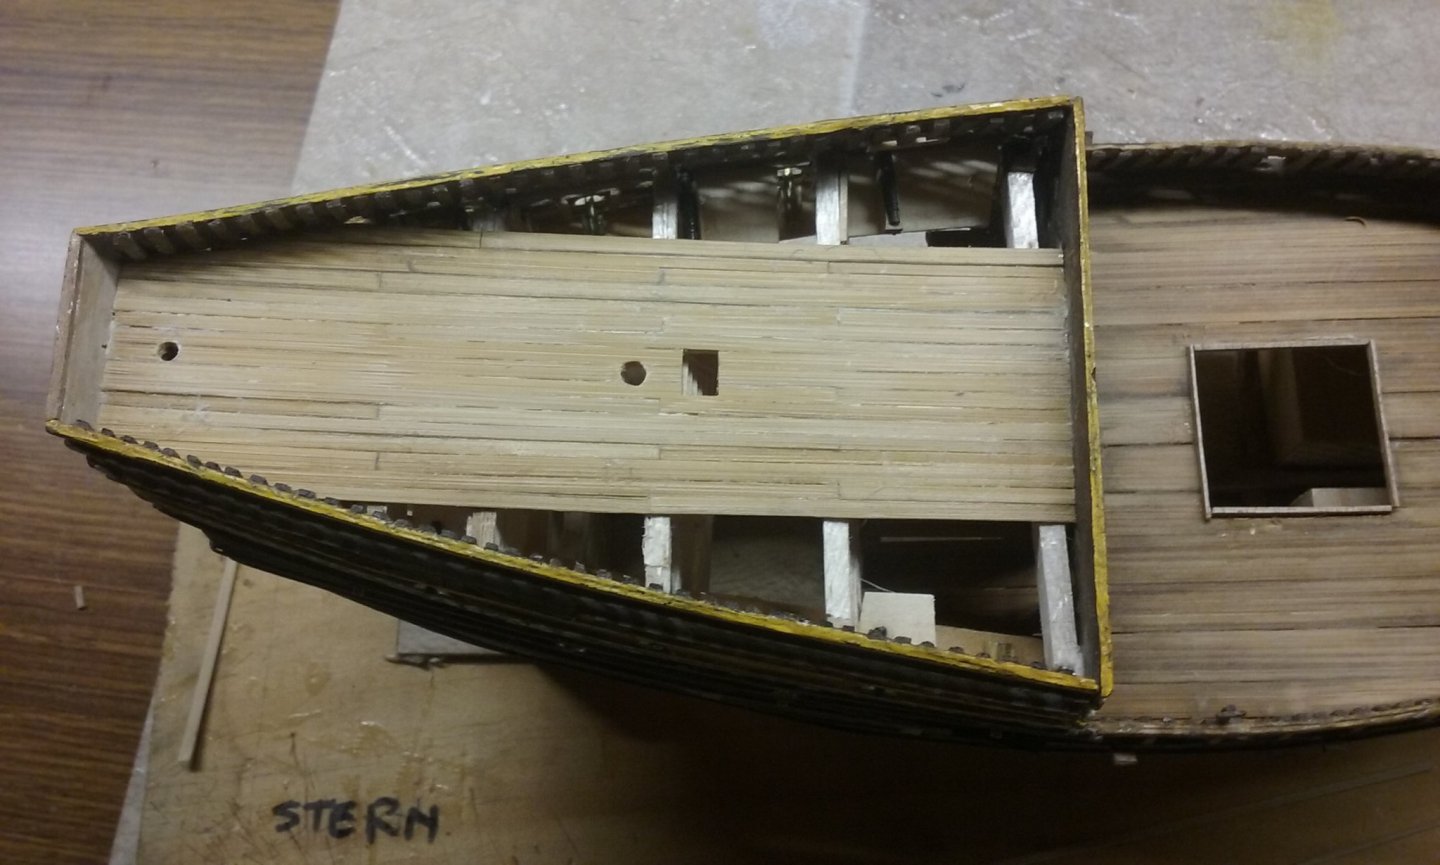
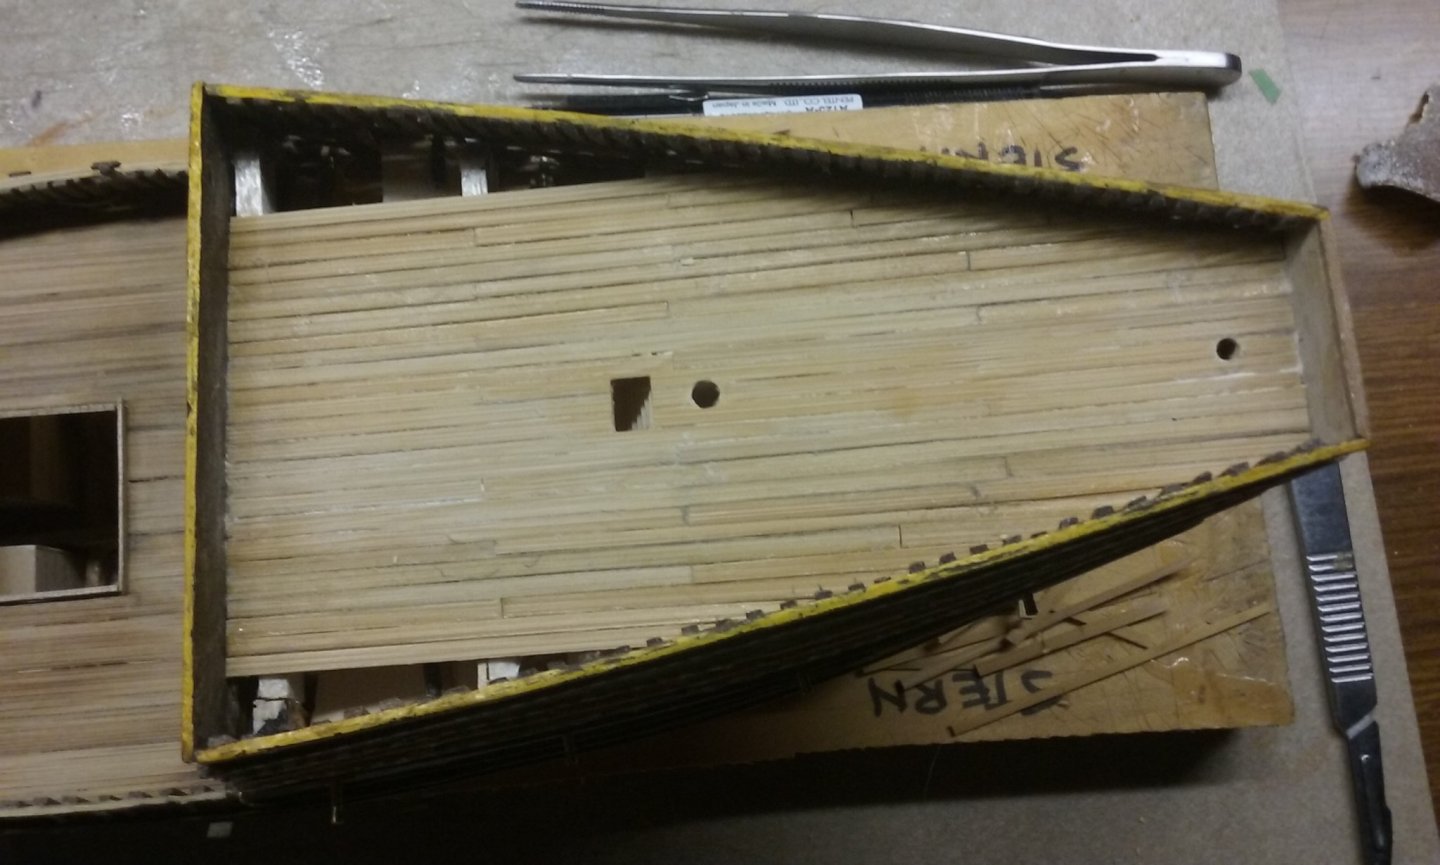
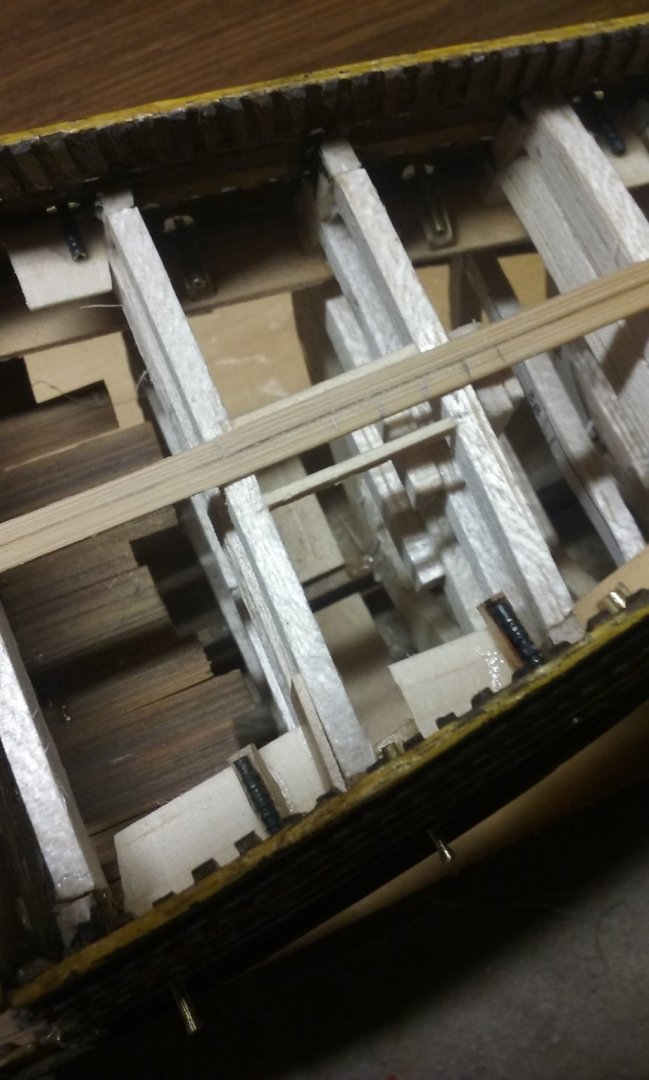
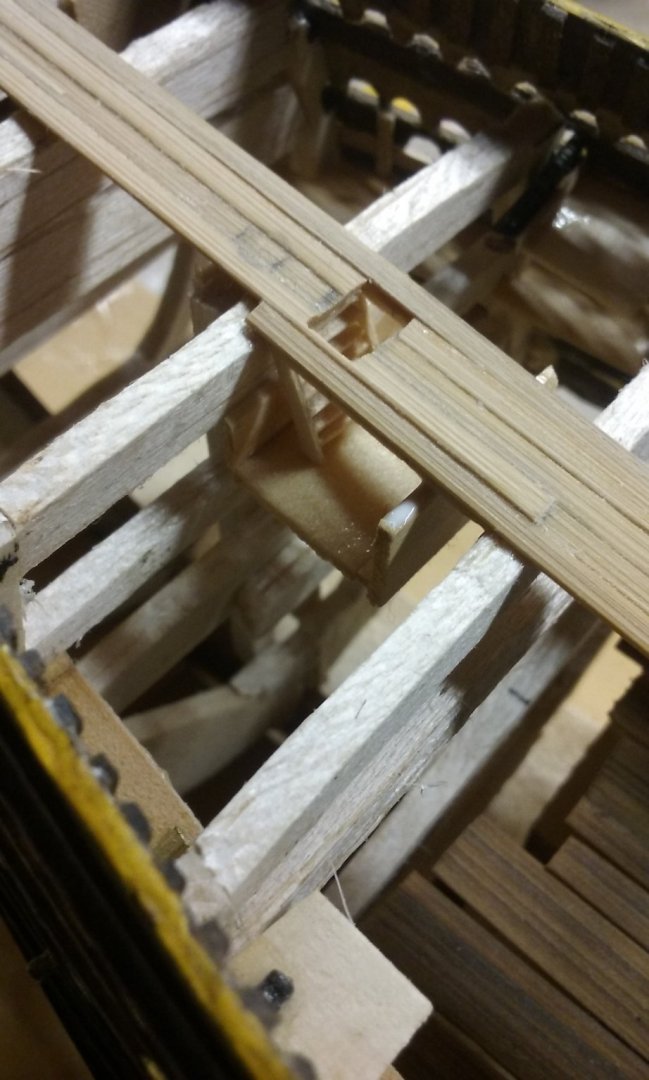
I've finally started the decking on the aftercastle. The original decks on the model were made from bamboo strips from an exterior blind, glued straight onto the deck beams. I'm making the new decking from the same stuff (it's ok - I didn't steal them from outside the house - they were surplus strips when we adjusted the blinds to fit the windows. That's my story and I'm sticking to it.) I had to strip off the outside "skin" of the bamboo to make it sit better. And sanded the inner surface smooth, as it's the side that will be upward. The original deck was made by just gluing the full-width strips onto the deck beams, but this time I'm cutting the planks individually to the correct historical width - partly to show which is old and which is new - and as bamboo is "tube-shaped" the strips have a bit of transverse curve to them, which can be minimised by cutting them into thin strips. Here's the first plank in place: And another. I've marked the locations of the masts, so I can cut holes for them later. And I've also marked the hole for the ladder down from the upper deck into the hull. II And here's the ladder (remember it's 1:200 scale - where's that giant matchstick I use for comparison?) I added a fake deck below it so there's somewhere for the ladder to go. Another consequence of not adding the lower decks when I originally made the model. Putting this assembly in place was harder than I'd expected. You can't just glue the top of the ladder to the underside of the deck and expect it to stay there. My first solution was a frame that was to be glued to the adjoining deck beam and the underside of the deck. It didn't work. Much too fragile and kept warping and bending out of shape. So then I made a solider structure, with a bit of wooden sheet glued upright at each end, like a couple of walls. That worked. Unfortunately as I was gluing it in my hand brushed against one of the bronze cannons and dislodged it, so I had to glue it back in place (not shown in photos). I'll have to tidy up the edges of the hole in the deck, but that can wait till later. Also the central plank is a bit high but I'll be sanding that down when all the decking is in place. Steven


- 740 replies
-
- 11
-
-
- Tudor
- restoration
- (and 4 more)
-
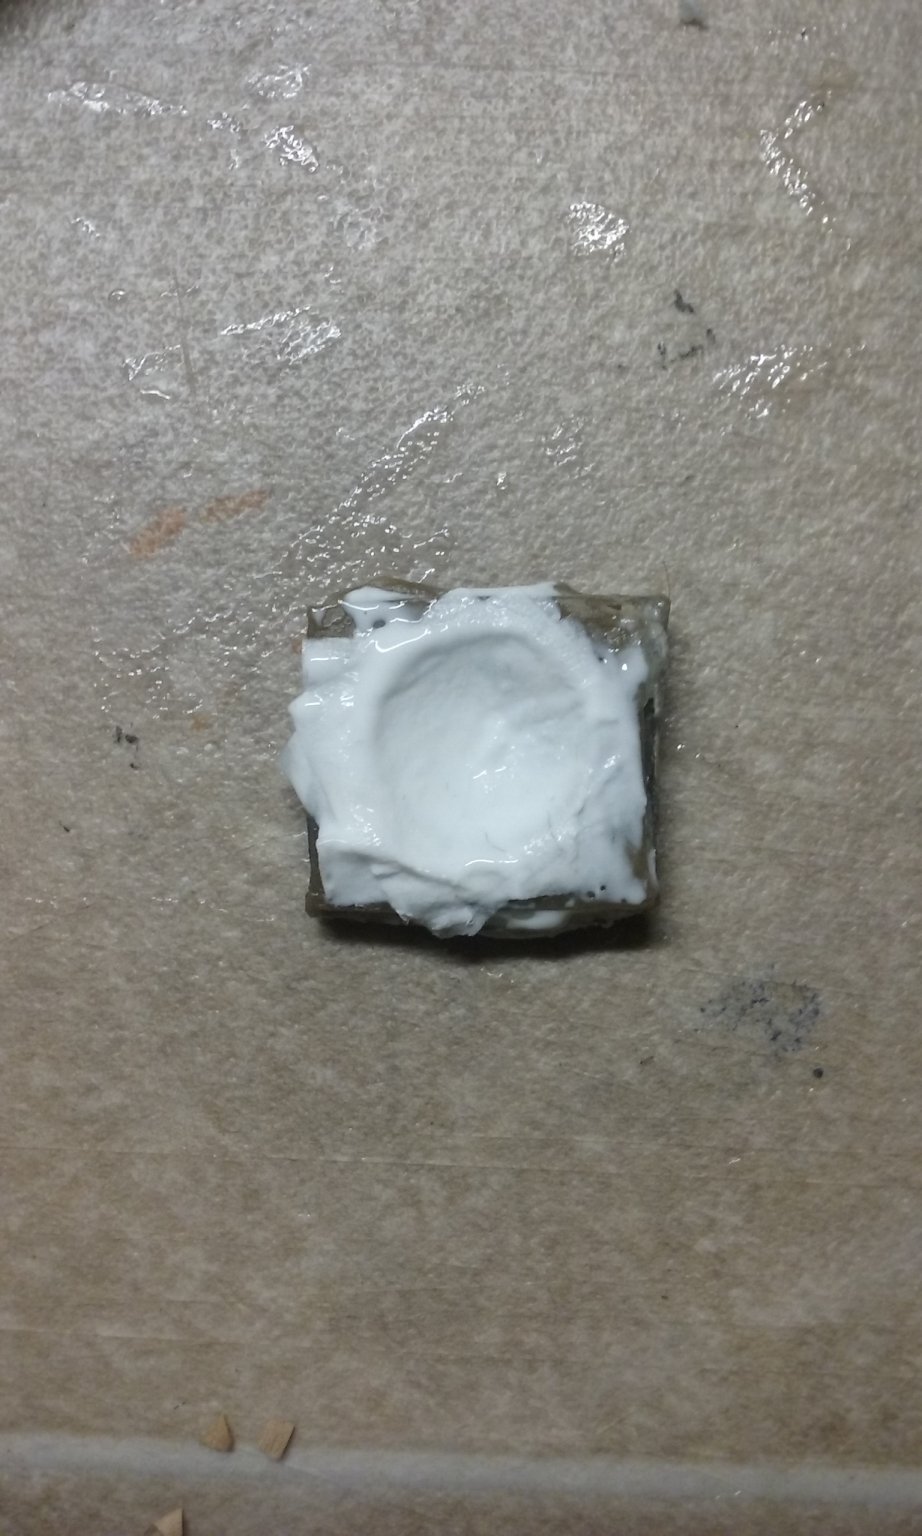
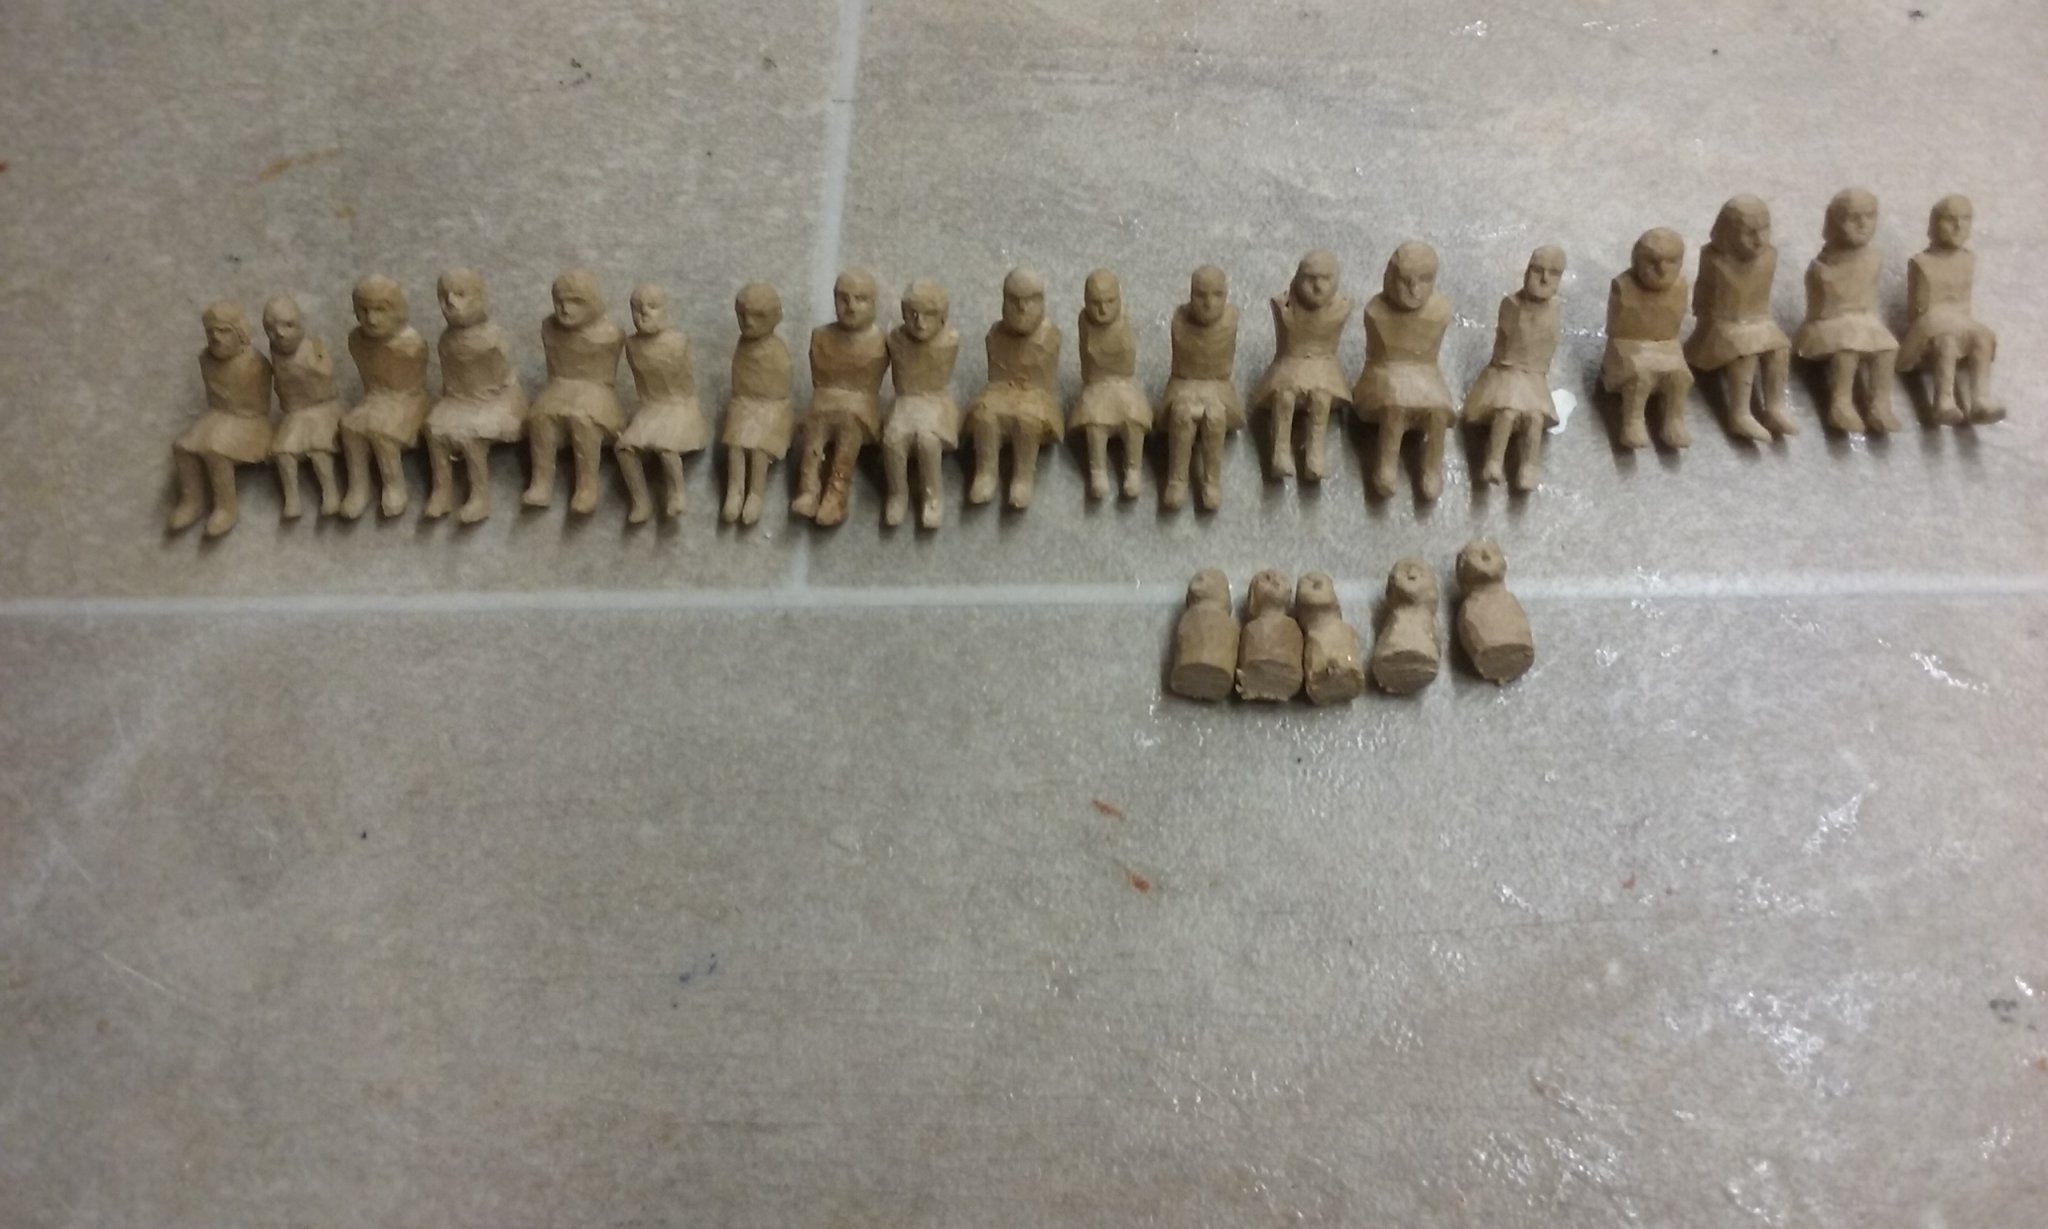
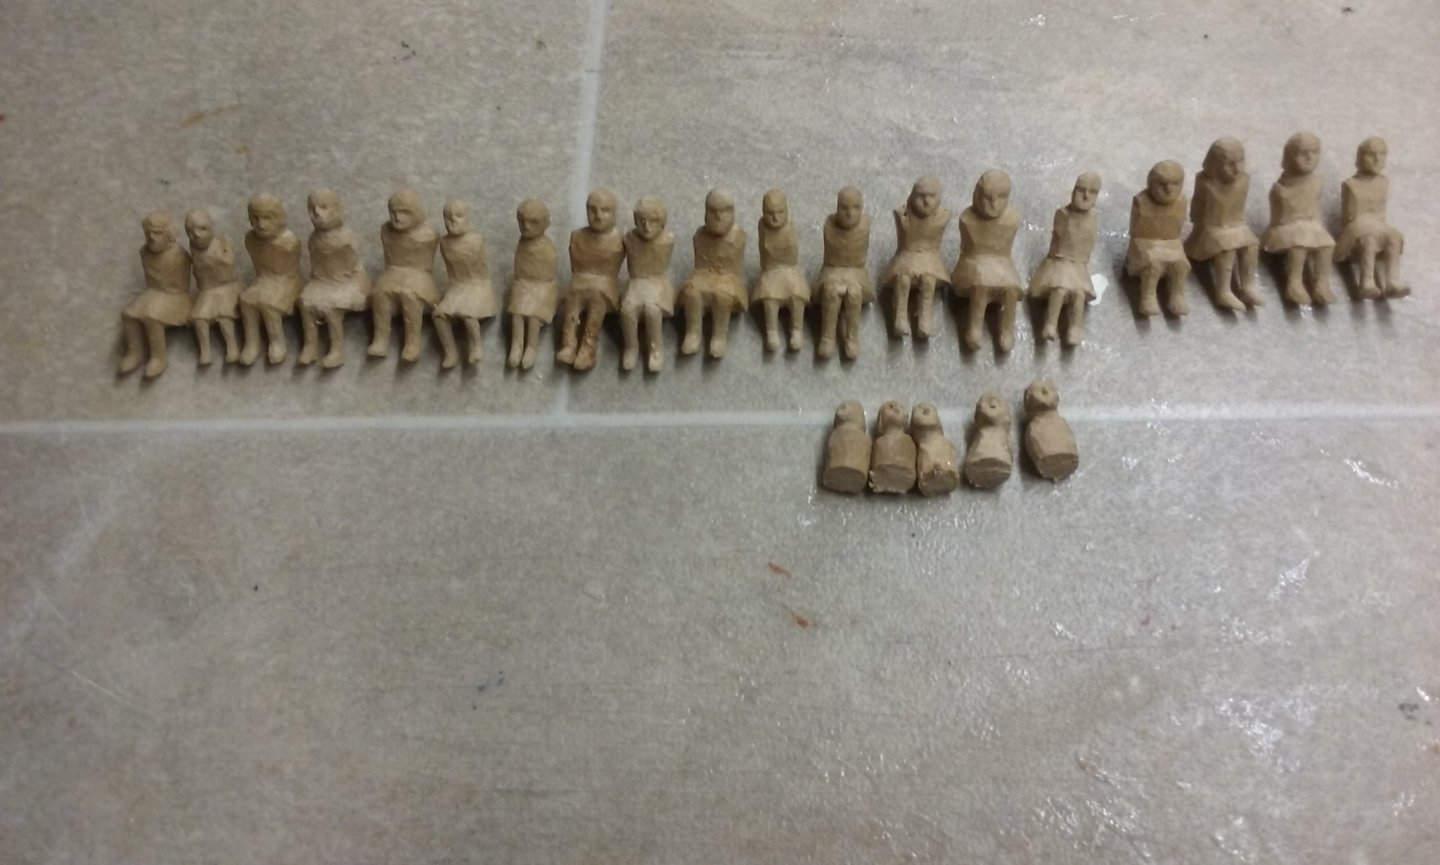
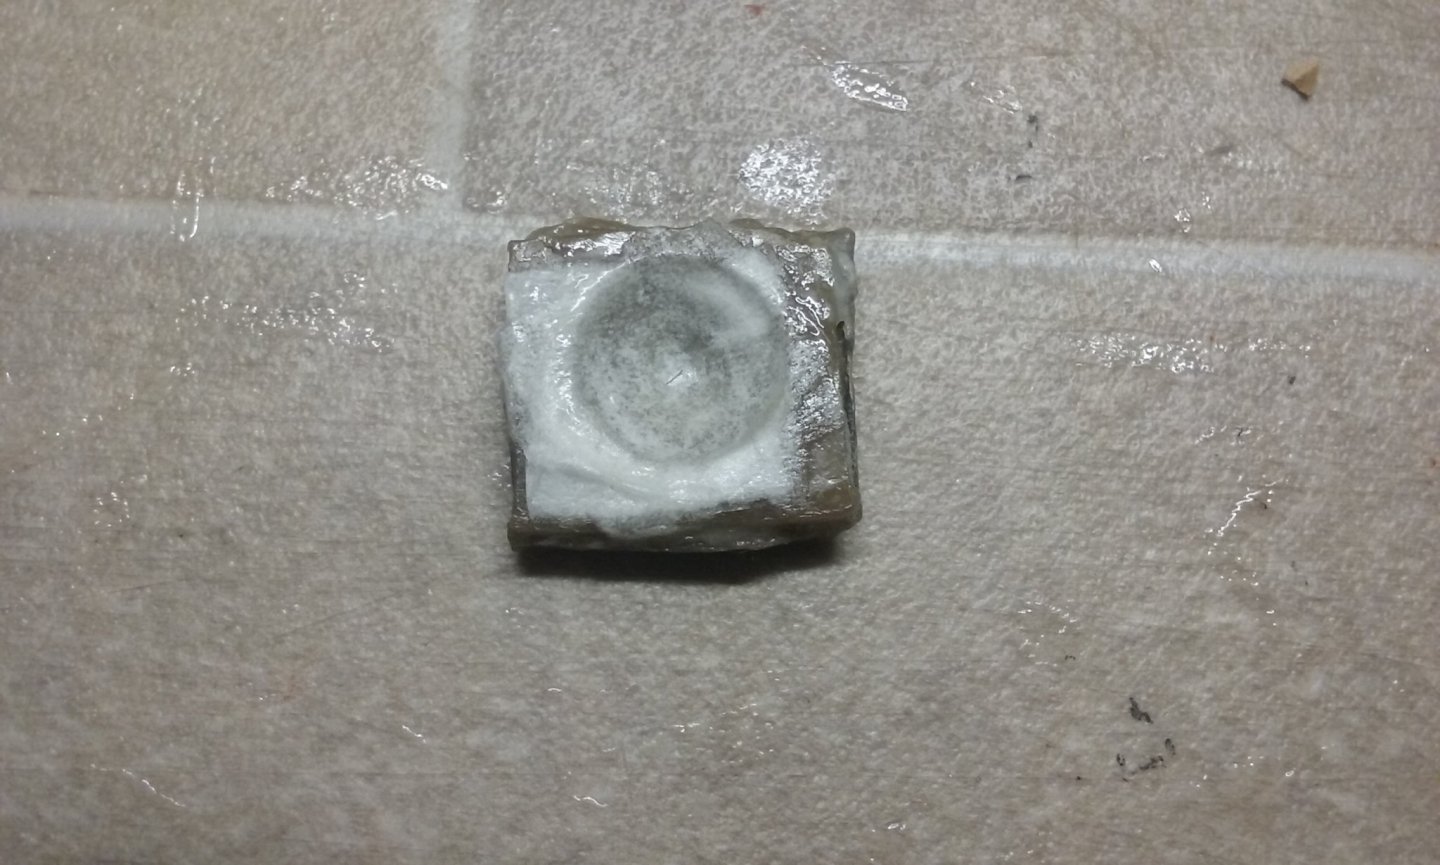
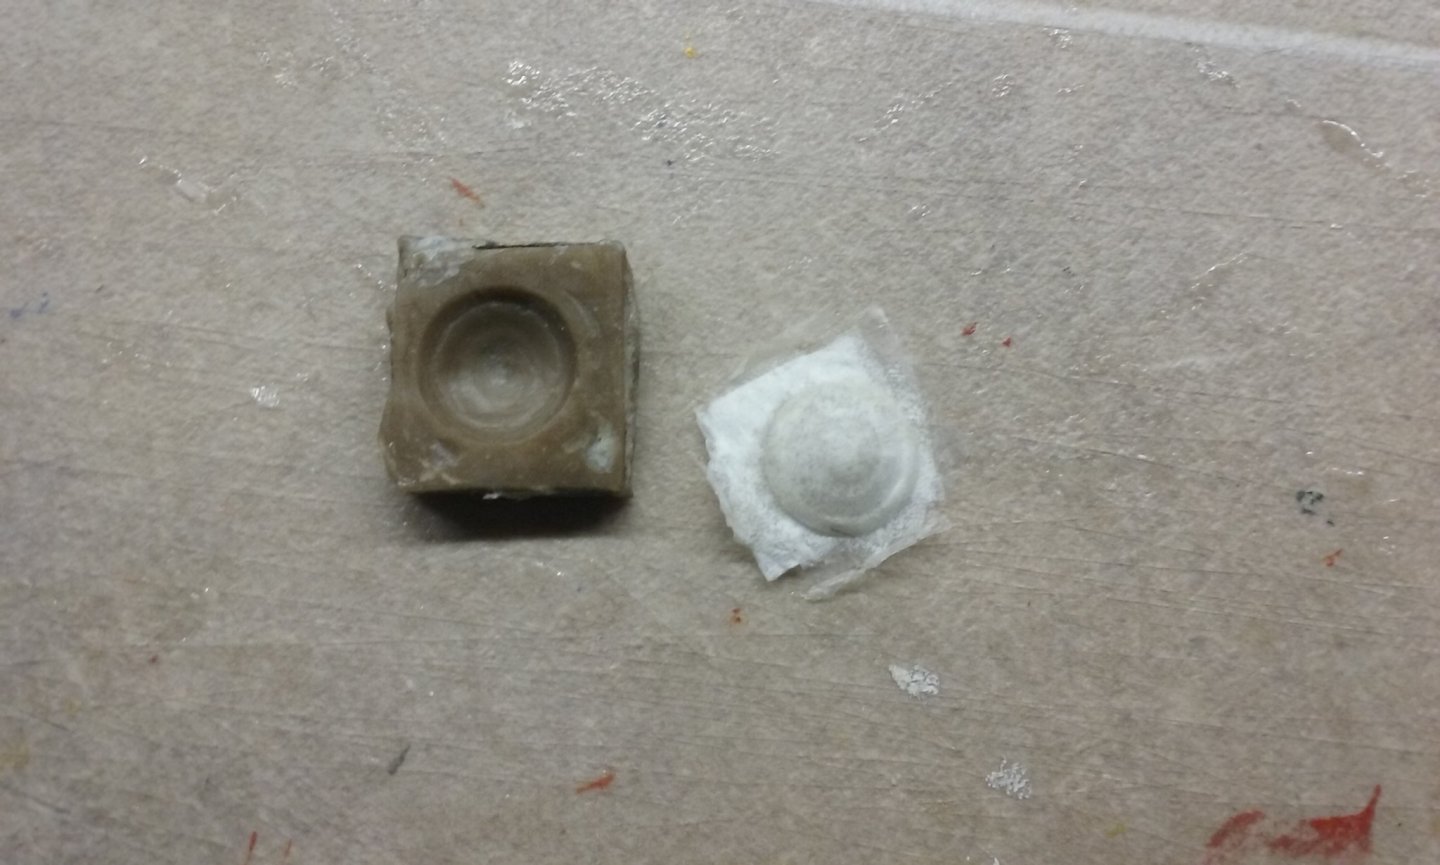
Something of a red-letter day. I've finally made the last shield of the 48 I needed for the sides of the dromon. Here it is just started. And dried out after 24 hours in the mould: and added to the shields made but not yet painted. Trimmed to shape, and the first coat of paint added to it and the rest of the unpainted shields. Tomorrow I'll be able to do the next coat, and the day after that I ought to have them all completed. And another milestone - I've carved half of the oarsmen I need. Yes, ok - five of them don't have anything below the waist. I was thinking I really ought to give them lower halves before I could claim I was half way through - but why spoil the moment? I'll fix them at the appropriate time when I'm good and ready. You could also say "But where are their arms?" But that's another project, which I'll do when I've carved the bodies. They're a bit of a mixed bunch, but then so are people in general - all kinds of sizes and shapes. However, when they're all done I'm going to look over them and see if any need altering to make them all work together better. And then I'll add arms, smooth the figures off, do the final touches, and paint them. Steven


-
Well, there you go. I'm still learning. This information - and all the information other members provide so generously - increases the knowledge base and the understanding. Thanks for that, Binho. Steven
-
The problems you've come across are not at all unusual with kits. Wood warps, shrinks etc, and kit parts aren't necessarily perfectly made in the first place. Apparently Corel, unlike most other kitmakers today, still has its cutting done by hand rather than by laser. How much variation (in inches or millimeters) is there in the height of the frames (ribs)? I'm not familiar with the kit, so can't give a definitive answer, but if the difference is very small it shouldn't matter whether you cut down the high ones or pack the low ones to be higher. However, maybe you should check whether you can see anything in the drawings that might show whether you have any critical clearances, that changing the deck height might affect. I've just checked images of the model - that's a nice looking ship, by the way. Deck height would perhaps affect the height of the upper gunports - but you can probably adjust all that as you do your planking, as long as you are aware of it in advance as a potential problem. Also, just check that your keel is straight - often a problem in kits (it can be fixed, however if it's not too severe). Good luck with it, and do put up a build log. A lot of very helpful people on this forum. I've sent you a PM which I hope will help. Steven
-
Welcome, Vince! What scale is your layout? And what location and time period? As an old rail modeller, I find this idea rather fascinating. Once you've set a few parameters as above, there's probably a lot of advice available to you for your build (such things as suppliers of scale accessories etc) Steven
-
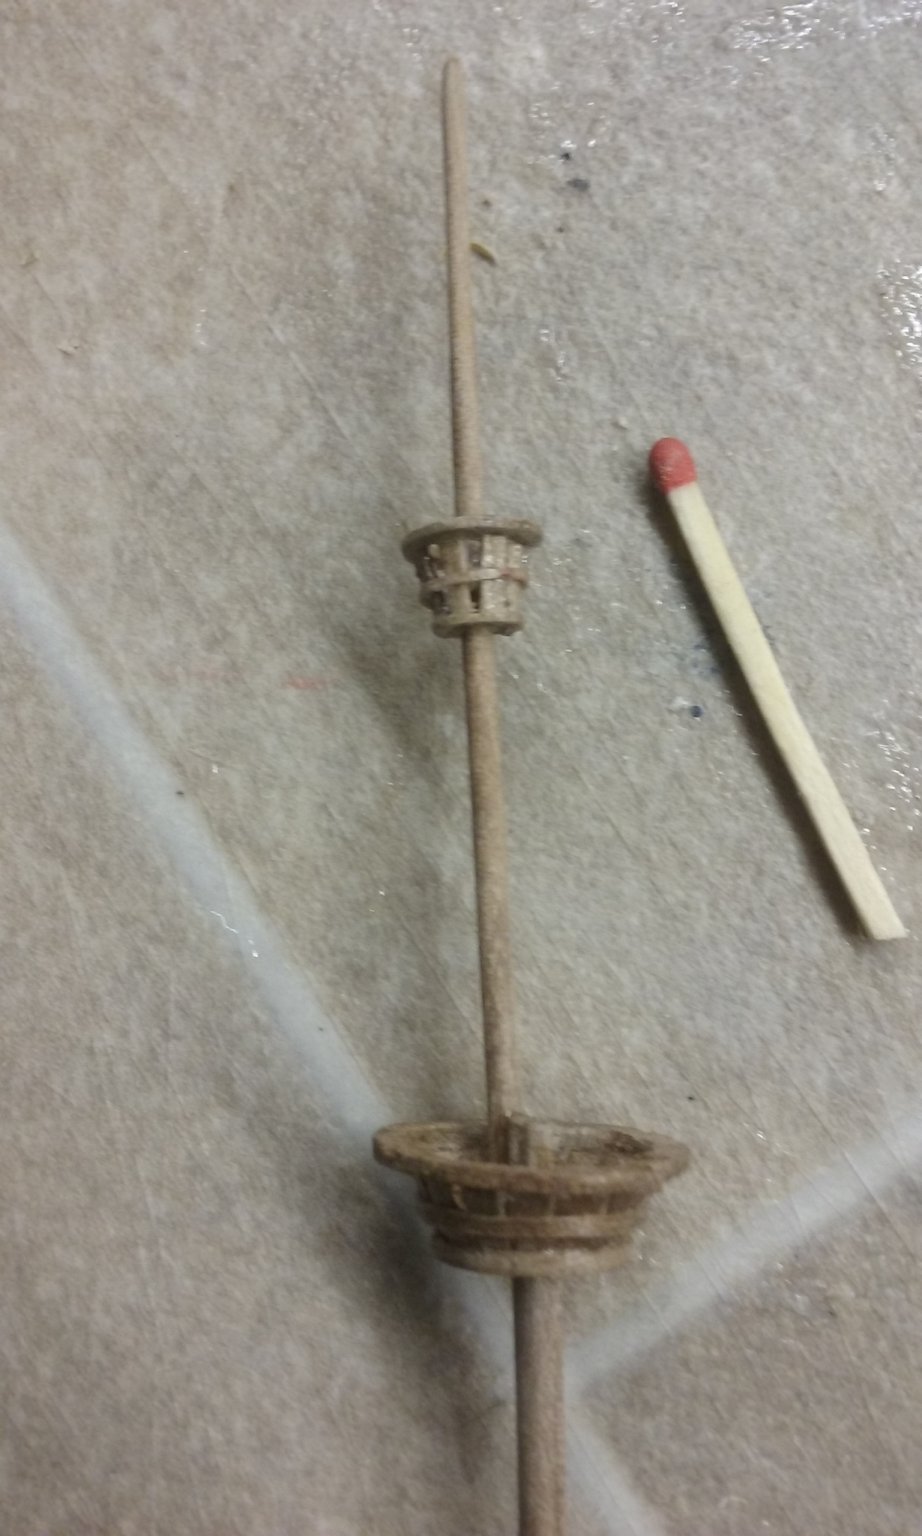
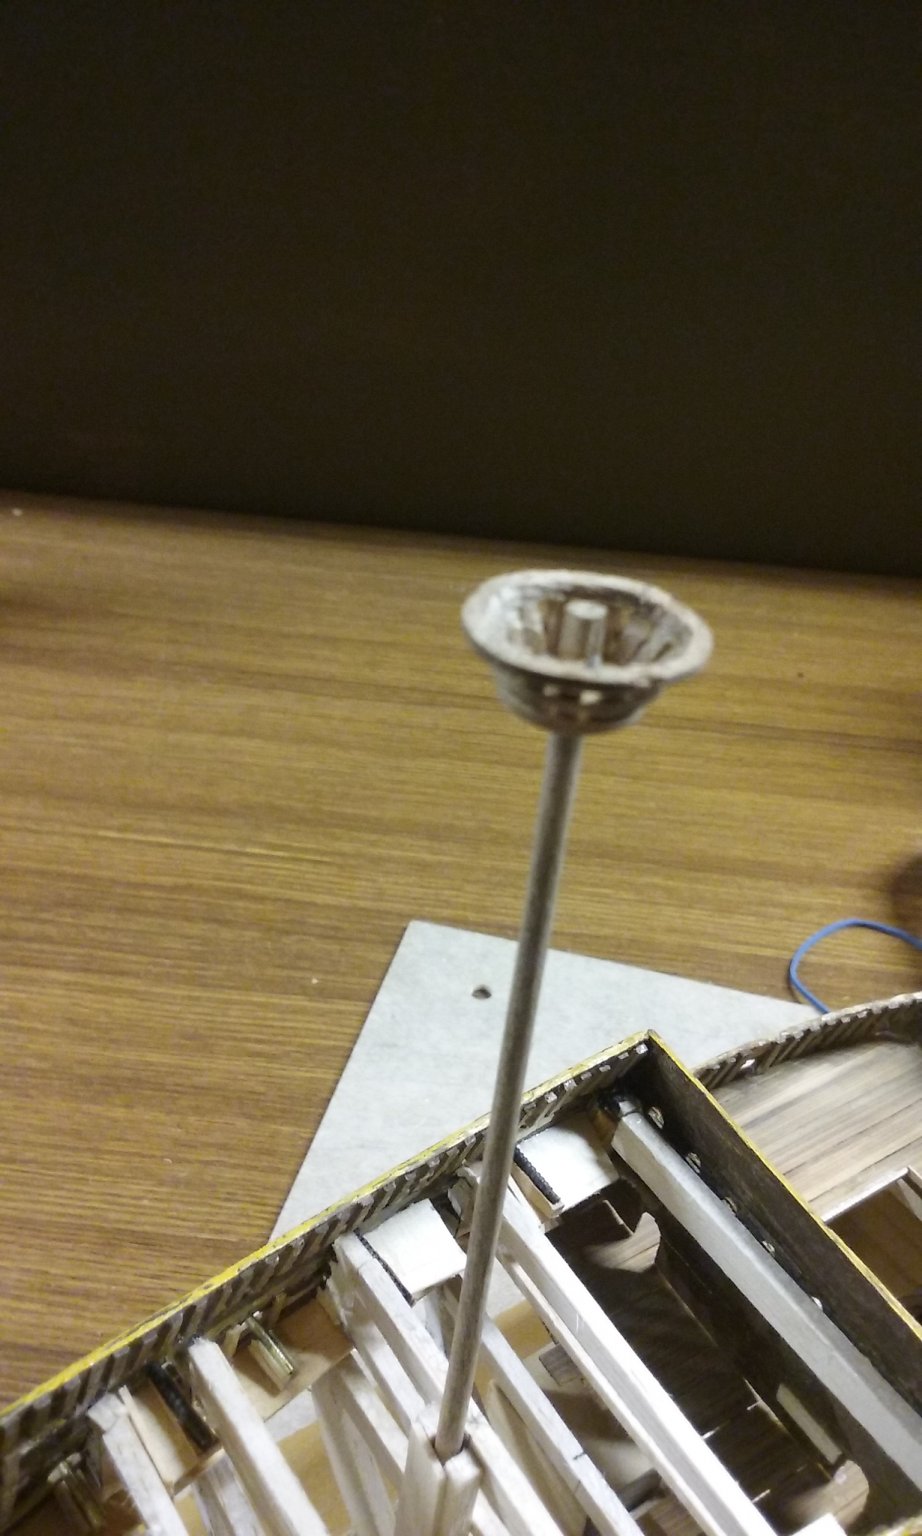
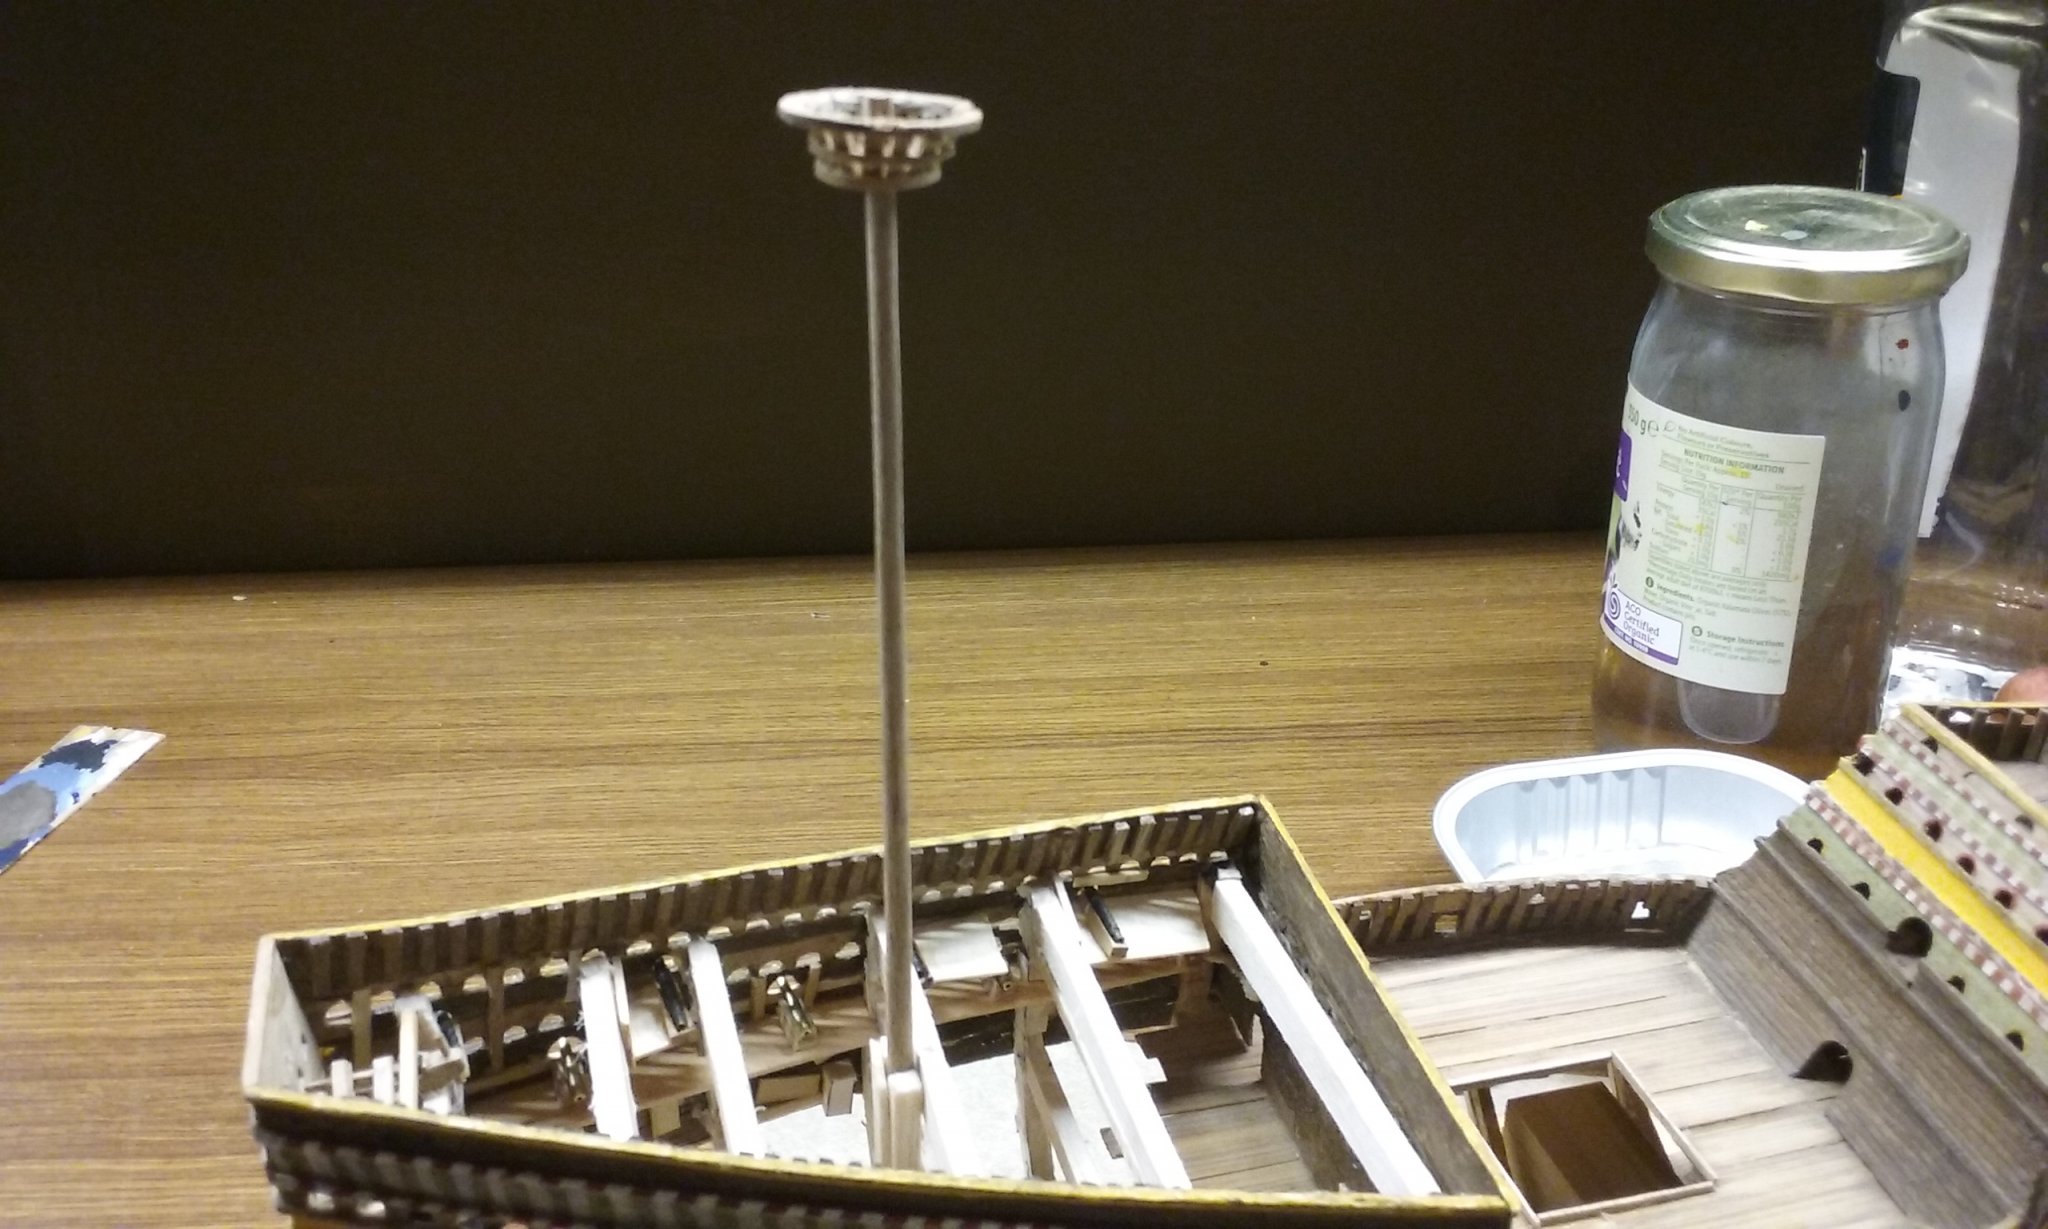
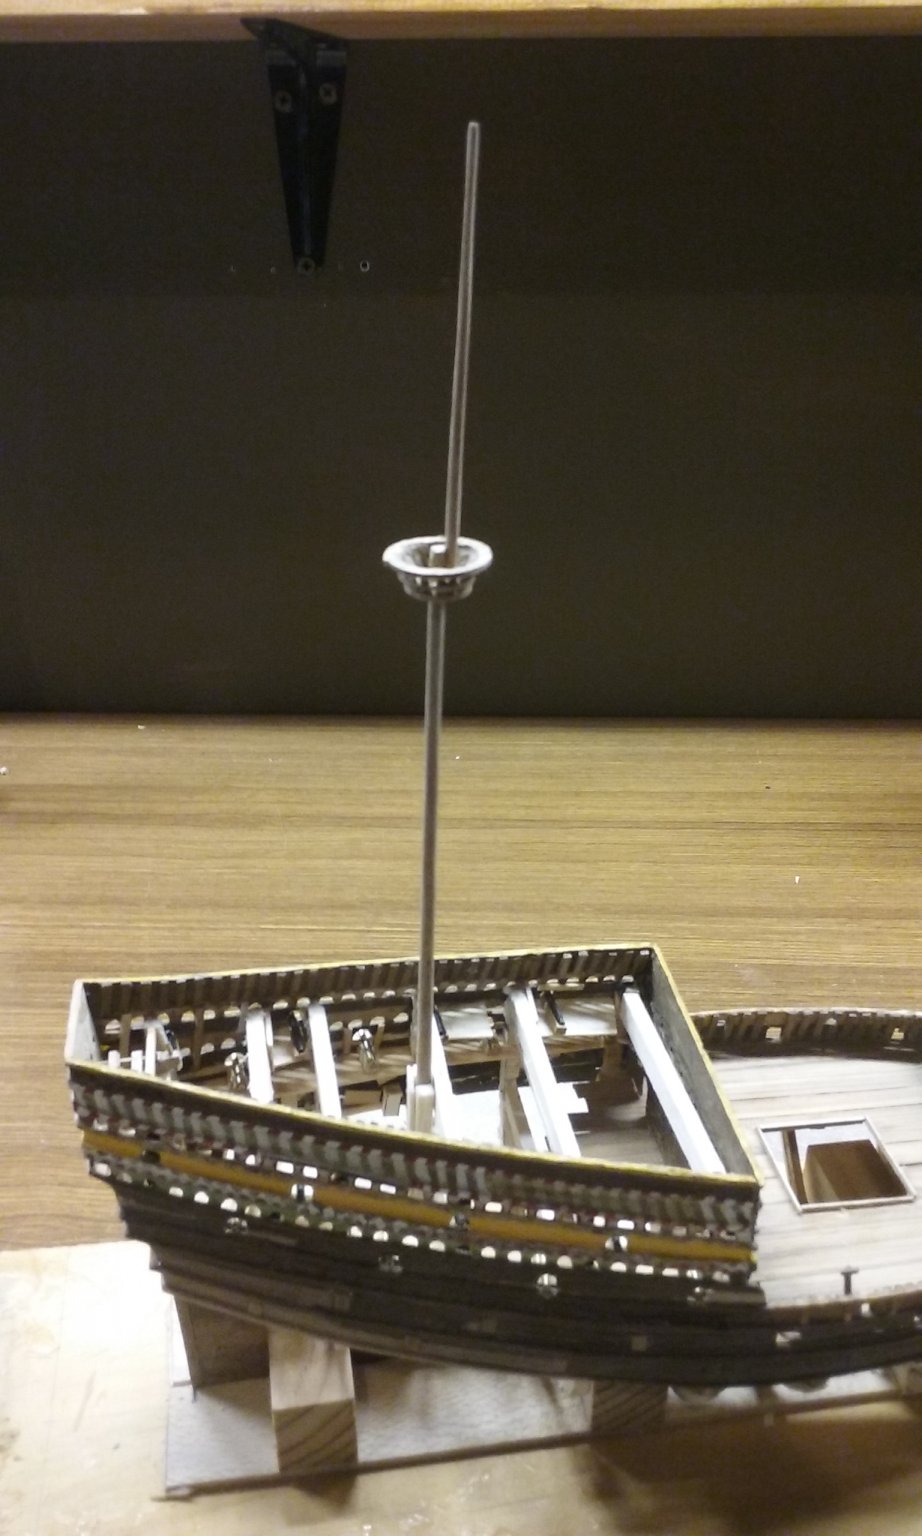
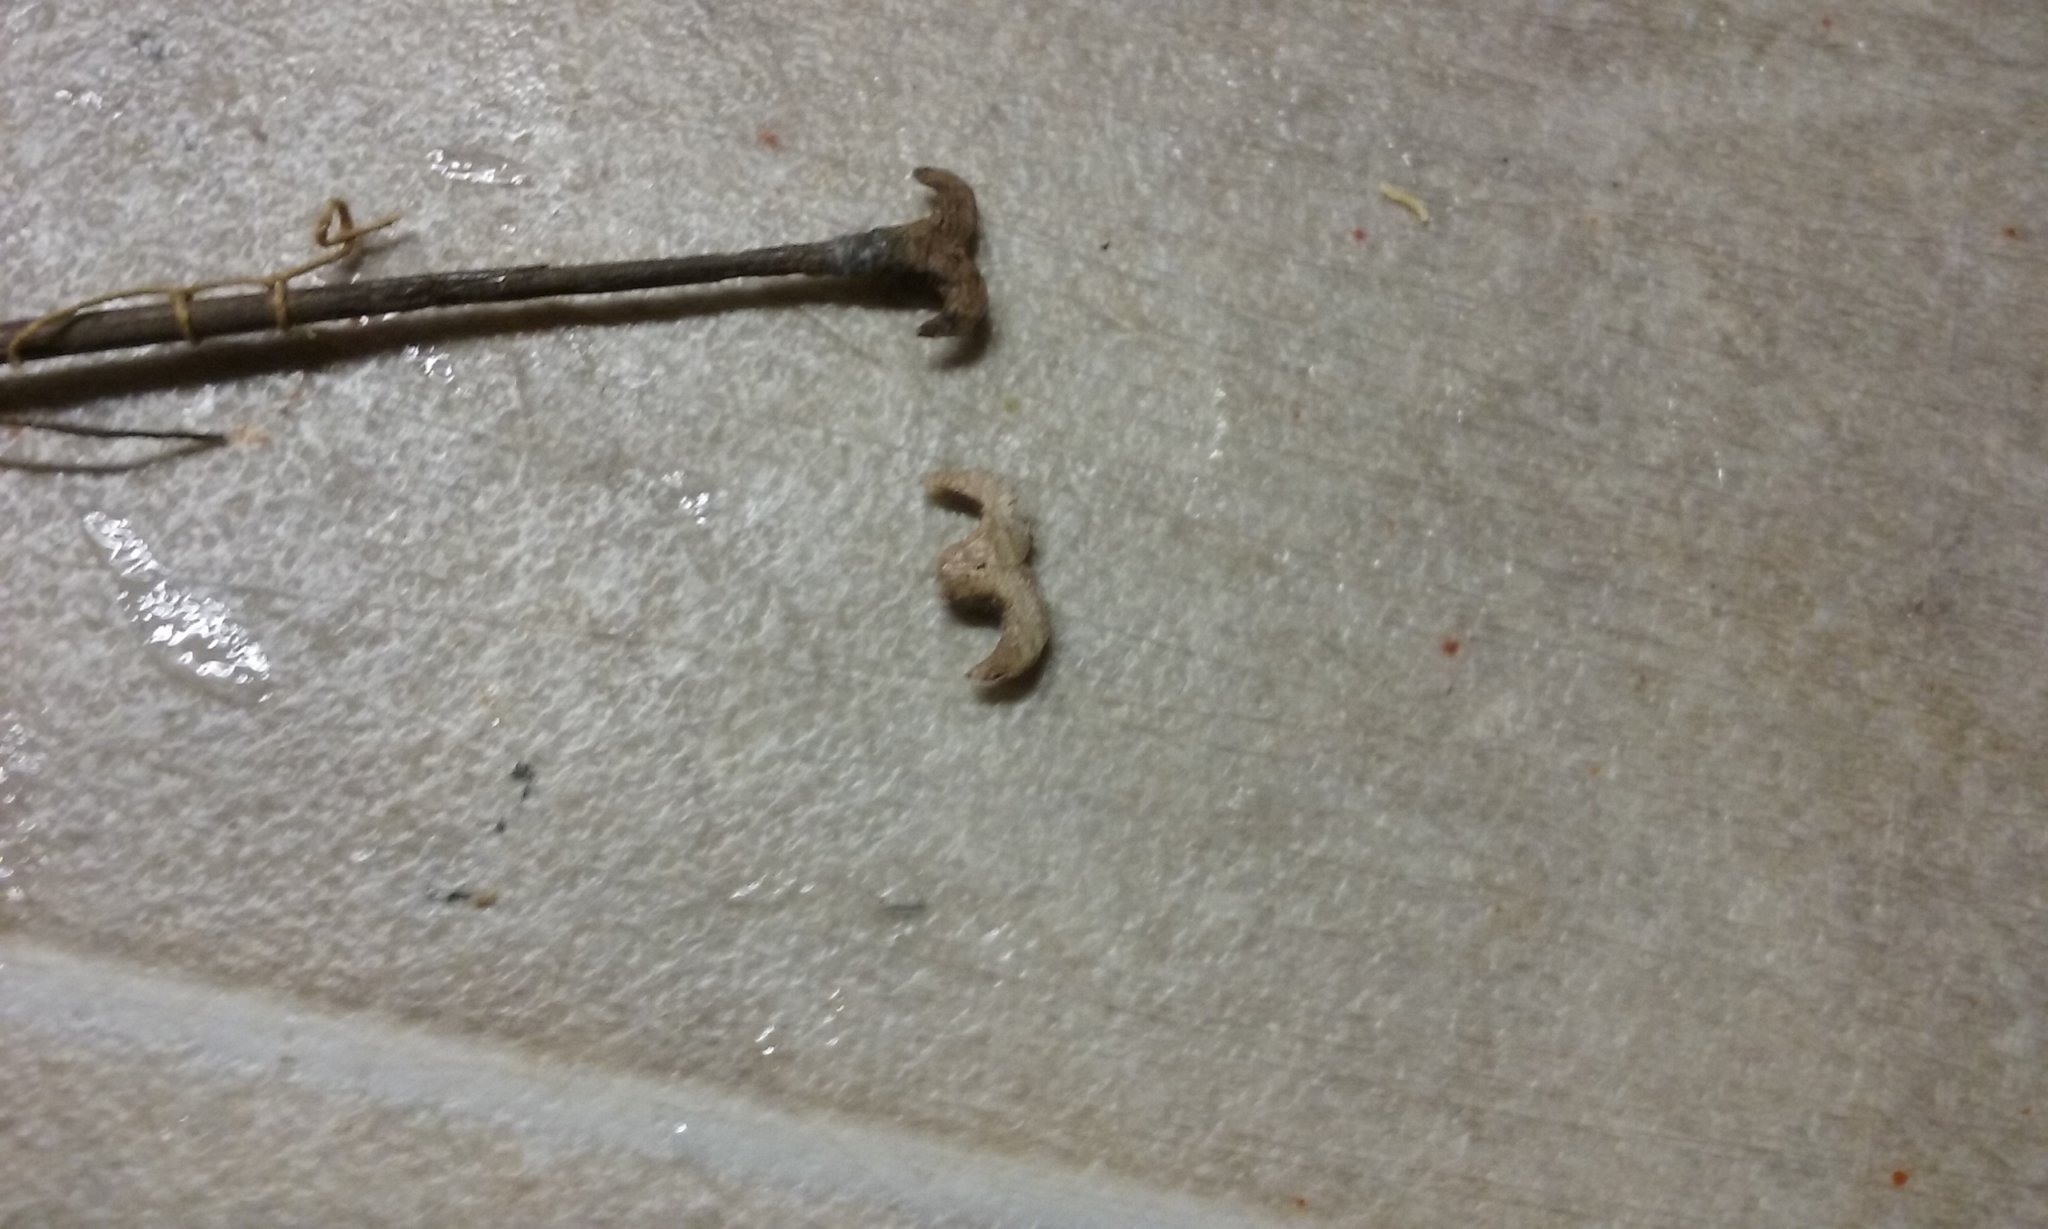
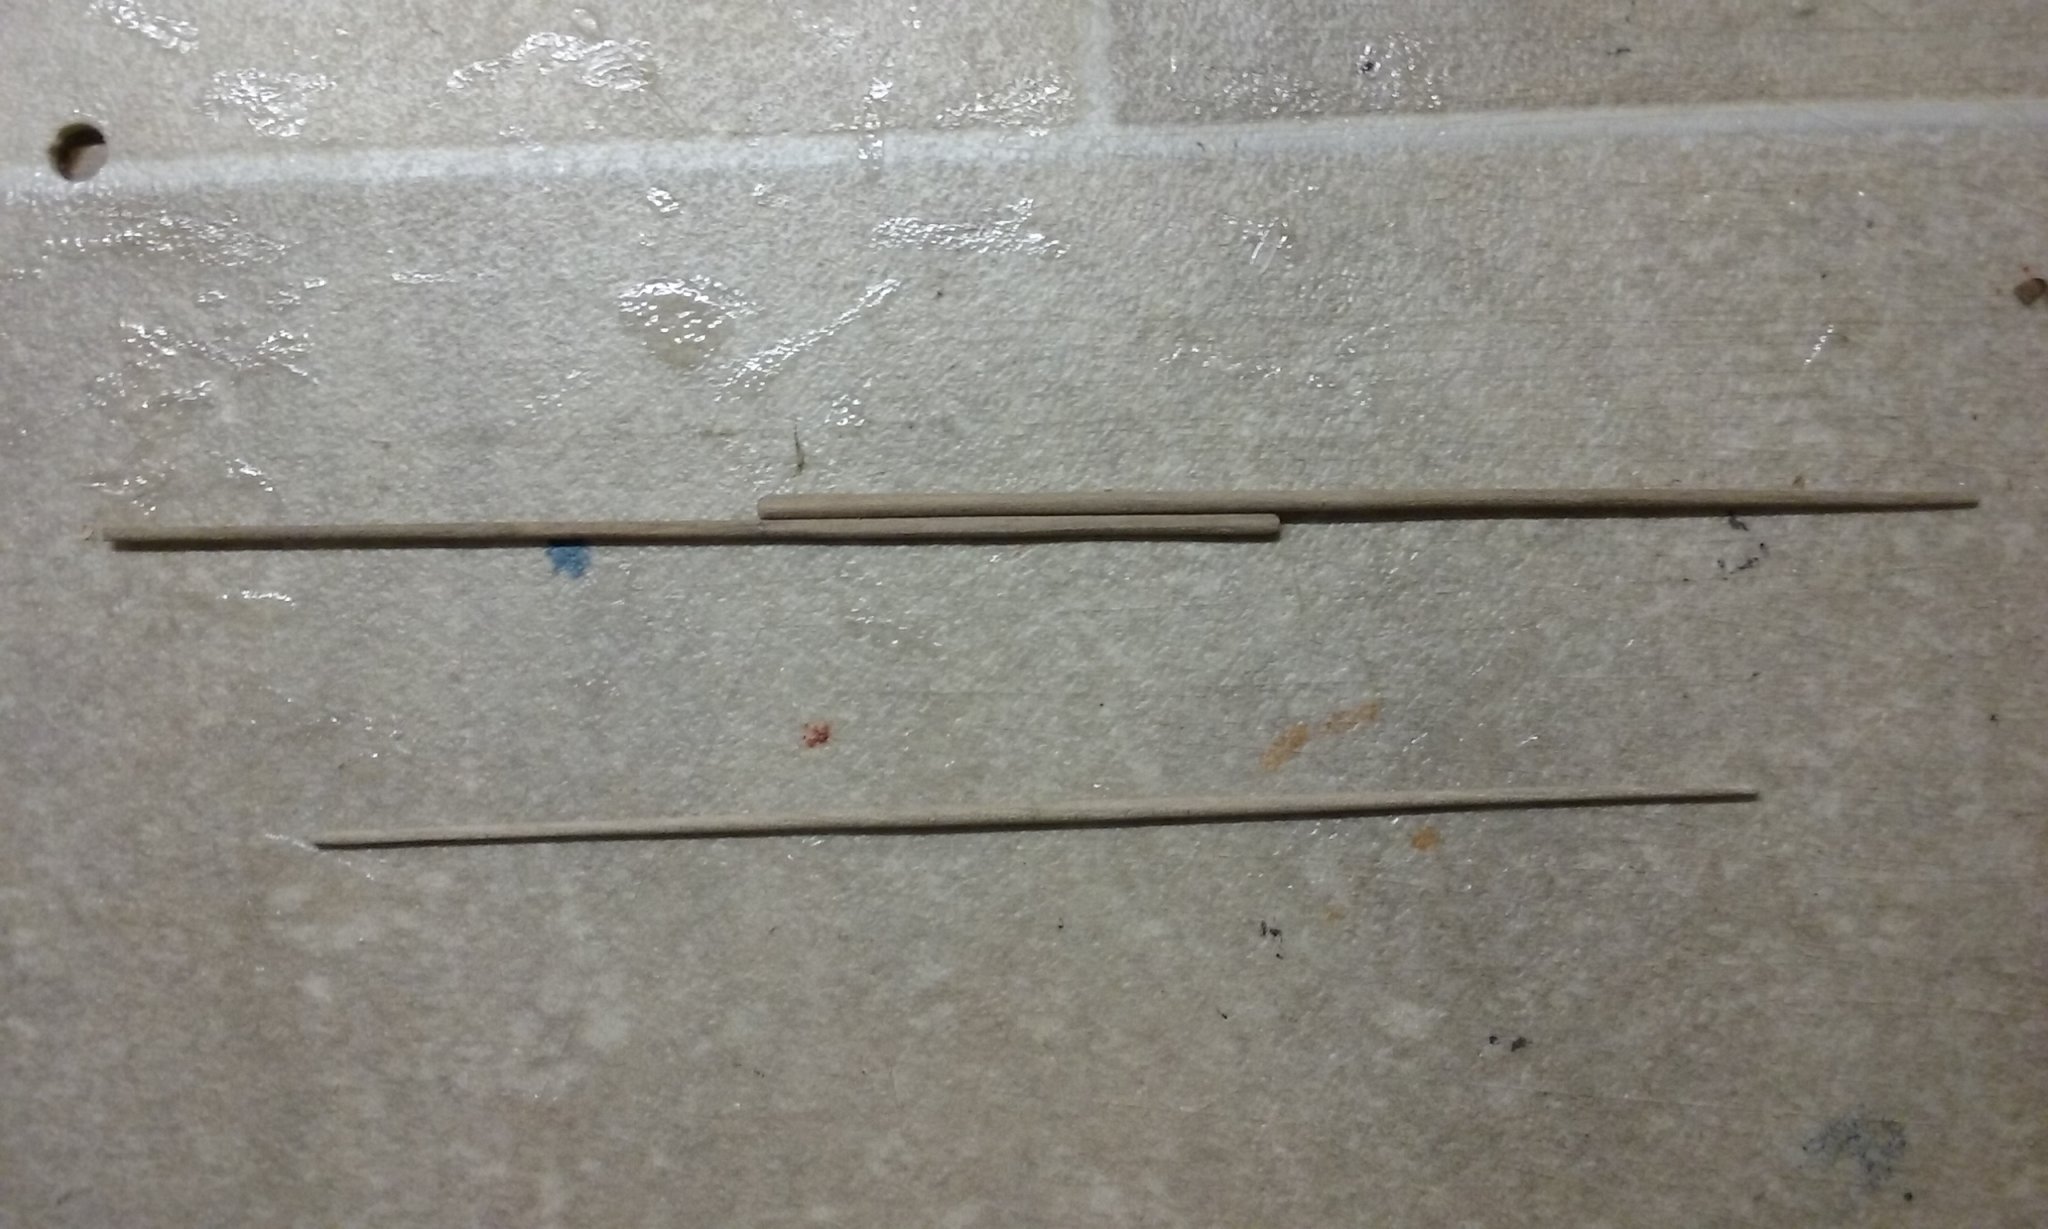
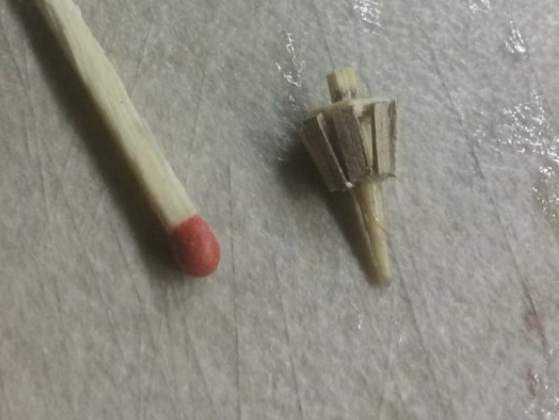
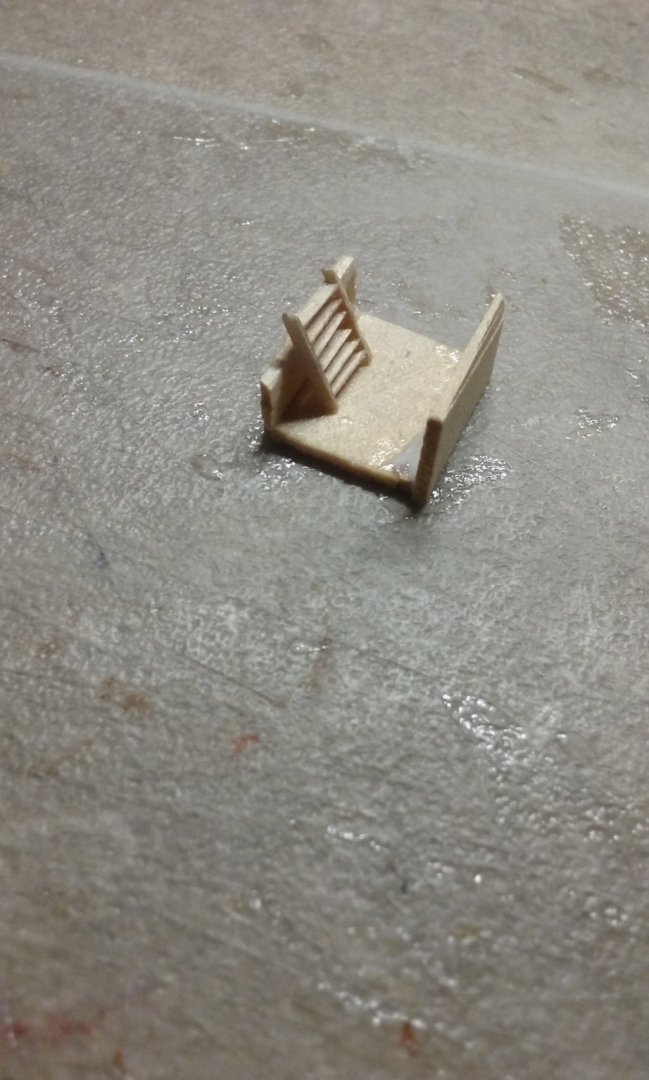
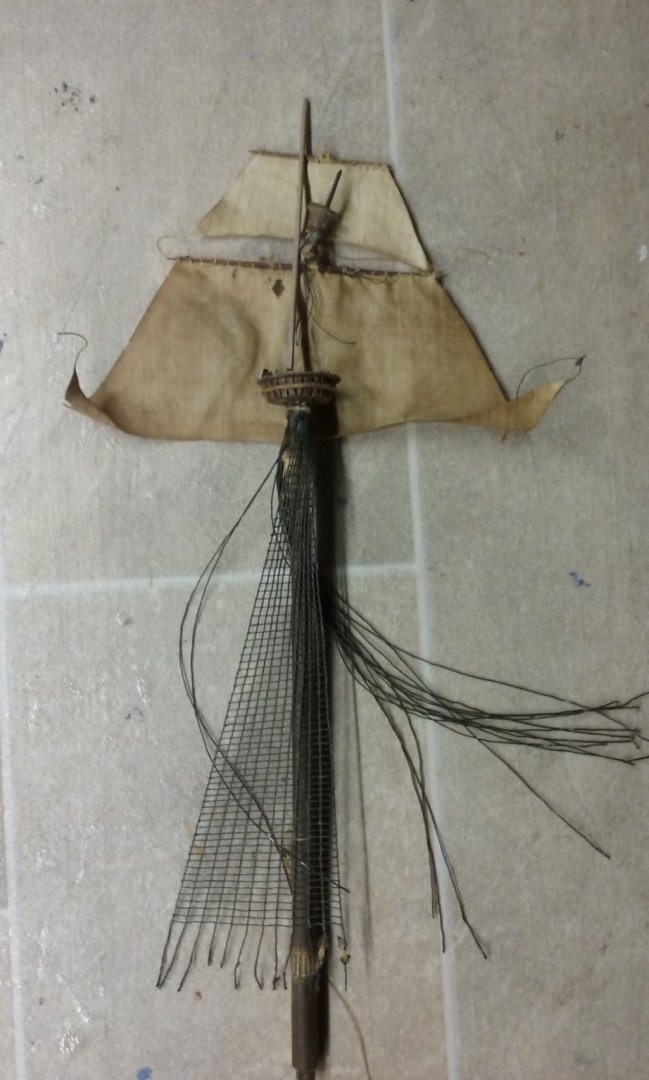
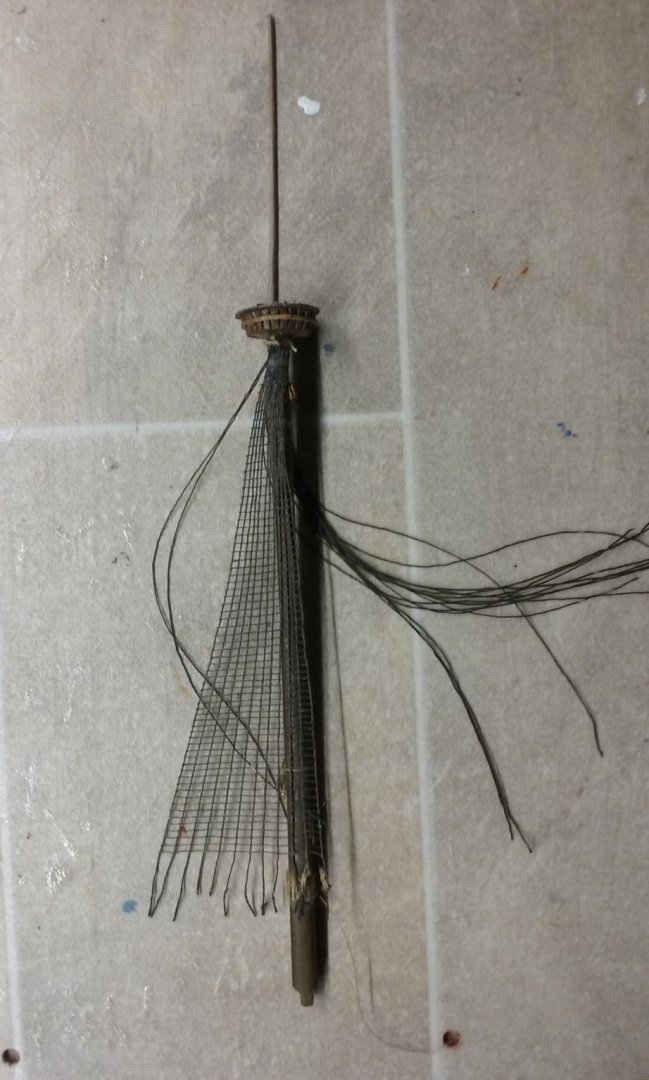
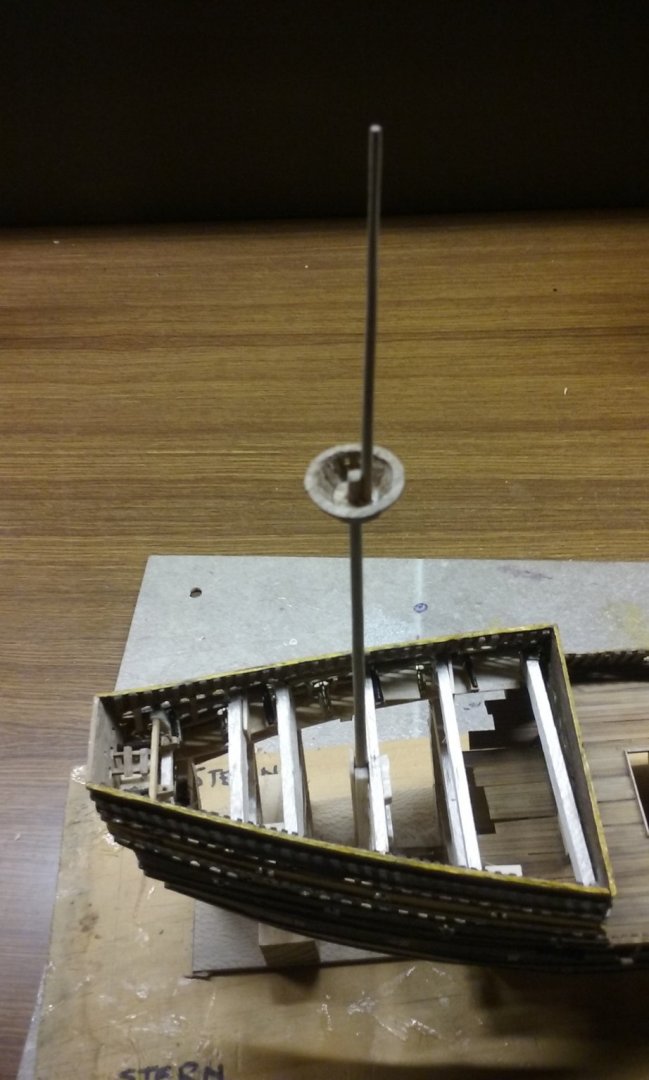
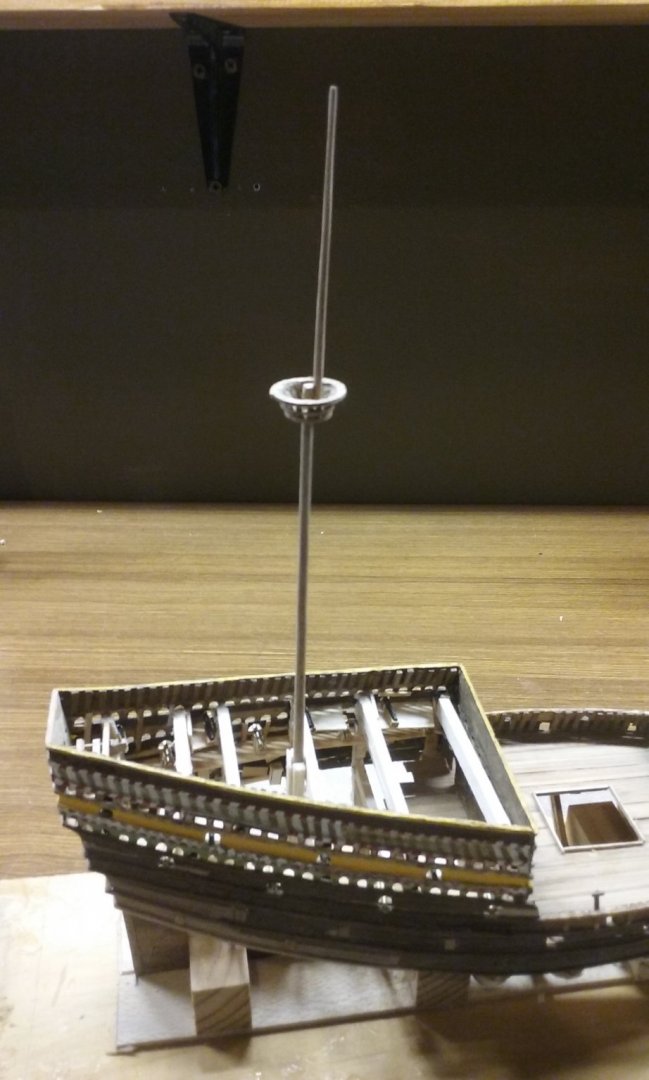
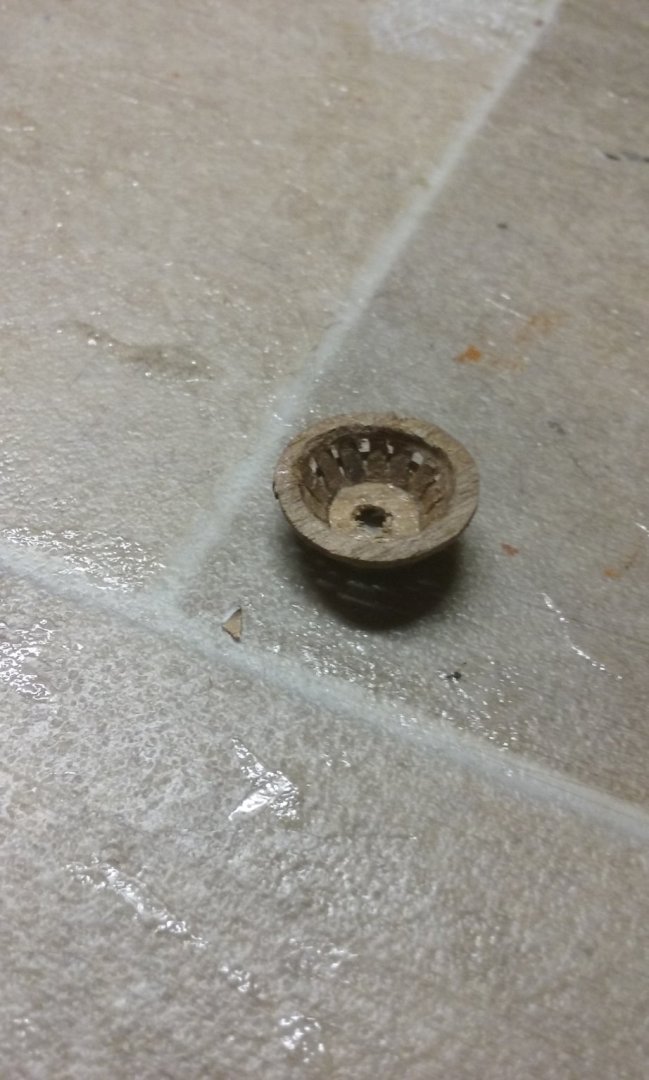
I've attached the top to the mizzen mast - I've temporarily put the mast in place (dry fitted) so the top has the best chance of staying in place and square while the glue dries. And added the topmast: Making sure it's square and in line: Here are the new hooks on the main and fore yardarms (they're the ones in a lighter colour). And I've made a new main topmast - the old one was so badly broken, with several pieces missing, that a new one was needed. Here it is against the topsail and topgallant - you can just see the old fighting top with the remnants of the old topmast. And here it is without the sails, so you can see it better. Coming along steadily. Steven


- 740 replies
-
- 10
-
-
- Tudor
- restoration
- (and 4 more)
-
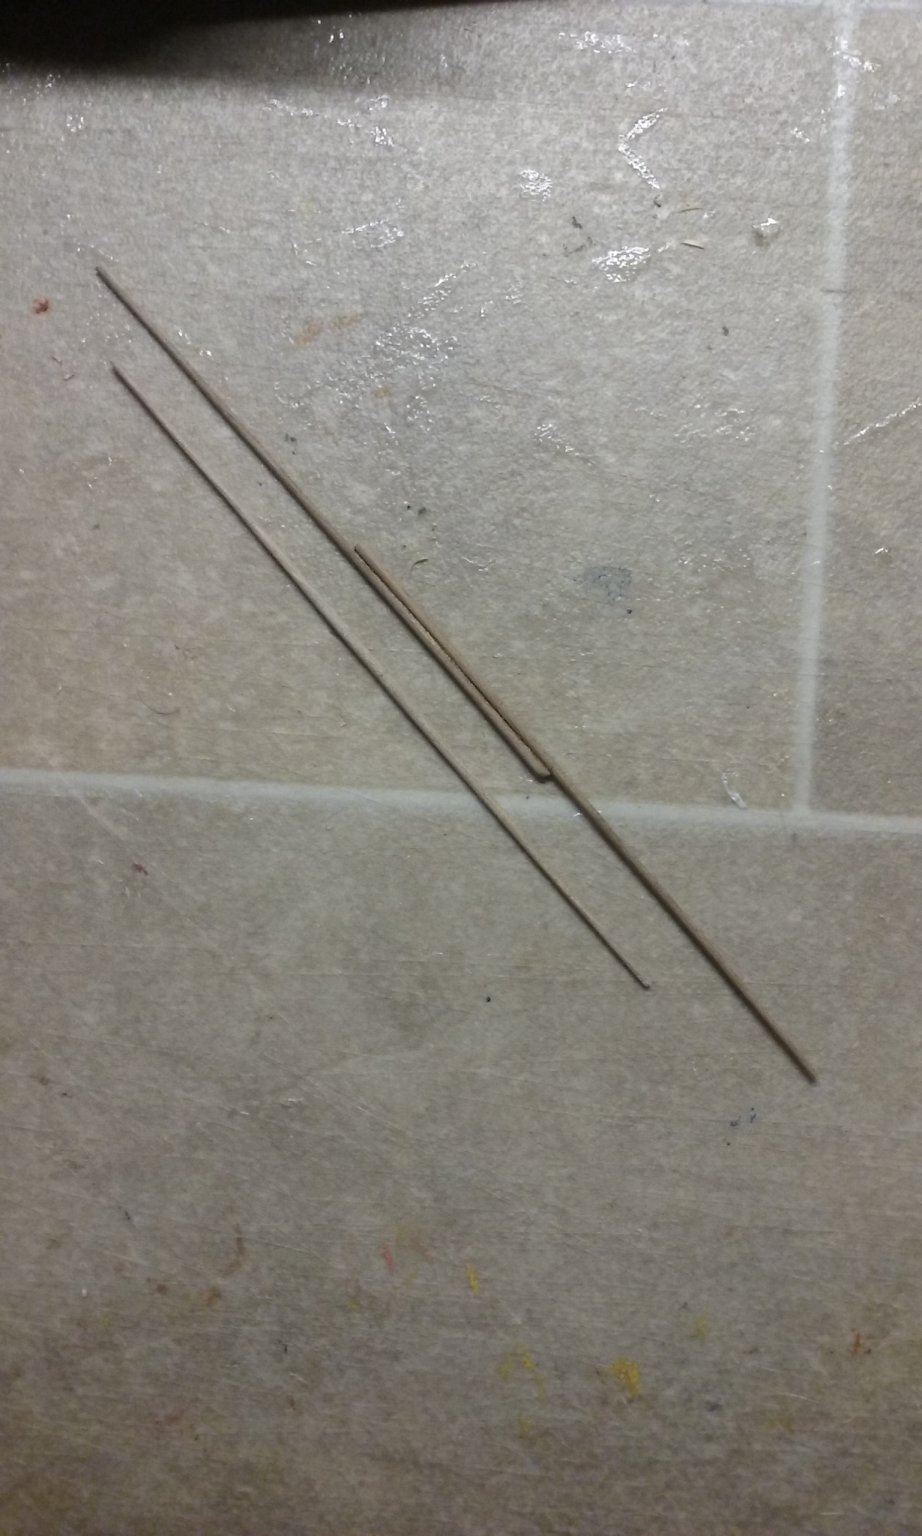
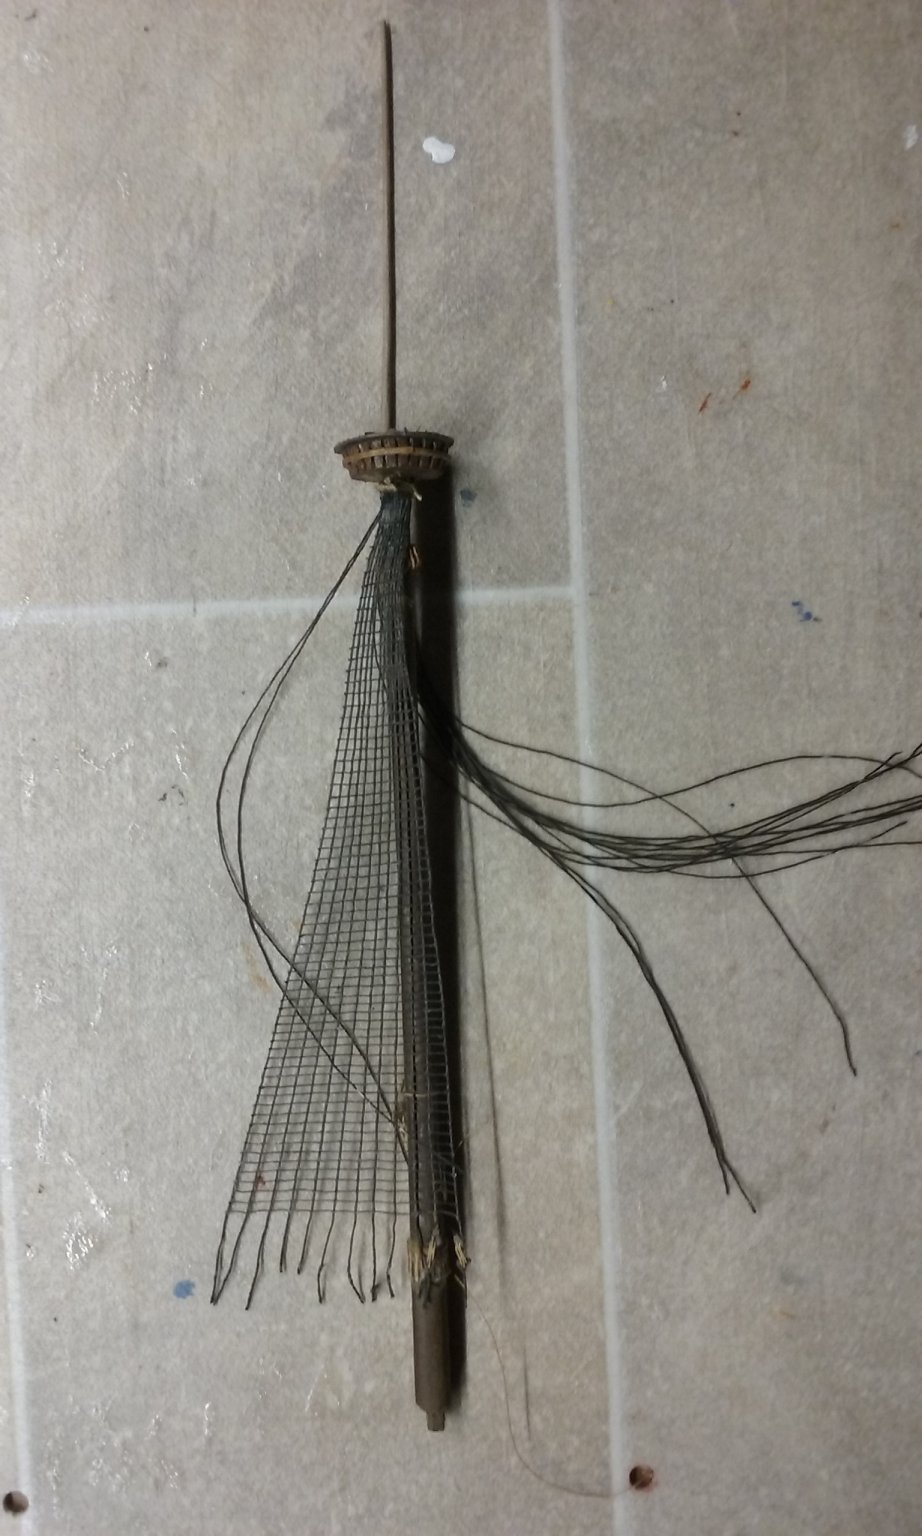
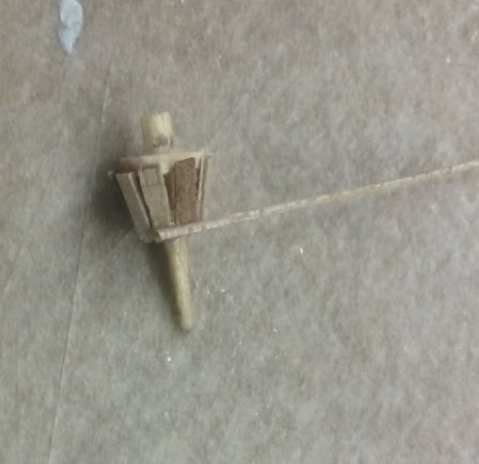
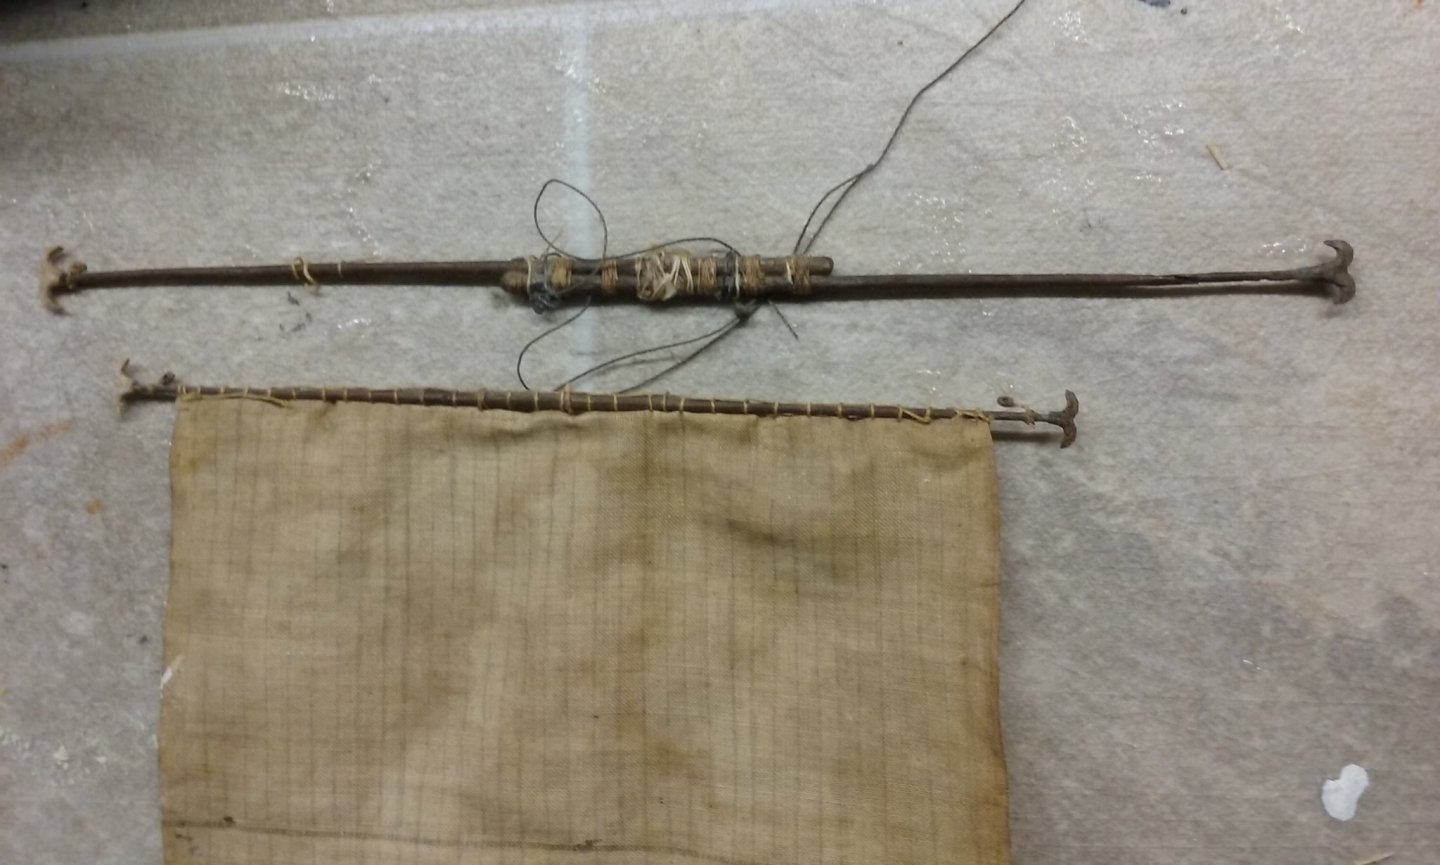
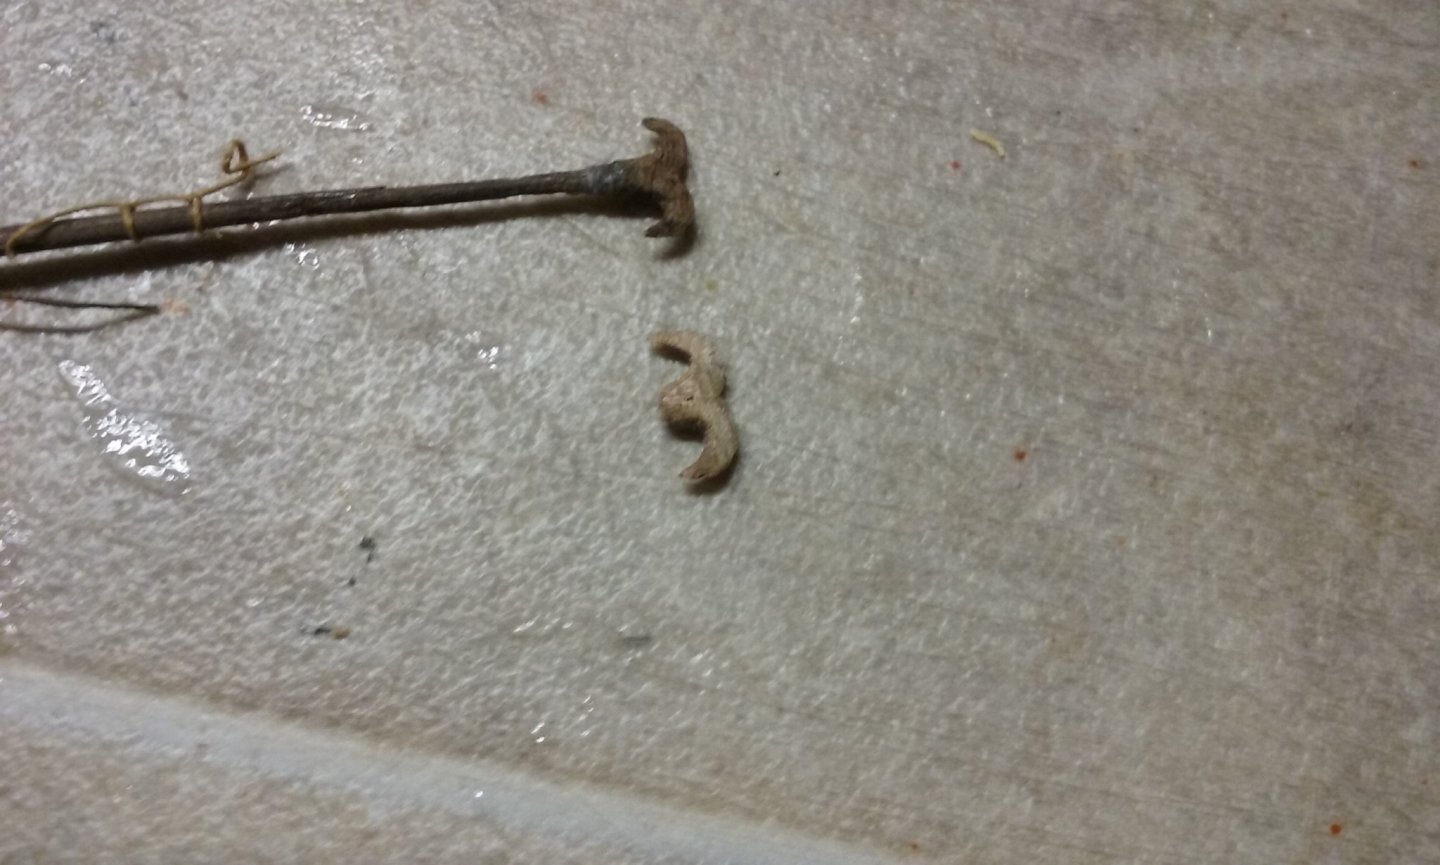
I've just finished the fighting top for the mizzen mast, plus the lateen yards for the mizzen and bonaventure. And I've made the hook for the end of the mainyard to replace the one that broke off and got lost. These are shown on the mainyard and the fore yard of Great Harry in the picture on the Anthony Roll (along with a grapnel on a chain attached to the bowsprit) and are thought to have been to grapple to the rigging of opposing ships to enable boarding, which had been the traditional method of fighting at sea until the development of cannons, though the discussion in Woodrat's Nave Tonda build log casts some doubt on this. At the time of the Great Harry they were probably being phased out . Steven

- 740 replies
-
- 7
-
-
- Tudor
- restoration
- (and 4 more)