Louie da fly
-
Posts
7,990 -
Joined
-
Last visited
Content Type
Profiles
Forums
Gallery
Events
Everything posted by Louie da fly
-
 Magnificent work, Hellmuht. Very impressive - the glass buoys, the net and the grapnel all amazingly well done. And the vessel herself - what a beautiful build! Steven
 -
The arms will come later, Carl. They have to be individually made to fit the relationship between the level of the oarblade, the thole and the oarsman's hands. In the meantime, the oarsmen are (h)armless enough Steven
-
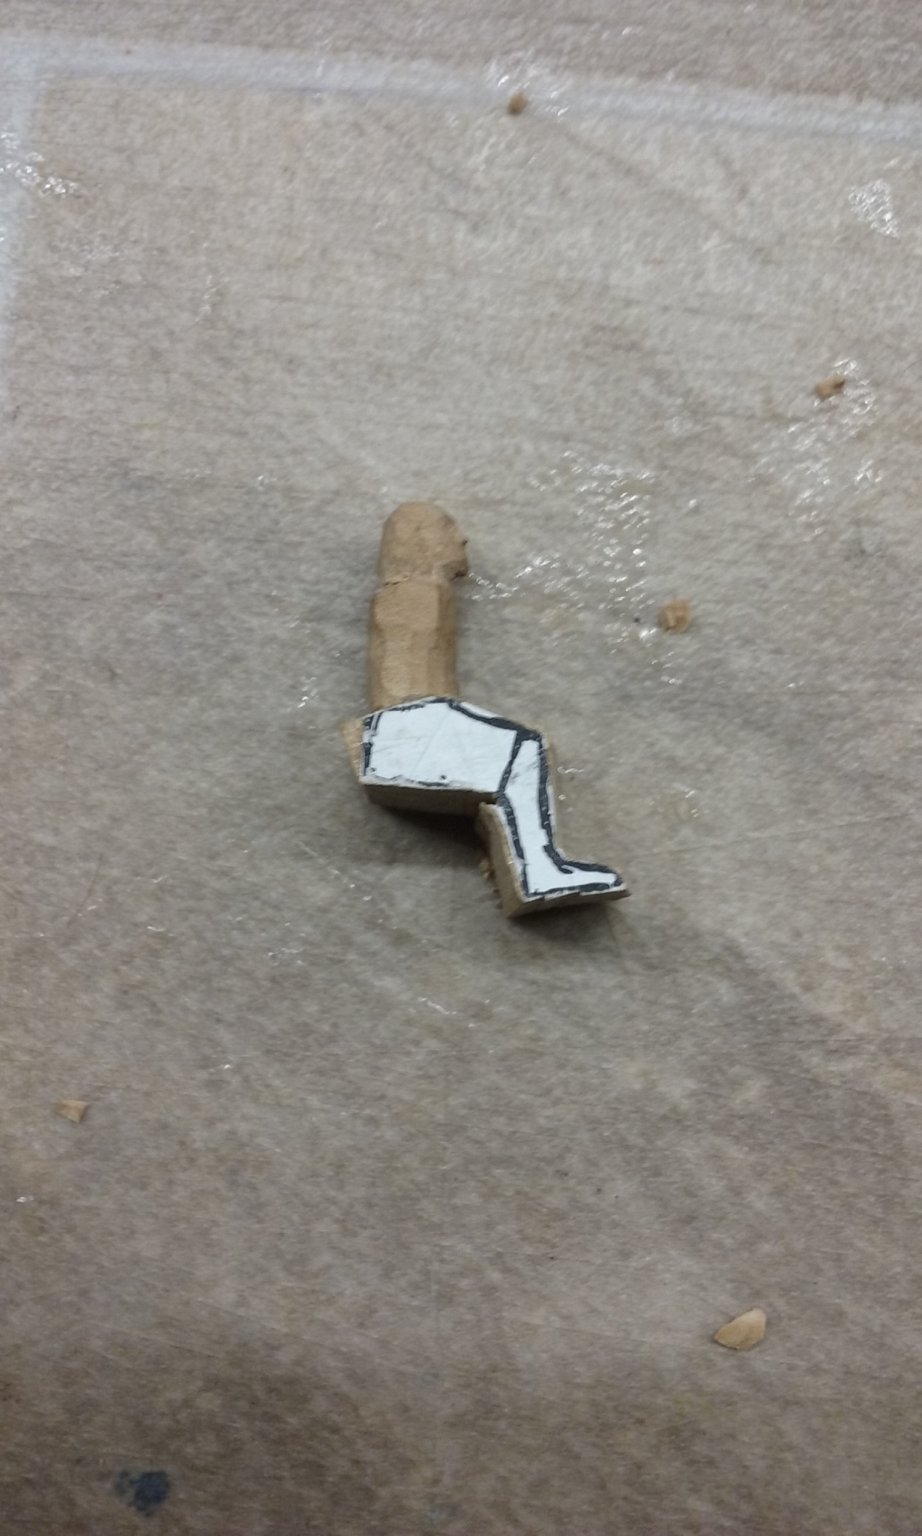
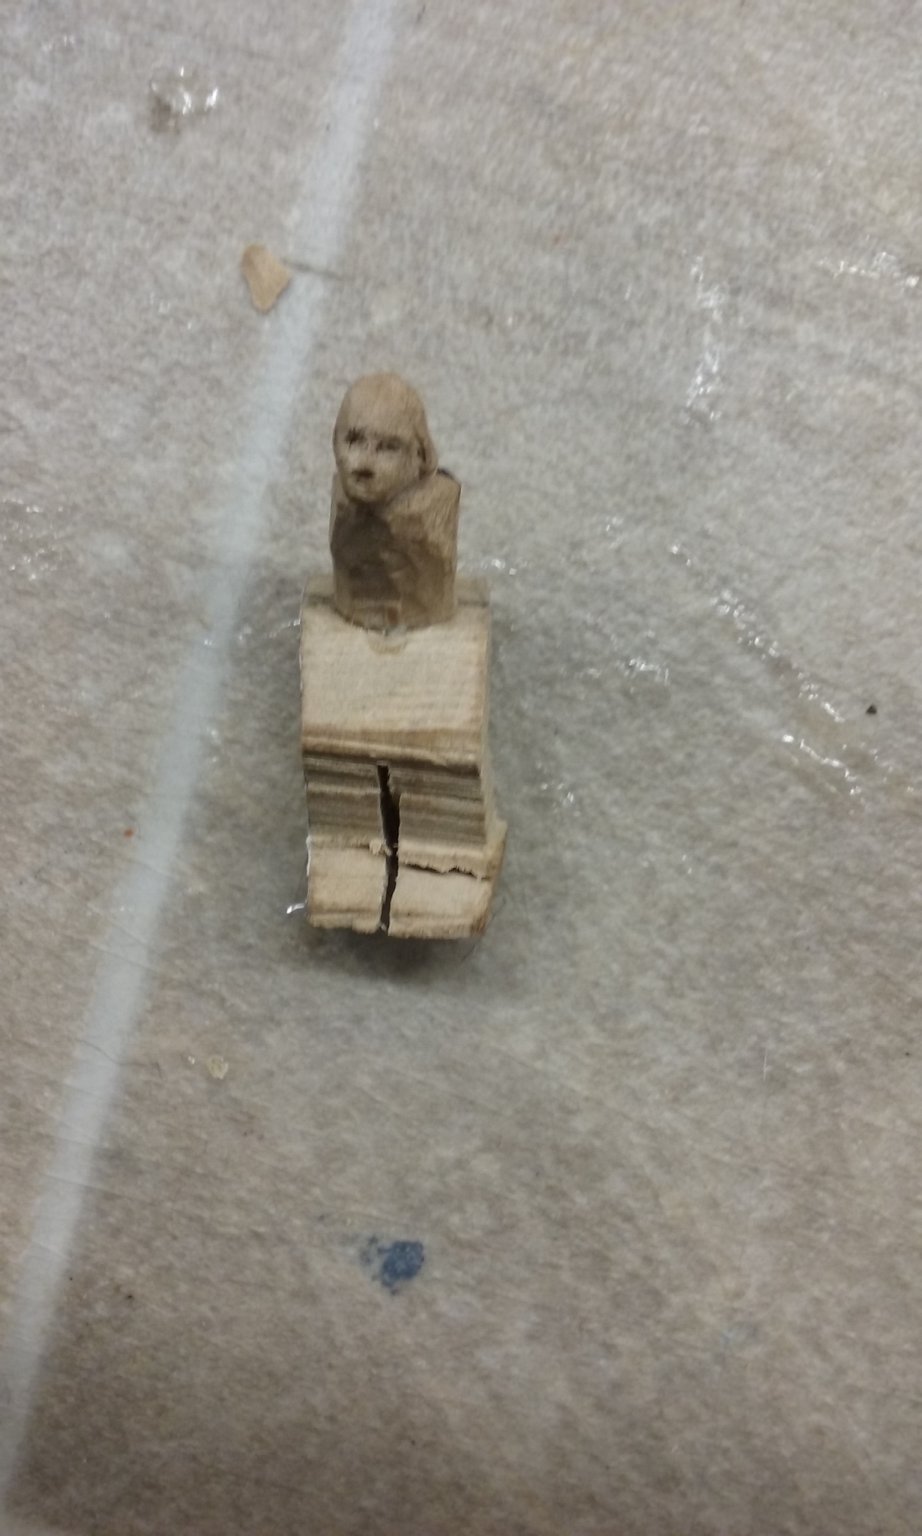
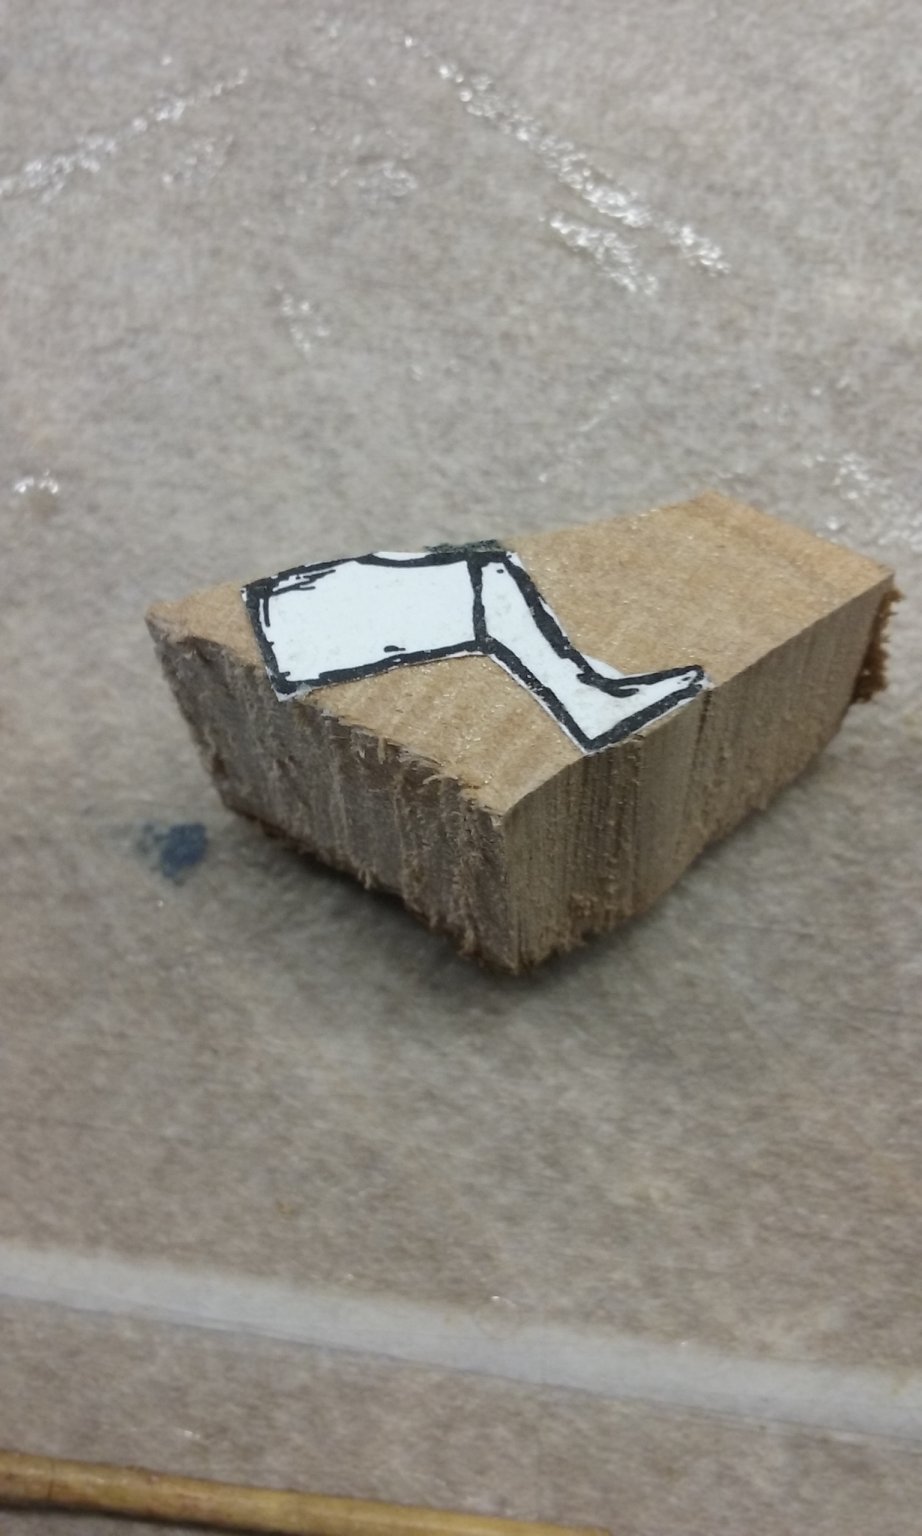
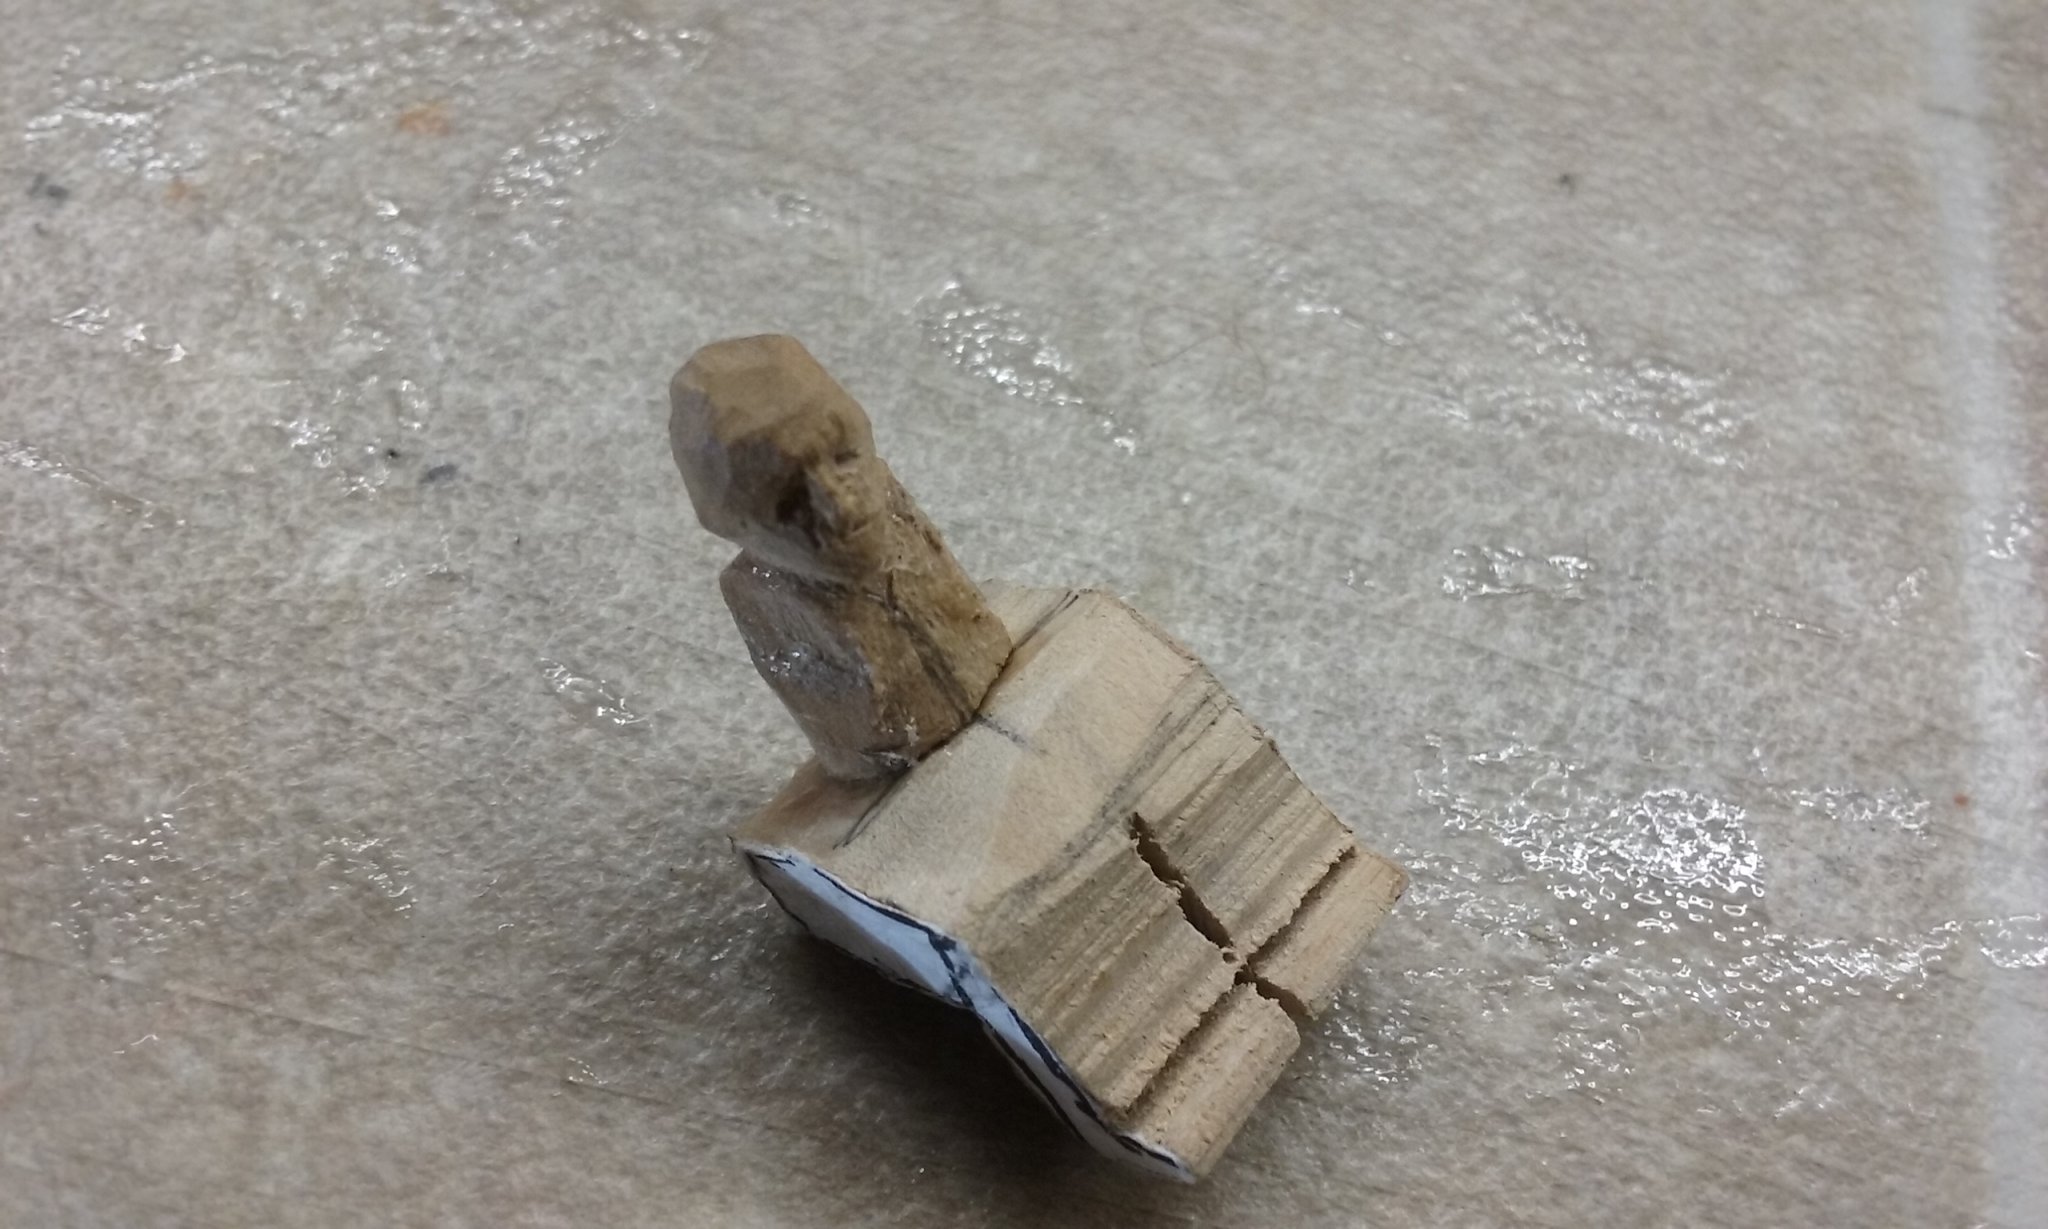
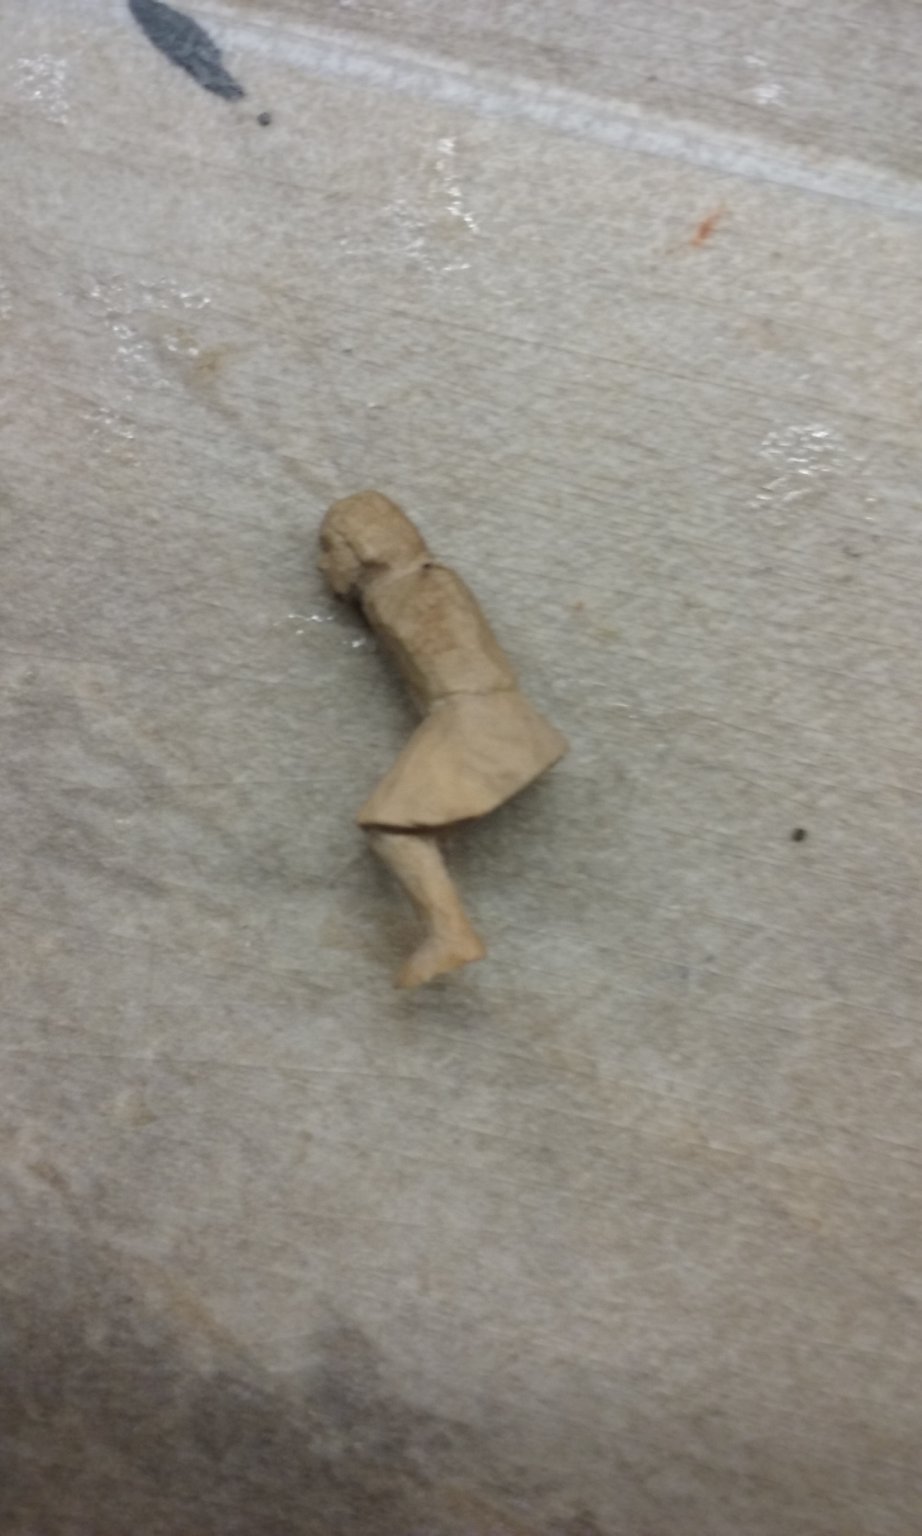
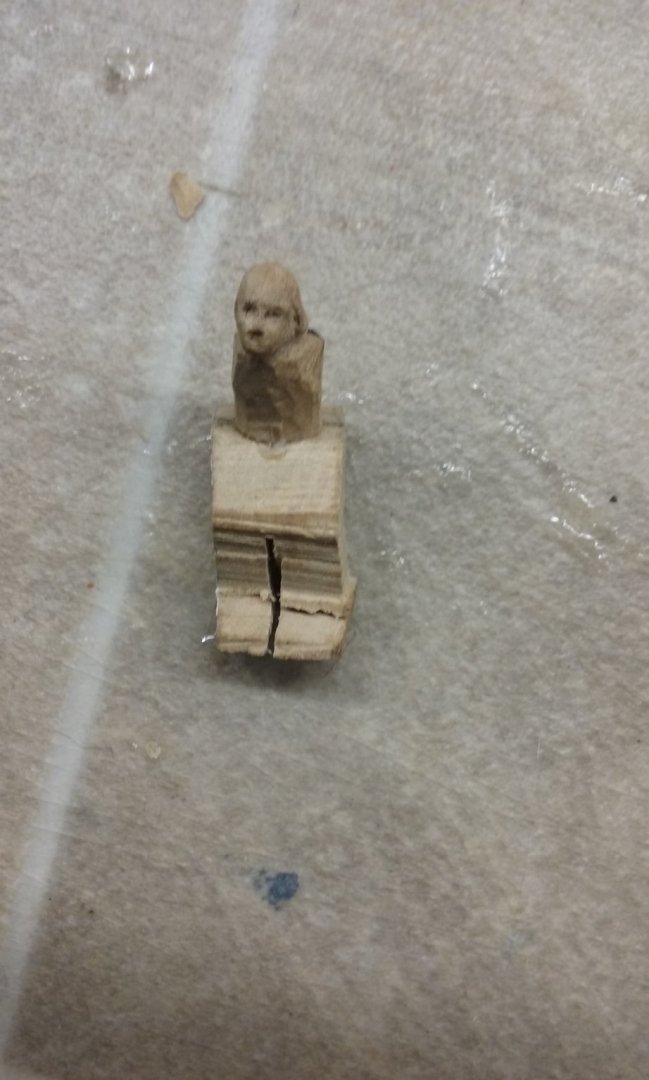
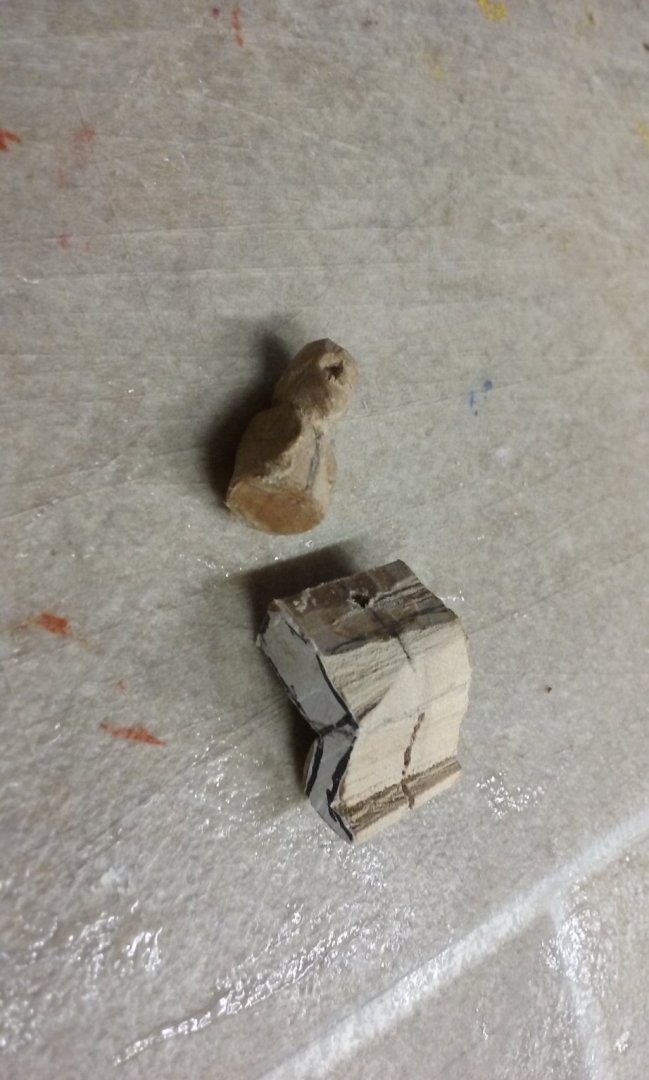
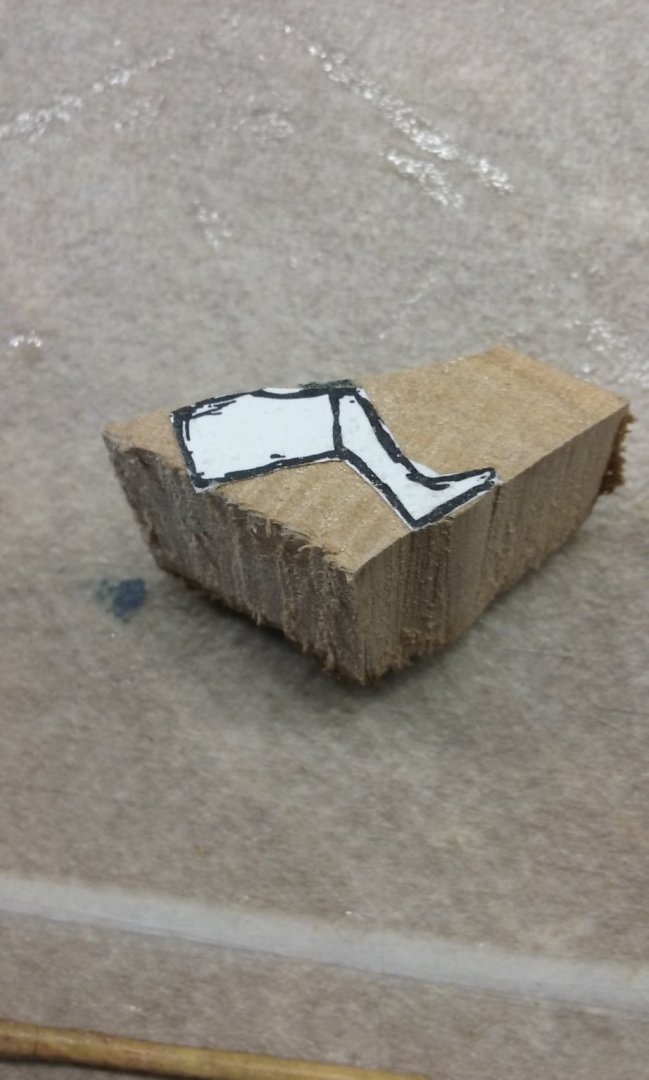
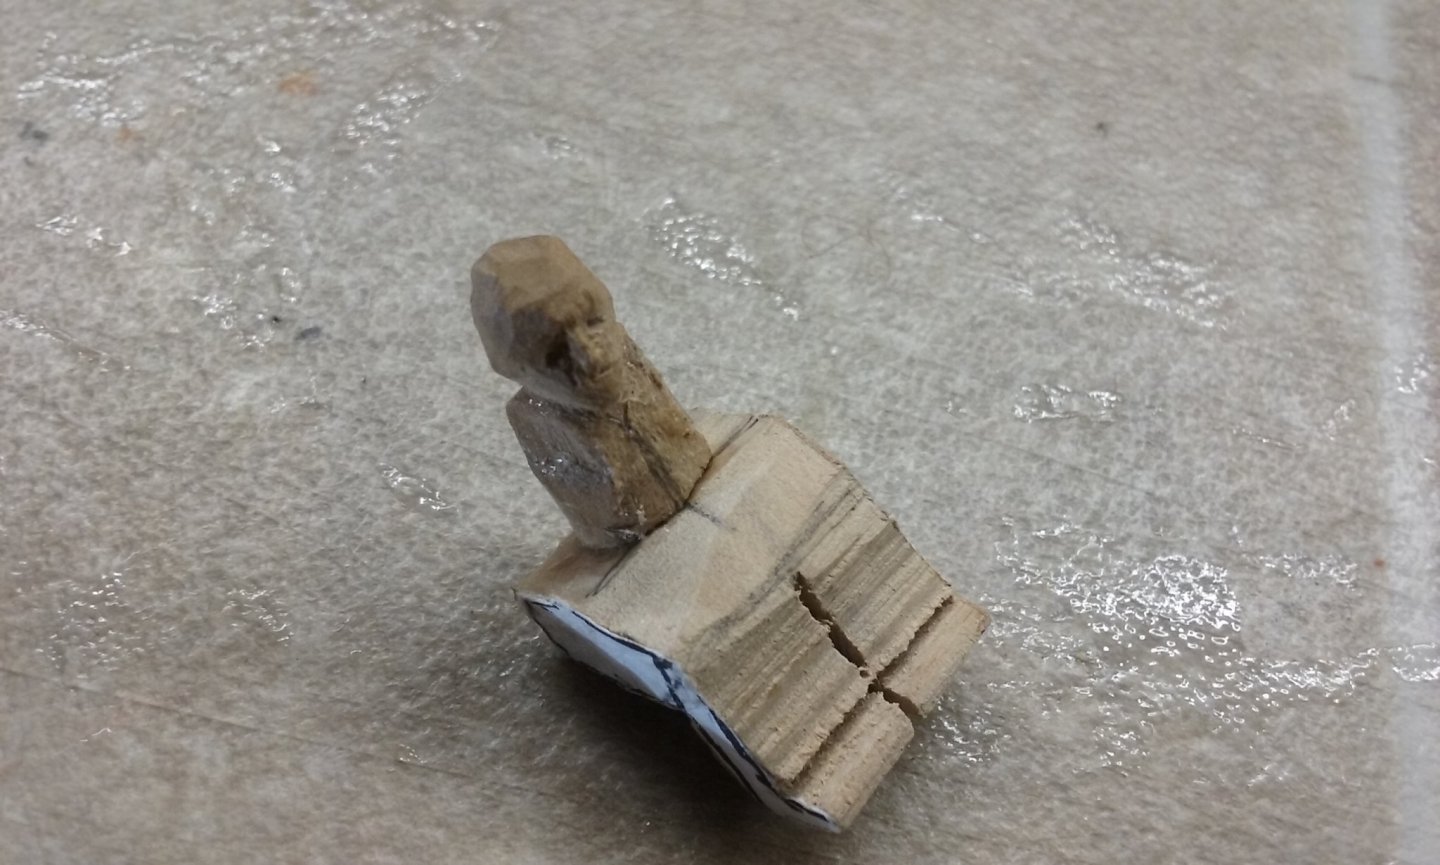
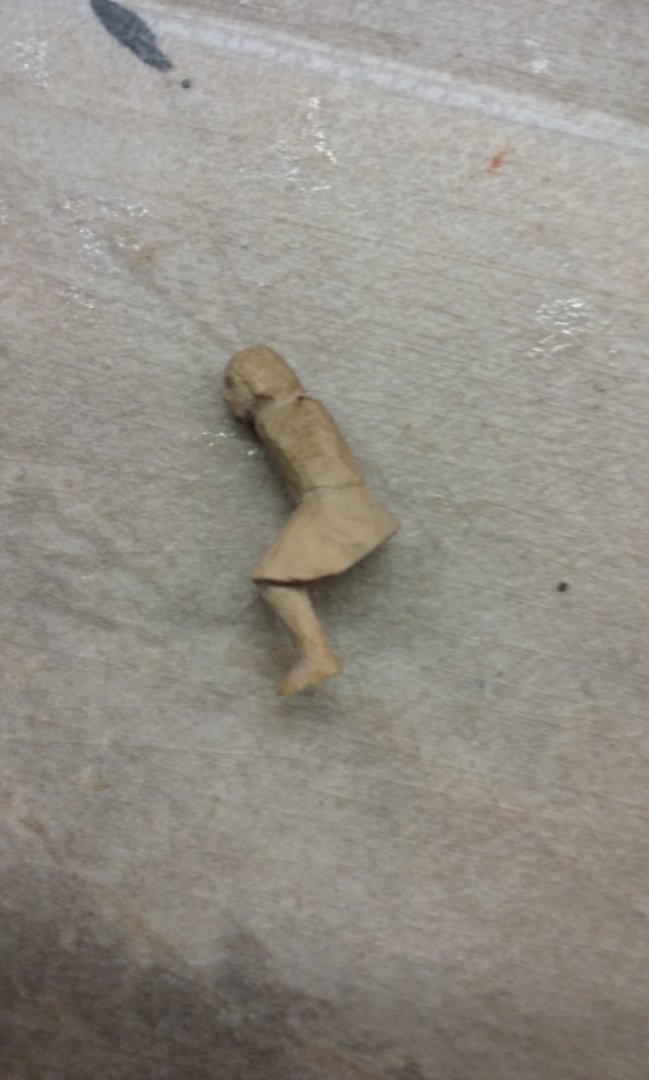
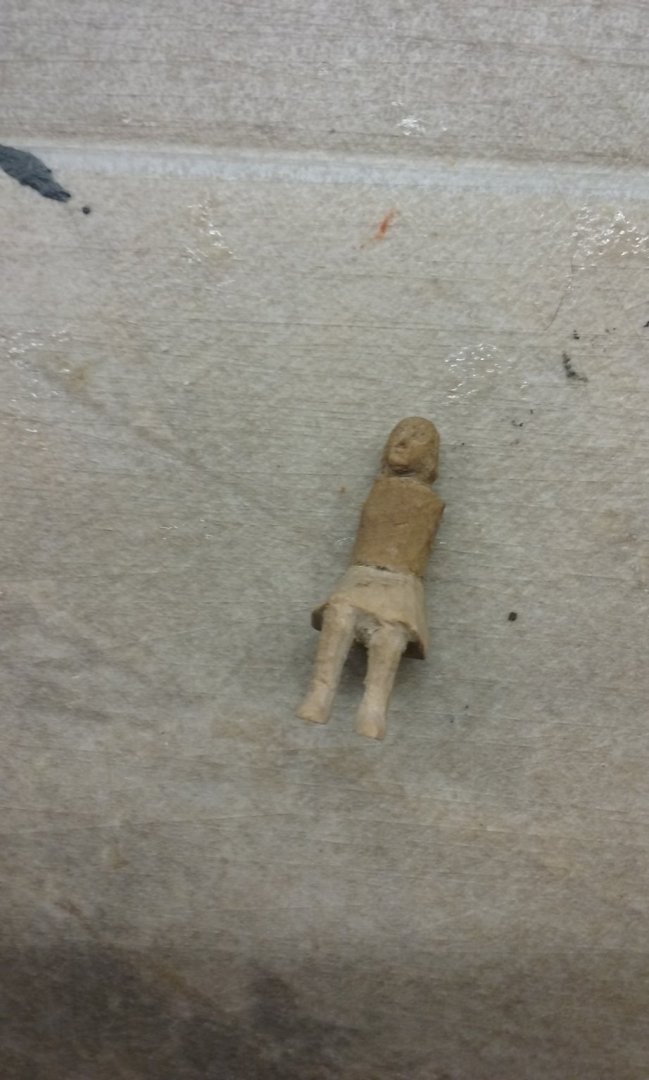
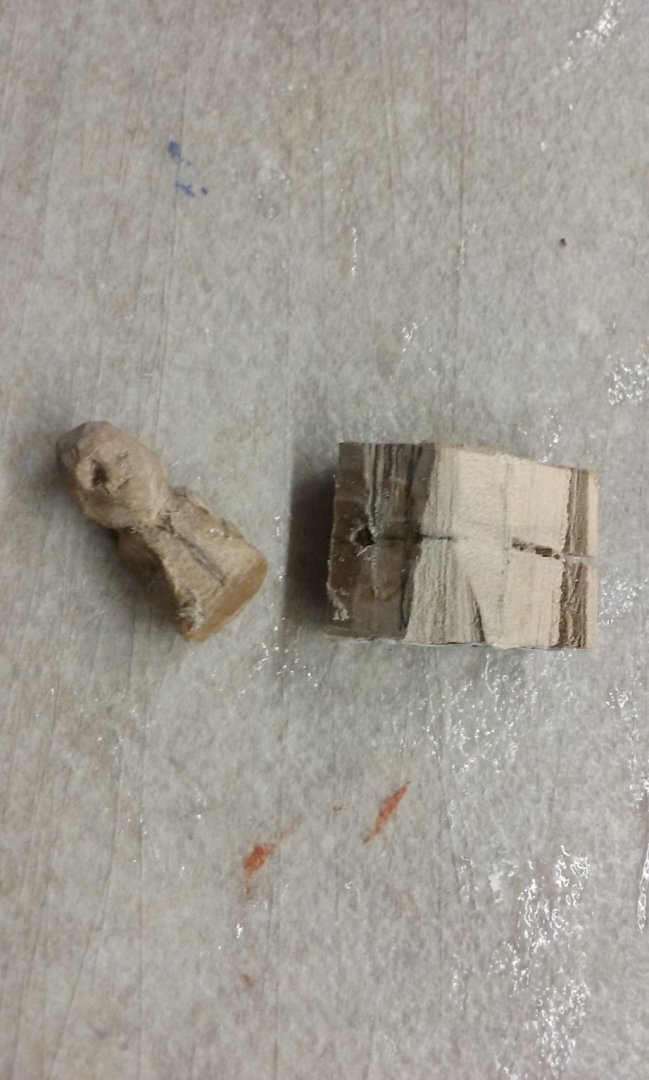
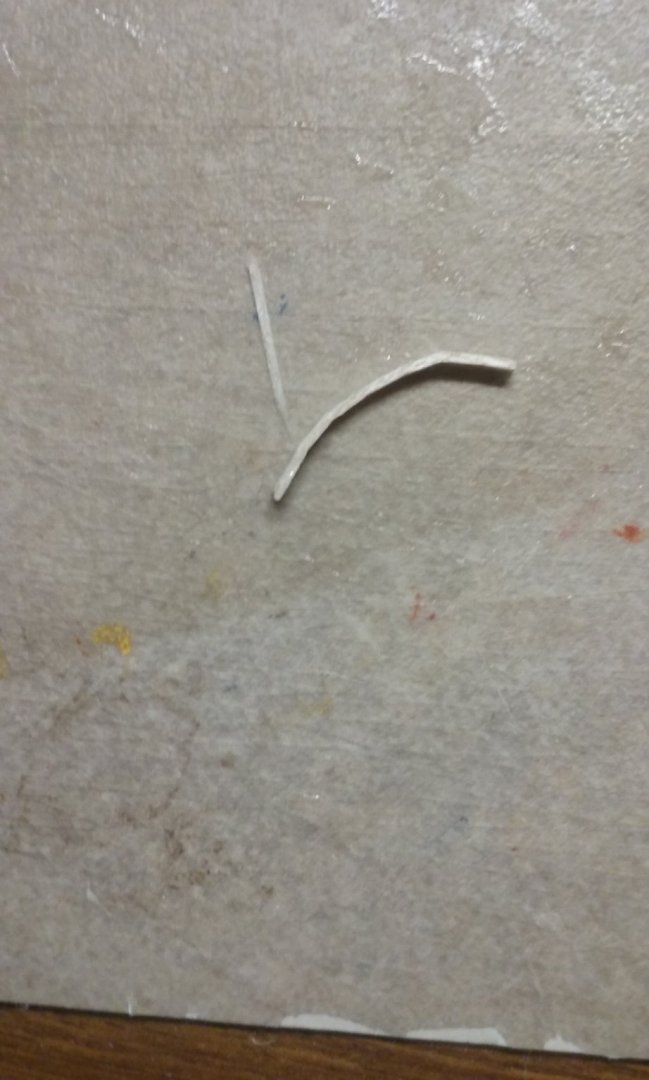
I've carved four of the new oarsmen pretty much to shape, ready for final smoothing off. Only twenty to go . . . And I've been working on the five I had to cut in half because the legs were wrong. To keep the two halves together, I had to drill a hole between them and glue in a wooden rod, which I then trimmed to length. Look away if you're at all sensitive . . . I took other photos, but you really don't want to see them . . . And here's one I prepared earlier.The two halves joined: A nice solid join between the two halves, and I was able to carve the lower half without worrying about them coming apart. Not too bad. Once all the finishing is done, you won't be able to tell them apart from the ones I carved from a single piece of wood. Steven

-
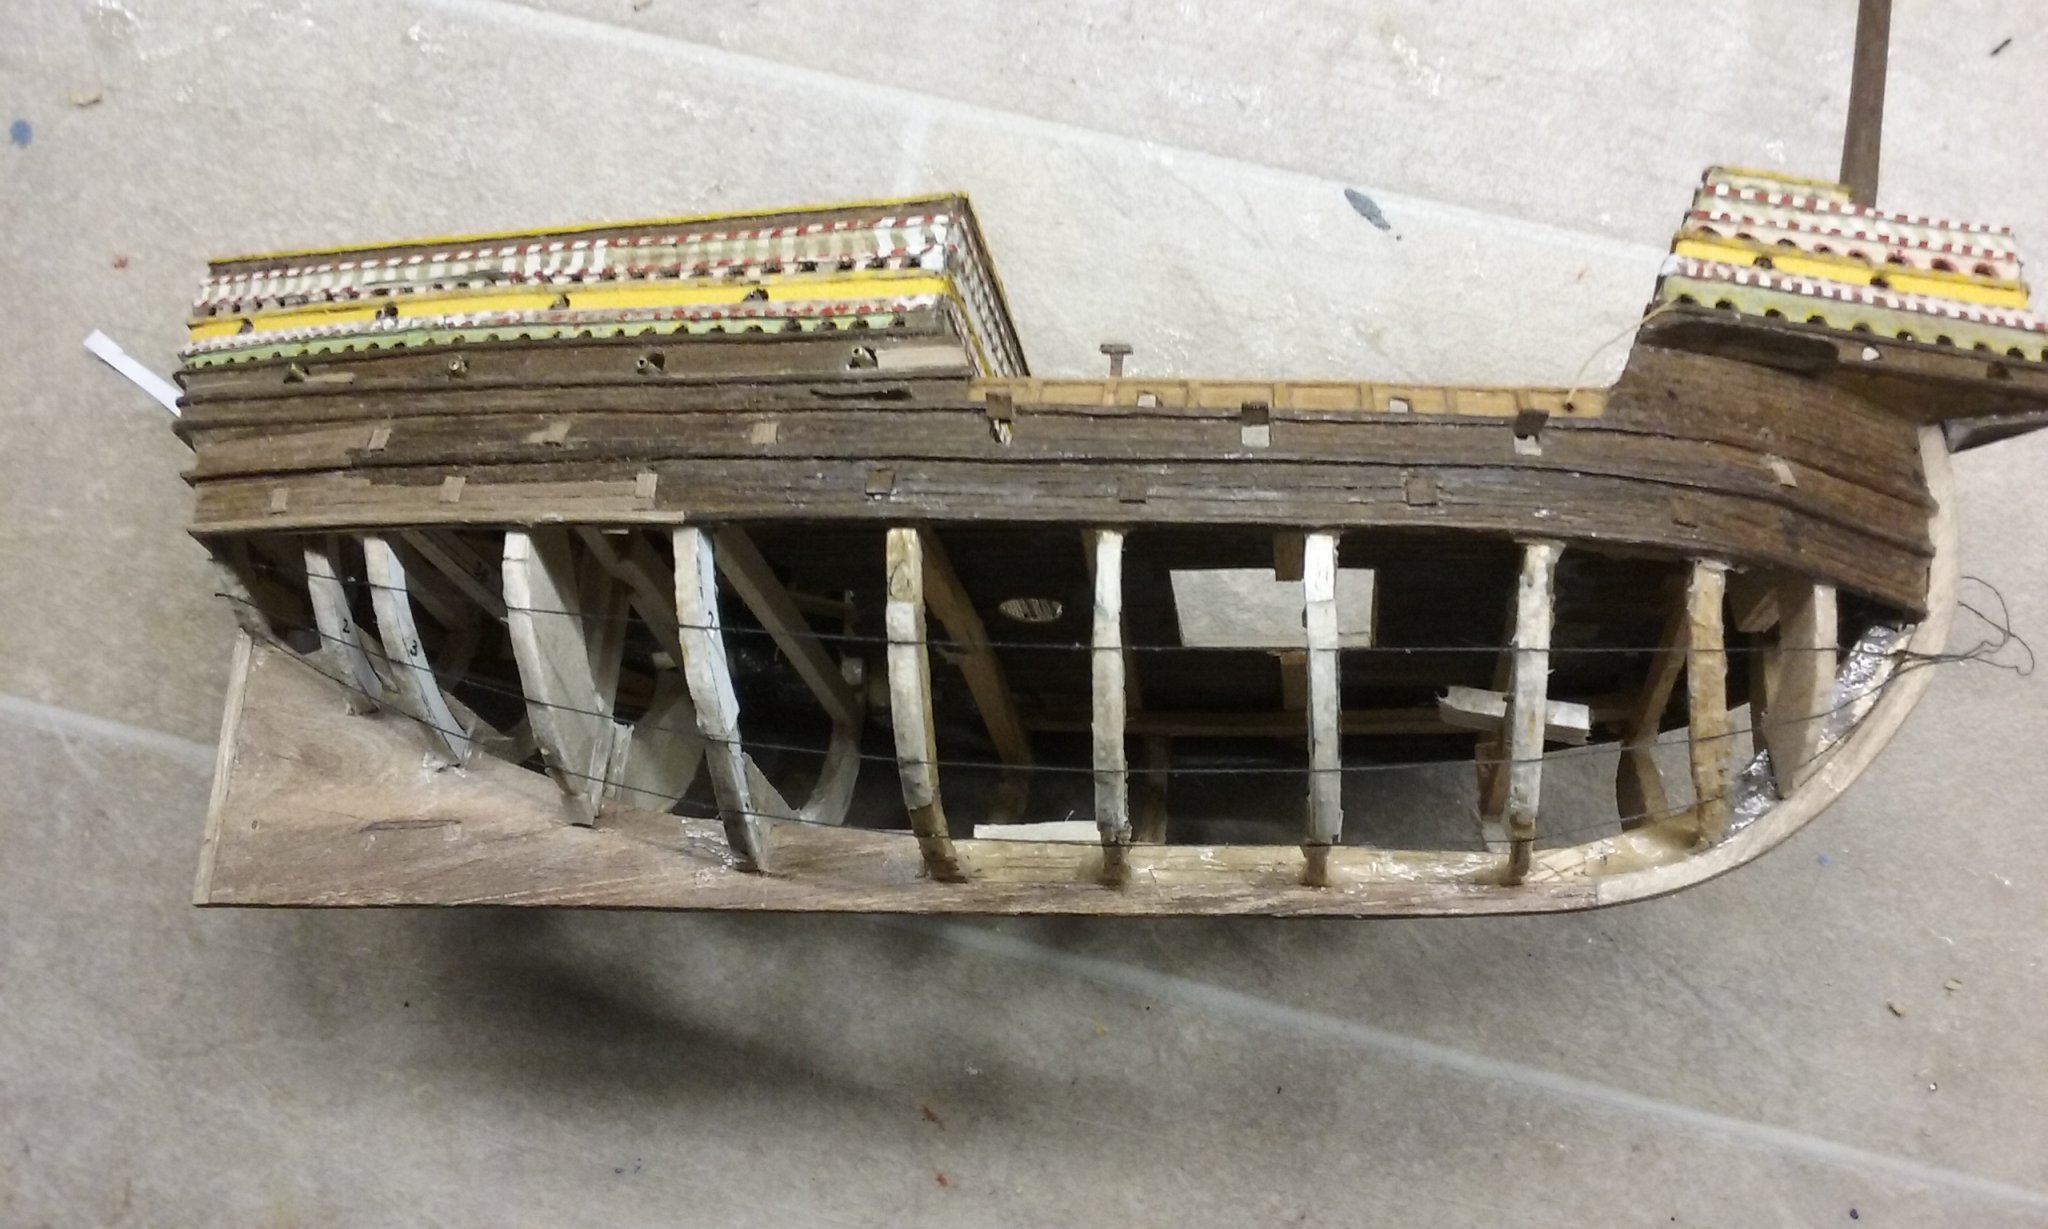
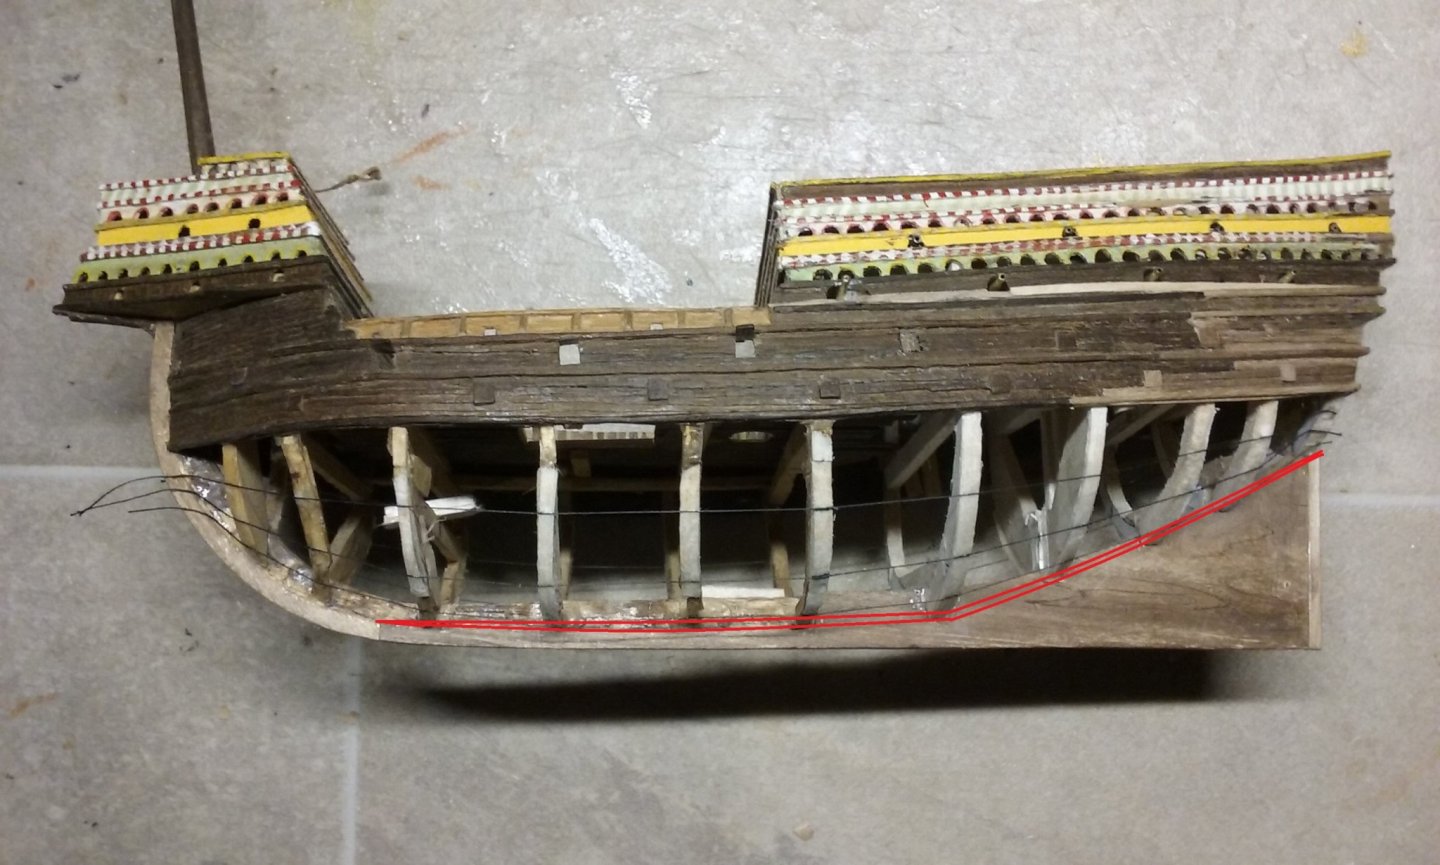
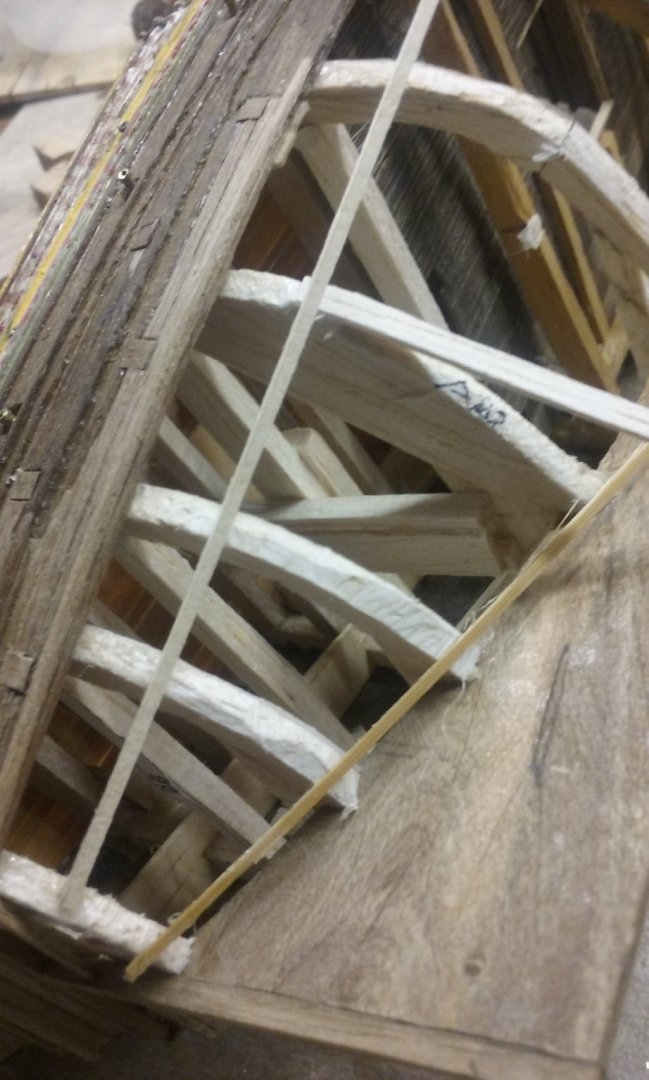
Thanks, Druxey. I had my doubts about those strakes at the bow. Your solution solves a problem for me - I hadn't thought of ending the lowest thread at bulkhead 2. I'm glad I got the forward end of the garboard right, but I may have a problem with spreading those strakes at the stern down onto the deadwood, because of issues with the thickness at the keel. I understand what you mean about the strakes coming to a point at the stern, and I certainly want to avoid that, but unless I make the strakes paper thin over the deadwood it'll be hard to pull off. I'll have to have a think about that and check other examples in build logs and tutorials, and see what can be done. I'll re-do the threads and re-post with those and a new outline for the garboard, if you'd be so kind as to review them once posted. Steven
- 740 replies
-
- 4
-

-
- Tudor
- restoration
- (and 4 more)
-
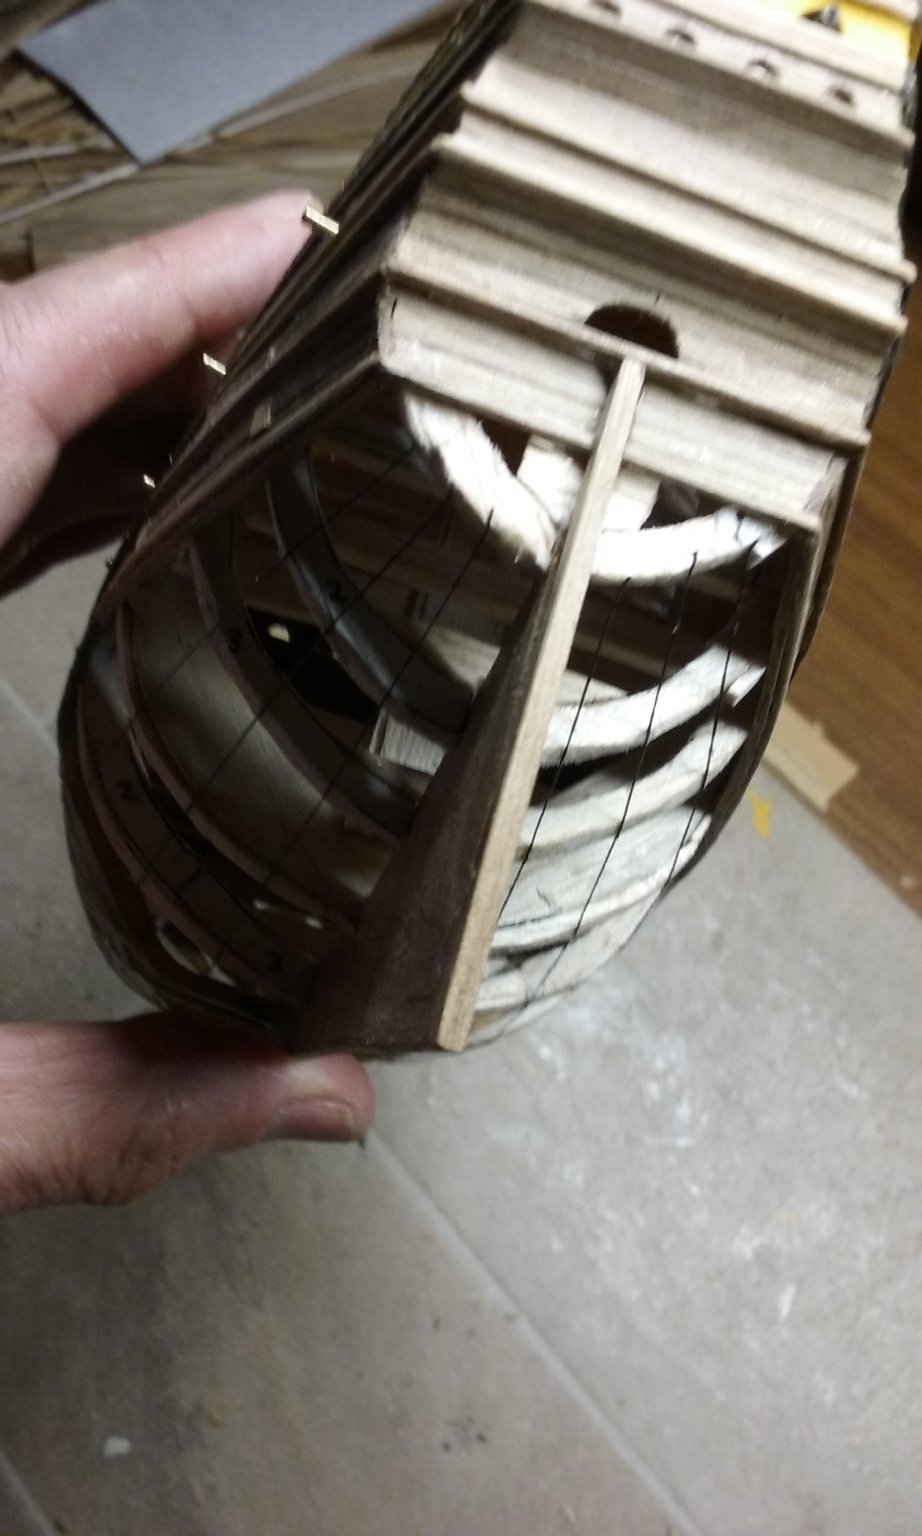
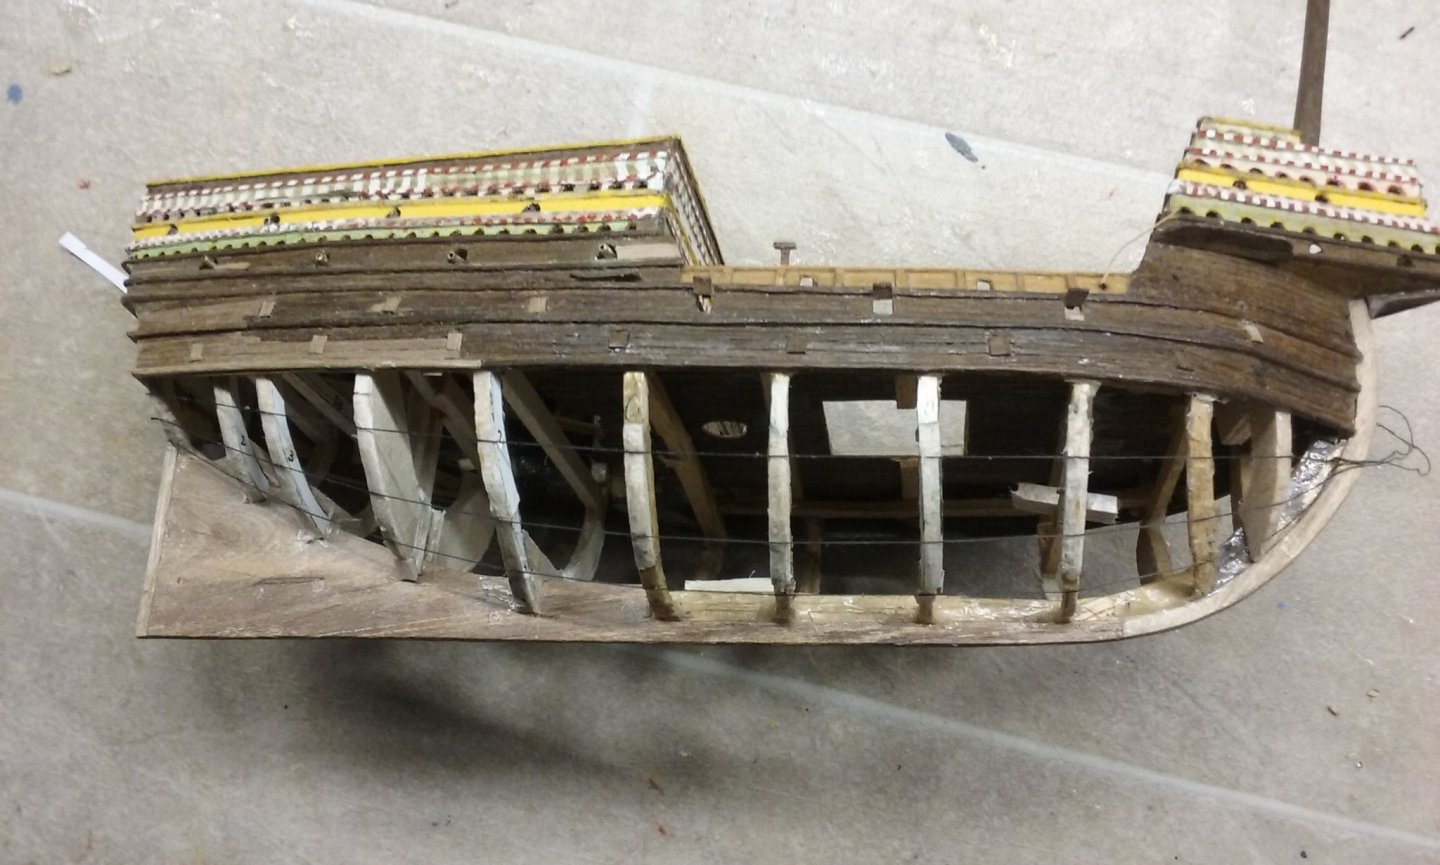
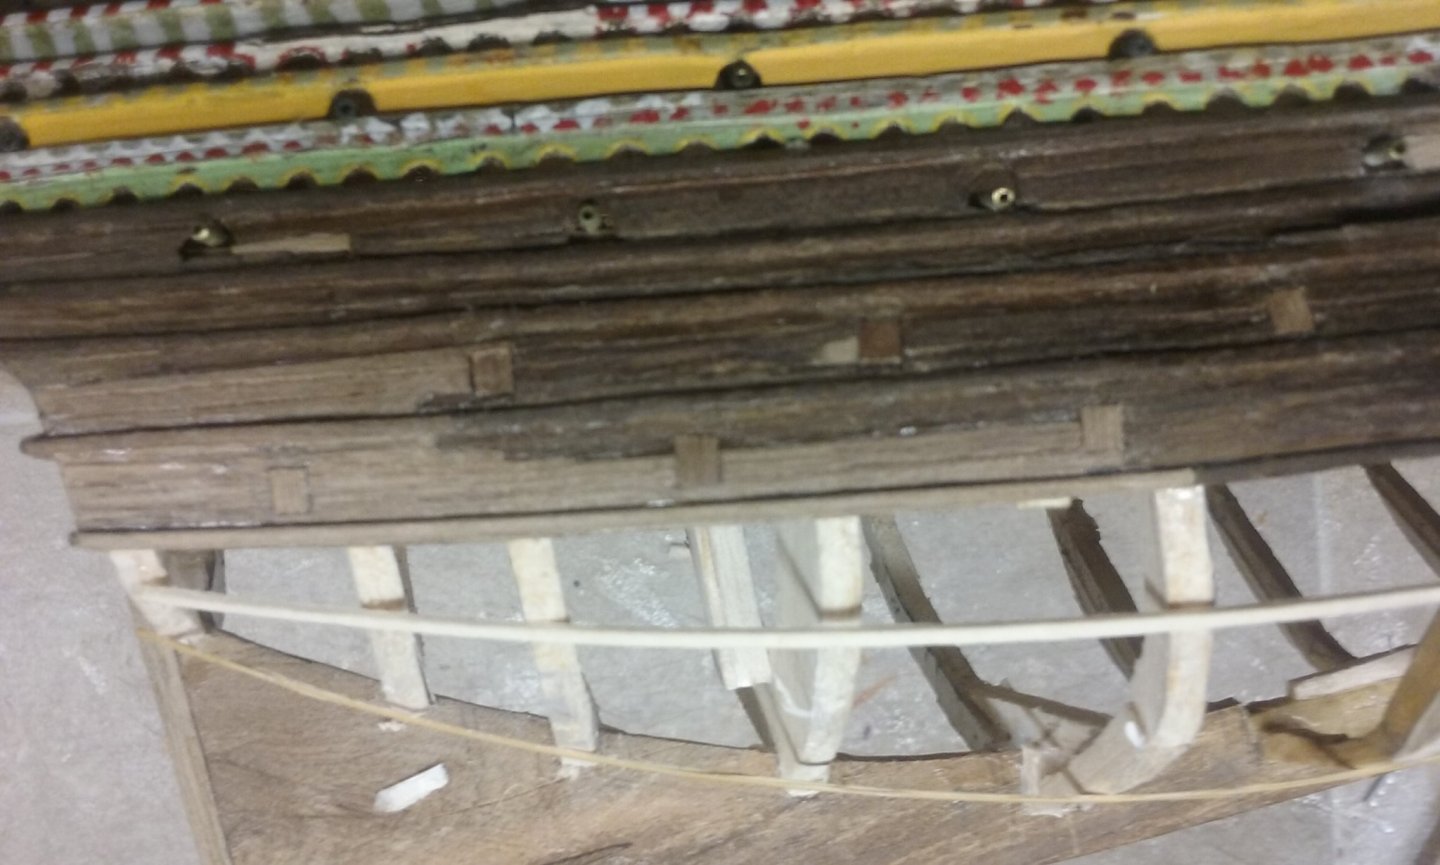
I've bitten the bullet and set up the lines defining the below-waterline hull with black thread, following the David Antscherl tutorial. I'd appreciate feedback on whether the lines of the threads are correct. I've also done a mark-up showing where I think the garboard strake should begin and end. Any advice would be gratefully received. Steven


- 740 replies
-
- 6
-
-
- Tudor
- restoration
- (and 4 more)
-
Beautiful work, Sceatha! I love watching speculative builds, the older the better! And you're doing a magnificent job of it. Steven
- 81 replies
-
- 2
-
-
- egyptian
- byblos ship
- (and 1 more)
-
I just had a thought. Do a Google image search for the Atlantic Charter - it was signed by Rooseveldt and Churchill on board the Prince of Wales - lots of publicity photos from the time taken on board ship. You might get some nice detail photos from that. Oh, and there's video footage at and Steven
- 211 replies
-
- 7
-
-
- prince of wales
- tamiya
- (and 2 more)
-
A worthwhile subject to build. I'm not sure whether you can get good pics of her for your detail work, but I just checked Google image search and Pinterest, and there are a reasonable number of photos. Might be worth checking out. Steven
- 211 replies
-
- 3
-
-
- prince of wales
- tamiya
- (and 2 more)
-
HMCSS Victoria 1855 by BANYAN - 1:72
Louie da fly replied to BANYAN's topic in - Build logs for subjects built 1851 - 1900
Yes, it's not the bronze that would be likely to corrode, but the iron. Steven- 1,013 replies
-
- 3
-
-
- gun dispatch vessel
- victoria
- (and 2 more)
-
You can say that again. Fortunately I was able to give her the broken one as a model, with an approximation of the required length to fit in the saw. No worries, as we say in Oz. Actually, not so. We've been working flat out together fixing up the garden - we've been building garden walls and paths. I only get to work on the model in the evening or when it's raining. Yesterday I wheelbarrowed a big pile of sand from the front driveway up the hill to its new storage area up the back. Today it's been raining heavily, so we get a break. You can see the results of our efforts in the "What Have You Done Today?" thread in "Shore Leave". Steven
-
HMCSS Victoria 1855 by BANYAN - 1:72
Louie da fly replied to BANYAN's topic in - Build logs for subjects built 1851 - 1900
Wouldn't there be electrochemical issues with the bronze tending to accelerate the rusting process in the iron? Steven- 1,013 replies
-
- 2
-
-
- gun dispatch vessel
- victoria
- (and 2 more)
-
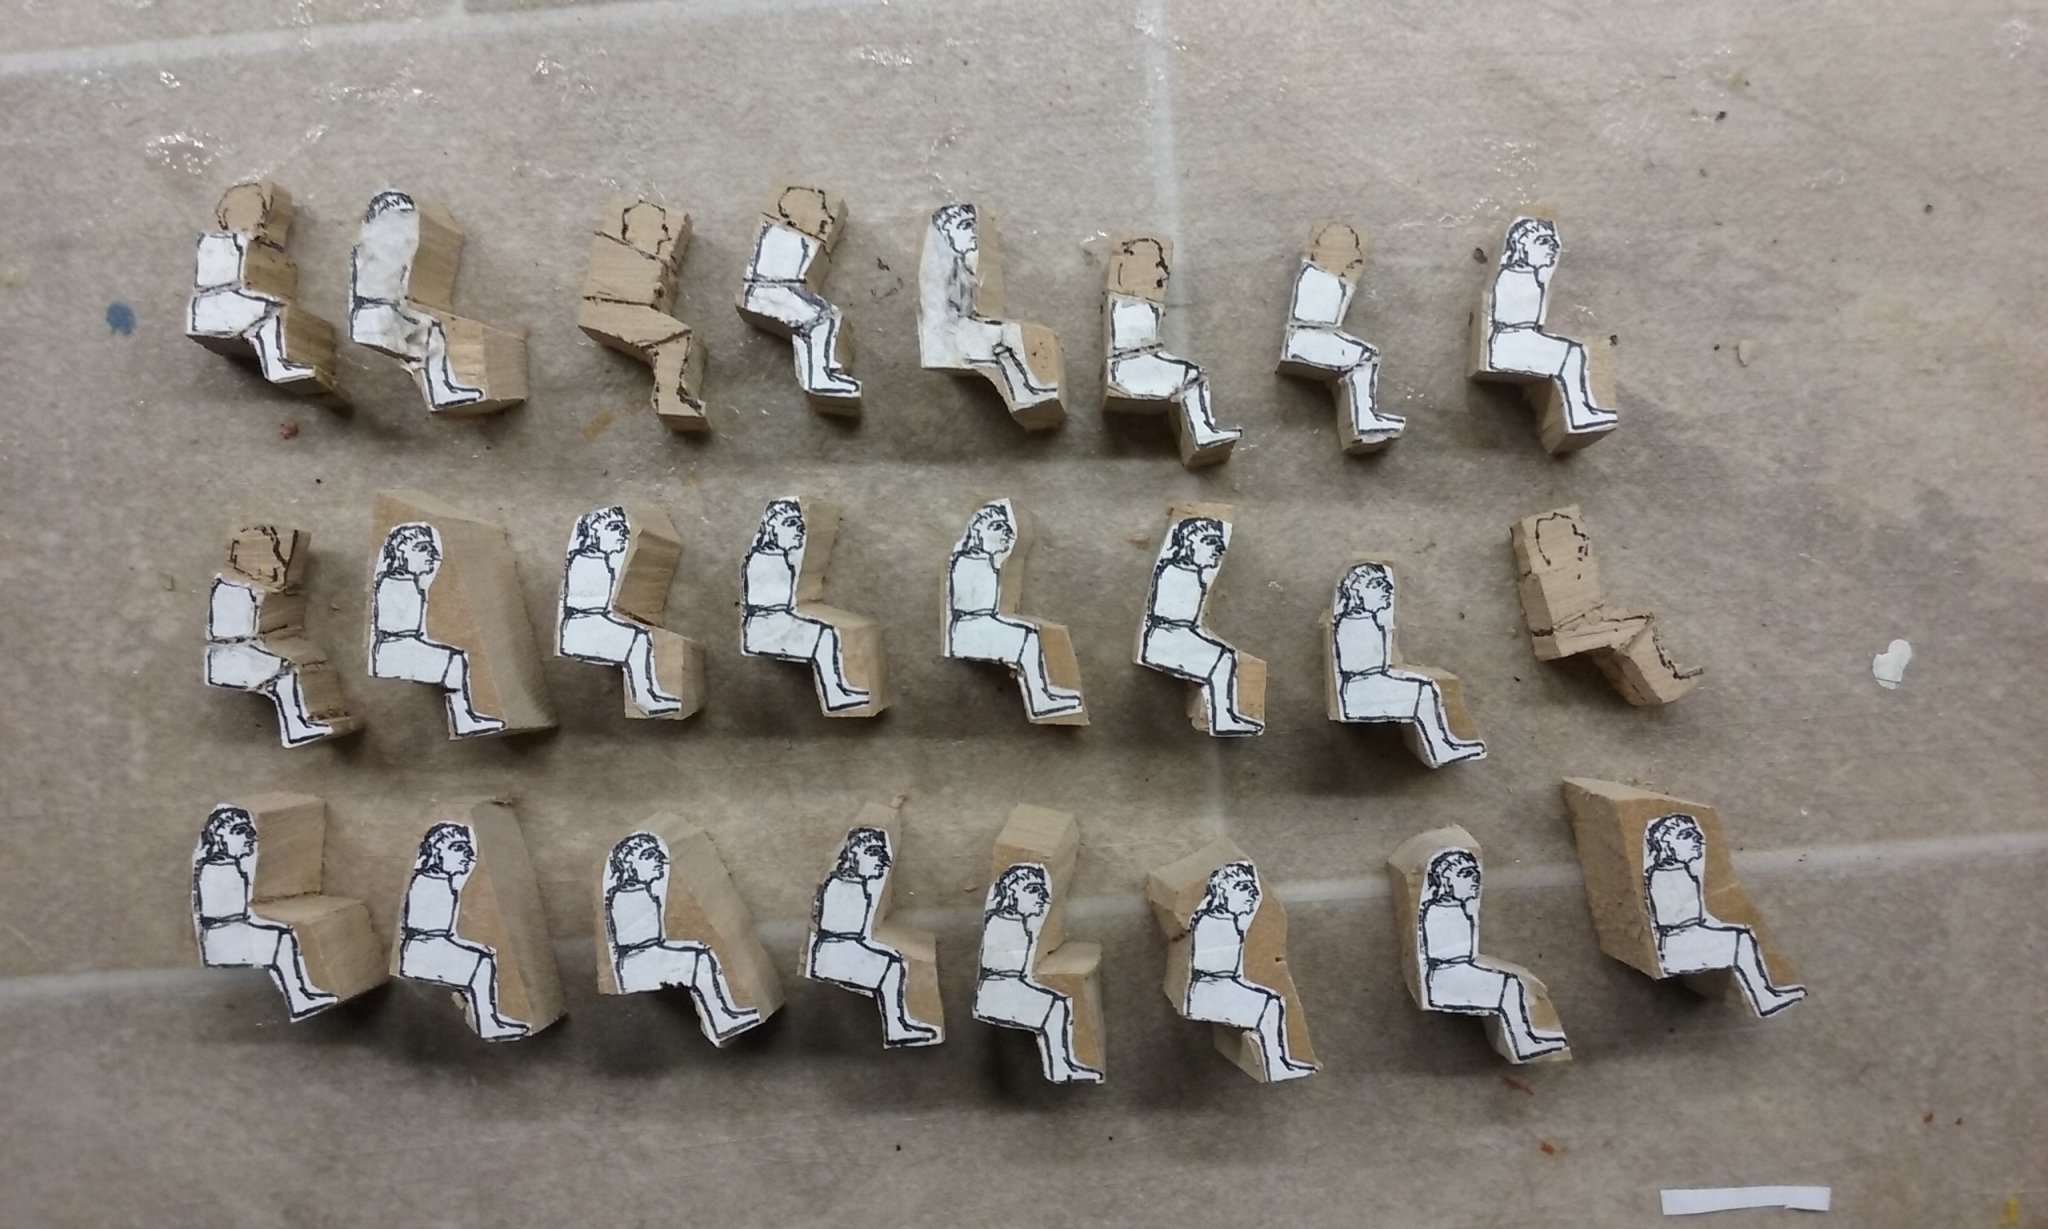
Oh frabjous day! Callooh! Callay!* (as Lewis Carroll wrote in the poem Jabberwocky) My lovely wife went to the hardware shop and bought me a packet of coping saw blades (to replace the one I'd broken, leaving me unable to saw anything.) So the production line is again in full swing. I've cut out the 24 oarsmen yet to be carved. At my rate of carving them - about one a day - it'll probably take at least a month to do them, but at last we're moving again. Steven * It took me years to find out that this was an in-joke. It is two of the declensions of the Greek adjective kalos = good, (καλού and καλη) which is among the first things you learn when you study Ancient Greek.

-
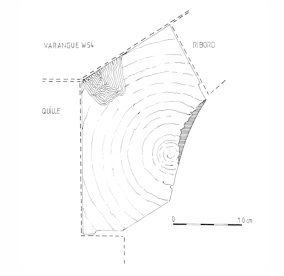
Interesting - the garboard strake on the Lomellina, built between 1503 and 1516 (the Great Harry was built in 1512-14) was carved out of a tree trunk. Here's a cross-section: Apparently the garboards of the Cattewater wreck and the Red Bay wreck have similar characteristics. However, Lomellina was a Genoese ship, and the Cattewater and Red Bay wrecks were Iberian (Portuguese and Basque). The garboard strake of the Mary Rose, effectively a sister ship to the Great Harry, is much more "normal" (number 11 on the diagram below), so I think that's the path I'll follow. Steven
-
Good grief! I'm gobsmacked at the level of detail and precision. You are a true artist, sir. Steven
-
So there's no hard and fast rule - doing it the way I described above is at least as good as any other. Now I feel ready to go ahead. Thanks for your help, people. Steven
-
Elvis on a grain of rice . . . that way lies madness! Pat, I hadn't thought of that. Thanks for the tip. Steven
- 740 replies
-
- 2
-
-
- Tudor
- restoration
- (and 4 more)
-
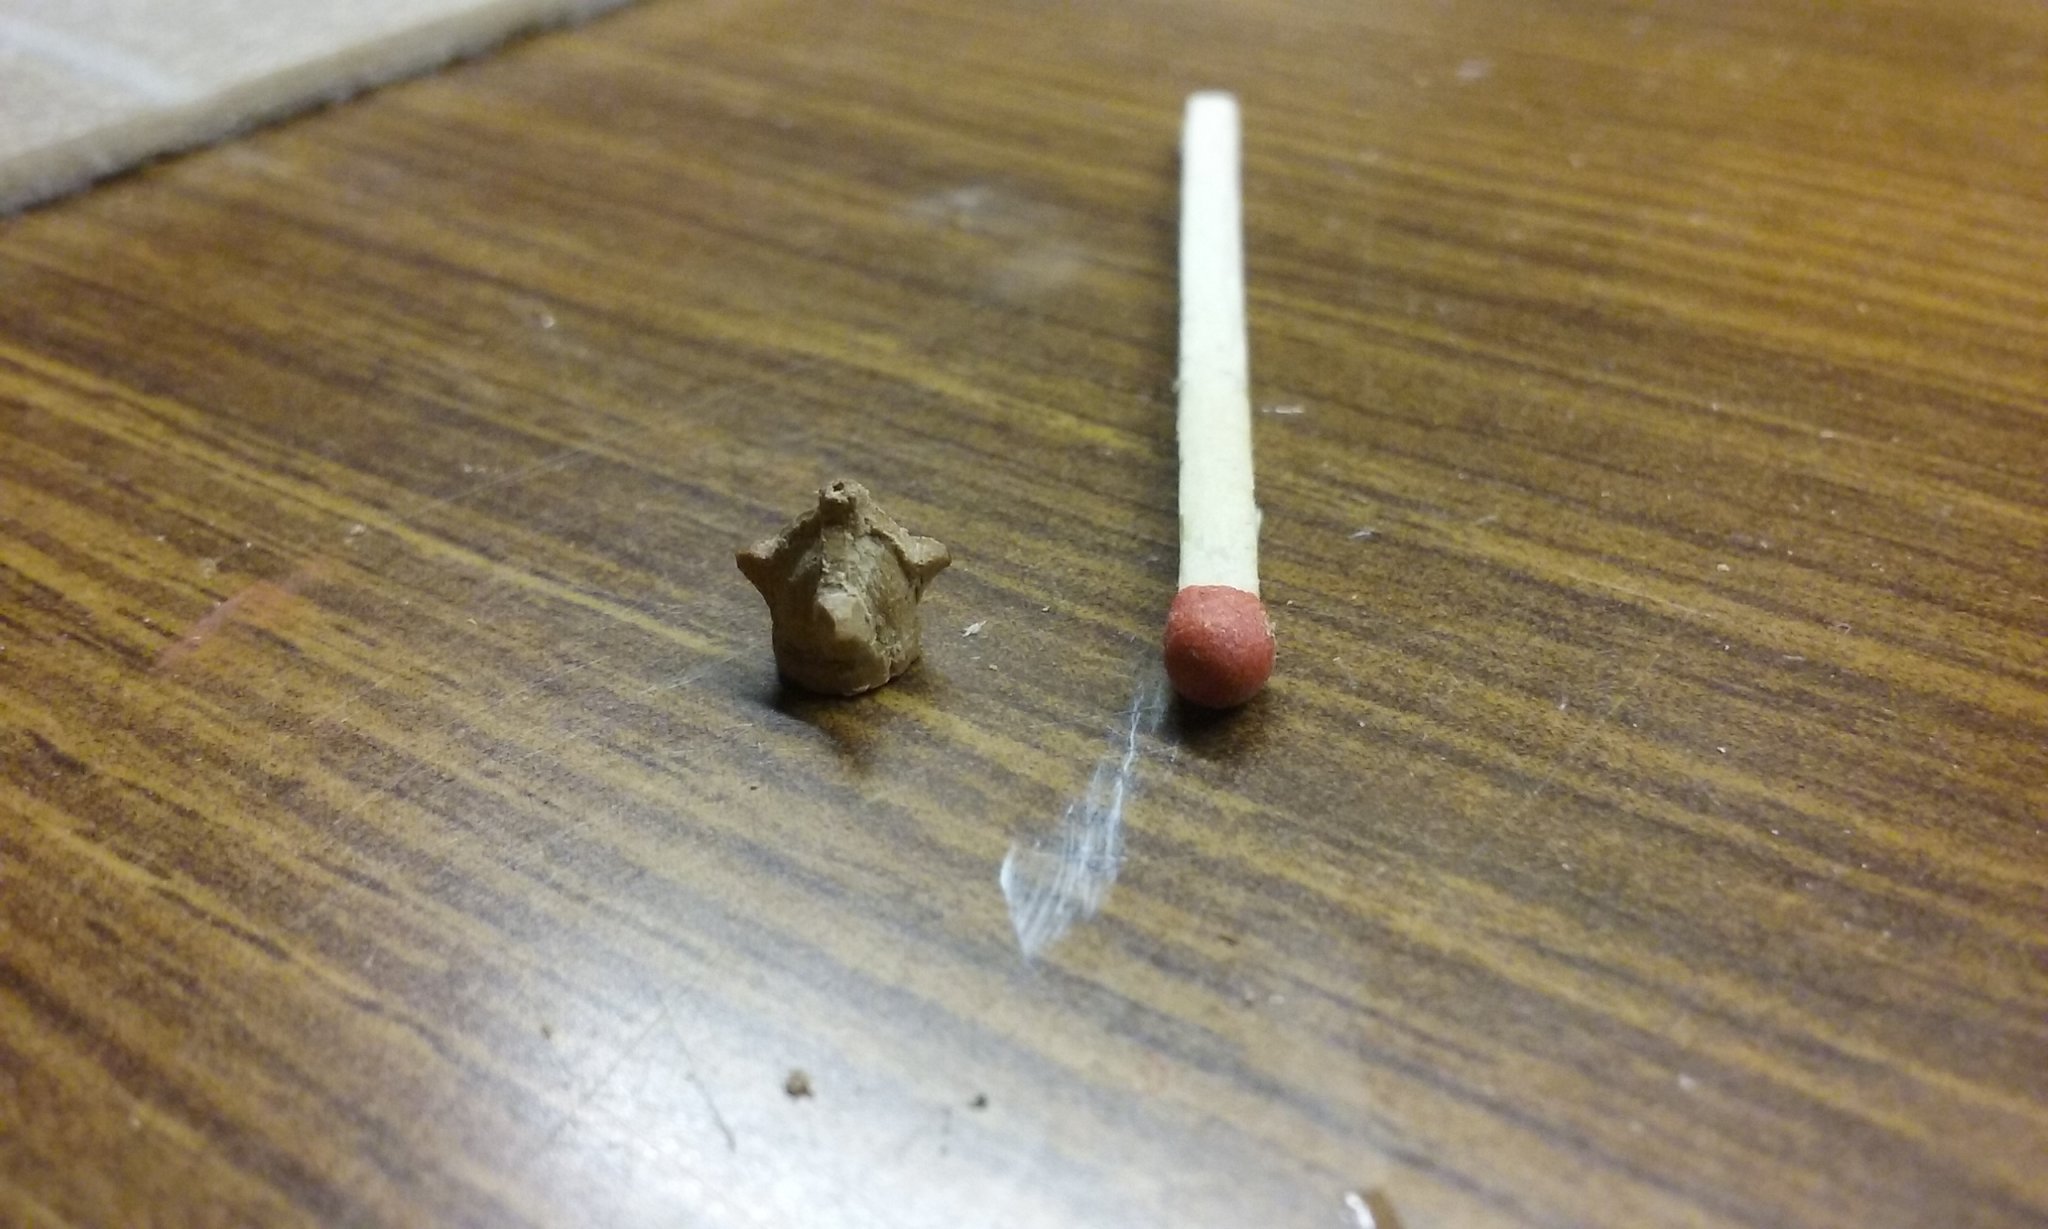
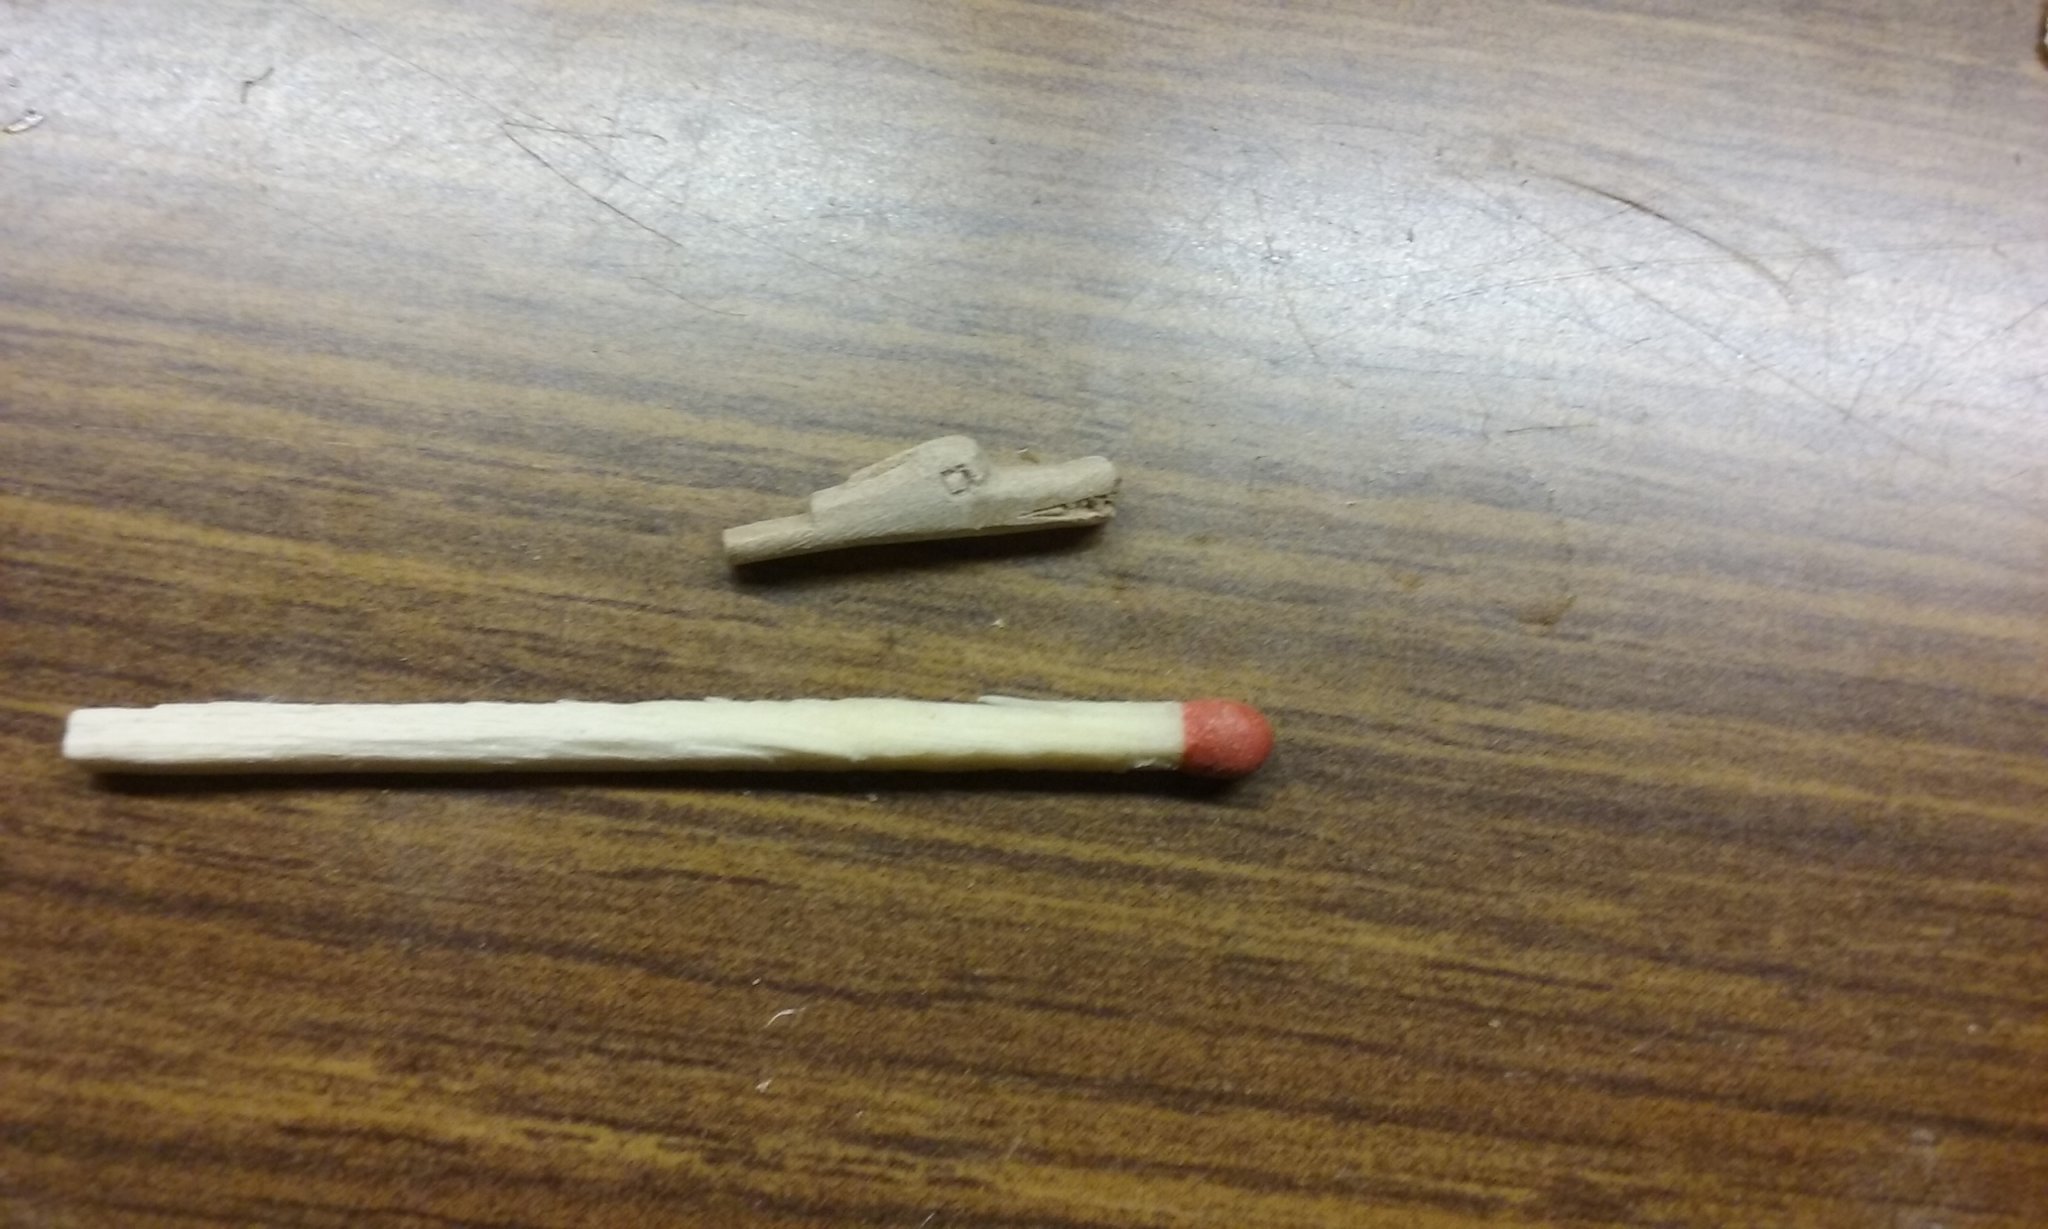
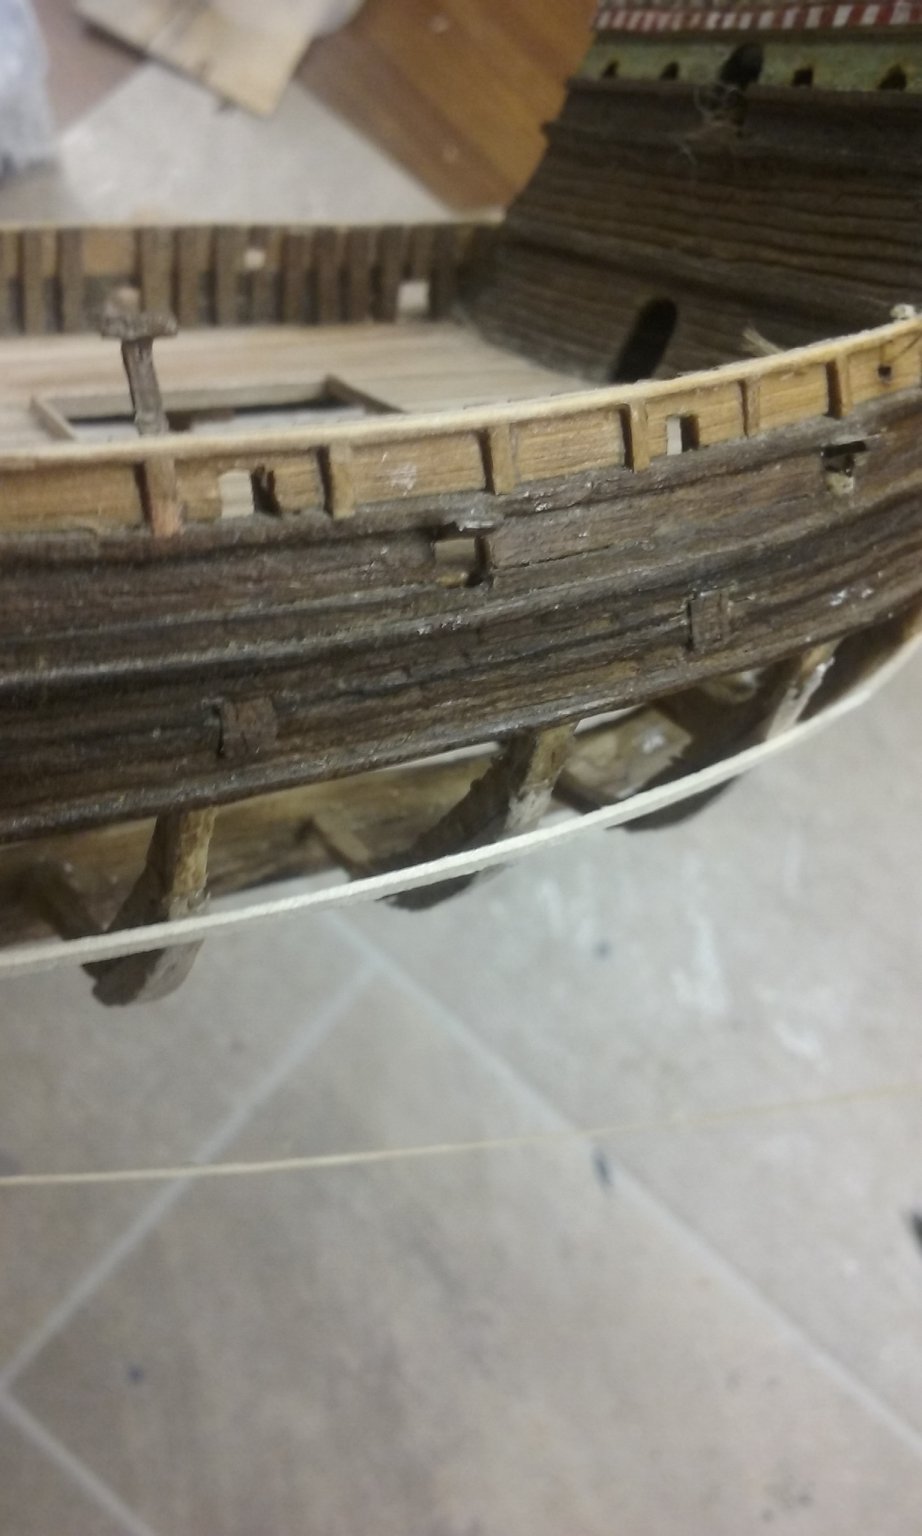
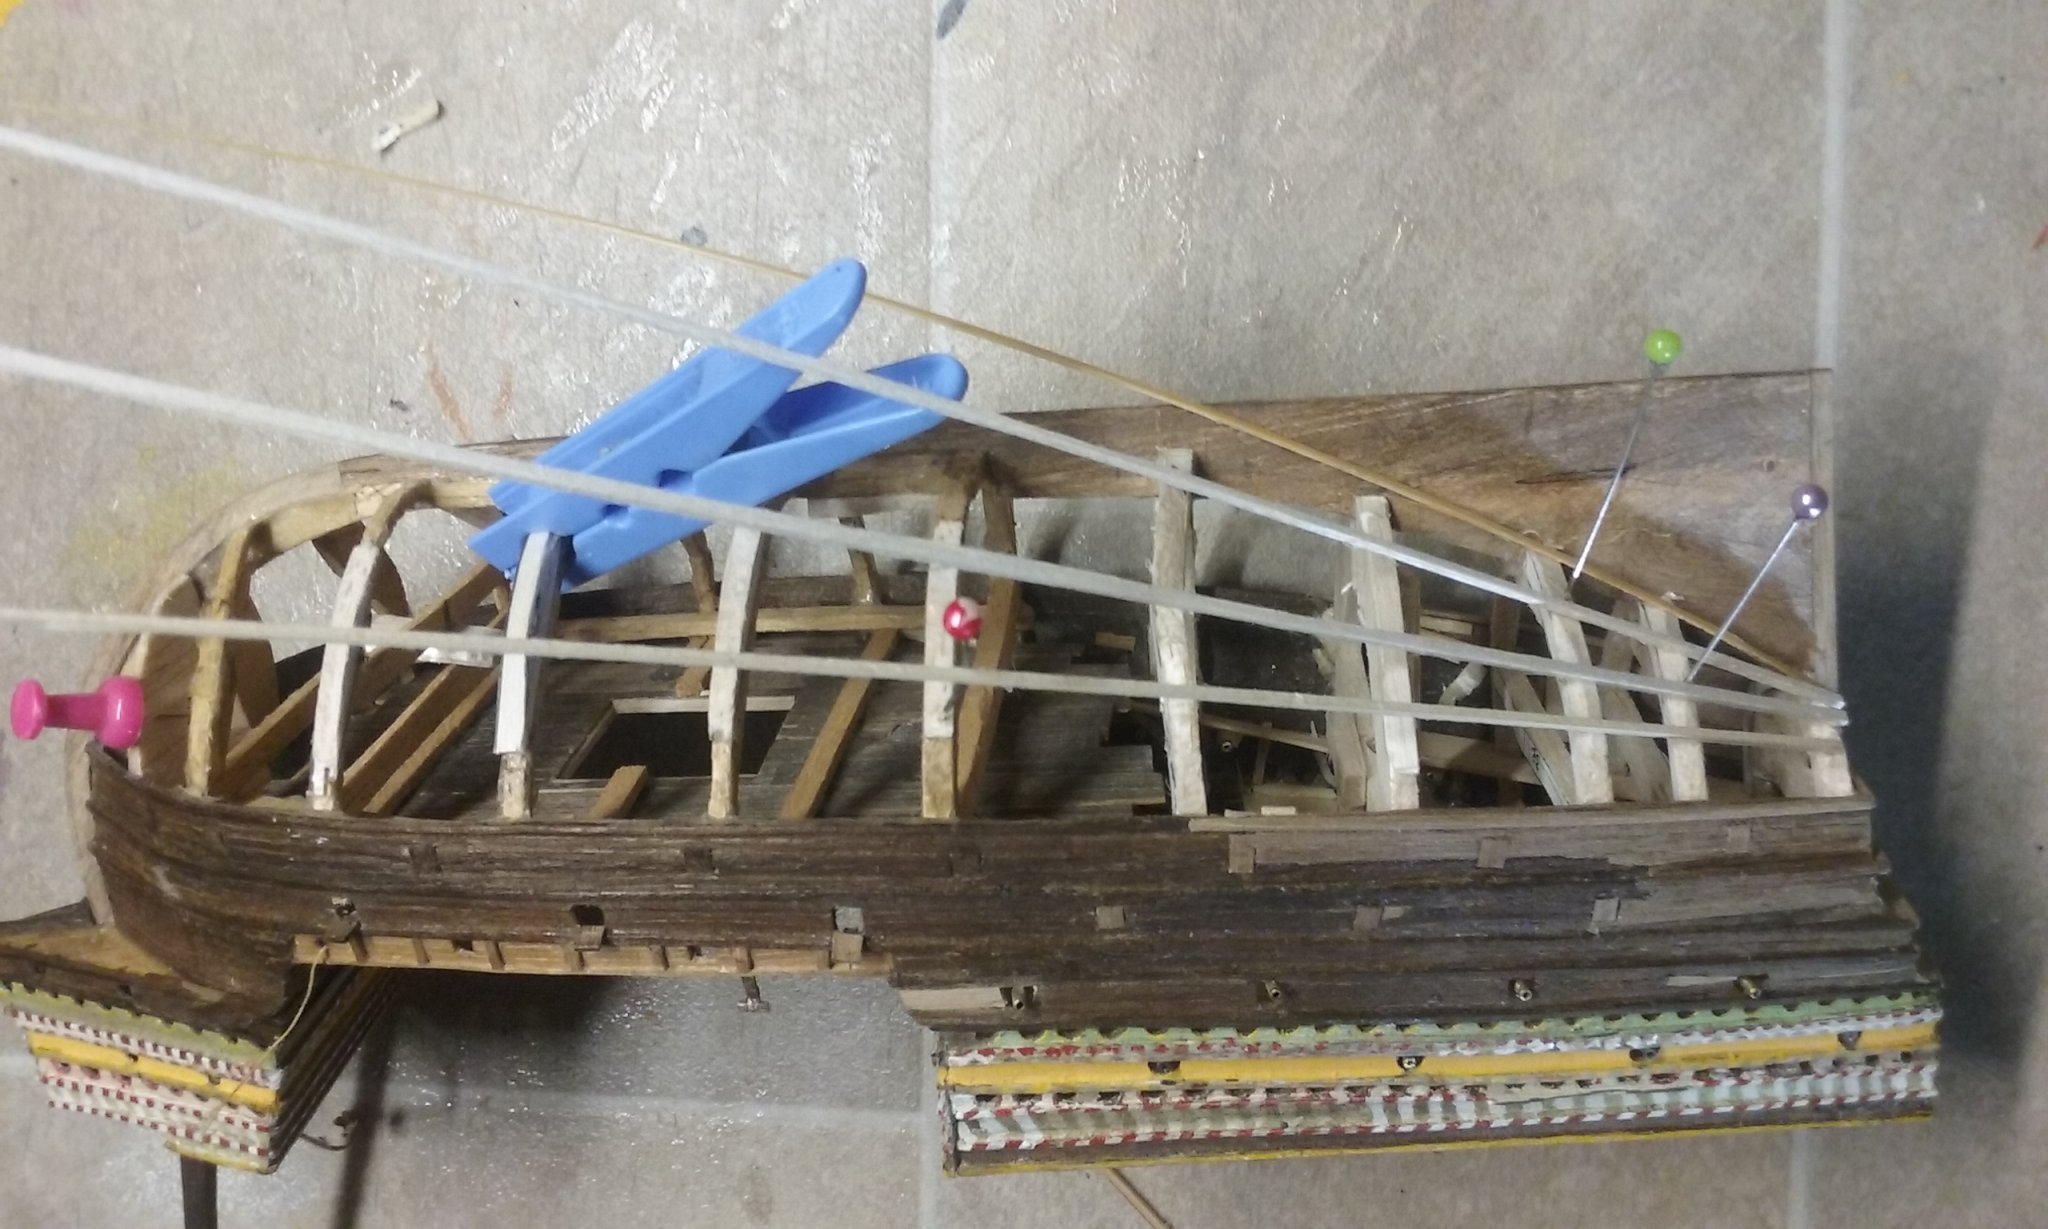
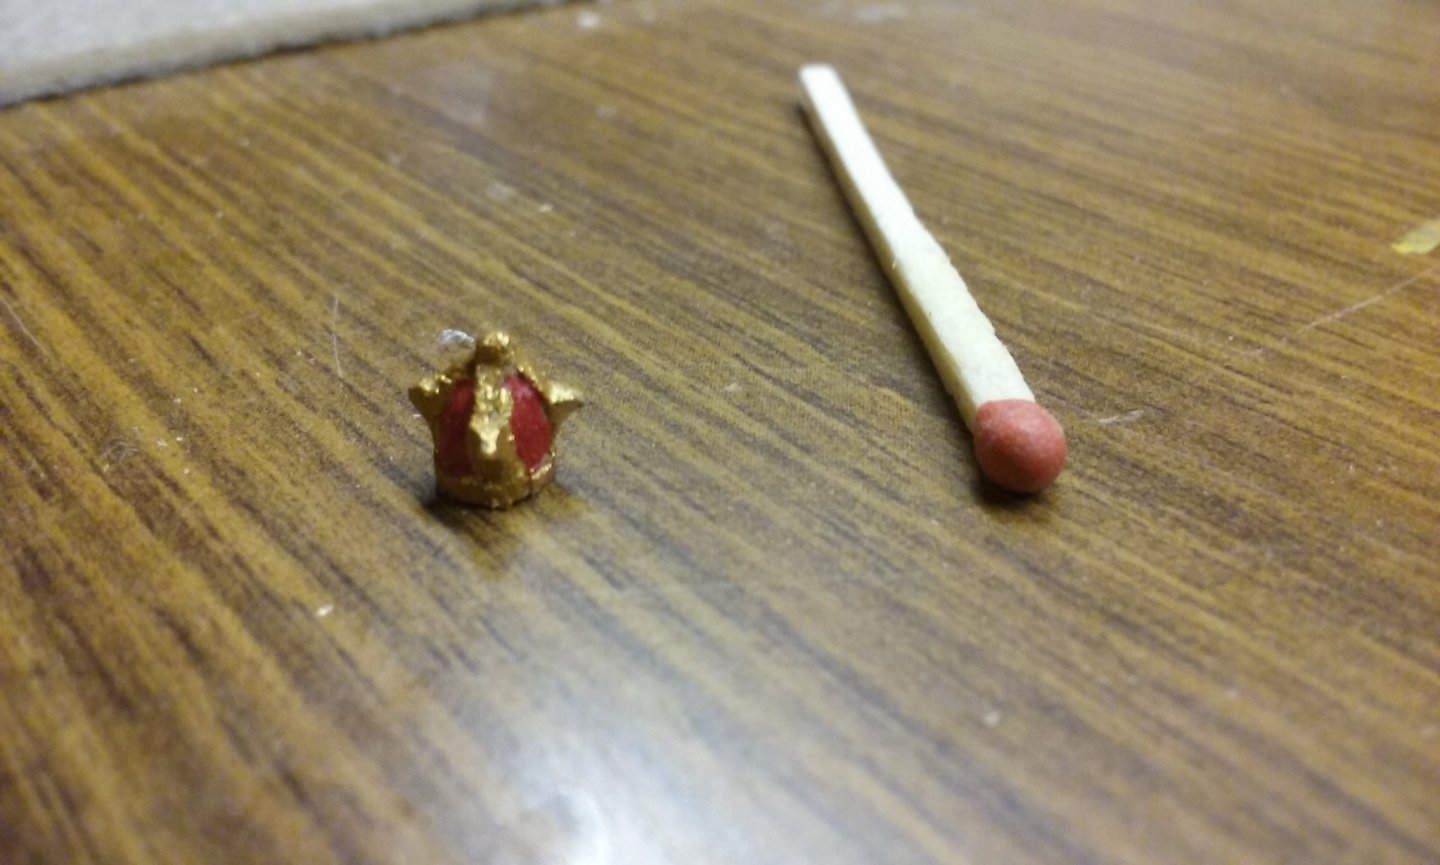
Nah, just a giant clothes peg . . . Thanks everybody for the likes. It's good to get the feedback. Taking a short break from setting up for planking (no, I'm not chickening out! ) Those who are familiar with the Mary Rose will remember that the archaeological team found her "figurehead" - aTudor rose - which is also shown on the picture of her on the Anthony Roll. You can see it at the top right of the forecastle, just to the right of the flags. The Great Harry is shown on the Anthony Roll with a crown on a staff at the end of the bowsprit, as is appropriate for a ship named after the king. It also has a dragon head as was common on carracks at the time. Landström shows both on his reconstruction in The Ship. So I made both - you'd think I'd get sick of carving . . . actually this model originally had them - I'd carved them when I first made her, but they got lost somewhere along the way. One day I'm going to find the box I put all that stuff in - probably not till I've re-done it all, however. Steven


- 740 replies
-
- 10
-
-
- Tudor
- restoration
- (and 4 more)
-
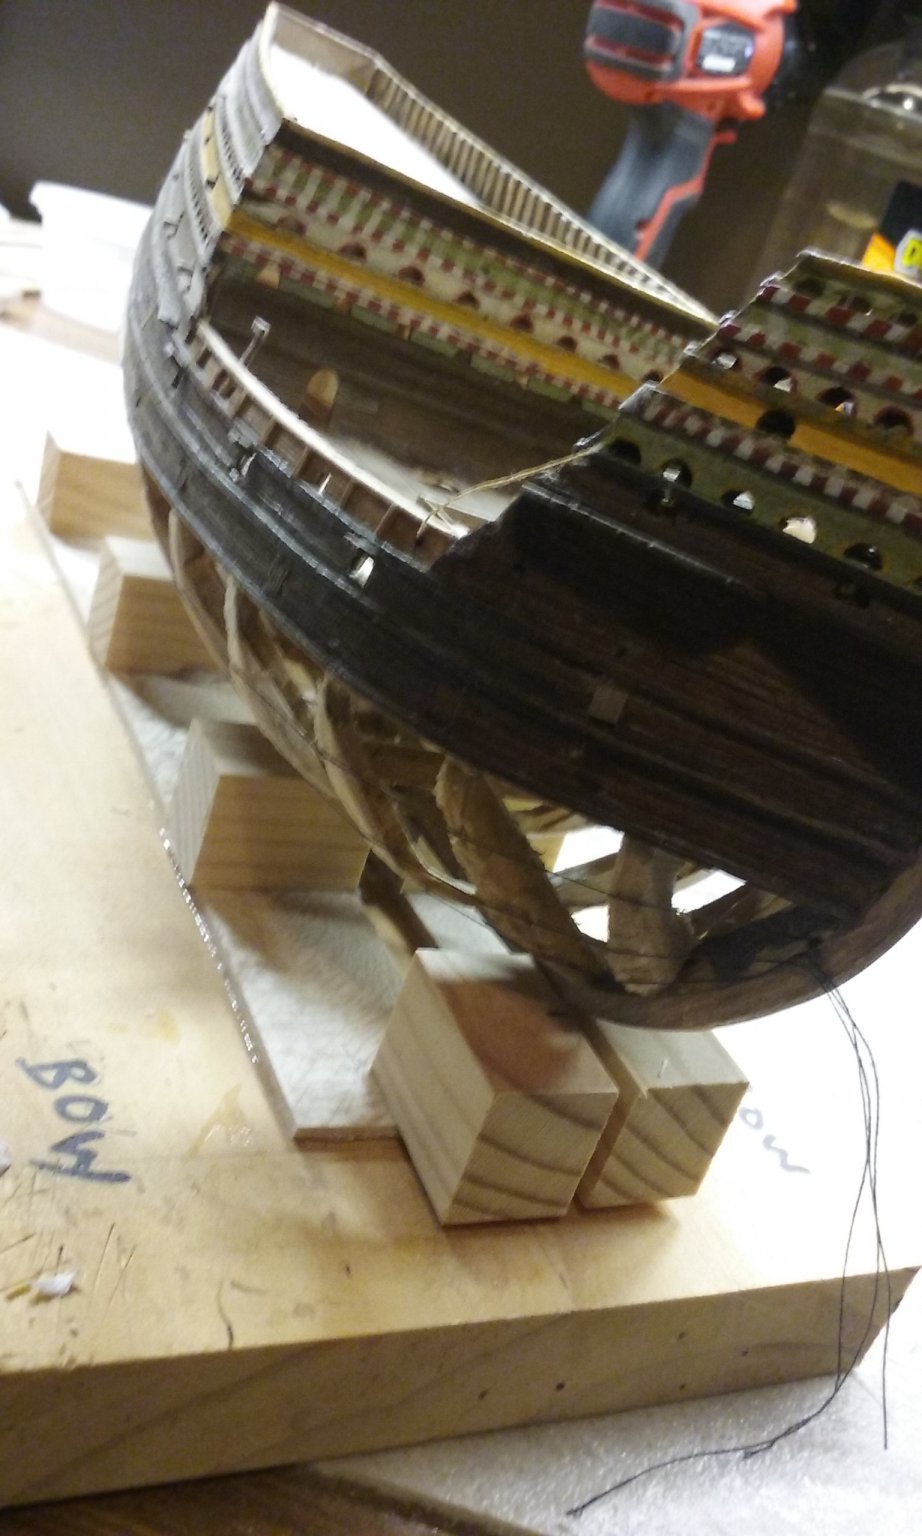
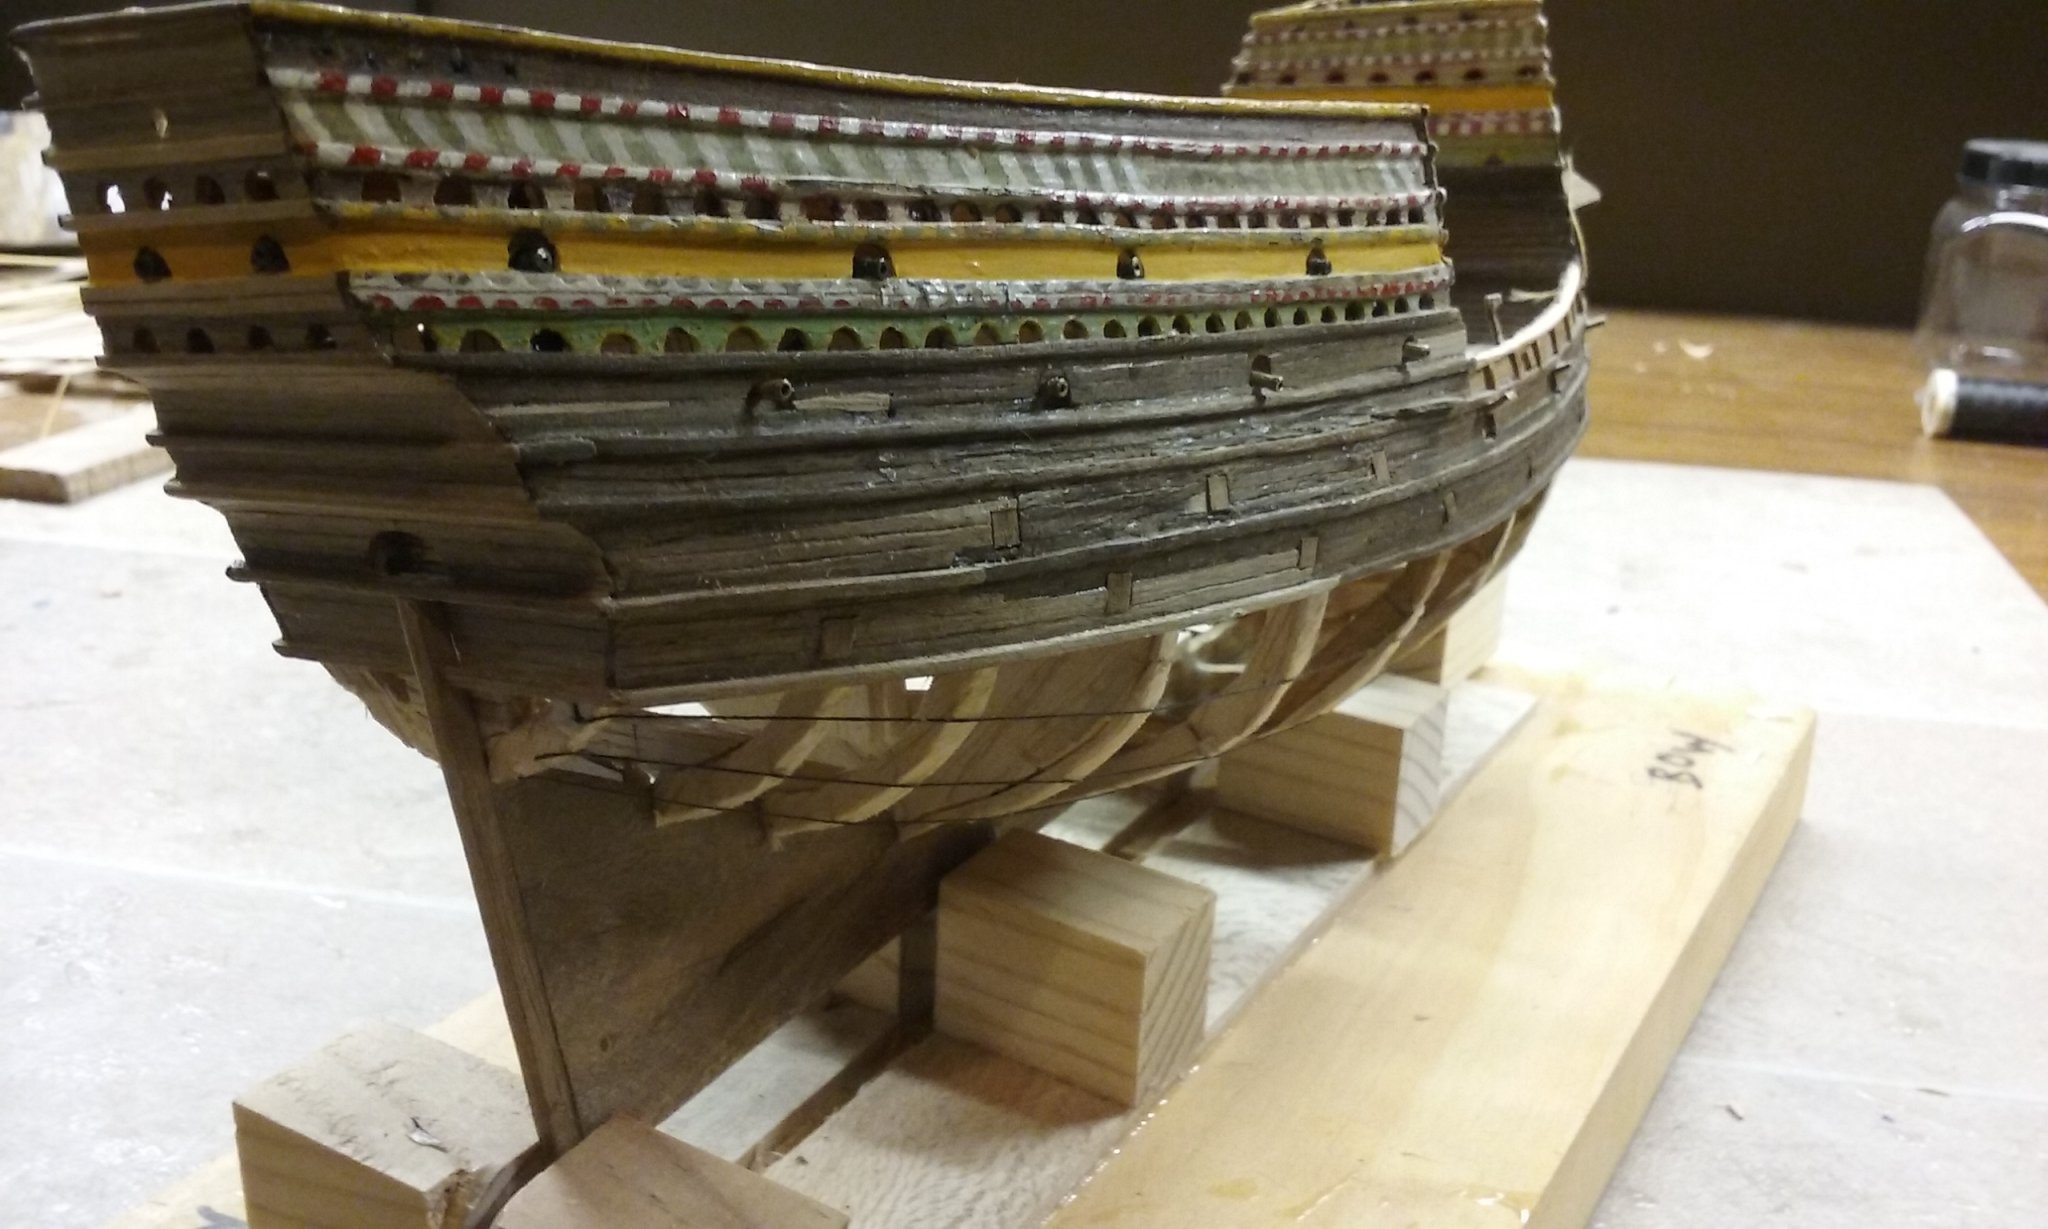
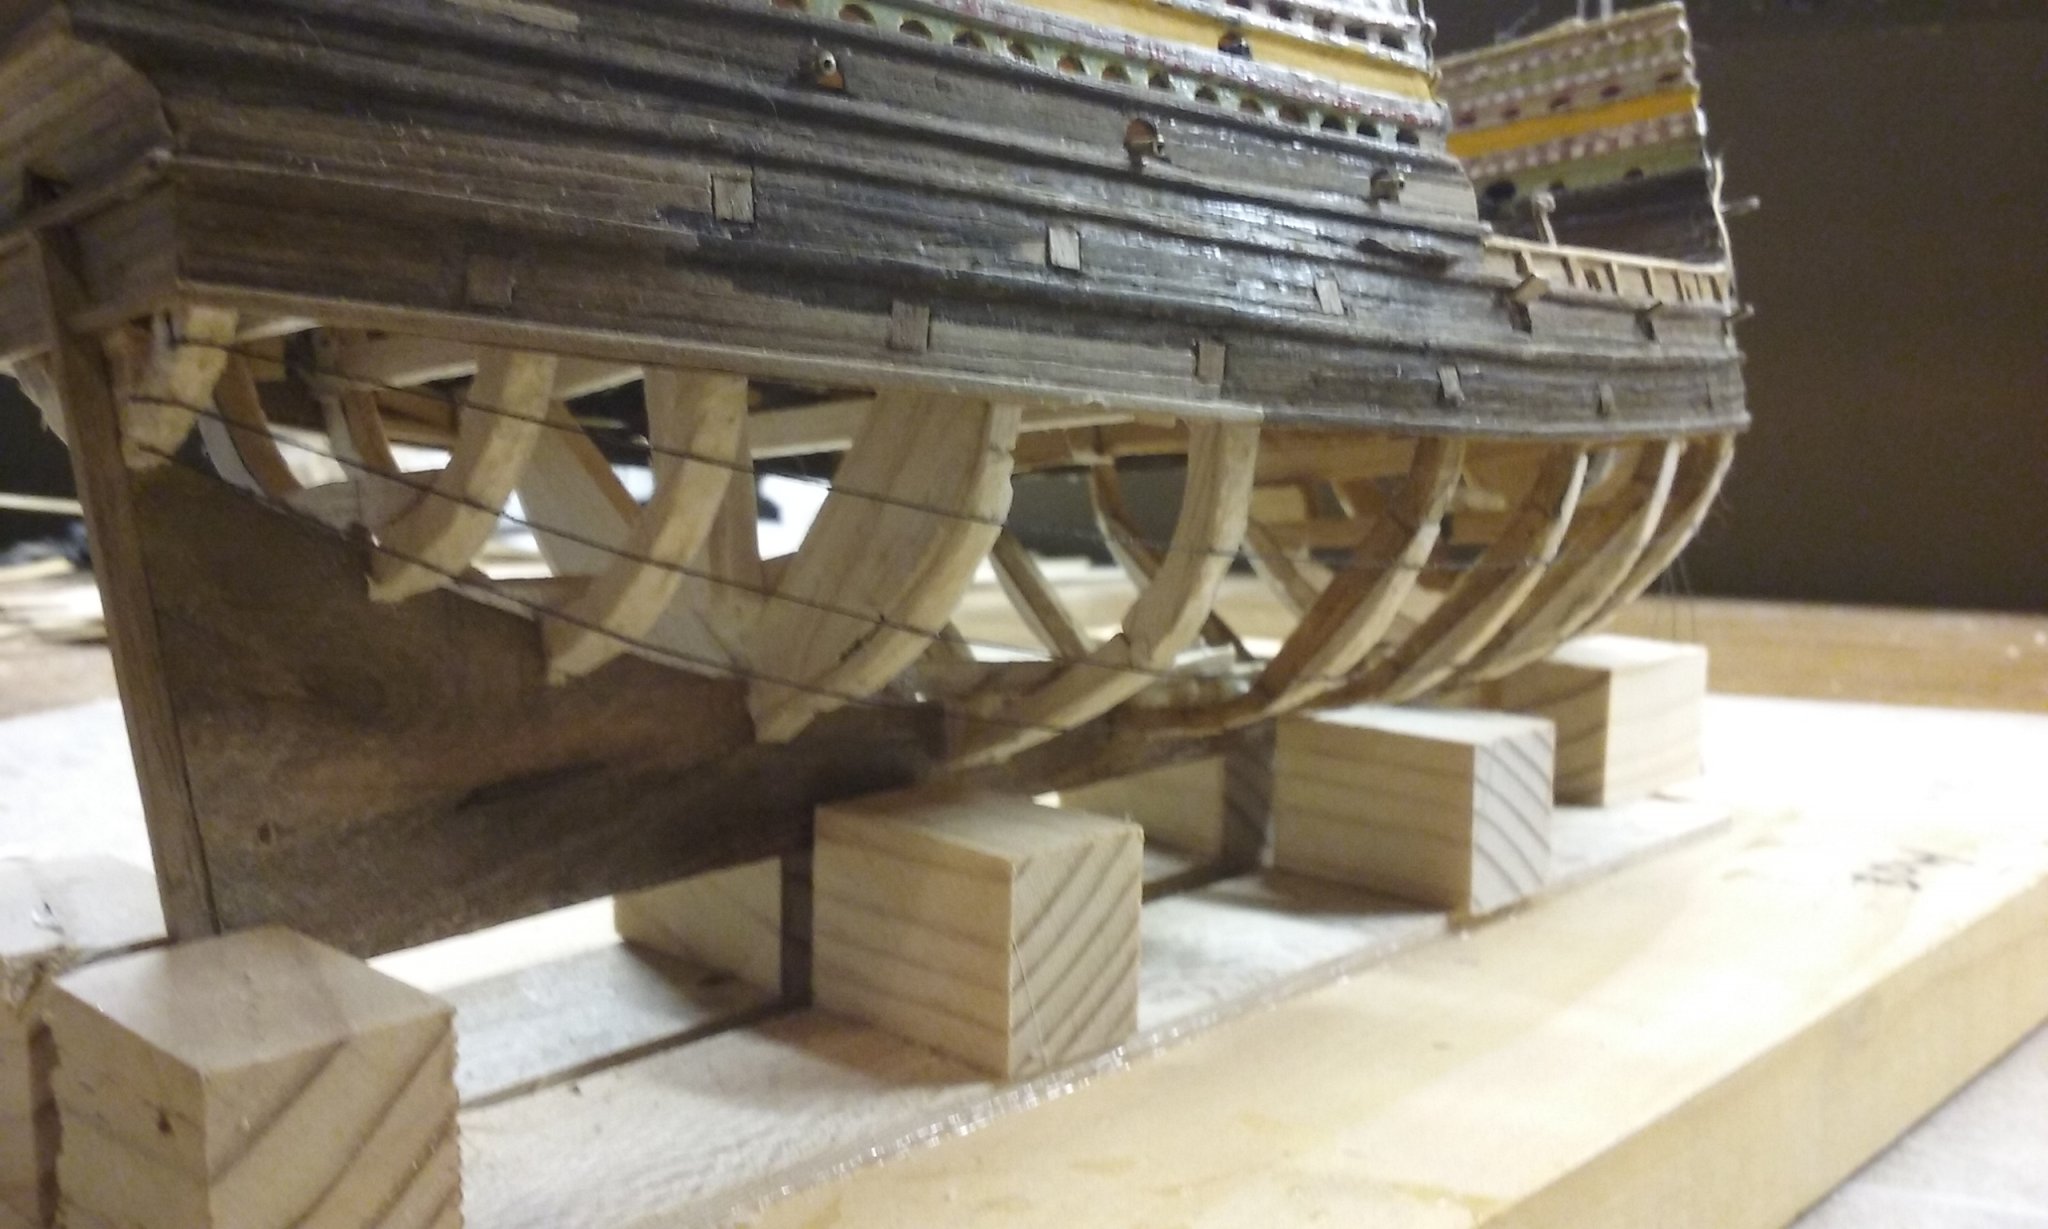
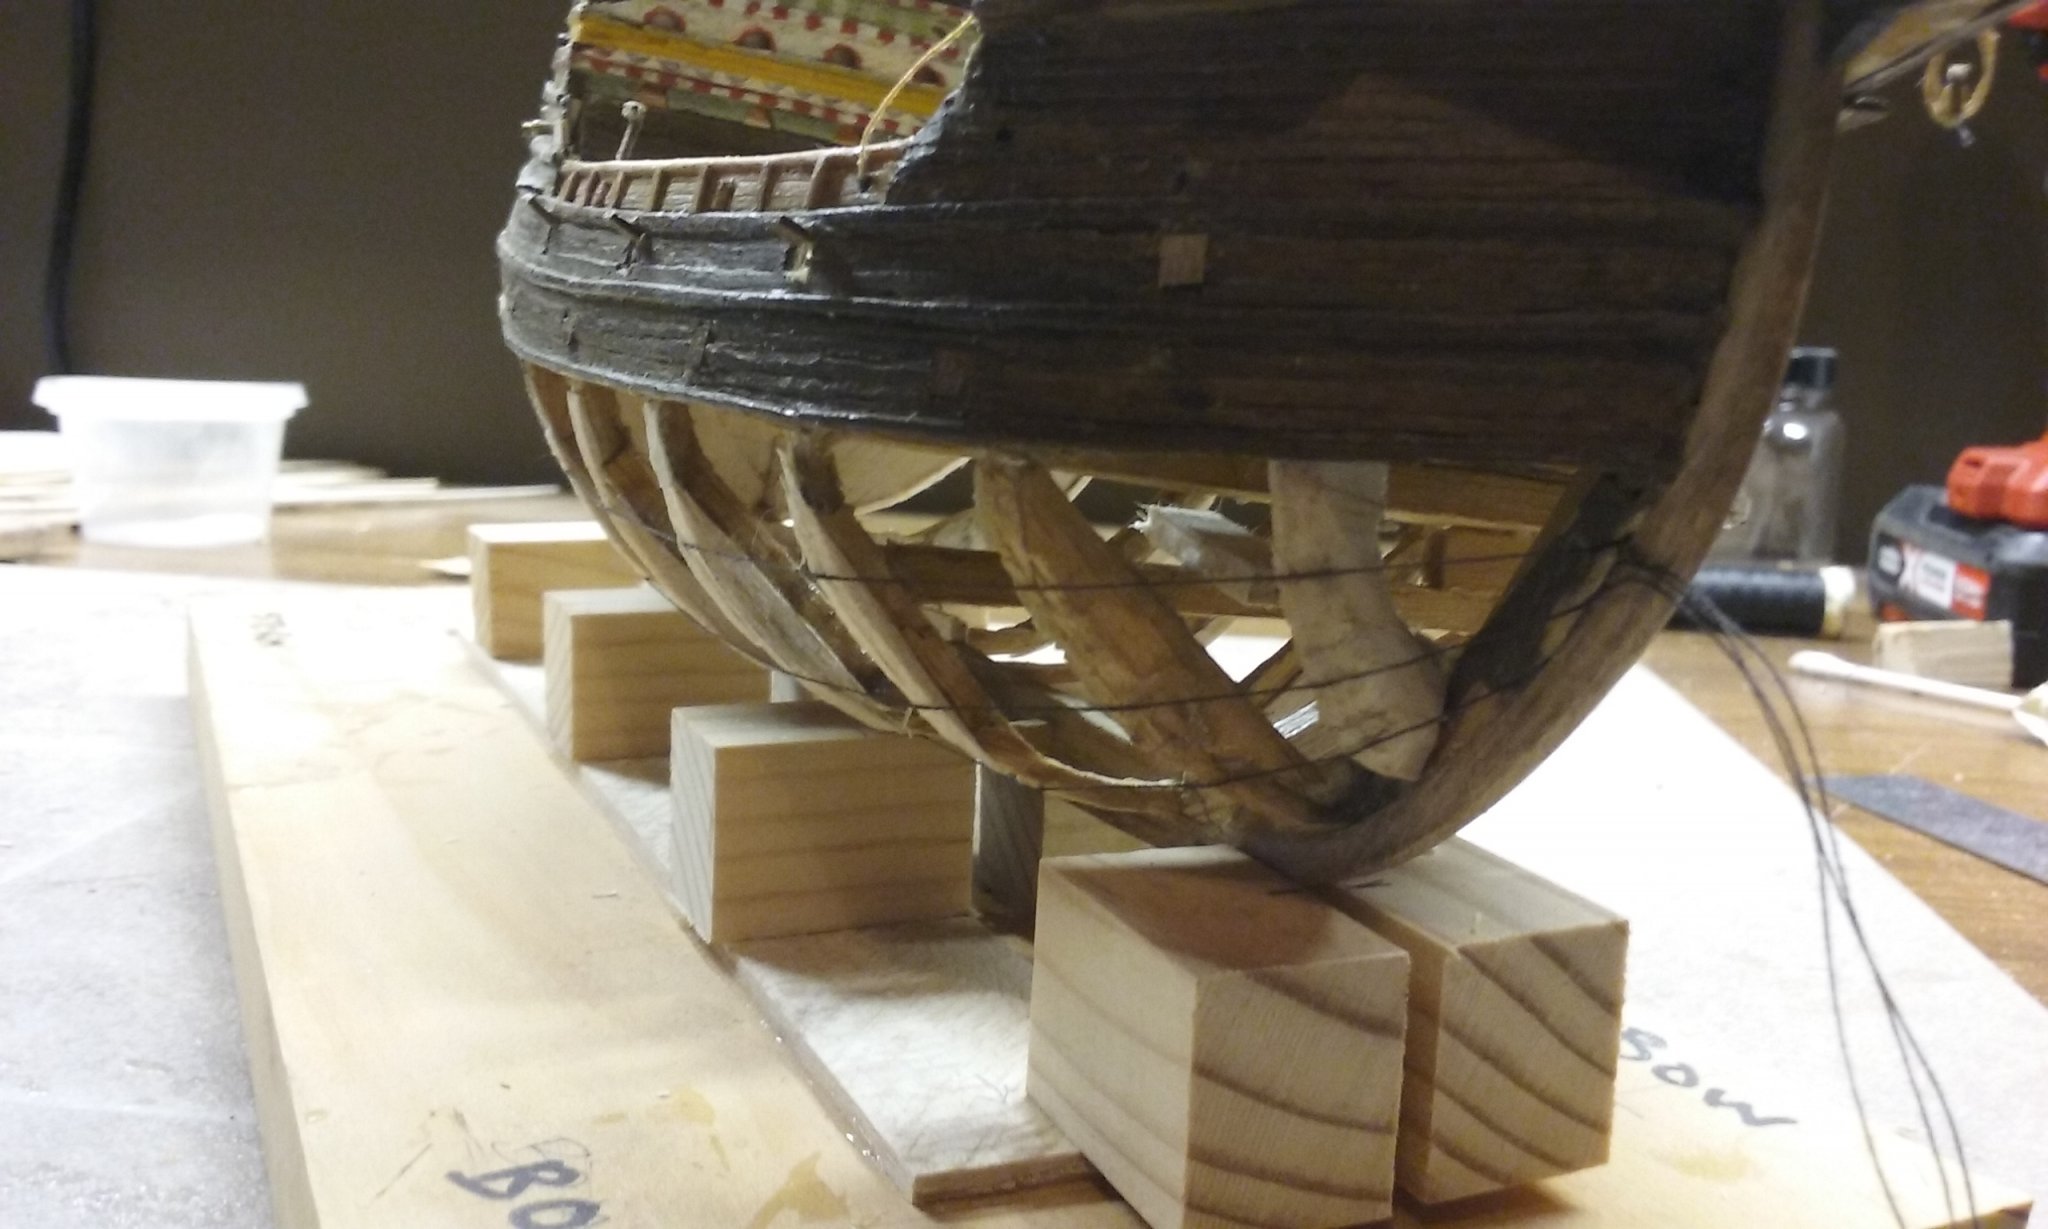
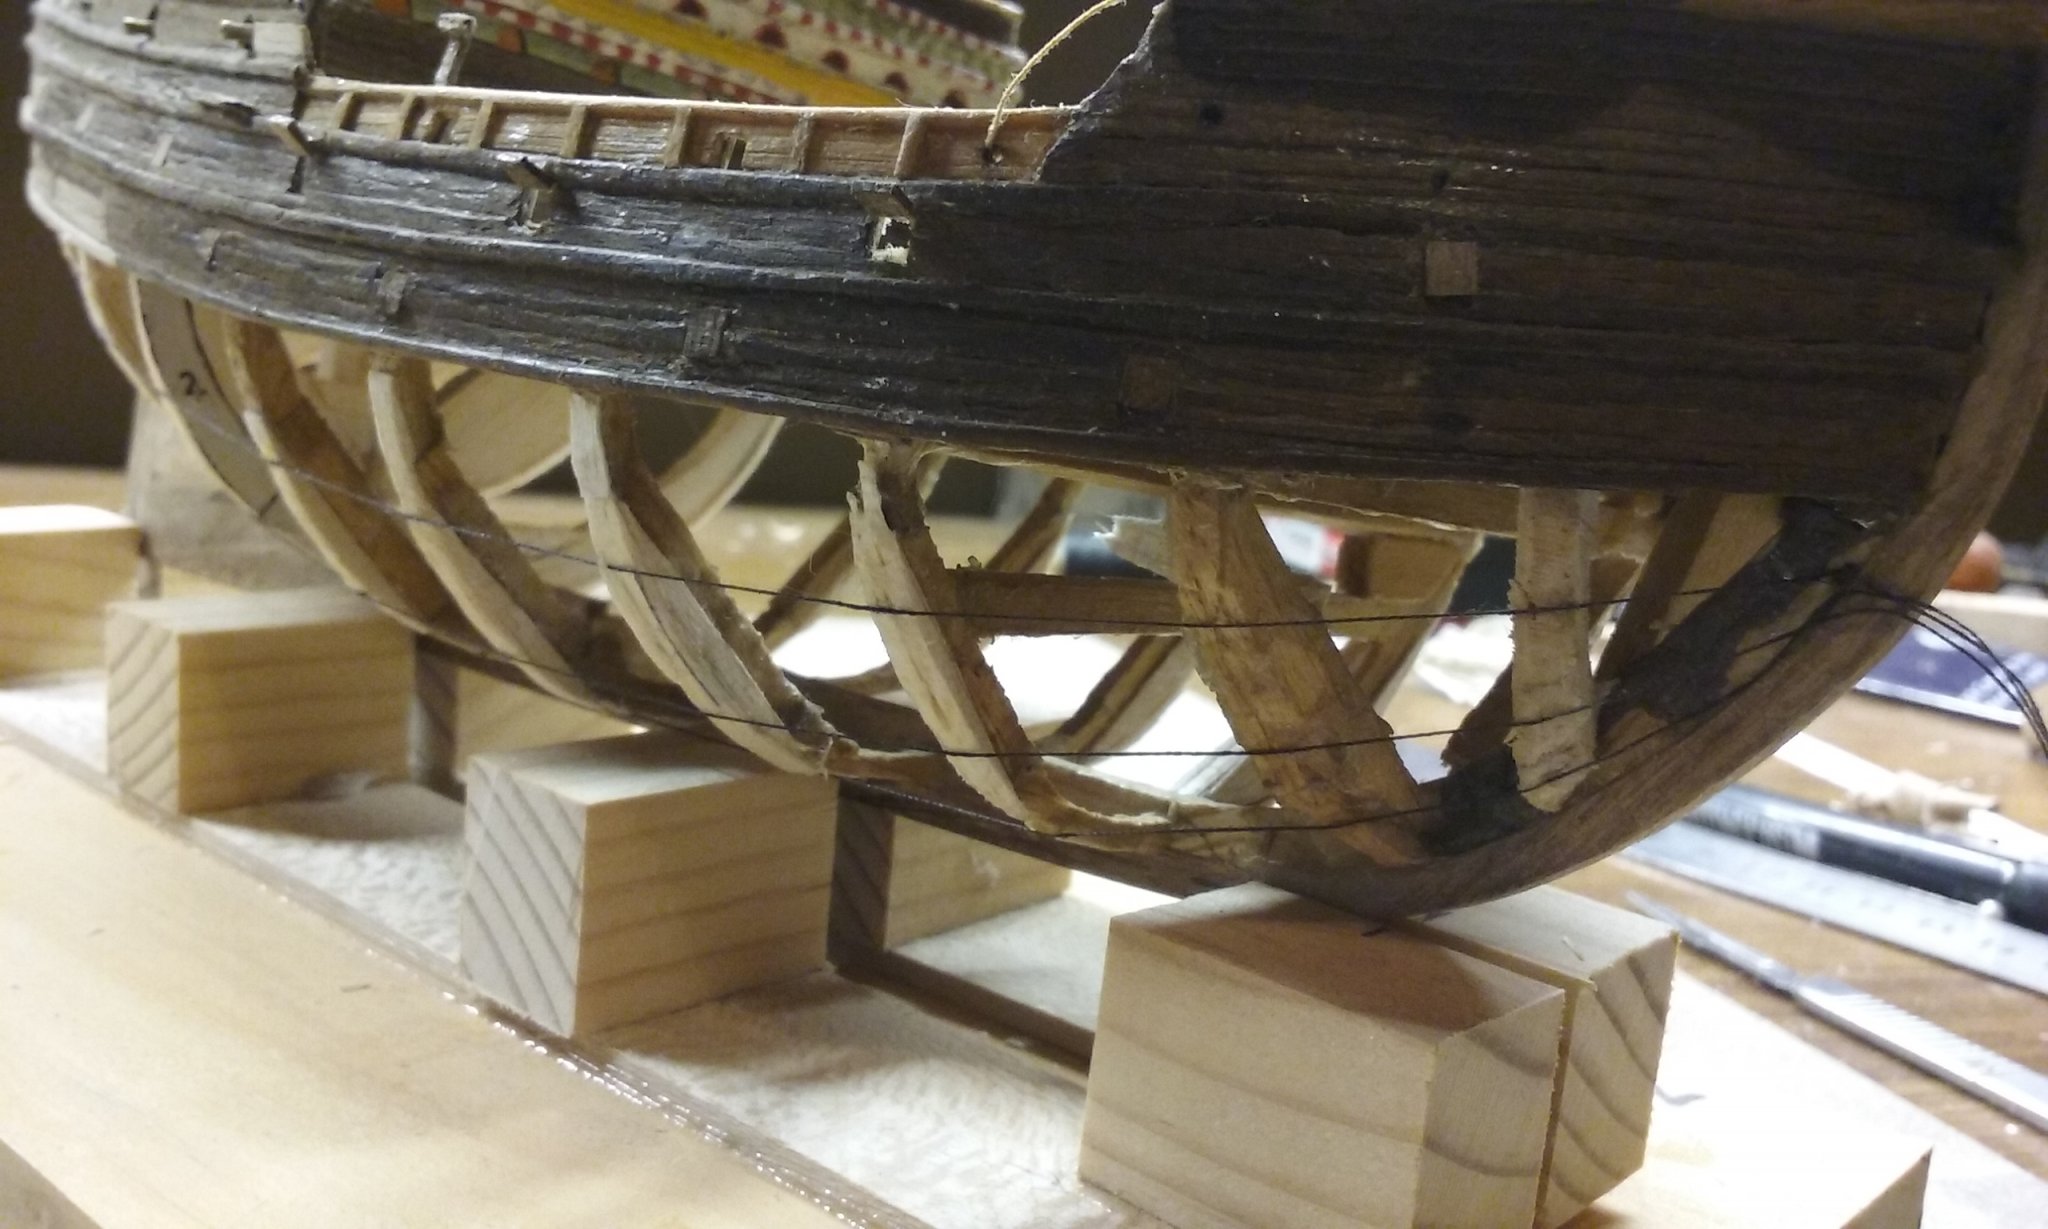
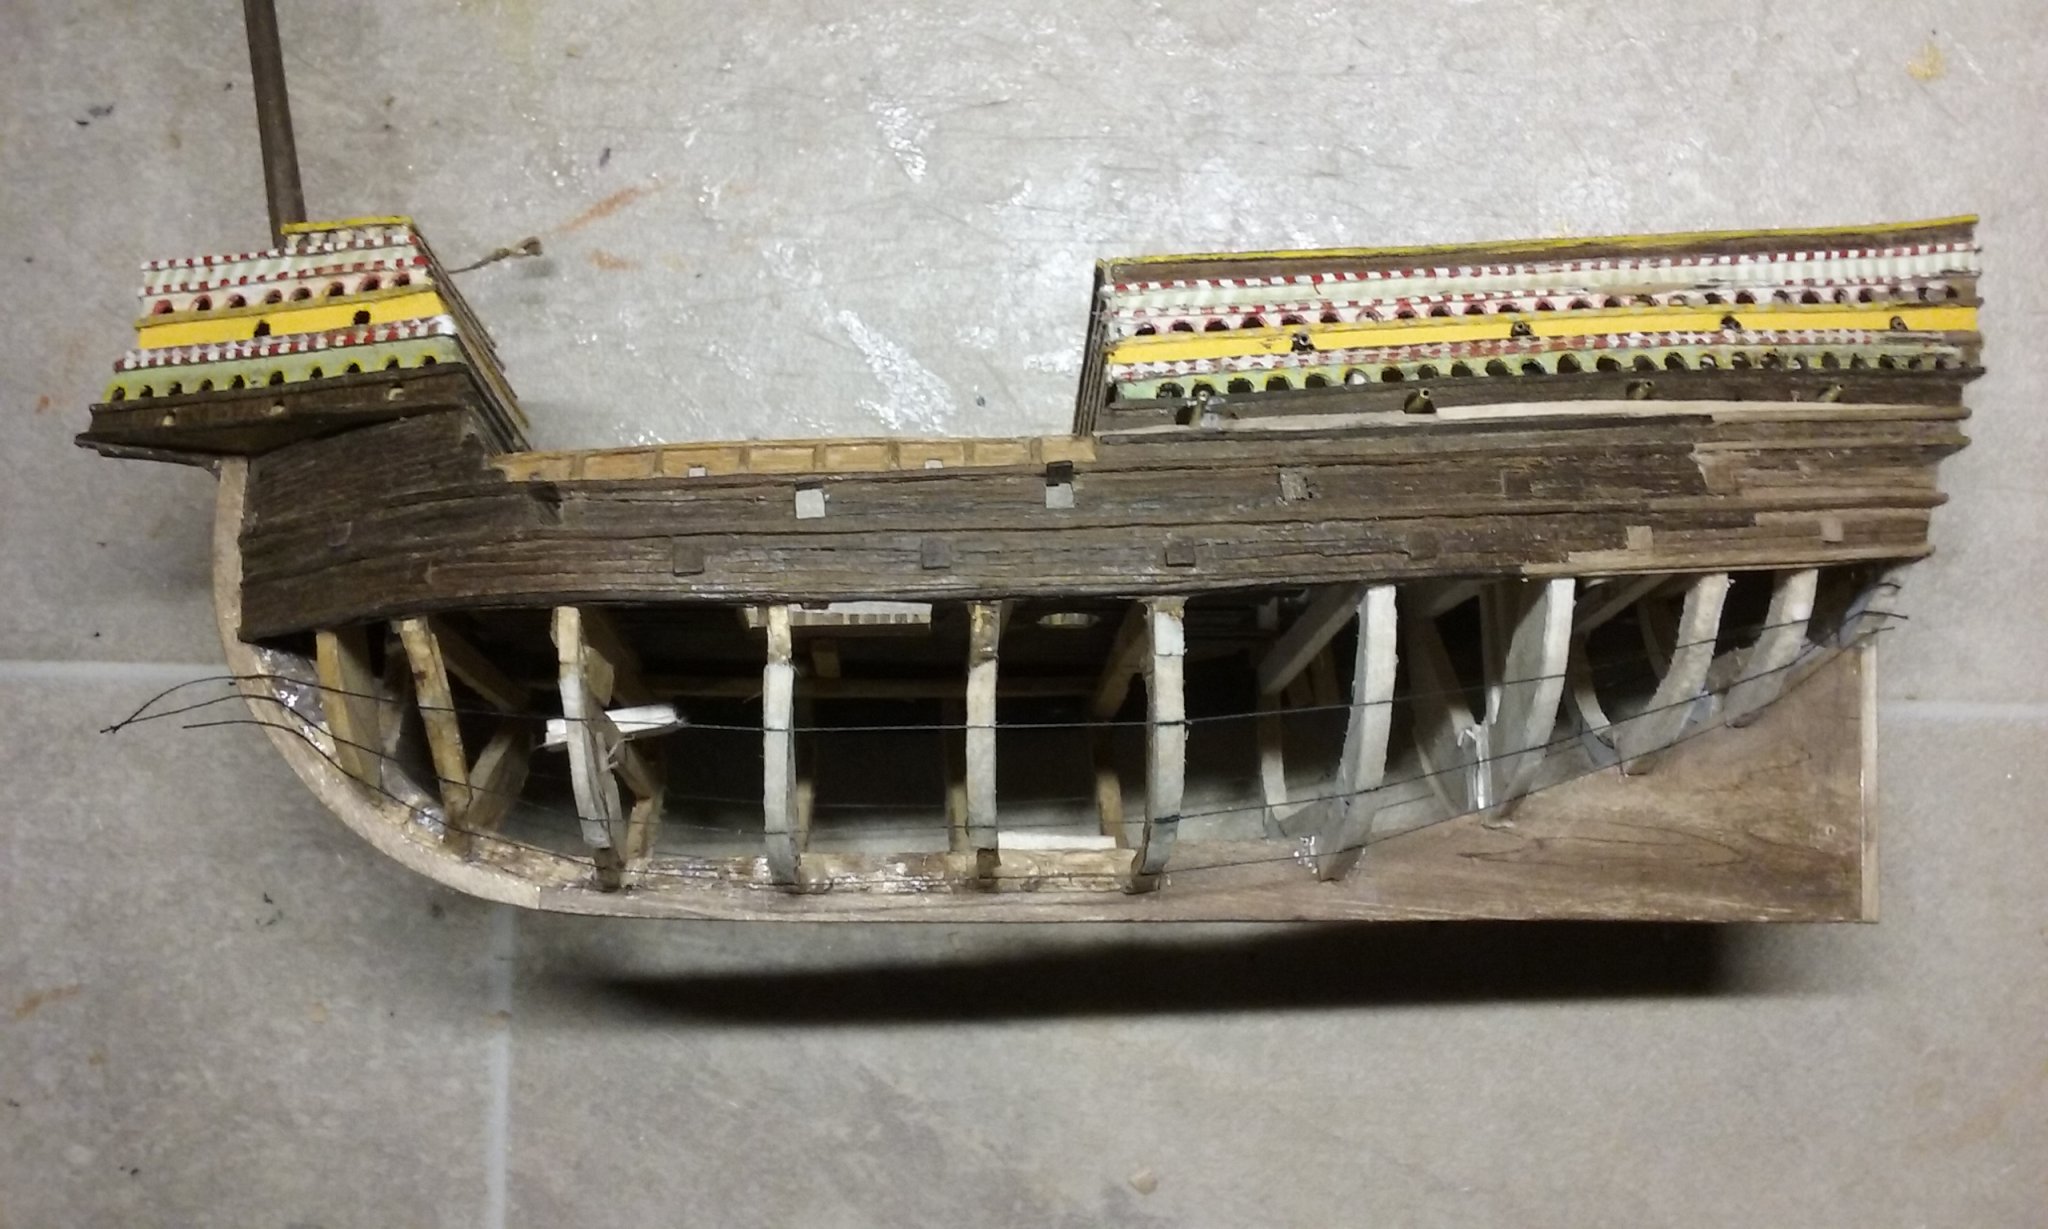
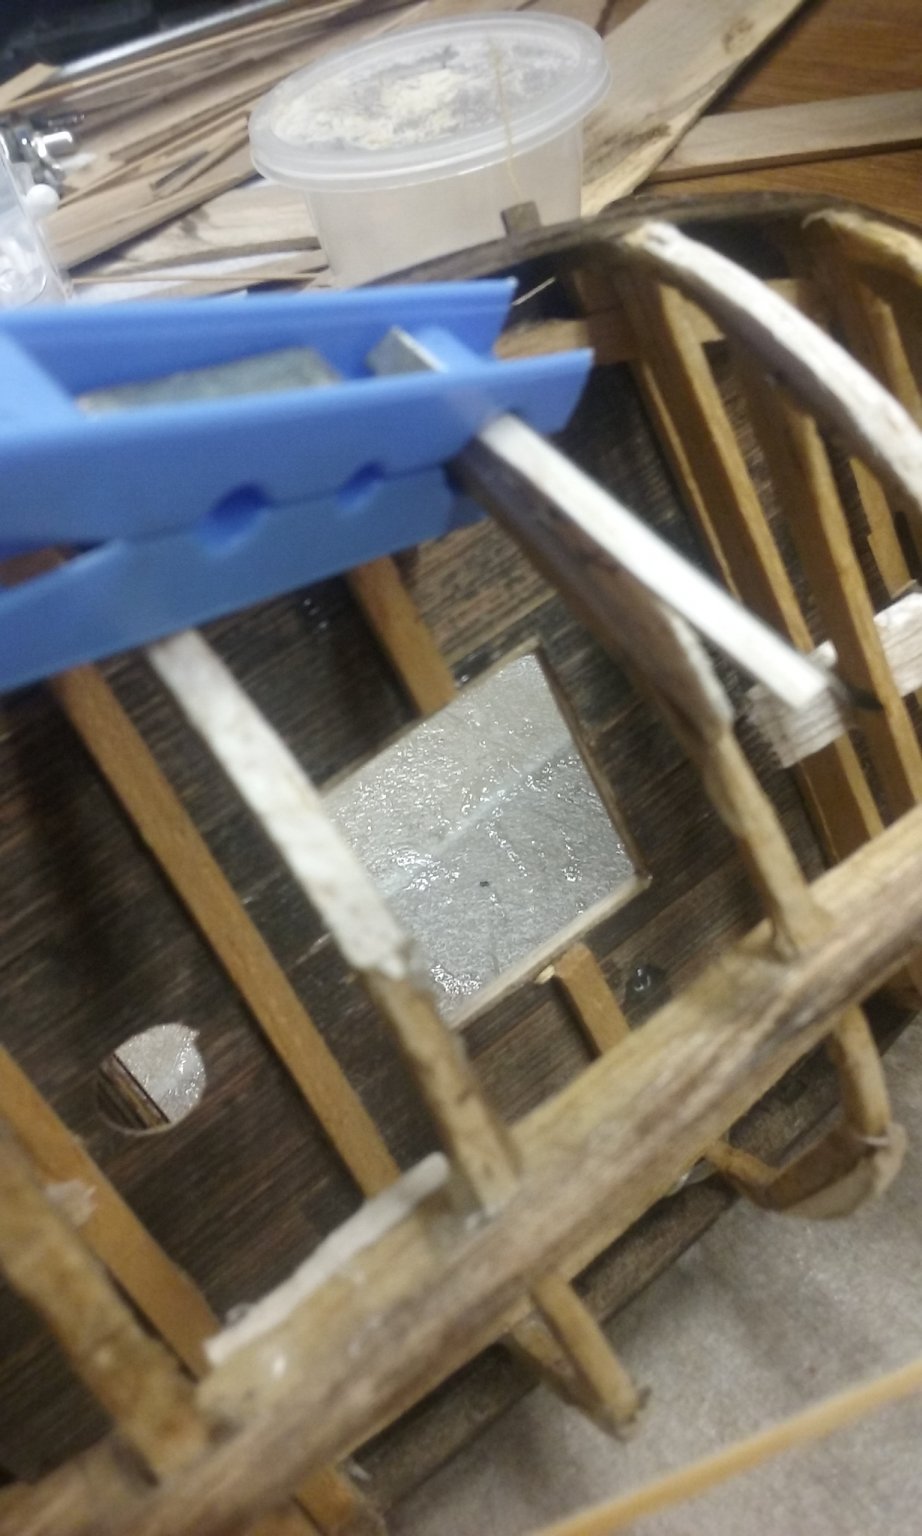
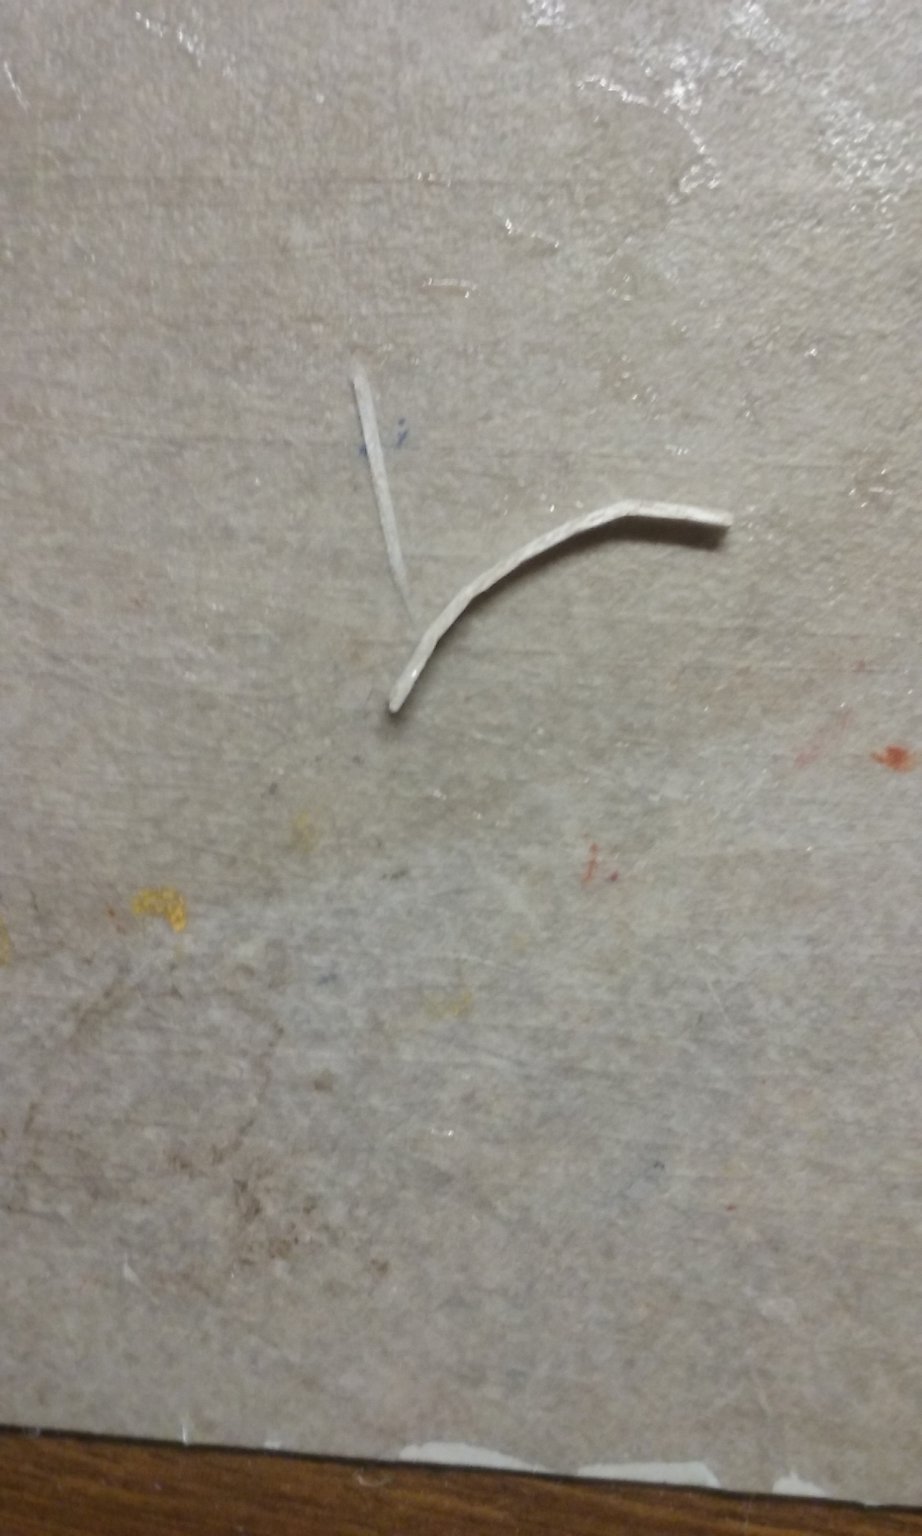
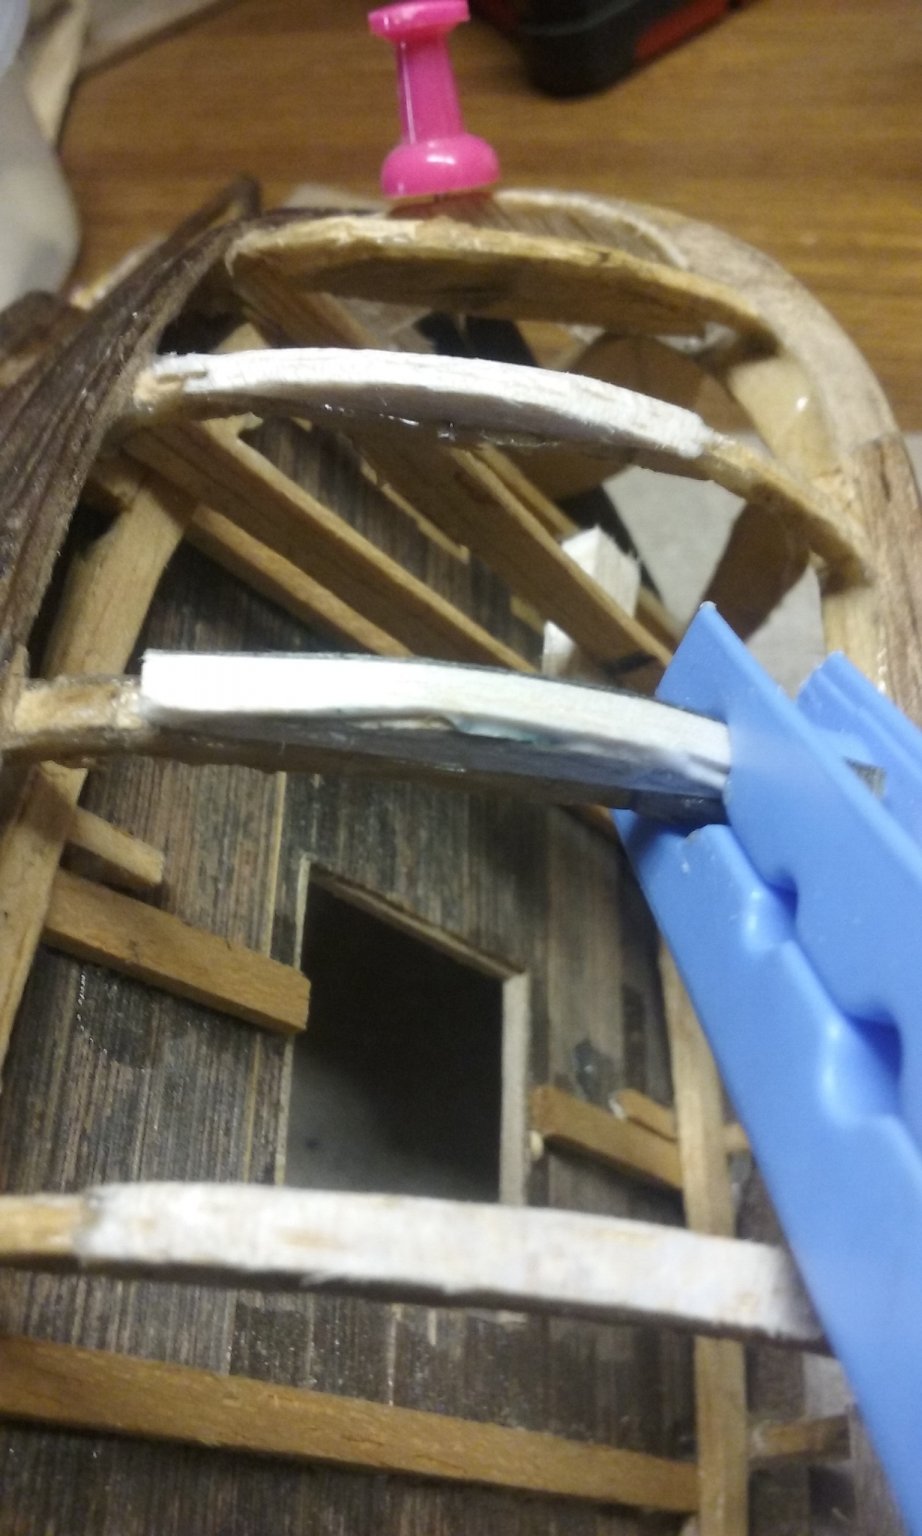
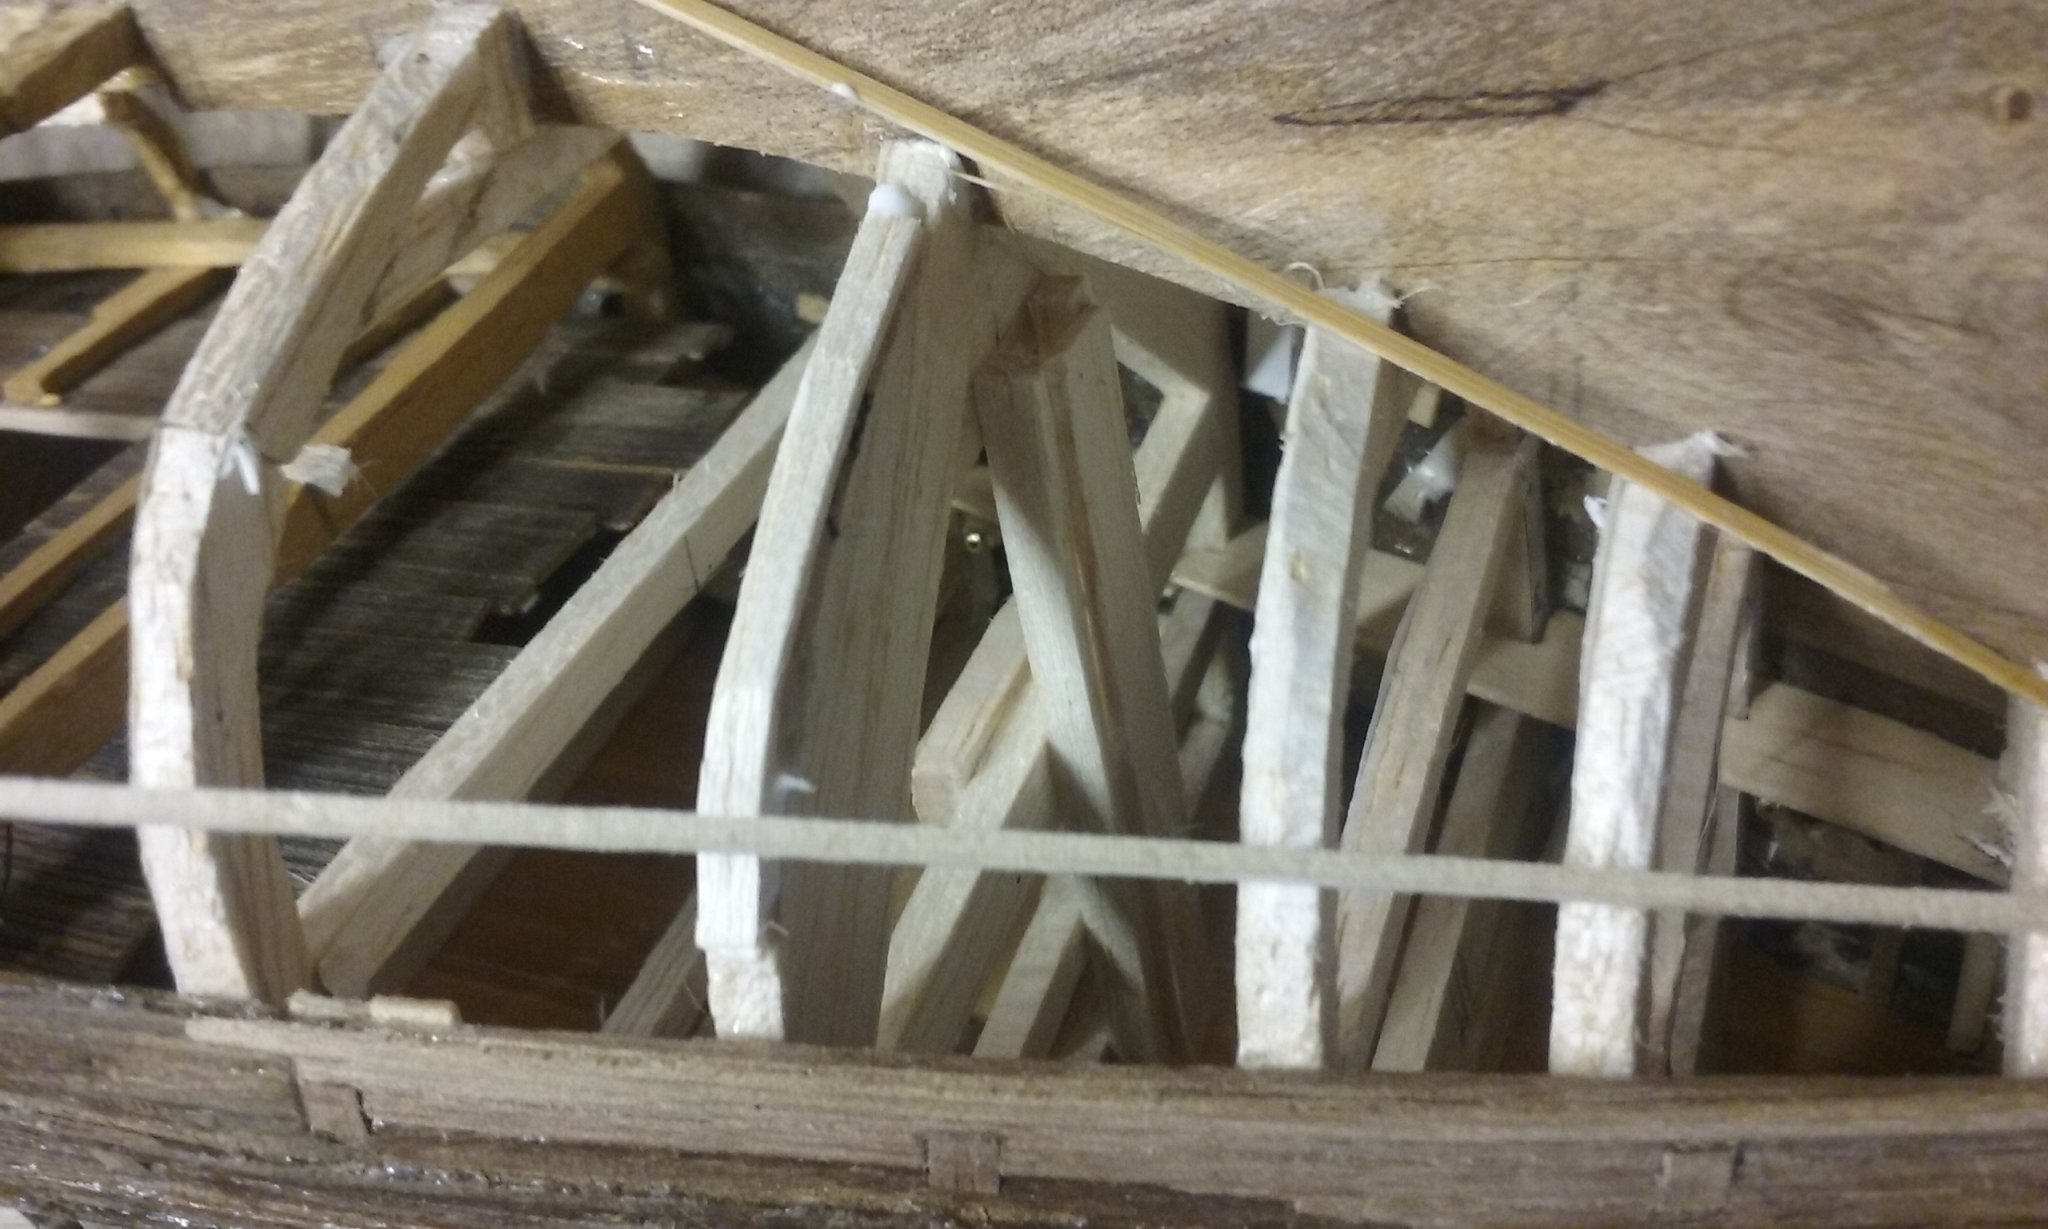
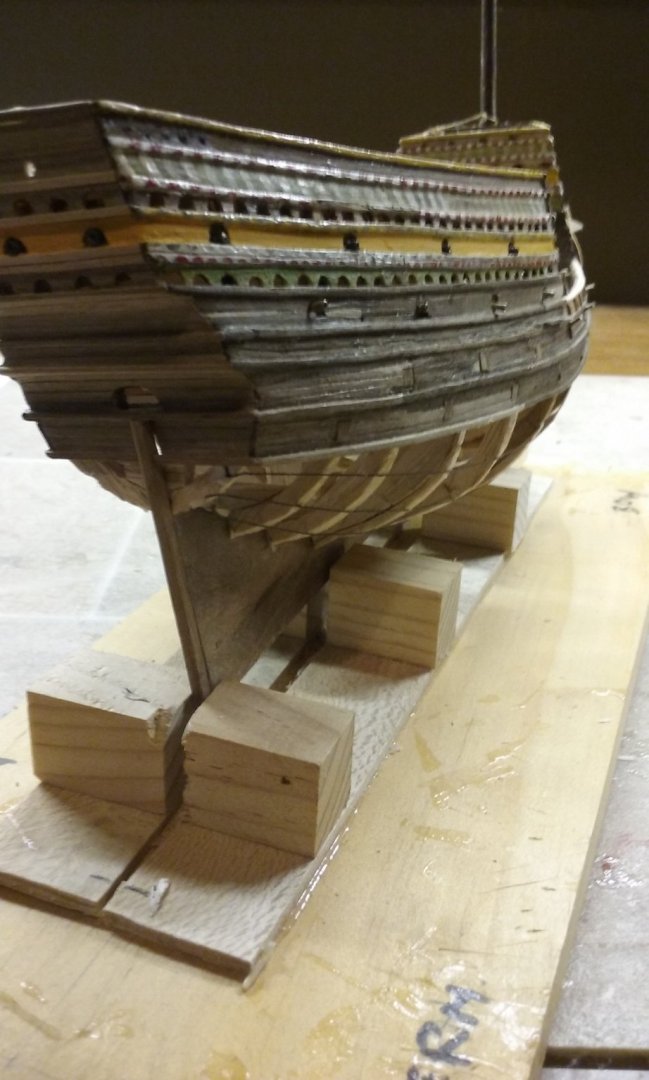
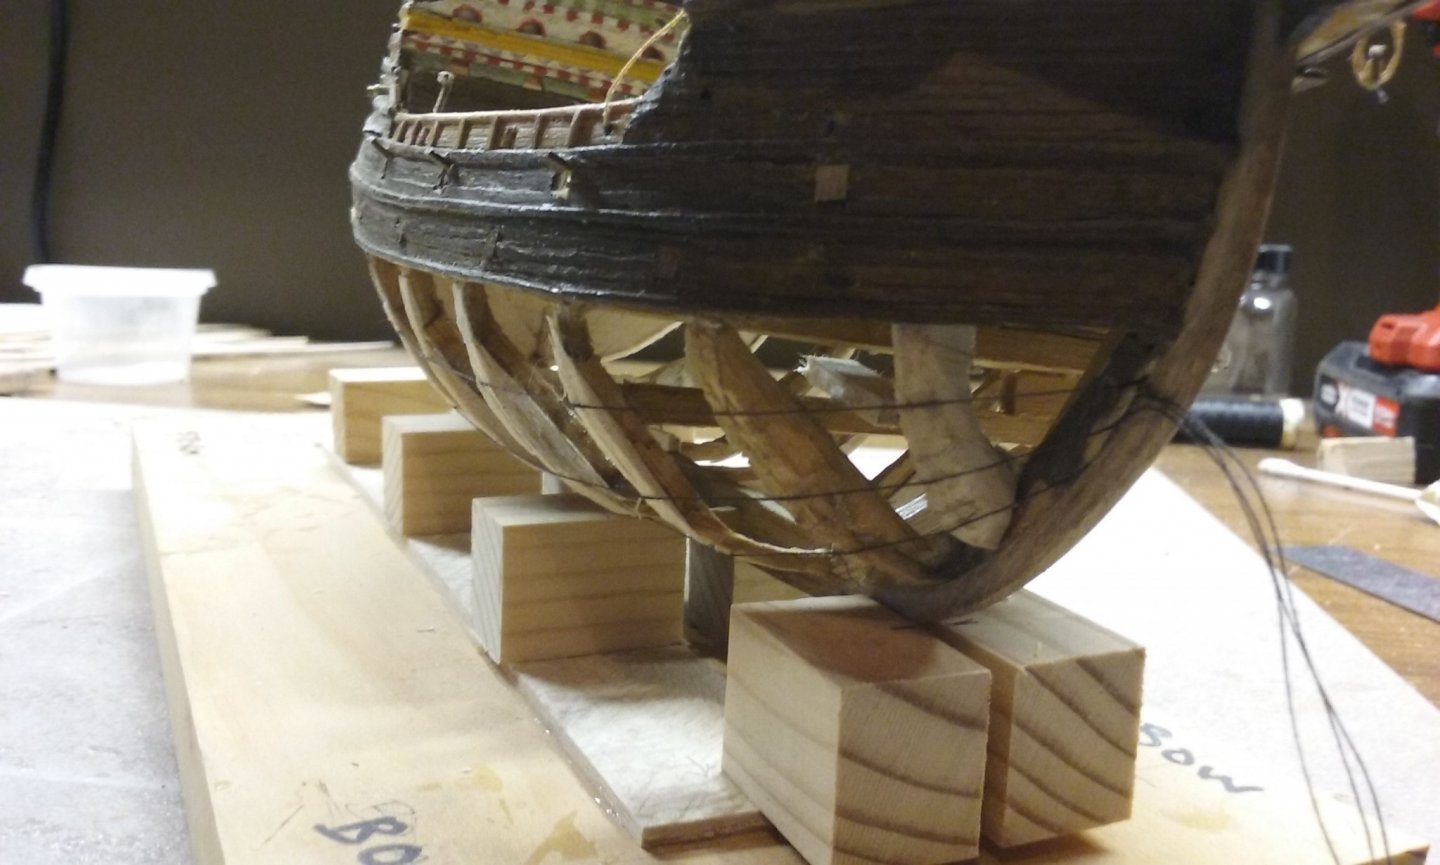
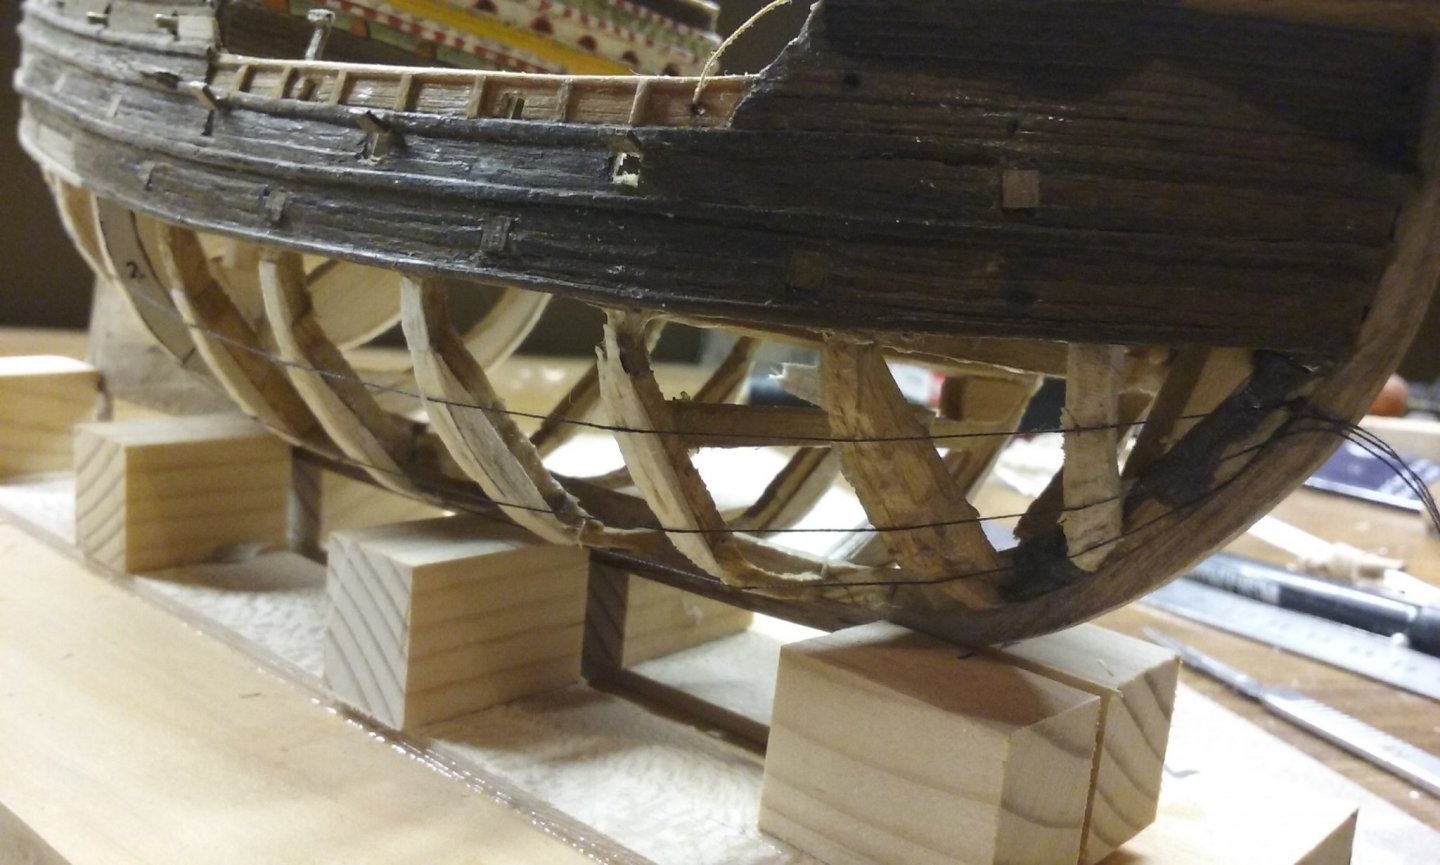
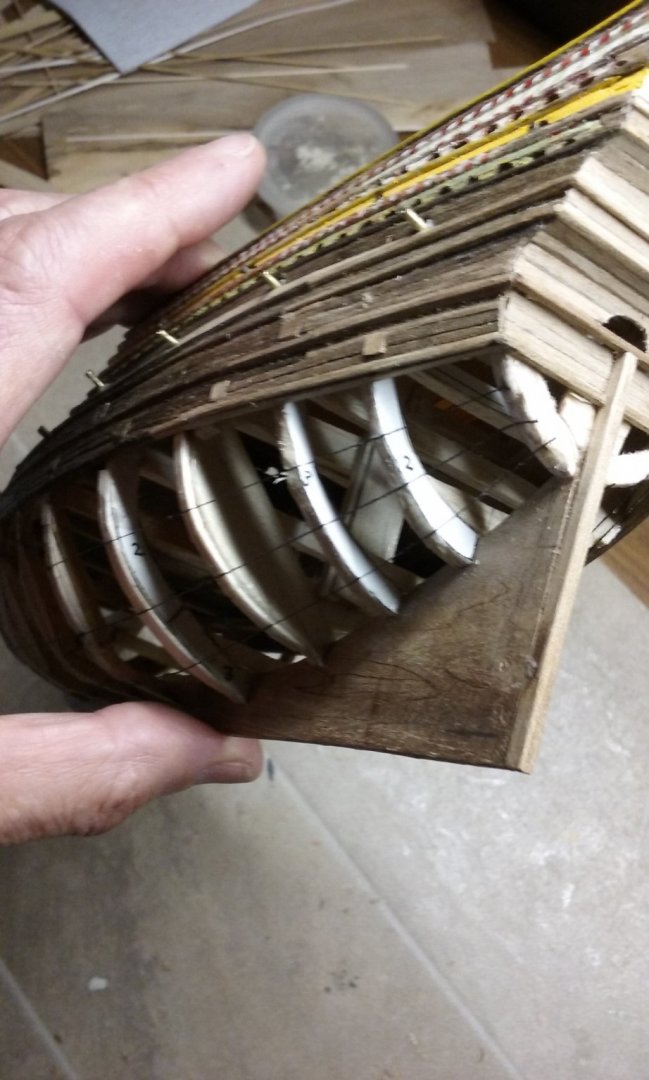
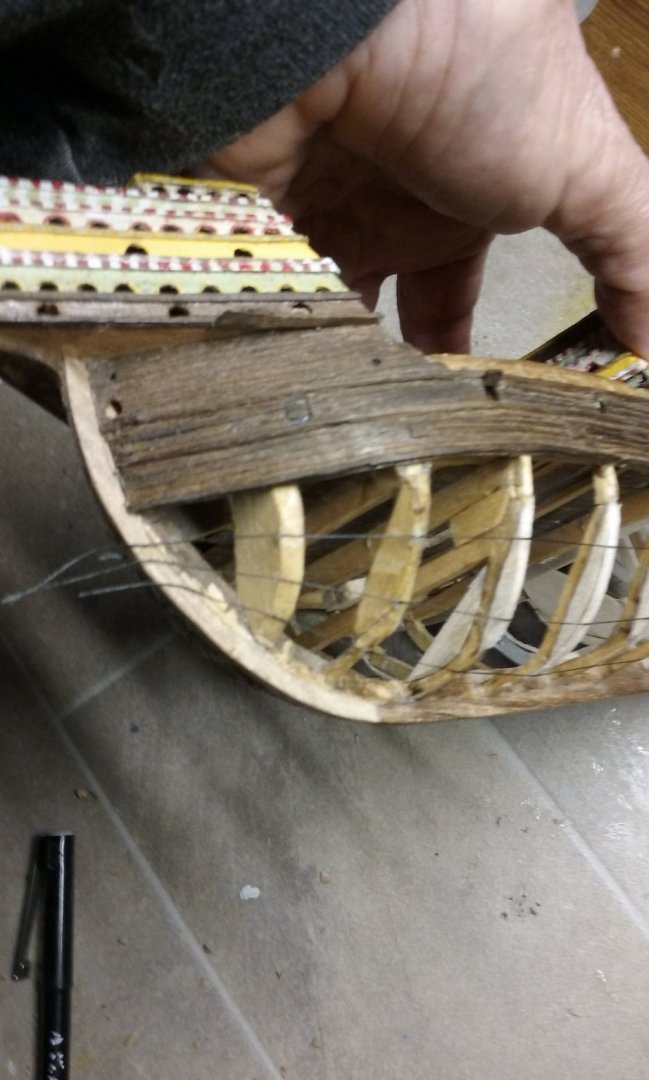
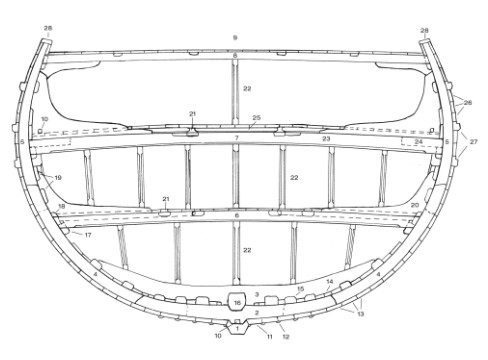
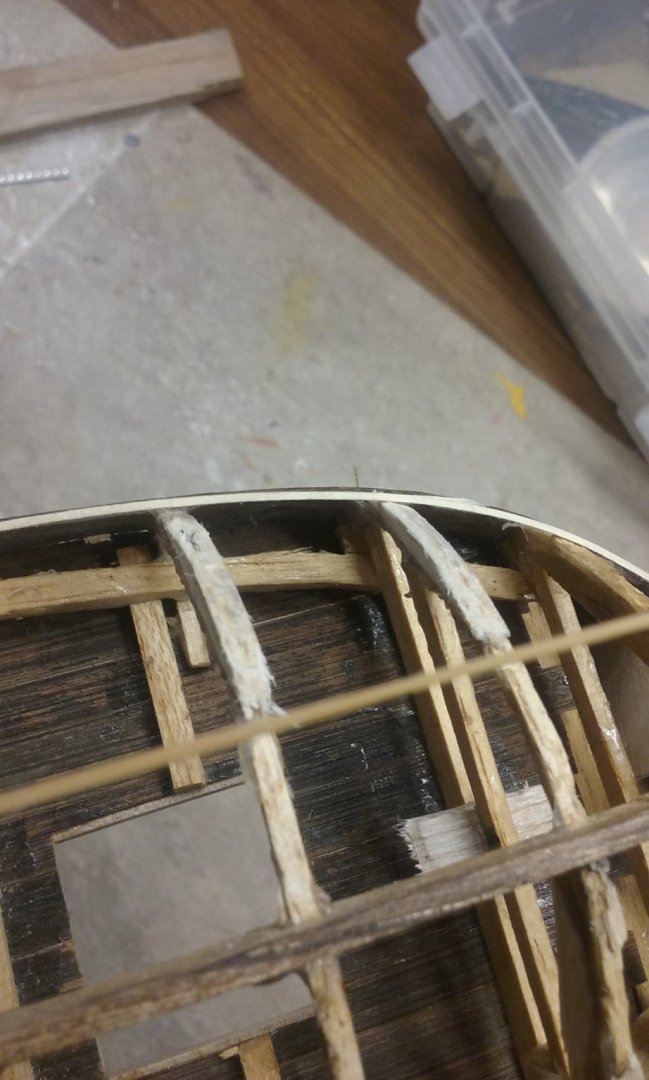
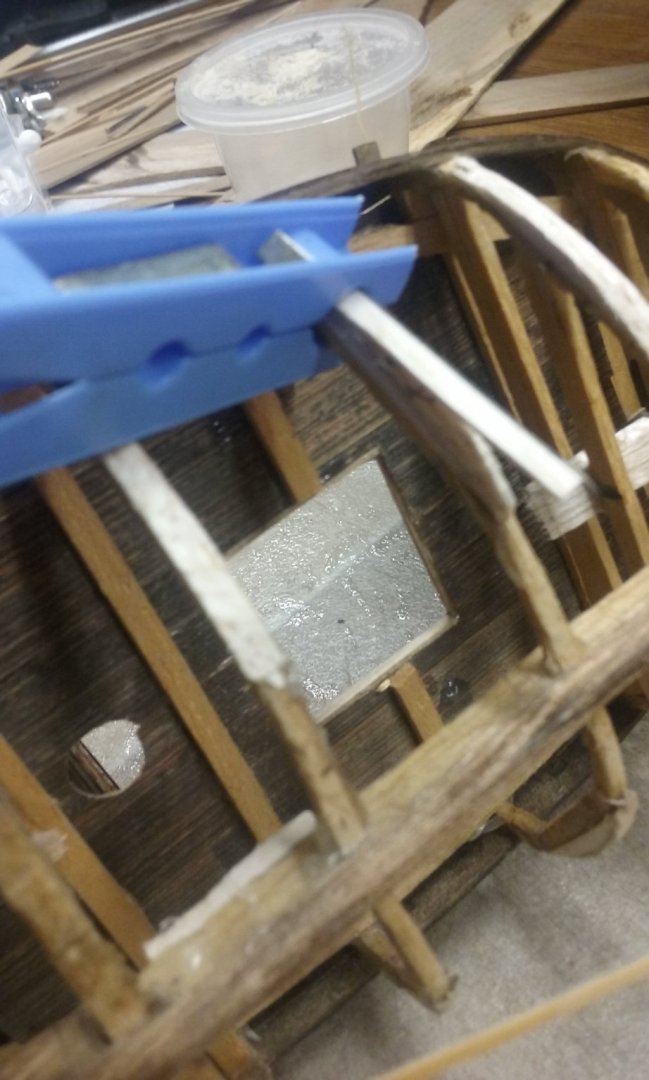
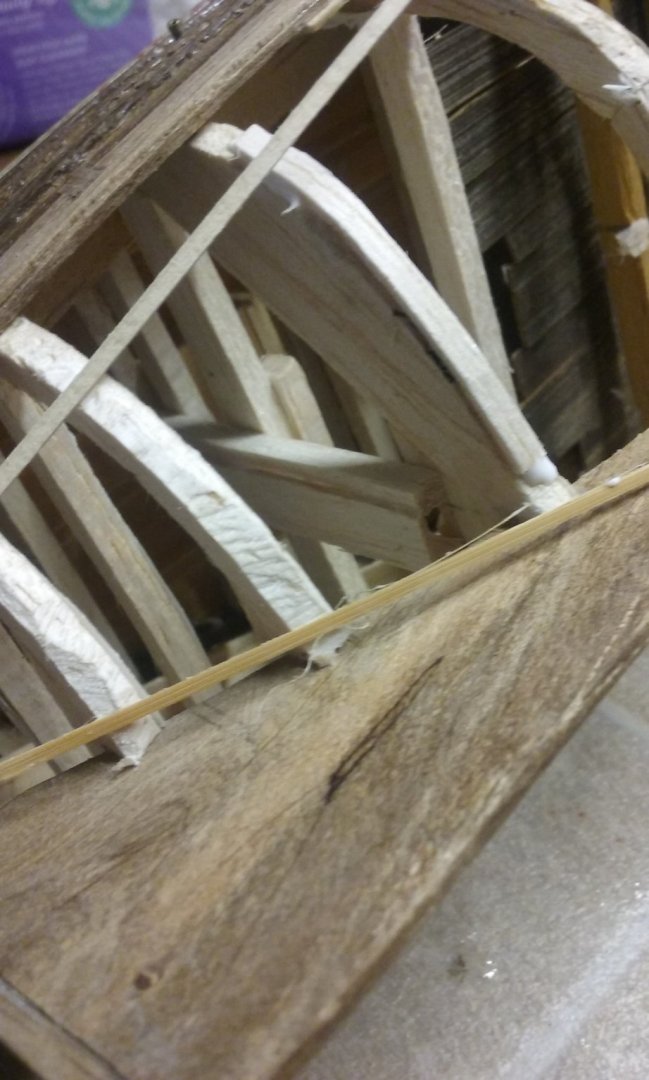
Working on the underwater hull so I can start planking. Because I was not only reconstructing the ship but changing the hull shape, there was a fair bit of trial and error involved. I used battens to get the curves as close as I could I've had to build up some of the frames (you can see open space between the frame and the top batten in the photo below). I cut strips of sheet balsa to make the additions, bending them to follow the curve, gluing them in place then trimming them to shape. I haven't been too careful with the glue because it'll all be hidden by the planking. and I had to shave others Almost ready to start planking. Steven


- 740 replies
-
- 11
-
-
- Tudor
- restoration
- (and 4 more)
-
Beautiful job on the oven, Patrick. Very realistic! Steven
- 756 replies
-
- 4
-
-
- galleon
- golden hind
- (and 2 more)
-
Unbelievable. I had no idea the model was so small. That just makes your achievement even more amazing. Such a sad fate, though for such a proud ship. To sail right across the world to be so ignominiously defeated; and the whole of that fleet was either destroyed in the battle, or later at Port Arthur, or captured. Was that the beginning of the end of Tsarist Russia as a world power? Steven
-
Well, I'm almost ready to start planking below the waterline on the Great Harry. I've only ever done one previous pair of garboard strakes, and they weren't all that successful. I've read the tutorials and looked at various builds but I just can't figure out - I know the garboard strake is different widths at different points along its run; but is it the same as the widths of the adjoining planks, (the only difference being that the garboard has one edge that is straight)? For example, if there are (say) 15 strakes between the keel and the other reference point you're measuring to, is the width of the garboard at any given frame 1/15th of the distance measured along that frame ? This has always been a puzzle to me , and I don't want to start planking before I'm sure I know what I'm doing. Thanks, Steven
-
What an amazing build! I'm always interested in weathering on models, but you've taken it to the nth degree! Superb! Steven
-
Beautiful work, Dick. A wonderful build and it's been a pleasure to follow it. Steven
- 263 replies
-
- 3
-
-
- nave tonda
- round ship
- (and 2 more)