HOLIDAY DONATION DRIVE - SUPPORT MSW - DO YOUR PART TO KEEP THIS GREAT FORUM GOING! (Only 27 donations so far out of 49,000 members - C'mon guys!)
×


Jason
-
Posts
202 -
Joined
-
Last visited
Content Type
Profiles
Forums
Gallery
Events
Everything posted by Jason
-

US Brig Syren by Gahm - Model Shipways
Jason replied to Gahm's topic in - Kit build logs for subjects built from 1801 - 1850
What a clean, well done job! Great work! Forgive me if I missed this in the log, but what sort of stock did you use for the hawse lining, and where did you get it? -
Thanks everybody! All of your builds are inspirations for me. Augie, I am looking forward to getting into the fun stuff. The copper press is built and ready for action. Dirk, I am glad to know I am not the only one with the deck height problem. Gerty, glad to have you following along. Hopefully it will not be another month until I get to work on the hull coppering!
-
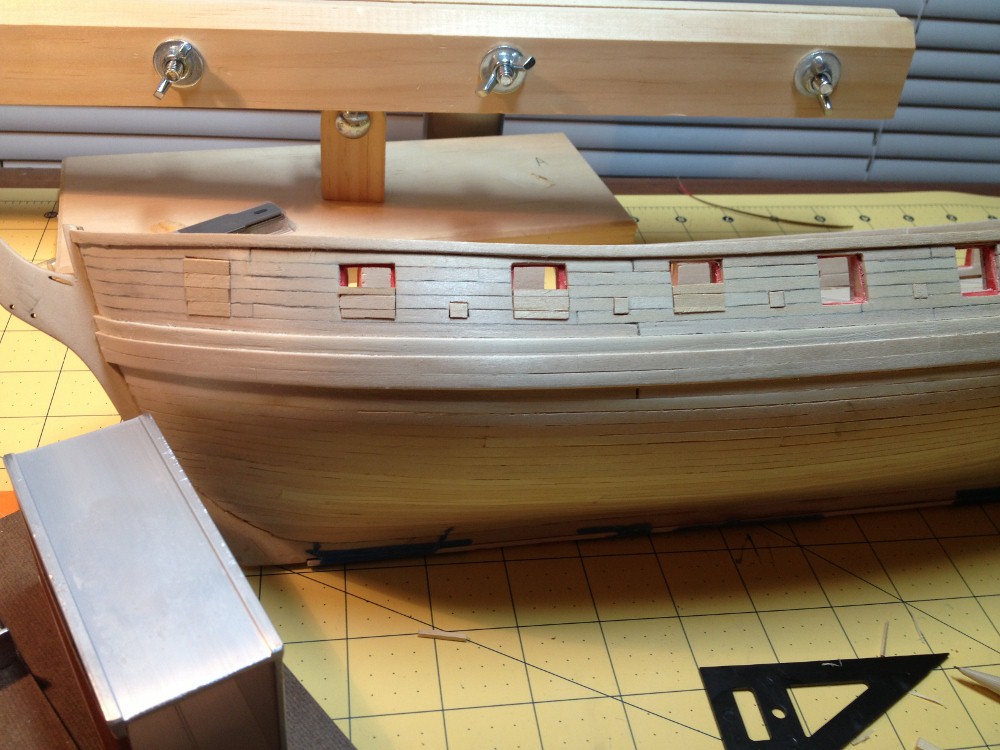
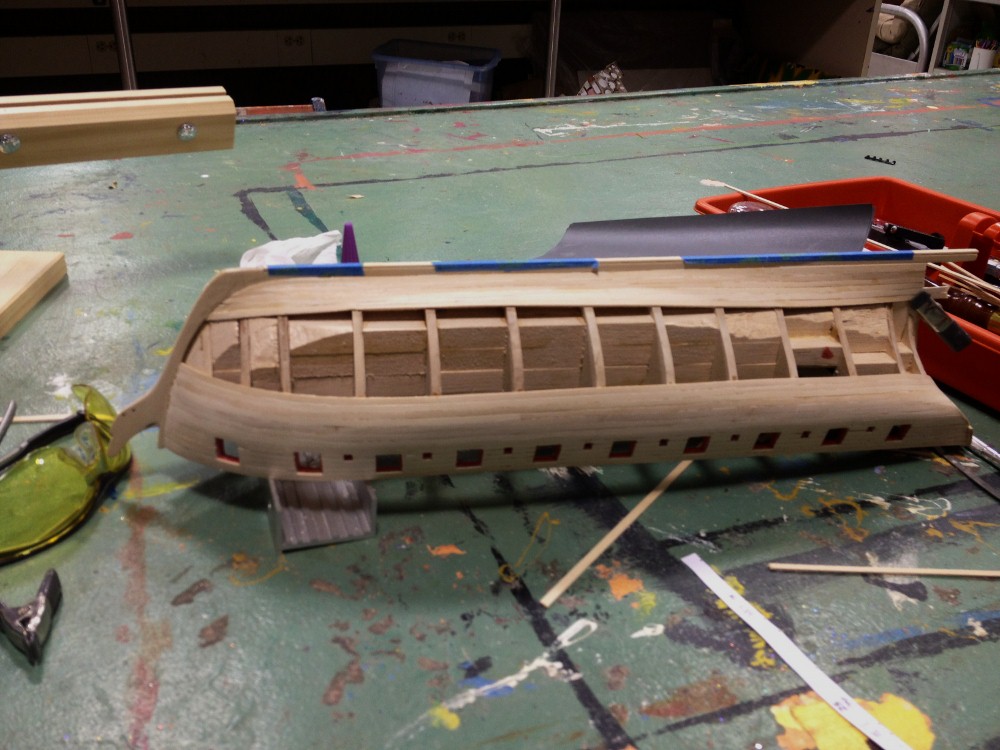
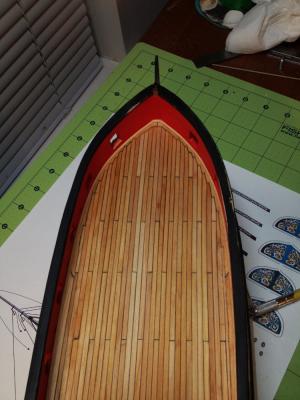
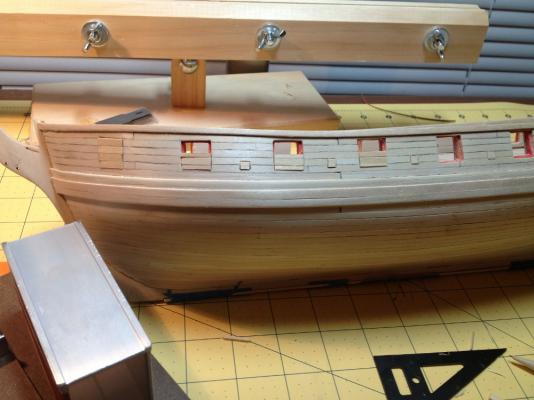
Deck Planking: This step brought a particular challenge stemming from a mistake made earlier in the build. I did not properly set the heights of the port sills above the deck during the framing layout. Being that I did not catch it until I was ready to plank the deck, it took a little while to figure out how I wanted to deal with the problem. There was not enough room between the finished deck and the bottom of the port sills to install both the waterway and the carronade chocks. I didn't need a lot of room, so I chose to make the deck planking thinner. Instead of using the kit supplied 1/16" thick planking strips, I went to the local hobby shop to acquire a set of 1/32" strips. Unfortunately my only choice was basswood, but since the rest of the model is basswood that is okay. Next model I will try something different. The thinner planks gave me most of the room I needed, a few carronade chocks will have to be made to fit into the waterway. I was in real danger of tearing the deck out and starting over, being that I am not totally happy with the job that I did. But I will accept it, and practice joggling into the margin plank before my next build.
-
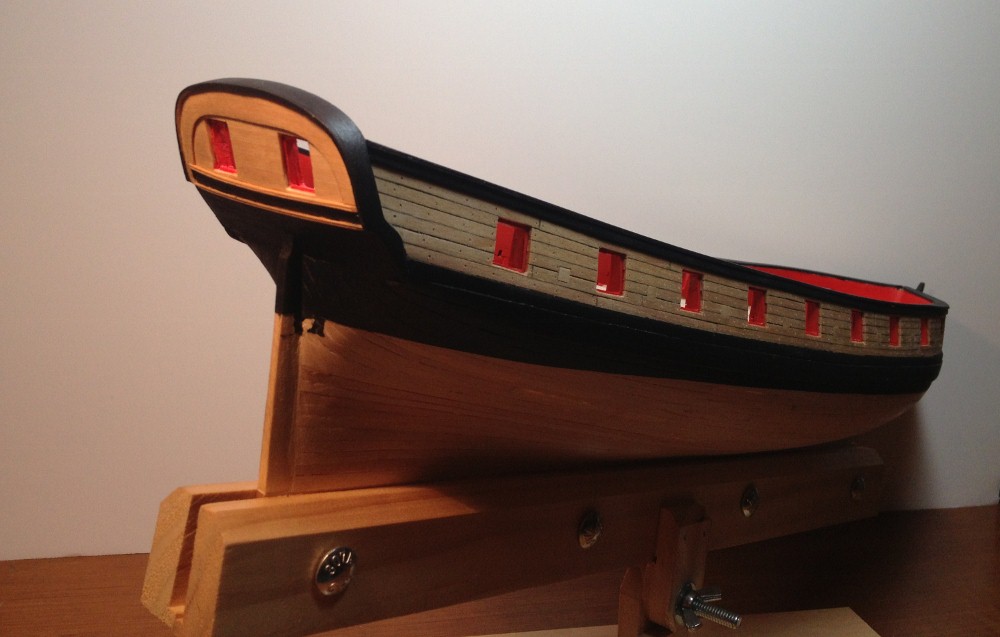
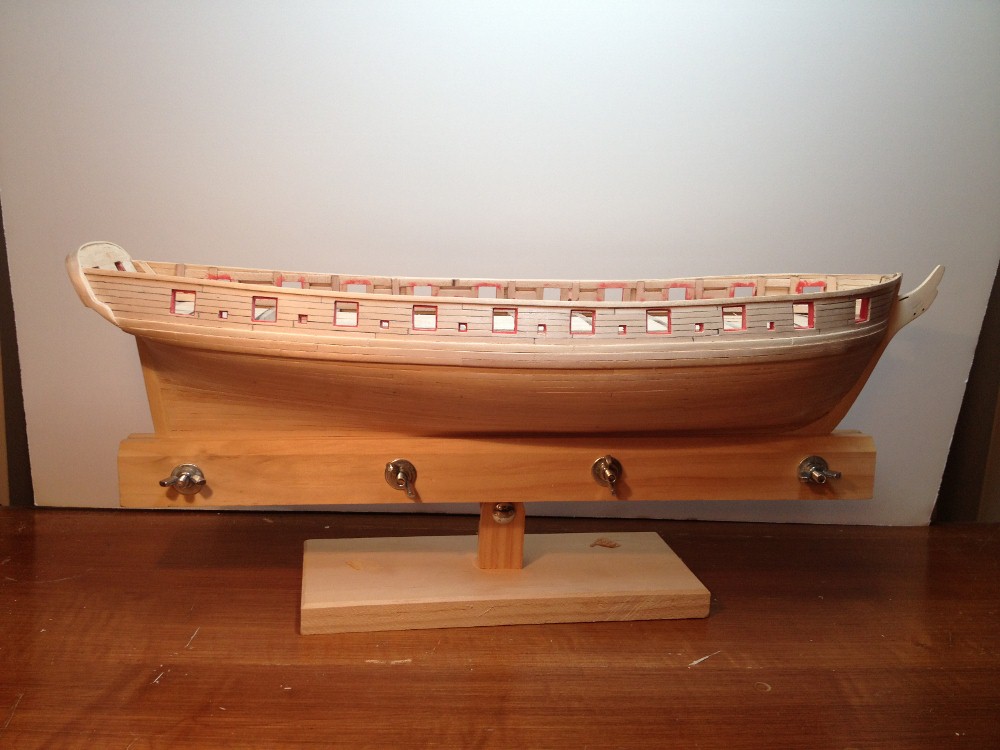
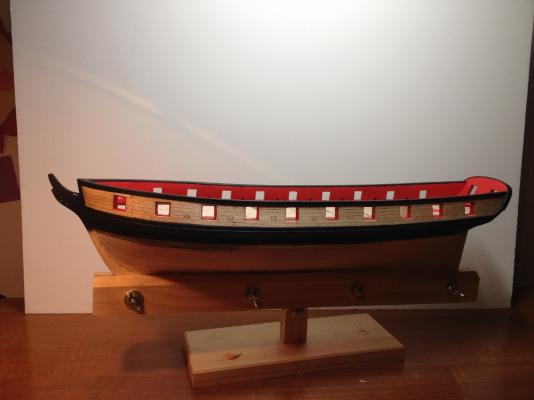
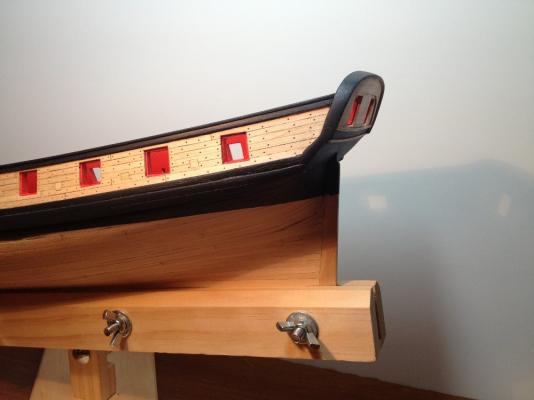
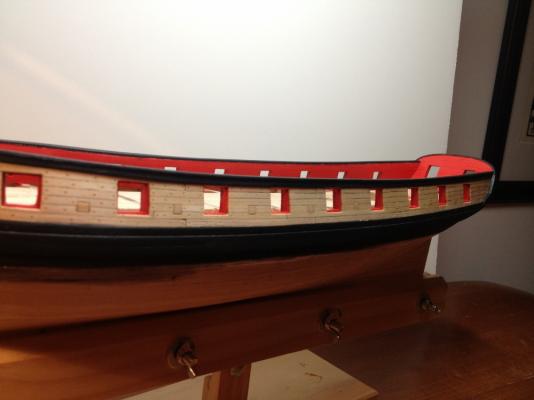
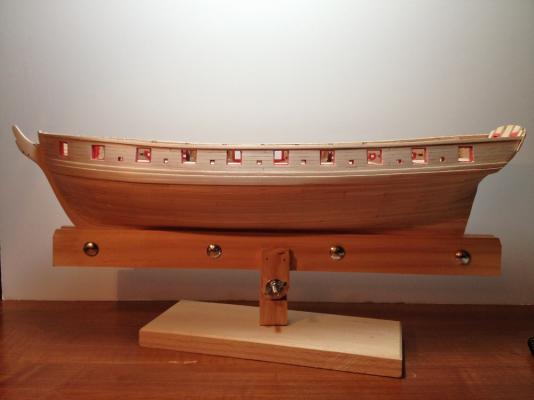
Cap Rail and Hull Finish I have been able to put a little more time into the Syren this week. Finishing the hull with the cap rail, and paint. I have let the treenail holes blank up until this point, and I am considering leaving them that way. I like the effect that they give in contrast to the planking they inhabit. I know on the real thing that would not really be noticeable, except to an inspecting eye and at close range, but for an informative piece showing landlubbers and nautical neophytes how a ship is constructed, I think it fits the bill. I should note here, that I have not stained or painted the planking in between the sheer and the wales, it has been oiled using white mineral oil. I have been using this in other woodworking projects and for model stands for about a year now. How it holds up beyond that I do not know, but for the items I have used it on so far I am pleased with the results.
-
Thank you ZyXuz. I am happy with the effect that the Treenails give to the hull, now on to some paint...
-
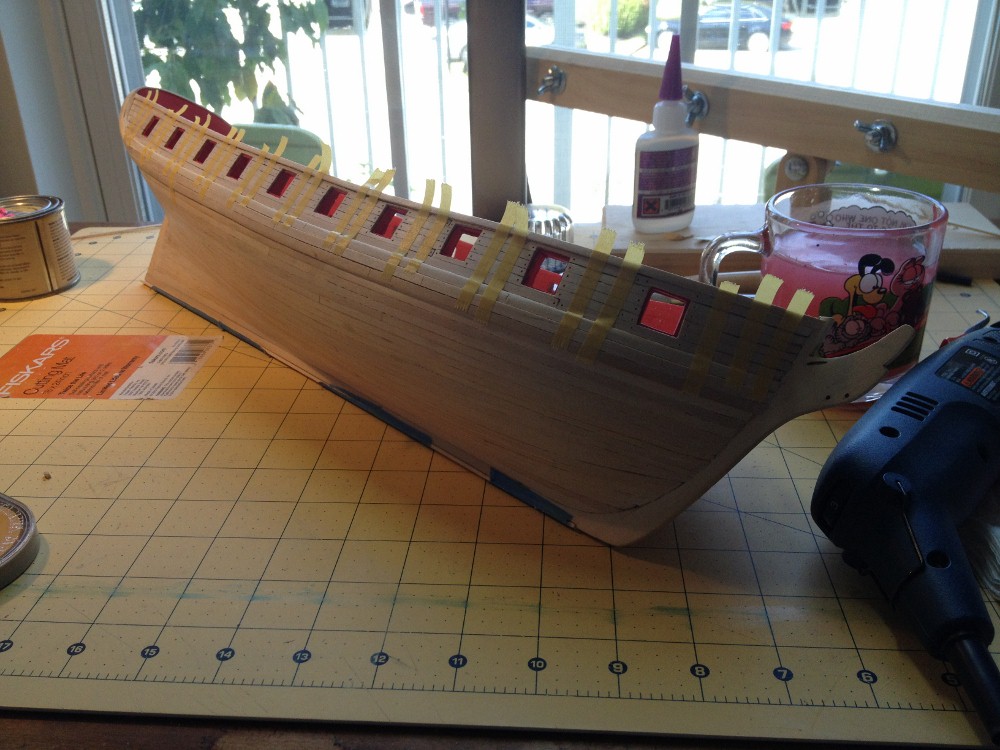
Work has really been heavy lately, so I have not been able to get much build time in. However, over the last week, I have finally been able to work on the Syren. I decided to produce the port lids at this stage, because I did not want to have to sand the ports to the curve of the hull after the hull was finished. There are a couple of things that I changed on the ports. First, I decided to make them in two layers. I copied this out of Goodwin's The Construction and Fitting of the English Man of War: 1650 - 1850. To do this, I made the first layer as described gluing the pieces together. After sanding them true to the outer curve of the hull, I traced the port frame on the inside of each lid. A 1/32" thick planking was added running perpendicular to the axis of the outer planking. Unfortunately, I do not have any pictures at the moment, but I will put them up when I finish the ports. After labeling and mapping the port lids to ensure that each one goes back to the port it was made for, they were placed aside for finishing and installing at a later date. I have also drilled the holes for the treenails, which up to this point I have left unfilled. I kind of like the contrast they offer in that state. As I get further into finishing the hull, we will see if they stay that way.

-
Thank you for the compliments Augie, David, John, and Thomas! Heavy workload has prevented me from performing the important scientific work on the angle of soaking . I have however, finally been able to get some build time in, which I will post on next...
-
Hello Richard, Great work on your Syren so far. The precision of the stern framing also came back to haunt me later in the process, though it is nothing a good sanding won't address. I also had the same problem with the dirty look of the planking where I used pencil to simulate the caulking. I tried sanding it, but that just seemed to drive it deeper into the wood. I think being that the basswood is very porous, the sanding process drives the graphite deep into the pores. How I got around it, was to scrape the surface with a #18 exacto blade, the straight kind, until the wood looked clean. I believe Chuck describes this process as well in his HMS Winchelsea build log. As far as the bending of the planks, I have to agree with Alistair. When I start to work on the ship, I will put whatever planking stock I need into a large travel mug of water before I start. When I need a plank with a curve in it, I take one from the water and clamp it around the lid of a mason jar for about 5 minutes. After that I find that they are very supple, and can be worked to the desired curve easily without any additional clamps. I only wipe off the excess water, then glue to the bulkheads using CA. The point that terminates at the most severe part of the bend is glued first, then the rest of the plank is ran down the bulkheads a couple at a time. I should note that I only wet the portion of the plank that is to take the most severe curves, only the first 6 inches or so. Therefore on planks that ran into the transom area, they were pieced with at least two sections, and meet in the middle of the ship somewhere. As far as spiling goes, since the bottom of the Syren is coppered, it is a great place to practice different techniques. As others have stated, you need to find the process that works the best for you. So the above is just my two cents. Great job, and good luck on your Syren build! --Jason
-
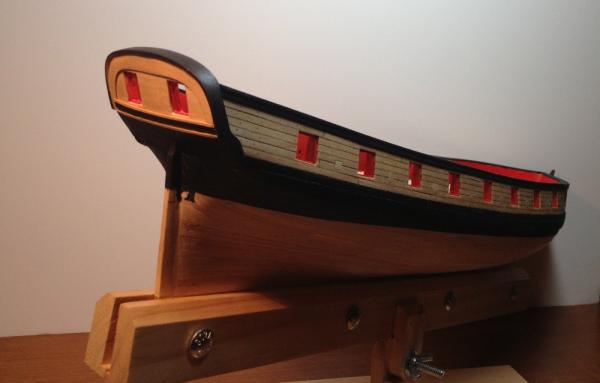
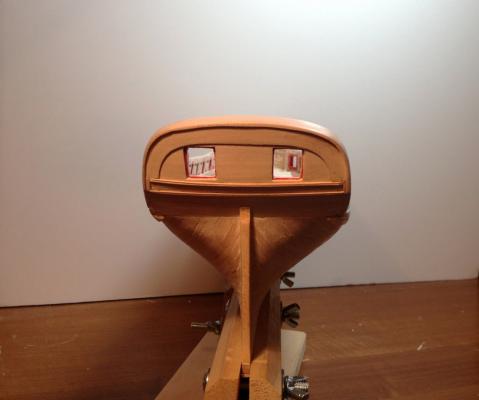
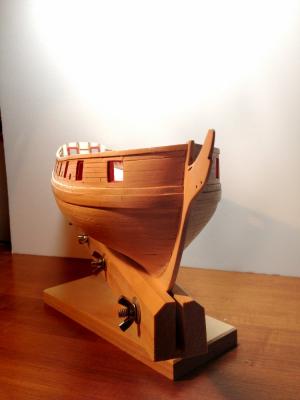
Build Update: Completion of the Transom and Fashion Pieces. This segment of my build could have been appropriately titled, "the slippery slope". In this stage I have redone, or touched up many items both on the transom, and in other areas, to the point that I had to stop. Telling myself to take a stand, and let this work be a statement of current ability, and not a quixotic quest for perfection. Ultimately, I am pleased with how the transom came out, though there is an exaggerated curve to the port side of the transom that apparently is in the fairing of the framing, that has translated to the exterior, making it difficult to finish it in a way that looks symmetrical. A note on the transom cap rail: As mentioned above in this log, there was some concern over the material used to construct the curve of the transom cap. I had intentions of purchasing the Beech strip mentioned, however I was spurred on by earlier successes in producing compound curves with the supplied material. I was able to produce the cap in one piece, with one try, using the supplied 1/4" wide basswood strip. I let the strip soak first for about 3 and a half hours in the vertical position. I really do not know if this produces better results in reality, than soaking horizontally in a bath. However, I have found the method to "seems" to produce more supple planks. Perhaps this is just an illusion created by the natural variation of the material and the order in which I selected it? I have observed that when the strips soak vertically, capillary action wicks the water up the strip to a height several inches higher than where the strip enters the water. Any body have any thoughts on this? Also, as you will see from the photos, I added an additional strip to the after surface of the cap. I did this because, when sanding the cap, I accidentally made it flush in some areas with the transom. Wanting some overhang for aesthetic purposes, I added the strip and re-shaped to give the present look. I additionally, added my own interpretation to the fashion pieces.

-
B.E., This is one of my favorite builds that I have found so far on MSW. The information and sensations, that your display conveys to the viewer about the age of sail is superb! I have never waterlined a model before, though I am planning on it for a few dreadnoughts in my queue, but it never occurred to me to do it for a sail powered vessel. Congratulations on a very successful build!
- 126 replies
-
- 1
-

-
- le superbe
- heller
- (and 2 more)
-
Thank you, Thomas, David, and Blue Ensign! I appreciate the comments!
-
Kester, What a great build of an interesting subject. The Sherbourne is on my short list of kits to purchase, and your example here is definitely an inspiration as to what is possible. As others have already said, the clinker construction and white hull are very striking. Keep up the great work!
-
Thank you Chuck, Augie, and ZyXuz! I am excited to move forward with this build, but work is being very demanding at the moment so we will see.
-
What a great light hearted story and build! I enjoyed it immensely.
- 33 replies
-
- 2
-
-
- trinkstein
- frigate
- (and 2 more)
-
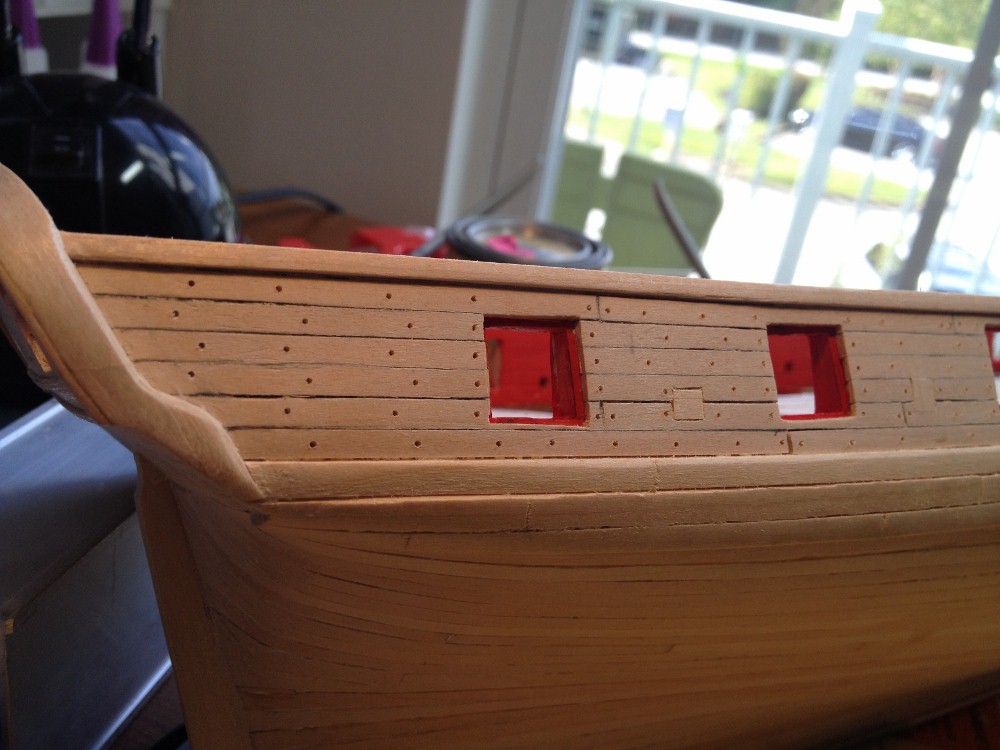
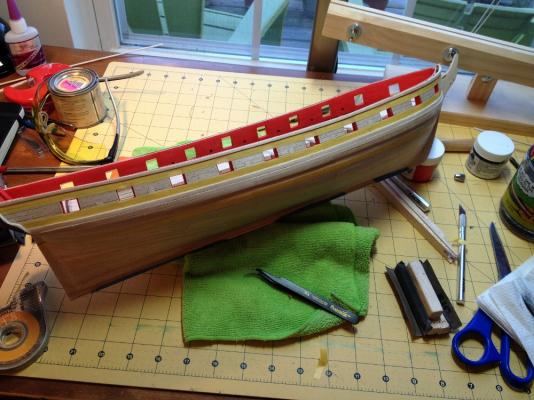
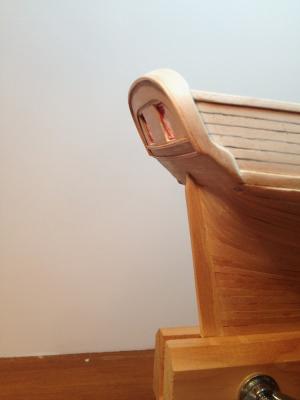
Nice clean cap rail, especially where it meets the stem.
-
Thanks Dirk! It was all the great help I had sanding...
-
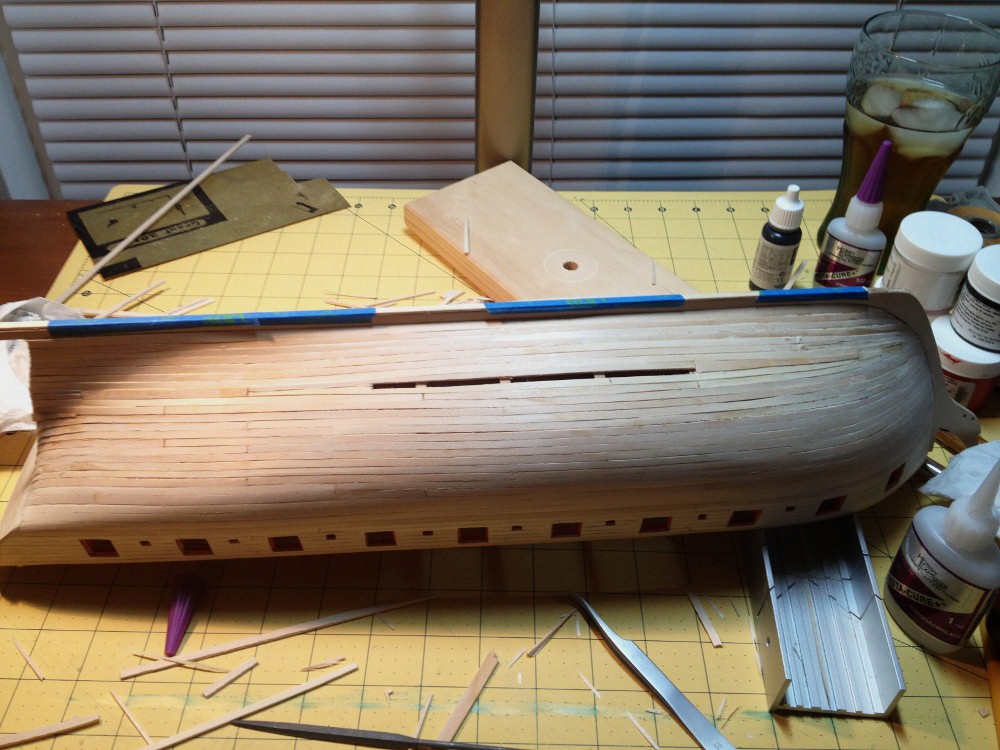
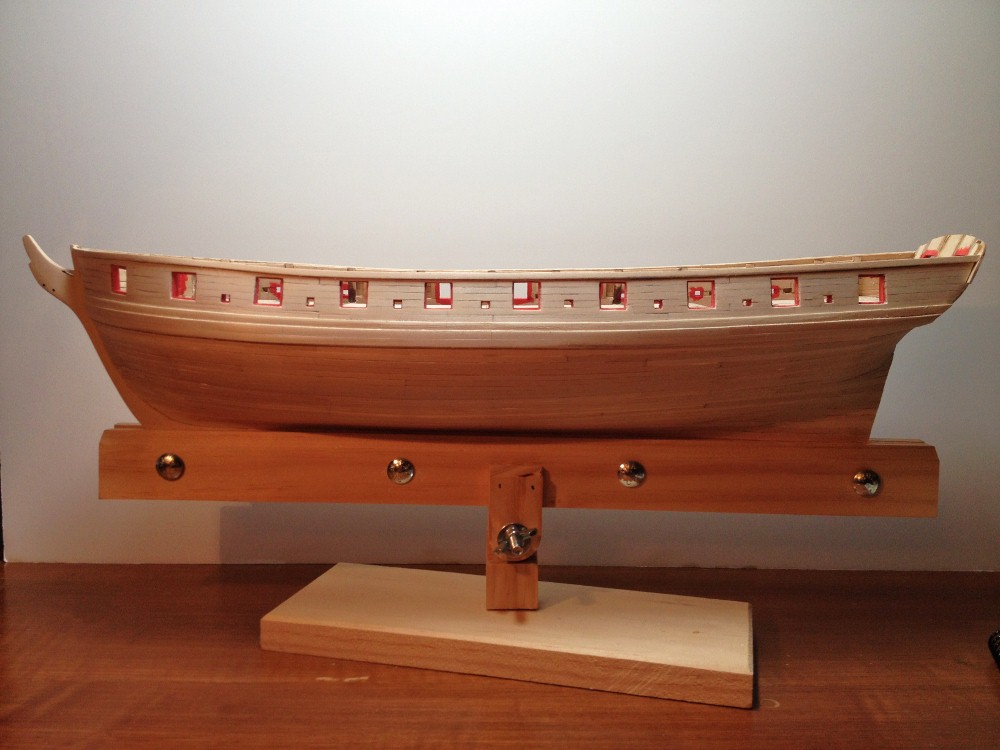
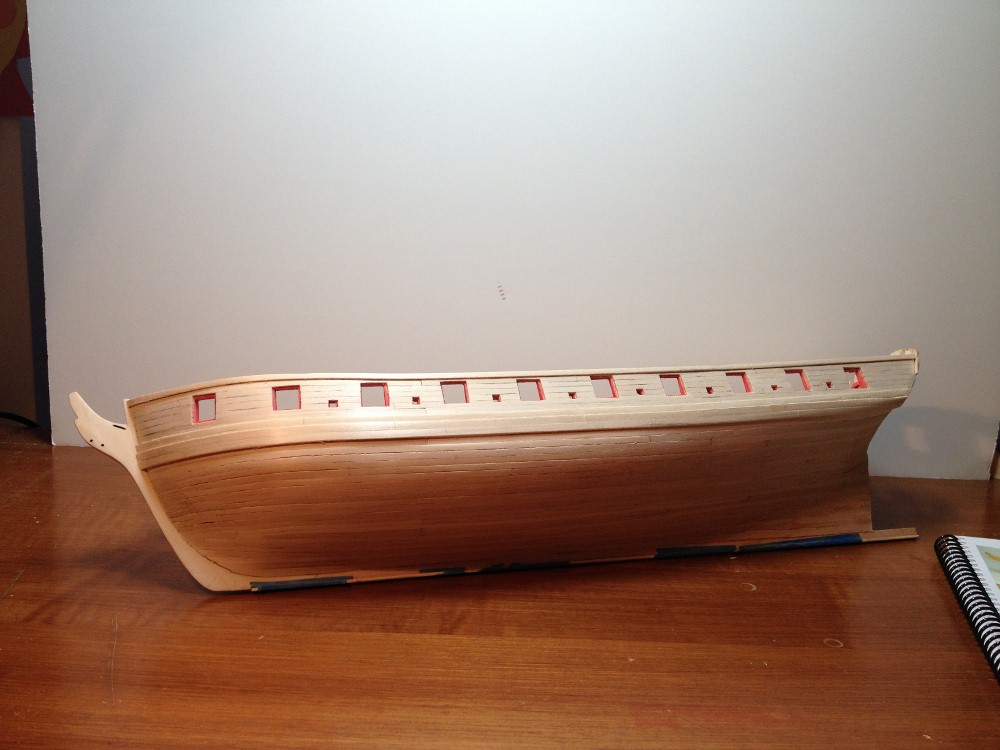
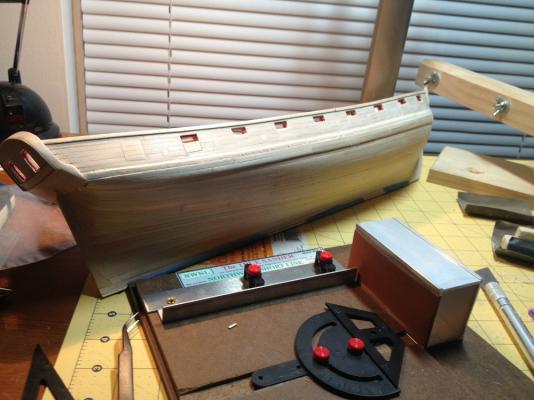
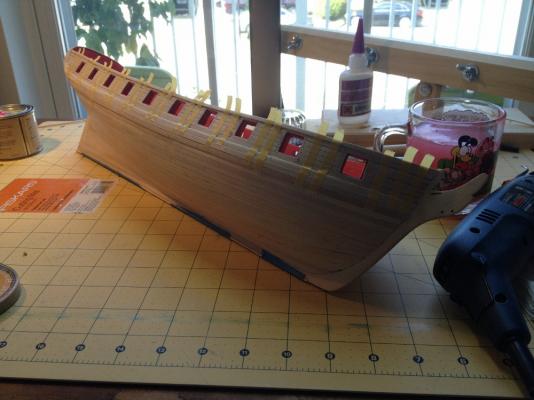
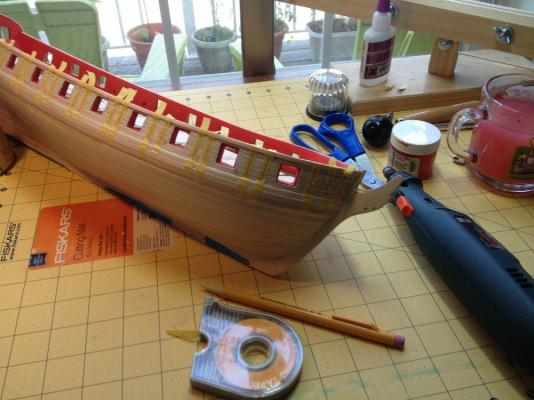
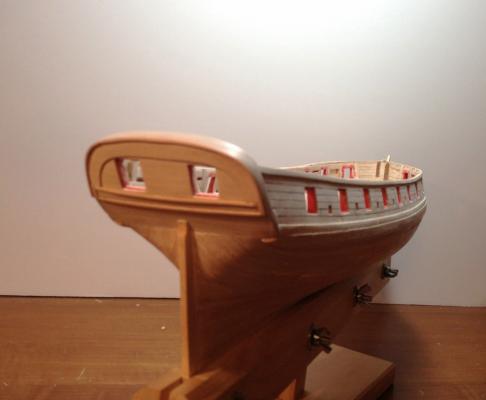
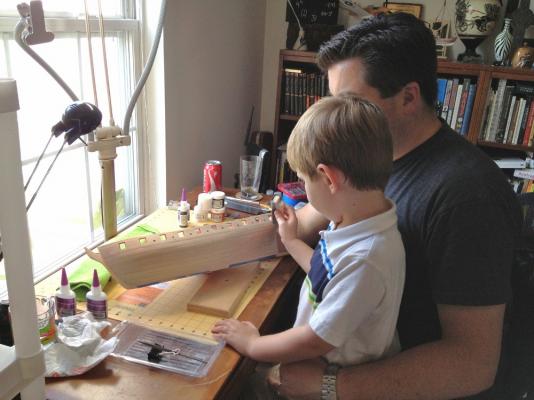
Build Update: Completion of the Exterior Planking: My Syren hull really turned out to be a tale of two halves. Being that this is the second model that I have ever planked, and that it was a lot bigger than my Longboat, it was a first rate learning experience. I planked both sides down below the waterline pretty much the same, then I continued with the starboard side until it was complete. Next I completed the port side, finally putting the wales and sheer strake on. I had a lot of fun with this step for a couple of reasons. The first being that, I learned how not to do it on the first side. The second, that during the planking process I went on vacation to a family camp, which had a wonderful craft space. Our days were packed with hiking, sailing, and fishing, but the evening was dedicated to crafts. So I took my Syren with me and worked on it over vacation. Part of the fun in that, was that so many people came over to investigate what I was doing, that I got to talk about the hobby to quite a few people. Thirdly, my son has taken an interest in what I am doing, so I have been able to start instilling a desire to make things in him. I hope that I am also passing on some skills as well . Crafting on Vacation: The Last Plank: The Next Generation:


-
Thanks for the suggestions Dirk.
-
Thank you everybody! I am having fun with this, and seeing the boat take shape is very satisfying. It feels good to make something with one's hands when so much of a day is spent creating and updating spreadsheets Dirk, can you suggest a supplier for the bending beech? I would appreciate the direction.
-
Thank you Floyd and Paddy. I appreciate the feedback! Floyd, I am glad you got to spend a day aboard the Olympia, she is truly a treasure. I try to make it over to go aboard every couple of months, trying to take it all in, so that if she is relegated to the pages of history, I can have some idea of what it was like "back then". If you are interested, and you use Facebook, the Olympia has a page where they post a lot of historic photos, and recently a lot of pictures from areas of the ship normally off limits to the public. It can be found here: https://www.facebook.com/CruiserOlympia I hope to return to the longboat and finish her in the next couple of months. Cheers!
-
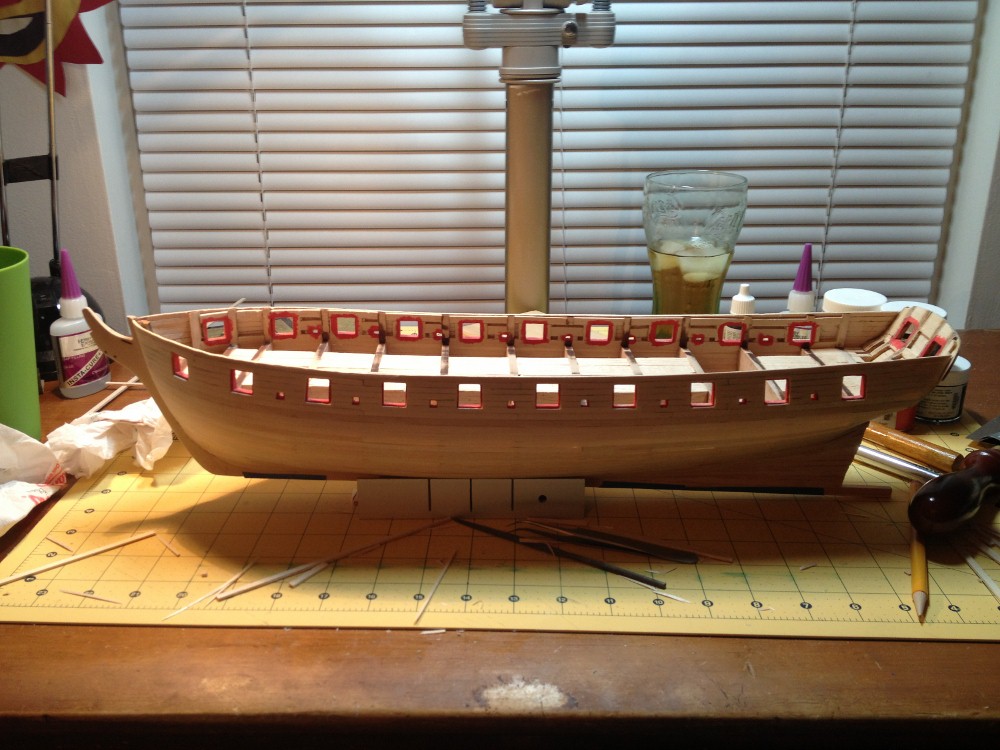
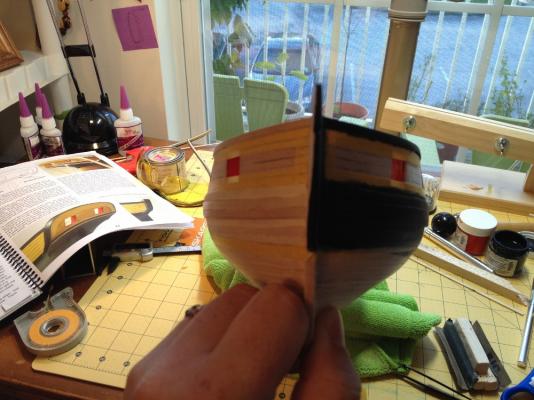
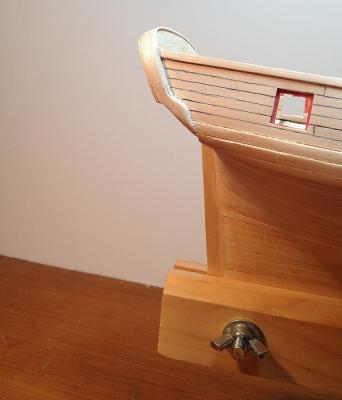
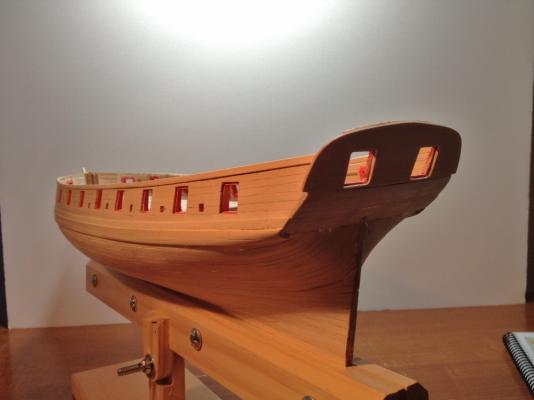
Well, it has been awhile since I have been able to get much done in the shipyard, work being very busy and real life demanding at the moment. However I have been able to do the other side of upper planking, the transom, the remainder of the first layer of the wales, and the garboard planks in the last week or so. With my last post, I mentioned my frustration with the wood provided with the kit. Following your advice Augie, I have been more patient with the process and as a consequence, have been rewarded with a better understanding of how to use the supplied material more effectively. I am having far fewer problems, after working out appropriate methods of preparing the pieces, and taking my time... to the extent that my eagerness allows any way. As to the reference about being in the "representation" school, that should be better explained as an expression of a running philosophical struggle that I have with myself, and with co-workers. I make models for a living, though they are mathematical constructs and not ships, they do represent something real. In specific case, buildings and how they use energy. We argue all the time as to what it means to "model" something. Anyway, just a clarification as to where I was coming from, i.e. not rationalizing my build quality. That being said, on to the build update! Again, Augie, you where right that the other side would come out better! With more patience comes better plank placement. I followed the printed practicum very closely, and got results accordingly. The practicum states that once the wales plus one 1/8" plank, and the garboard plank, plus two 1/8" planks are installed, you should have room for 22 - 23 (1/8") planks as measured from the amidships bulkhead. That is exactly what I got! I was excited. The one thing that did come out a little different, is that my Transom sits one plank, as seen from the side, higher than it should. Not really sure how that happened since the turn of the counter is dictated by the shape of the laser cut parts, but that is how it turned out. After checking the internal height of the gun ports, it still works, so I am going to run with it. One piece of advise I can give is, take your time with the transom, particularly shaping the bottom edge to meeting the counter planking. I was left with a gap, after hurrying to get the transom glued on before I needed to quit for the night. I am hoping that it will be covered by a trim piece.


-
A belated Thank you for all of the birthday wishes! Work has been really busy lately, not much time for ship building or checking content
-
Thank you everybody! Can somebody give me a tutorial, or point me in the direction of a tutorial on how to make a good rope coil? I would appreciate it. Thanks!
-
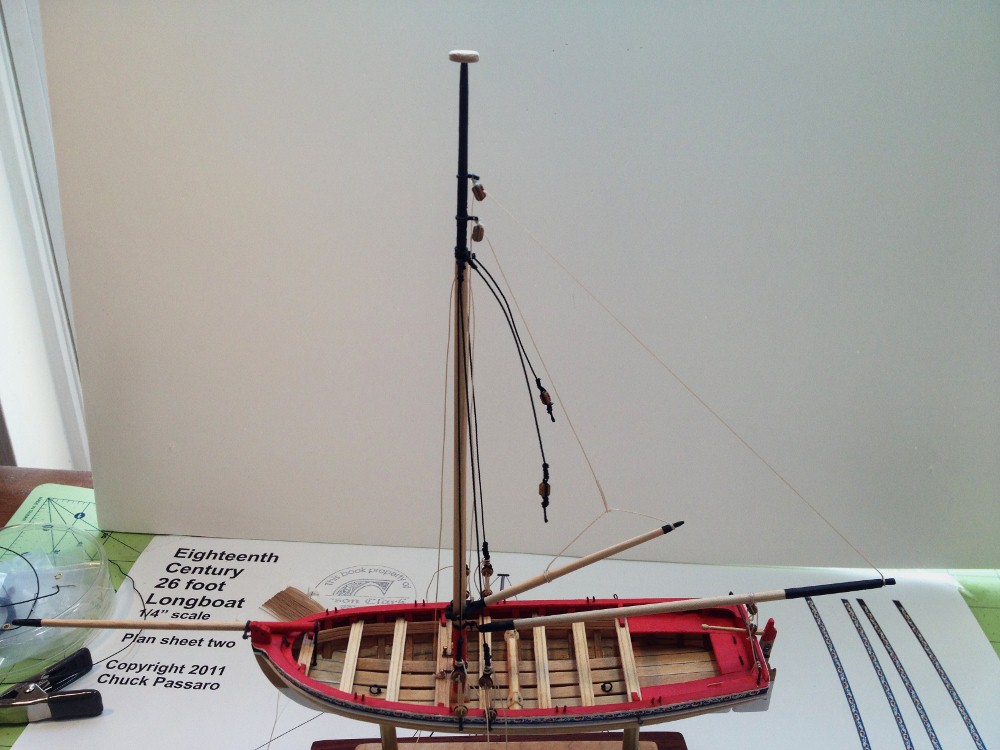
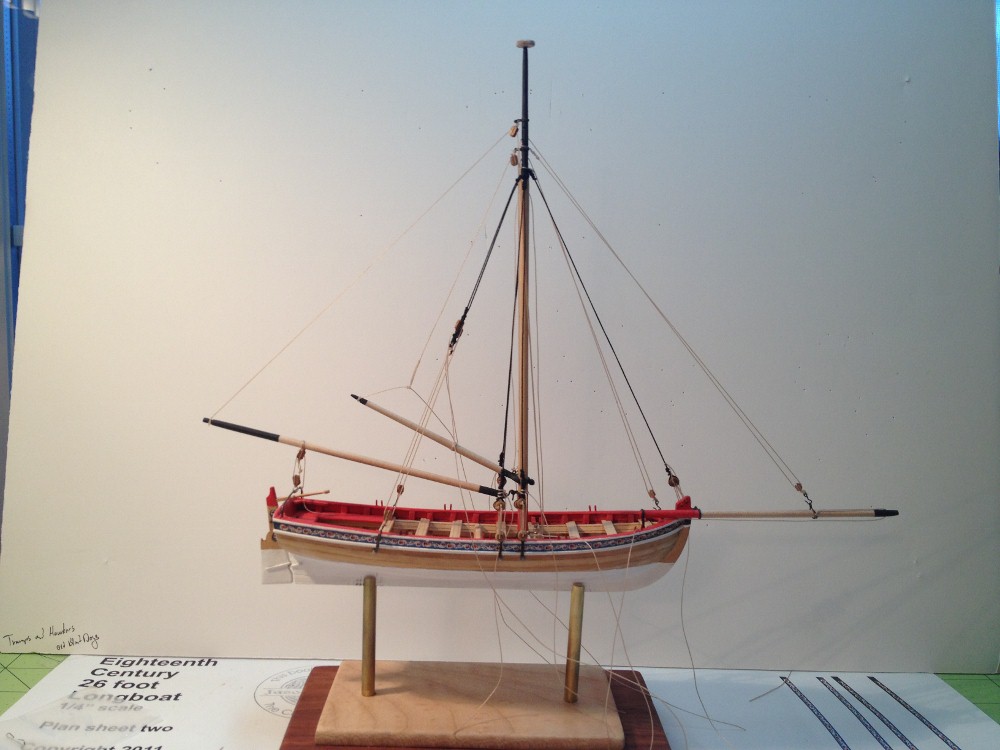
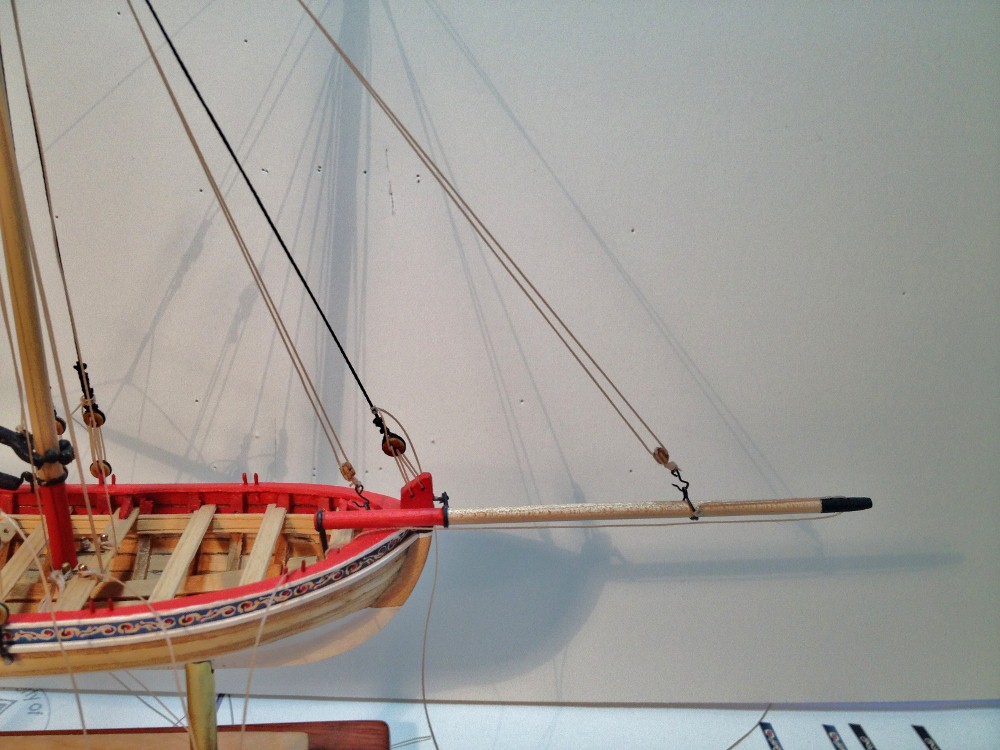
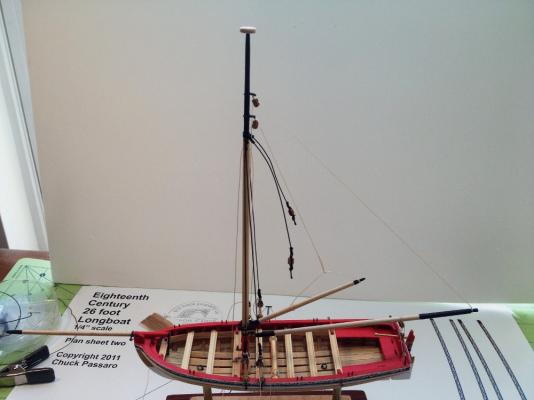
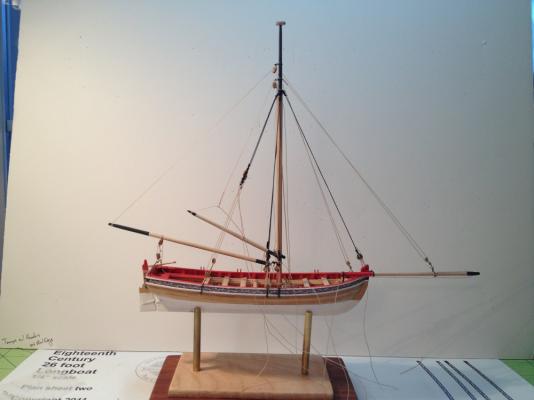
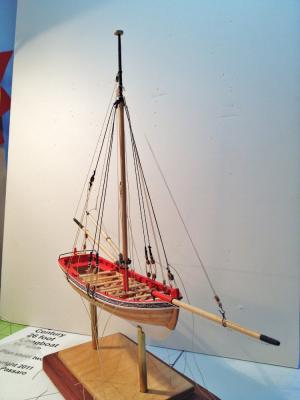
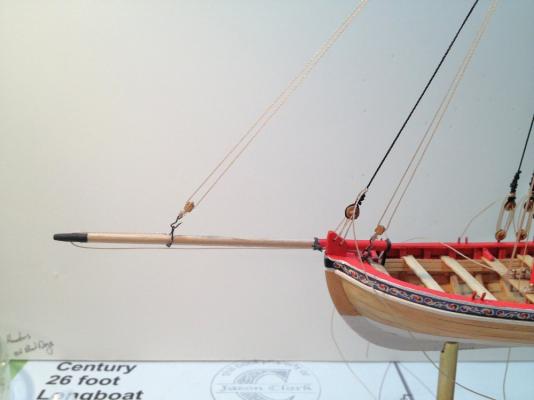
Finishing the Rigging: I finally had a Sunday evening free to work on a boat! I was able to complete the fore and back stays, to the point that they just need to be finished by trimming the lines, and adding rope coils. First I have to say, that I enjoyed this kit immensely. I still have a little ways to go, but this little boat is really a wonderful project to work on. I highly recommend it. I am still really out of my element when it comes to rigging, so I do not have a whole lot to say as to the process, other than I followed Chuck's directions pretty closely. Everything came out pretty smooth. I think my favorite part was making the little hooks needed for the running back stays and the fore stay sails' running gear. At this point I still have to trim off the ends of the rigging, I ran all of the lines pretty long so that I could finish each line easily. Right now I have about a half dozen lines hanging from the boat, looking a little less than ship shape. The next step for me is figuring out a good process for making rope coils, and finishing details such as the oars, anchor and windlass bars. Not to mention some paint touch up from the handling process.


- 58 replies
-
- 4
-
-
- model shipways
- 18th century longboat
- (and 2 more)