
HOLIDAY DONATION DRIVE - SUPPORT MSW - DO YOUR PART TO KEEP THIS GREAT FORUM GOING! (Only 20 donations so far - C'mon guys!)
×

kees de mol
-
Posts
796 -
Joined
-
Last visited
Content Type
Profiles
Forums
Gallery
Events
Everything posted by kees de mol
-
 Hello saillors! A little photo of the baseplate I made for the Antje. I think you will all be glad if I tell you its made of wood... not plastic. I got a nice peace of oakwood for free and I rubbed some oil on it. The model stands on two inox stansions. I like the wood very much. And the next thing. If you build a ship from the sixtys the biggest problems occur when you are ready for painting. Because then you have to ask yourself wich colours you need. Well the only colourpicture I have is the pic below. (its the ship in the back unfortunately) That doesnt help me a lot. But you can see the wheelhouse is green, not white anymore. To find out what colours I needed I made colourcards wich I showed to some old saillors. They helped me to pick a colourmixture for all the components Today I started painting the hull red. It was a drama! I got a cracked effect and had no idea what was the cause. I made teststrips with the primers I used and the primers apart and a clean peace. I found out it was not the primer but the paint itself and aftes some more tests I found out the airbrush thinner was the problem. Very strange because I used the right thinner and both the thinner and the paint were the same brand. Tommorow I will start painting again and hopefully without any more problems. Kind regards, Kees
- 205 replies
-
- 7
-

-
- kw49 antje
- trawler
- (and 1 more)
-
These are the last pictures before painting with the airbrush. I special love the first picture because with all the parts on the table it really looks like a modelkit. Modelkit. Anyone knows the brand? All the piece apart is very handy when you paint them. No masking needed. Here al the parts together for a nice snapshot. Very proud of what I have accomplished. Started with some bits and pieces and now I have a complete ship. Now on with the painting and maybe the next update I can show you some collours. Regards, Kees
- 205 replies
-
- 15
-
-
- kw49 antje
- trawler
- (and 1 more)
-
No only one ship at a time. First I will finish the KW49 and then I will start building the KW88 Pelikaan. Only searching for photo's and drawings now.
- 205 replies
-
- 2
-
-
- kw49 antje
- trawler
- (and 1 more)
-
Yes me too! This week I will recieve drawings and photo's so maybe I will start a new topic to introduce the ship soon. Kind regards, Kees
- 205 replies
-
- 2
-
-
- kw49 antje
- trawler
- (and 1 more)
-
Yes Maaskant it had to be! Nice that you know how they call us, Kattukkers. De KW88 is the ex UK153. Casco build in Poland and finished at Maaskant.
-
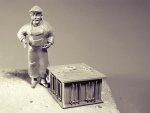
Some little jobs had to be done on the Antje before I could give her a fine coat of primer First I made some horizontal bar on the mast. It is a guard to prevent the net from swinging above the deck Things for the ropes Here we miss some parts Overall picture And a dryfit with the oakwood baseplate paintspray With a good coat of primer Kind regards, Kees
- 205 replies
-
- 9
-
-
- kw49 antje
- trawler
- (and 1 more)
-
Organizer and drill-bits
kees de mol replied to kees de mol's topic in Modeling tools and Workshop Equipment
Thats a truth I can not argue. I alwasy say to my wife "there are two sertaintys in life. First is death and second is that you can never have enough tools". -
Thank You all for the likes and replys. My goal is to make the hull the same as the KW49 so I can always build more of these ships. Regards, Kees
- 205 replies
-
- 2
-
-
- kw49 antje
- trawler
- (and 1 more)
-
Organizer and drill-bits
kees de mol replied to kees de mol's topic in Modeling tools and Workshop Equipment
I know what you mean Tom. I got another organizer on the left and one on the wall. I hope it helps me to find my tools when I need them. -
I bought a beautiful organiser for the tools I use most. It's from Hobbyzone and I bought him at sceneryworkshop. You have to assemble it yourzelf but it fits very well. Also bought some small drillbits in China. Very cheap but good quality. You can find them at aliexpress.com When I bought them tey were 50% off. For organizing the drillbits I made an drill-block so I have them all together.
- 7 replies
-
- 12
-
-
After the KW49 Antje this will (most likely) be my next project. The KW88 Pelikaan a Dutch beamtrawler build in 1999. L: 42.4 meters. It will be in scale 1:75 the model will be +/- 22 inches
- 205 replies
-
- 13
-
-
- kw49 antje
- trawler
- (and 1 more)
-
Only a master dares to use these words posting these photo's... Man, you make me feel like a total ***** when I see these pictures. Regards, Kees
-
Those fish are very well made. In the overall pictures you post, they even look better!
-
Totally agree with this!
-
Brig Eagle by robnbill - 1:48
kees de mol replied to robnbill's topic in - Build logs for subjects built 1801 - 1850
I have read the buildinglog. And there is only one question I have left.......... Do you, or do you have not super human powers? I will worship you the next coming updates, oh great shipmodellingguru -
Very smooth finish. Will be a beautifull ship
-
This portside gallow was not neccesary for driftnetting (vleet vissen in Dutch) The net went in to the sea on starboard and was hauled in on starboard. The portside gallow was added later when the ship was transformed in a beamfisher. The front starboard gallow lead the fishingline to the starboardbeam and the portside gallow did this for the portside beam. The aft starboardgallow stayed on the ship so the could also go driftnetting again. On wikipedia there is some info http://en.wikipedia.org/wiki/Drift_netting A movie-clip http://www.haagsefilmbank.nl/archieven/843 Only the ship has no gallows yet. Search for Vleetvisserij to find more info Regards, Kees
- 205 replies
-
- 2
-
-
- kw49 antje
- trawler
- (and 1 more)
-
Part two: Tadaahh. If it does not work like it has to be, then it has to be like it works (I have no idea if this makes any sence but I tried to translate a Dutch saying) Drilling holes in the deck. With a handdrill. Very handy tool! Parts First I start with the midlle stansion And before you know it half of it is ready Yes, this is how it has to be And the old and trusted guilder/florin to show the proportions Kind regards, Kees de Mol PS. Thank you for all the likes and replys. Very pleased with that!
- 205 replies
-
- 13
-
-
- kw49 antje
- trawler
- (and 1 more)
-
Part one: On the frontdeck I had to make a railing and today I started with this thankfull job. Readymade-raillings are for sale but I dont like them because they never fit the way you want and I think they are ugly. Make them myself it is then. First I make a design and then I mark the position of the stansions so I know how much I have to make. 28 It has to be. Brass strip 2x1 mm. This how they have to be when they are ready. If my Autocad-teacher would see this drawing he would not stop crying. Cut the stansions And then the drilling. Drill-thing a mould and enough drill-bits (I tought) Ohh no there goes a drillbitt.... again... They are supersharp and I like the universal diameter of 3.2mm but when you look at them, they break. Or I am just a clumsy man? It was my last 0.55mm bit so I had to use a conventional drill. Ready Marking where the stansions end and where the pin starts In the lathe. It's not really the right way to use this machine but hey! Who knows?! Movie-clip
- 205 replies
-
- 7
-
-
- kw49 antje
- trawler
- (and 1 more)
-
Hello, Thank you all for the kind repleys and the likes. The Antje is 58cm/22,8inch long. At the photo's everything looks a little bigger than it is in my opinion. I like the ship as she is now. Some older fishermen who follow my build on facebook asked me why I build here with all the later additions. They say the ship was much more a beauty when she was just build. I asked them how many ships where changed in beamers around 1960. The tell me almost every trawler. How many of the trawlermodels in the local museum are with these additions? Non.... So I think it's not a bad thing to build her this way. Alltough she wont come into a museum, but thats not the point. Kind regards, Kees
- 205 replies
-
- 4
-
-
- kw49 antje
- trawler
- (and 1 more)
-
Thanks and good luck with the build. But why such a tight buildingscedule? Take your time to have a great buildingquality.
-
Your friends have very good buildingskills!