


hornet
-
Posts
645 -
Joined
-
Last visited
Content Type
Profiles
Forums
Gallery
Events
Posts posted by hornet
-
-
On 11/25/2020 at 1:04 PM, peterbrowne said:
OK, thanks for the replies, and thank you Thunder for your assistance and the images.
The Admiralty plans should be the source of truth. Those plans have some stated measurements, including extreme deck length, but not the Length Over All (LOA), which originally means not including any spars. The rule on the bottom of the plans therefore need to be used to determine LOA.
The rule goes from 0 to 90 feet.
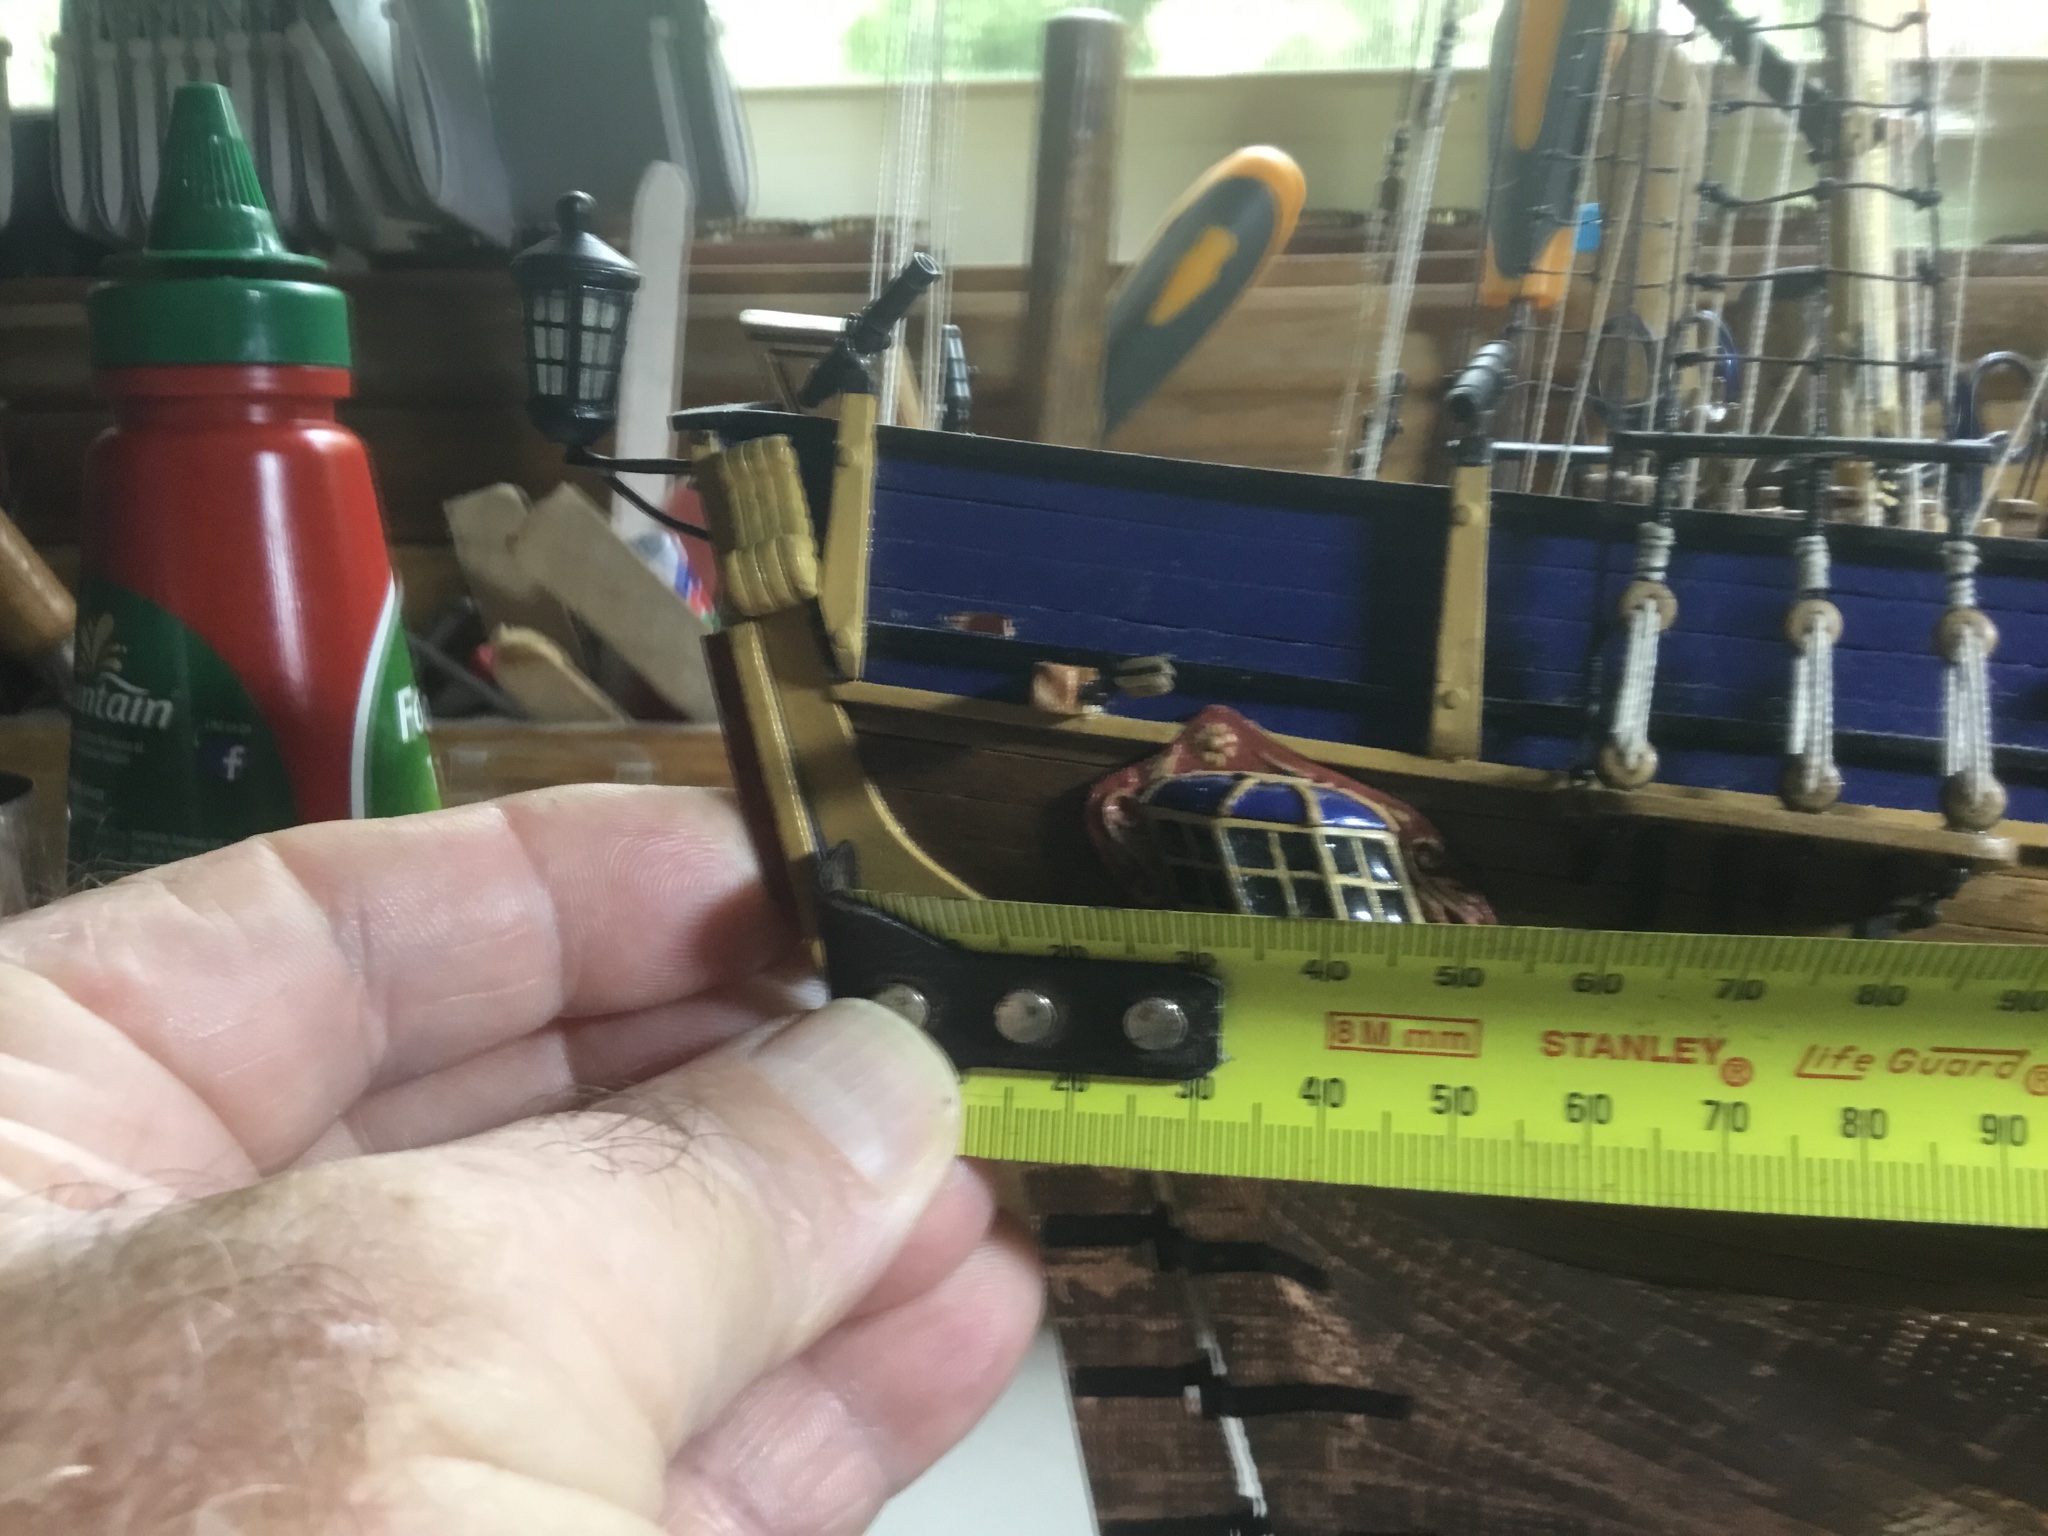
I have marked zero and 90 feet with vertical red lines in Photoshop. The zero line is on the base of the stern. The 90 foot line is approx in the centre of the stem at the bow. That length is 90 feet. Measuring out to the forward side of the stem would seem to be about 91 feet, judging by the graduations on the rule.
If someone would care to measure that section (as indicated on the image below) on the Caldercraft plans? That length, 90 feet, if accurate on the Caldercraft plans, should be @ 1/64 428mm...
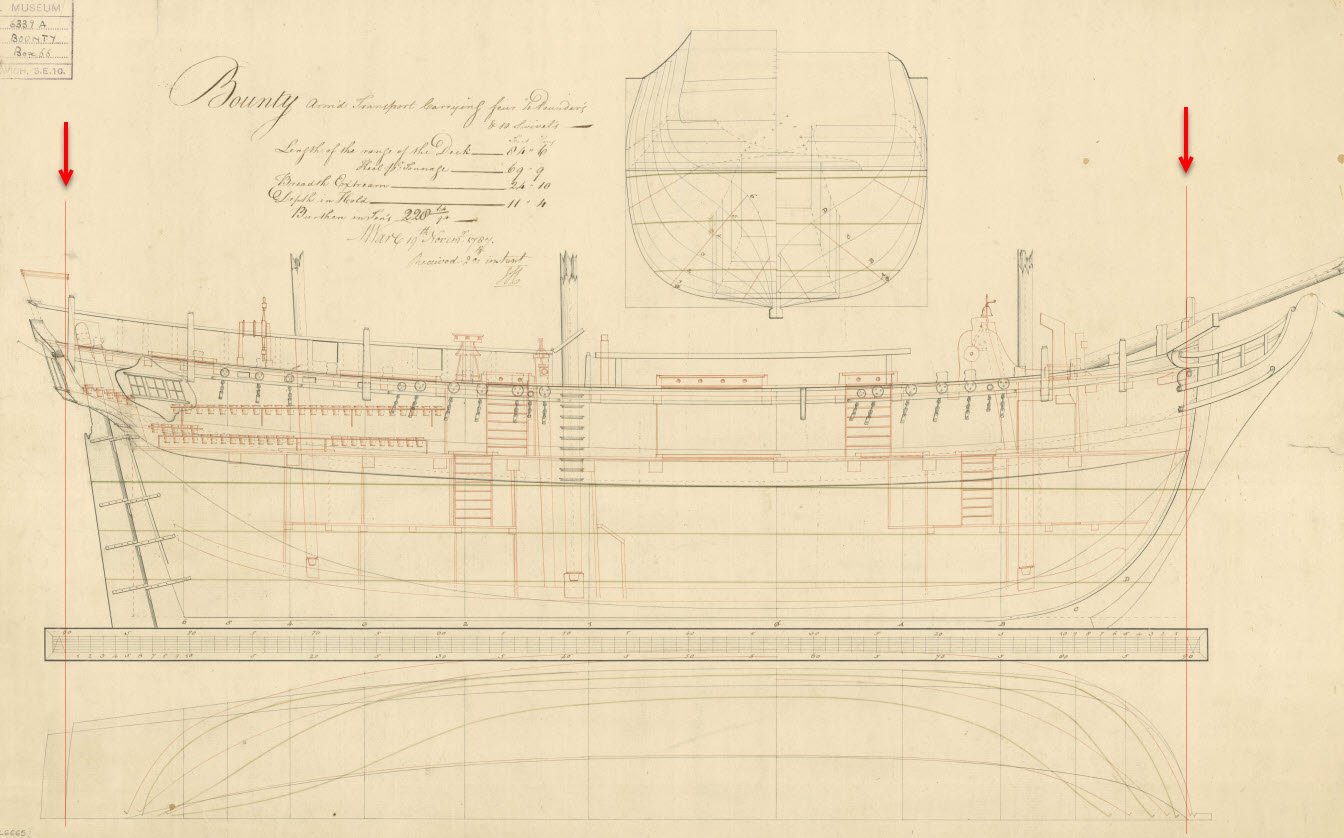
My Caldercraft Bounty - nearing completion appears to be very close to the 428mm

-
-
I hold this size block in a fly tying vice, ream the hole out slightly with a very fine drill bit then use a doubled over very fine piece of copper wire taken from the core of a piece of electrical wire. BTW an upturned glass jar (with concave base) makes a good receptacle for a few drops of CA glue.
- mtaylor and thibaultron
-
 2
2
-
Thin brass rod from 1mm and upward in diameter is available on EBay. I’ve found it to be useful for a variety of applications. Usually comes in a pack of 5 & lengths of 300mm
- thibaultron, vossy, mtaylor and 2 others
-
5
-
7 hours ago, Y.T. said:
I am trying to find a simplest solution as I only need to tumble 1 set of blocks every 5 years. Building a tumbling machine from PVC is too much work. If I can use mixer without ruining it this is best for me.
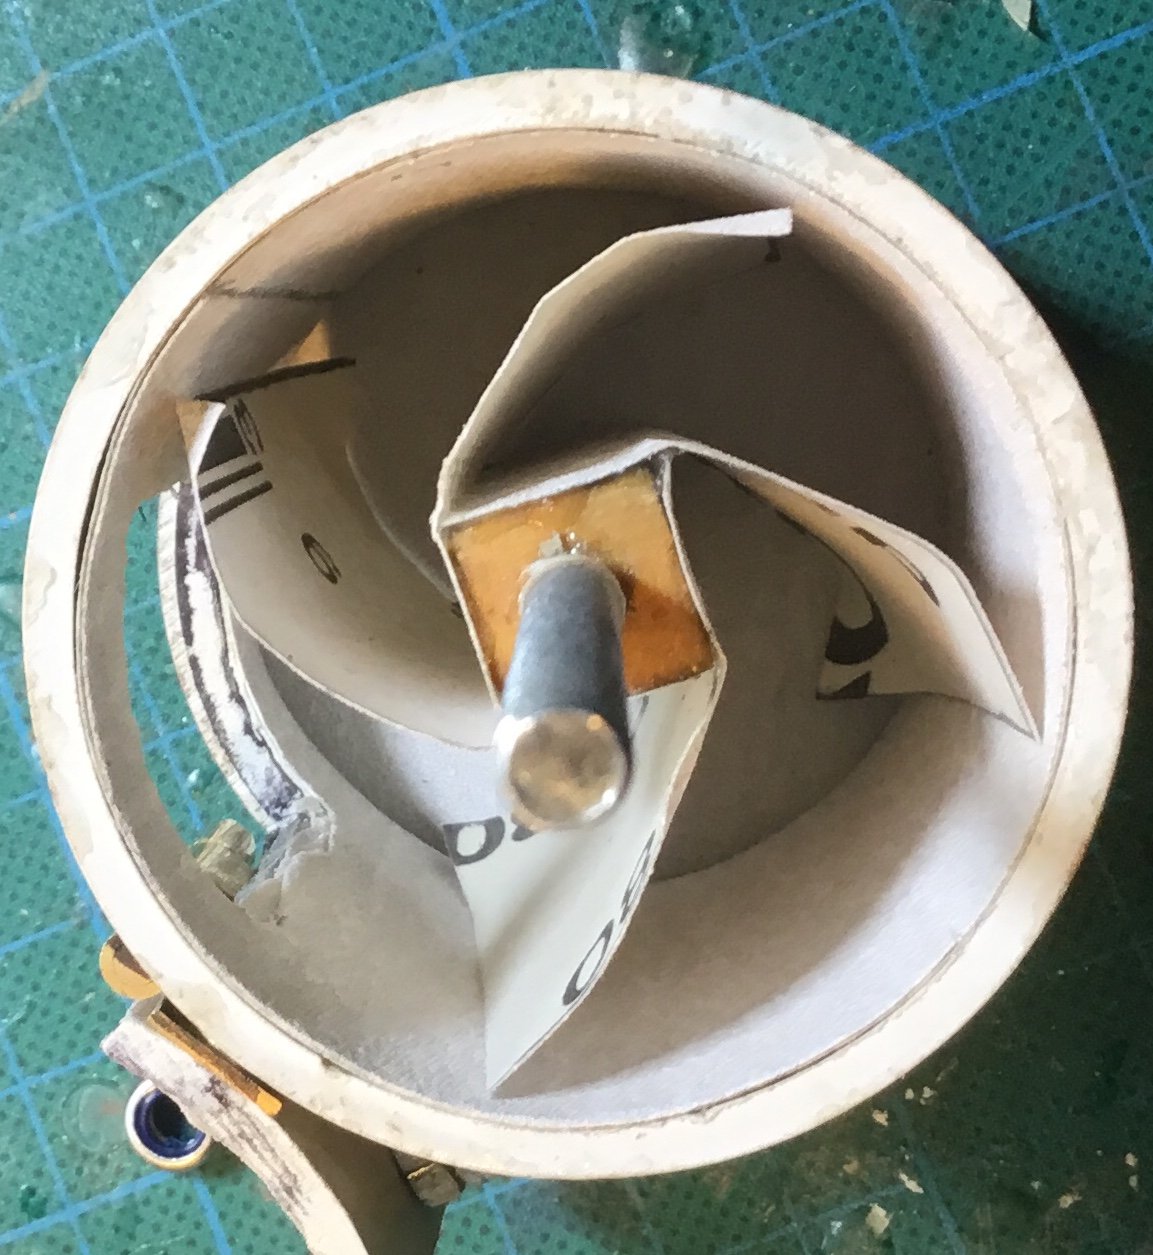
Building the PVC tumbler was a bit of work Y.T. but it was a fun project and gave me a sense of achievement (not dissimilar to building a model). I have to agree with Mark though, the inflexible blades on a food mixer may be a little harsh for the job. You might like to consider making a whole new sandpaper ‘impeller’ to replace the blades on the spline completely or cut the blades off the attachment and replace with something more flexible. Post your endeavours as I would be interested to see the results.
-
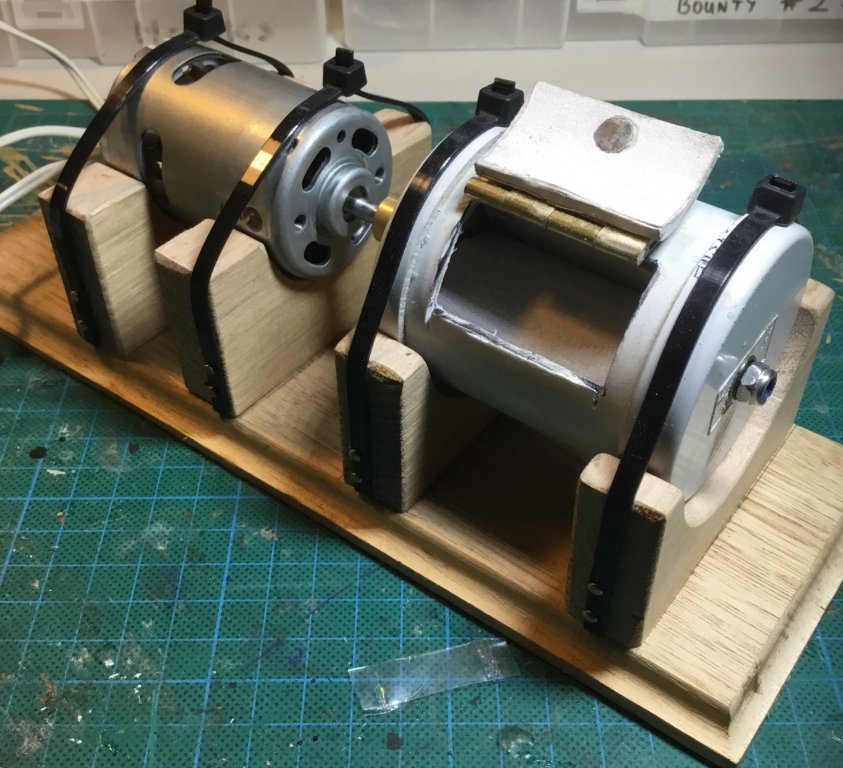
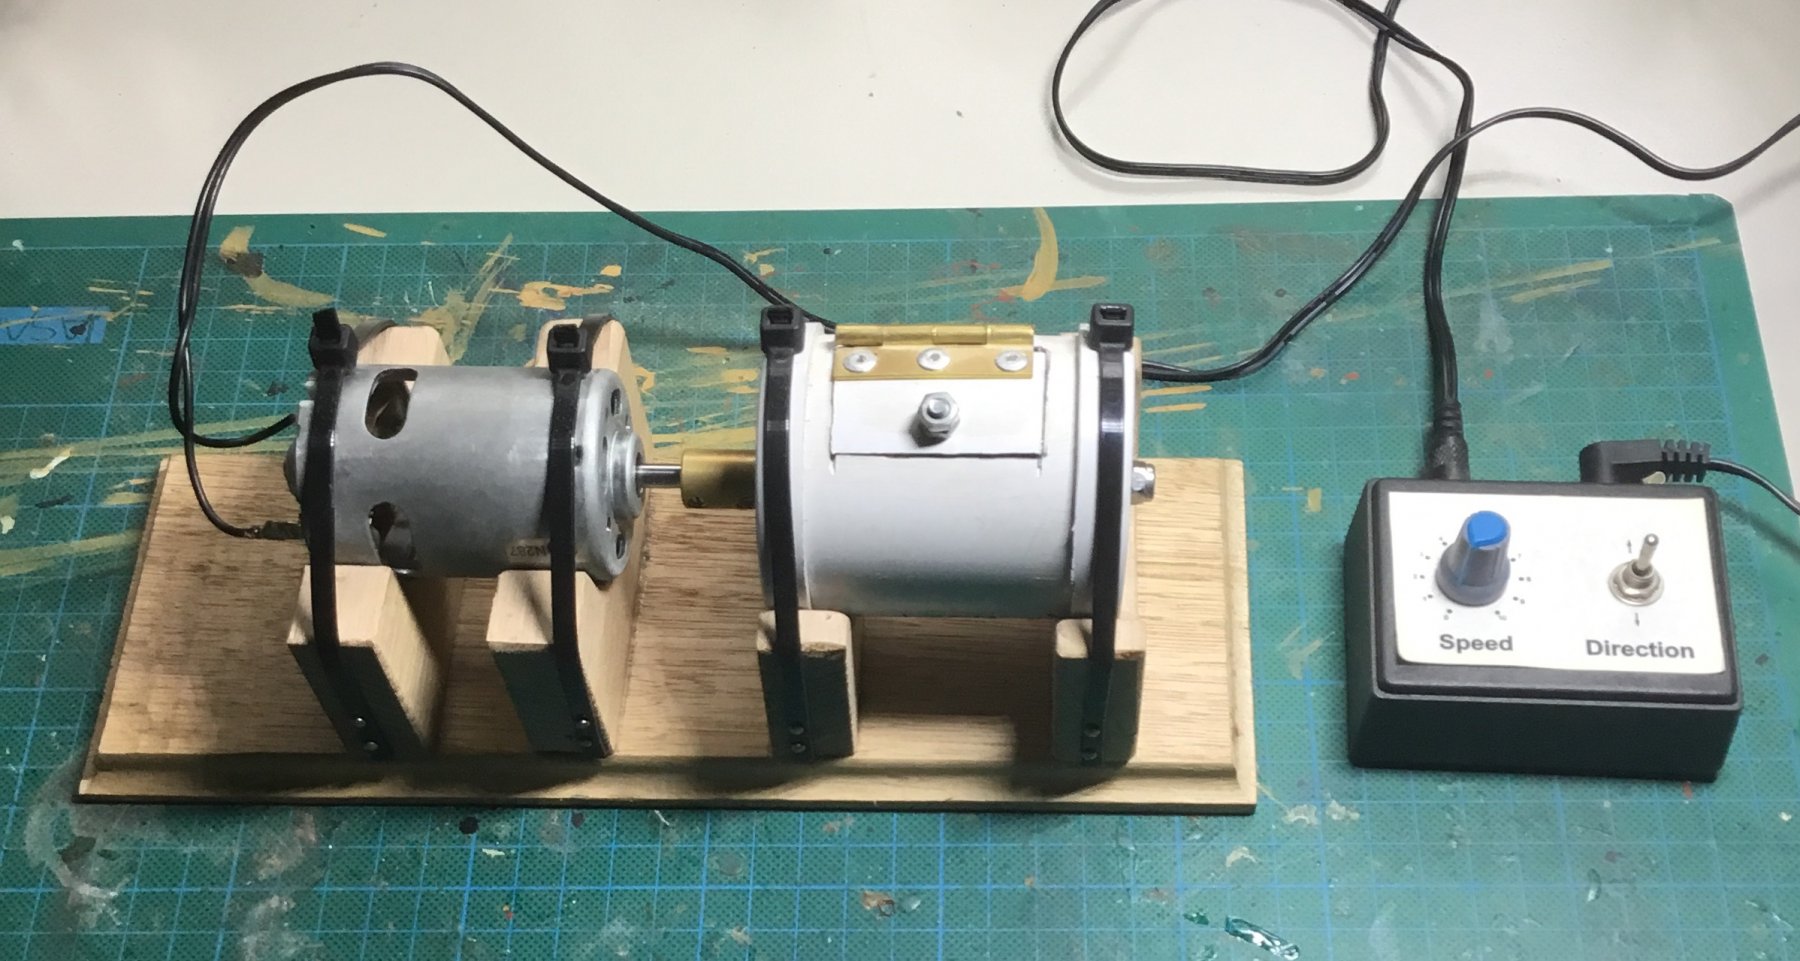
I use the variable speed control from my Domanoff serving machine ( which I also use on my home made rope making machine) I experimented with different grit sandpaper in the tumbler and ended up deciding on 180 grit. I tumble them for a couple of minutes but because I use the variable speed control the number of revolutions in the tumbler depends (obviously) on the motor speed - not too fast, not too slow. I check the blocks as I go. Another pic of tumbler and some tumbled blocks below.

- AON, Geoff Matson, Canute and 3 others
-
6
-
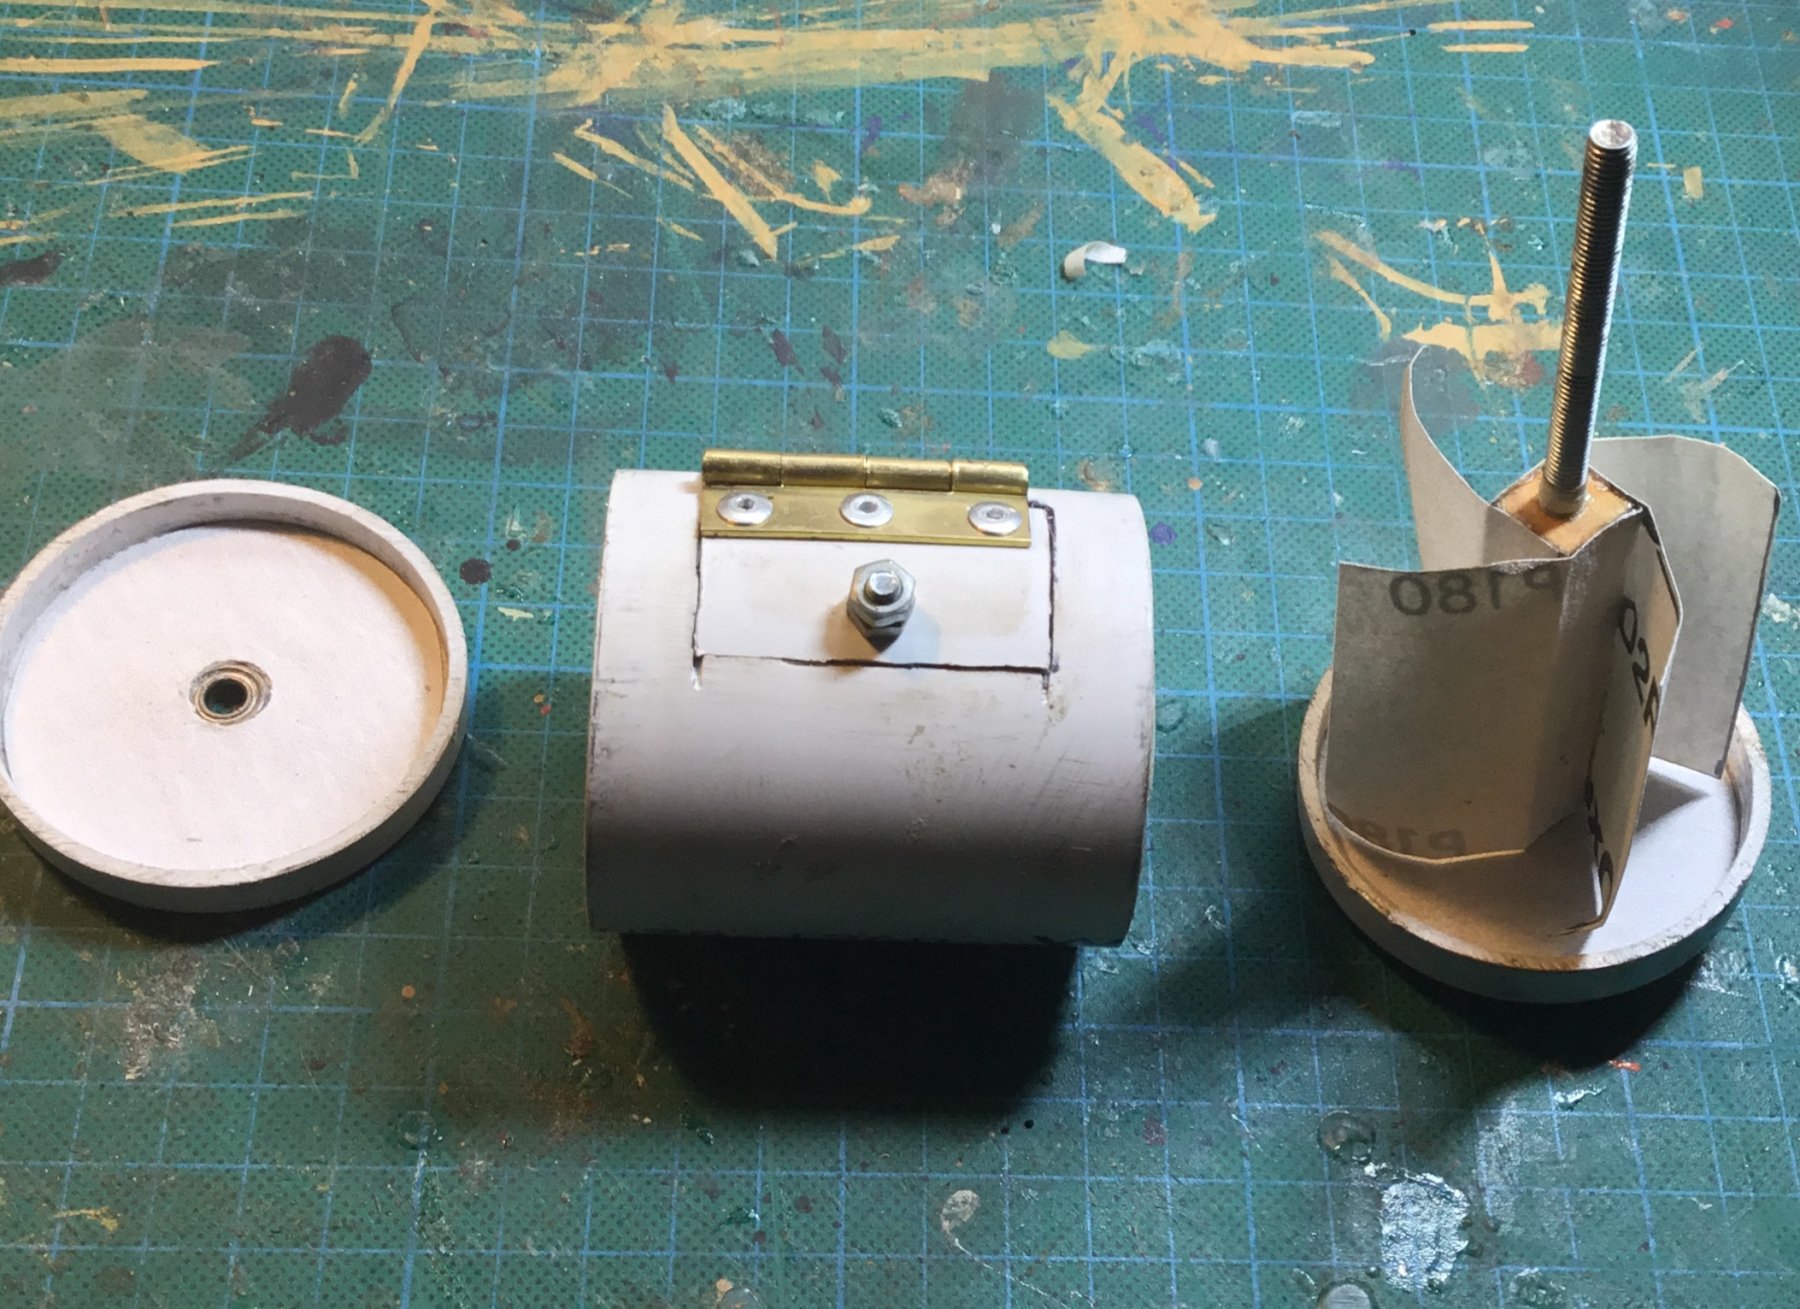
Just spent the day putting together a block tumbler using PVC pipe and end caps. Had to cut the end caps down a bit but it works well. The whole thing comes apart by taking one nylex nut from the end of the shaft. Bearings were obtained very cheaply on EBay. Added a small 12 volt motor and now I can tumble a handful of blocks very quickly.
Cheers
Steve.


- Geoff Matson, CaptainSteve, cog and 12 others
-
15
-
-
I have recessed a set of these into a piece of timber. Covers most sizes of dowel I use. Push dowel into recess, centre marked, job done.
- thibaultron and Canute
-
2
-
Lots of great ideas here.
- mtaylor and thibaultron
-
2
-
I have found that if you are careful about hull shaping as you apply the first layer of planking, packing out/ trimming planks as you go, there is very little need for filler of any sort. If you are concerned about small gaps you can make a wood dust & PVC paste to fill them. I you are concerned about planks drying out and cracks appearing you can use bandage gauze and PVC - a bit like fibreglassing on the inside of the hull.
-
On 8/26/2018 at 9:09 PM, MESSIS said:
Thankyou hornet,
But thats hard to find. Though I found in Germany by Steingraber this one:
What do you think of this?
The beauty of the aeropiccola bender is the spring loaded roller attachment. It allows you much more control of the bend. I normally use mine while the handle is clamped in a vice. This allows me both hands to work the plank. You could do the same with this bender.
-
These are the bees knee. Not sold any more. I have had one for over 30 years. If you can find one second hand, snap it up!
- Canute, mtaylor and thibaultron
-
3
-
For anyone who may be interested, this book is available on Apple iBooks (in Australia at least) for 99c (down from about $14) Written by Daniel Bryce.
- thibaultron and Jolley Roger
-
2
-
-
4 hours ago, Chuck Seiler said:
Then you are making them wrong.
A couple years ago when I was more active in my local club, I would help man the ship modeling both at the County Faire. One of my mates would demonstrate making treenails with a drawplate, making his length of 'nails' increasingly smaller. As he got down to about 1MM and showed everybody his creation (ooooo ahhhhhh) I would chuck up a inch or 2 of bamboo in the ol' Dremel and whip at an inch of 1MM treenail in under a minute with a piece of fine sand paper.

Good quality bamboo is strong for is size. I use BBQ skewers, but you have to make sure you get good ones. It takes some practice and is prone to burnngfingers if not careful, but they are great. I use hem to affix small furniture items to the deck.
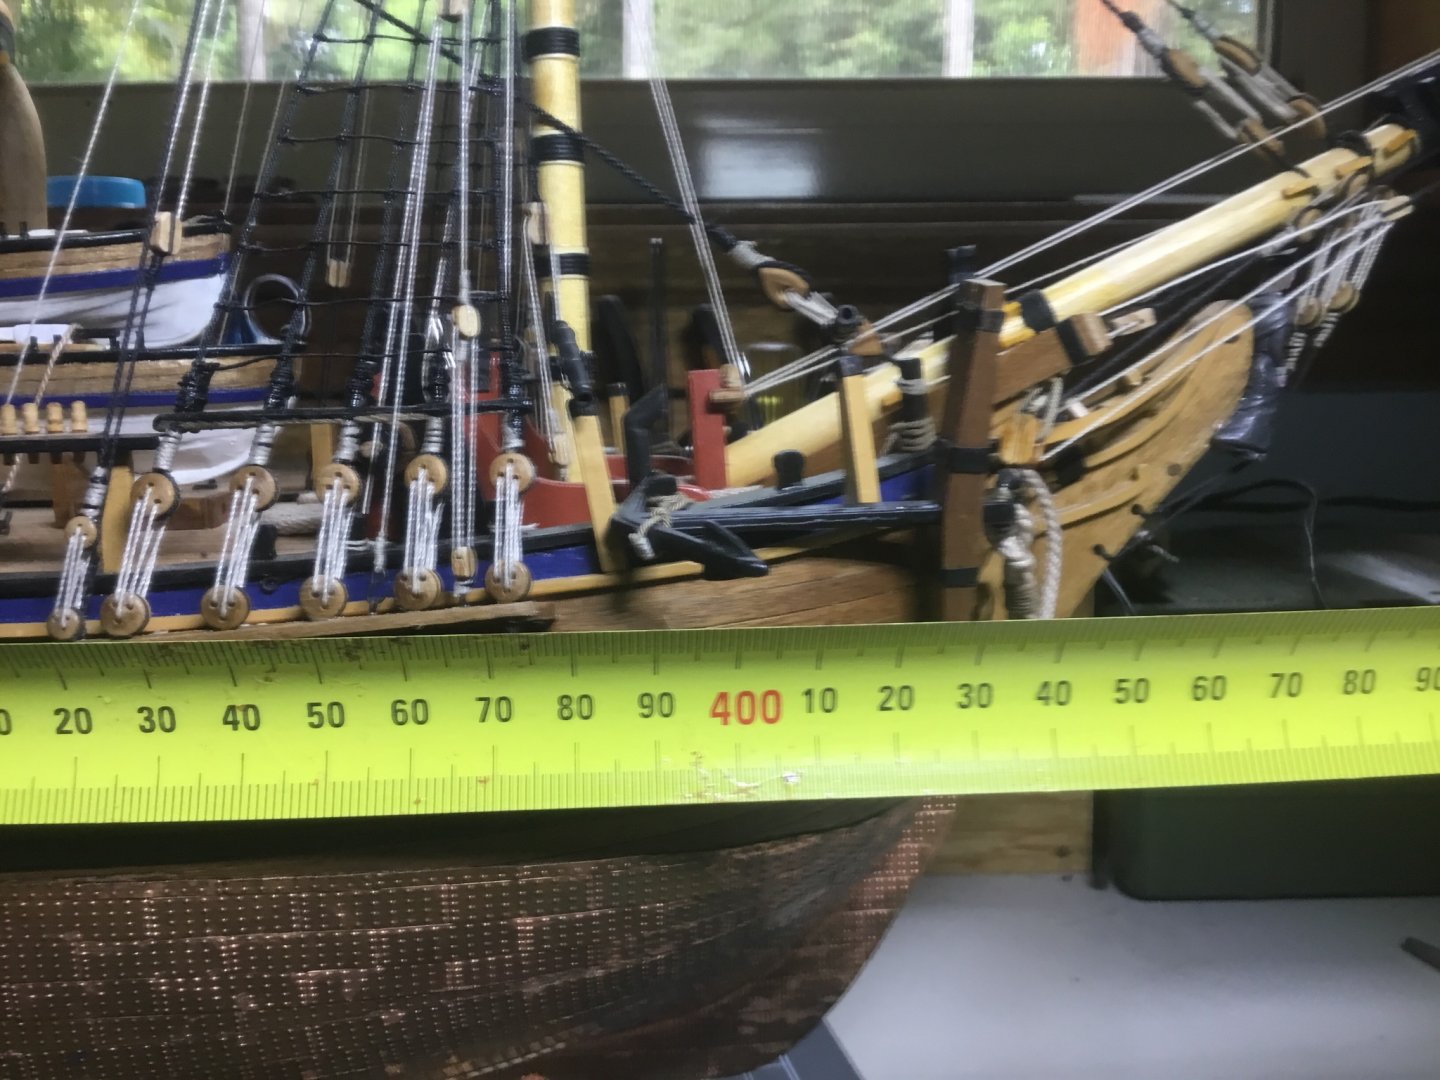
1 mm is easy with Byrnes draw plate but I have found that for a 1:64 scale model, 0.5 mm is more to scale. When drawing bamboo down to this size it I have found it does get tedious and fiddly.
-
-
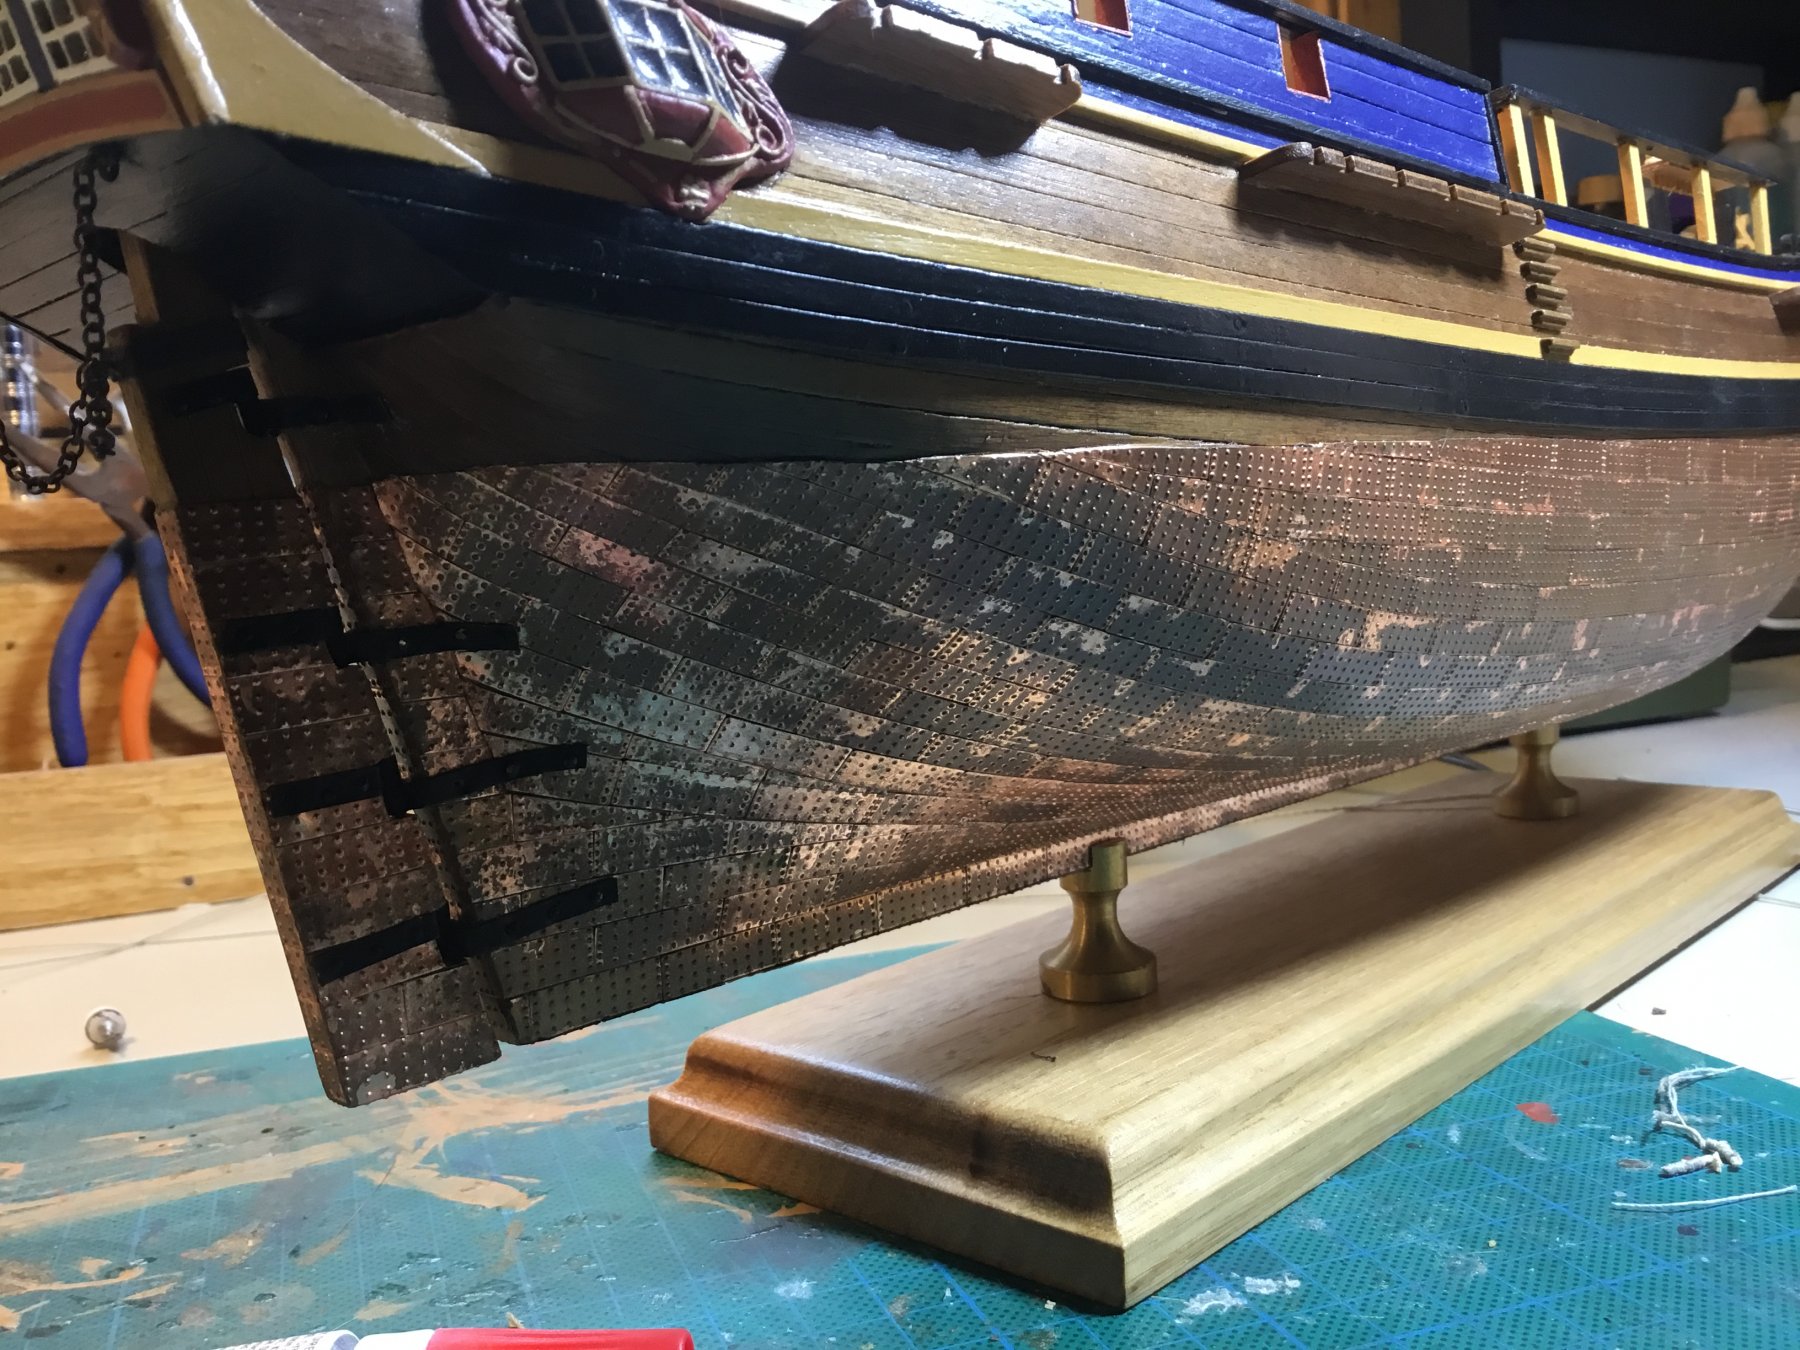
Whichever plates you choose, I probably wouldn’t overlap them. I think it would be very difficult to get a neat and tidy finish. I’ve done 3 models using your option 1 - I bulk ordered the plates from Cornwall Models and they were a bit too expensive to bin. While not completely satisfied with the size of the rivets/dimples on the plates, I was happy with the overall effect. If I was choosing again, I would probably go something with much smaller rivets but I still wouldn’t overlap. Below is my current build - HMAT Bounty with option 1 plates attached.

-
-
I also only use diluted wood glue on rigging. CA glue fumes are also very toxic. Cause flu like symptoms. I only use CA when fixing copper plates. I put puddle on the bottom of an upturned glass jar and use a glue applicator (like a metal hook that holds a drop of CA) purchased from a hobby shop. I only use CA while working outside on a verandah in the open air.
-
-
-
-


Question on ropewalks
in Rope Materials and parts resources
Posted
Gday Mate,
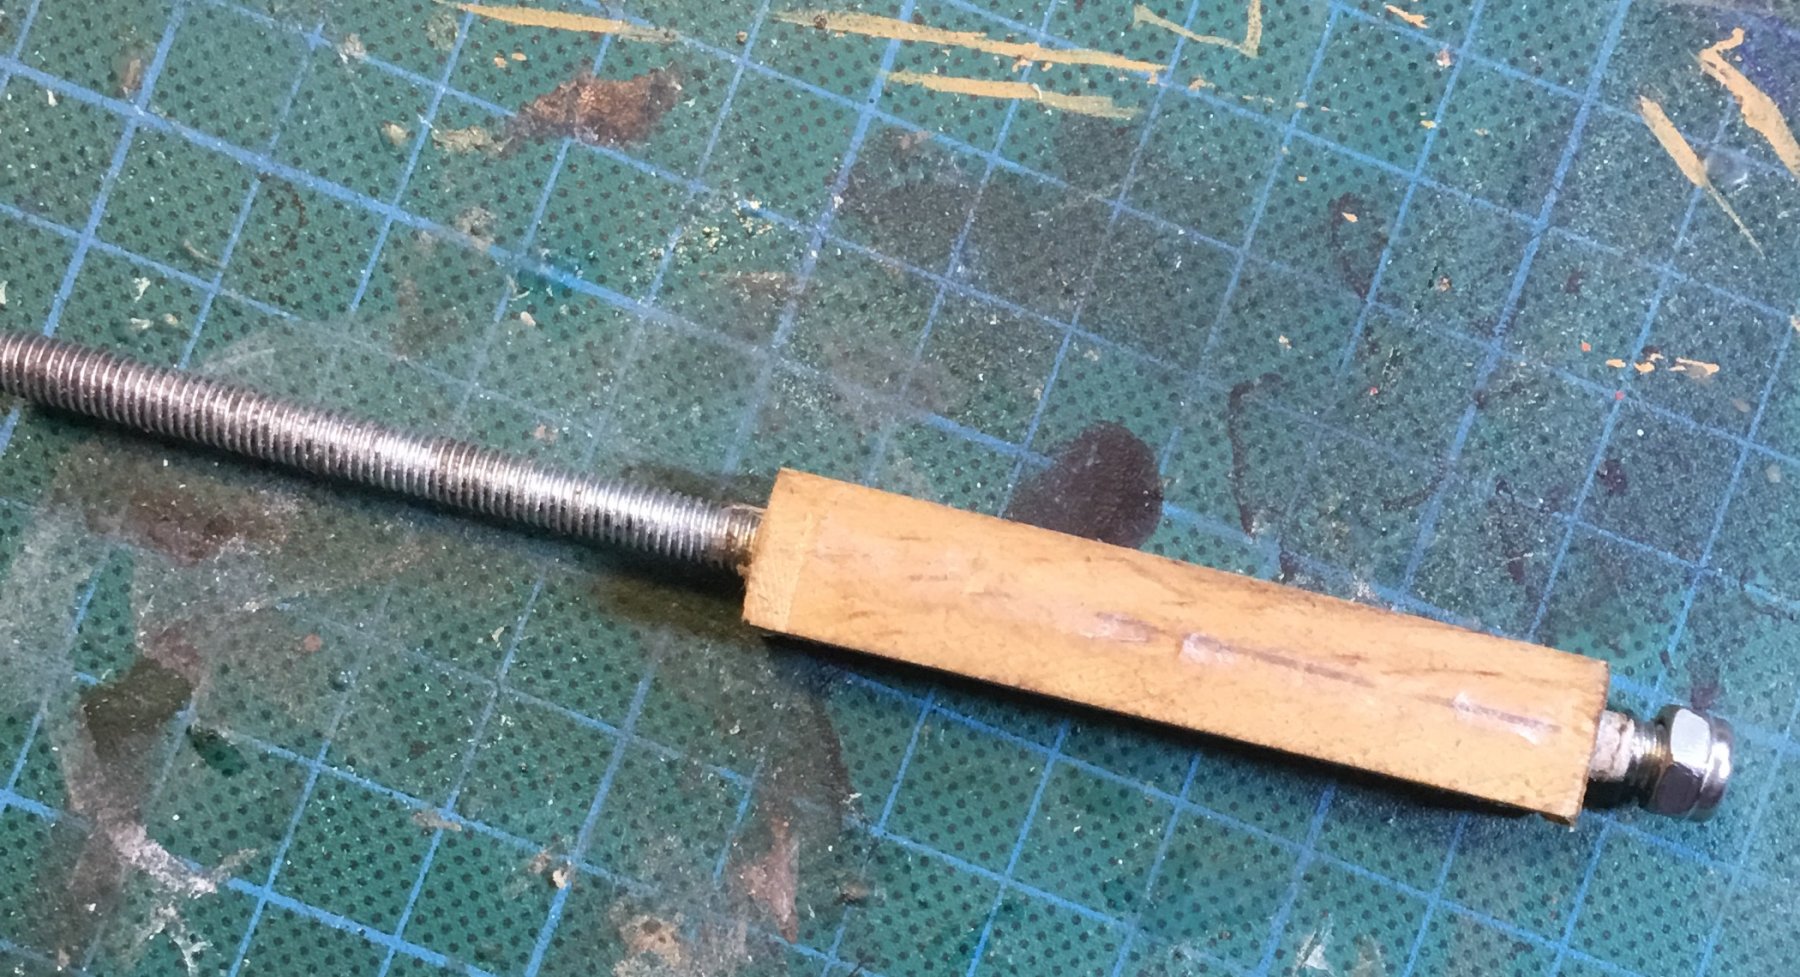
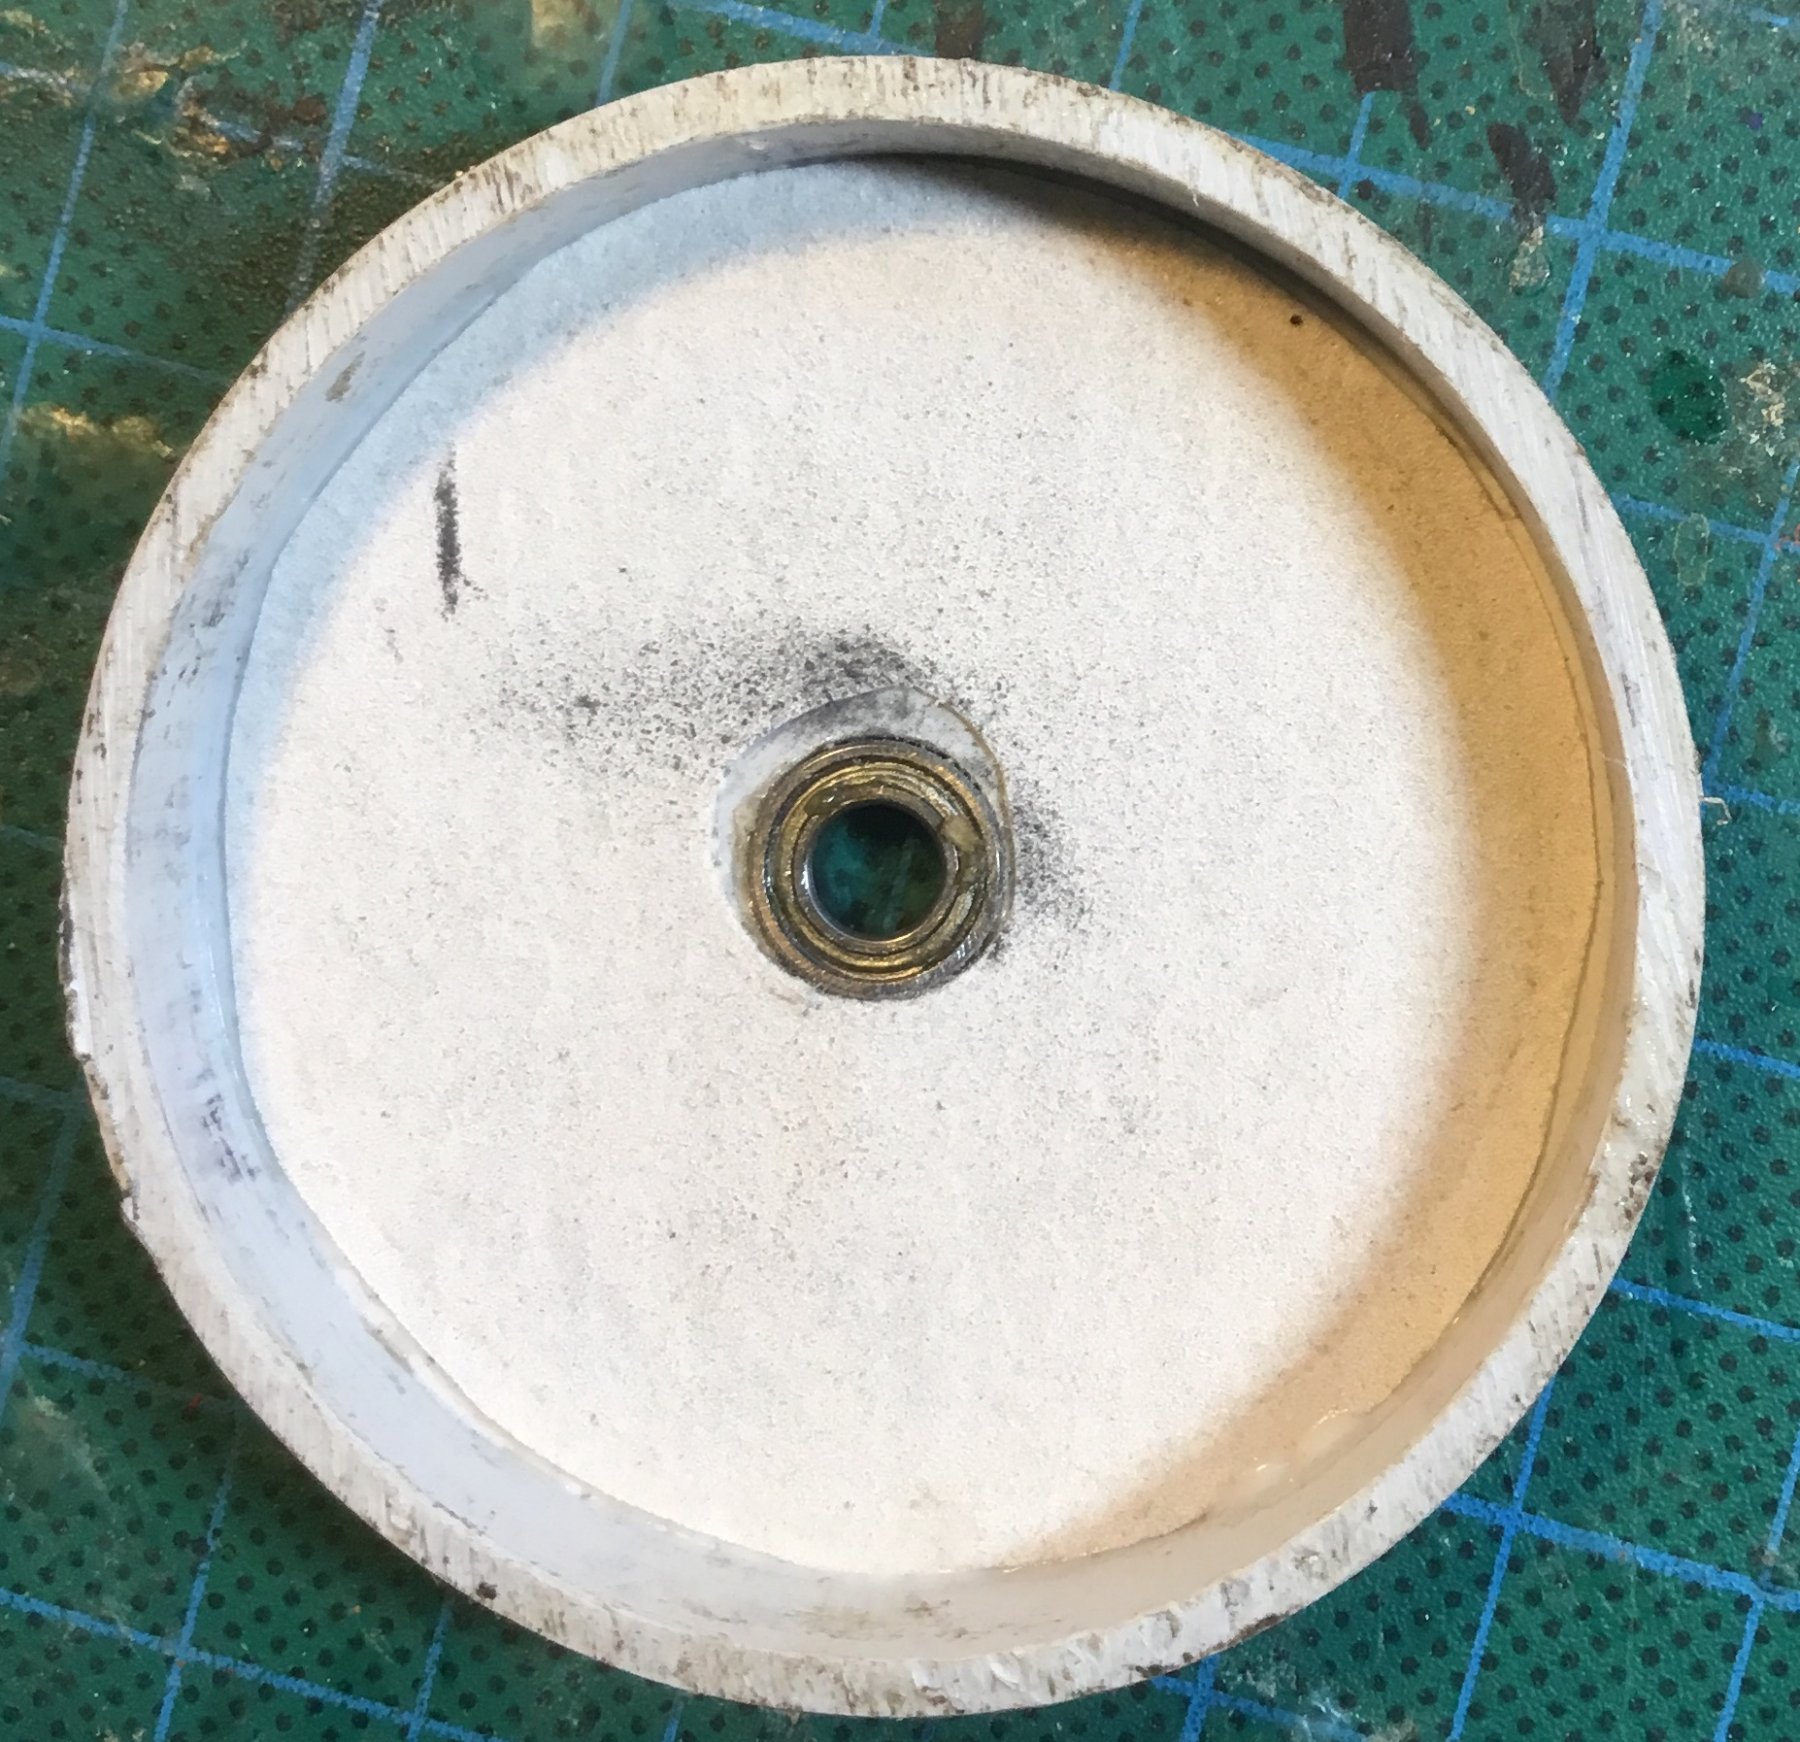
the rope walker in your pic is the one I built quite a while ago. I have made many great looking ropes with it since and it is now one of my favourite aspects of the hobby. In answer to your question, I didn’t put a motor at the other end of the Walker, but after I make a length of rope on the walker, I have found that attaching a cheap battery powered screwdriver on a low speed setting to the rear of the bolt on the trolly to which my rope strands are tied and giving it 50 - 100 rotations tightens up the rope even more. The rope still needs to be under pressure i.e the lead weight is still attached to the trolly. After removing the rope from the Walker I always run it backwards and forwards over a curved , hard surface to ‘harden’ it. The pic attached is my trolly with the screwdriver sitting on the bolt which goes through a bearing to a ring onto which I tie my threads - it is not set up to make any rope - just a demo pic so you can see what I mean. Hope this helps.
Steve (hornet)