


mugje
-
Posts
978 -
Joined
-
Last visited
Content Type
Profiles
Forums
Gallery
Events
Posts posted by mugje
-
-
-
Very nice clean work! Love it!
")
- jereremy and Knocklouder
-
 2
2
-
-
-
You can see it's one of your specialties...very nice painting job and thanks for explaining
- Thukydides and Glen McGuire
-
1
-
 1
1
-
49 minutes ago, MCo said:
Thanks a lot (reuze bedankt)! The lines are beautiful. But one wonders what the lower deck space would have been like, for a 130 men crew.
Yeah those numbers of crew members are always mind boggling with these old ships. So weird how everyone fitted in and on these vessels. Life was hard back then. 😮
-
Do I see it right that you also (not sure how to call it, but the small red edge on the inside of a gunport) lined off the gunports, like Blue Ensign also did in his version of the Sphinx?
- mtaylor and Knocklouder
-
2
-
-
Really nice, you are doing a great job! Also beautiful lines in this ship
-
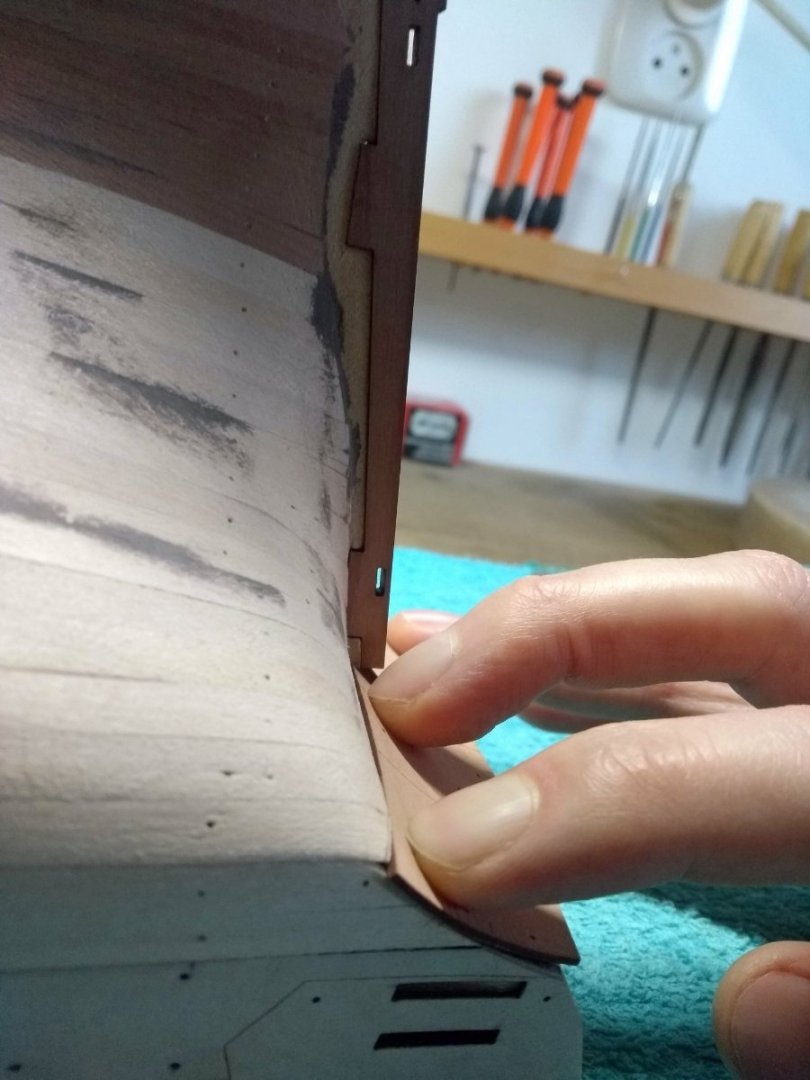
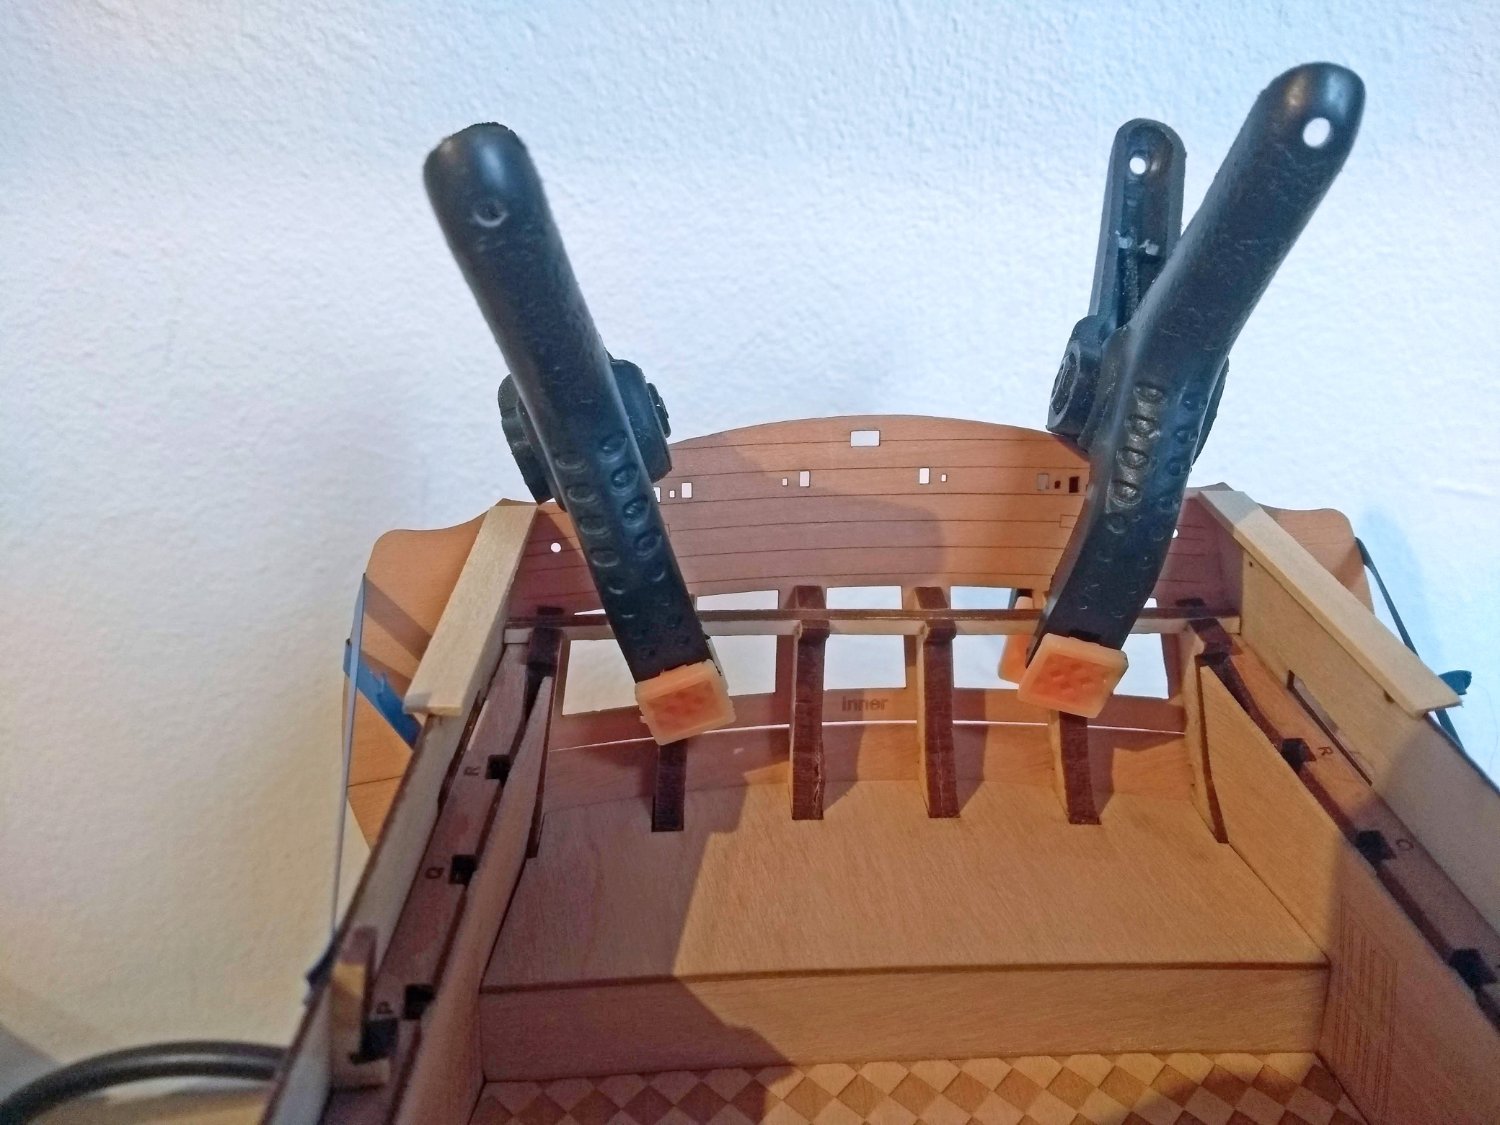
Just sharing my solution how i've dealed with that little gap between the first layer of planking and counter planking. I used some filler to fill up the gap, also to give everything some strength because it's connected to each other. And at the counter planking I glued a extra 1 mm thick piece of pear so it covers the gap nicely. Now with testing a scrap piece of pear of 0.8mm (the second layer planking thickness) there no height difference anymore and it looks nice level to each other. Also if i'm not mistaking later in the construction the bottom part of the counter piece will be covered with a decorative strip of wood.
- Thukydides, KurtH, Blue Ensign and 9 others
-
12
-
It´s a cool unusual design, I like it! It somehow reminds me of a little tank but then on water
- hollowneck, thibaultron, Canute and 3 others
-
6
-
1 hour ago, glbarlow said:
The overlap of the second planking should cover that. The counter is planked first then trim the hull side planking flush with the planked counter. The gaps should easily be covered, the first planking is a foundation, doesn’t always need to be a perfect match to the final look generated by. 2nd planking. The parts are generally oversized on purpose as every hull is different. You can also sand the counter piece to fit a little better.
Do make sure the second planking is equal, by trial fitting, to the rudder at the stern post, generally this is more problematic than the counter. I wish my Pegasus log wasn’t lost in the great 2013 crash.
Thanks Glenn, that's helpful 👍
-
-
-
-
I've learned with building the Sphinx that diluted PVA gives you also more time jiggle around before it sets. Nice progress so far! Master Korabel and Vanguard Models are both quite innovative with their designs.
- Ryland Craze, Canute, Dave_E and 4 others
-
7
-
-
Okay...it's time for me now to place the lower stern counter into the right place, but I have a question...let's see if I can explain it.
Blue Ensign did a great job explaining how he tackled it, with temporary pinning the rest of the stern pieces. So you can see if everything lines up.
Sounded like a great plan, so I did this too. Need here and there a few little corrections, but in general this looked good and on the correct height (if it's not please let me know
") )
)
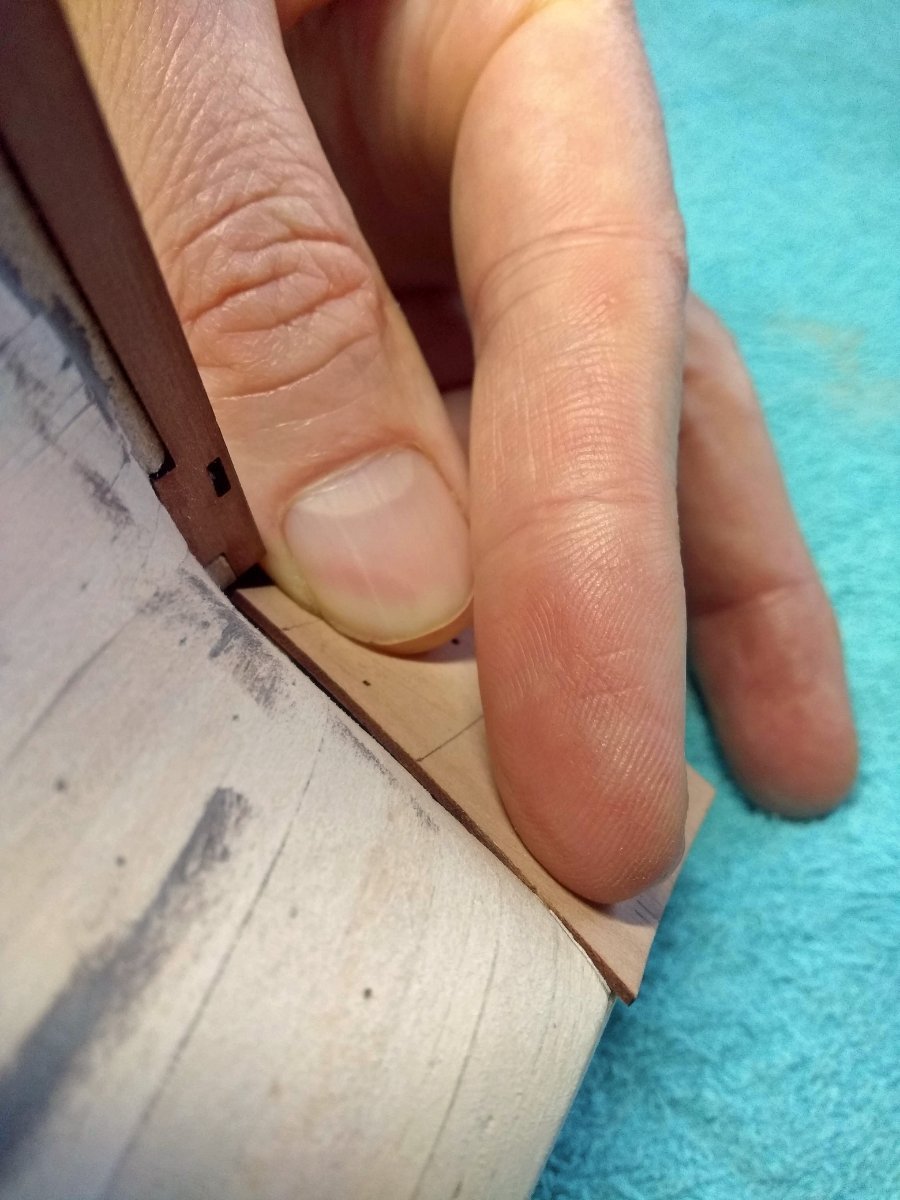
I asume the first layer of planking needs to be on the same height (thickness) of the lower stern counter. One flows in the same height into the other, without elevation?
Well that is what I think it should be but if it's not by design, please let me know.
Because as you see in the lower pictures, you see that my first layer of planking is a bit lower than the stern counter. In the outer corners not so, but closer to the stem it is lower. I can put some filler to get it more level with each other.

-
-
22 hours ago, glbarlow said:
Seems ready for second planking to me, well done!
Thanks Glenn and everyone else for the likes! And everyone that has visited my buildlog this year, giving likes and comments/tips how to improve. Hope to see you next year again. I wish everybody a healthy and fun new year
❤️
- Thukydides, Mr Whippy, glbarlow and 3 others
-
6
-
3 hours ago, chris watton said:
You do not have to fully rig it, you can leave off all sail related rig and just add yard rig, the ties, lifts and braces, and leave it at that. That also means a lot less blocks to tie to the lower yards.
Thanks for the suggestion Chris! I'll take it one step at the time...and see where I end

- chris watton, Mr Whippy, mtaylor and 1 other
-
4
-
Good luck with your Sphinx journey! It's such a lovely kit...I also toyed with the idea of building it without rigging etc. due to space saving. But I also lack the experience to rig a three masted frigate...so i'm going to rig it just for the experience I think...but I have some time to decide it so nothing is set in stone at this point.
-
-


HMS Sphinx 1775 by mugje - Vanguard Models - 1:64
in - Kit build logs for subjects built from 1751 - 1800
Posted · Edited by mugje
New update about what I've done this week:
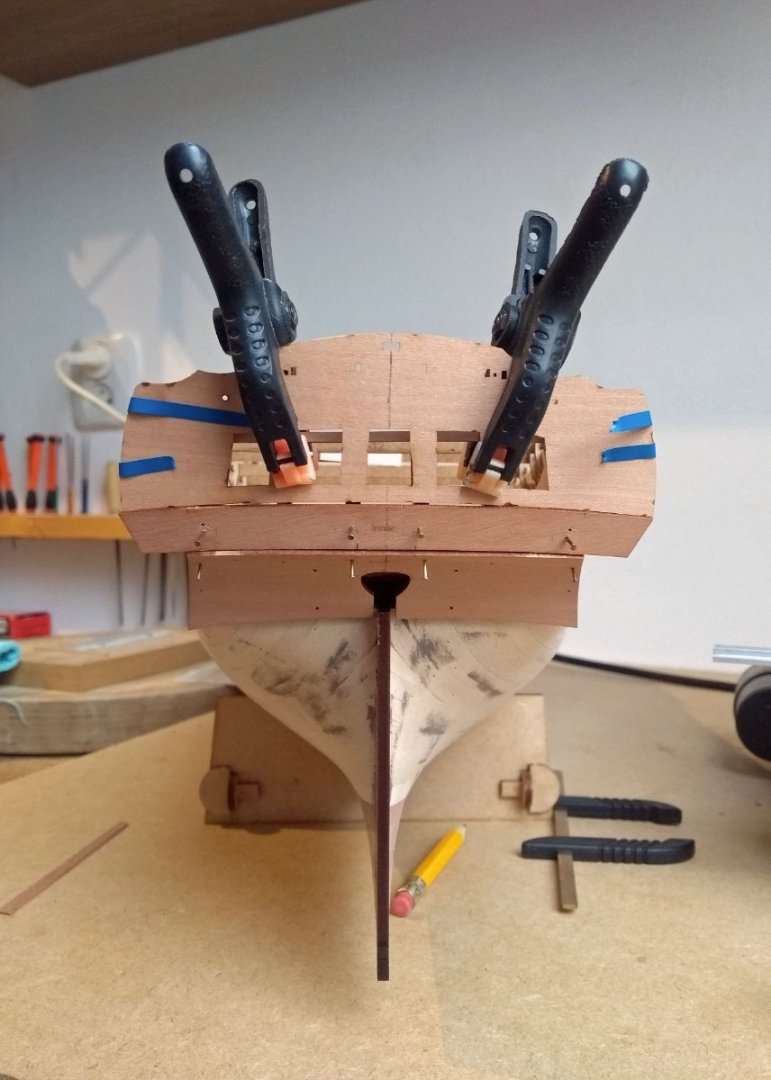
Installed the prow, keel and rudder post, including their outer patterns/facings so to speak.
This gives the ship a whole new appearance.")
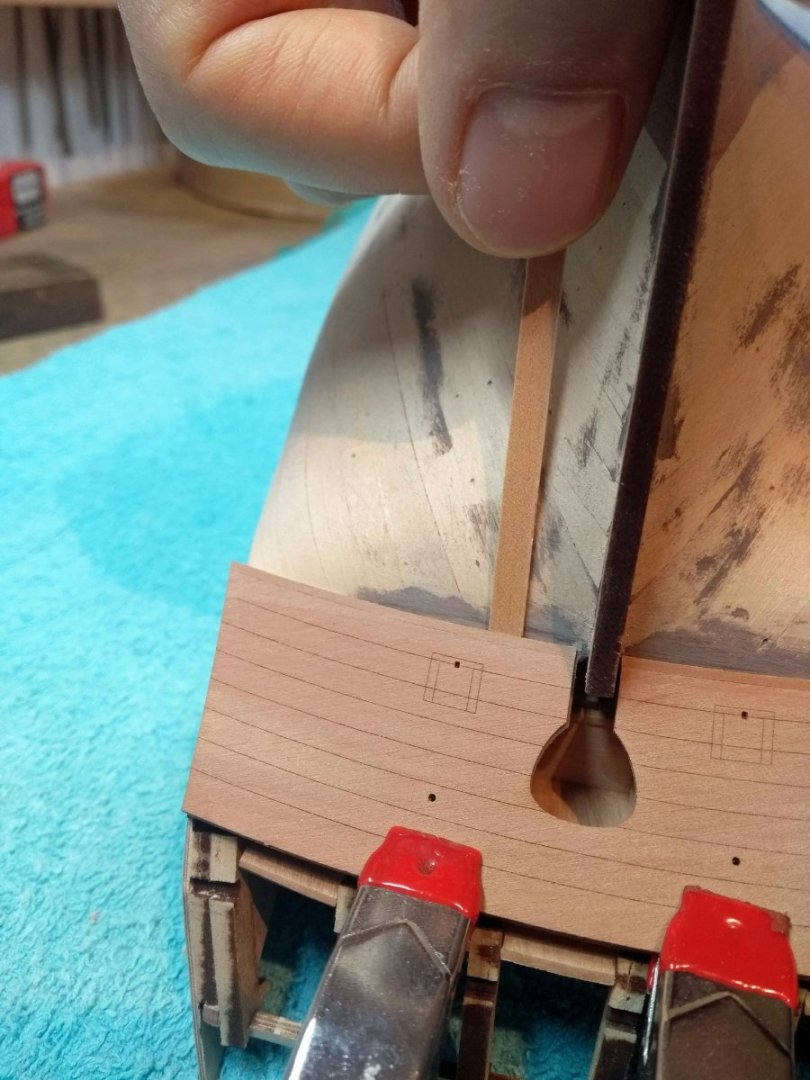
After that I glued the outer lower counter pattern in his perticular spot. This all went without trouble. Now I could measure the space between this pattern and the rudder post, so I could fill the difference with a thin piece of pear wood that I abstracted from the same sheet where also the outer patterns came out of. So there is no color difference")
Because of the thickness difference (the outer patterns of the rudder post and keel are 1mm thick and the supplied outer pear planks are 0.8mm thick) I maybe need a bit of filler underneath the second layer of pear planks against the rudder post and keel. Just to get them at a even height in the end. Will think about how to approach this.
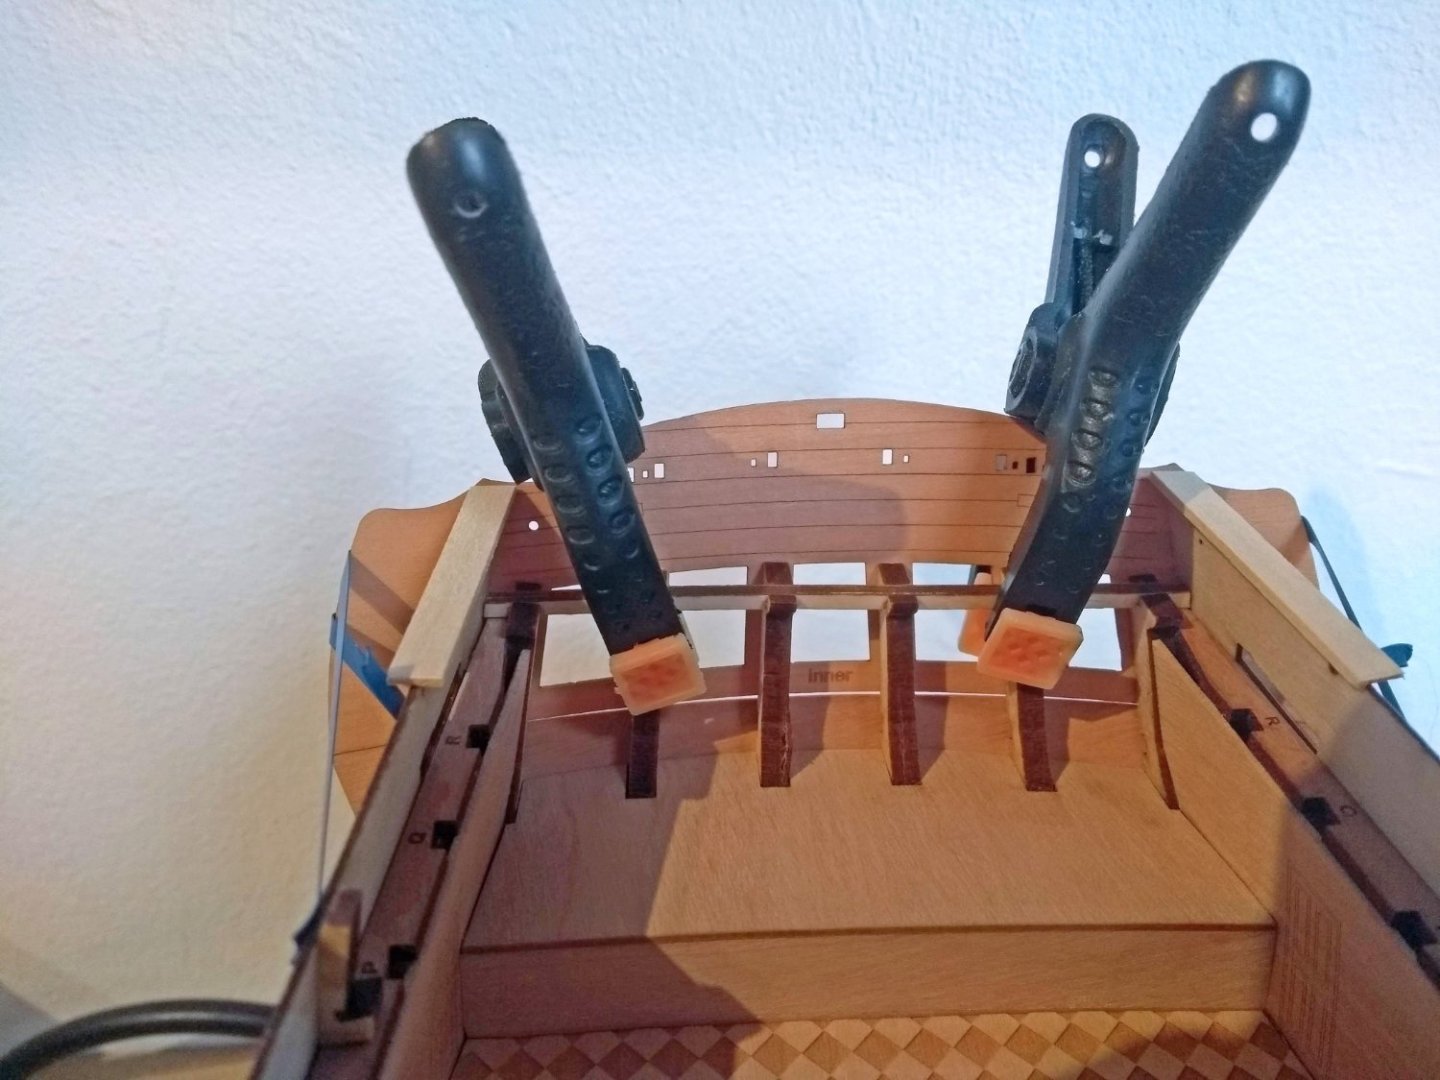
Last step that I've done was soak the fore outer planking patterns and clamped them onto the hull. They have dried overnight and will glue them soon onto the hull.
A bit exciting these larger thin pieces of wood, so I need to gather some courage to get them in a good way onto the hull
I also thought about the gunport stops and if i'm going to do them on all the gunports and not only at the ones with actual lids. I saw this idea in Blue Ensigns log and like the look when all the gunports have the stops, including those without a lid. So i'm going for those...it looks fairly easy to execute this small modification. The two questions after that were...glueing first the patterns onto the ship and install after that the stops? Or do them first and glue the patterns after that. I go with the first option because the outer patterns have a bit of extra "meat" onto the gunports...they are a bit smaller then the mdf inside frame so you have some wiggle room and you can sand them afterwards flush with the mdf framing. So it looks to me easier to install them afterwards.
Next question was...at all four sides a stop or only at the sides and the bottom? I found this topic:
And saw that both options look correct. It didn't seem if there was 1 correct answer, so then I choose for asthetics and will do all 4 sides because I find that look more appealing.