


mugje
-
Posts
931 -
Joined
-
Last visited
Content Type
Profiles
Forums
Gallery
Events
Posts posted by mugje
-
-
pff...such beautiful work man, you are a true artist!👍
- mtaylor, hollowneck, mort stoll and 3 others
-
 5
5
-
 1
1
-
-
😔 Wish you and your family a lot of strength and beautiful moments with your 4 legged companion in this upcoming time...
- AJohnson, mtaylor, Ryland Craze and 1 other
-
4
-
What a wonderful result! And she looks great on her new spot!
")
- mtaylor and Blue Ensign
-
1
-
1
-
-
-
-
-
Yeah you can always take it a bit further when laying the first foundation of planks. The flow of the planks will reveal the spots that aren't faired enough. Especially the bow and stern were for me a point that I needed to correct. But like I said...that isn't to difficult to do it then.
- Mr Whippy, KurtH and CaptnBirdseye
-
2
-
1
-
-
-
-
-
Will be interesting to see how much difference there will be between the standard supplied blocks and the pear wood set.
I have the idea that the items are so small...that I wouldn't really see the difference, but who knows
-
Interesting project!
👍
- Mr Whippy, JeffT, thibaultron and 3 others
-
6
-
Thanks for the likes and compliments!
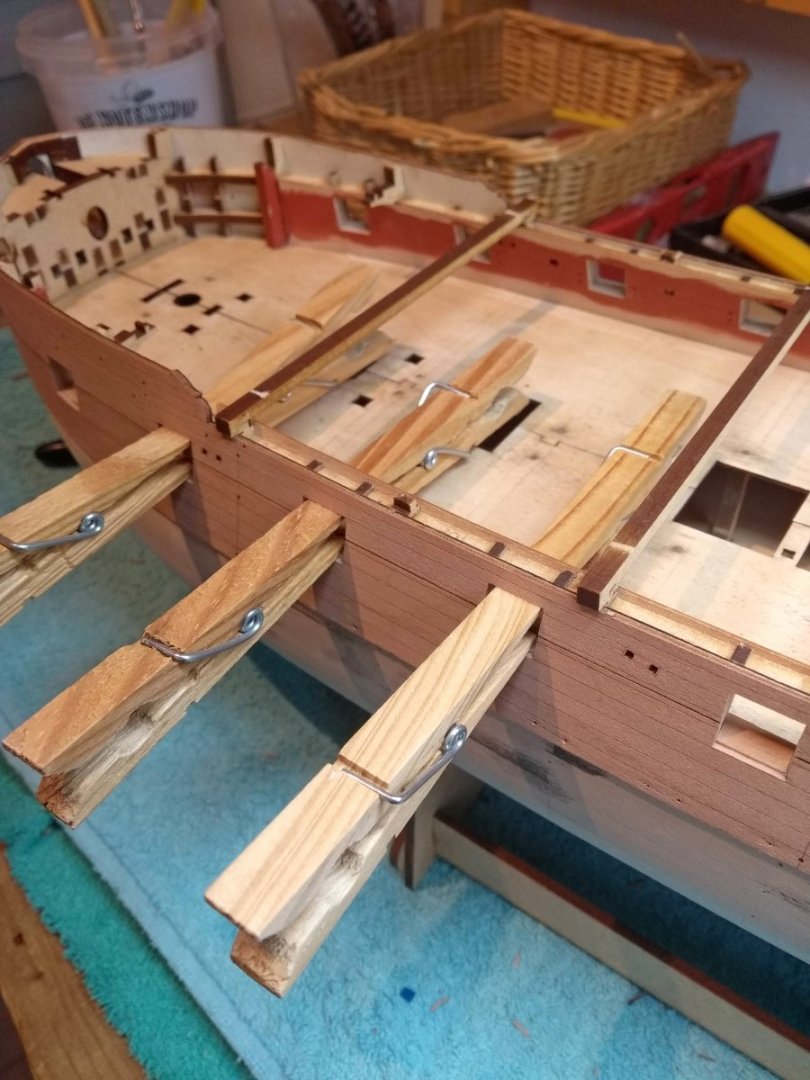
Just a small clamping tip regarding the gunport linings. Especially the lower cill was frustrating to properly clamp or push down until the glue would set, but clothespins help with pushing down the cill until it's dry. Just reverse them so they push against the upper and lower side. The side cills could be hold in place with larger tweezer clamps, but the clothespins can be used also for this.
- RossR, wvdhee, DonSangria and 19 others
-
22
-
-
Little update here:
I didn't had a lot of time to work on the Sphinx because I was renovating my garden these last few weeks, season is beginning and needed to do quite some work.
But these last few days I could do here and there some work on the ship
.
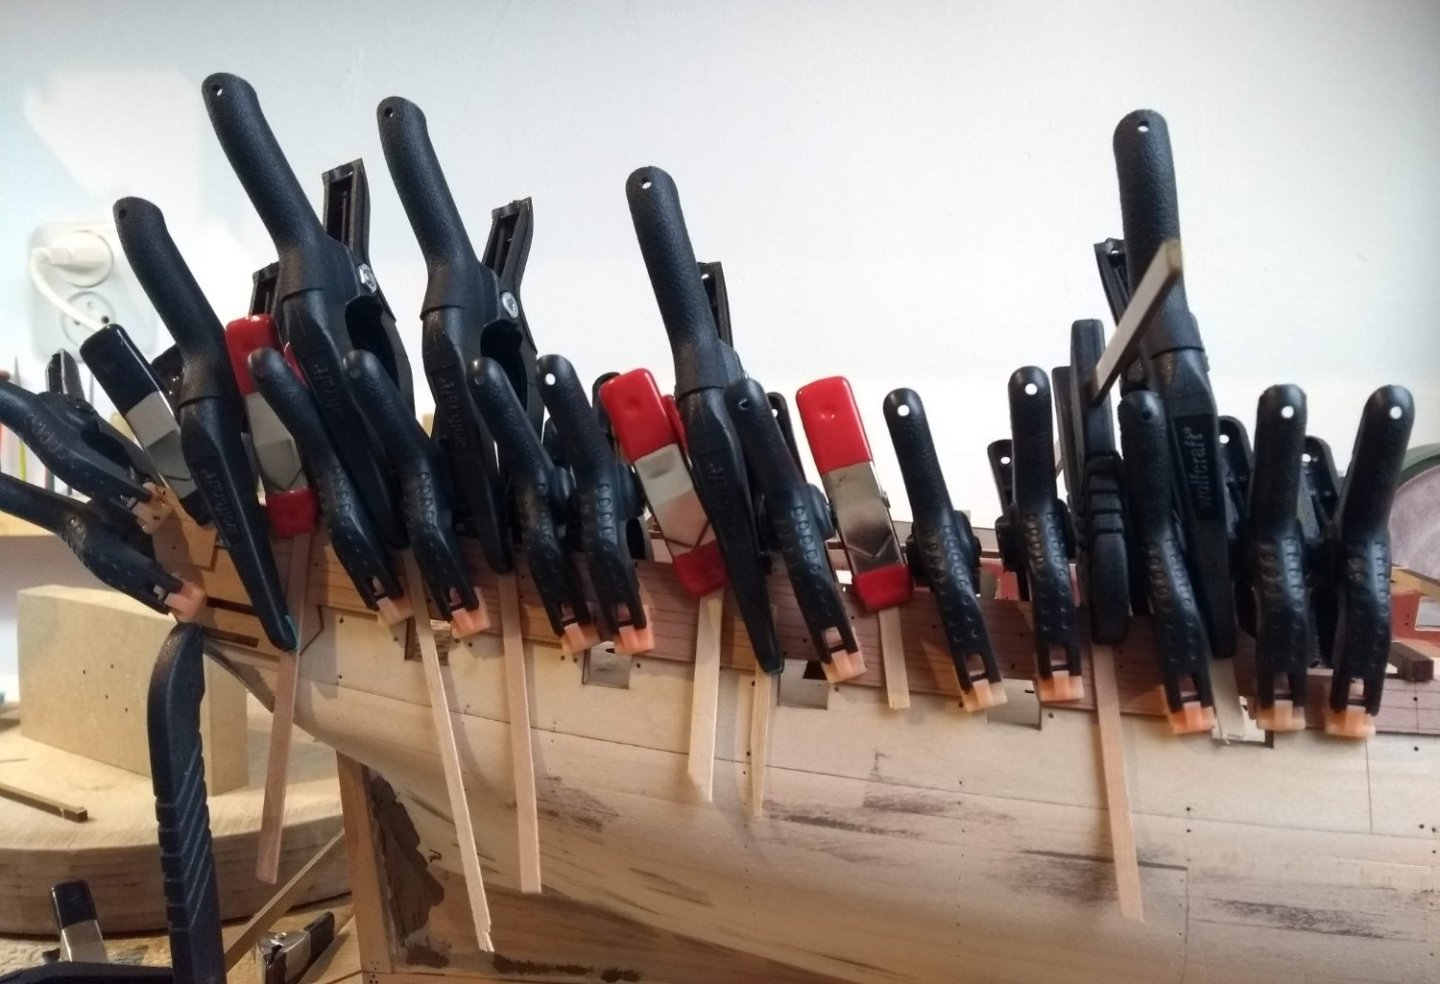
I have glued the large pear sidepanels onto the hull. Not super difficult, but some concentration is needed to get a good fit. Especcially the lower front pieces I found the most challenging. I do have a small gap here and there between the upper and lower parts, but overall i'm happy with the fit. Those seams are going to be covered anyway so it's not really a problem. The most important thing for me was that I got all the right curves of the hull and the pieces were glued firm against the underlying patterns.
I advise to have a sound clamping plan before you begin
 it takes away a bit of the stress when you apply the diluted pva and the pattern begins to curl a bit.
So dry-fitting first helps with this.
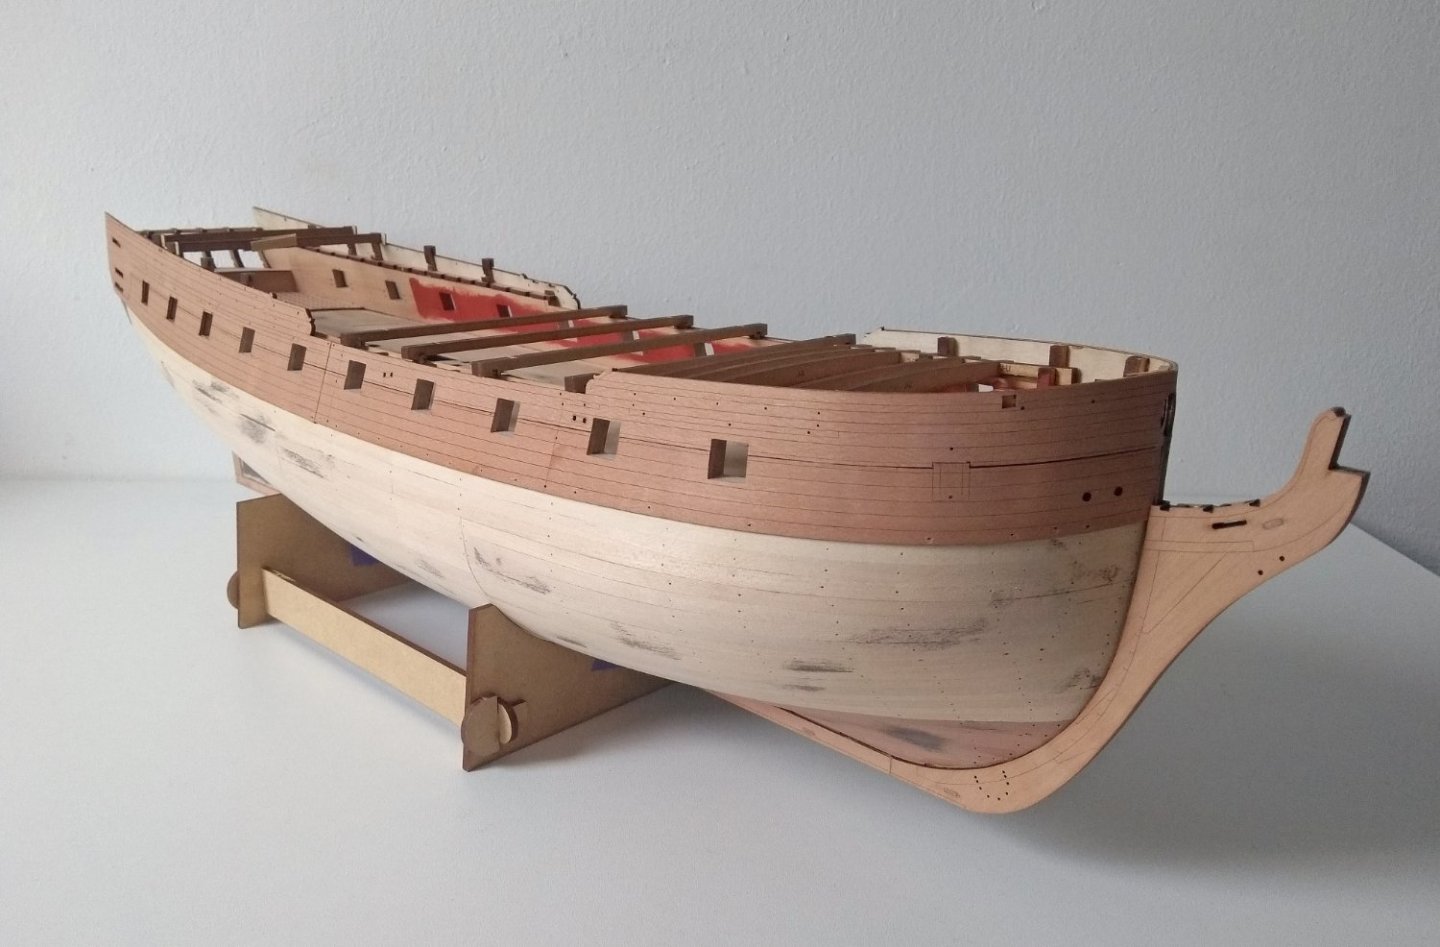
After that I sanded all the gunports flush with the inner MDF frames and began a test fit with the gunport linings. Used 0.5 pear for this and are quite happy with the first results. They are not too much in your face but distinctive enough to notice. Also the 3 ports with the lids need some extra work, because the underlying pattern didn't lay flush with the MDF inner frames. So I need to fill up or sand down here and there. It's a bit different for each gunport, a little bit of extra work...but that's part of the fun

2 done....18 more to go!

-
Great to hear your plans! What do you considering "medium size"? The Flirts and DoK or also Sphinx size? Just wondering
- chris watton, AJohnson, Canute and 2 others
-
5
-
She looks fantastic! And so massive! Then you can appreciate when fittings etc are designed in the right scale, and not a gross blob of wood/metal. The fine details really gives the ship a massive appearance.
- hollowneck, mtaylor and Blue Ensign
-
2
-
1
-
11 hours ago, rvchima said:
Hey Mugje,
I just ran into a problem where my rudder with the tiller arm wouldn't fit into the opening in the hull. I had to remove about 6mm of the rudder post to make it fit. I recommend removing the main rudder piece from the 3 mm sheet now to see if it fits. It will be easier to fix now than later.
Thank you for the warning! I did have checked it when I dry fitted the lower counter. So I think i'm good there. But will check it again, because i'm a bit in doubt now haha. Double check wouldn't hurt 👍
-
-
Greetings from Friesland
I wish you all the best with this build. It's a beautiful ship when it's finished!
-


HMS Sphinx 1775 by mugje - Vanguard Models - 1:64
in - Kit build logs for subjects built from 1751 - 1800
Posted
Update:
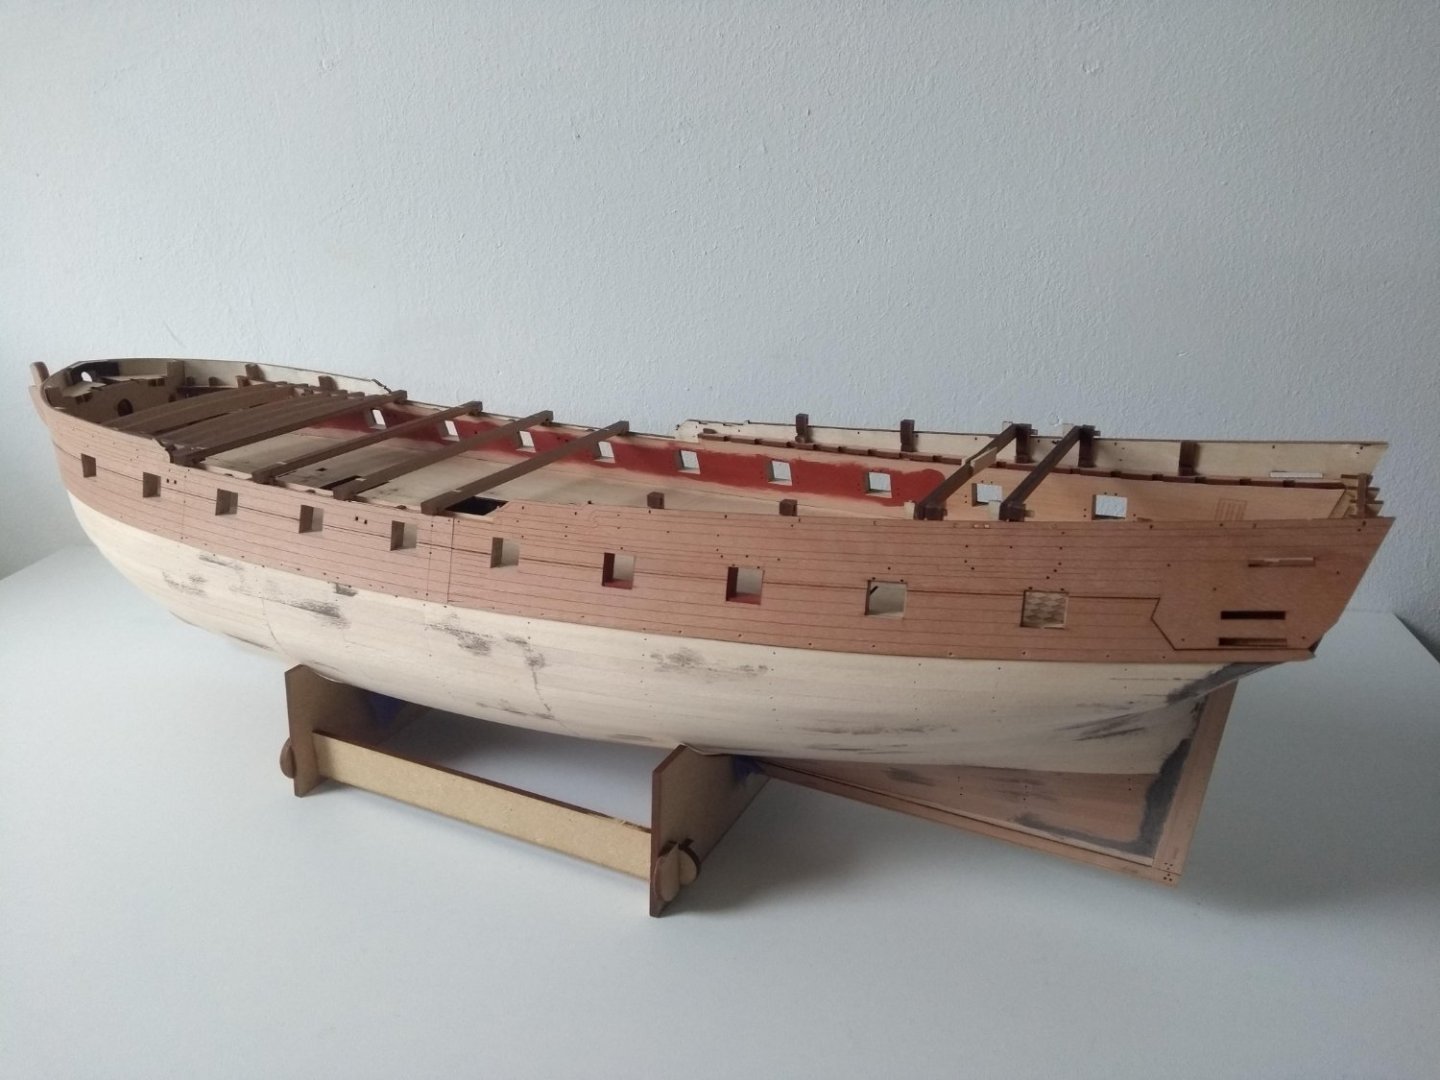
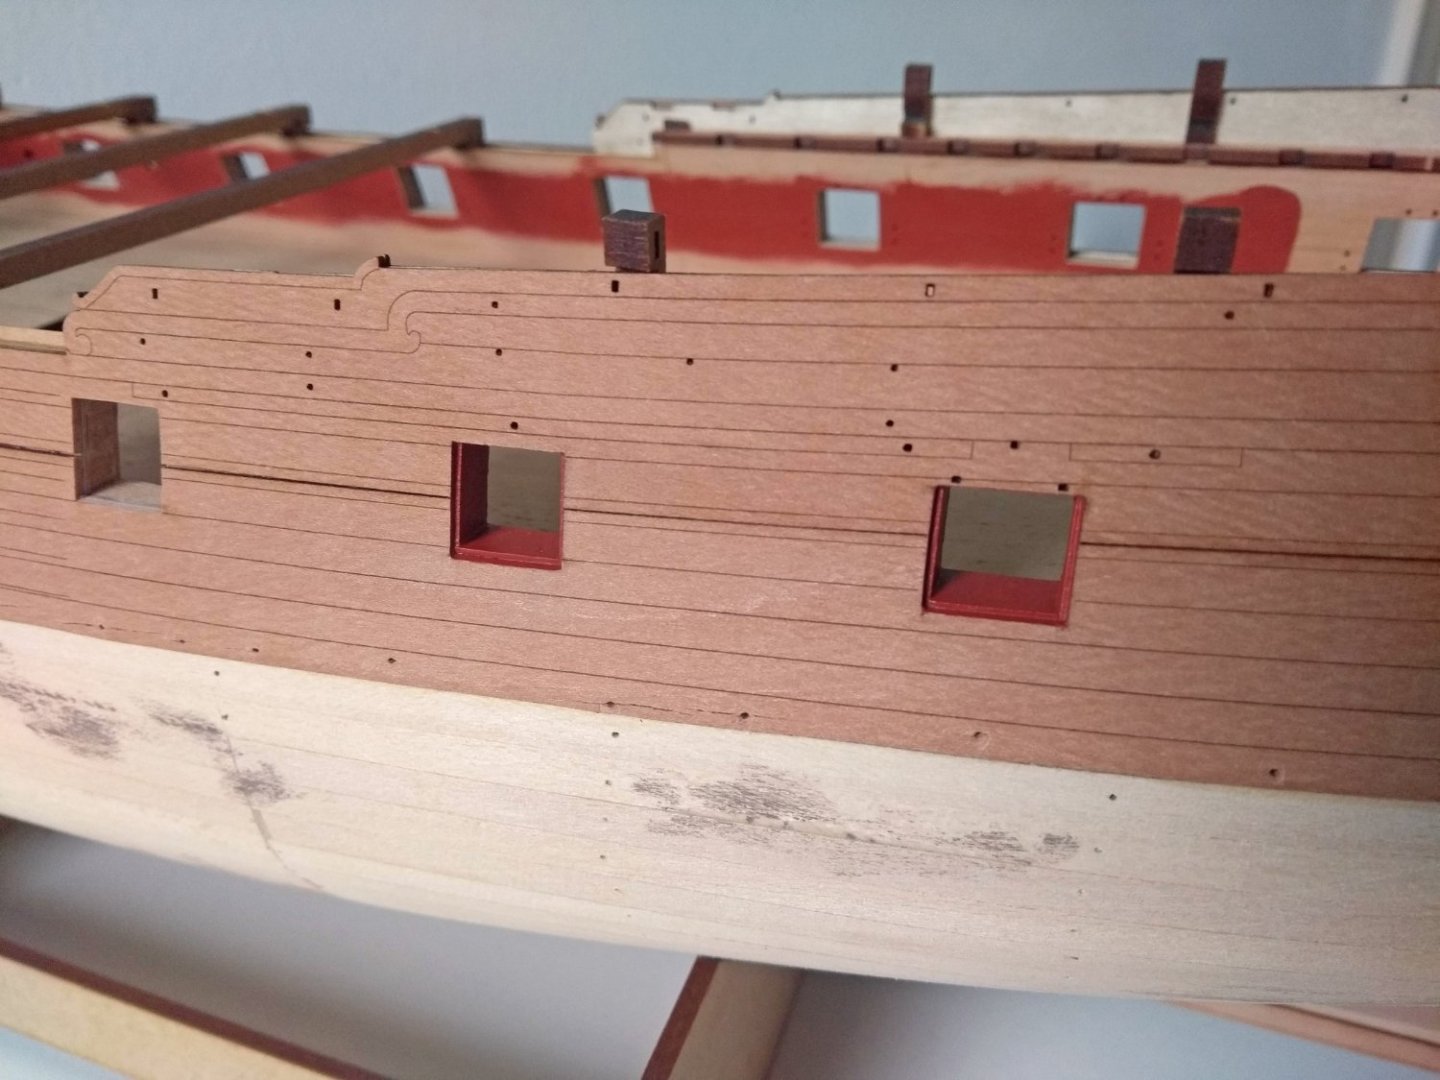
I finished all the gunport linings. I took me a bit longer then I expected, but to get it nice and clean...there needed to be used some filler here and there
But i'm happy how it turned out. I painted them right away...I did use some masking tape around the edges to get a clean edge. First I used some clear varnish to seal of any gaps where the red could leak into. That worked quite well.
Next step was to install the pre-lasered planks below the gunport patterns, that did go well, not really something I can say more about it. I also added two more planks that should be the base of the lasered wale patterns. I measured them (about 14mm wide) so I covered that area. Now below these planks I can begin with the real test
I want to leave the hull in the natural wood color, without the white color. So the planking journey begins from here. First step would be lining off the hull, mark the lines where the joints are going to be etc.
In the original planking pattern (you can find it in Blue Ensign's log of his Sphinx) there was a dropplank right under the wales. That would be a cool thing to replicate and makes the rest of the planking also easier. So I'm going to see if I can make that. That's why I found it important to allready plank the area underneath the wale patterns, so the drop plank would rest to the underside of it. Well...in theory