


mugje
-
Posts
978 -
Joined
-
Last visited
Content Type
Profiles
Forums
Gallery
Events
Posts posted by mugje
-
-
Last update this year I suppose
")
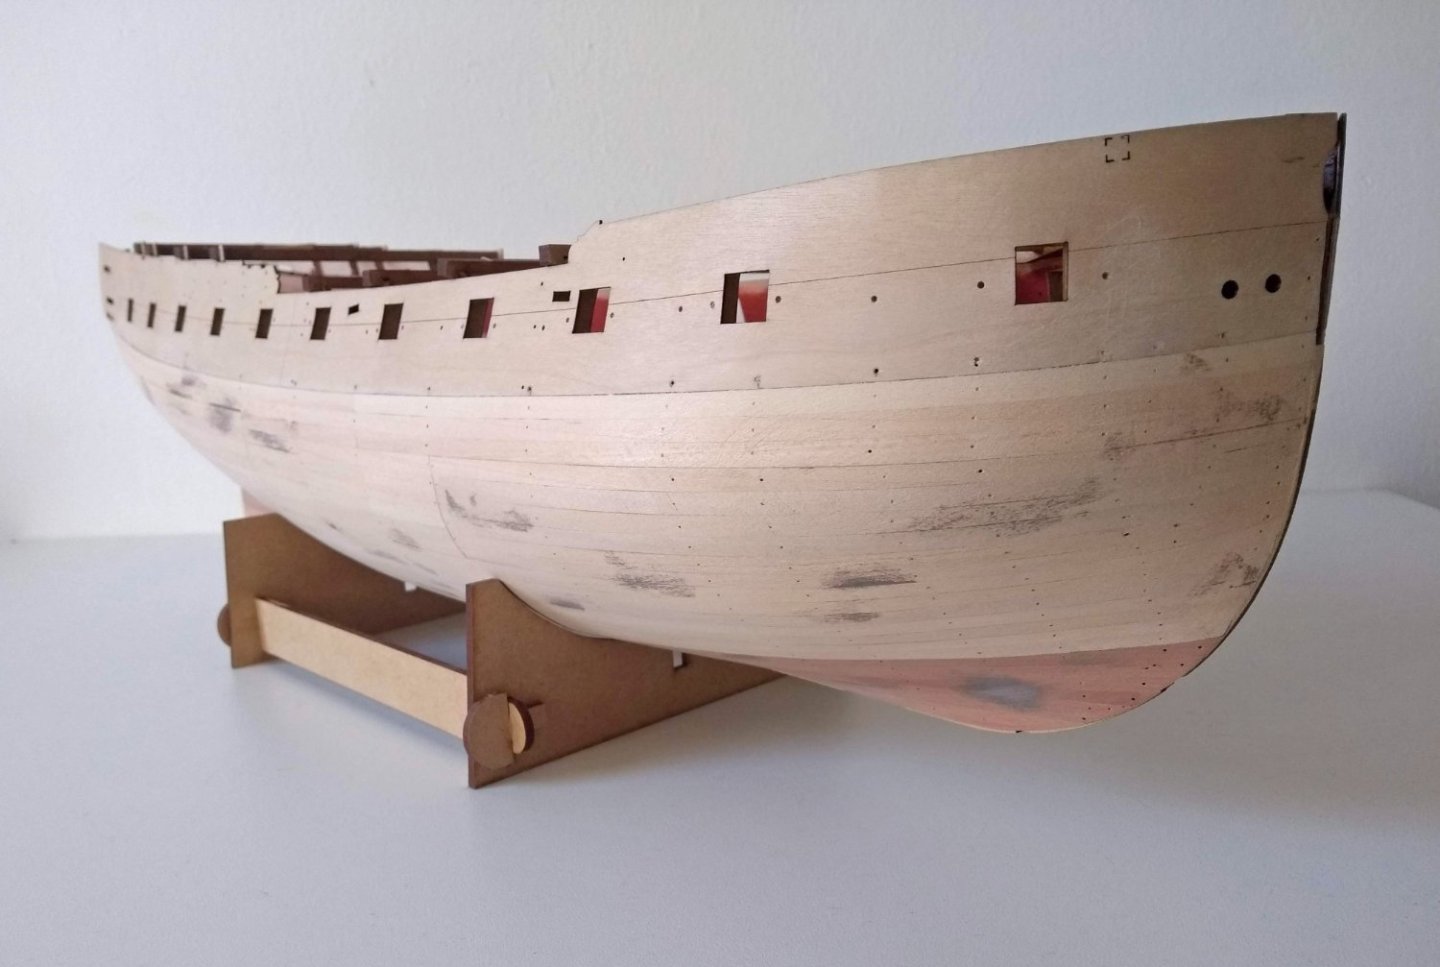
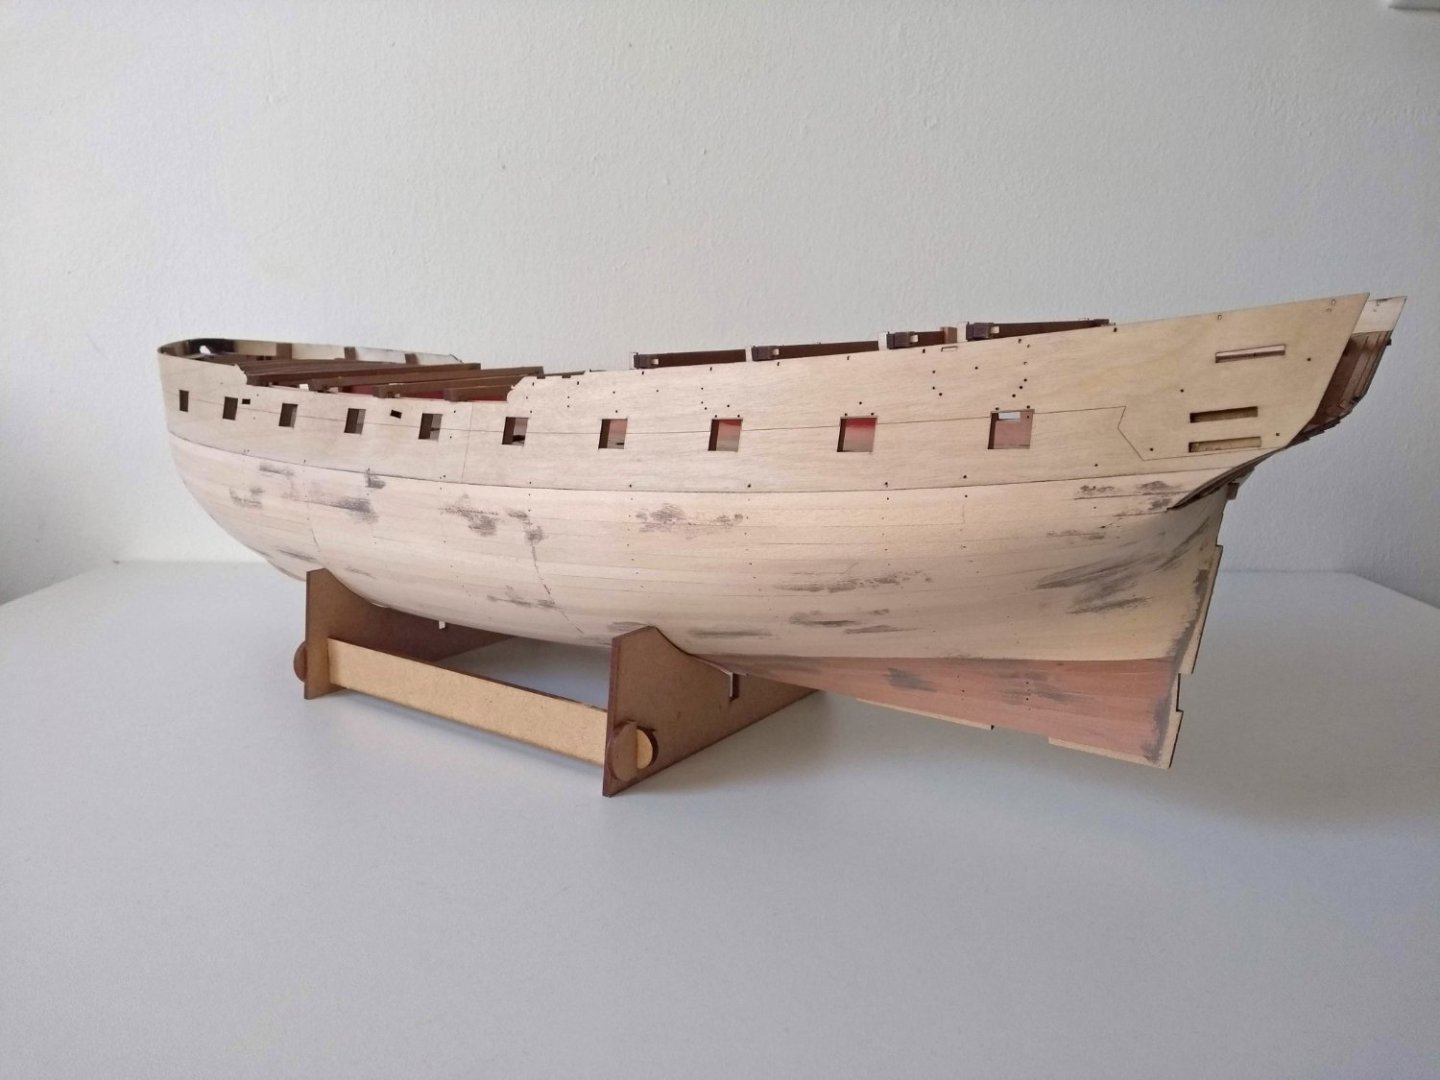
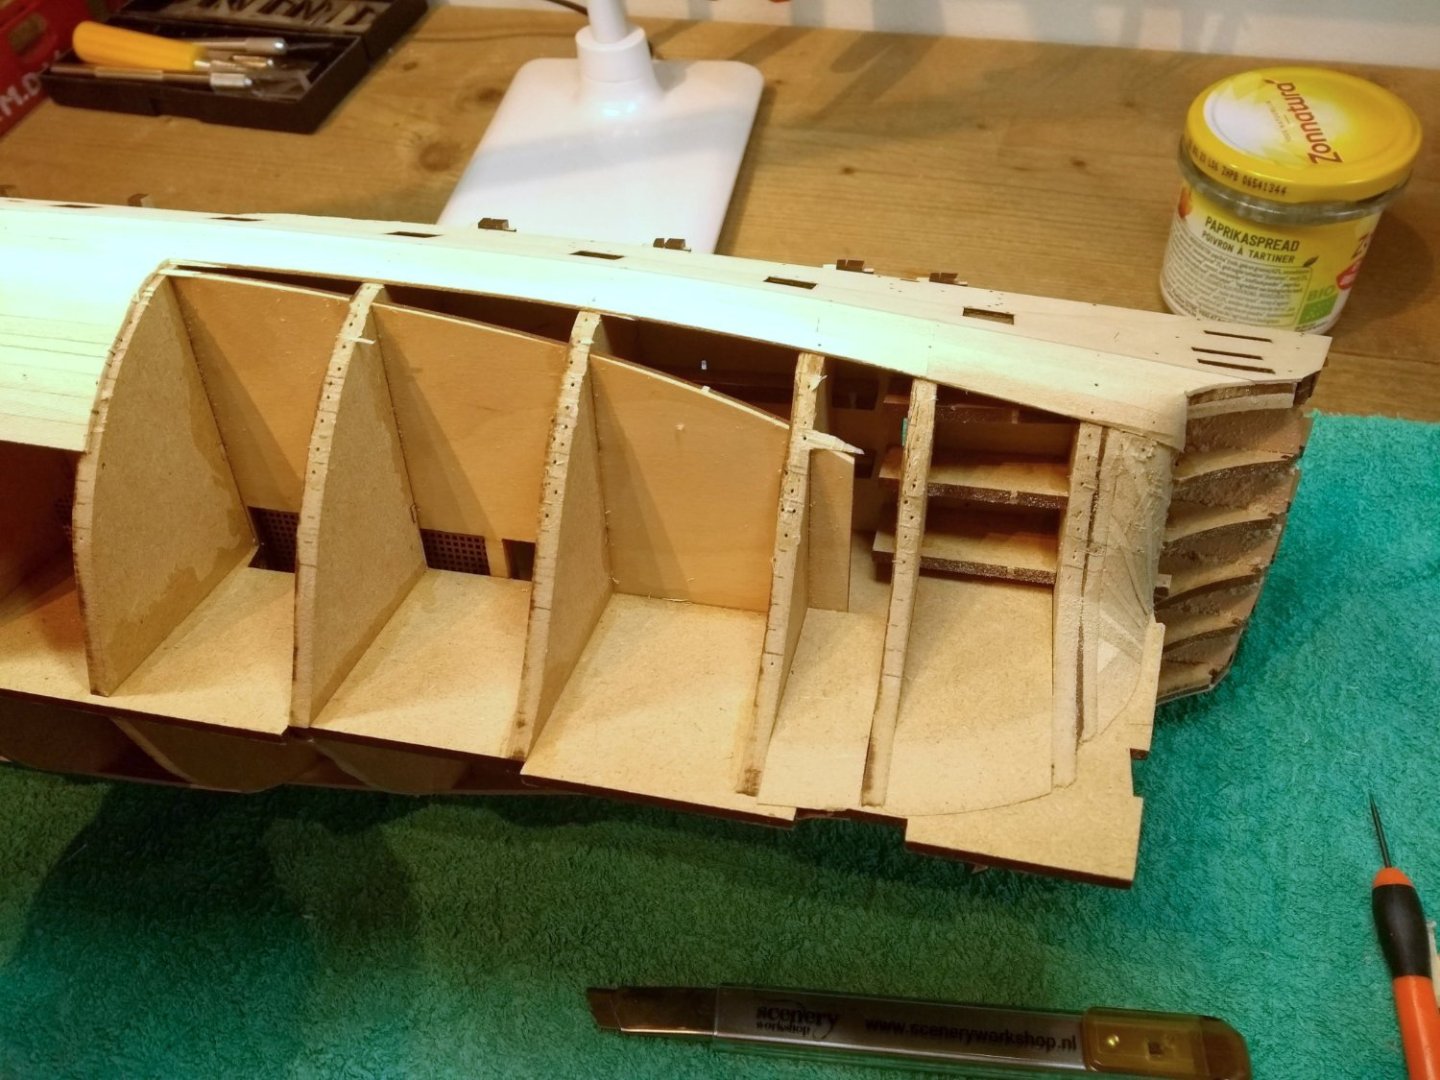
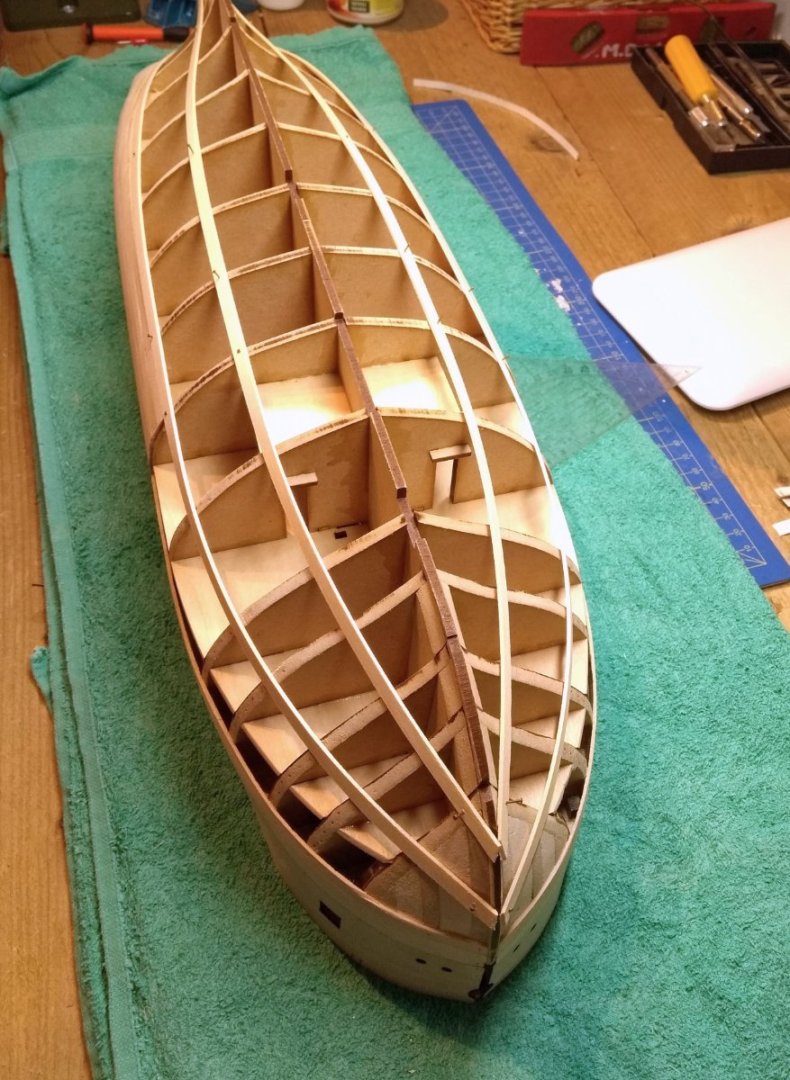
The hull is now sanded smooth and the little cracks/deeper lying planks etc. are filled. Ready for the next step I guess.
I will test fit the prow/keel and sternpost patterns to see if it fits right, and maybe there are spots that need a little extra sanding (places around the tabs that are connected to the prow and keel). Also need to test fit the lower counter ofcourse. I think I also need to check if the upper hull side patterns are flush with the gunports inside. I haven't done that yet, but also didn't see it mentioned in the manual. Would be a good moment for that.
- alex791, KARAVOKIRIS, KurtH and 17 others
-
 20
20
-
And be aware....when you are at the part of glueing it in place....don't put glue on the deck, but only at the false deck below. Because the PVA will moisture the wood causing it to swell a bit. This resulted in that the deck didn't fit anymore because I couldn't get it fast enough onto the false deck, and as a consequence...the deck became fixated in this swelled up size due to the glue that dryed. So I messed this up a bit
Totally my own fault due to the inexperience working with thin sheets of wood. So maybe I can warn others to not make these mistakes 
- Mr Whippy, DonSangria, Clark and 2 others
-
5
-
That a beautiful result so far!
- Mr Whippy, Knocklouder, mtaylor and 1 other
-
4
-
-
Looking forward to see your progress on this one.
- KennyH78 and Ryland Craze
-
2
-
Yes Sphinx is a good alternative, but not sure how experienced you are. I'm building it now and it's a real joy. Your criteria of decent instructions and materials are met with this kit. I can't judge how difficult it is because i'm not that far into the build yet, and i'm considering myself a experienced beginner. But knowing the designer and prototype builder are here on the forum, that gave me enough confidence for trying to tackle this kit

-
-
-
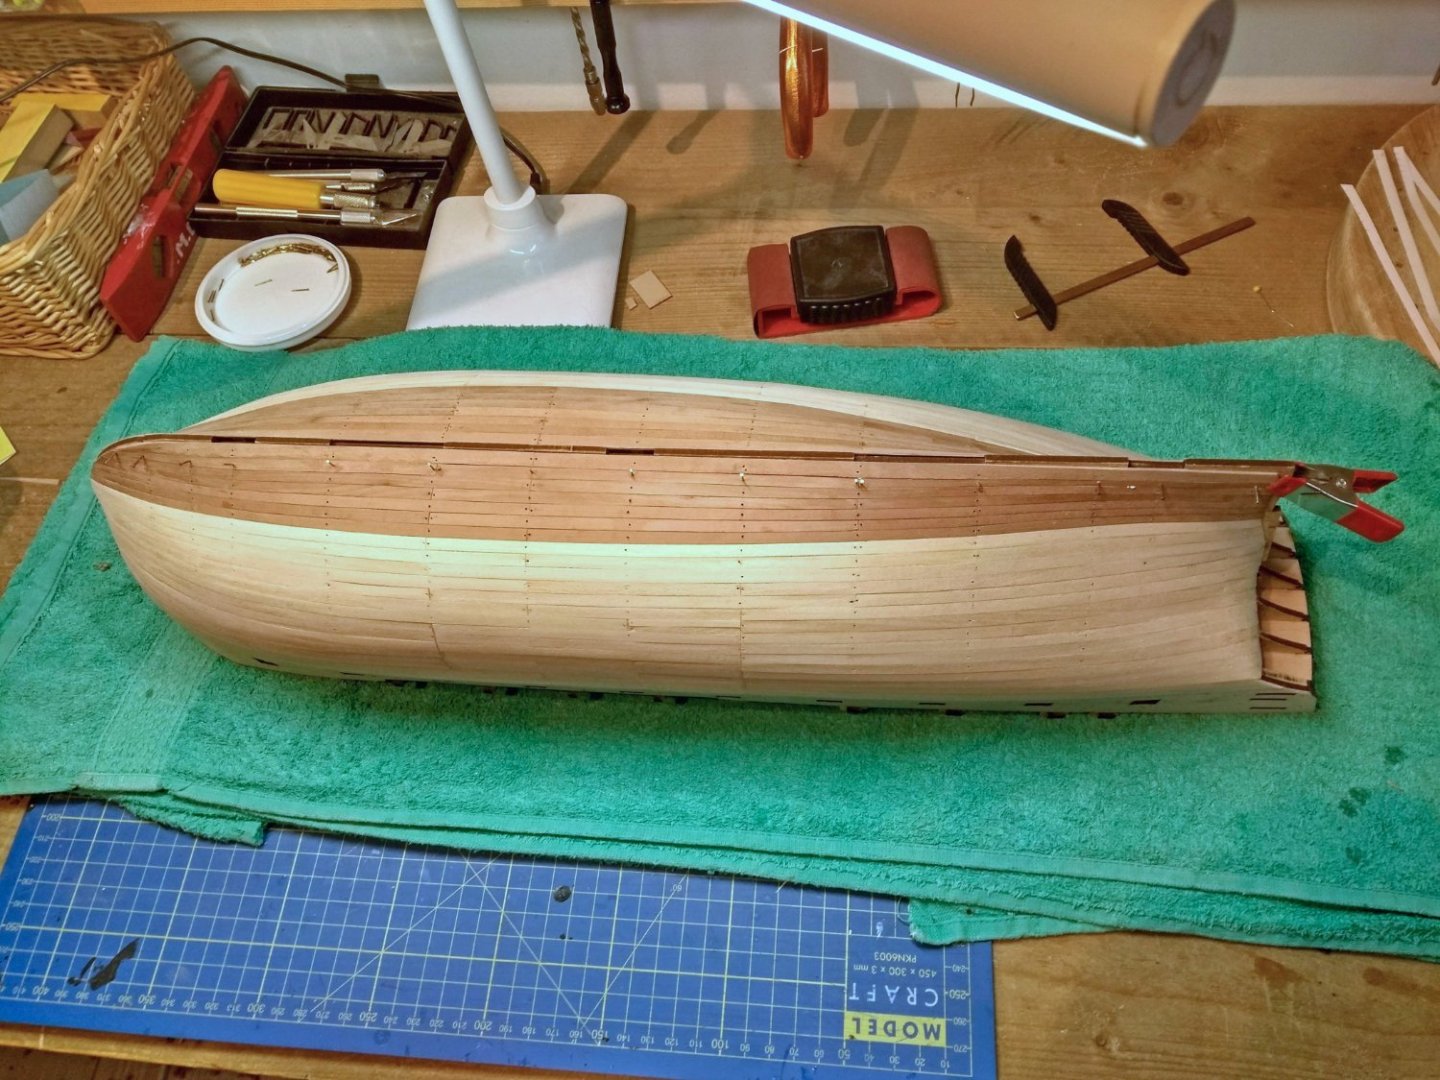
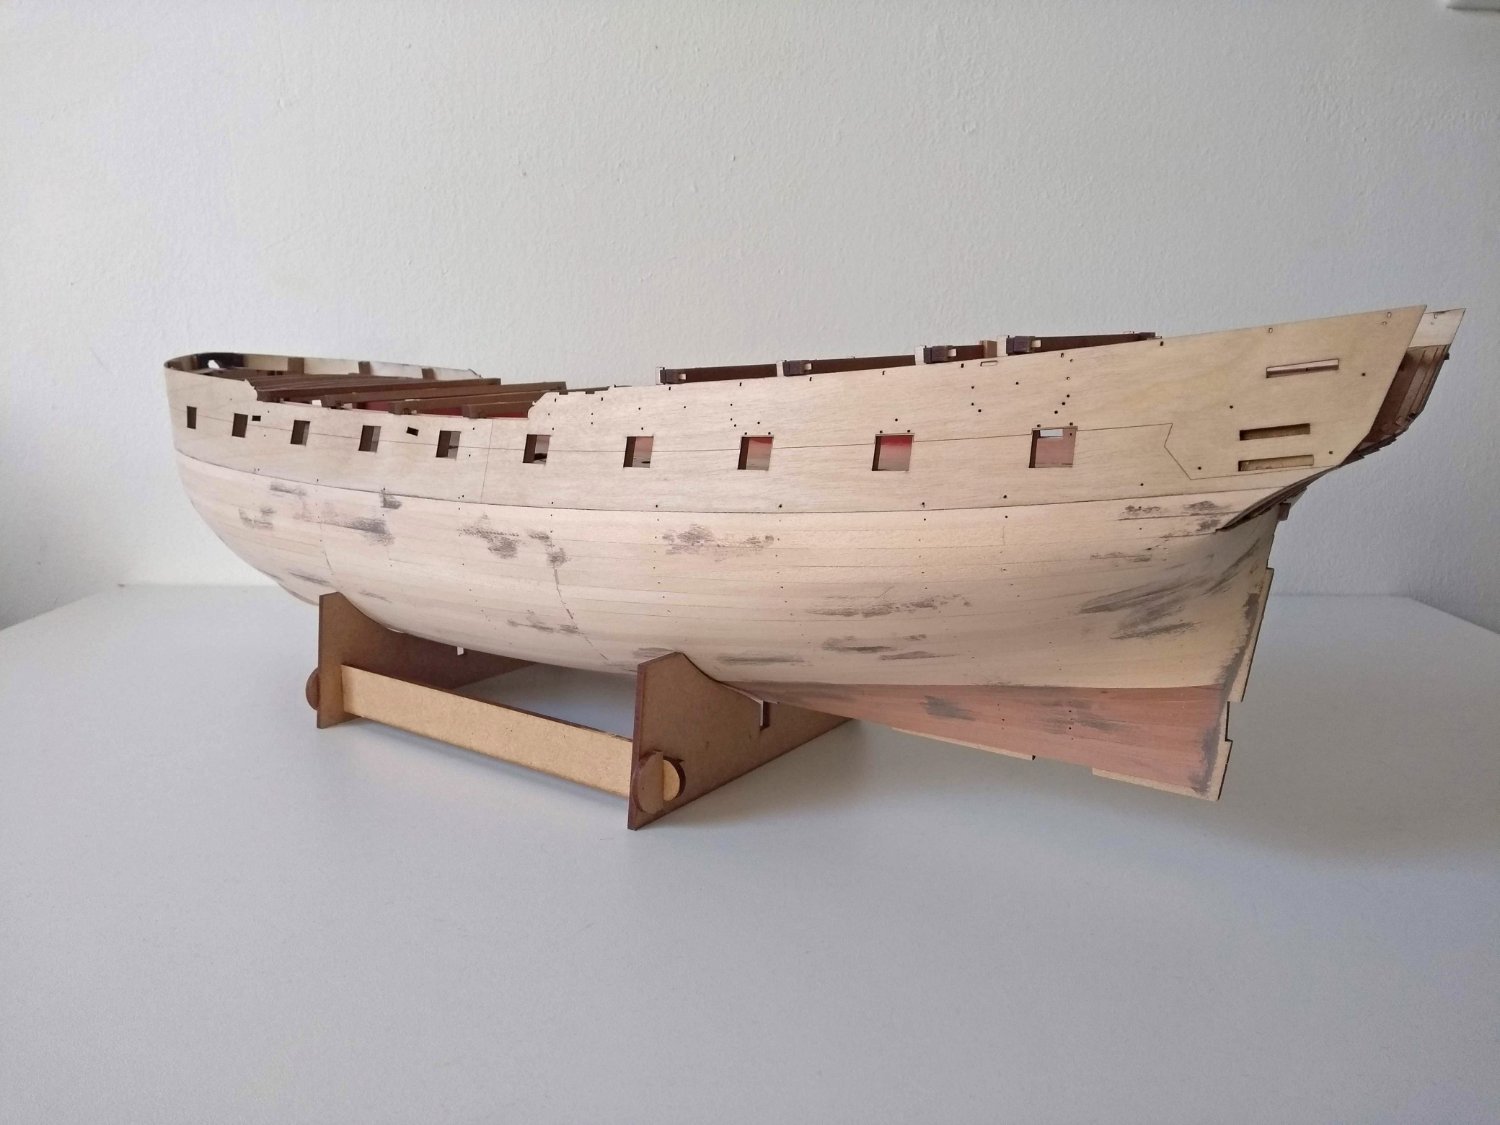
Finally closed!
Took a bit longer then expected because I was quite sick last week with a flu and fever, but feeling good now so I could do the last planks.
I used some 1mm pear that I had lying around, because I had run out of the lime wood. Not because Chris didn't supply enough, but because I redid such large areas.
This gave me the change to get a bit familiar with pear wood and how it behaves, so maybe that gives me a bit of an advantage for the final layer.
I couldn't get the first layer exactly as I wanted, without mistakes and knowing exactly what I did, but I have learned a lot!
So hoping that I learned enough to get a decent second layer that I could be happy about and leave it unpainted. Otherwise there is always the option to paint
it white if it's not too great
Now first some sanding and filling here and there to get a nice smooth base for the second layer.
- CiscoH, Haliburton, rvchima and 19 others
-
22
-
Congratulations! That´s a real beauty!
-
Welkom! And nice model you have there
- mtaylor and Keith Black
-
2
-
-
-
Welcome
- mtaylor, Deyson Morken, Keith Black and 1 other
-
4
-
26 minutes ago, Thukydides said:
Looking good. A minor point, the butts of the planks should be perpendicular to the keel (they are attached to the frames on a real ship). So they will not always be at right angles. A relatively minor point that I also didn’t realize until part way through my second planking.
Oh wow...never thought about that either
- Mr Whippy and Thukydides
-
2
-
-
-
Sounds not like a small production with those names...congratulations Chuck!
-
Even without VR it was interesting
...I did read that Chris wanted to design this one, if he does...that would be an epic kit 😮
- scrubbyj427, mtaylor and Canute
-
3
-
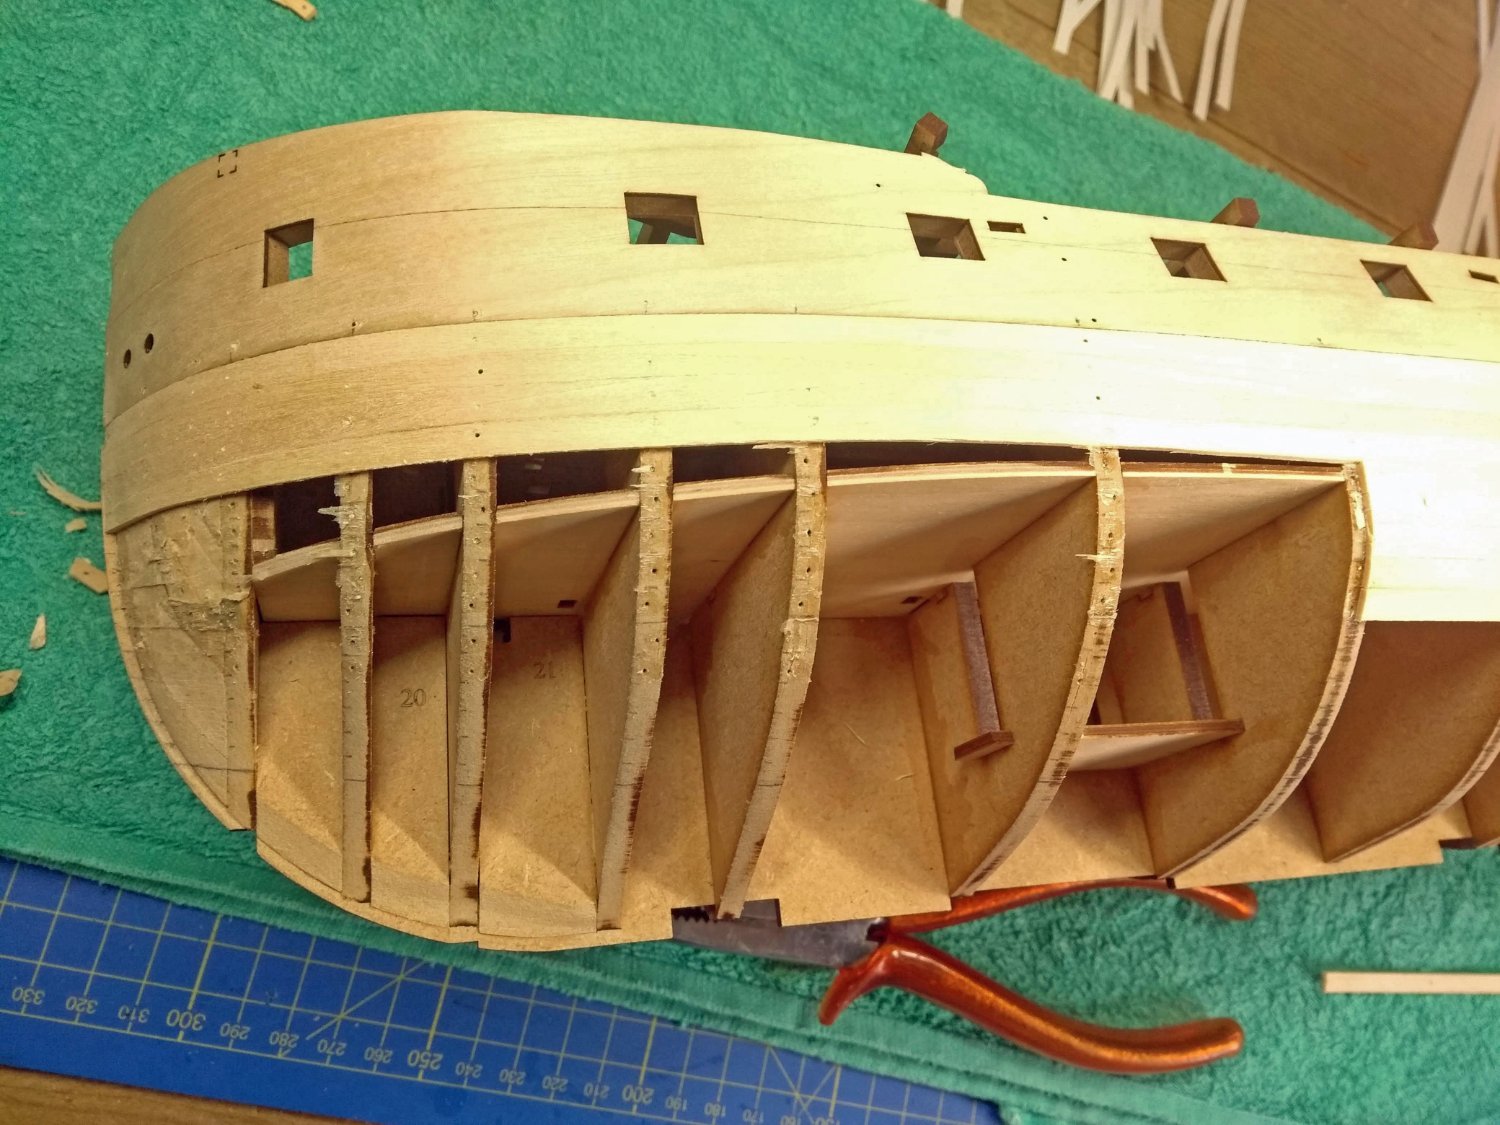
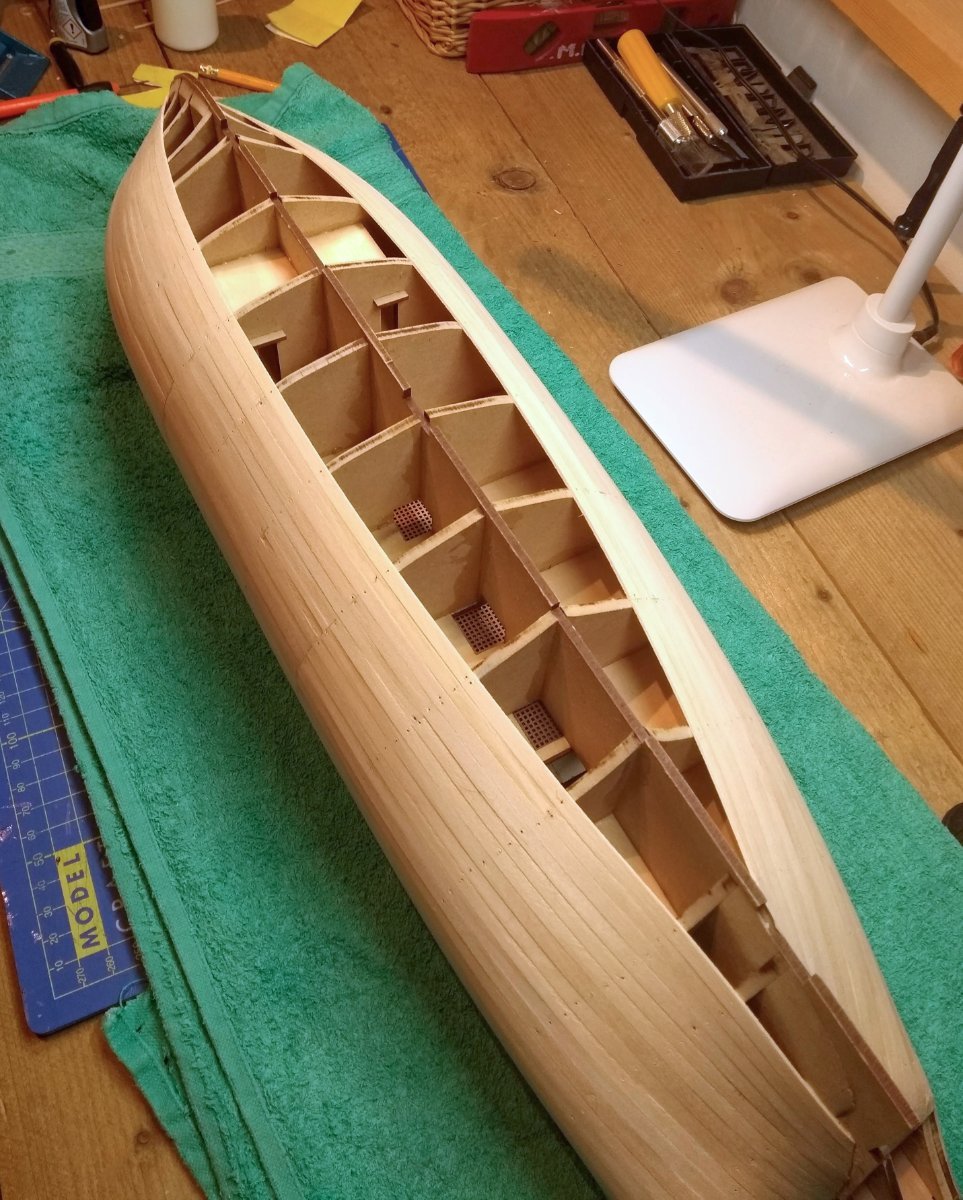
Little update...i'm just 6 planks and a garboard strake away of finishing the first layer of planking. Going not so very fast, but enjoying the process.
Halfway planking the hull I realized I wasn't happy with the shape of the bow and stern. I sanded them a bit to conservative and this resulted in not a real nice flow in the planking. So made the decision to brake away the planking at the places where I thought it didn't look right. So this was a bit of extra planking fun
, I learned some extra bending techniques along the way, so it was helpful also. I also realized that with lining off the hull using tape that I didn't took enough time to really check the run of the tape (because the tape didn't stick well). This resulted in a bit of a waviness pattern across the hull. Therefore I did the process of lining off again, but this time with wooden battens. For me this works better because of the stiffness of the planks...you won't have to check every bulkhead if the plank waves up or down the hull. So that was also a valuable lesson for me.
So first broke the planks away for reworking the bow and stern:

After that I used wooden battens for lining off the hull:
And now almost closed! 🎊

-
Lovely project to watch developing! 👍🙂
- cajunrandy214 and mtaylor
-
2
-
-
-
That is an impressive result! Congratulations with finishing this build
, also great thorough review!


For the Beginner Modeler
in Modeling tools and Workshop Equipment
Posted
Well a disc sander with adjustable table (like the proxxon one) made my modellers life a lot more enjoyable. It makes it so much more easy.
And a Dremel ofcourse...those two are my essentials...for now