HOLIDAY DONATION DRIVE - SUPPORT MSW - DO YOUR PART TO KEEP THIS GREAT FORUM GOING! (83 donations so far out of 49,000 members - C'mon guys!)
×


Ronald-V
-
Posts
1,865 -
Joined
-
Last visited
Content Type
Profiles
Forums
Gallery
Events
Everything posted by Ronald-V
-
Welcome here!
-
Welcome to MSW Giovi!
-
 Beautiful, beautiful work!👏
 -
-
Looks like time well spent B.E.👍
-
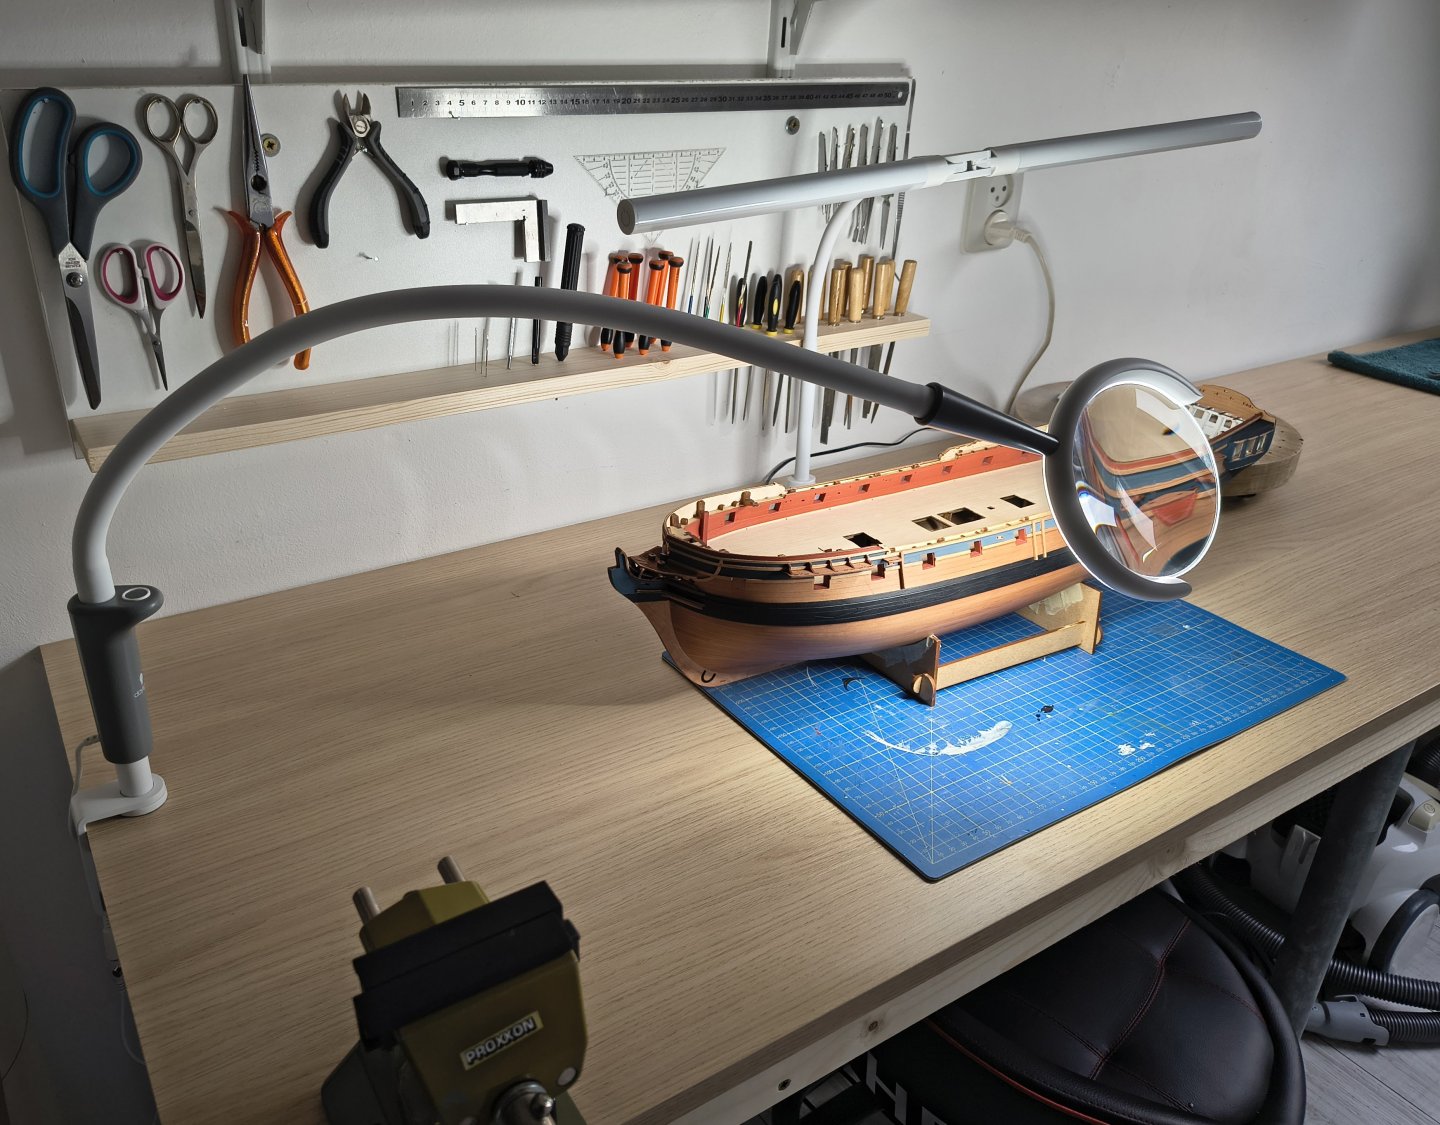
It's 1,75x magnifying...for me that's more then enough I get your point on moving around, but then I can always use the headband with the magnifying glass. For me it was the point of a stand alone magnifyer so I can work on a particular spot without seeing everything around me up-close
-
Smart jig for the waterways! And nice scarph joints 👌
-
Very well done! Love the overall look, very neat work...the casing looks good too
-
I'm not so far of beginning to apply the decoration on the Sphinx i'm building...nice to read how you are doing it! Sounds like a stress free method, will keep this in mind. Tnx!
-
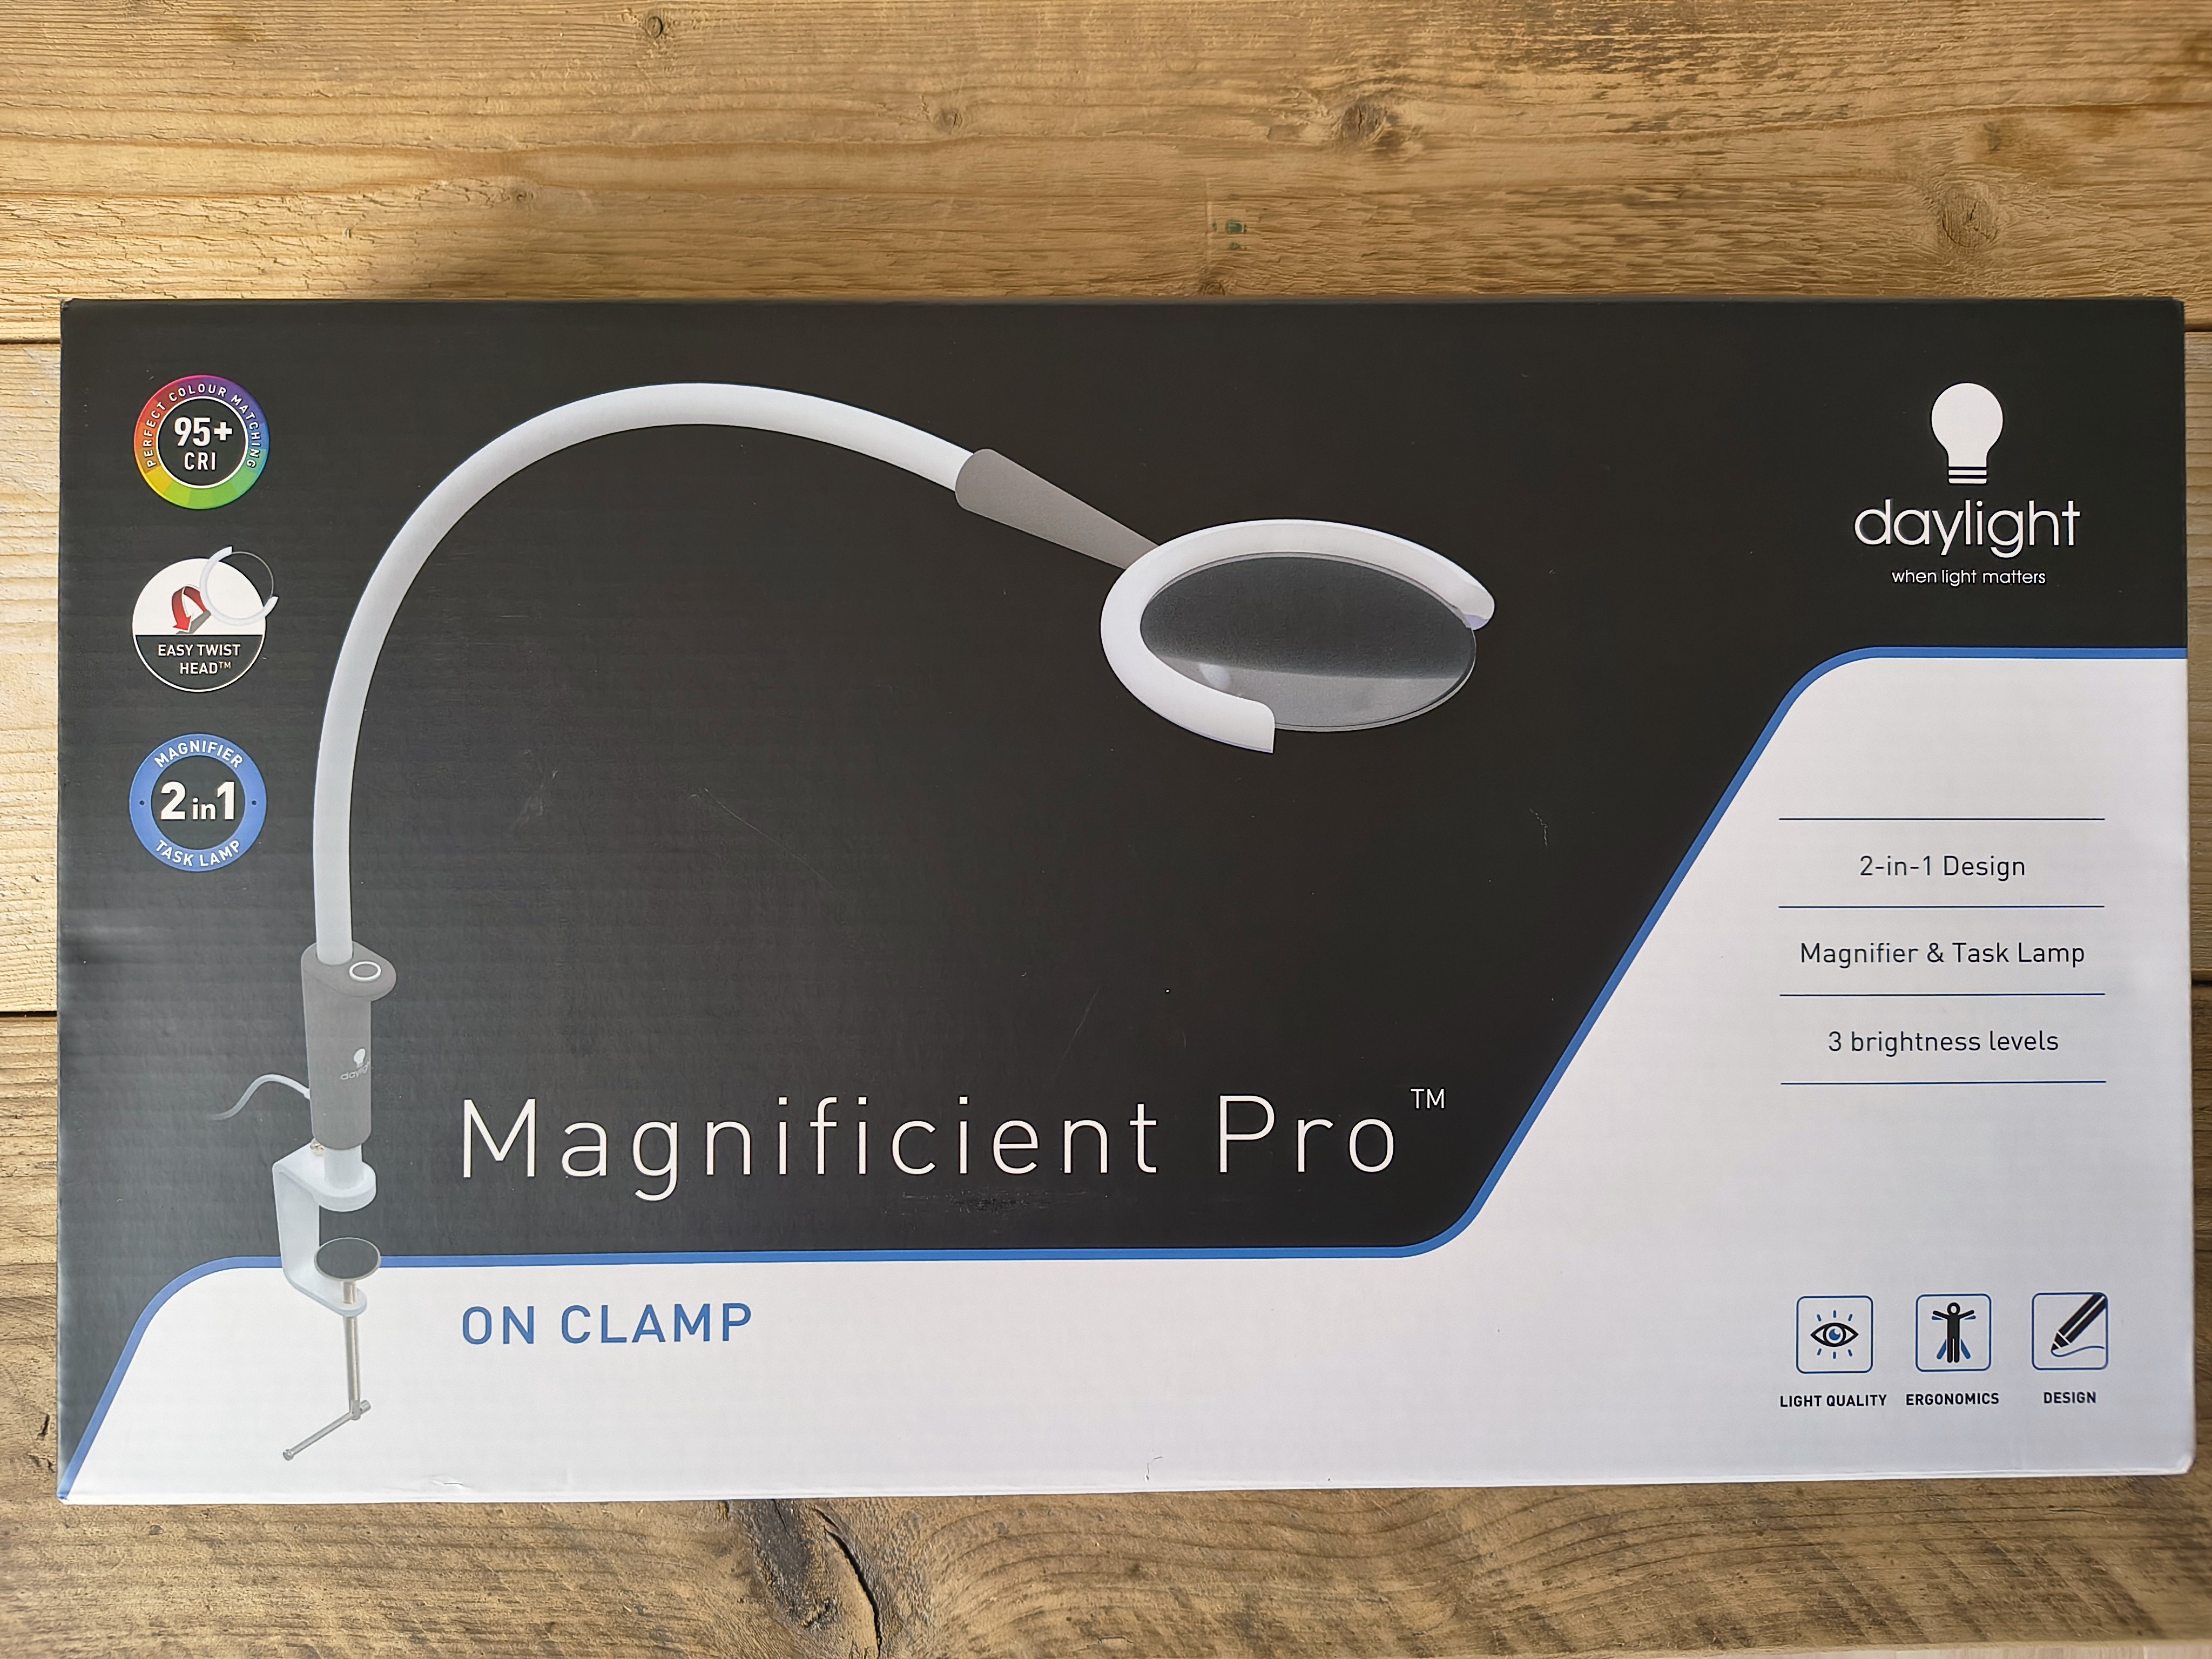
Just received this. I've been looking for a good magnifying glass for a while. I always used a headband with a small magnifying glass over my eyes... but what I always found annoying about that was, for example, when I was painting, it was nice to have a magnified image while painting, but as soon as you had to dip your brush in the paint pot, you always had to look past it to avoid getting cross-eyed and nauseous, haha. Now I've tried a few standing desk magnifying glasses, but I found them all too big and bulky for my narrow table. And this one is just right, magnifies well, has nice "daylight," and a flexible arm. I know it's a good brand because my mother, a painter, has been using a larger version of this brand for years. They're not cheap (in my opinion), but quality comes at a price.

-
Cutters, Choppers, Guillotines, Slicers
Ronald-V replied to MintGum's topic in Modeling tools and Workshop Equipment
What you don't want is the Amati "master cut"...I know that's not between your options, but maybe I can prevent someone else to make the mistake to buy one. I know from experience it's quite worthless 🙂 Amati "master cut" -
That's a nice finish! Looking beautiful 👌
-
Recommended First Machine
Ronald-V replied to vvvjames's topic in Modeling tools and Workshop Equipment
This! 🙂 Ship modelling would be much more less enjoyable without a disc sander in my opinion. I use the Proxxon one and I am pleased with that one 🙂 -
Good start on this ship! 👌
-
That is beautiful work Alessandro!
-
That is a beautiful looking stern! And I like the design improvements like the tabs for the sternfacia to sit on, clever stuff! And interesting there are no wales, something I didn't know until now
-
To be honest...if I wanted to build a Victory, only the Caldercraft one would be good enough in my opinion.
-
I never experienced staines from the graphite myself If you've applied it as neatly and smoothly as you did, I don't see how the graphite would end up on top of the deck and be smeared by the sandpaper. Some people use a scraper afterward to smooth the deck (not sure if that prevents the stains), but I've always used sandpaper myself and haven't encountered any problems.
-
Nice paintwork Glenn 👍
-
Wish you all the light in these days Kevin, and i'm looking forward to see this ship build by you
- 317 replies
-
- 2
-

-
- enterprise
- caf
- (and 1 more)
-
What a beautiful work so far Palmerit! And nice upgrades from Syren 👌
- 33 replies
-
- 2
-
-
- crabbing skiff
- Chesapeake Bay crabbing skiff
- (and 1 more)
-
Thanks Frecap! Yes color choice is not an easy task, because it can make or break a model in my opinion. We will see how it's going to turn out...will be exciting!