
HOLIDAY DONATION DRIVE - SUPPORT MSW - DO YOUR PART TO KEEP THIS GREAT FORUM GOING! (Only 75 donations so far out of 49,000 members - C'mon guys!)
×


ccoyle
-
Posts
10,456 -
Joined
-
Last visited
Content Type
Profiles
Forums
Gallery
Events
Everything posted by ccoyle
-
 Catching up on your build -- everything looks wonderful!
 -
I did a search and was actually kind of surprised by how many pond yacht topics we have posted here. Some of them are concerned specifically with rigging. Comb through them and see if you can find something to get you started in the right direction. https://modelshipworld.com/search/?q=pond yacht&quick=1
- 1 reply
-
- 2
-

-

-
It is indeed! Wait until you see the rudder pedals. 😵💫
-
Another subject I remember fondly thanks to building one as a kid. Don't remember which kit it was.
-
Alo and welcome aboard! Certainly, there are some folks here that place great value on historical accuracy, but by no means all! This is a hobby, so participants should first and foremost have fun building whatever they happen to be building, making it as accurate as their abilities and interest allow. There is no requirement here for builds to meet some threshold of quality or accuracy in order to be shared, so please be encouraged to show us your work if you ever feel so inclined. Cheers!
-
Basswood Strips
ccoyle replied to DGraley's topic in Building, Framing, Planking and plating a ships hull and deck
Try Hobby Lobby, if you have one nearby. -
The latest to begin the Model Shipways 3 kit set
ccoyle replied to Taken Aback's topic in New member Introductions
I was in Gatlinburg two weeks ago -- first time in your great state! -
Great idea! Something a little off the beaten path always makes an interesting diversion.
-
The latest to begin the Model Shipways 3 kit set
ccoyle replied to Taken Aback's topic in New member Introductions
You're welcome! And thanks for that bit of encouragement! -
Getting Started: From Dollhouses to the USS Constitution
ccoyle replied to Jasennord's topic in New member Introductions
Welcome aboard! -
Ya can't rush a Halinski build, partly because there is always a large number of parts to slog through, and partly because Halinski designs can be terribly unforgiving of error creep, so proper fitting and gluing is essential.
- 56 replies
-
- 15
-
-
Greg's "deep dives" are a great resource!
-
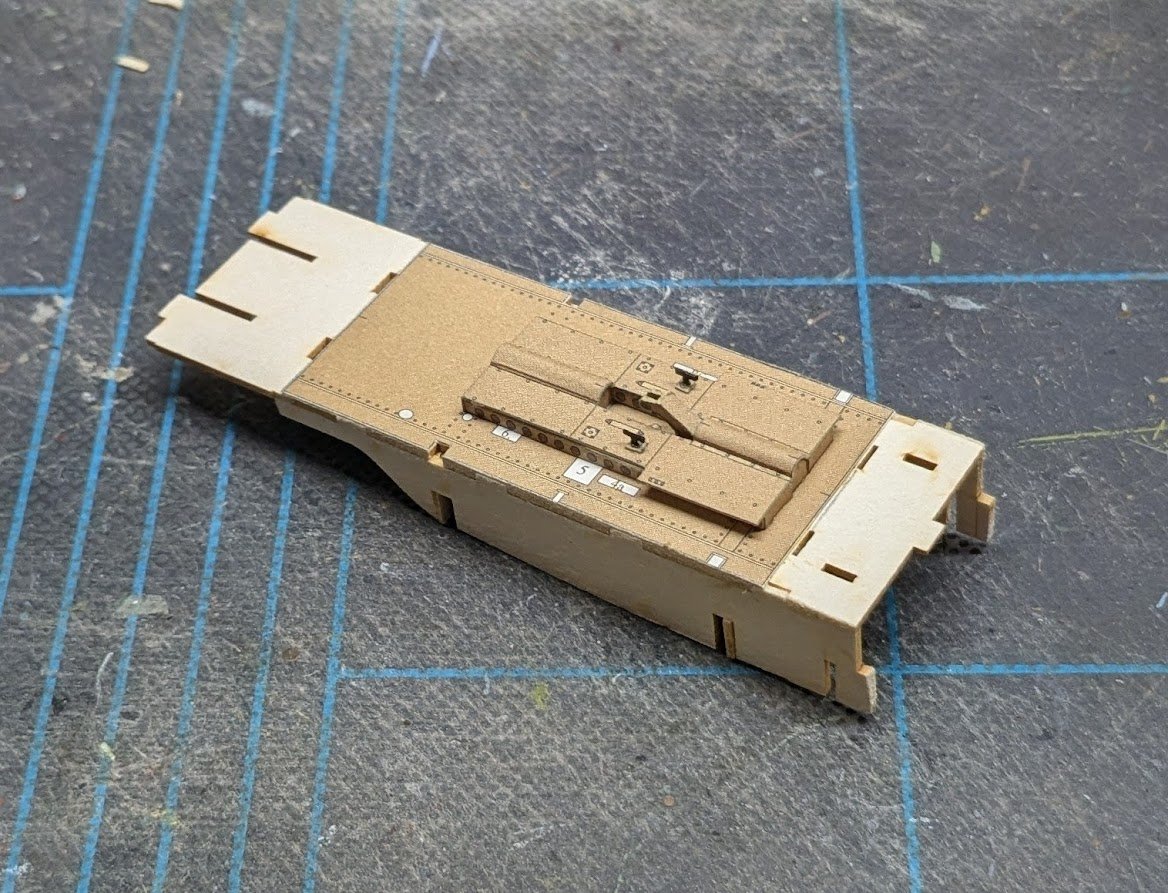
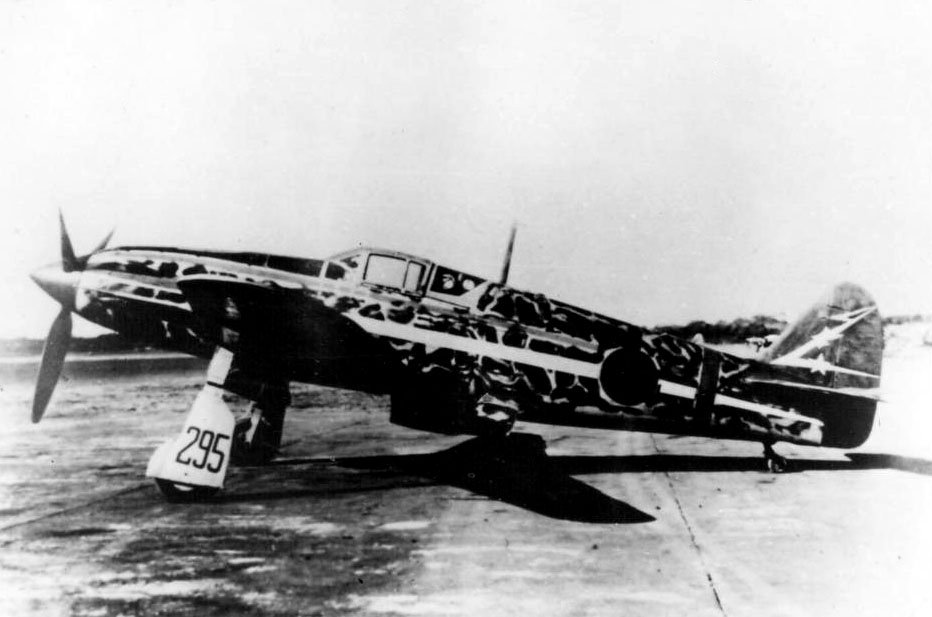
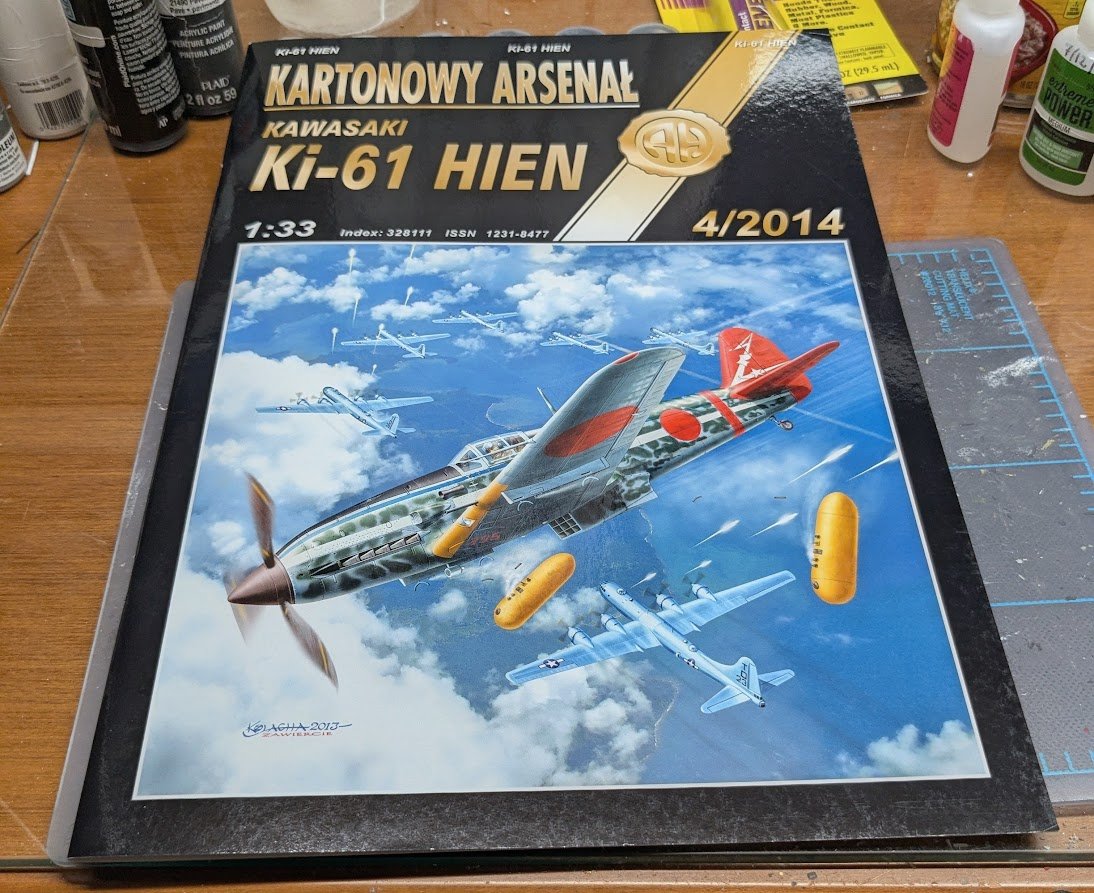
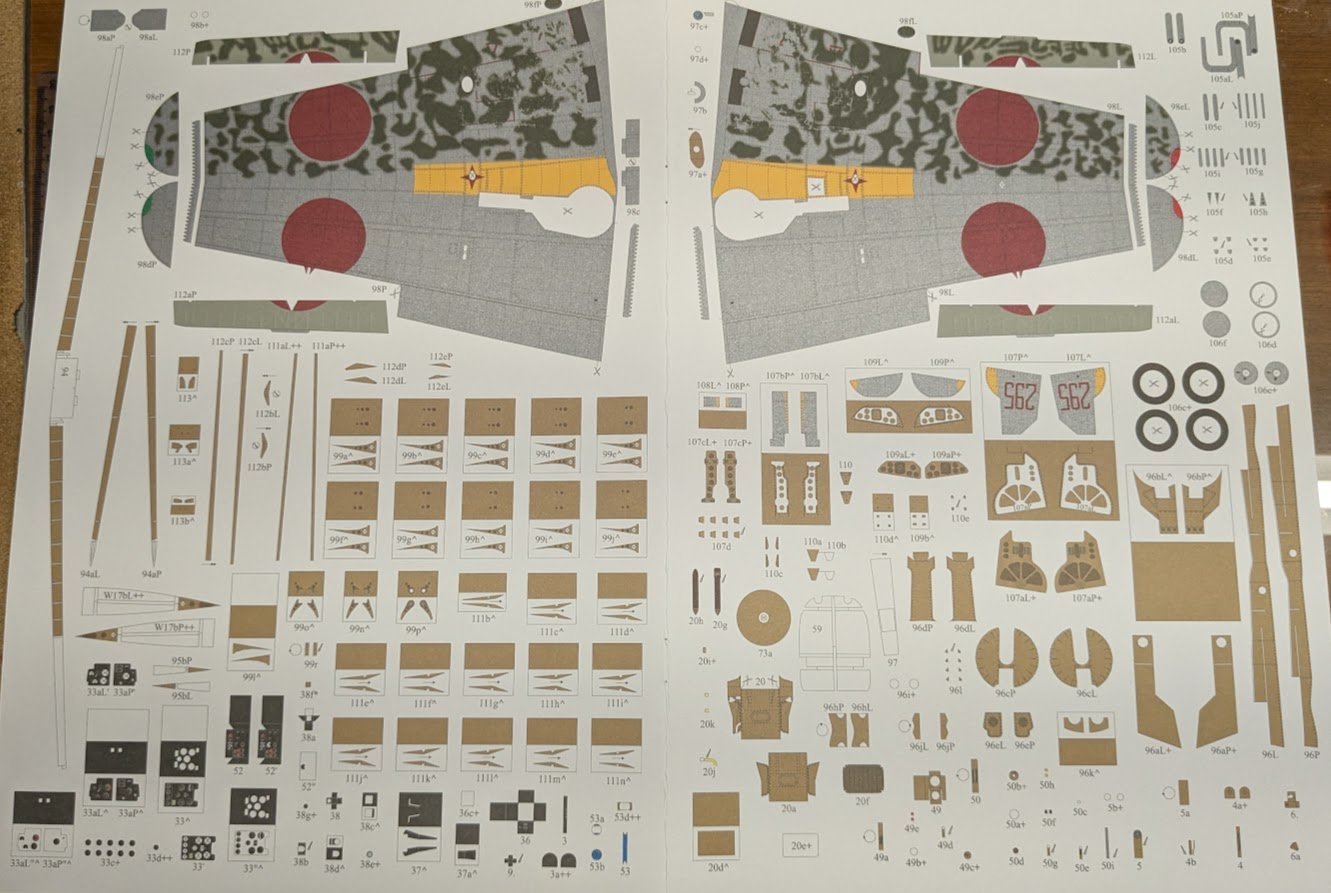
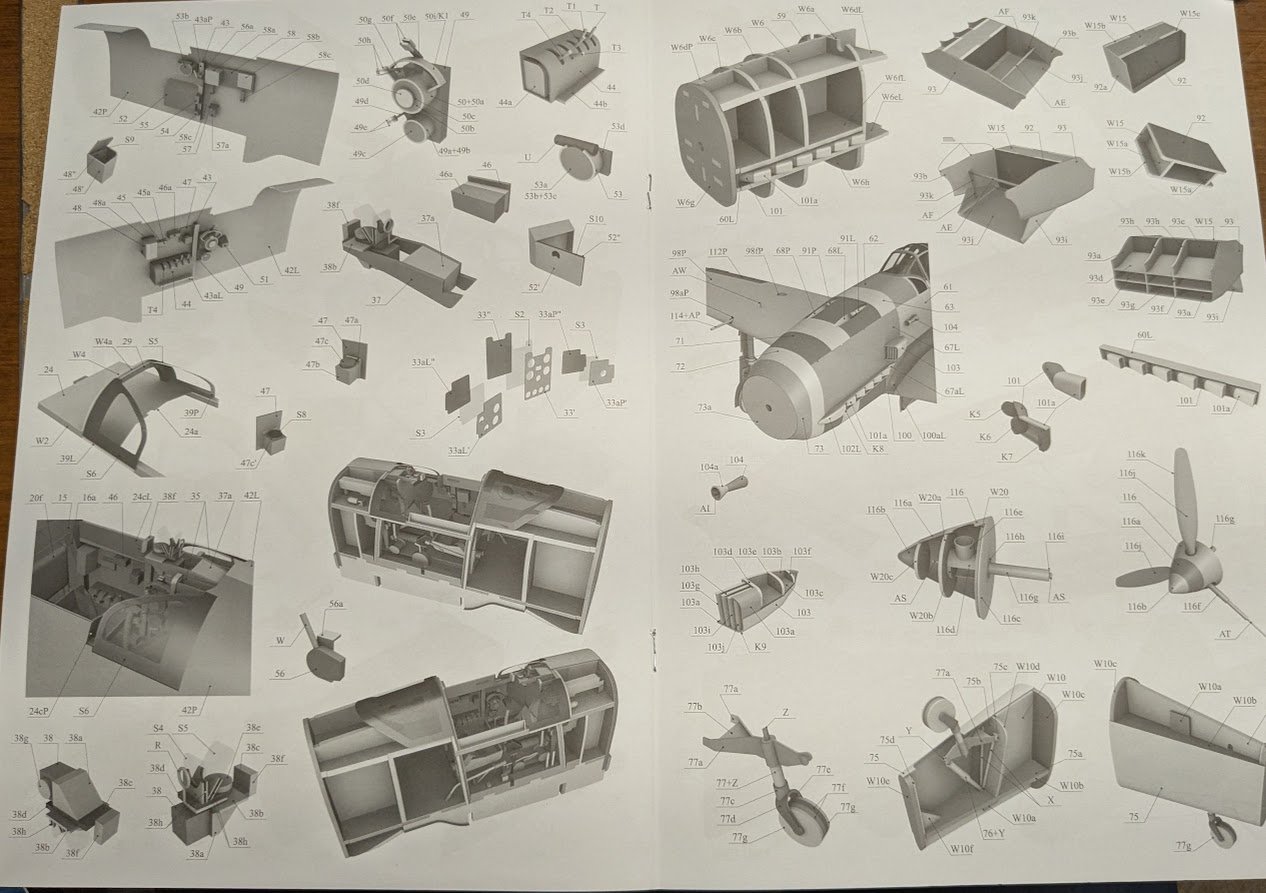
Welcome to another creative adventure in card! This kit, chosen by the members of MSW in a recent poll, depicts a Kawasaki Ki-61 Hien, Allied code name "Tony", flown by Cpt. Teruhiko Kobayashi of the 244th Sentai in early 1945. Courtesy of Wikimedia The Hien was interesting for a number of reasons. For one, it was the only mass-produced Japanese fighter to have an in-line engine. Second, that engine -- the Ha-40 -- happened to be a licensed derivative of the famous Daimler-Benz DB601. Third, it was the last Axis fighter to be powered by the 601 or its derivatives. And lastly, for now, it was code-named "Tony" because of its resemblance to Italian fighters such as the C.202 Folgore. The Hien caused some anxious moments among the Allies in the Southwest Pacific when they encountered it, but fortunately for them, the Hien's glaring weakness, from an operational perspective, was its poor combat-readiness record. For a number of reasons, the Hien was difficult to maintain, and that, coupled with the decreasing proficiency of new Japanese pilots, meant that Allied pilots never encountered as many competently handled Hiens as they otherwise might have. Which was a good thing, because by all accounts competently handled Hiens were dangerous adversaries. The Halinski kit, as per usual for their kits from that period, is very detailed. The aircraft's metal surfaces are printed in metallic ink, which does not show well in this image. Many, many diagrams. The cockpit is absurdly detailed. The trade-off for the overall build is that there is no equally detailed radial engine, so once the cockpit hurdle is cleared, the remainder of the build should go relatively quickly. I have the laser-cut frames, consisting of two frets, and the molded canopy, but no wheels -- I'll have to make those the old-fashioned way from laminated discs. First cuts soon!

- 56 replies
-
- 18
-
-
Great job, Andrew! "No water inside" is always a good report for an RC project!
- 70 replies
-
- 1
-
-
- Miss Adventure
- Model Shipways
- (and 2 more)
-
I'm not a purist, but I suspect some of our members may not know the significance of the a, b, and c (and later e) in Spitfire parlance. These were not sub-variants, as seen for example in designations like P-51D or Bf-109G, but rather indicators of the type of wing used on the aircraft. Each wing could accommodate a different armament configuration: a wing: eight .303 machine guns b wing: four .303 machine guns and two 20mm cannon The c, or universal, wing could be configured with the a loadout, the b loadout, or with four 20mm cannon, as well as bomb racks. The e wing could take four 20mm cannon or a pair of cannon and two .50 cal Brownings. Personally, the clipped wing Spitfires have never caught my fancy, which is why I don't have the Halinski Mk. XIV in my stash, but the clipped wing improved roll rate, so I can understand why they were built. Cheers!
-
Agree -- nice work!
-
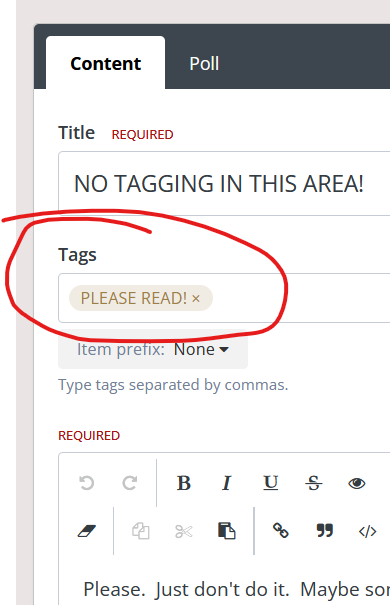
It's a clickable identifier that you can add to the first post in a topic -- except in this area, of course! Clicking a tag brings up a list of all the topics that have that same tag. Here, for example, is the tag that was created for this topic. Additional tags are added by typing in some text in the box and hitting 'enter'.
-
Very nice result!
-
Rick, If you'd like to get a sense of what is available in the card ship market, take a look at the first few chapters of our card modeling tutorial here. There's a discussion of the major publishers and vendors. Getting products into the US is a little dicey at the moment, given the current tariffs environment.
- 42 replies
-
- 1
-
-
- card
- Speeljacht
- (and 2 more)
-
D7E Bulldozer by RGL - FINISHED - Hobby link - 1/35 - 3D-printed
ccoyle replied to RGL's topic in Non-ship/categorised builds
I hit the "wow" button because not only does your model look exactly like a well-used dozer, but you did it in only three days. Amazing! -
Finnarctis was sailing under the name Alouette Arrow as of 2019.
-
Pictures and location of item would be helpful.
-
Bristol Bulldog by Danstream - Airfix - 1/48 - PLASTIC
ccoyle replied to Danstream's topic in Non-ship/categorised builds
I have a similar issue with some of my card airplanes. After they've sat on a shelf for several months, I sometimes notice that the landing gear have sagged. I don't usually have much motivation to repair them. My modeling mojo tends to regard finished models with a bit of indifference.