ccoyle
-
Posts
10,579 -
Joined
-
Last visited
Content Type
Profiles
Forums
Gallery
Events
Everything posted by ccoyle
-
 Mike, I'm betting those are a variant of the RAF's Mk VIII depth charge, as seen in this photo from Wikimedia.
- 75 replies
-
- 11
-

-

-
Start with one area or the other, but put both media in the title. You'll probably get answers for both.
-
First cuts 'n' glues. I've never built a kit like this that has the wing spars as part and parcel of the cockpit framing -- just seems to me like a good way to snap the spars off accidentally. But I will try to be extra careful moving forward. As I said earlier, the Wildcat is not as beefy as the Hellcat, but it's still bigger than I had imagined. The next -cat I build will have to be the relatively diminuitive Bearcat. But don't get your hopes up -- I don't actually have one in my stash.

- 150 replies
-
- 19
-
-
Short answer: You don't. Only an administrator can make changes like that, and I don't think they can do it for individual topics, i.e., it's a site-wide setting. Page length is determined by the number of posts in a topic -- I believe each page is currently set for 25 posts. The only way to shorten your content is to post fewer pictures. That's probably a good thing to do in any case, since scrolling past endless photos can be a turn-off for some users, not to mention all those photos can take a long time to load on older systems or slower internet connections. Best thing to do is to select a few photos that best show your progress on your build. If you still want to post lots of photos, you can try posting them in installments -- more posts with fewer photos per post. Cheers!
-
That's literally why I have never gone out of my way to purchase a P-38 kit. 😆 But I have caved in to temptation in the past by acquiring big birds like the Whirlwind, Tempest, and P-47. Not exactly sure where I will display them when I get around to building them, but we'll cross that bridge when we get there.
- 150 replies
-
- 11
-
-
Not so much a monster as the F6F I built last year. This one should have about a 2 in. shorter wingspan. It may actually fit on a shelf! Speaking of shelves, part of the reason I picked this one as my next project is the appalling lack of American aircraft on display in my man cave. I have only completed two American-built planes, and neither of them is wearing American markings! 😮 That needs to be remedied!
- 150 replies
-
- 12
-
-
Congratulations, Rusty! That is simply a fantastic model!
- 642 replies
-
- 3
-
-
- winchelsea
- Syren Ship Model Company
- (and 1 more)
-
Welcome aboard, Chaz! Based on your question, I'm assuming you have the 1/96 scale Shipyard kit? The cheapest way to get 1 mm card is to look for chipboard at a print shop. It's the stuff used for backing scratch pads and the like. It's terribly hard on craft knife blades, though. You can also laminate sheets of thinner card stock together using 3M spray adhesive until you obtain the desired thickness. If you haven't seen it yet, we have a card modeling tutorial in the card section of the ship kits discussion area.
-
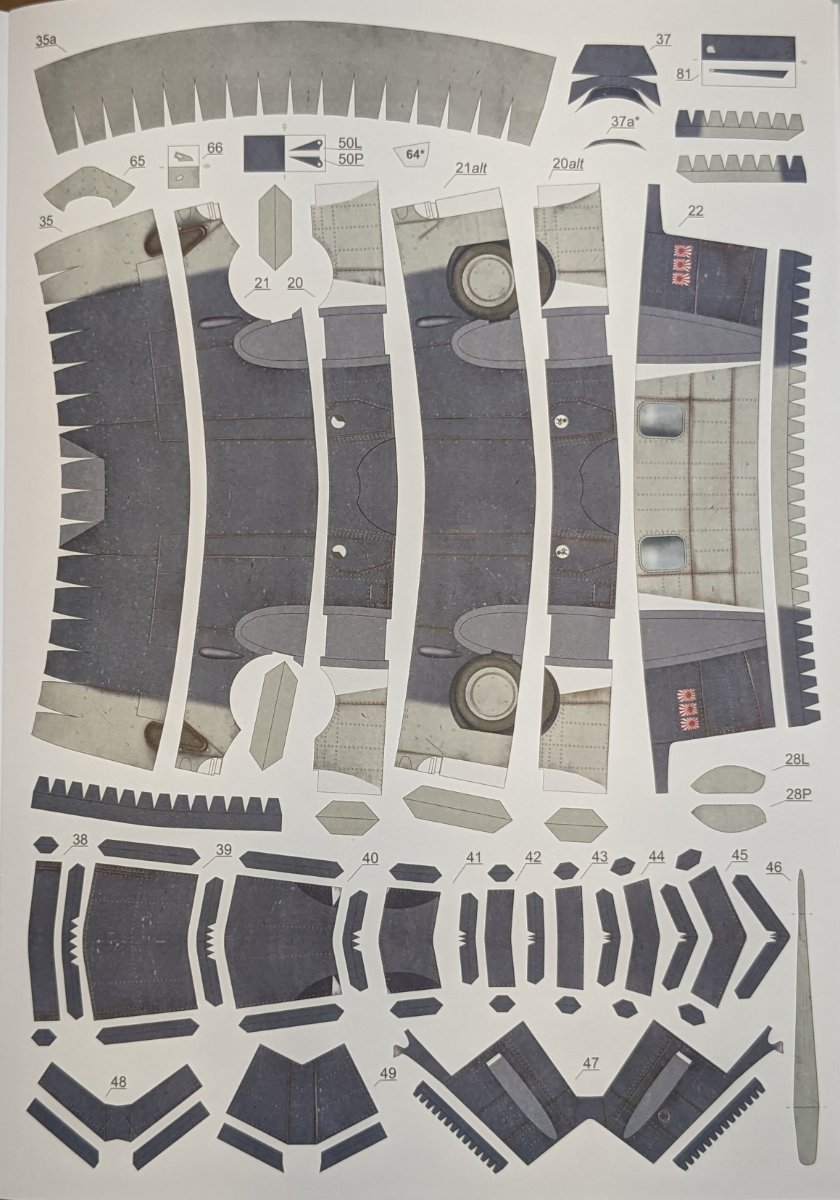
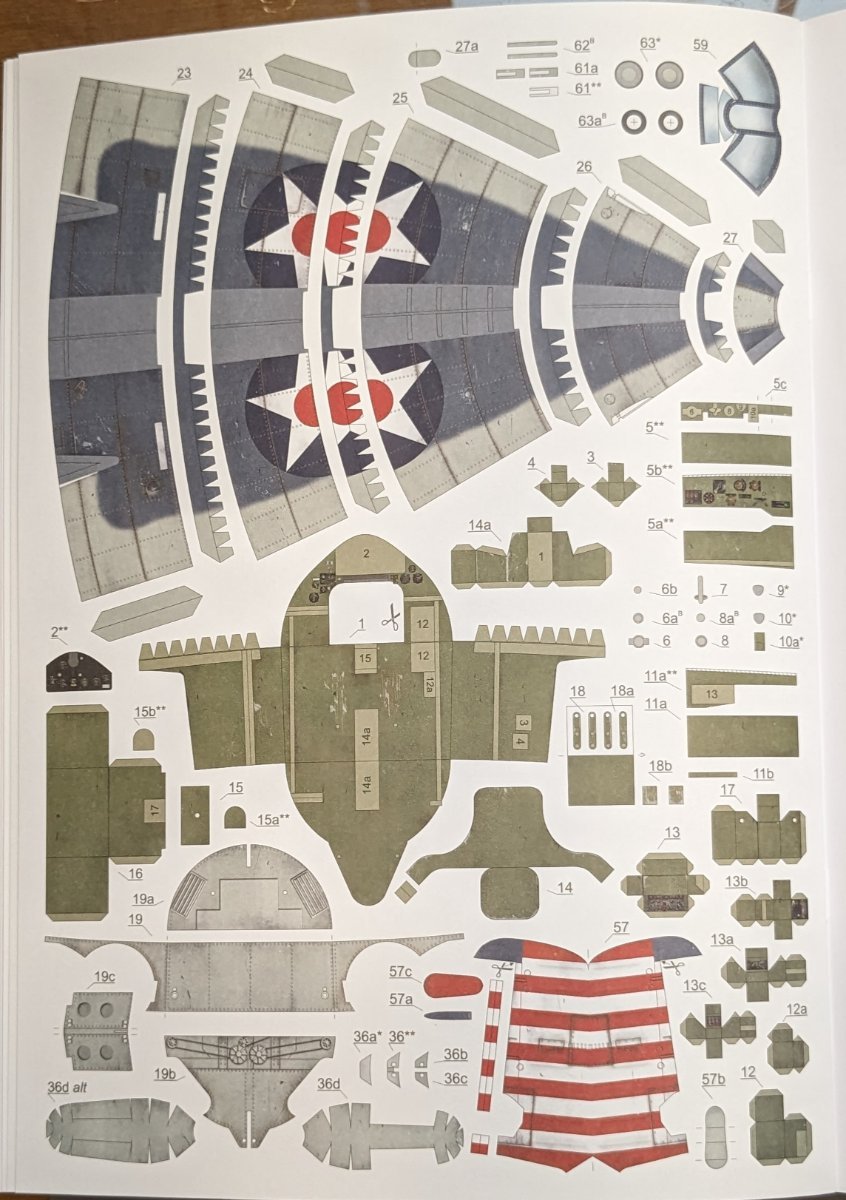
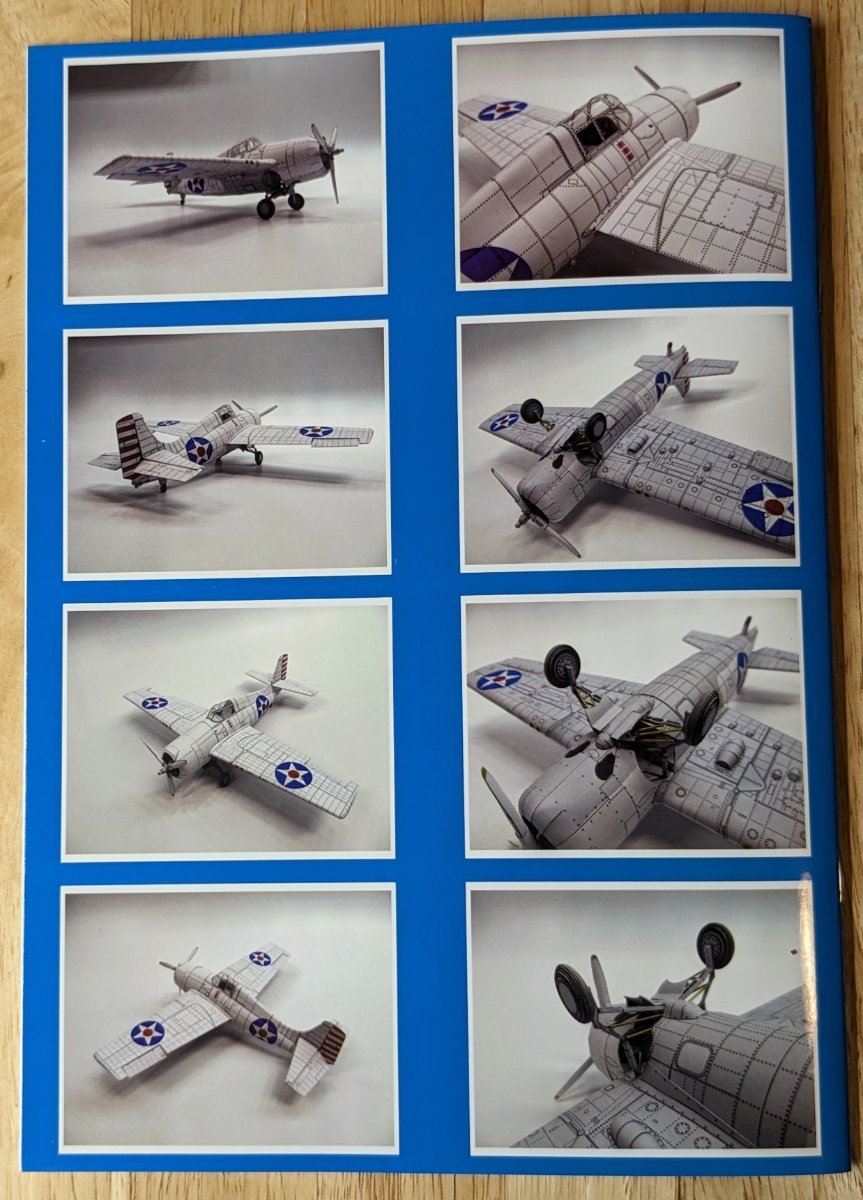
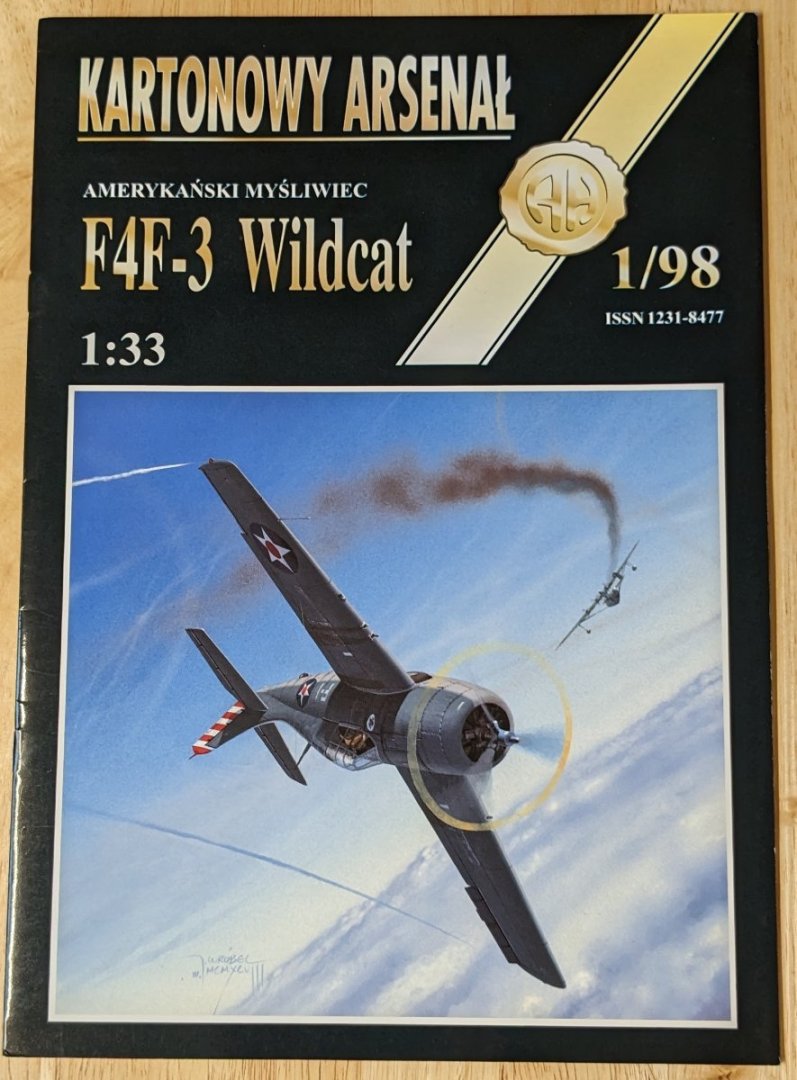
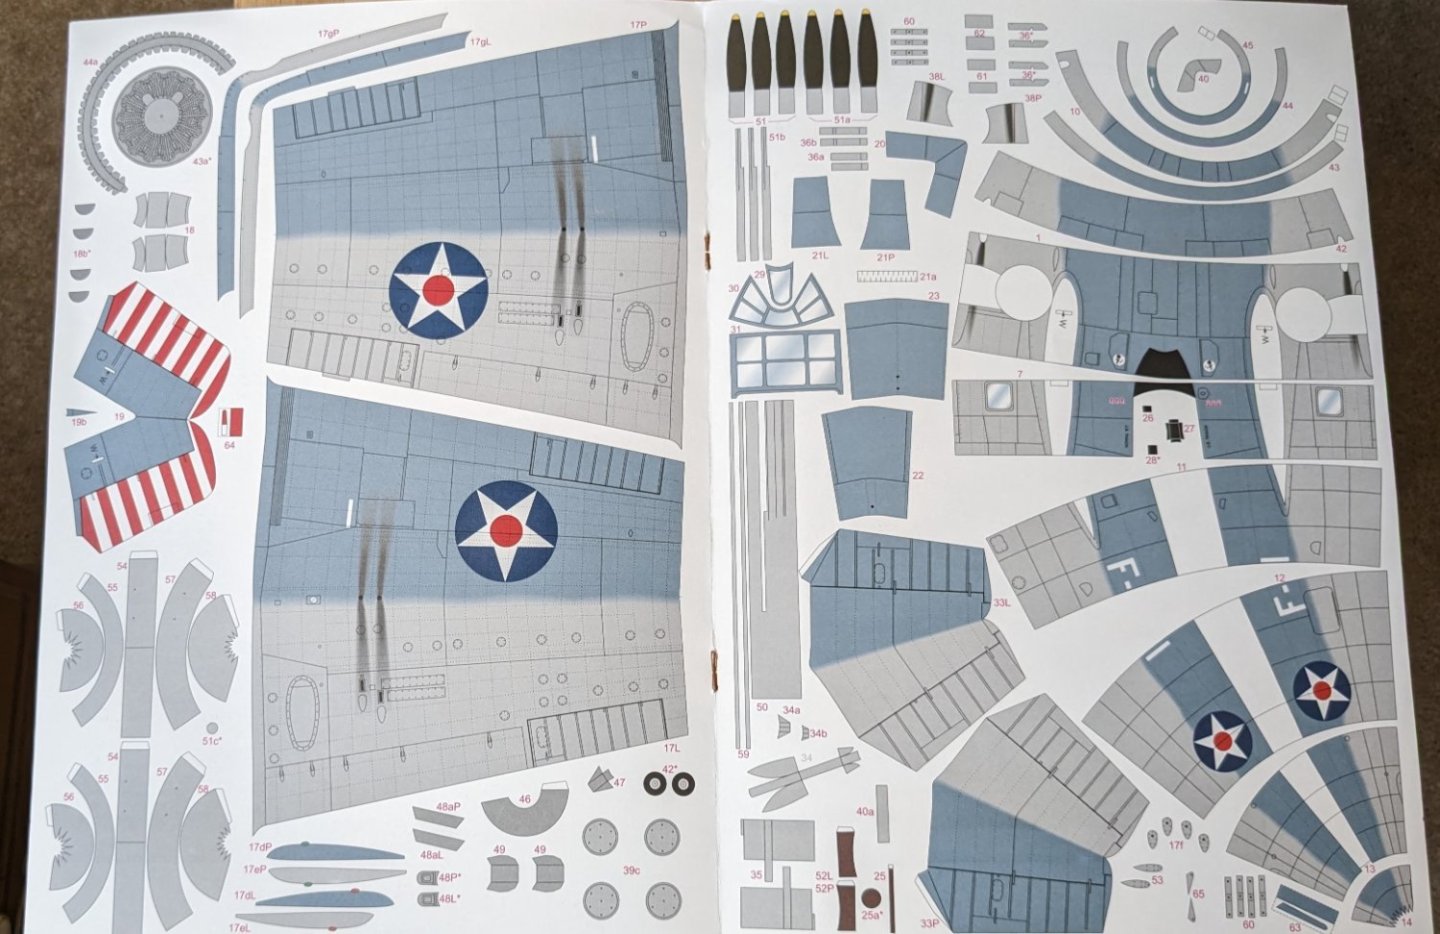
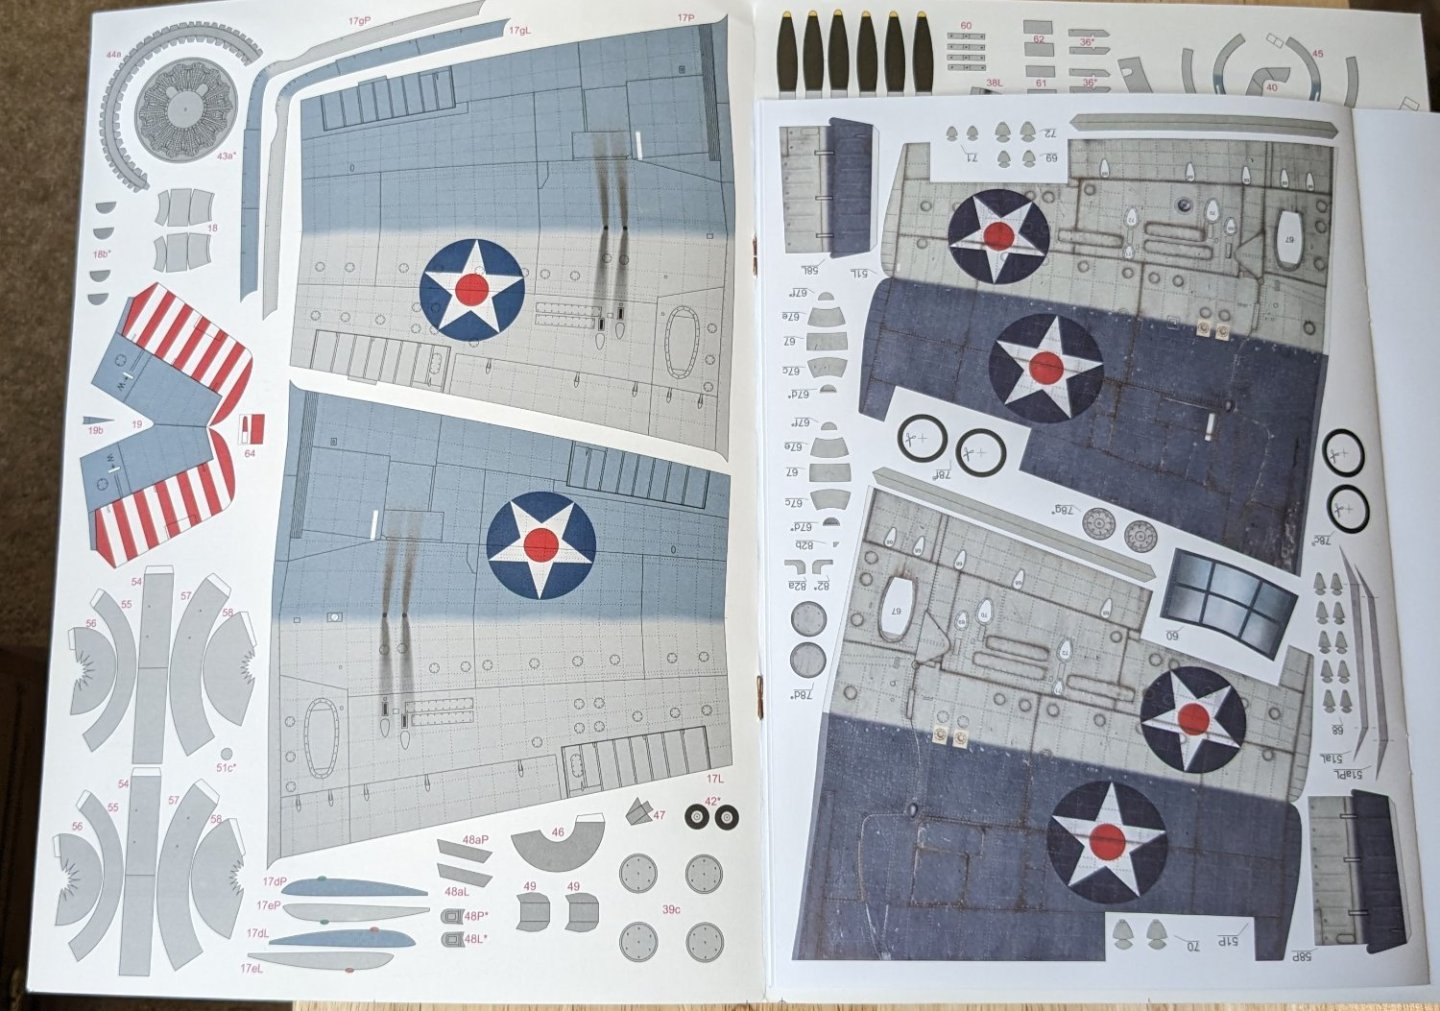
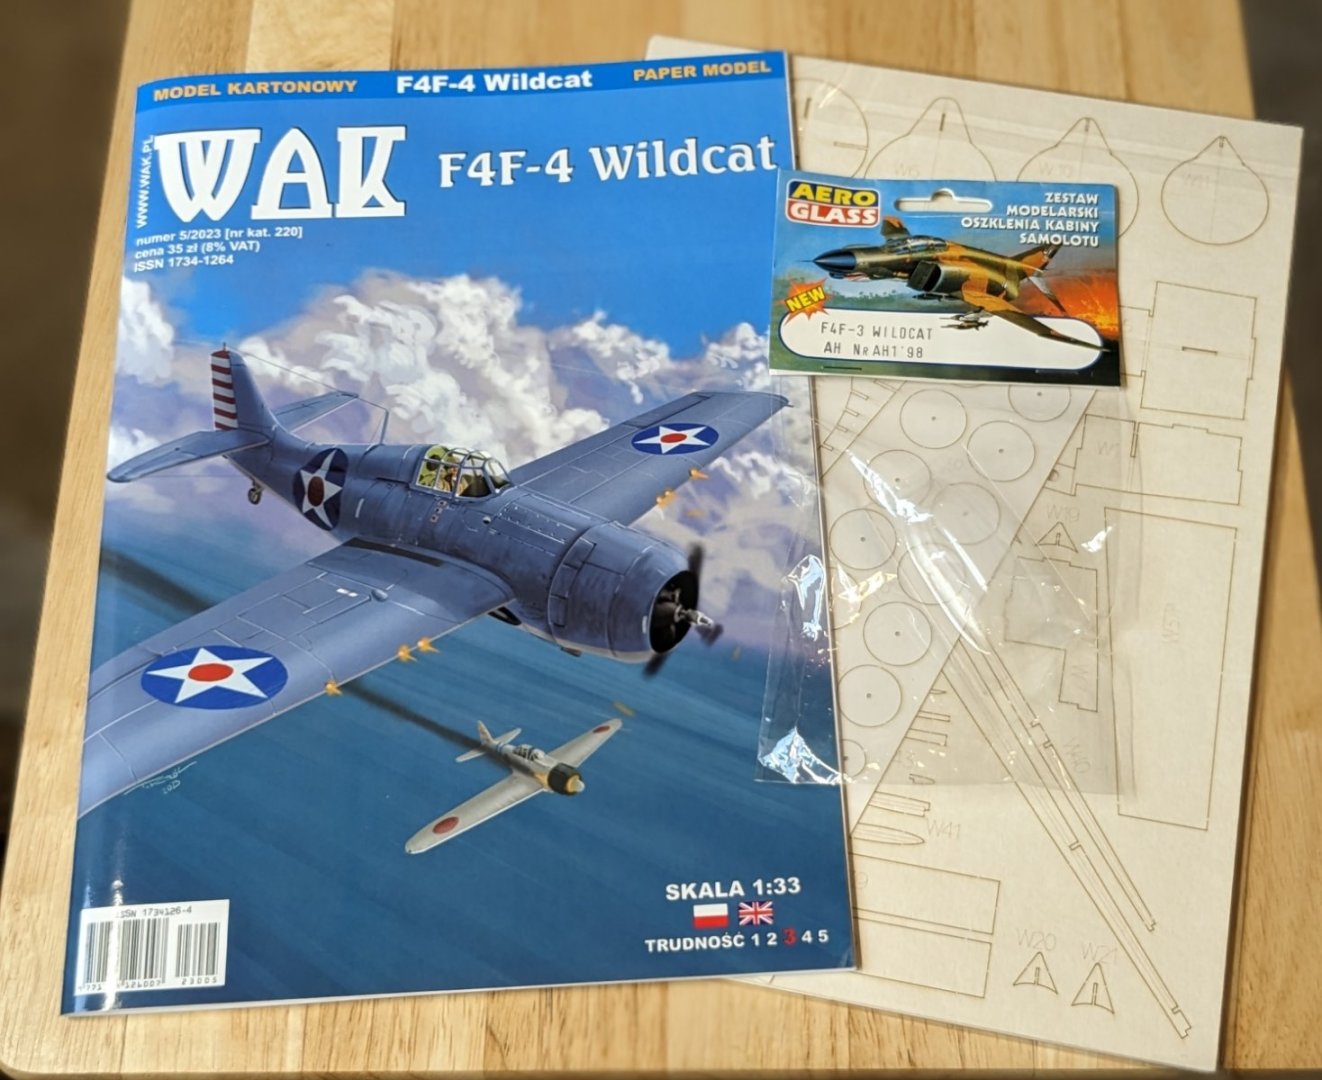
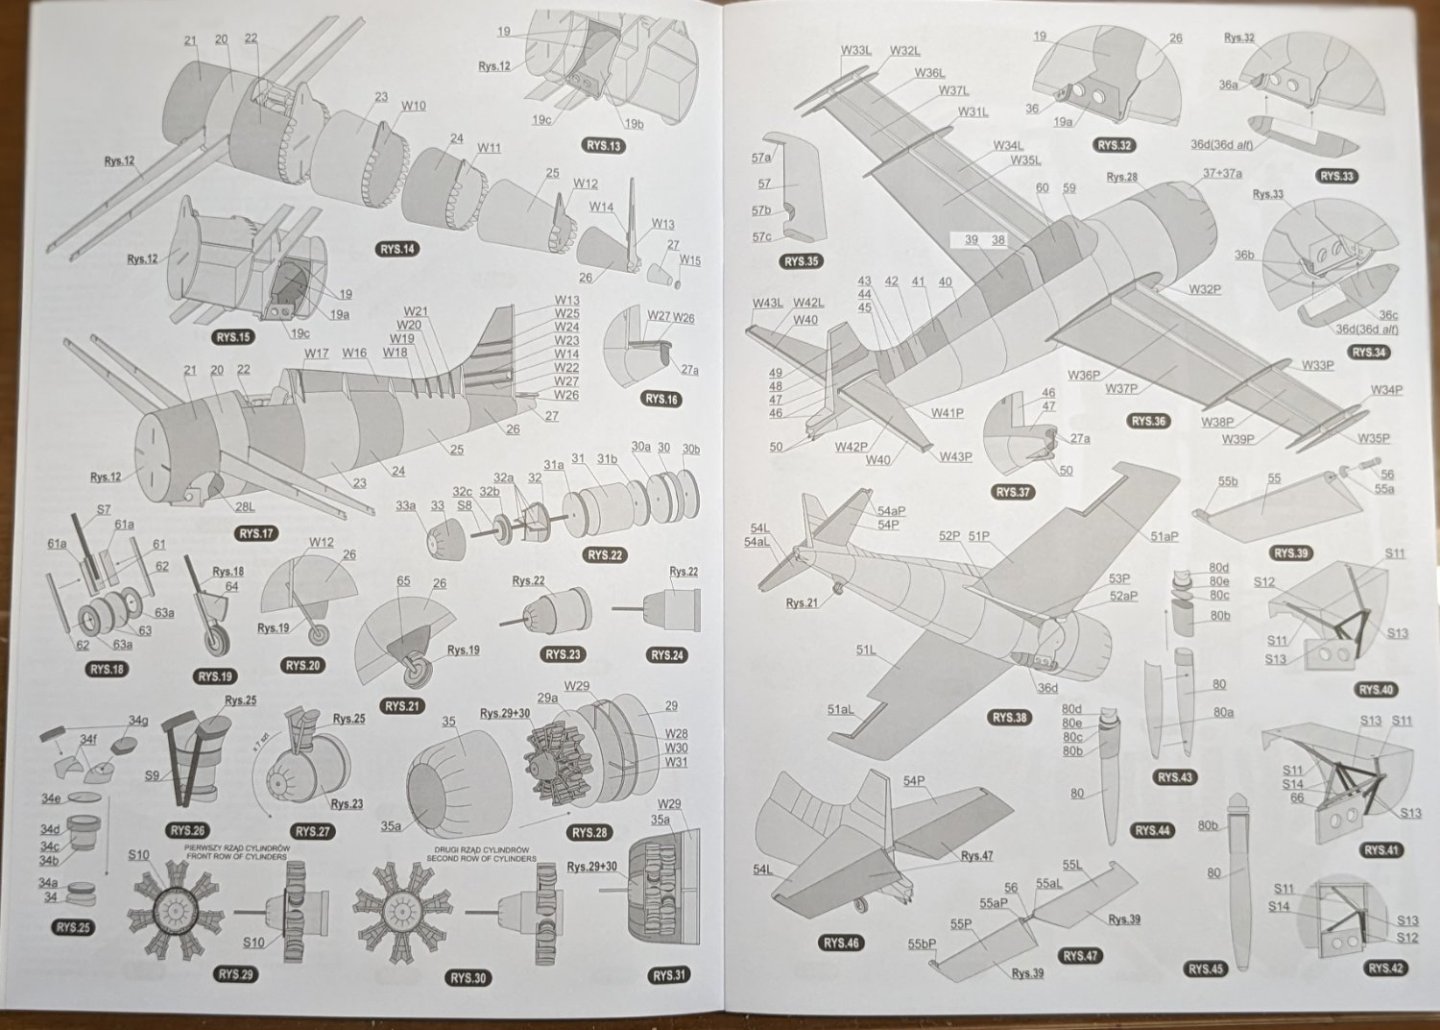
Ahoy! Well, it is time to start a new build log. For those of you who might be saying, "Hey, don't you already have, like, three other unfinished builds in progress?", I will simply observe that what you say is true, but I'm starting a new log anyway, so there! Anyways, I haven't been doing much modeling lately because I have a six-month-old, very active puppy, and for that same reason I may not make speedy progress on this model, either, but we'll see. The Subject The subject of this log is Leroy Grumman's famous F4F-4 Wildcat. I won't go into too much detail about this airplane, because if you are reading this then you are probably sufficiently airplane nerdy to already have a good grasp of the Wildcat's place in history. It will suffice here to say that the Wildcat was America's front-line, carrier-borne fighter for the first year-and-a-half of the country's war against Japan. Although the Wildcat is frequently compared unfavorably with the Mitsubishi A6M 'Zero', I think it is fair to say that the Wildcat, when flown to its strengths by a skilled aviator, could hold its own in a scrap with the Japanese fighter. You can read more about the Wildcat here. The Kit The kit is a brand new offering from the Polish firm of WAK. In fact, at the time of this writing the kit is still listed as 'NEW' on the company's website. This will actually be the first time I have ever worked on a hot-off-the-press kit, so you should all feel fortunate to be among the first to see one of these being built -- perhaps not likely to be among the first to see one finished, but close enough. The kit is designed by Jerzy Janukowicz, with artwork by Marcin Dworzecki, who is famous in the card modeling world for his work done for Kartonowy Arsenal (Halinski). Let's have a look, shall we? The kit depicts the personal mount of the famous Lt. Cdr. John S. "Jimmy" Thach, the man who perfected the "Thach weave," a combat tactic that allowed a Wildcat pilot and his wingman to get a drop on the more maneuverable Zero. As you can see in the photo, I also have the laser-cut frames for the kit. Now, I took a bit of a gamble by not buying a canopy for this kit, since I already had one on hand, albeit for the ancient Halinski F4F-3 kit. I'm not aware of any changes made by Grumman to the canopy for the dash-4, so I'm cautiously optimistic that the dash-3 canopy will fit. Lots of lovely diagrams. And beautiful graphics. Don't be alarmed by the printed wheels -- there's an option to build the kit wheels-up, which I will probably not elect to build. The back cover has pictures of the prototype model. A nice touch in this kit is the inclusion of instructions in English. To wrap up this introduction, I thought you all might like to see a little comparison of this kit with the older Halinski F4F-3 kit published in 1998. A side-by-side view of the graphics (I don't believe Marcin did the art for this Halinski kit) reveals the nearly complete lack of weathering on the older kit (at left). The difference in detail is even more stark for the cockpit interiors (not shown) -- the older kit has almost no three-dimensional details at all. Well, that's it for the introduction -- hope to get started soon!


- 150 replies
-
- 27
-
-
Yes, my brain was drawing a blank on the correct term. Also, the box art for the fittings set suggests that the kit is rather long in the tooth (as was also noted in the OP). If it were me, I would be very hesitant about plunking down the necessary change for after-market parts to use with a sketchy kit.
-
It looks to me that the hull is pre-molded plastic -- the black item in the second photo.
-
The product description suggests that it is not a complete kit. A detail set must be purchased separately.
-
Curtiss BF 2C-1 by CDW - FINISHED - Hasegawa - 1:32 scale
ccoyle replied to CDW's topic in Non-ship/categorised builds
I do, actually. Answer published one in 2006. And here is a finished example, although the usual caveat about Polish builders and their uncanny abilities applies here.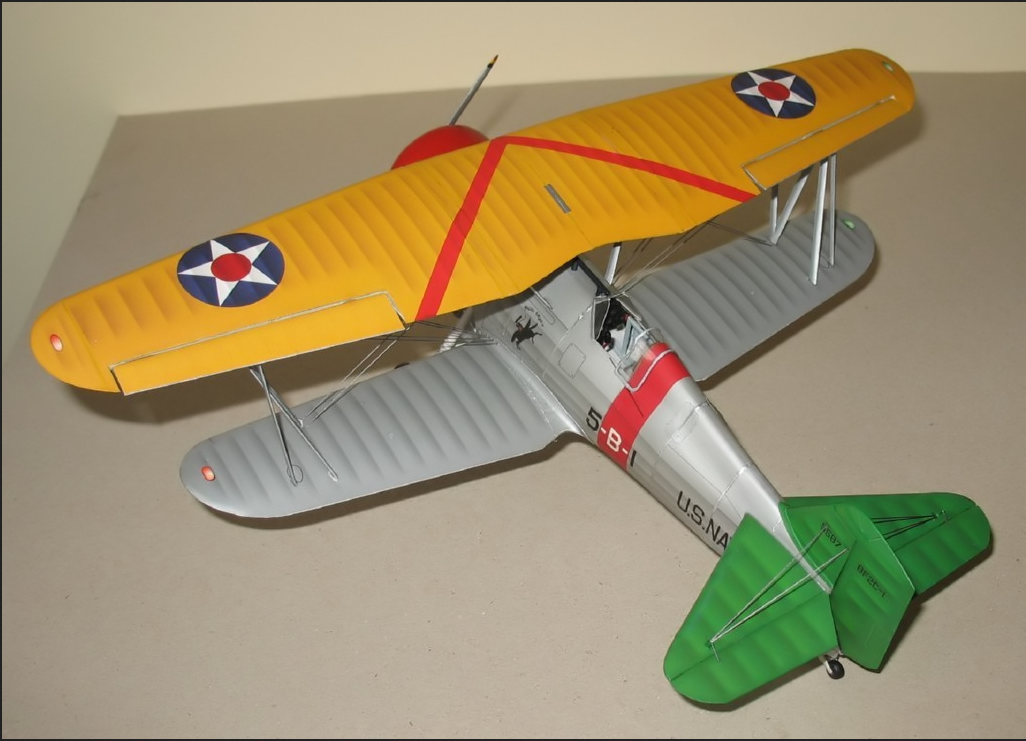
- 93 replies
-
- 11
-
-
-
Welcome aboard from a Humboldt County ex-pat!
-
Sorry to hear about your mother, George. Good to hear that her family was able to be with her. Your model is coming along nicely.
-
My LGS had an 1895 Nagant listed just a couple of days ago -- sans boarding axe, though.