


ccoyle
-
Posts
10,599 -
Joined
-
Last visited
Content Type
Profiles
Forums
Gallery
Events
Everything posted by ccoyle
-
That'd be the gallery. Welcome aboard!
-
 Congratulations, you have now 'arrived'! All modelers break something somewhere along the way. Maybe even multiple somethings.
- 177 replies
-
- 1
-

-
- Perseverance
- Modellers Shipyard
- (and 1 more)
-
Once again making only very slow progress on the cylinders. I can only do a few parts at a time before the monotony shuts down my will to live. 😑 So far I have finished three cylinders and started the cylinder heads on the remaining eleven. Anyways, while I'm at it I thought I'd try adding some extra detail to the basic engine, using the accompanying Wikipedia image as a reference: I will only be adding a few extra bits, but I might take a crack at the spark plug wires, since they are one feature that is rather obvious in the photo. The coloring of the kit engine also differs from the real thing on a number of points, e.g., the valve covers being brown in the kit but silver in the image. I think the colors seen here are much more visually interesting, although I'm fully aware that this is a bright and shiny display engine and not a tired and weathered service engine. One thing I need to determine before installing the engine (eventually), and I'm certain that at least one person in my audience will know the answer to this question, is which cylinder goes in the 12 o'clock position. The kit diagram shows a front row cylinder in the 12 o'clock position, but the image above, as well as others I have seen online, appear to show a back row cylinder in that position. What can you guys tell me about this? Cheers!

- 150 replies
-
- 12
-
-
You won't normally see me liking every new build log update on the forum, but I do try to check in on each of them periodically. When you see me post a like, it means I've read the previous posts as well.
-
Gotta say it -- "form follows function", but darned if I can figure out the function of that rig! 🤔 But regardless, your model is looking great!
- 12 replies
-
- 2
-

-

-
- Muleta de Seixal
- Seahorse
- (and 1 more)
-
Dad gummit! This happened last time. Stupid Google Photos! 🤬 Fixed now. It was showing up on my computer at work. Go figure.
- 69 replies
-
- 3
-
-
-
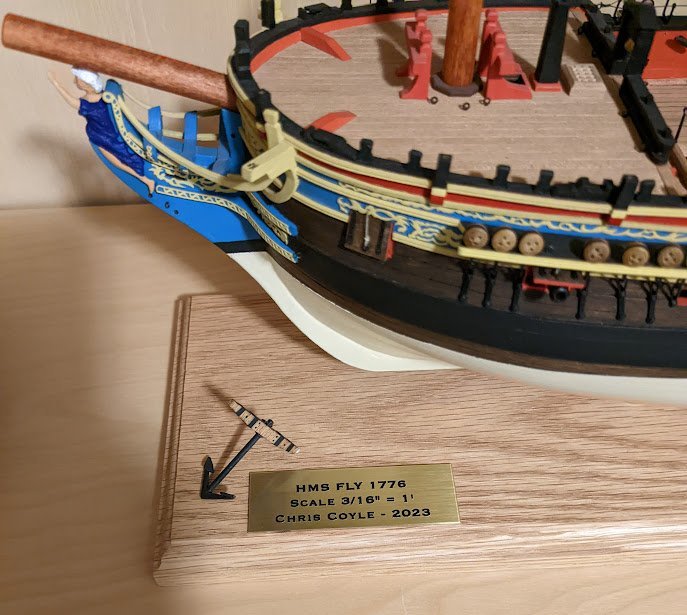
- fly
- victory models
- (and 2 more)
-
Hey, I forgot to add a shot of the name plate, also added back in December. Swivel guns should (hopefully) be on the way soon, after which I will post a set of final photos. Cheers!
- 69 replies
-
- 17
-
-
- fly
- victory models
- (and 2 more)
-
Welcome aboard! That is some fine workmanship on display. Cheers!
-
Niels, a couple of issues: 1. It's not necessary to create a separate post for each photo. You may add multiple photos to a single post. 2. Your photos are not displaying. We don't recommend using third-party image hosting sites. We regularly have problems with such sites when they go out of business or members don't renew their subscriptions. We strongly advise members to upload their photos to the site first and then add them to their posts.
-
Nice to see the 'fragile' label stuck right on the ginormous crease. Hopefully everything inside was packed correctly.
- 16 replies
-
- 4
-
-
-
- Lady Nelson
- Victory Models
- (and 1 more)
-
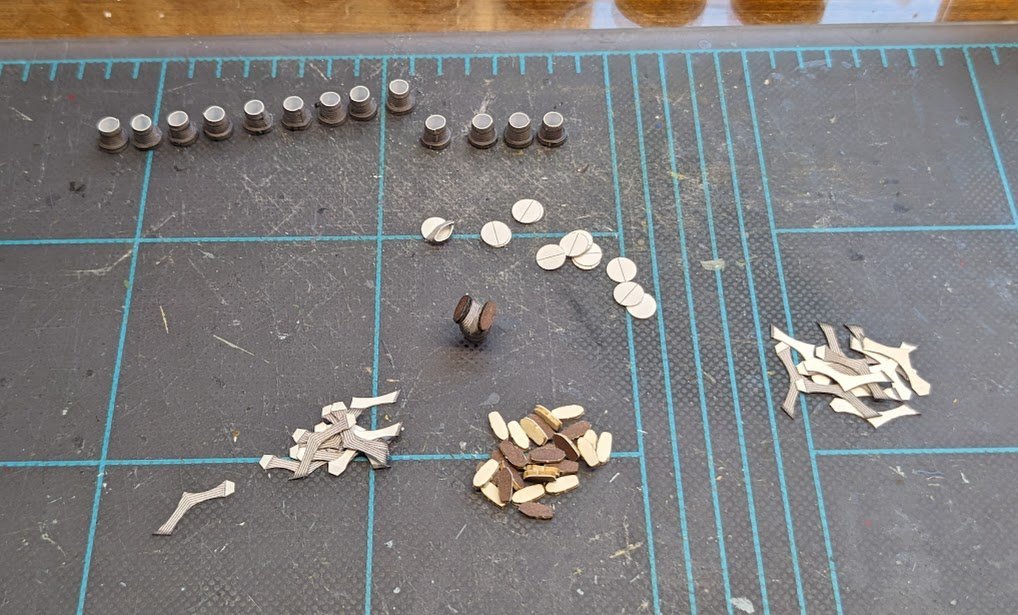
Ugh. One down, thirteen to go. 😑 If you ever see me complaining about card radial engines, this is why!
- 150 replies
-
- 19
-
-

-
Sadly, in our hobby, the reason is often that the previous builder expired, and his or her family didn't know what to do with a partially-built kit.
-
I've taken care of it for you (and deleted the duplicate log).
-
The Shipyard designs, with their multiple skinning layers, are intended to eliminate the typical "starving cow" look sometimes seen in card model hulls.
-
As one of my college professors used to say, "Sounds like there's a thesis in there."
-
Hello All - From Santa Barbara, CA
ccoyle replied to Blu330ciracer's topic in New member Introductions
Welcome aboard! Look here to kick-start your Thermopylae research -
Very nice, Maurino!
-
Which is why we strongly encourage our members not to use third-party image hosting sites. I hope you were able to make some progress on your model since your last update?
-
This kit's framing is pretty rudimentary, and I'm skeptical that its stern framing would correspond very well with Mr. Hahn's plans.
-
Welcome to MSW! The answer to your question depends in part on what medium you wish to work in. Liners in wood are relatively uncommon, except for the ubiquitous Titanic kits. Plastic is another story, but I'm not familiar with what's available. If you are interested in card models, liners are popular subjects in that medium. I can steer you toward some entry-level card kits if you'd like. Cheers!
-
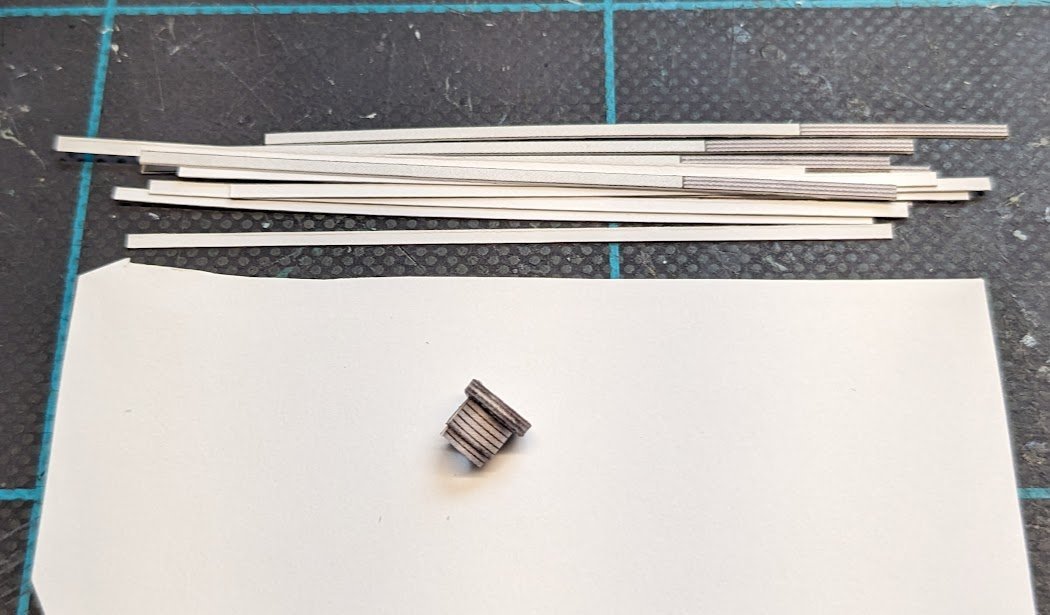
Okay, mystery solved -- and boy do I feel a little sheepish about the whole episode! It turns out there is no missing disk. Instead, part 34d wraps three times around the top of the cylinder formed by 34c. Derp!!
- 150 replies
-
- 14
-