ccoyle
-
Posts
10,586 -
Joined
-
Last visited
Content Type
Profiles
Forums
Gallery
Events
Everything posted by ccoyle
-
 She's a beauty! I love the part about £4.5m equaling 0.05 Pogbas. 😂 PS: I'm mucking along slowly on the build. The canopy is on now and I just finished the exhaust pipes during lunch -- they look pretty cool. The propeller is the only major task remaining, plus the antenna mast, cannon barrels, and pitot tube.
 -
Laser-cut frames and canopies for the kits I bought through the recent estate sale at Paper Modelers, plus Halinski's Ki-61 Hien kit with artwork too beautiful to pass up.
- 130 replies
-
- 15
-

-
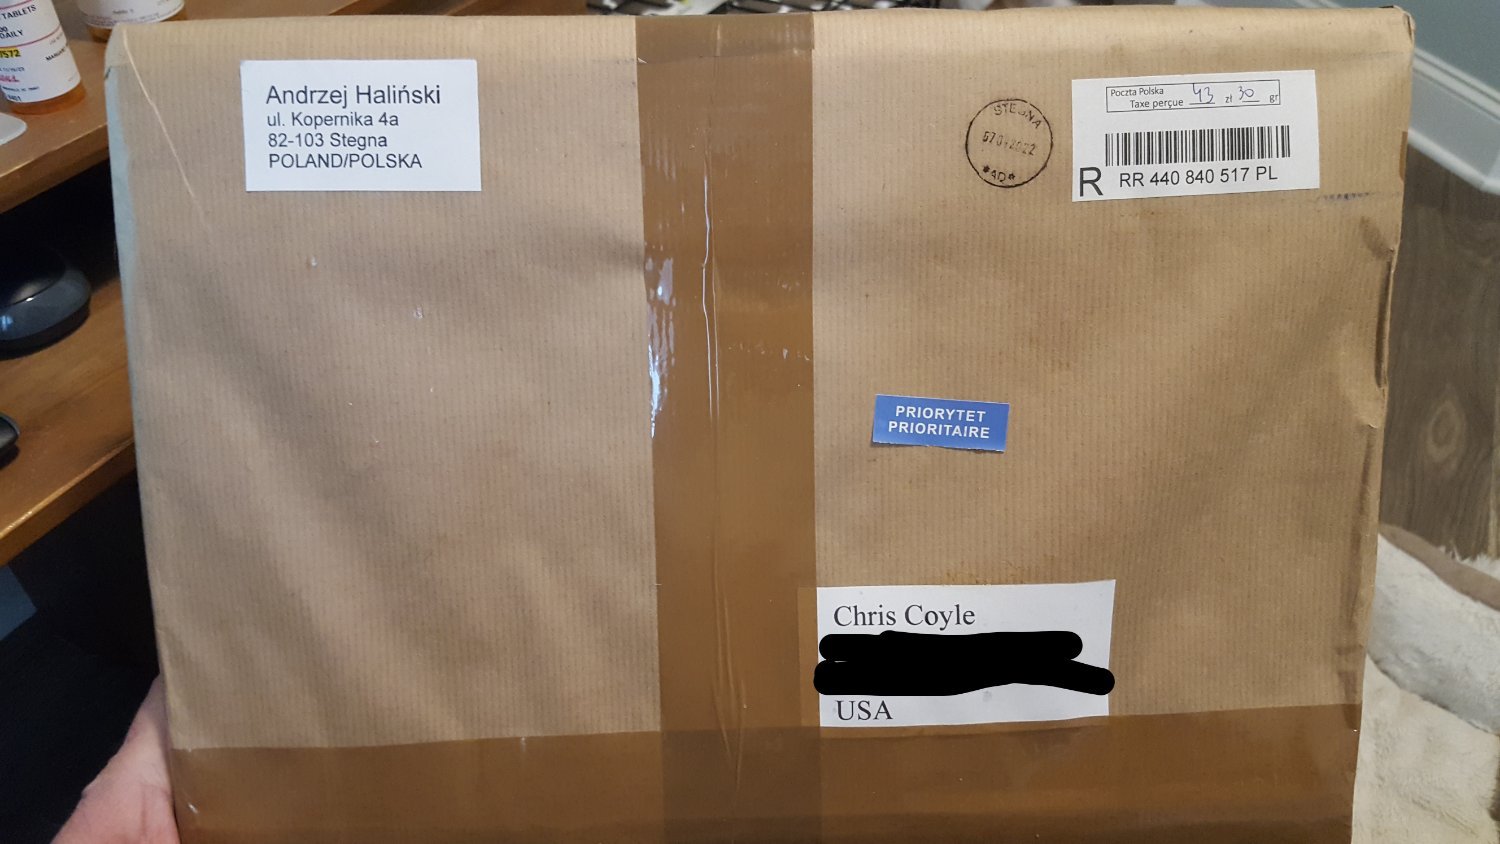
Oooh . . . that tingly feeling you get when a long-awaited package arrives from Poland!

- 130 replies
-
- 15
-
-

-
Here, Kevin -- I have created a Polish-English dictionary for you based on my "extensive working knowledge" of the language: okrety: ship klej: glue drut: wire Okay, that's all I know. For the rest, you're on your own. 😜
- 24 replies
-
- 10
-
-
-
Old Montgomery Ward Model Kit worth building?
ccoyle replied to kwaheltrut's topic in Wood ship model kits
The answer to your question is somewhat subjective. If the kit is old, which it looks like it is (my guess is anywhere between 1945 - 1965), it might have some value to a collector, even though it is more of a novelty than an actual scale model kit. I don't collect kits, so I can't determine how much that value might be. Now, as to whether you should build it, that too is somewhat subjective. The kit appears to be highly simplified, in which case it would not be nearly as difficult to build as an actual scale model kit. On the other hand, is the kit a good design? That I can't answer -- only building it will tell. Building a poor kit design can be very frustrating, but if you got the kit for free and aren't afraid to possibly booger it during the build process, then what is there to lose? Sorry I can't offer more help than that. Cheers! -
Somebody had to say it! This is an exquisite model and a wonderful testament to the suitability of card as a medium for fine models. Very well done, sir!
- 28 replies
-
- 3
-
-
- Shipyard
- Enterprize
- (and 2 more)
-
Wait . . . there's PE details inside the cockpits at 1/350?? Mind blown. 😮
- 126 replies
-
- 8
-
-
- Thetis Bay
- Finished
- (and 4 more)
-
I have to do this for my card models, except that for each model I have to whip up 4-6 different colors, and it's not an exact science, due to the fundamental difference between pigmented paints and pixelated printing. The problem is worse for weathered models, because then each color doesn't consist of a single shade. Cheers!
- 857 replies
-
- 5
-
-
- Sphinx
- Vanguard Models
- (and 1 more)
-
"Isn't that much" is a matter of opinion. If it will keep you up at night, then fix it. Personally, it wouldn't keep me up at night. 😉
-
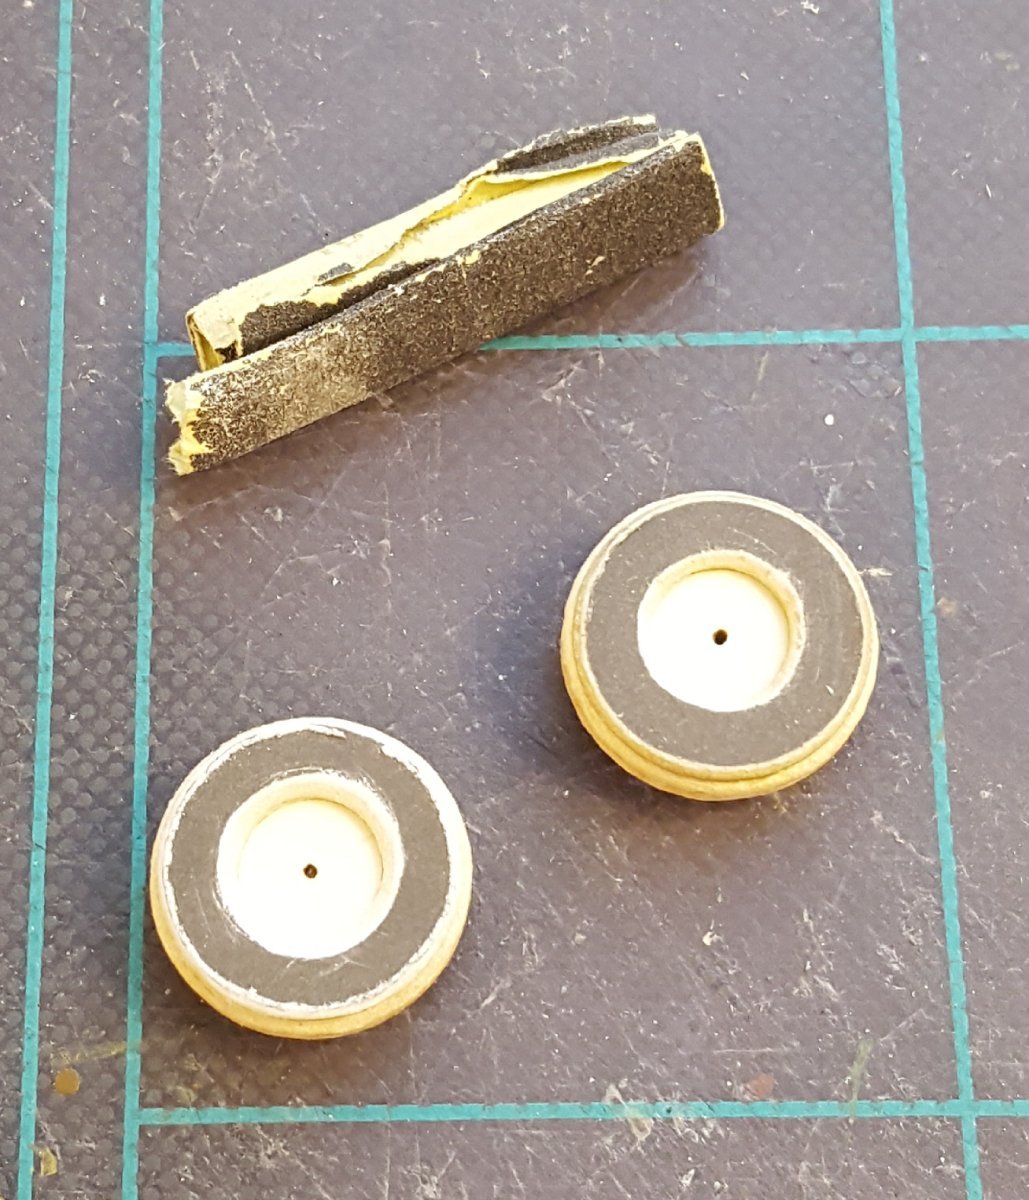
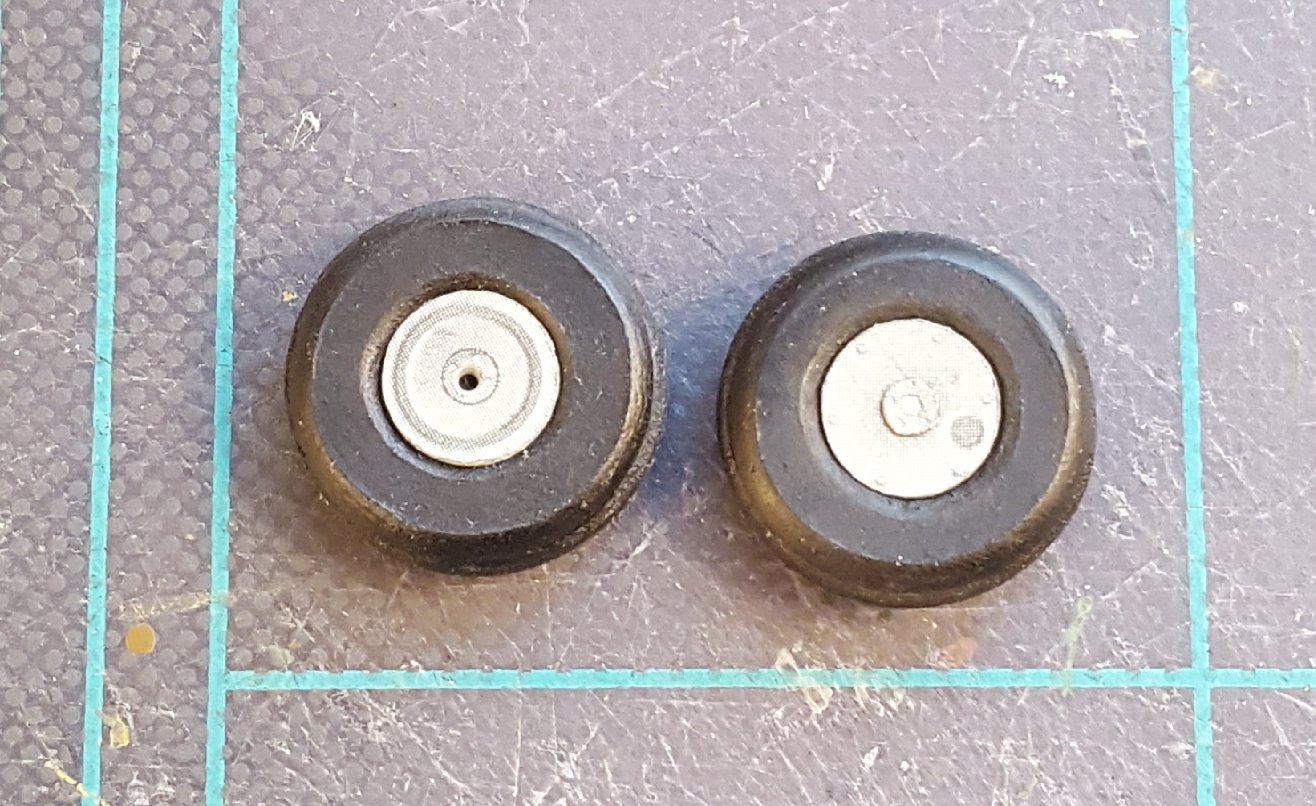
Wheels (I lost track of what chapter this is.) The main gear wheels are each made of five laminated discs. The outer discs were dunked in shellac to prepare them for rough handling and sanding. Here's the laminated wheels. And here they are after final shaping, painting, and having their hubs added. That darn paint has a tendency to pick up all kinds of dust. And here she sits on her new shoes, including tail wheel. Still bits to add, but since each won't individually make a huge visual impact, I think this will be the last update until The Big Reveal. Cheers!


- 130 replies
-
- 18
-

-
-
And a fine result, too. Congratulations!
-
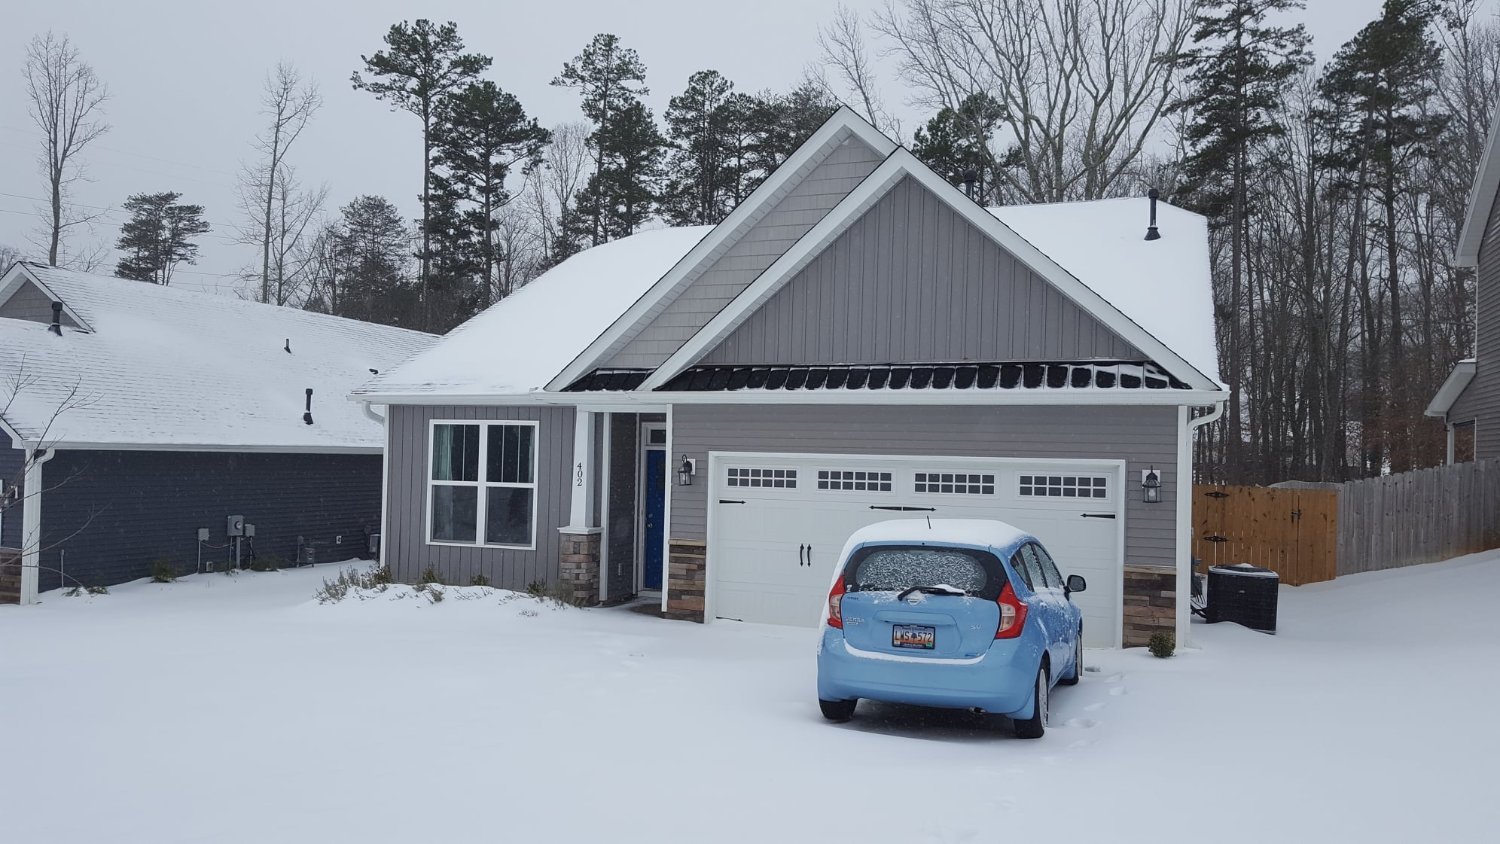
We got maybe three inches of snow. That's enough to get the locals excited and paralyze commerce, but it's less than what we were accustomed to in California and substantially less than the 8-12" in the initial forecasts. I have titled this photo "The Wrath of Izzy."

- 130 replies
-
- 17
-
-
-
If you have to go raiding for thread, look for quilting thread. It has far less fuzz than regular sewing thread. Congratulations on completing your model!
- 51 replies
-
- 1
-
-
- Model Shipways
- norwegian sailing pram
- (and 1 more)
-
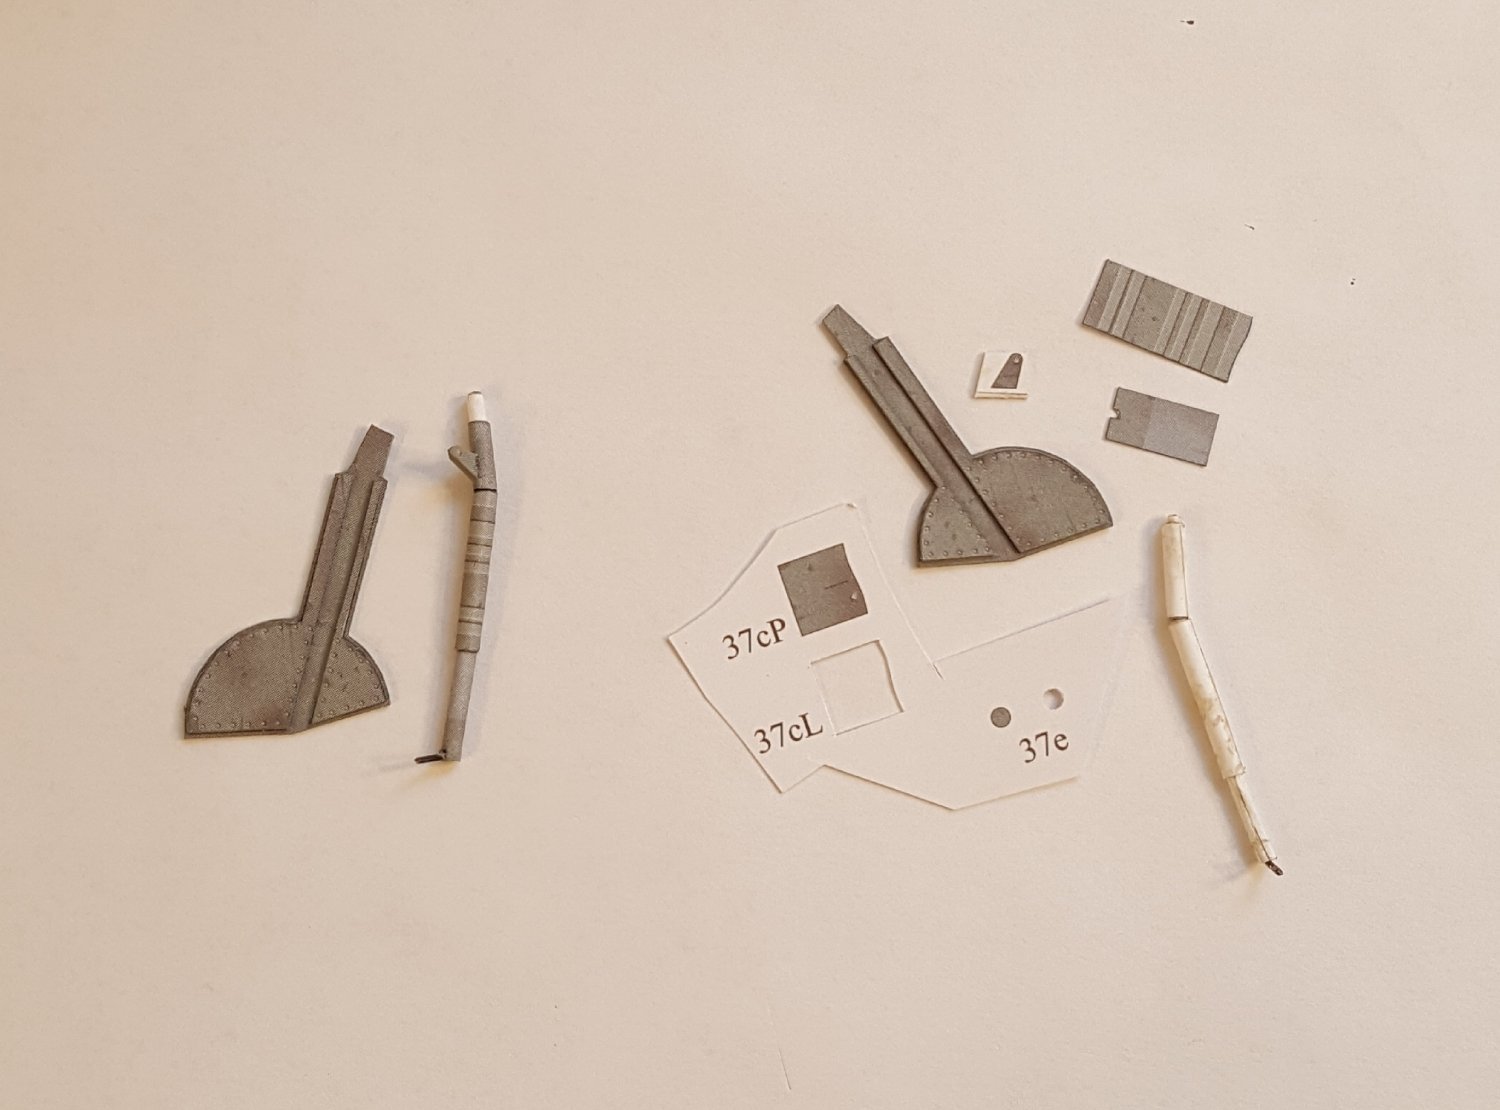
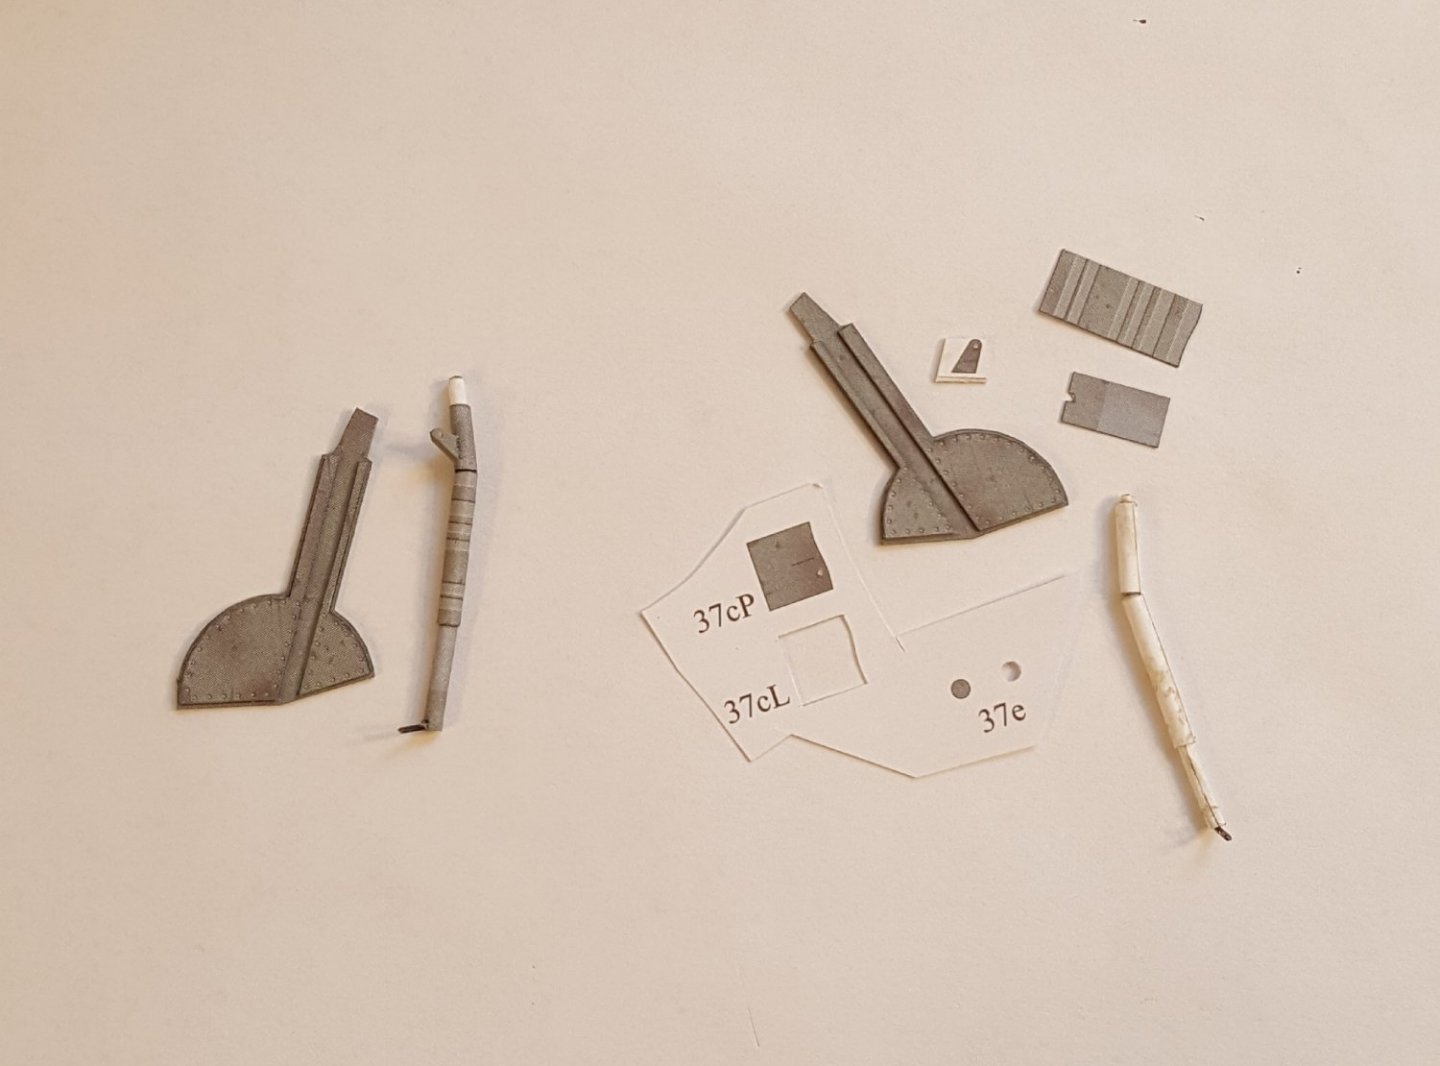
A bit of further progress. All gun blisters complete, along with the oil cooler and air inlet. The latter was a booger to build. I wound up with a part left over. 🤔 Work on the landing gear is in progress. On the left are the port strut and door. On the right are the parts for the starboard strut and door, just for comparison. Not hard work, but kind of tedious. Once these are done it will be time for wheels.

- 130 replies
-
- 17
-
-
Finnish T26 tank by Baker - FINISHED - Mirage - 1/72 - PLASTIC
ccoyle replied to Baker's topic in Non-ship/categorised builds
Is it just me, or does the T-26 look like it would be very cramped to fight/drive in? -
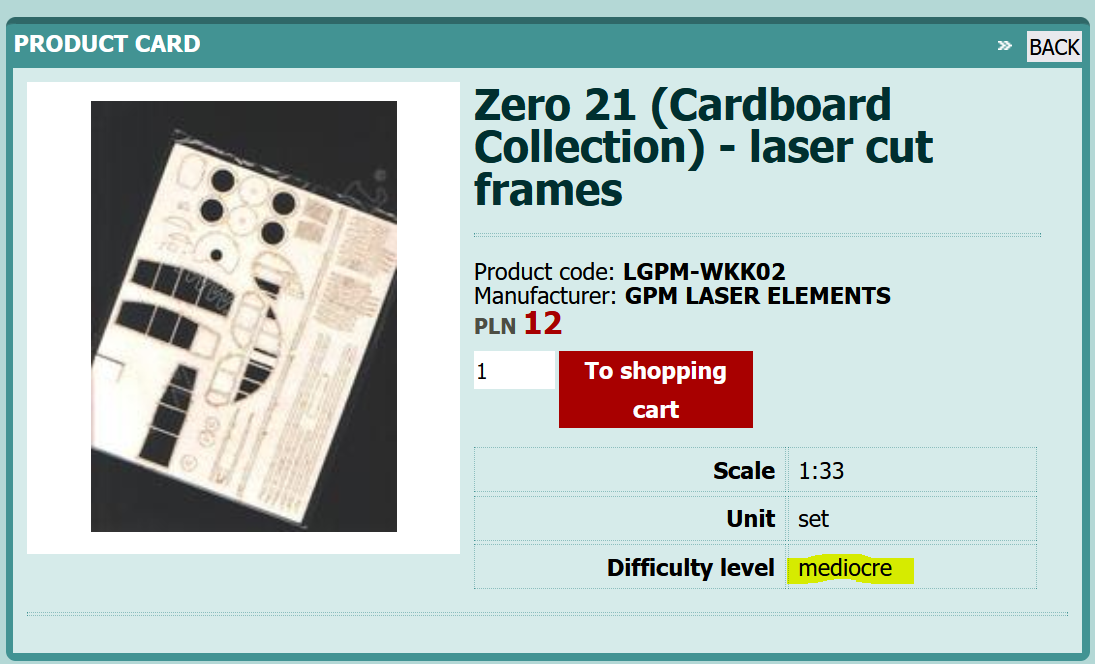
I was doing a bit of shopping this morning. I think they may be trying to tell me something. 🤔 Side note: Yes, the frames in the product photo are obviously not for a Zero. It's quite common for photos of laser-cut elements in listings to feature a generic set rather than the actual product.
- 130 replies
-
- 11
-
-
-
Noted and done. I have no experience with the Falkonet kits, but I can vouch that the Master Korabel kits are awesome. Just be advised that at their usual 1/72 scale, the parts in such small boats can easily be broken. If you're inquiring about the 1/24 scale Falkonet kit, we have a finished example in our gallery here.
-
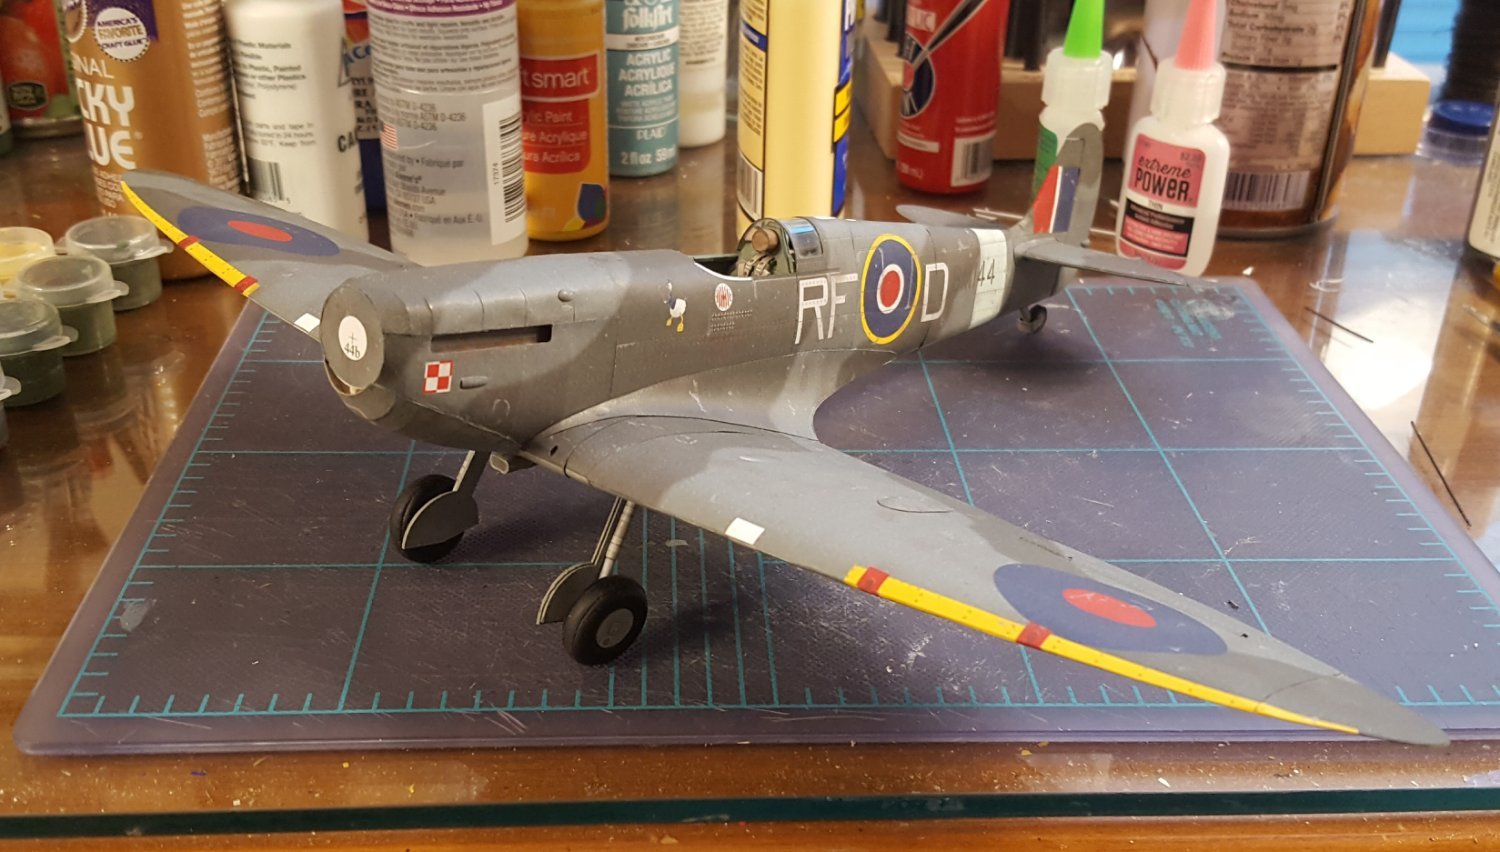
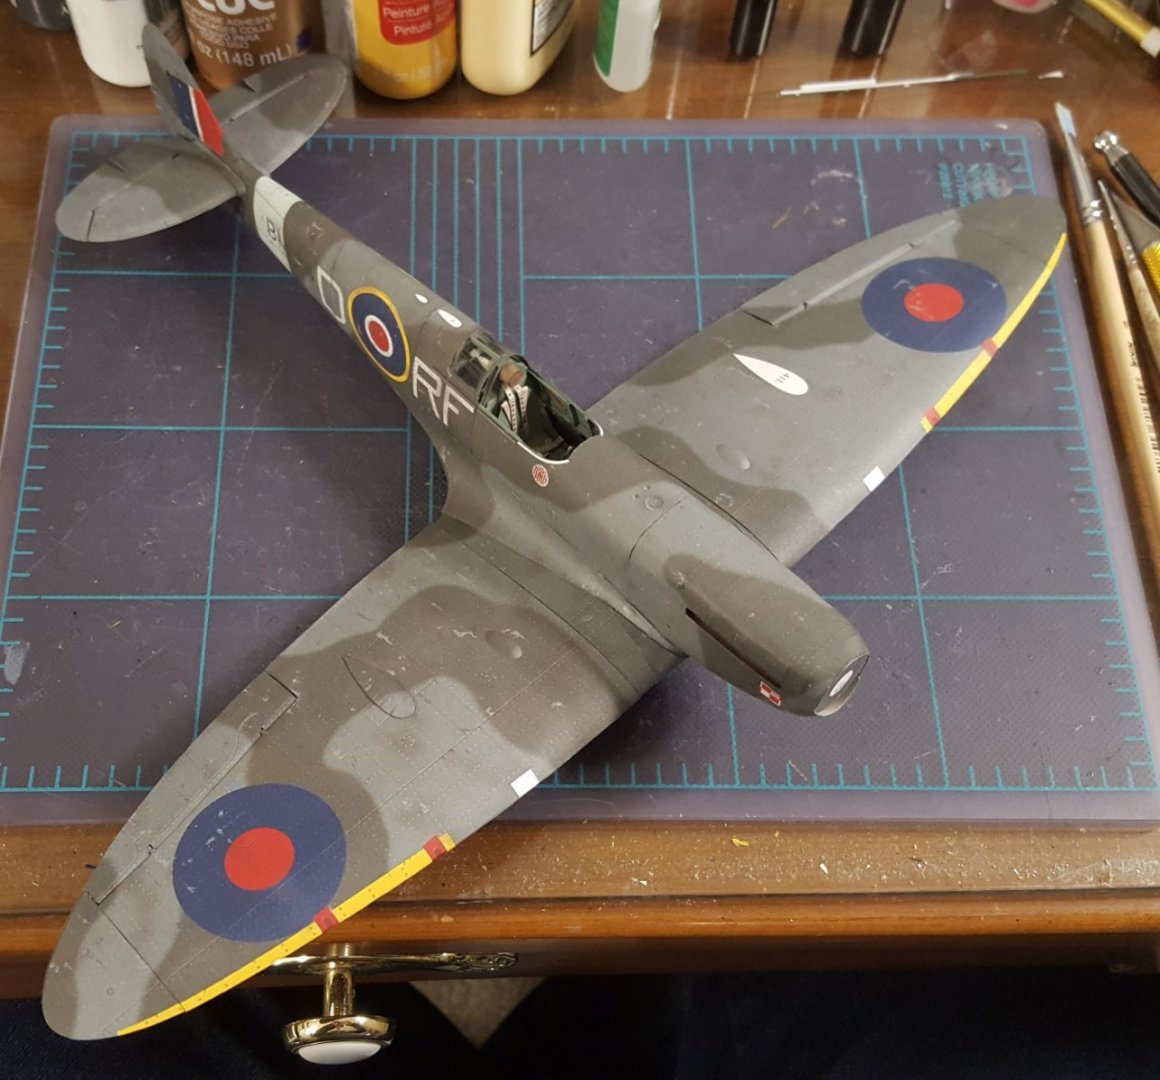
It's amazing how much of a visual difference is made by killing a white spot -- compare the starboard wing to its port side counterpart. On the real plane, the bulge you see was made necessary by the addition of the drum-fed Hispano 20 mm cannon; the bulge, along with another on the bottom of the wing, covered the gun's ammunition drum. The early cannons were not a resounding success -- while they fired a heavier shell, the drums carried only a small number of rounds -- about 10 seconds' worth, if I remember correctly. In any case, pilots rarely got the whole 10 seconds of fire thanks to the gun's tendency to jam, often after only a few rounds.
- 130 replies
-
- 18
-
-
I discovered that after two coats of satin varnish, the matte printing still looks . . . matte.
- 130 replies
-
- 11
-
-
-
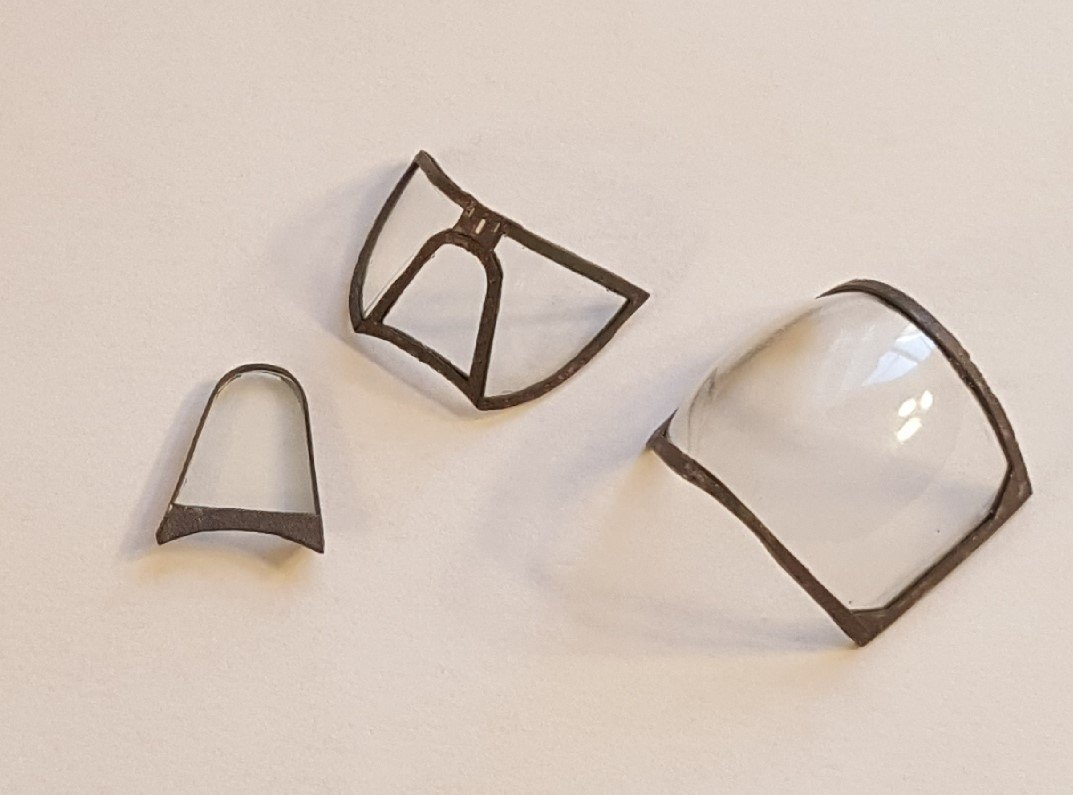
So, as I said, work continues rather slowly. Over the last few evenings I have been working on the canopy and armored windscreen. The clear portion is a pre-formed canopy from Halinski; the armored windscreen is cut from sheet mylar using a supplied template. As many higher-end kits do, this kit came with both inner and outer canopy framing. Before fixing the frames to the canopy, they must first be edge-colored, as per usual, but with a slight twist. Because of the thickness of the clear plastic, some slight amount of the plain white reverse side of each frame will be visible, more so if the inner and outer frames are aligned less than perfectly. Therefore, the back of each frame must also be painted. What's tricky to remember is that the back of each frame should be painted with the color that is seen from the opposite side of the plastic, i.e. the backside of interior framing gets painted with the exterior color and vice versa. I don't always remember to do that last part correctly. 😬 Using the canopy glue from Evergreen has had its own learning curve. I have found that it adheres paper to plastic quite well, especially if it is allowed to set the entire recommended 24-hour curing time. Once cured, it resists a substantial amount of deformation, which typically happens when the flimsy canopy parts have been cut apart and require extra finishing (this flimsiness led to a few boo-boos during trimming and sanding). The glue does not dry completely clear, though, so a lot of care has to be used to not get it everywhere when applying it and putting the parts together. Its working time allows parts to be moved around a little, but not very much -- it tends to grab pretty quickly. With all that in mind, I'm somewhat pleased with the result, though I have no doubt that later efforts will be better. I have test-fitted the canopy to the fuselage and so far it looks good, but I will not attach it until later. In the meantime, I have been toying with the idea of spraying satin varnish on the model to give it a slight sheen. I have done some research online regarding just how shiny RAF wartime finishes were. As I suspected, the paints used on preserved Spitfires are applied with more of a view toward long-term preservation rather than keeping the few remaining Spits unobserved by Luftwaffe eyeballs, and glossier paints are more durable. However, I also read that the small size of scale models makes them appear to be more matte in appearance than their real-life counterparts, so a bit of shine may be in order. Not wanting to do a test spray on the model itself, I am conducting a test on the next best thing -- the kit's cover art -- and will report back on what I discover. Cheers!
- 130 replies
-
- 16
-
-
Hi, Mary-Ann. Sorry to hear about the loss of your relative. The easiest way to off-load a large quantity of modeling materials is to find a local club to donate them to (Google "ship modeling club" + the name of your nearest large city); clubs often auction off such things to raise funds. Another helpful tip would be to post pictures here, if you can obtain them -- these would be more likely to tempt local modelers. Kind regards, Chris
-
How many kits do you have on the go at the moment?
ccoyle replied to CaptnBirdseye's topic in Wood ship model kits
Technically, I have three models "in progress" in addition to the one I'm currently working on. In reality, there's only a slim chance that I'll actually finish any of them. Once motivation is lost, it's very difficult to get it back -- at least for me.- 54 replies
-
- 10
-
-
The highly simplified "camera" is recessed inside the wing and not visible, much less noticeable, unless you look directly at it from head-on. Most people will not even spot it if they view the finished model later, and 9 out of 10 publishers wouldn't even include such a detail. But, you know -- Halinski.
- 130 replies
-
- 12
-