HOLIDAY DONATION DRIVE - SUPPORT MSW - DO YOUR PART TO KEEP THIS GREAT FORUM GOING! (78 donations so far out of 49,000 members - C'mon guys!)
×


ccoyle
-
Posts
10,461 -
Joined
-
Last visited
Content Type
Profiles
Forums
Gallery
Events
Everything posted by ccoyle
-
Welcome aboard!
-
 Just my two cents, but I think your sails look fine as-is.
- 32 replies
-
- 3
-

-

-
- Bounty
- Constructo
- (and 1 more)
-
Welcome aboard! Check here for NRG-affiliated clubs.
-
OcCre and AL make most of their sales in non-English-speaking parts of the world, and 1000 kits is a small run. And MSW, though large, represents just a fraction of the greater ship modeling community. Now add to that the fact that most MSW members do not actively post at our site. When these facts are taken together, it's little surprise that relatively few examples of any kit on the market are depicted in build logs here. So, I too wouldn't be surprised if one of those kits was purchased by an MSW member -- but I wouldn't be surprised if it never shows up in a build log.
-
You have a well-appointed man cave!
-
Your Bounty looks very nice! Based on that result, I have little doubt that you will do well with Bellona.
-
I can't remember the gentleman's name, but all or most of Orel's predreadnoughts are designed by one man, and he is prolific, which is why so many of the Orel kits have a common look about them.
- 288 replies
-
- 7
-
-
- Card
- Pre-Dreadnought
- (and 3 more)
-
Hello, Thomas. That is a nice model. Your post doesn't state whether this is your own work or not, though I assume it is. Since this is a finished model and not a build log, the gallery is the preferred place for your photos. Cheers!
- 1 reply
-
- 2
-
-
Welcome aboard, Philippe!
-
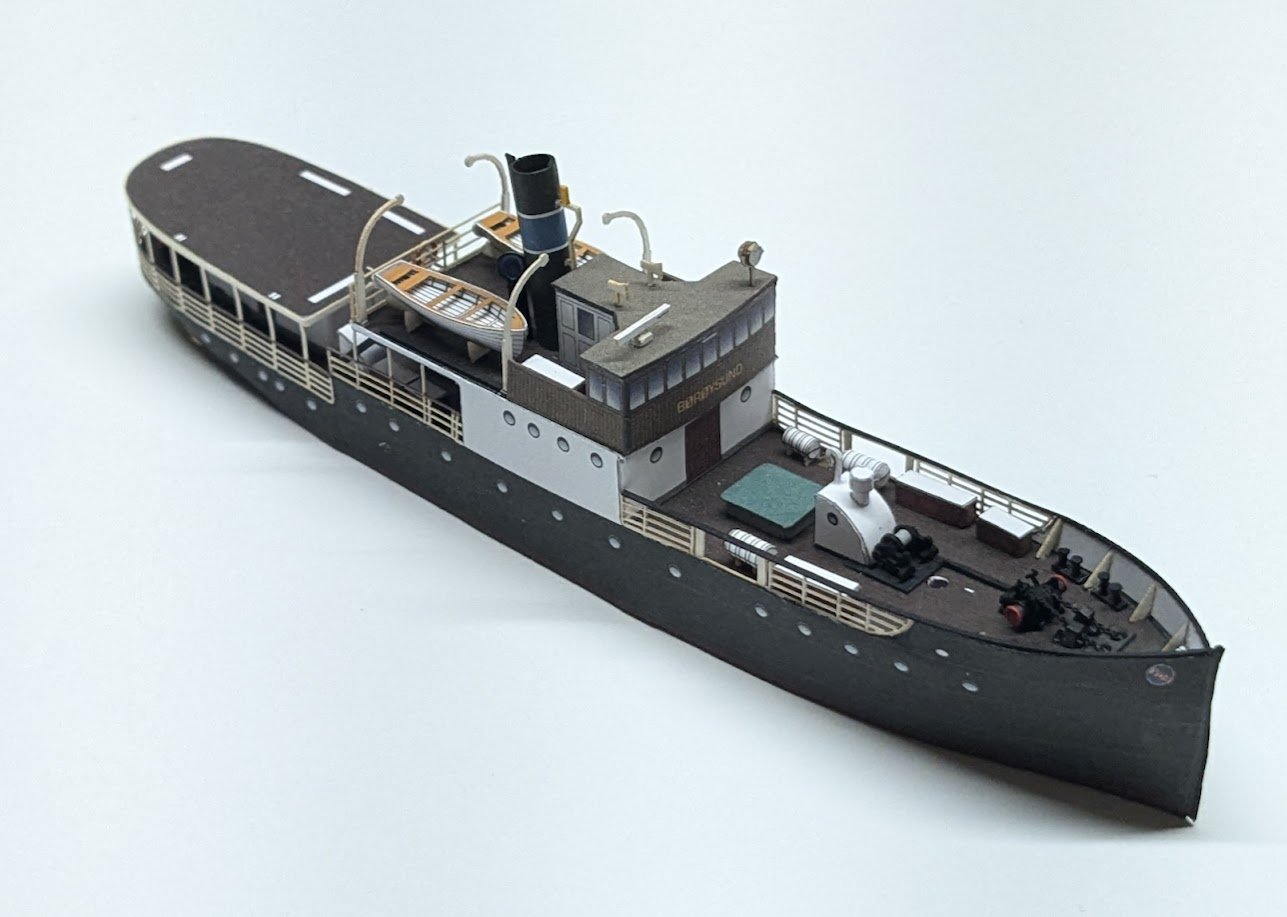
All the foredeck bits have been assembled and added. As you can see, the winch is about the size of Abraham Lincoln's head.

- 31 replies
-
- 12
-
-
Welcome aboard! Your model is coming along well.
-
Very cool!
-
Post pics if possible, please.
-
Your help is needed! Can you recognise her?
ccoyle replied to TM1's topic in New member Introductions
The contrasting wood colors are the hallmark of kits made in Spain. Constructo made a kit for PdN at one time. We have a build log for that kit here. -
Kit review 1:10 Military Turbofan engine - TECHING (build review)
ccoyle replied to James H's topic in Non ship-related reviews
Very nice! Though I can see where the endlessly repeating engine start-up loop might do this to a person:
-
Kit review 1:10 Military Turbofan engine - TECHING (build review)
ccoyle replied to James H's topic in Non ship-related reviews
Whew! For the price, it should be able to power a real aircraft! Looks like it will be a hoot to build. -
At one time I thought I had some ancestors from Pomerania. All I knew at first is that they were from 'Pommern', so it was a natural assumption to make. I later learned that they were from the other Pommern -- the village in Rhineland-Palatinate. A big difference!
-
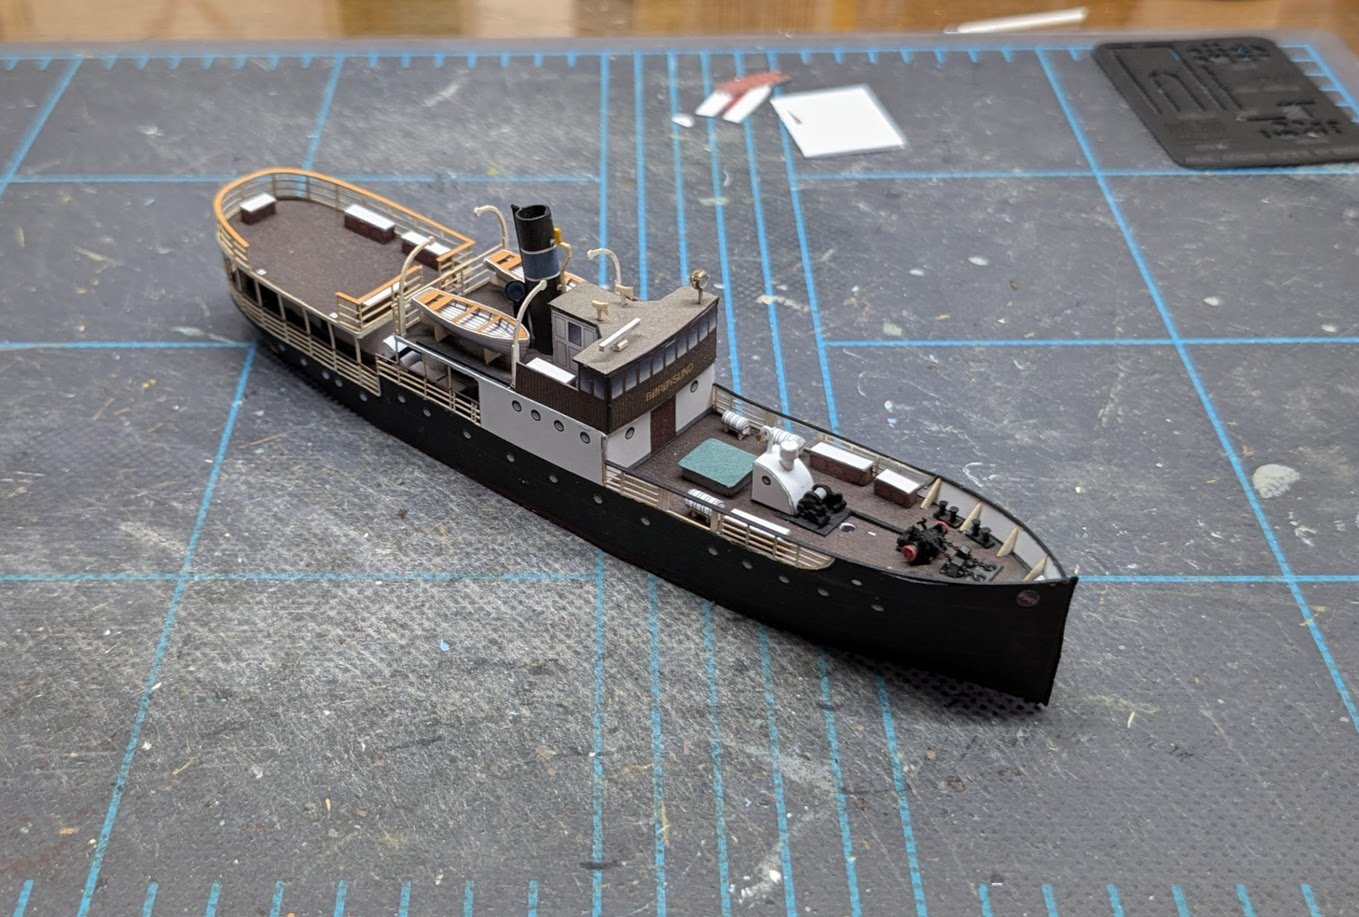
The bridge has been added. The kit includes optional parts for the bridge interior. I decided not to add these, because that would require cutting out the many printed bridge windows and then glazing them. It's a difficult task to do neatly, nearly impossible actually, and the finished interior would be difficult to see -- just not worth the extra effort IMO.
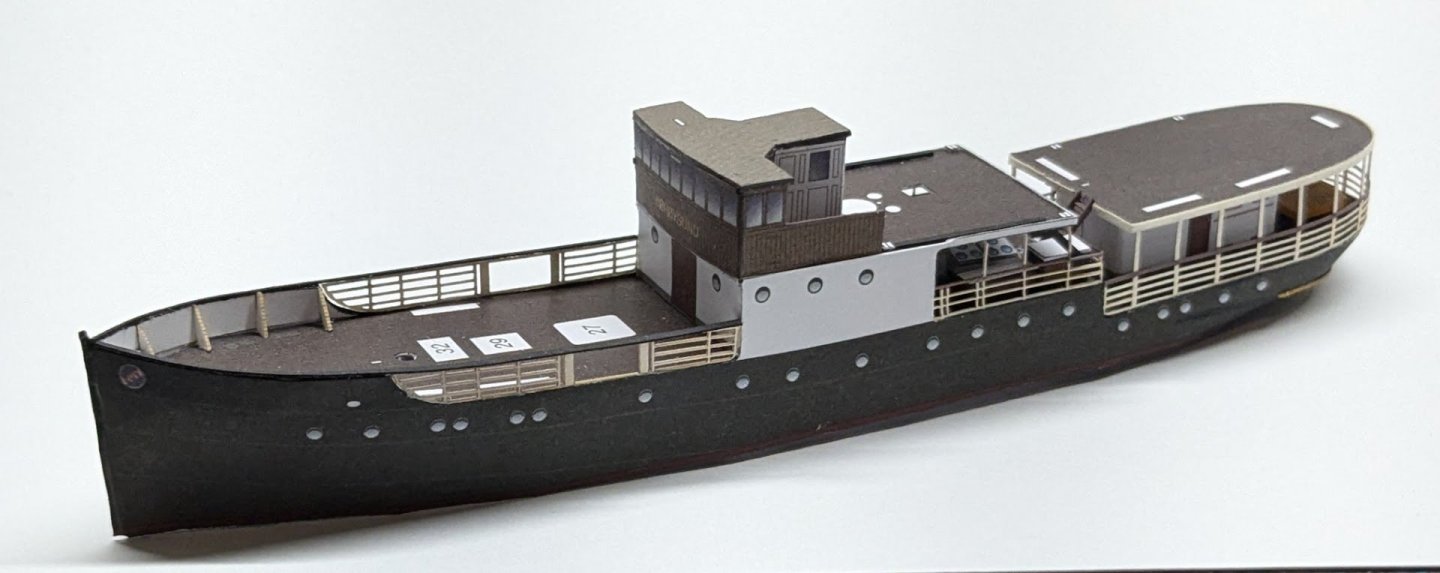
- 31 replies
-
- 11
-
-
Welcome aboard!