ccoyle
-
Posts
10,599 -
Joined
-
Last visited
Content Type
Profiles
Forums
Gallery
Events
Everything posted by ccoyle
-
 Darn work! I know how that goes. 😅
 -
Welcome! We've actually had at least one model displayed here that was built from Legos. Some Lego ships are quite impressive. I think it'd be quite the challenge to find just the right combinations of bricks to create a ship's many and varied structures.
-
Can do!
-
That is true. 1/48 does mean more materials and therefore most cost. The 1/64 scale Indy is pretty large for the average modeler's display needs, and 1/48 will of course take up even more space. That's one reason why I selected a 1/72 scale brigantine for my current project. The admiral is still not fully aware that I have started it. 😏
-
Moin, moin! Glad to have you aboard.
-
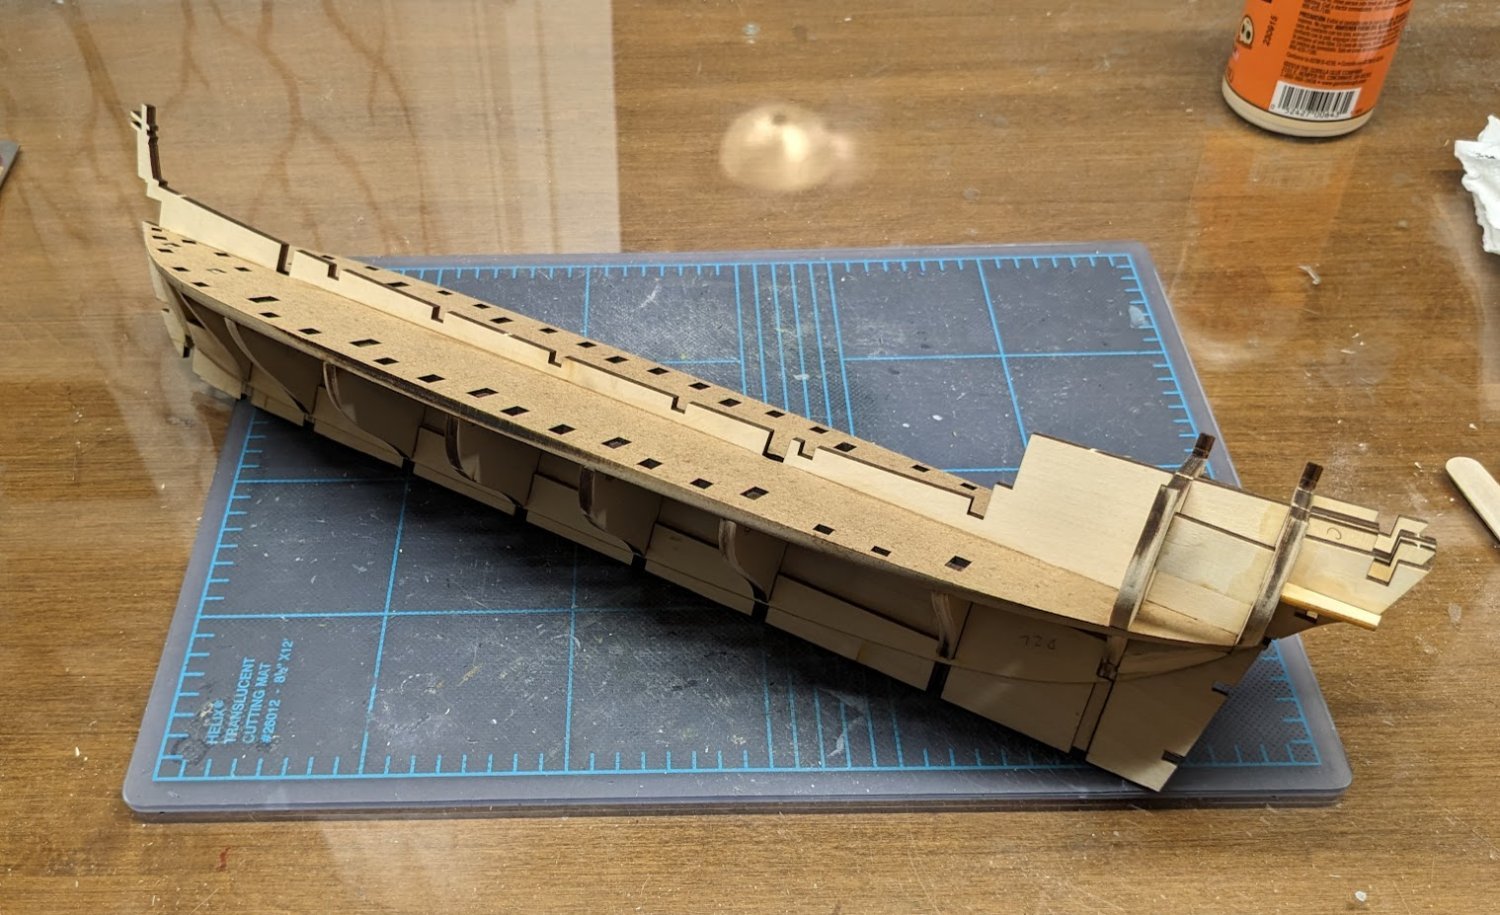
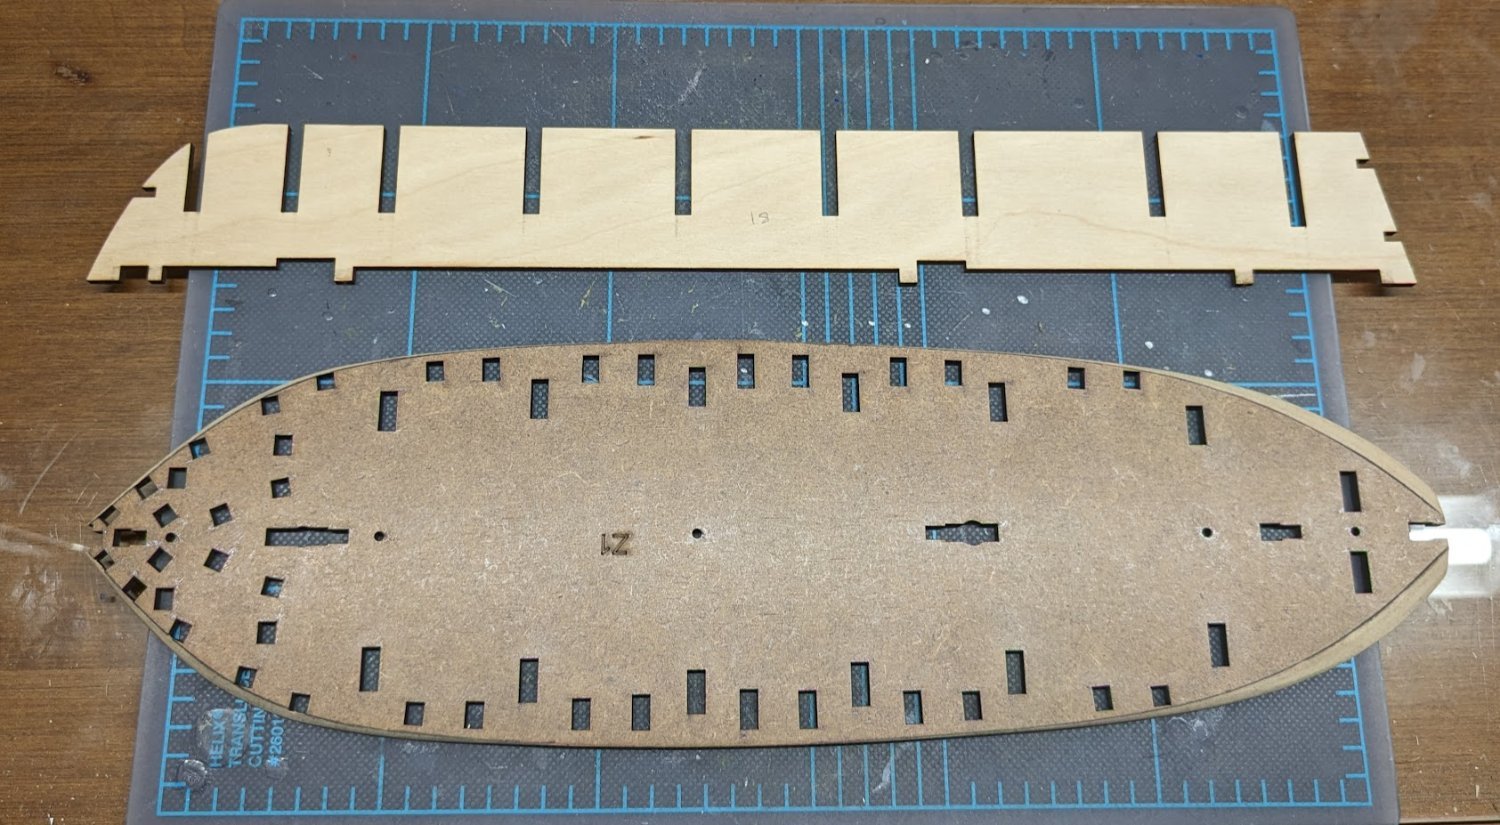
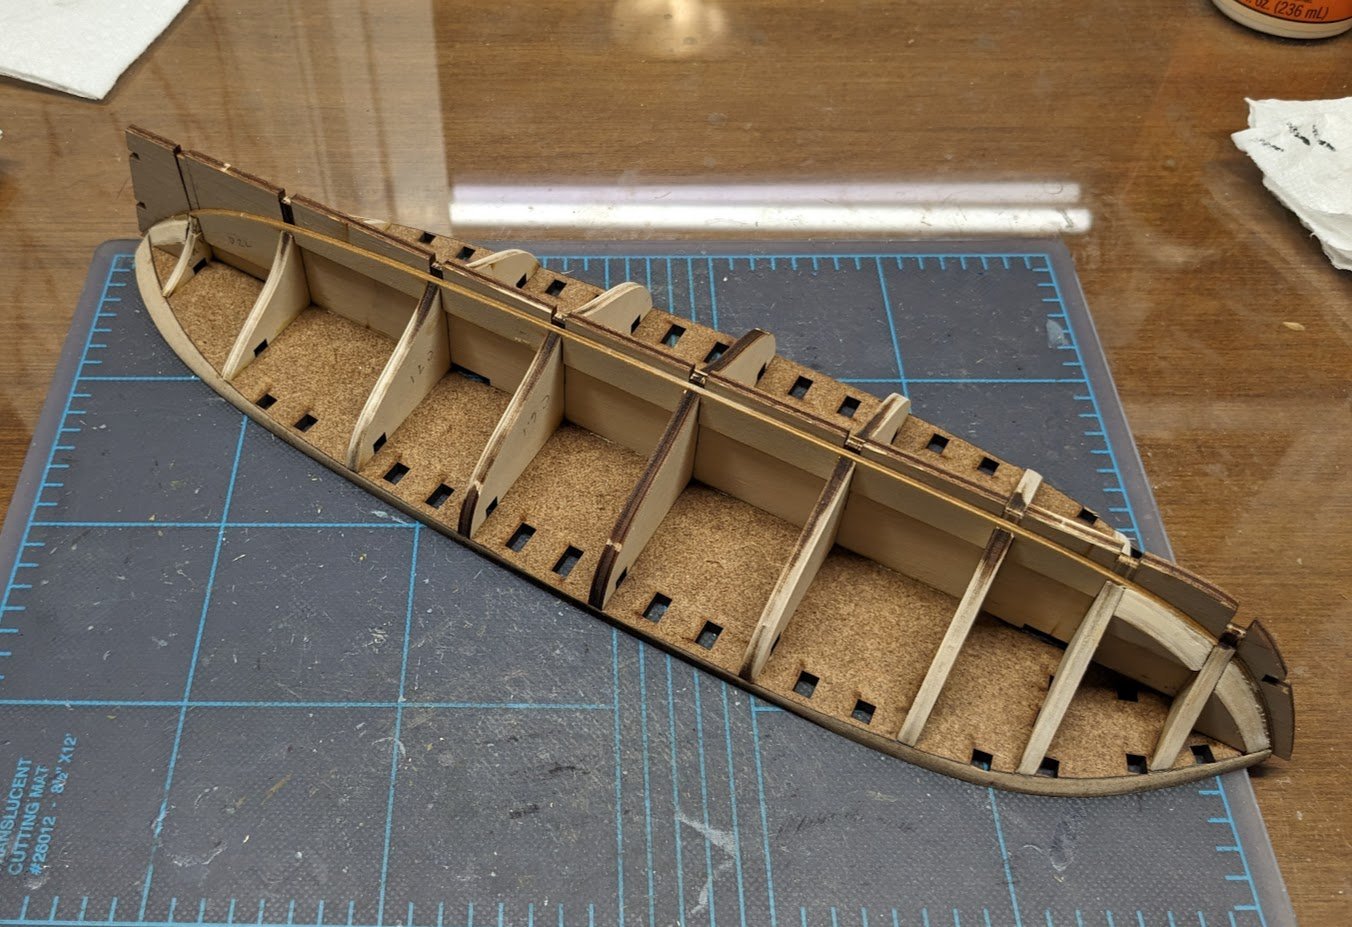
Got the rest of the bulkheads installed. The next steps involve flipping the hull over and adding the upper structure (in progress). My cutting mat is eleven inches wide, so you can see it's not a large model. Cheers for now!

-
Agree!
-
I have the Seahorse 1/100 scale card model version of this pretty little ship in my stash.
- 16 replies
-
- 1
-

-
- Duyfken
- Modellers Shipyard
- (and 1 more)
-
You have to use the edit option in post #1. I'll cover this one for you. Congratulations on your fantastic model!
-
Welcome aboard!
-
Welcome aboard, Chuck! With your background, I hope we may see some exciting display options for your models!
-
Welcome! Excellent work on the pinnace!
-
Hello & HNY on 123123 from Philadelphia
ccoyle replied to ChiefScienceOfficerDrew's topic in New member Introductions
Welcome aboard, Drew!- 11 replies
-
- 3
-
-
- racing sailboats
- commercial ships
- (and 1 more)
-
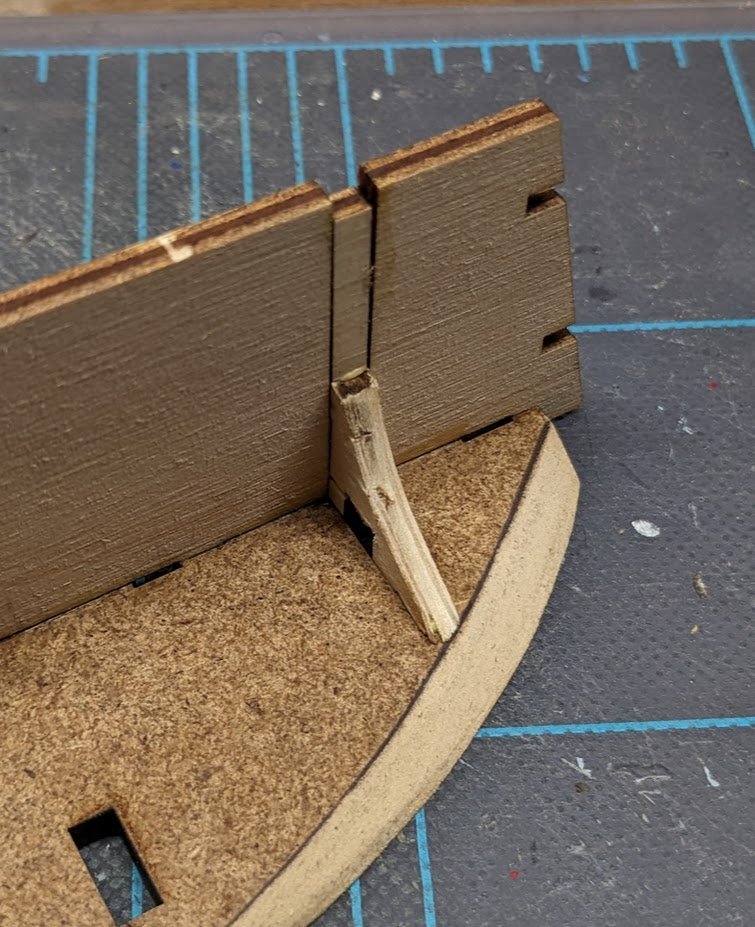
So, sweet Keeva is off the hook now. To effect the repair, I first needed to get the main hull plate and profile former assembled. Here's the plate with its beveling completed. After gluing those two pieces together and letting them cure, it was time to 'fix' the broken bulkhead. It turns out the damage was not as catastrophic as it looked at first glance. The main part of the bulkhead was broken in half; after beveling the two halves, I glued each in separately. The bulkhead had a long stem that fills most of the remaining slot. The original stem was munched beyond repair, but it was a simple matter to make a replacement from scrap plywood. All done! Now there remains a lot of beveling and gluing of the remaining bulkheads. I probably won't post another pic until that task is done.

-
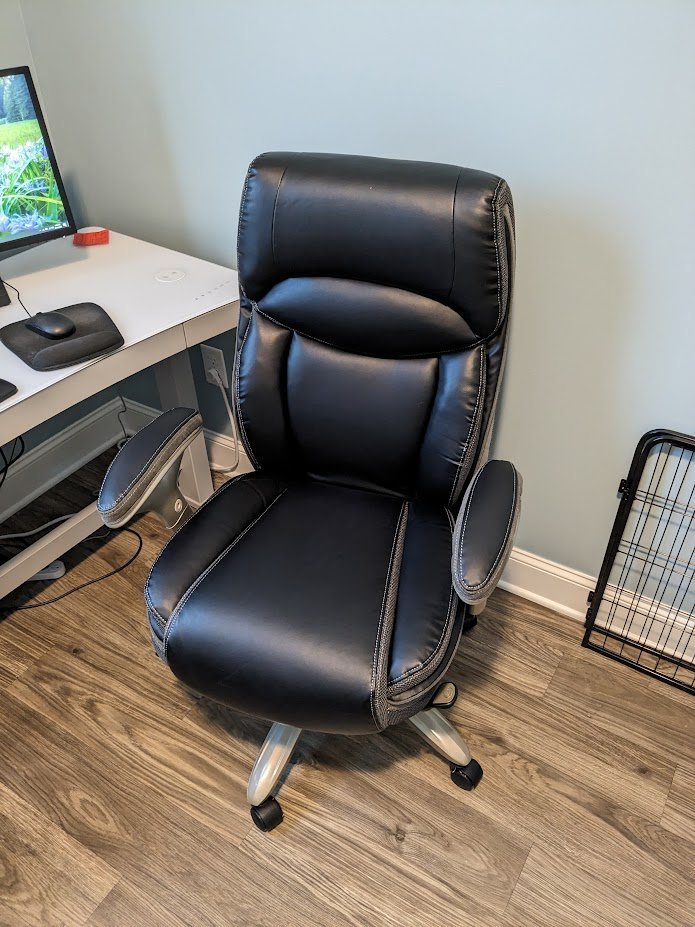
Well, I haven't got Phoenix fixed yet, but I did assemble my new office chair -- a late Christmas present to myself to replace the abomination that was the old chair. Note: That is not my modeling desk. 😅
-
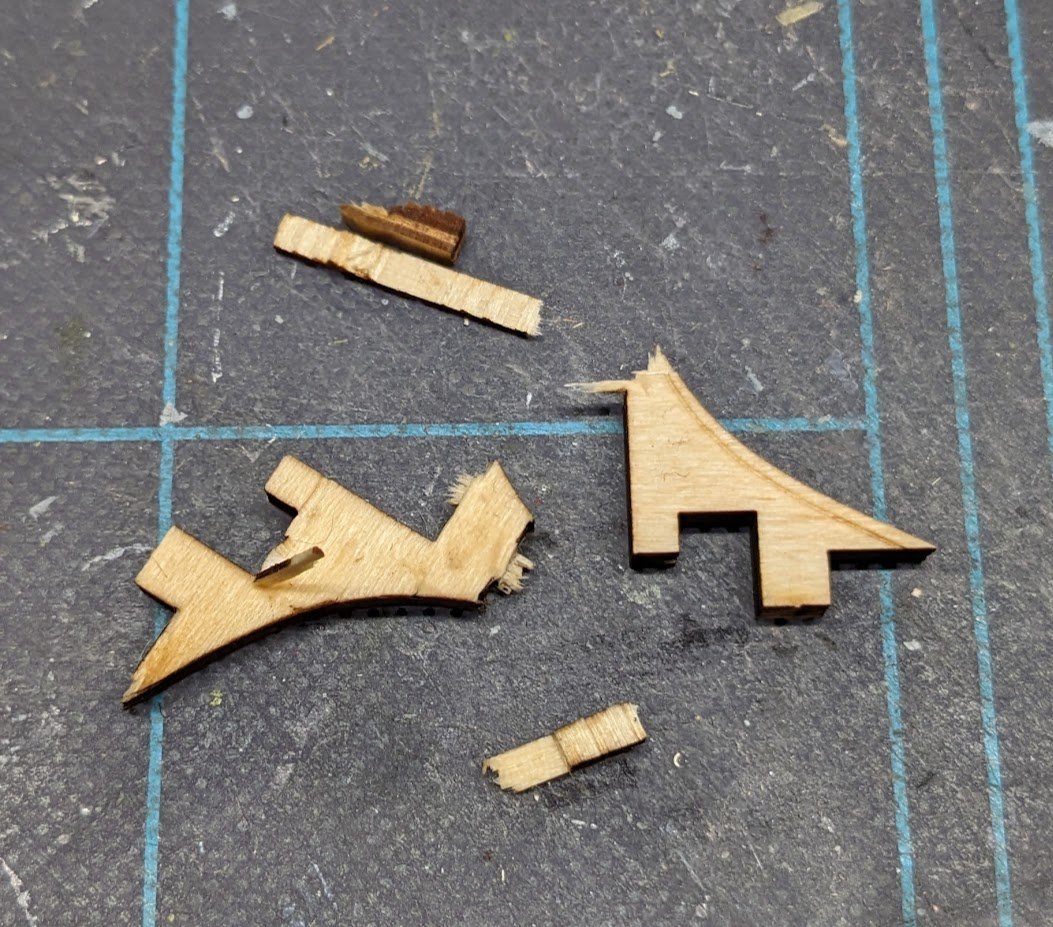
My dog has earned her way onto Santa's naughty list -- forever.* *I may feel differently about this tomorrow, but not right now. 😑😑😑 I'd be less angry if her depredation didn't mean having to cut out a replacement from the thickest plywood in the kit -- 4 mm. 😑😑😑 Hmm . . . looking at the picture just now, I realize there might just be an easier way to fix this. Stay tuned.
-
Good luck with your project! At 1/48 scale, this makes a very striking model.
-
Welcome aboard, Ron!
-
Welcome aboard, Dave!
-
Welcome aboard, Ian!
-
Hopefully this one won't take 17 years! 😅
-
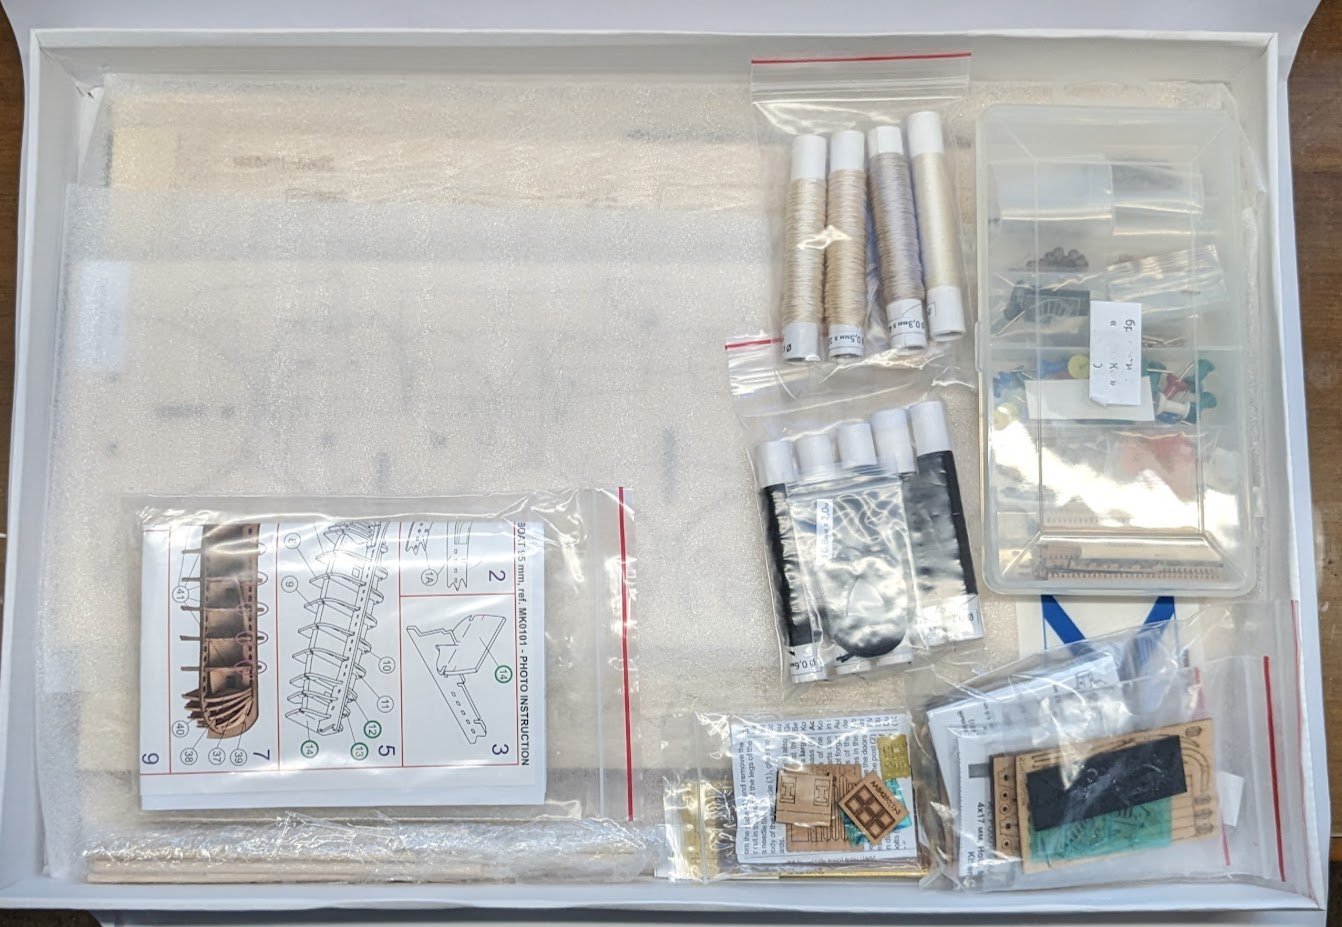
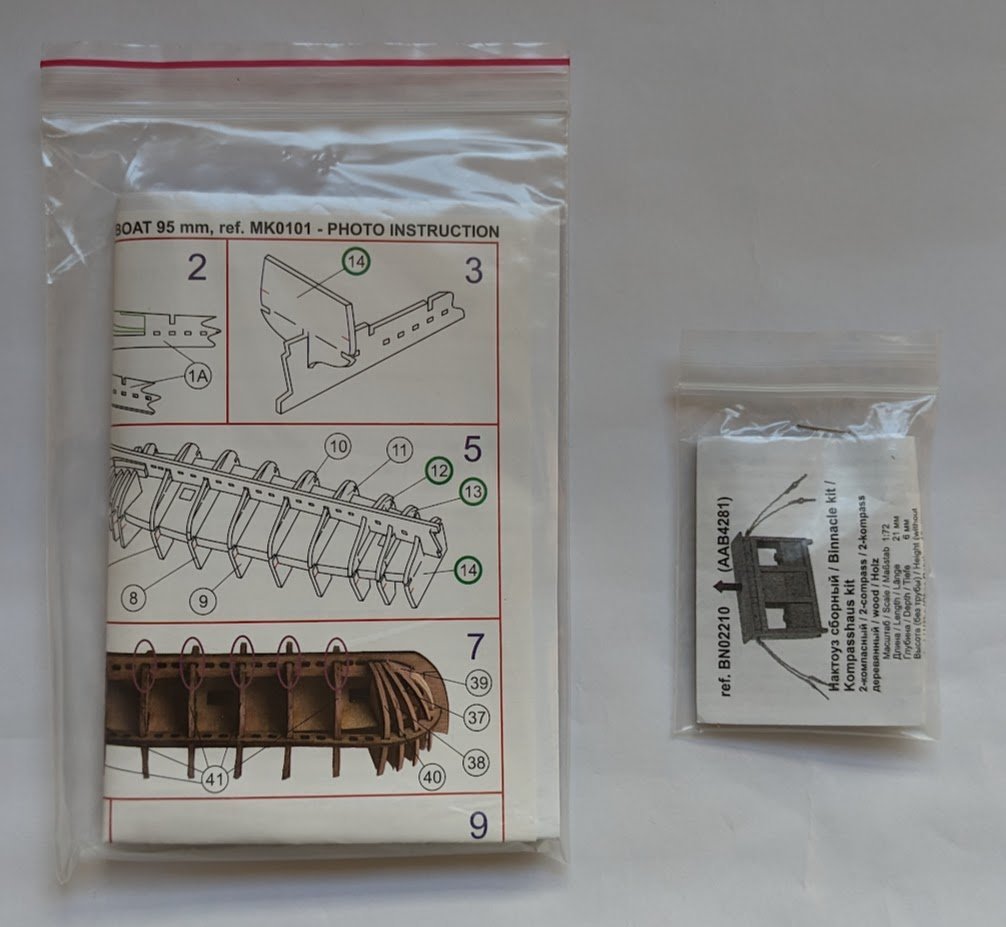
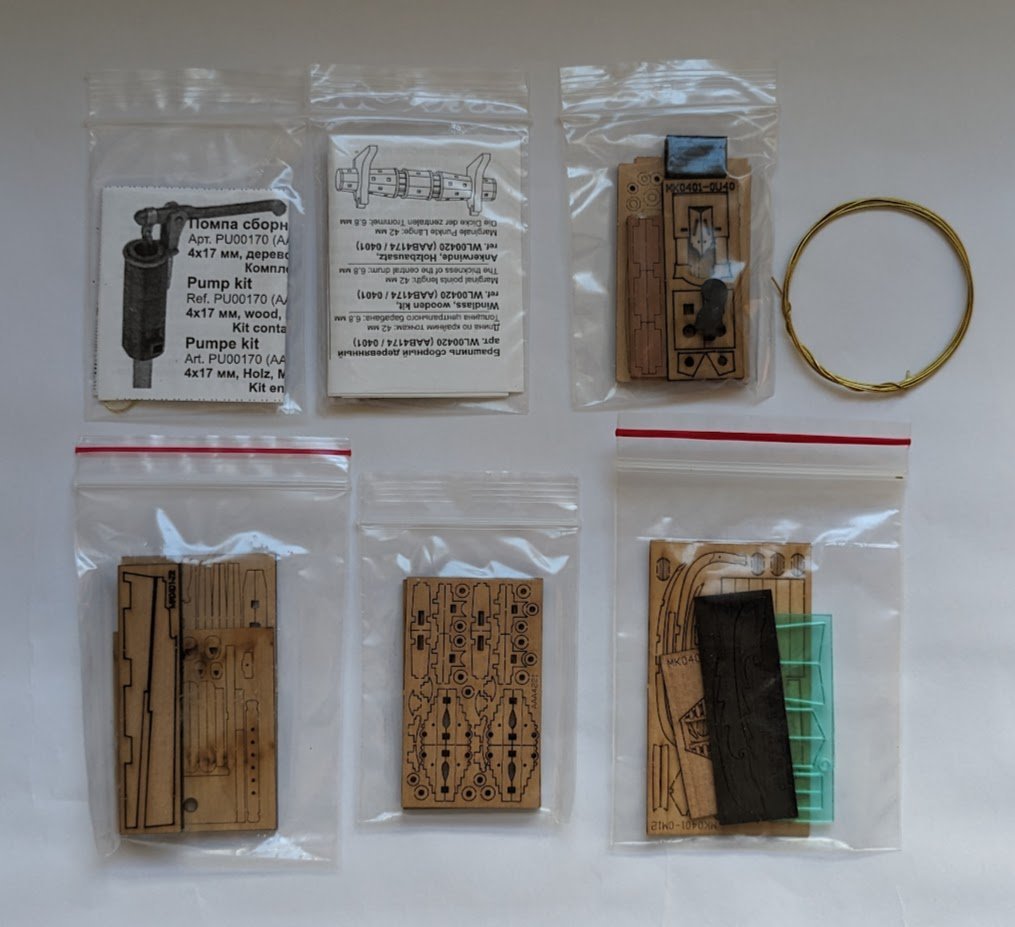
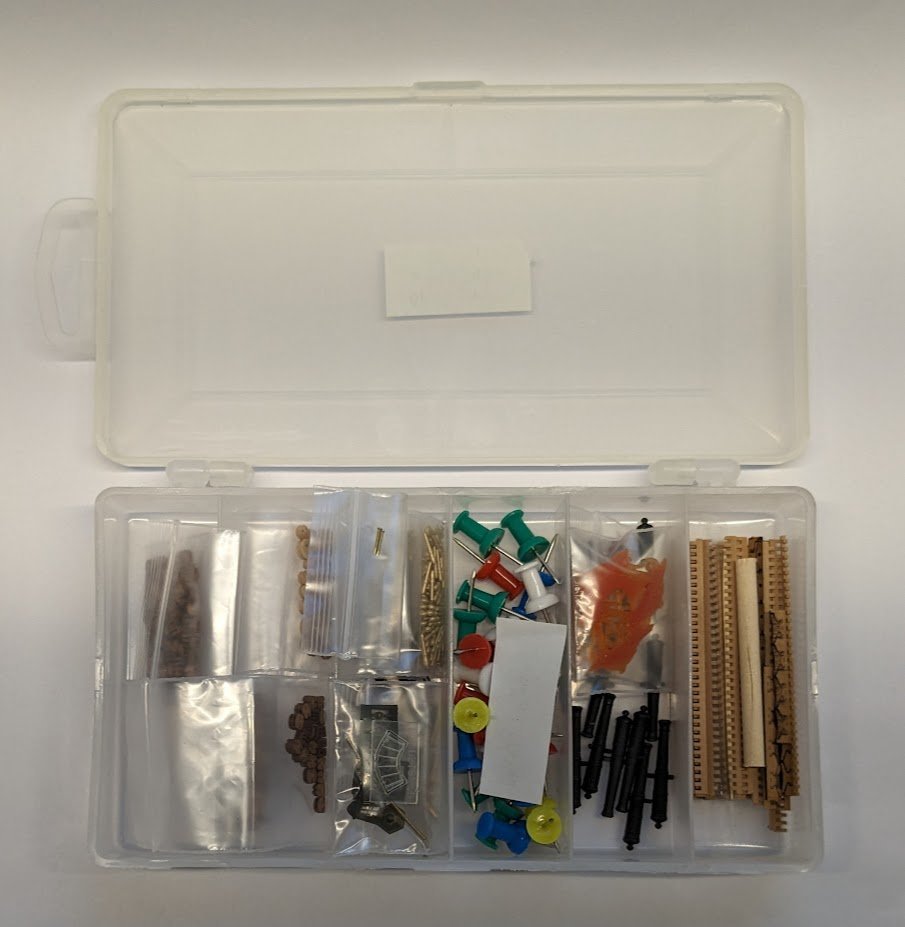
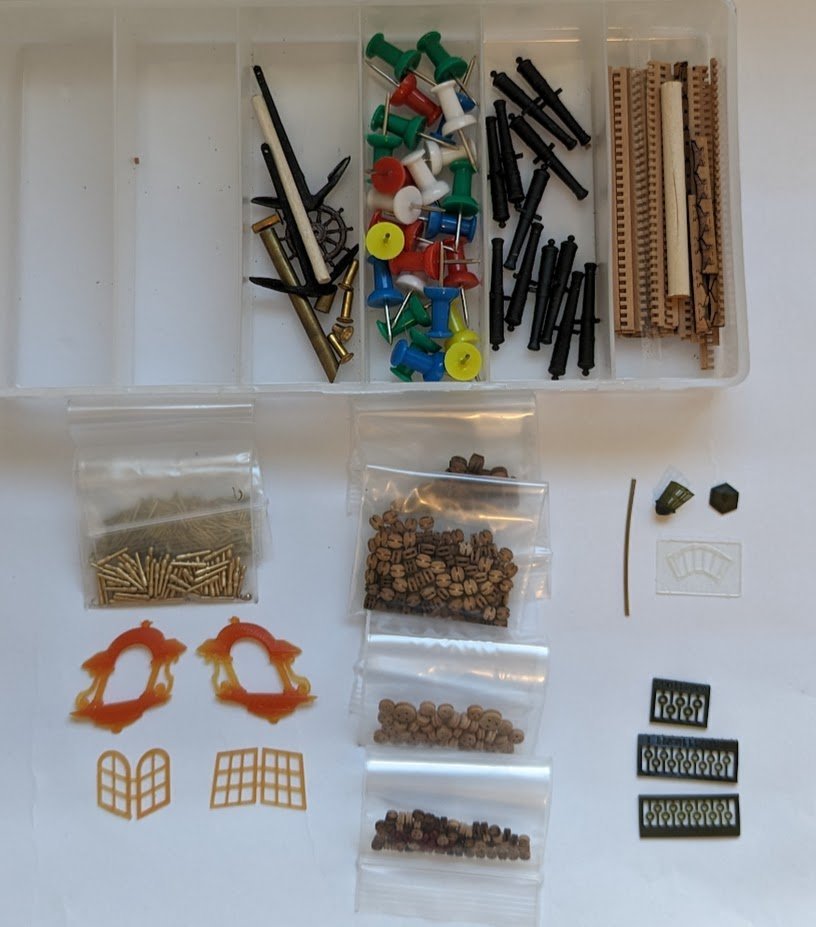
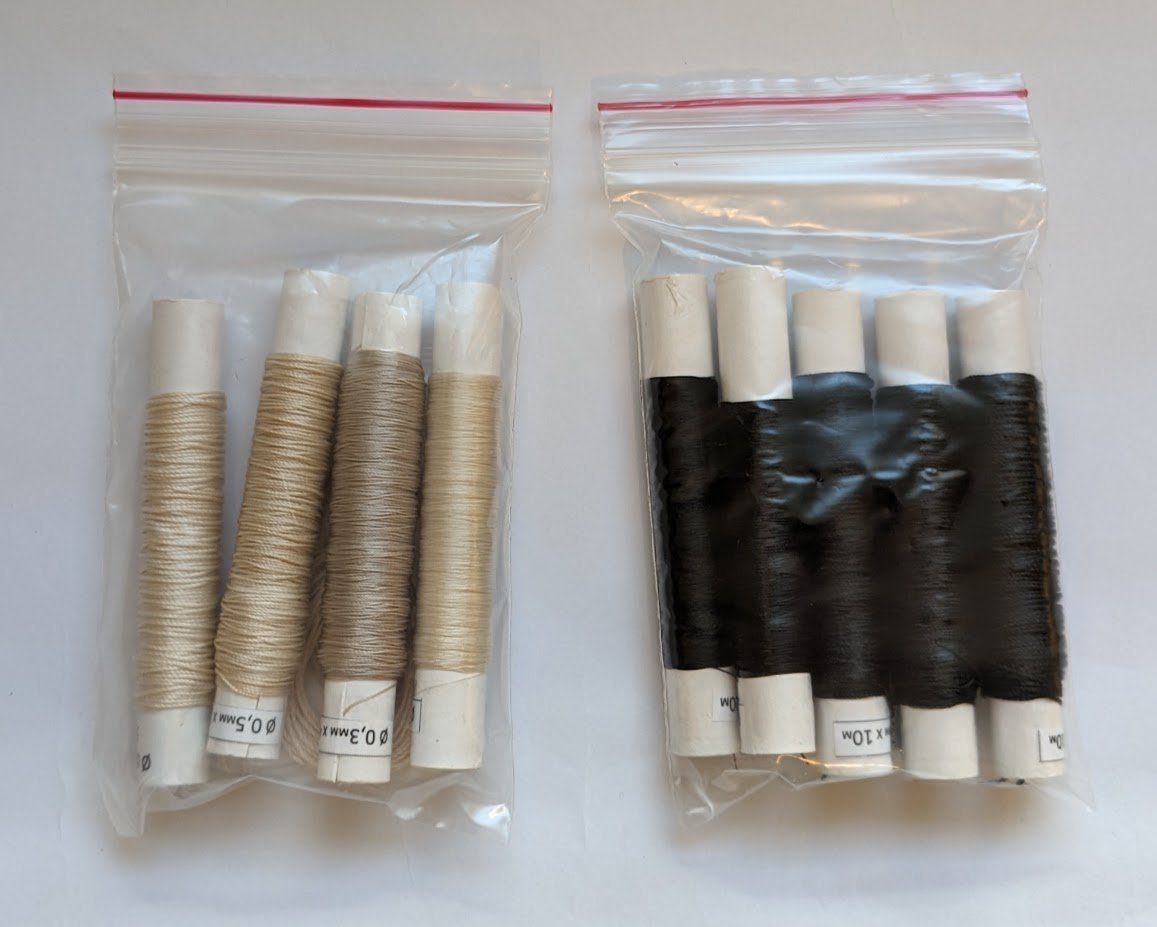
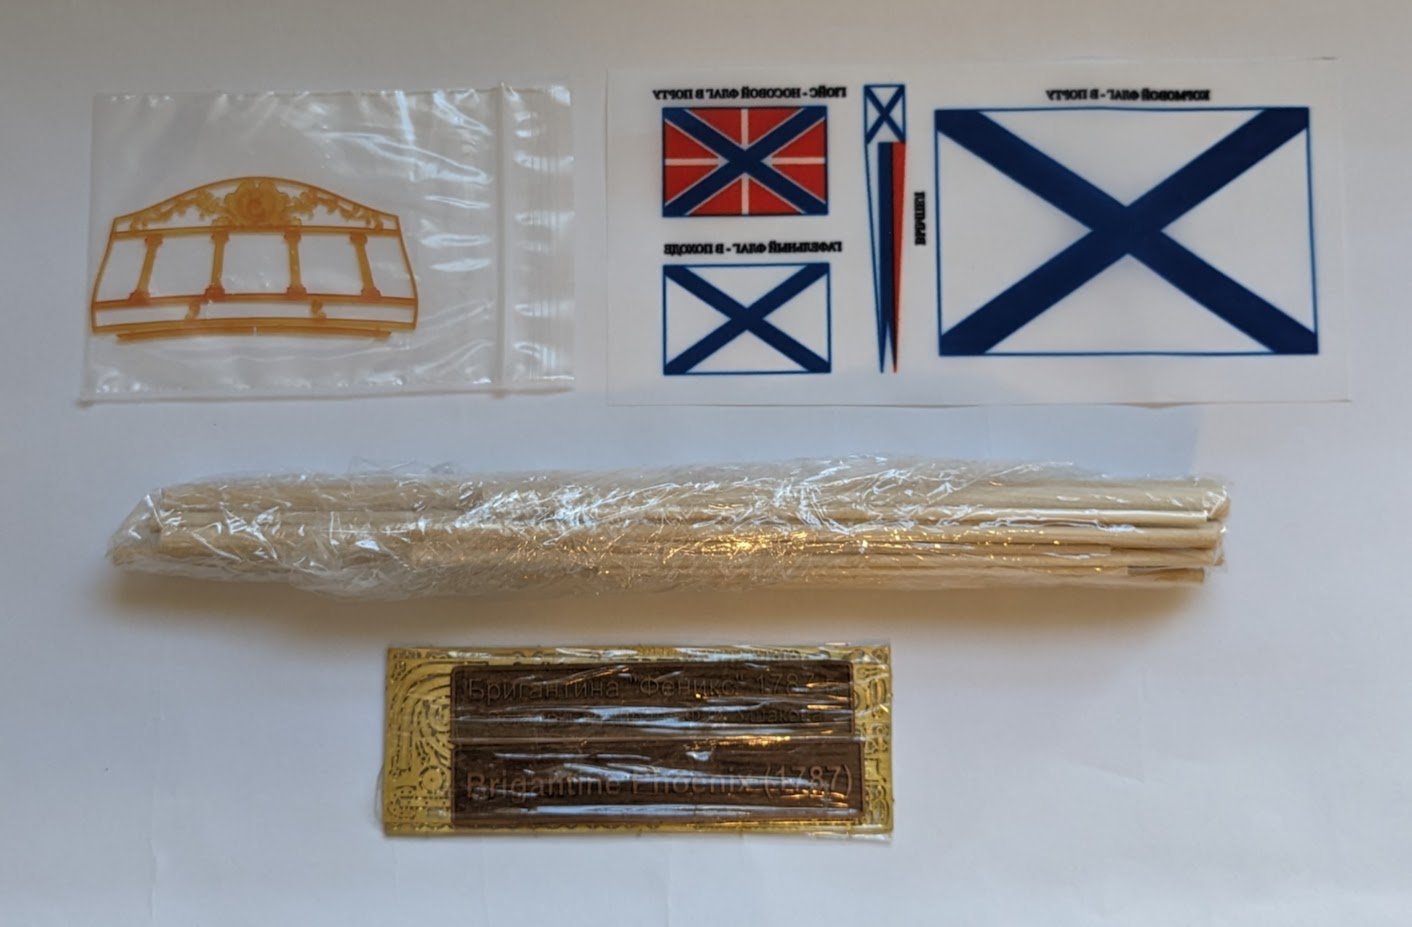
Unboxing Part II: Parts and Fittings After all of the paperwork is removed, one sees an intriguing collection of plastic bags and boxes. Let's explore! First we have the ship's boat and binnacle mini-kits. The pumps and windlass are also separate mini-kits. The other bags contain small billets of wood containing laser-cut parts for things like gun carriages and headworks. Then we have a small compartmented box. This will do nicely for storing spinners for trout fishing after the model is built. 😋 Inside the box we find metal fittings, resin cannon, grating strips, laser-cut cleats, and push-pins to use during planking. Separate bags contain brass nails, brass belaying pins, resin quarter badges, stern lantern parts, and deluxe blocks. The blocks are very nice and definitely a cut (or several cuts) above the usual kit-grade blocks one usually encounters. Rigging line. If you have read my cannon yawl log, then you know that the line used in MK kits is, um . . . not good. It neither looks like miniature rope, nor is it easy to work with. This, sadly, is the one thing that detracts from an MK kit. I plan to replace all of the kit line -- yes, all of it -- with after-market rope from a source such as Syren. But that will be quite a ways down the road. Several more individually-wrapped items include finely-detailed resin stern ornamentation, dowels for masts and spars (each already cut to the correct length), printed flags, and laser-engraved wooden name plates. Unlike the yawl kit, this kit includes a name plate in English in addition to one in Russian. There are also several small frets of PE brass parts. Some of those parts are the original brass versions of the head decorations that are now provided as laser-cut wooden parts. And lastly we have the many sheets of laser-cut parts. I didn't want to unwrap these right away, but I can tell that these parts are up to MK's high standards: great wood, clean cutting, and minimal char. Parts that require fairing have laser-engraved fairing lines to indicate how much wood needs to be removed. And that's it. Look for first cuts to start soon, but I do need to start by checking that I have all the necessary stuff on hand for working with wood -- it's been a while since I've worked on the hull structure of a wooden ship. Cheers!

-
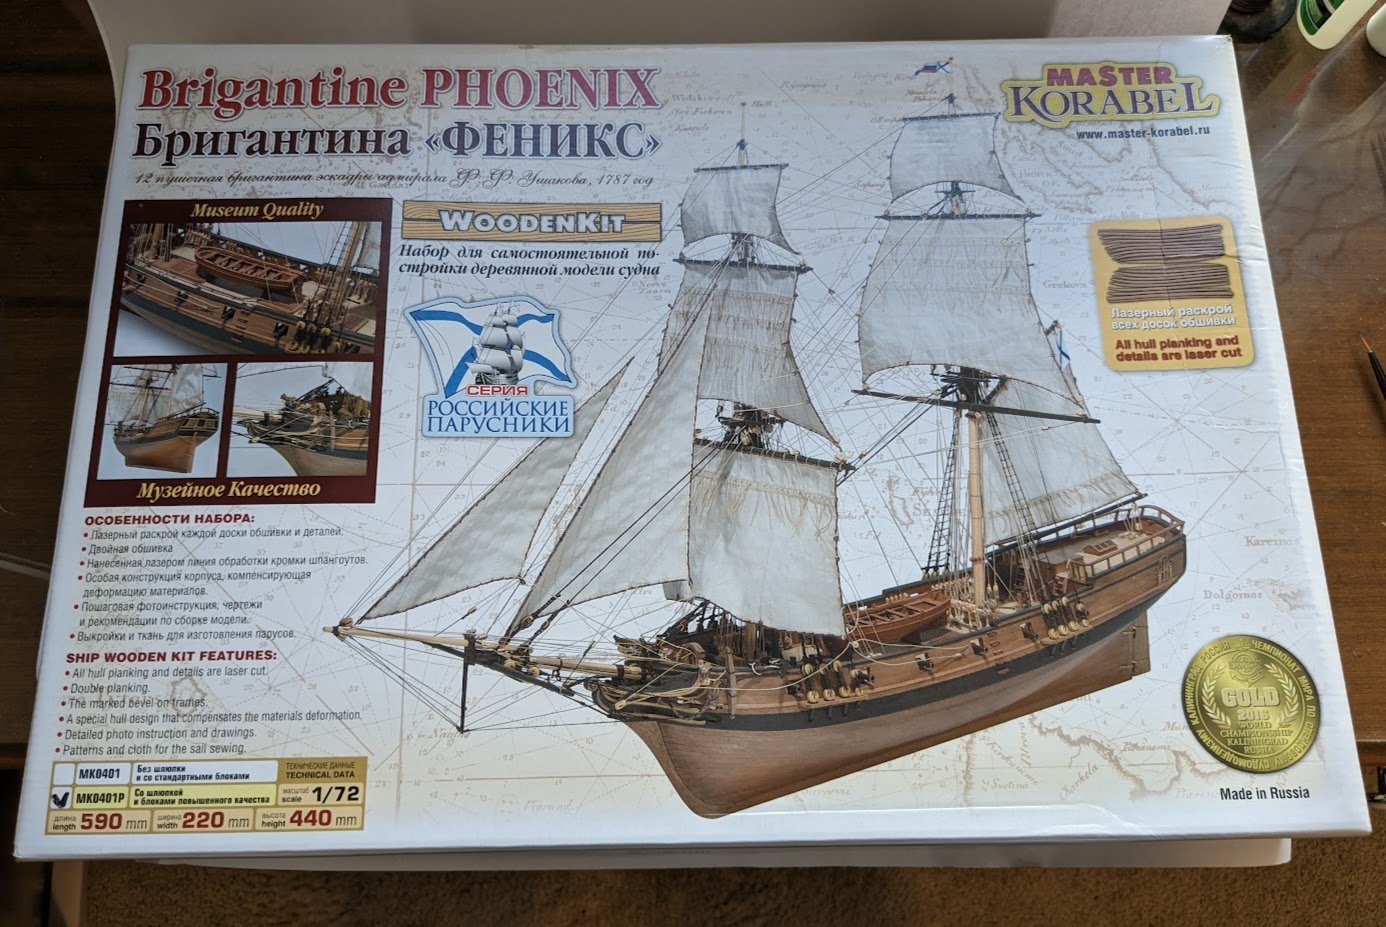
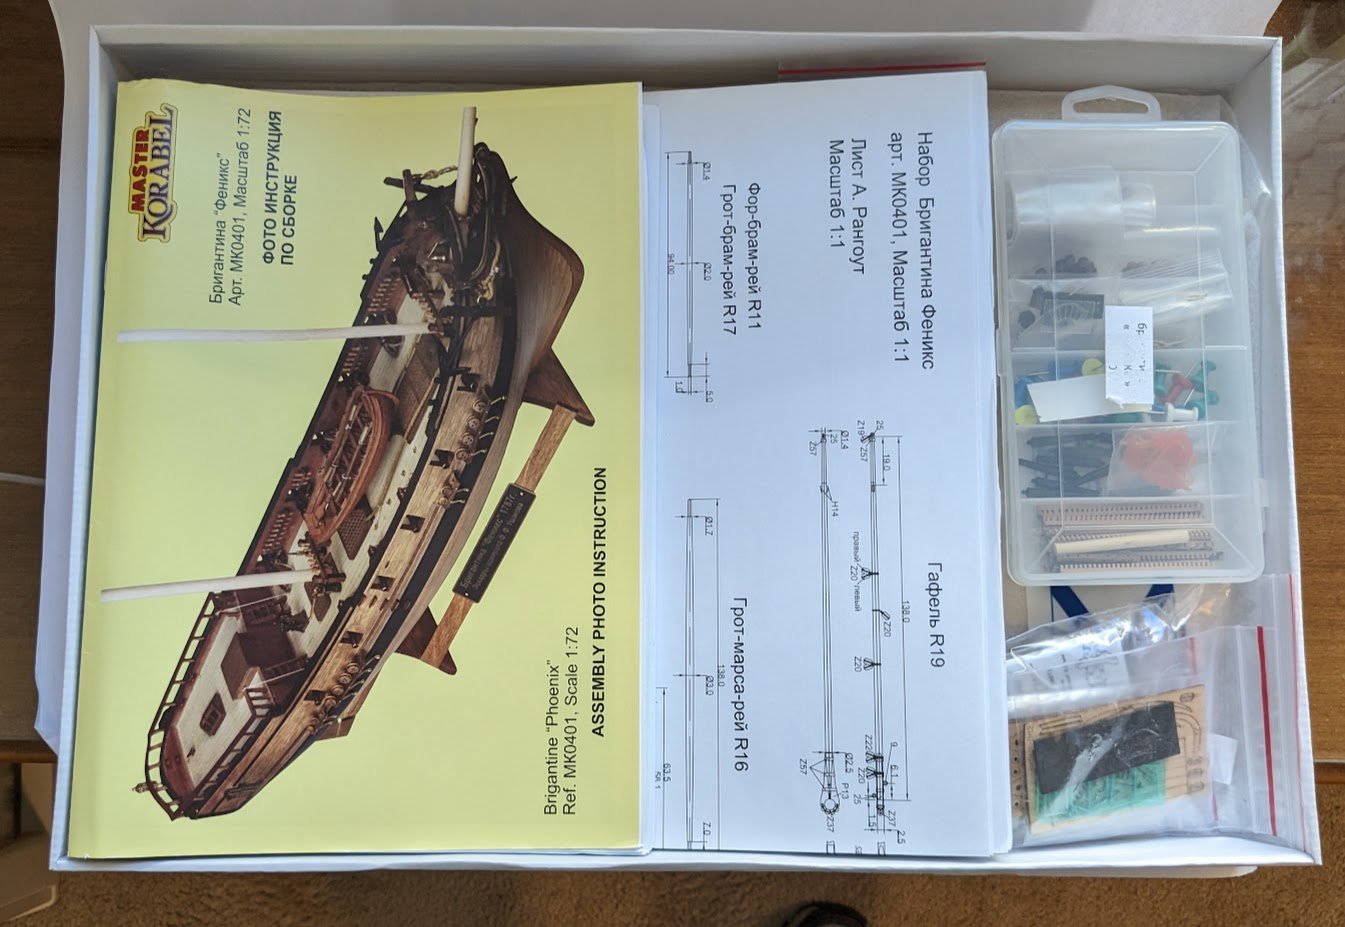
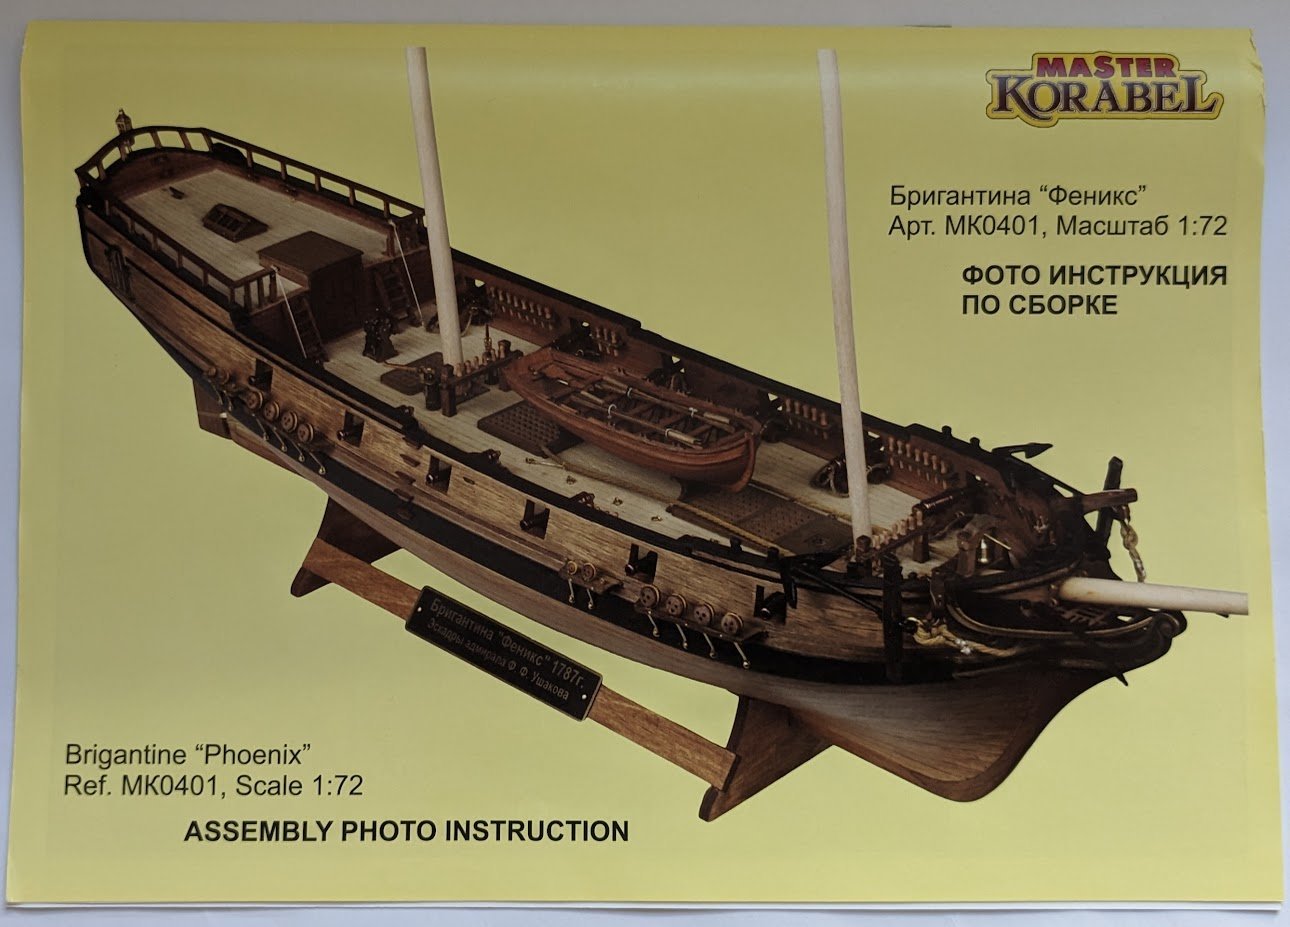
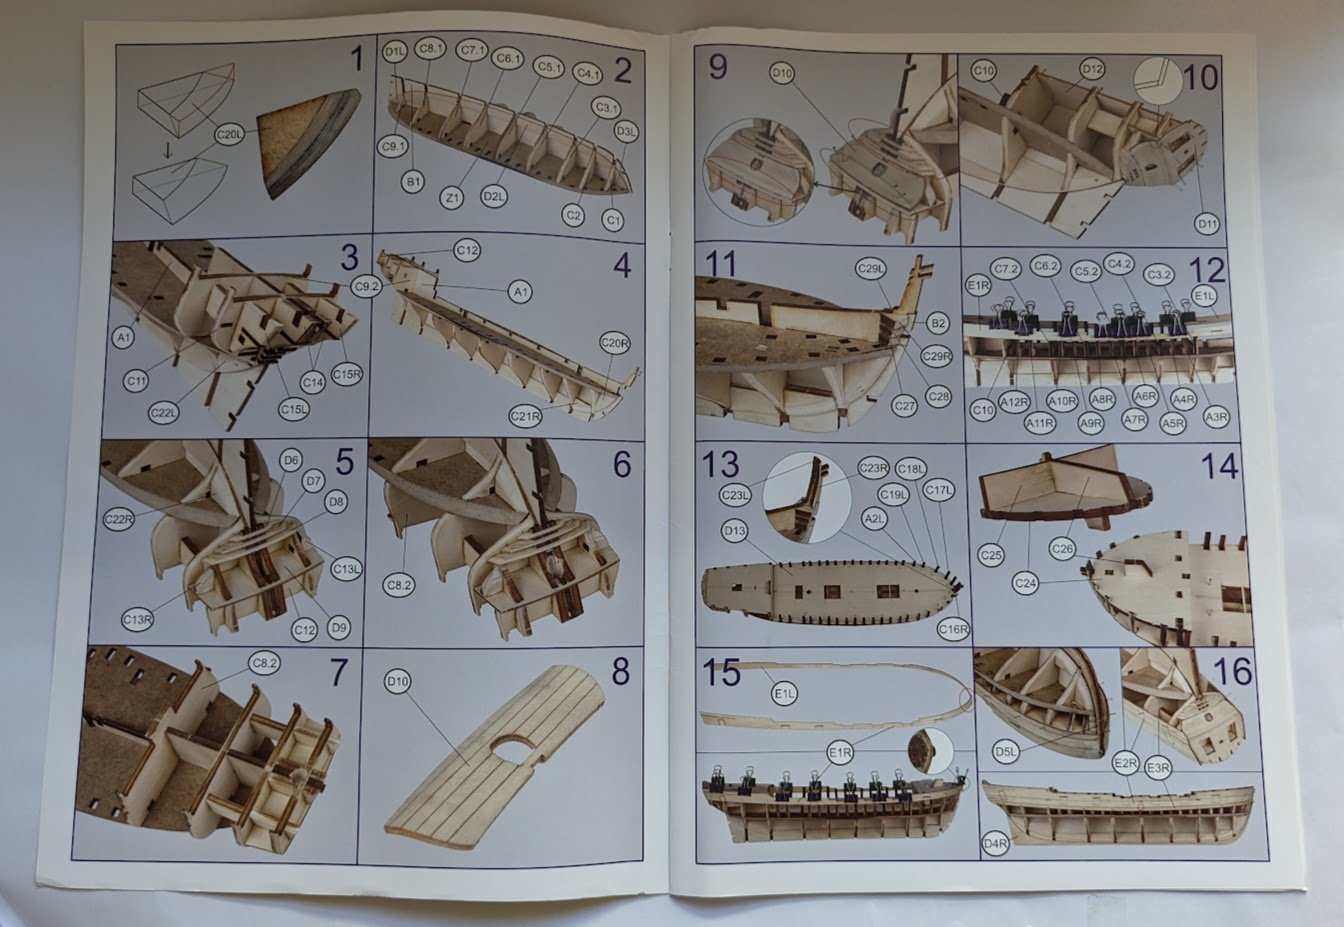
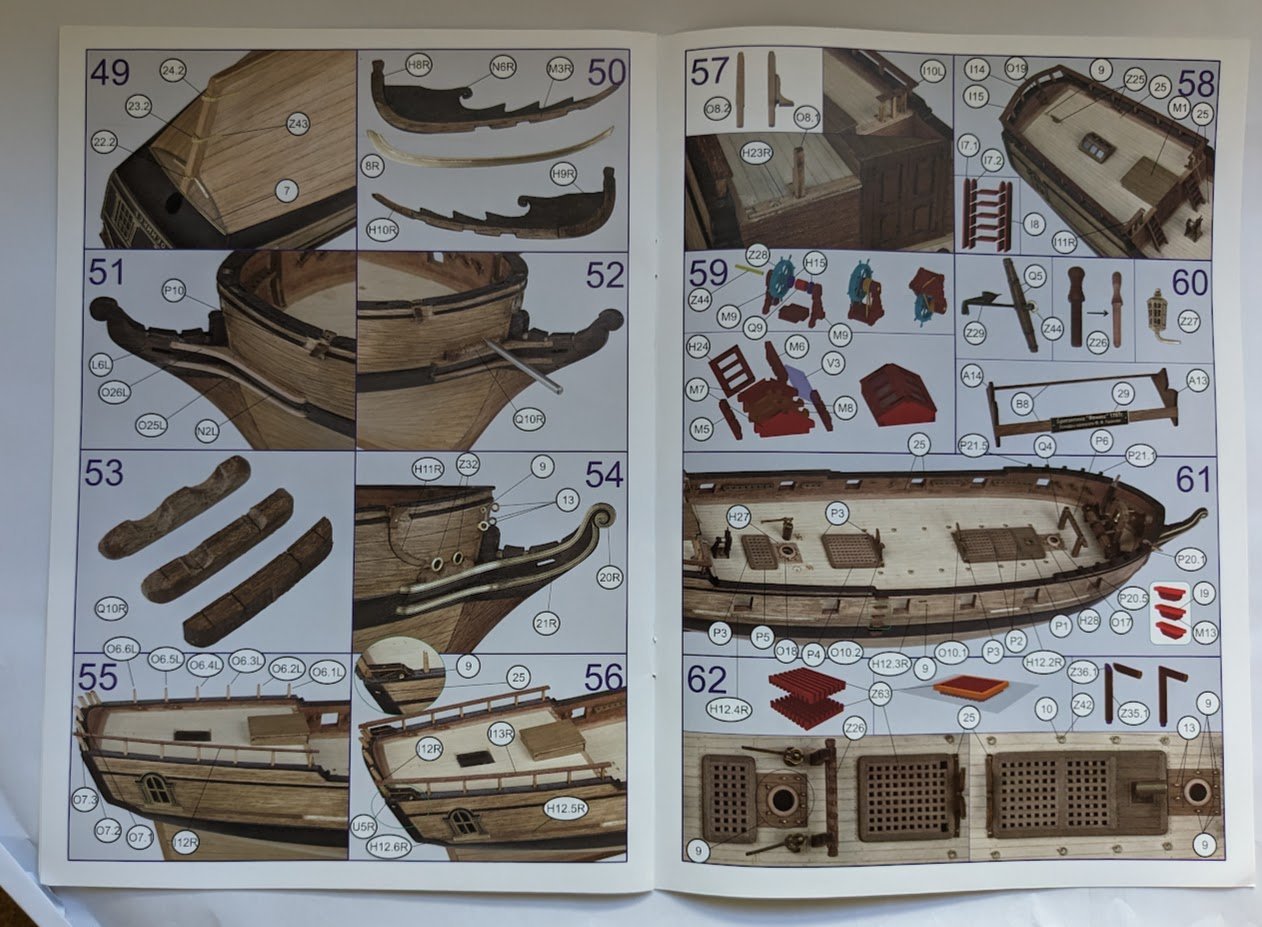
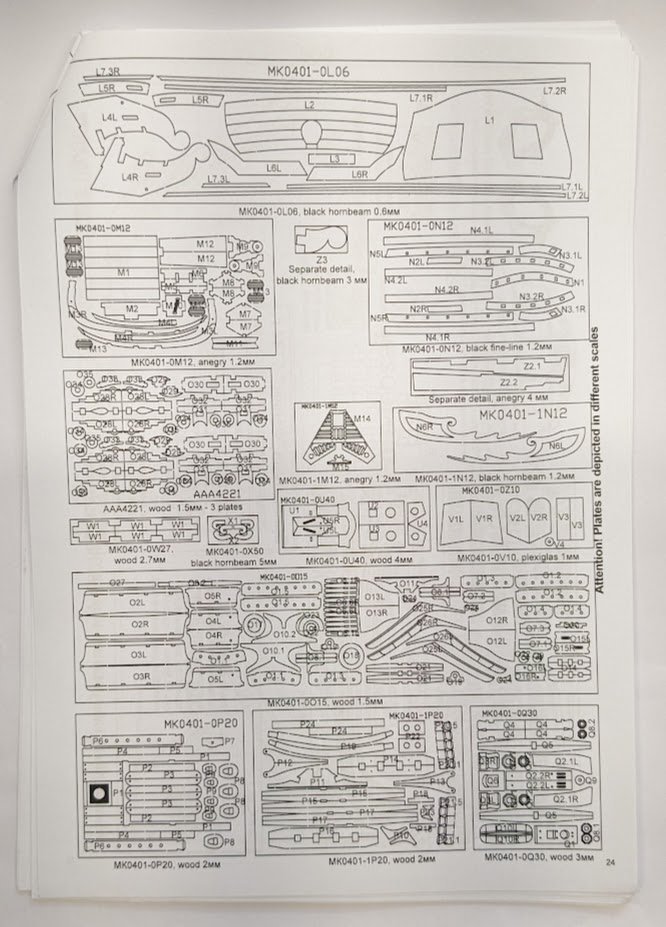
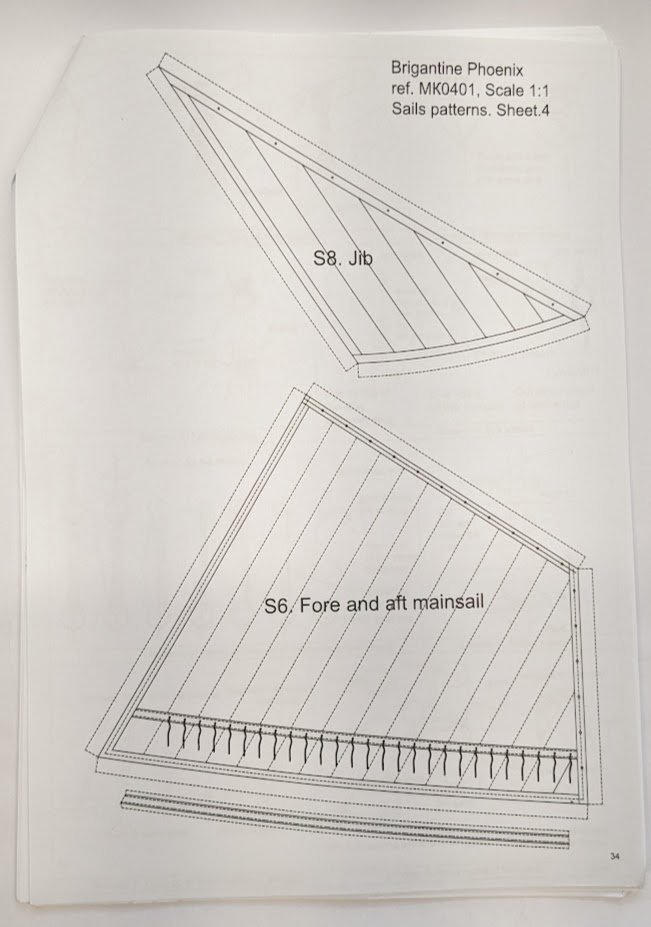
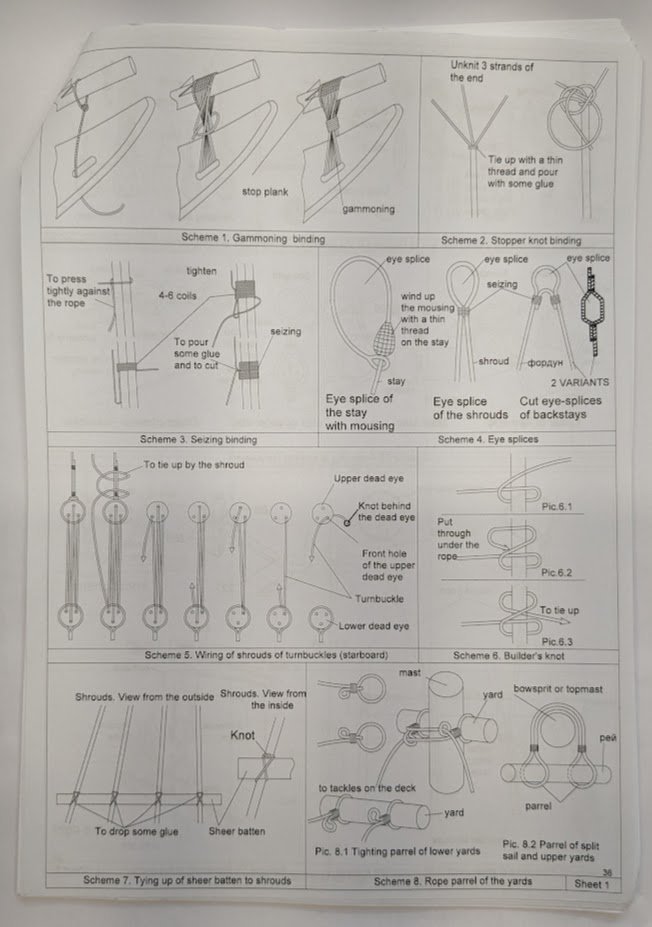
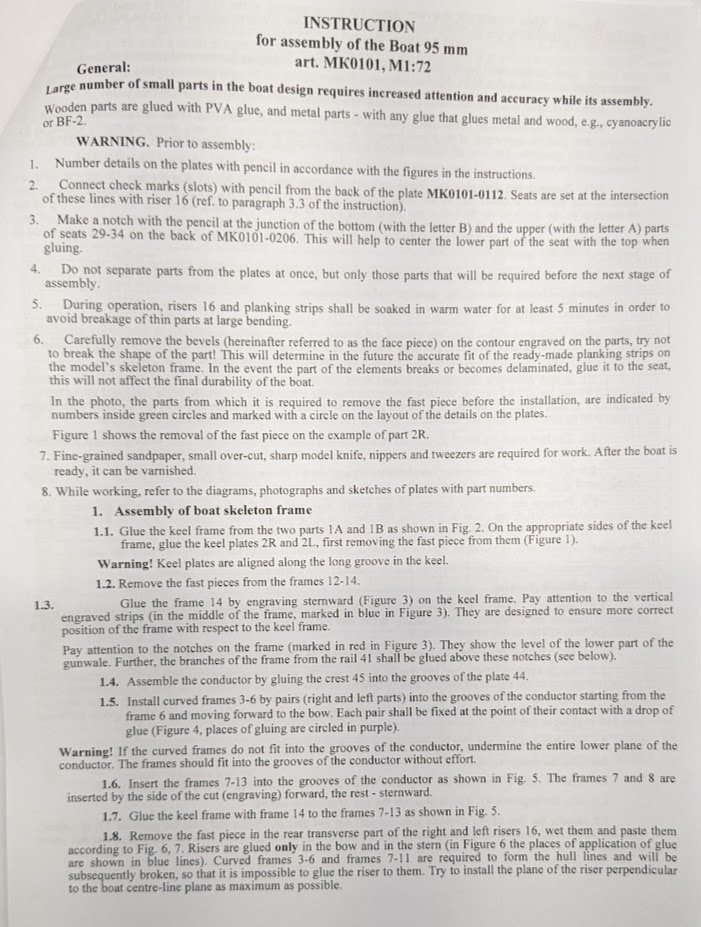
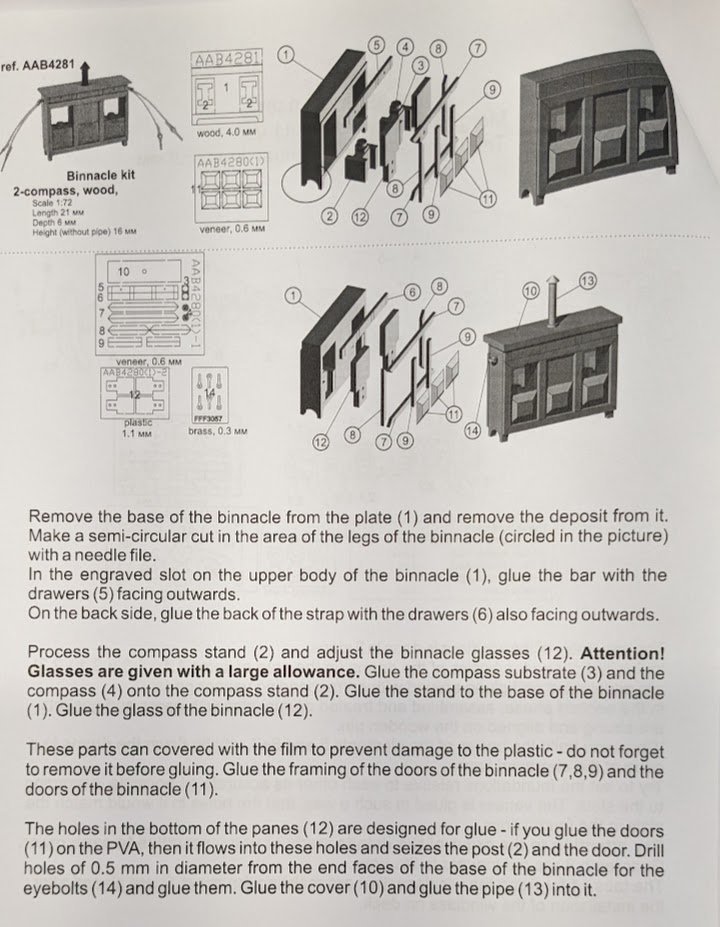
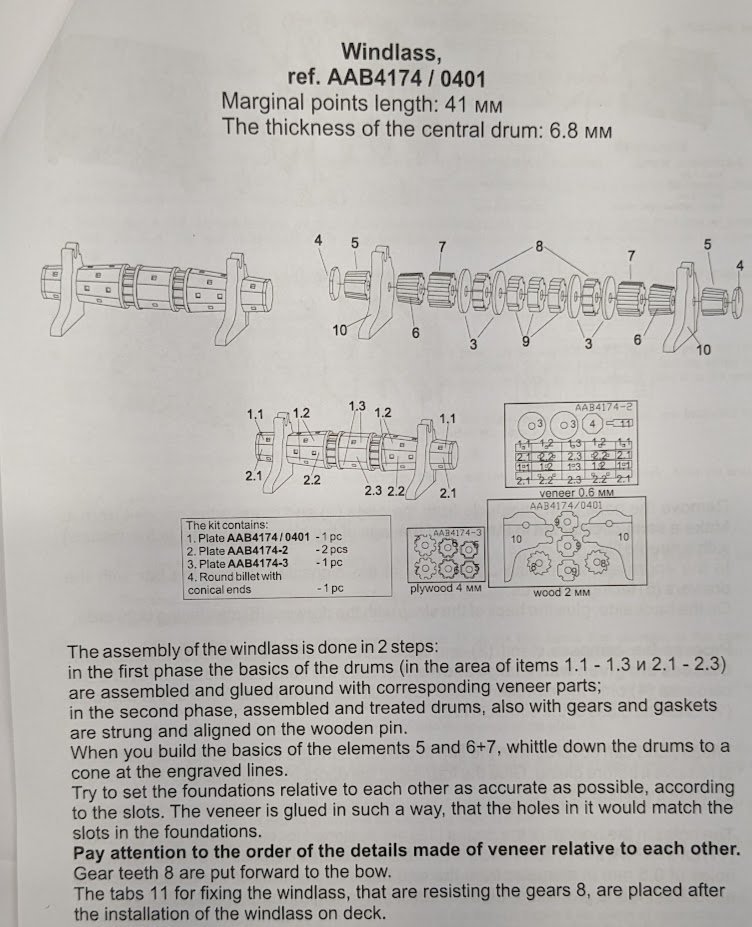
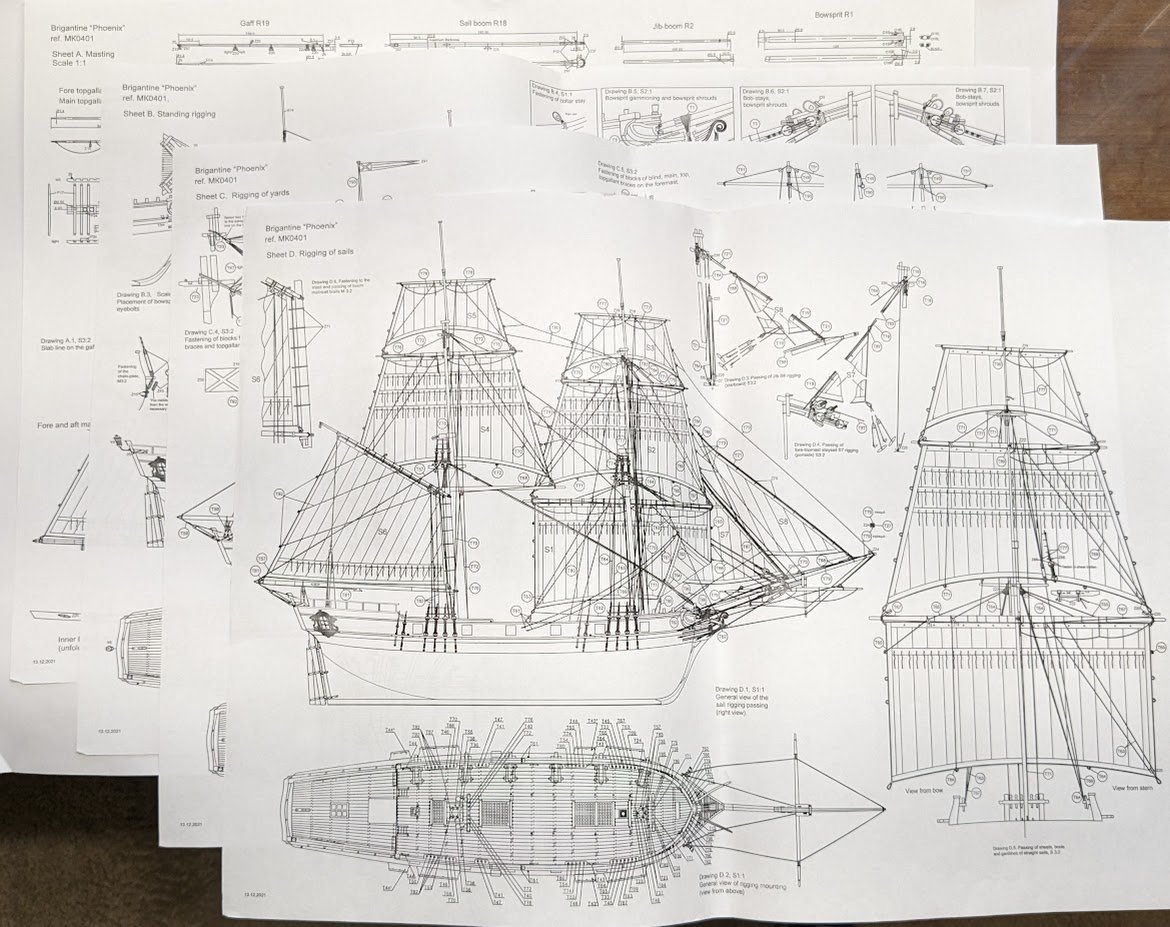
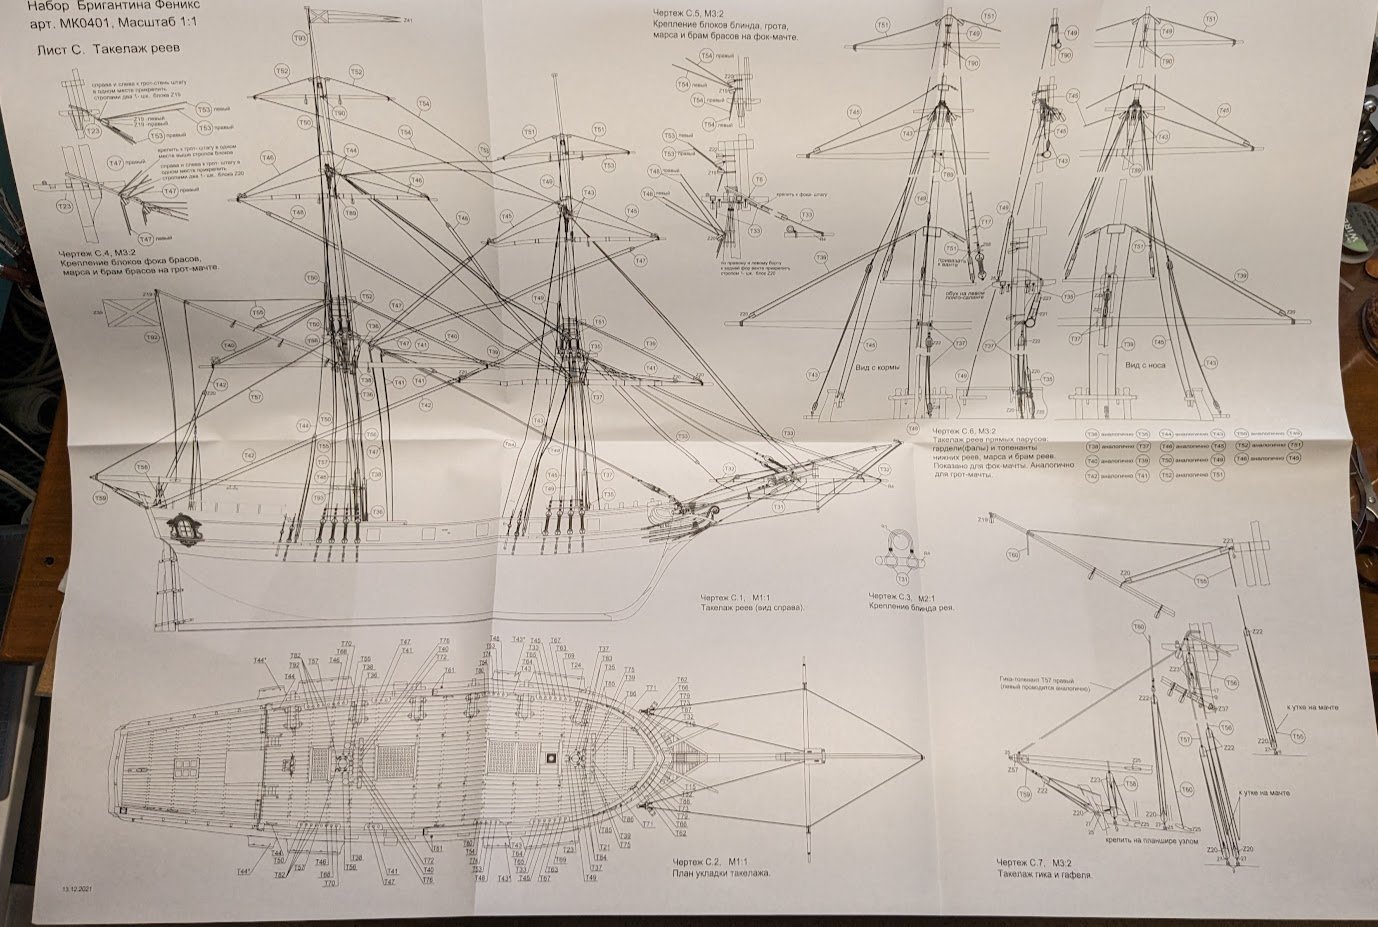
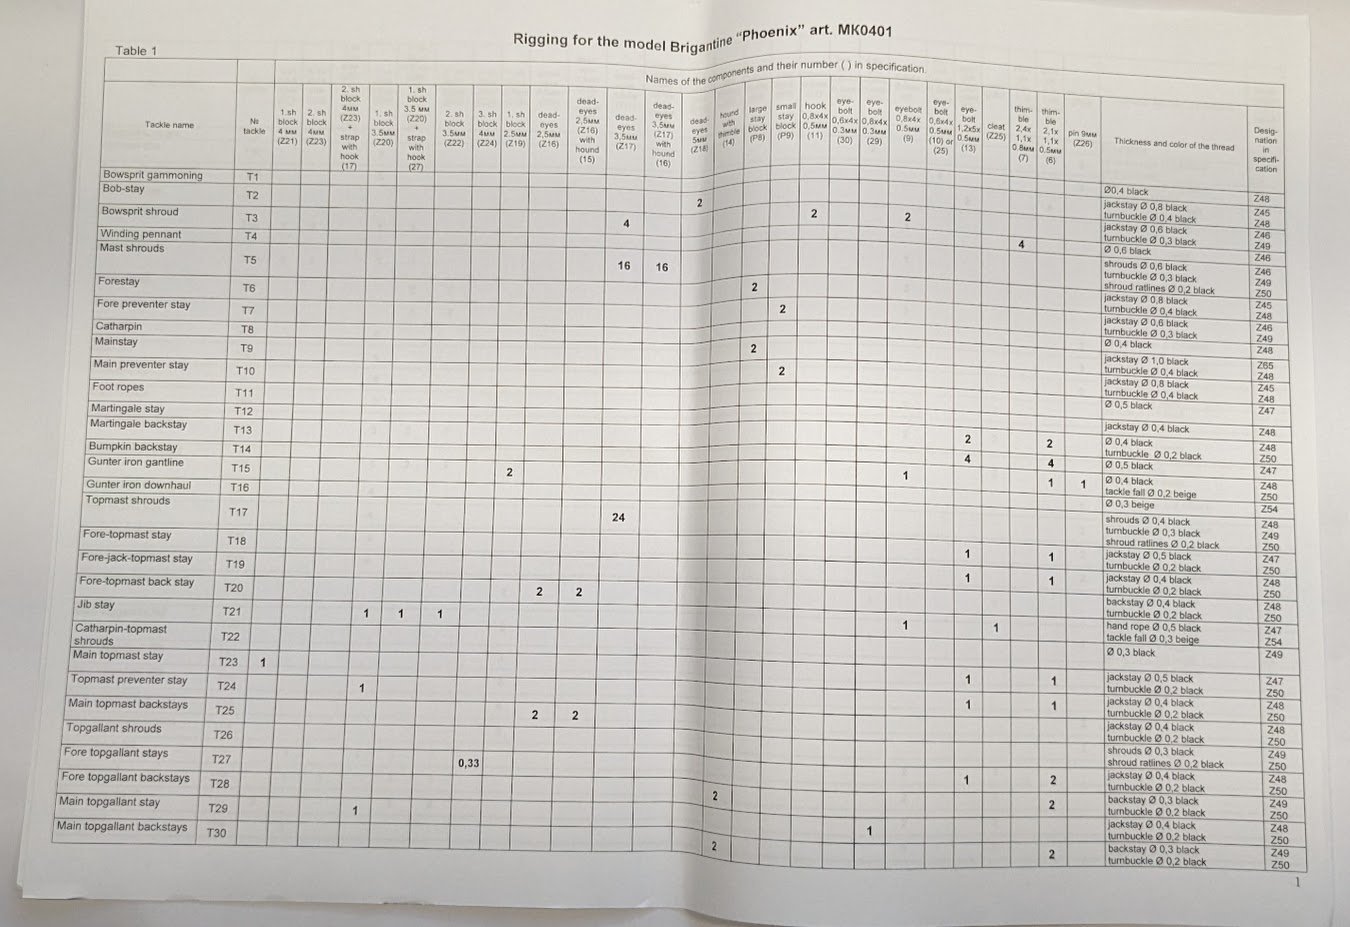
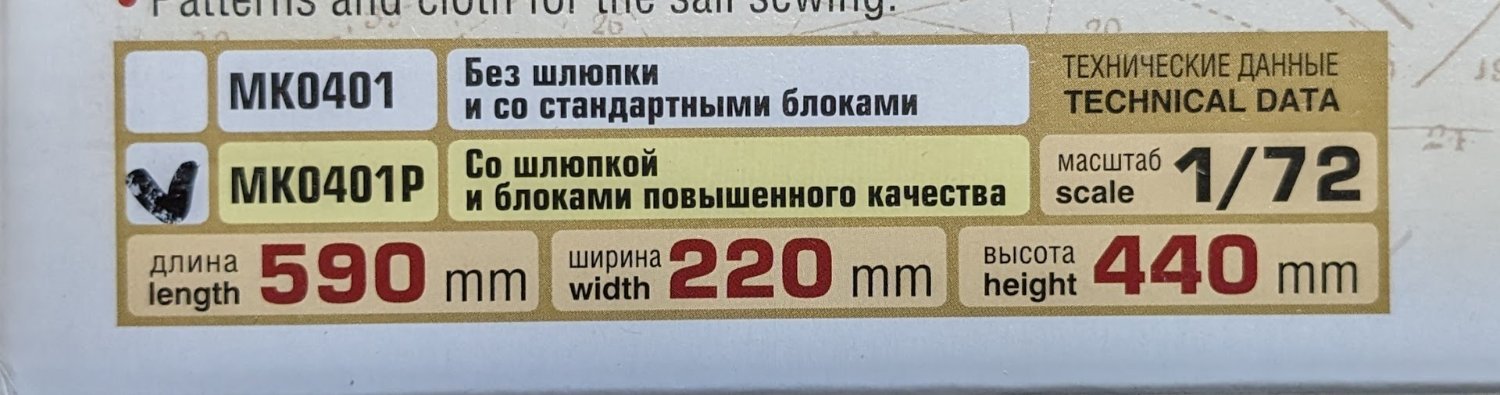
Unboxing Pt. I: Instructions & Plans There's a lot of info on the box lid, both in Russian and in English. It probably goes without saying that in the current geopolitical climate, the supply of kits from our friends at Master Korabel (MK) has more or less dried up. I was fortunate enough to snag this one before they disappeared completely. An important item of note on the box lid is this: As you can see, there are two available versions of the kit: the basic MK0401 kit and the deluxe MK0401P version. The deluxe version includes a ship's boat and deluxe blocks. One thing to be mindful of if you are shopping for this kit is that it has been out for some time now, and the contents have evolved over the years. Newer examples provide, among other things, high-quality resin parts in place of some of the older cast metal fittings. Happily for me, I received one of the newer kits. The first impression one gets upon opening the box is that everything is nicely packed. The yellow booklet is a set of photo instructions that cover construction of the hull. There are two complete sets of written instructions, one each in Russian and English. These instructions complement the photo instructions and cover the entire build process through masting and rigging. The instructions also include keys to all of the various wood parts billets . . . . . . and 1:1 sail patterns. A suit of pre-sewn sails can be ordered separately, but I will not use them, since they suffer from all of the out-of-scale issues that normally plague such sails. I haven't yet decided whether to add sails or leave the model bare-poled (it looks good either way), but if I go for sails, I will make them myself. Several pages of the instructions are devoted to illustrations of the various types of rope work needed to complete the model. Separate instructions cover the construction of the upgraded binnacle and windlass. There are four sheets of masting and rigging diagrams . . . . . . as well as four sheets of full-sized plans. And lastly there's something that I think is a nice touch -- a spreadsheet that lists all of the various rigging lines along with the blocks they require, the plan sheets they can found on, and the alphanumeric designation used for each. In the next post, we'll look at parts and fittings.