ccoyle
-
Posts
10,535 -
Joined
-
Last visited
Content Type
Profiles
Forums
Gallery
Events
Everything posted by ccoyle
-
 Love both of their design philosophies. The MK hull structure feels incredibly solid and hefty -- I saw this with their Cannon Jolle kit as well. I have not had a single one of the plywood frame extensions snap off yet, even the beveled ones; this is an object lesson some manufacturers could stand taking to heart. I came across another potential color scheme I really like. This builder chose to stick with the natural wood theme and painted the hull decorations with an orange-toned shade of ochre that I think complements the wood very nicely. I knew I was going to end up waffling on this particular decision! 😬
-
Hi, Pat. Small schooners like this often lacked ratlines. Their sails were designed to be hoisted, trimmed, and set from the deck.
-
And that's all for this afternoon.
-
Not likely. The main "deck" is a single piece of laser-engraved veneer. But even if someone wanted to use individual planks, the line will be back in place once the two false deck halves are glued in.
-
Okay, the next step is a little bit of a logistical challenge. The thingy on the right is a jig for aligning the bow frames while glue sets. The challenge is, I'm supposed to glue the bow frames in, add the sub-deck, tack down the sub-deck, and, finally, temporarily secure the jig in place -- all before the glue sets. I mean, the MK guys know that wood glue sets up pretty quickly, right? Right?? As you can see, there's a laser-engraved center line on the sub-deck. The instructions don't say anything about cutting the sub-deck into halves, but I assume that's what the line is for. So my plan is to cut the deck into two halves and then do the aforementioned tasks one side at a time -- should be more manageable. Cross your fingers!

-
Here's some light reading for ya. 😉
-
My students would ask if my wooden models would float, and I would respond with, "Yeah -- for a while!"
-
Never!
-
Pretty sure that is a flare launcher. Nice work on a very busy deck!
-
I have HMV's Schwan II in my stash -- your work makes me think about moving her higher up in the build queue. 😏
-
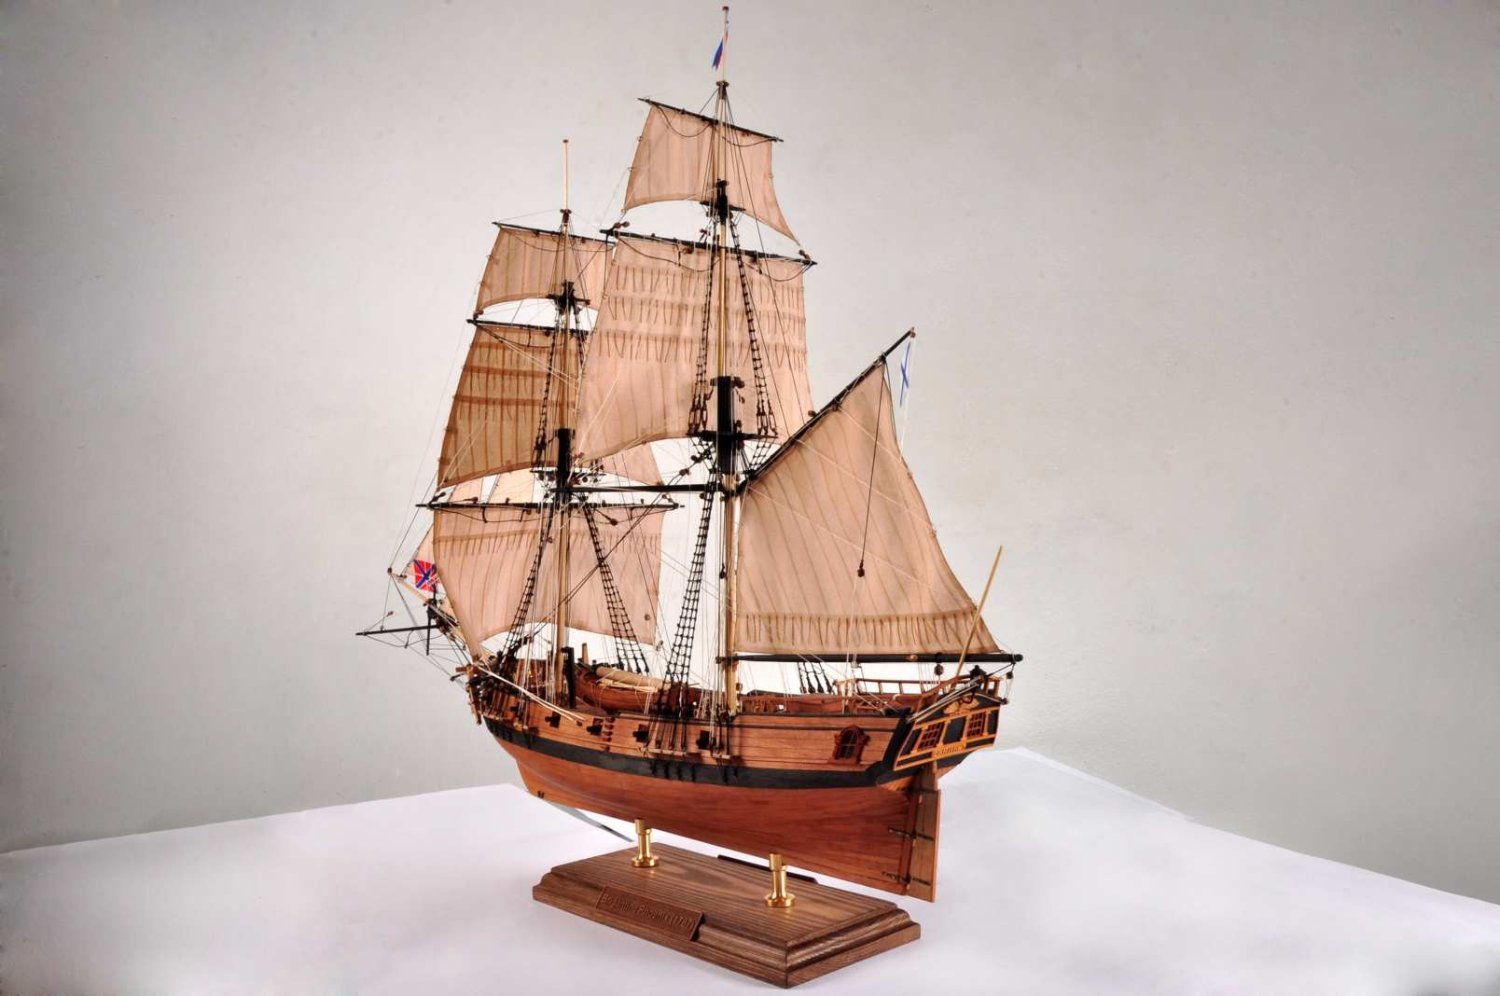
Whoa! The Corel figurehead looks like their mold has been used a few too many times -- or maybe the mold maker was having a little of that Italian vino when he made it. 😬
-
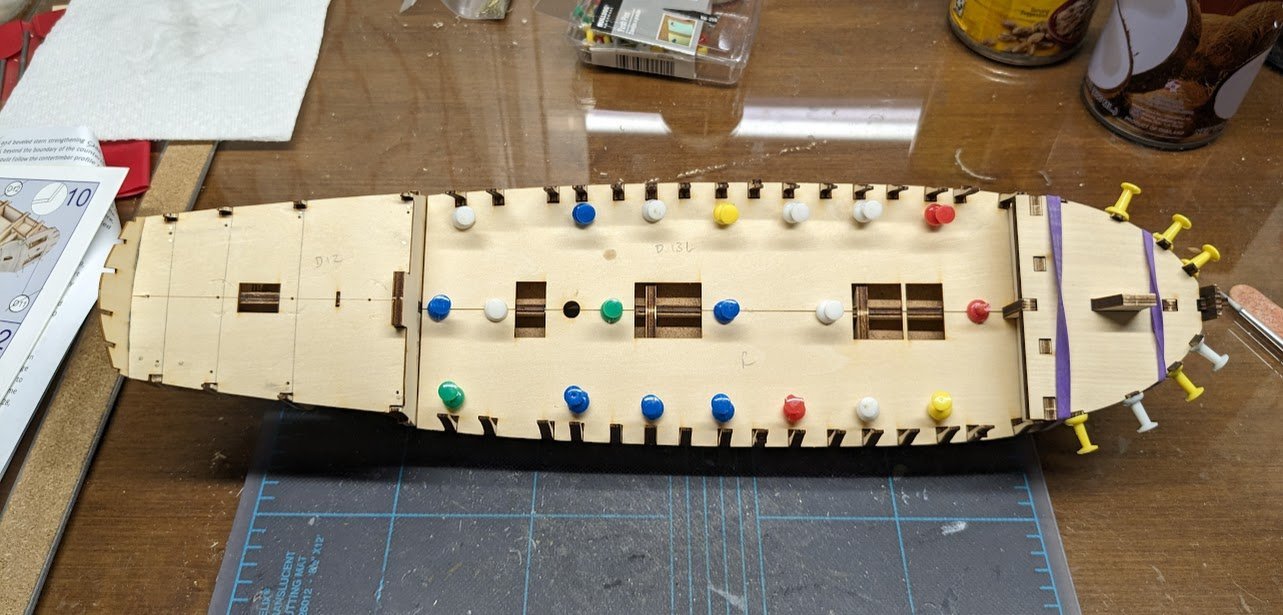
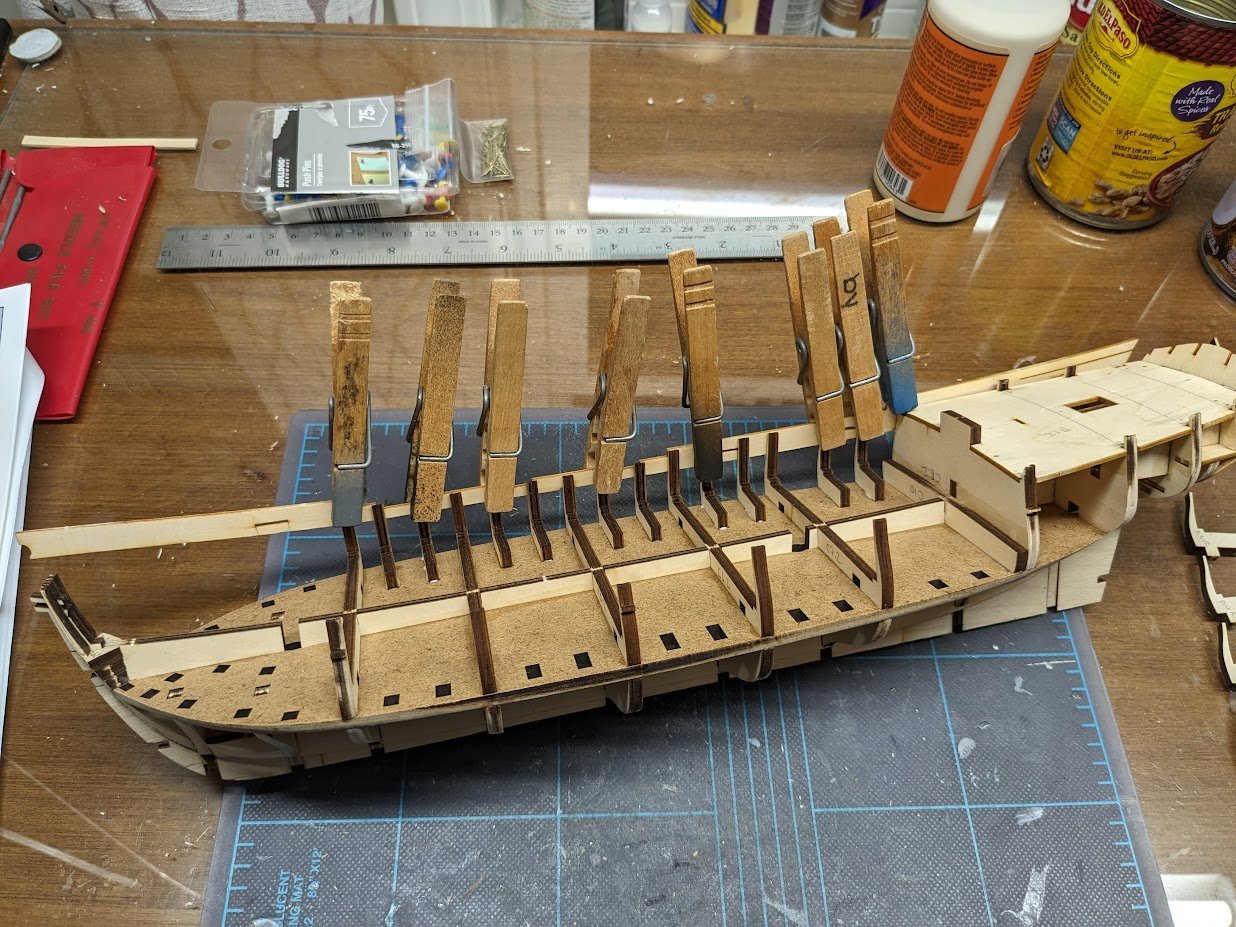
The upper bulkheads are in place. The upper hull strip, which is marked with the gun port locations, is temporarily clipped to the bulkhead extensions; this is then used to align the gun port frames. Here's half of those in place -- I didn't want to do both sides at the same time, because I had visions of myself repeatedly knocking the clothespins loose. There's no rush.
-
Hello from North Haven, Connecticut, USA
ccoyle replied to PatLynch's topic in New member Introductions
Welcome aboard, Pat! -
Very nice! The booms for the lines give these boats a lot of visual appeal.
- 17 replies
-
- 2
-

-

-
- Marie-Jeanne
- Artesania Latina
- (and 1 more)
-
The stern structure is now complete. Next up will be the amidships upper bulkheads.
-
We need to be mindful of certain things when determining whether a kit is truly copied or not. Depending on what source materials are used, we would not necessarily expect the models produced by two different kits to look different, even if they are at different scales. They are, after all, modeling the same ship. This is a point that James and I were careful to make in our Anatomy of a Knock-Off article. Where the copy-cats have cut corners is on designing internal structures for models. There we definitely would not expect two designs to be exactly the same, as they were for the kits examined for the article. Personally, I have not been keeping a close eye on ZHL of late, so I can't recall whether we delved deeply into the provenance of their Surprise kit -- there are already enough blatant examples for making the case against ZHL.
-
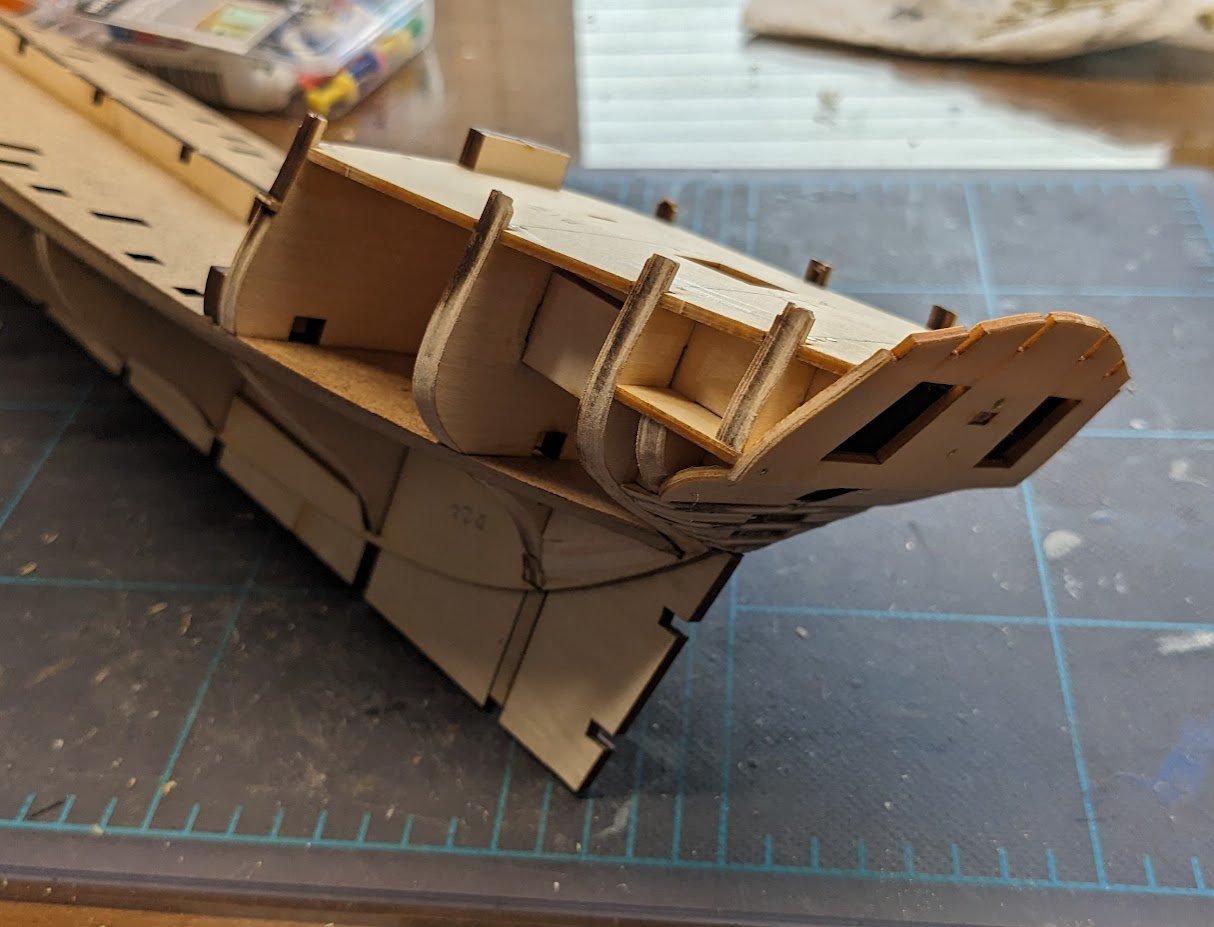
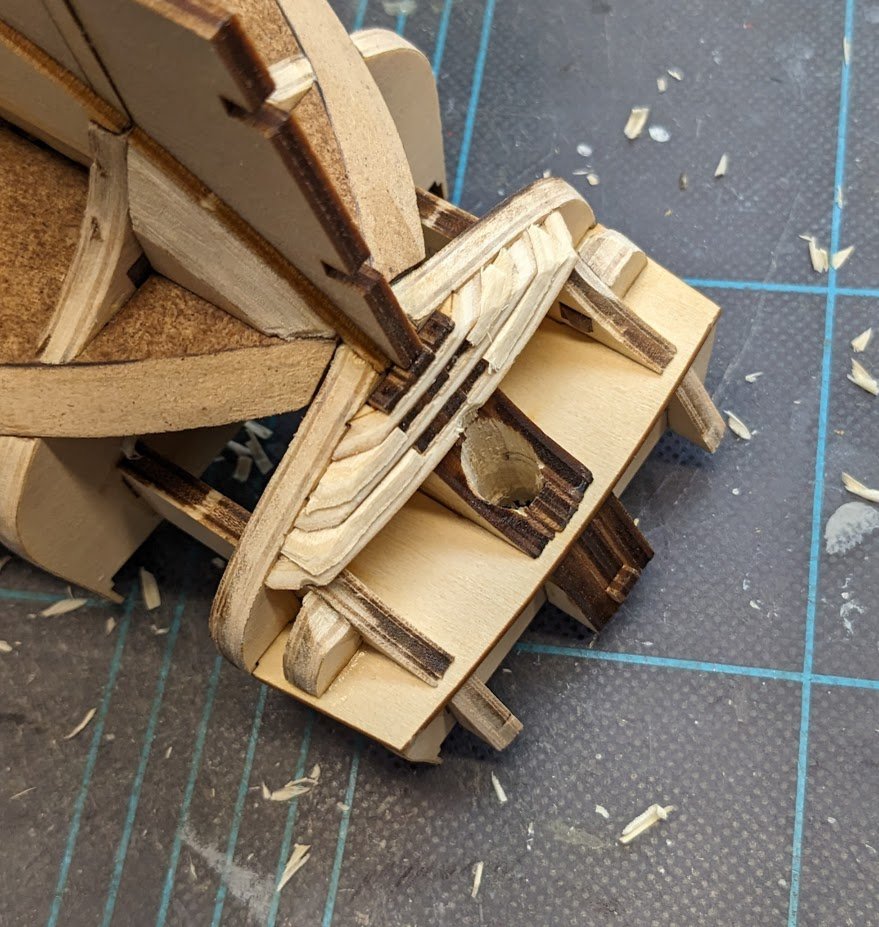
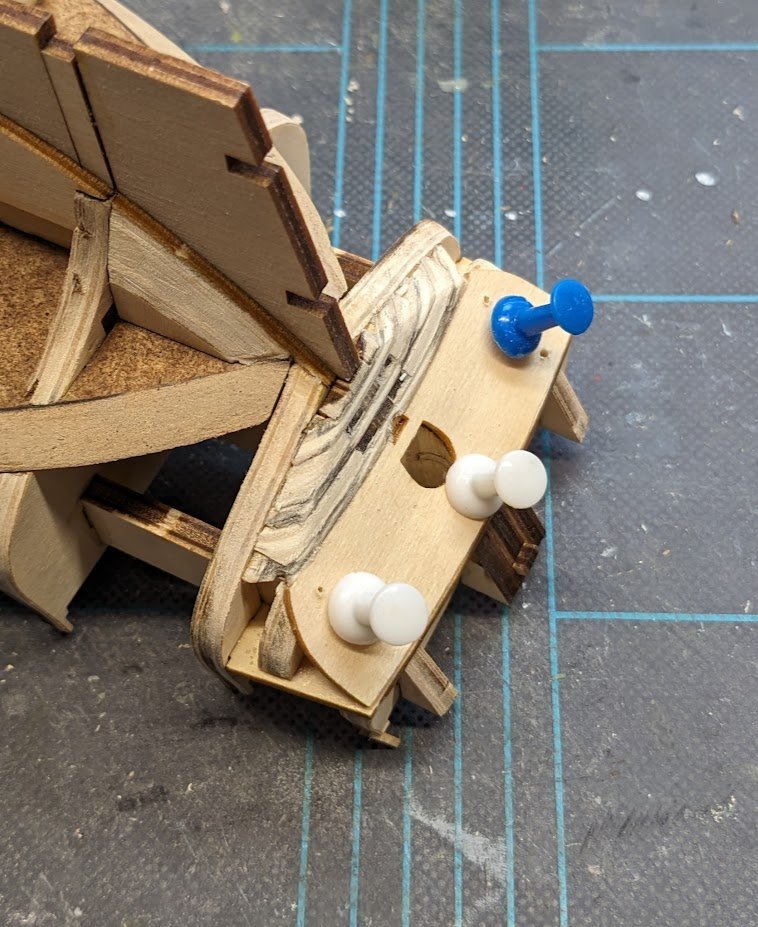
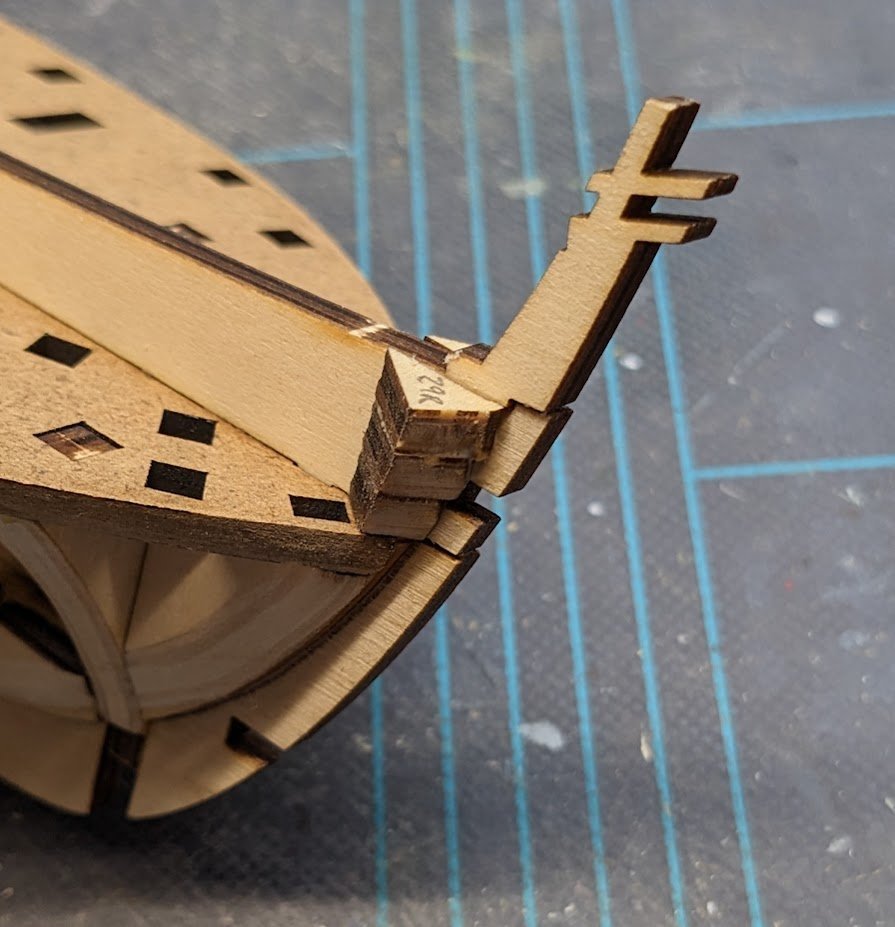
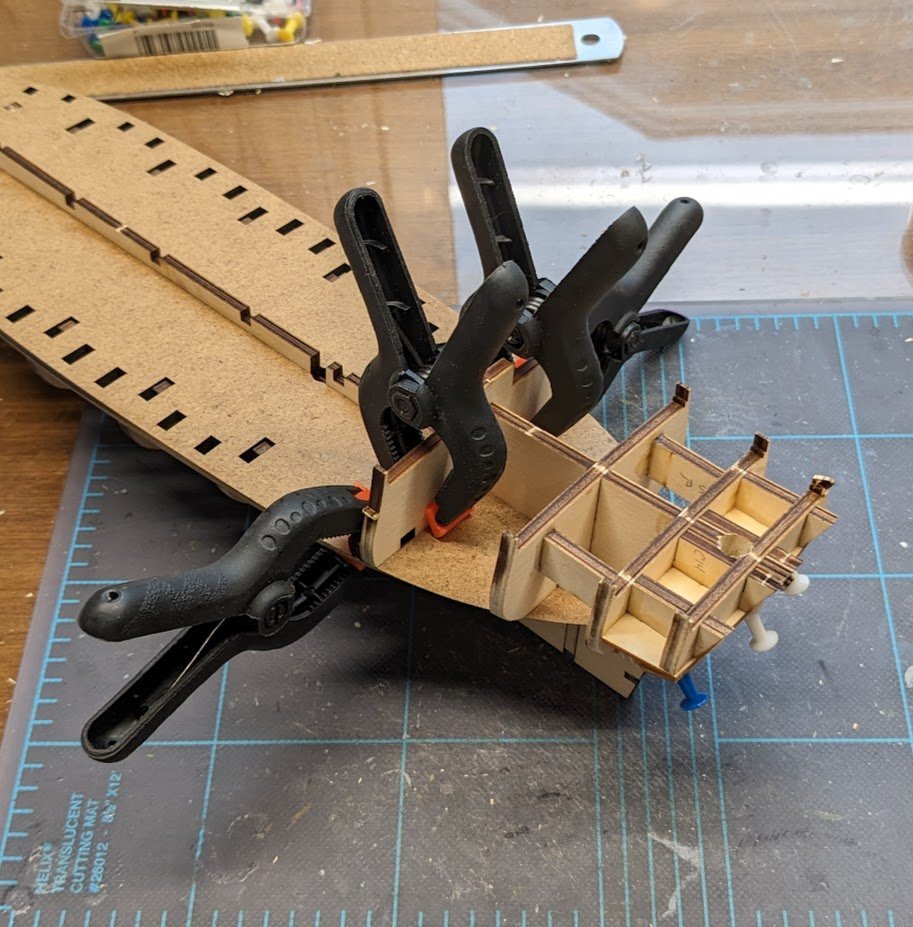
A bit more progress . . . There's a series of filler "blocks" at the bow and stern. Instead of being the typical balsa or basswood blocks, the filler is built up from multiple layers of laser-cut plywood pieces. Three such pieces are provided at the stern, each marked with beveling lines. Once those are glued in, the gaps are filled with scrap plywood. A channel for the tiller must also be drilled out. In the next image, you can see how I penciled the edges of the laser-cut pieces so that I wouldn't remove too much material from the filler pieces when sanding them down to the correct (hopefully) shape. The counter is soaked in water, bent, and glued into position (there's a notch that fits over a nub on the profile former, enabling proper positioning). The counter must be tacked into place until the glue sets. While that sets, I decided to skip ahead a little and work on the bow filler pieces. No difficulties there. You might notice the number "29R" on the top piece. It's nice that the parts are marked L and R on the plans and instructions, instead of L and P as in Polish kits, which takes getting used to. Lastly, there is a beam to install right before the first quarterdeck bulkhead. This will support the aft end of the main deck. Once that's glued and clamped, some waiting is in order to allow everything to set. I have half a mind to fire up a card model to work on during the intermittent waiting times required for this build.
-
Welcome aboard, Travis!
-
Extraordinary result, Rick! Your skills are top-shelf!
- 43 replies
-
- 1
-
-
- Essex
- Model Shipways
- (and 2 more)
-
That's correct! She knows I have started a new project, but she hasn't let on whether she comprehends exactly what it is. Every time I start something new, she usually comments on my lack of display space -- an issue I choose not to tackle head-on. 😁
-
Darn work! I know how that goes. 😅
-
Welcome! We've actually had at least one model displayed here that was built from Legos. Some Lego ships are quite impressive. I think it'd be quite the challenge to find just the right combinations of bricks to create a ship's many and varied structures.