ccoyle
-
Posts
10,524 -
Joined
-
Last visited
Content Type
Profiles
Forums
Gallery
Events
Everything posted by ccoyle
-
 Looking very sharp!
 -
Congratulations, Rich, on completing your superb model!
- 166 replies
-
- 5
-

-
- Maine
- BlueJacket Shipcrafters
- (and 1 more)
-
Why not just build it and call it a 19th-century dispatch boat?
-
The AMX-13 project by RGL - Heller - 1/35
ccoyle replied to RGL's topic in Non-ship/categorised builds
The AA version reminded me that I saw an M-42 Duster at Patriots Point last weekend. Sadly, like the other outdoor exhibits there, prolonged exposure to the elements has done a number on it.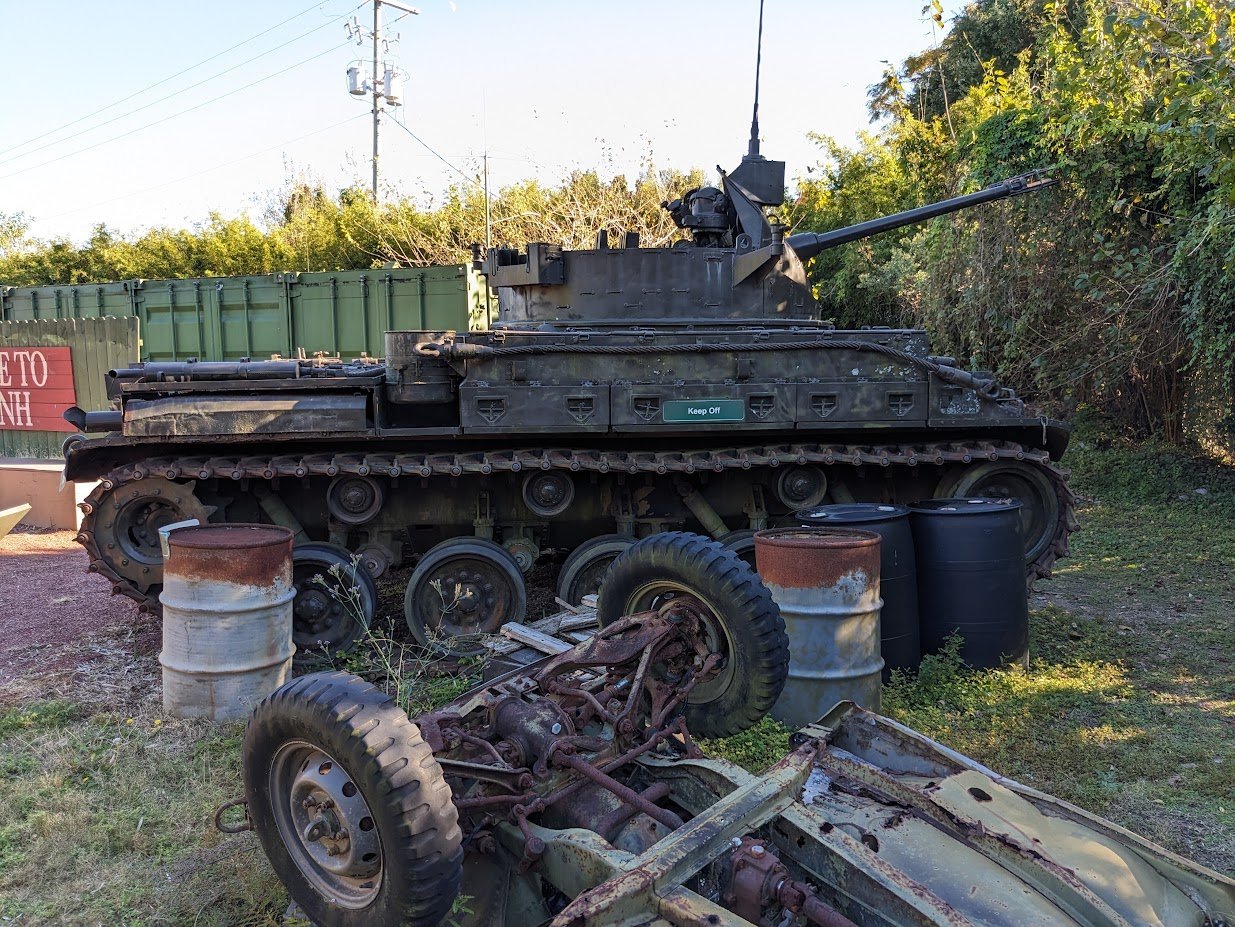
-
Welcome aboard!
-
A lot of different skills on display in this build, all executed to great effect.
- 282 replies
-
- 3
-
-

-
- Bluenose
- Model Shipways
- (and 1 more)
-
1/40 -- whoa!
-
All I will say about this kit is that the hoopla leading up to its release was all out of proportion to the quality of the kit itself.
-
Nice!
-
For anyone interested, this kit is designed by Darius Lipinski, the same gentleman who designed my recently completed USS England kit.
-
Welcome aboard, Robert!
-
Welcome aboard! In addition to the great options mentioned above, Model Expo offers a line of kits under the Midwest Products label. Having built two of them in the past, I can vouch that they are nearly foolproof beginner kits with very thorough instructions. You can see many finished examples by browsing the build logs here. Cheers!
-
Nice work! One little suggestion I would make, though (and I don't know if you can implement it at this point), would be to improve upon the oars. The blades should be faired into the handles, and they should taper in thickness toward their tips. I point this out only because the un-faired oars stand out in an otherwise nicely done model. Cheers!
- 24 replies
-
- 2
-
-
-
- OcCre
- bounty launch
- (and 1 more)
-
Welcome aboard! That's a great-looking collection of models!
-
I vote for white interior -- just seems like a more usual color for boats.
-
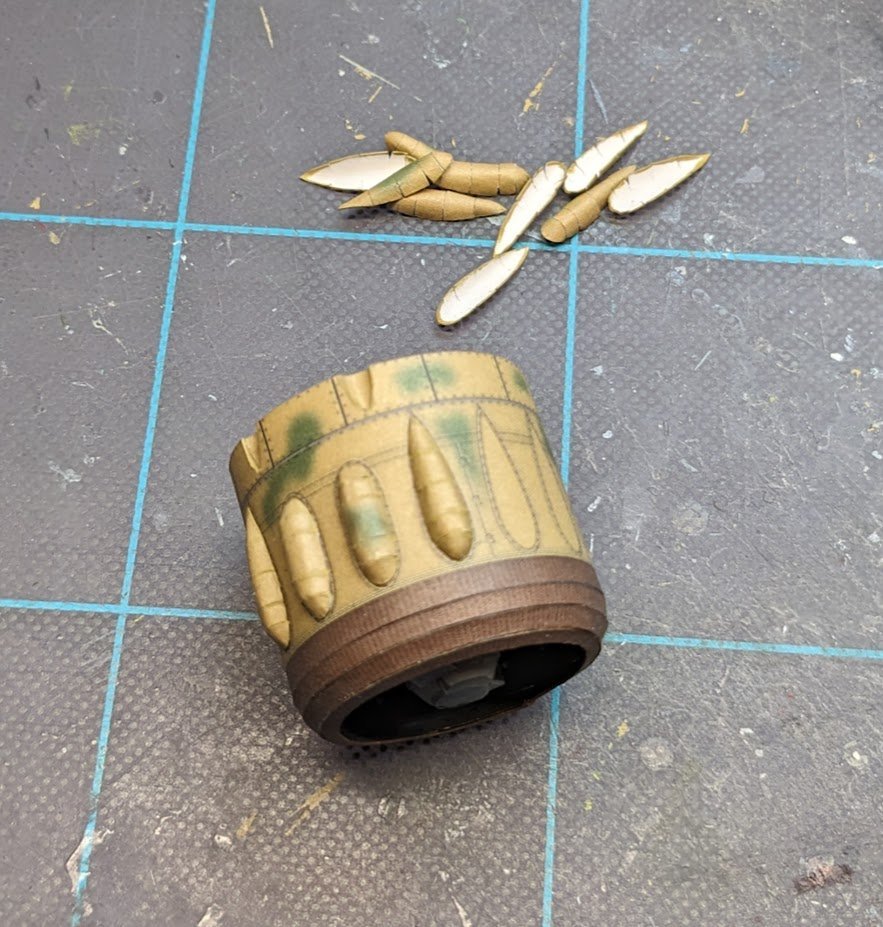
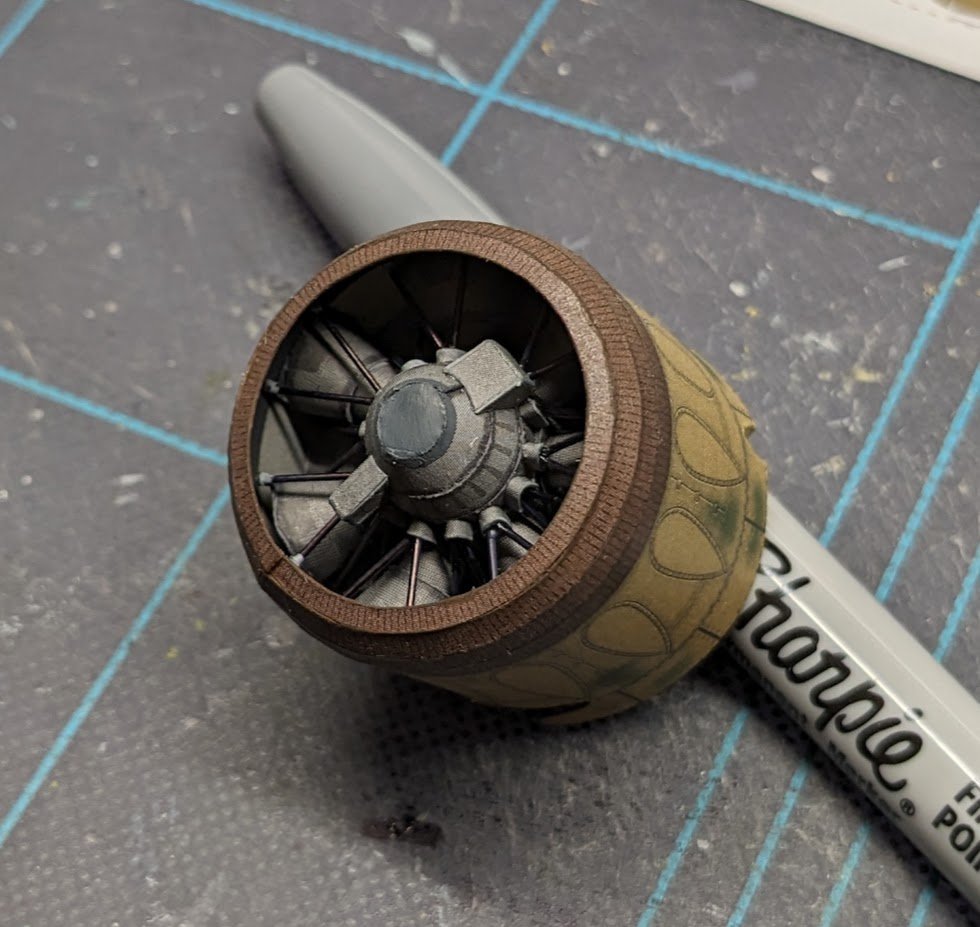
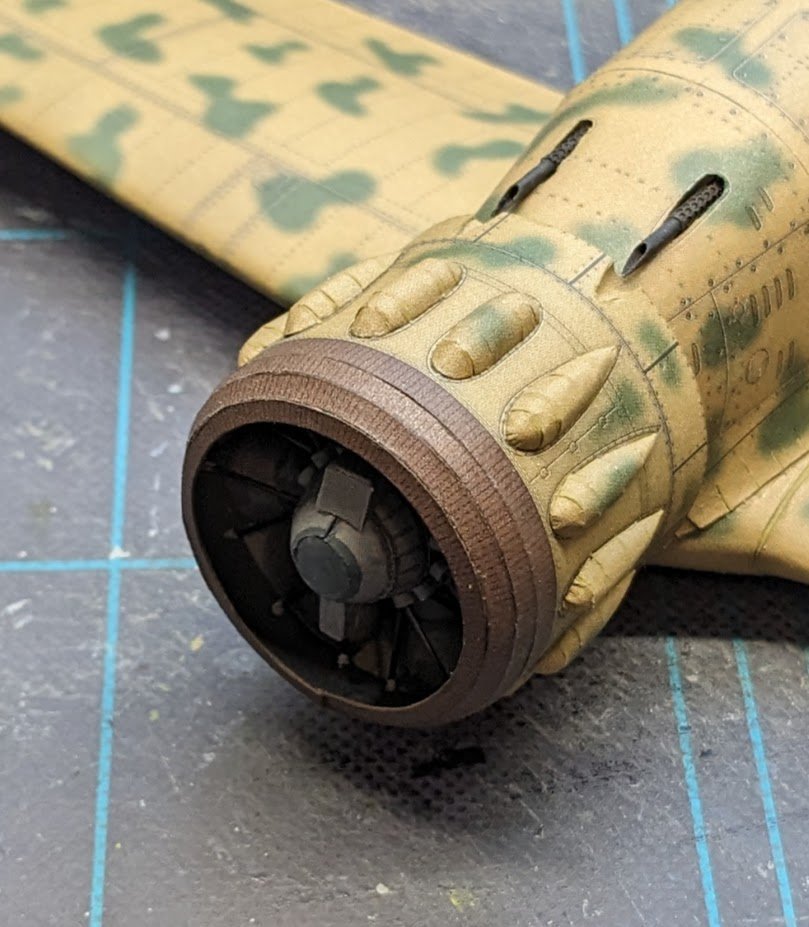
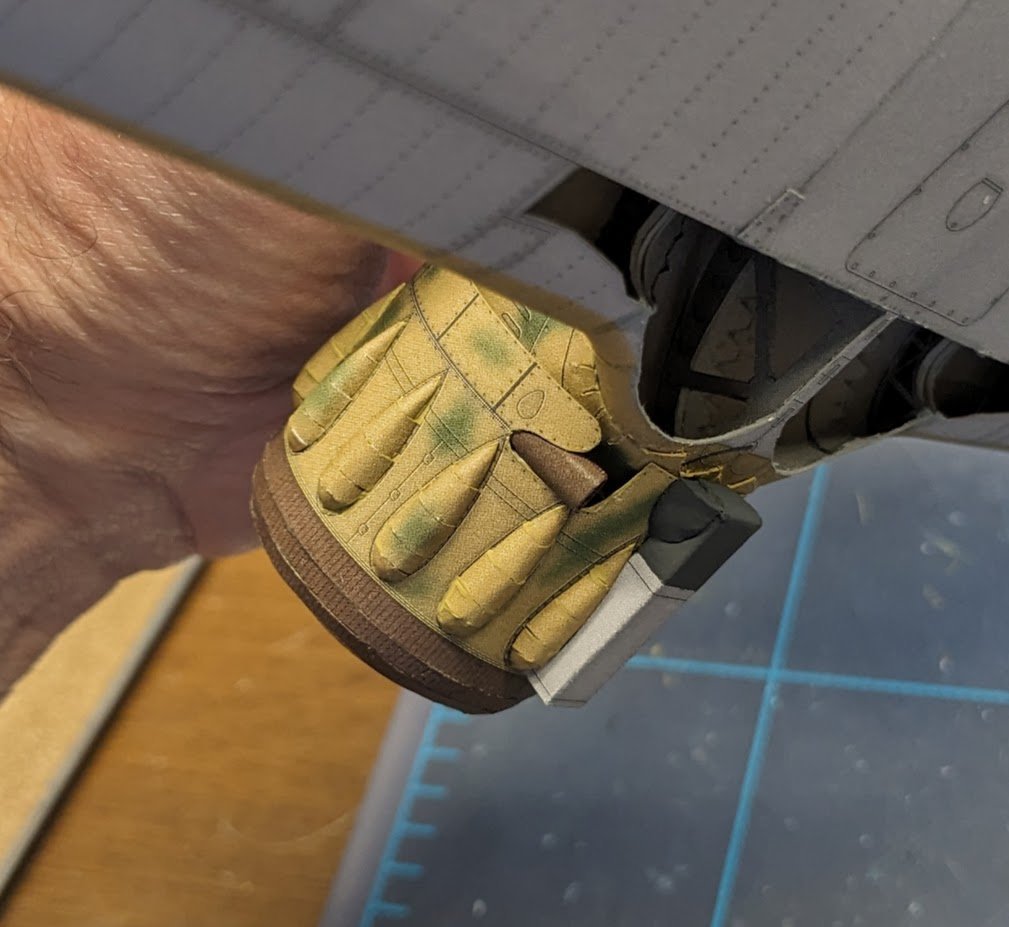
Cowling is finished and the intake at the bottom (oil cooler intake, maybe?) and exhaust pipes have been added. A certain amount of guesswork went into the latter two constructions, as there were no close-up diagrams for either of them, and the instructions for this kit are ludicrously terse.
- 80 replies
-
- 18
-
-

-
Imagine the chaos when the ropes were uncoiled and being worked by gun crews in action.
-
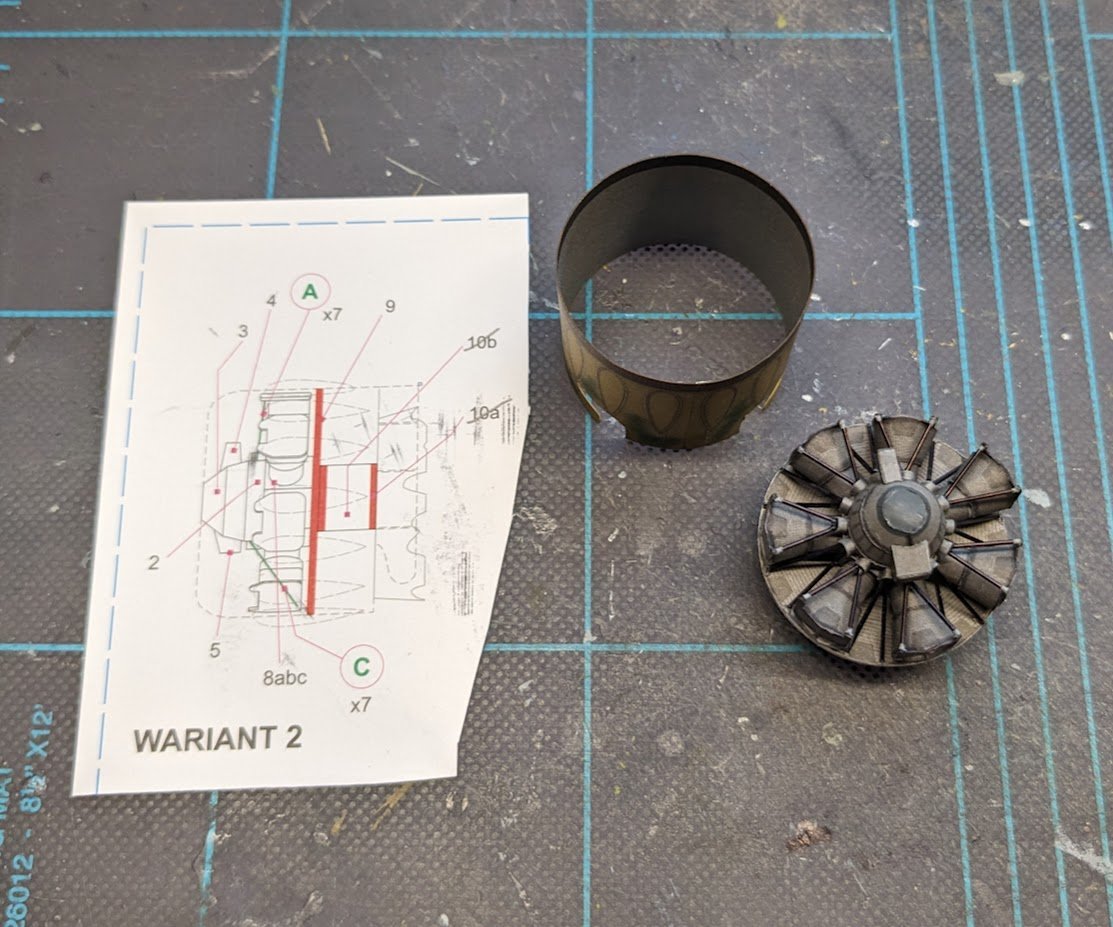
Okay, a little bit of good news, a little bit of not-quite-as-good news. I have the engine completed. As you may recall, I chose the median option, i.e., a printed rear bank of cylinders coupled with a 3D front row. It doesn't look terrible, even considering that I transposed the two box-like doohickeys (parts 4 and 5) on the top and bottom of the case -- oh, well. Since I'm not building a full engine, I'm also not going to attempt any super-detailing like I did for the Wildcat. Don't worry about the funny color on the front of the case -- that will be almost entirely hidden by the propeller eventually. I also made the main cowling ring. The ring just happened to fit precisely around a bottle of craft paint, so by dampening the ring and allowing it to dry while clamped around a bottle, I achieved a very nice circular ring. And now for the mildly annoying part. The printed rear cylinder bank and its laser-cut false bulkhead do not fit inside the cowling. I have already done two rounds of sanding on the bulkhead to get it to fit, but it's still too tight. I will have to work on this some more later this evening. UPDATE: It took five sanding passes in total to get it to fit. That's all for now!
- 80 replies
-
- 15
-
-
I can't speak to the Amati kits without knowing which one's you're thinking about. Billing Boats also offers a number of kits with plastic hulls. And yes, many kits with plastic hulls are aimed at the RC market.
-
Well, I was only five when that one came out, so maybe you guys are dating yourselves. 😉
-
You got that right. I wish I had a dollar for every shared picture I've seen in the last year or so that featured an "amazing" but obviously doctored animal image. 🙄
-
😂 Yep, a pretty homely airplane with an unenviable service career -- but that doesn't mean it can't make a great model. Good luck!