


wernerweiss
-
Posts
130 -
Joined
-
Last visited
Content Type
Profiles
Forums
Gallery
Events
Posts posted by wernerweiss
-
-
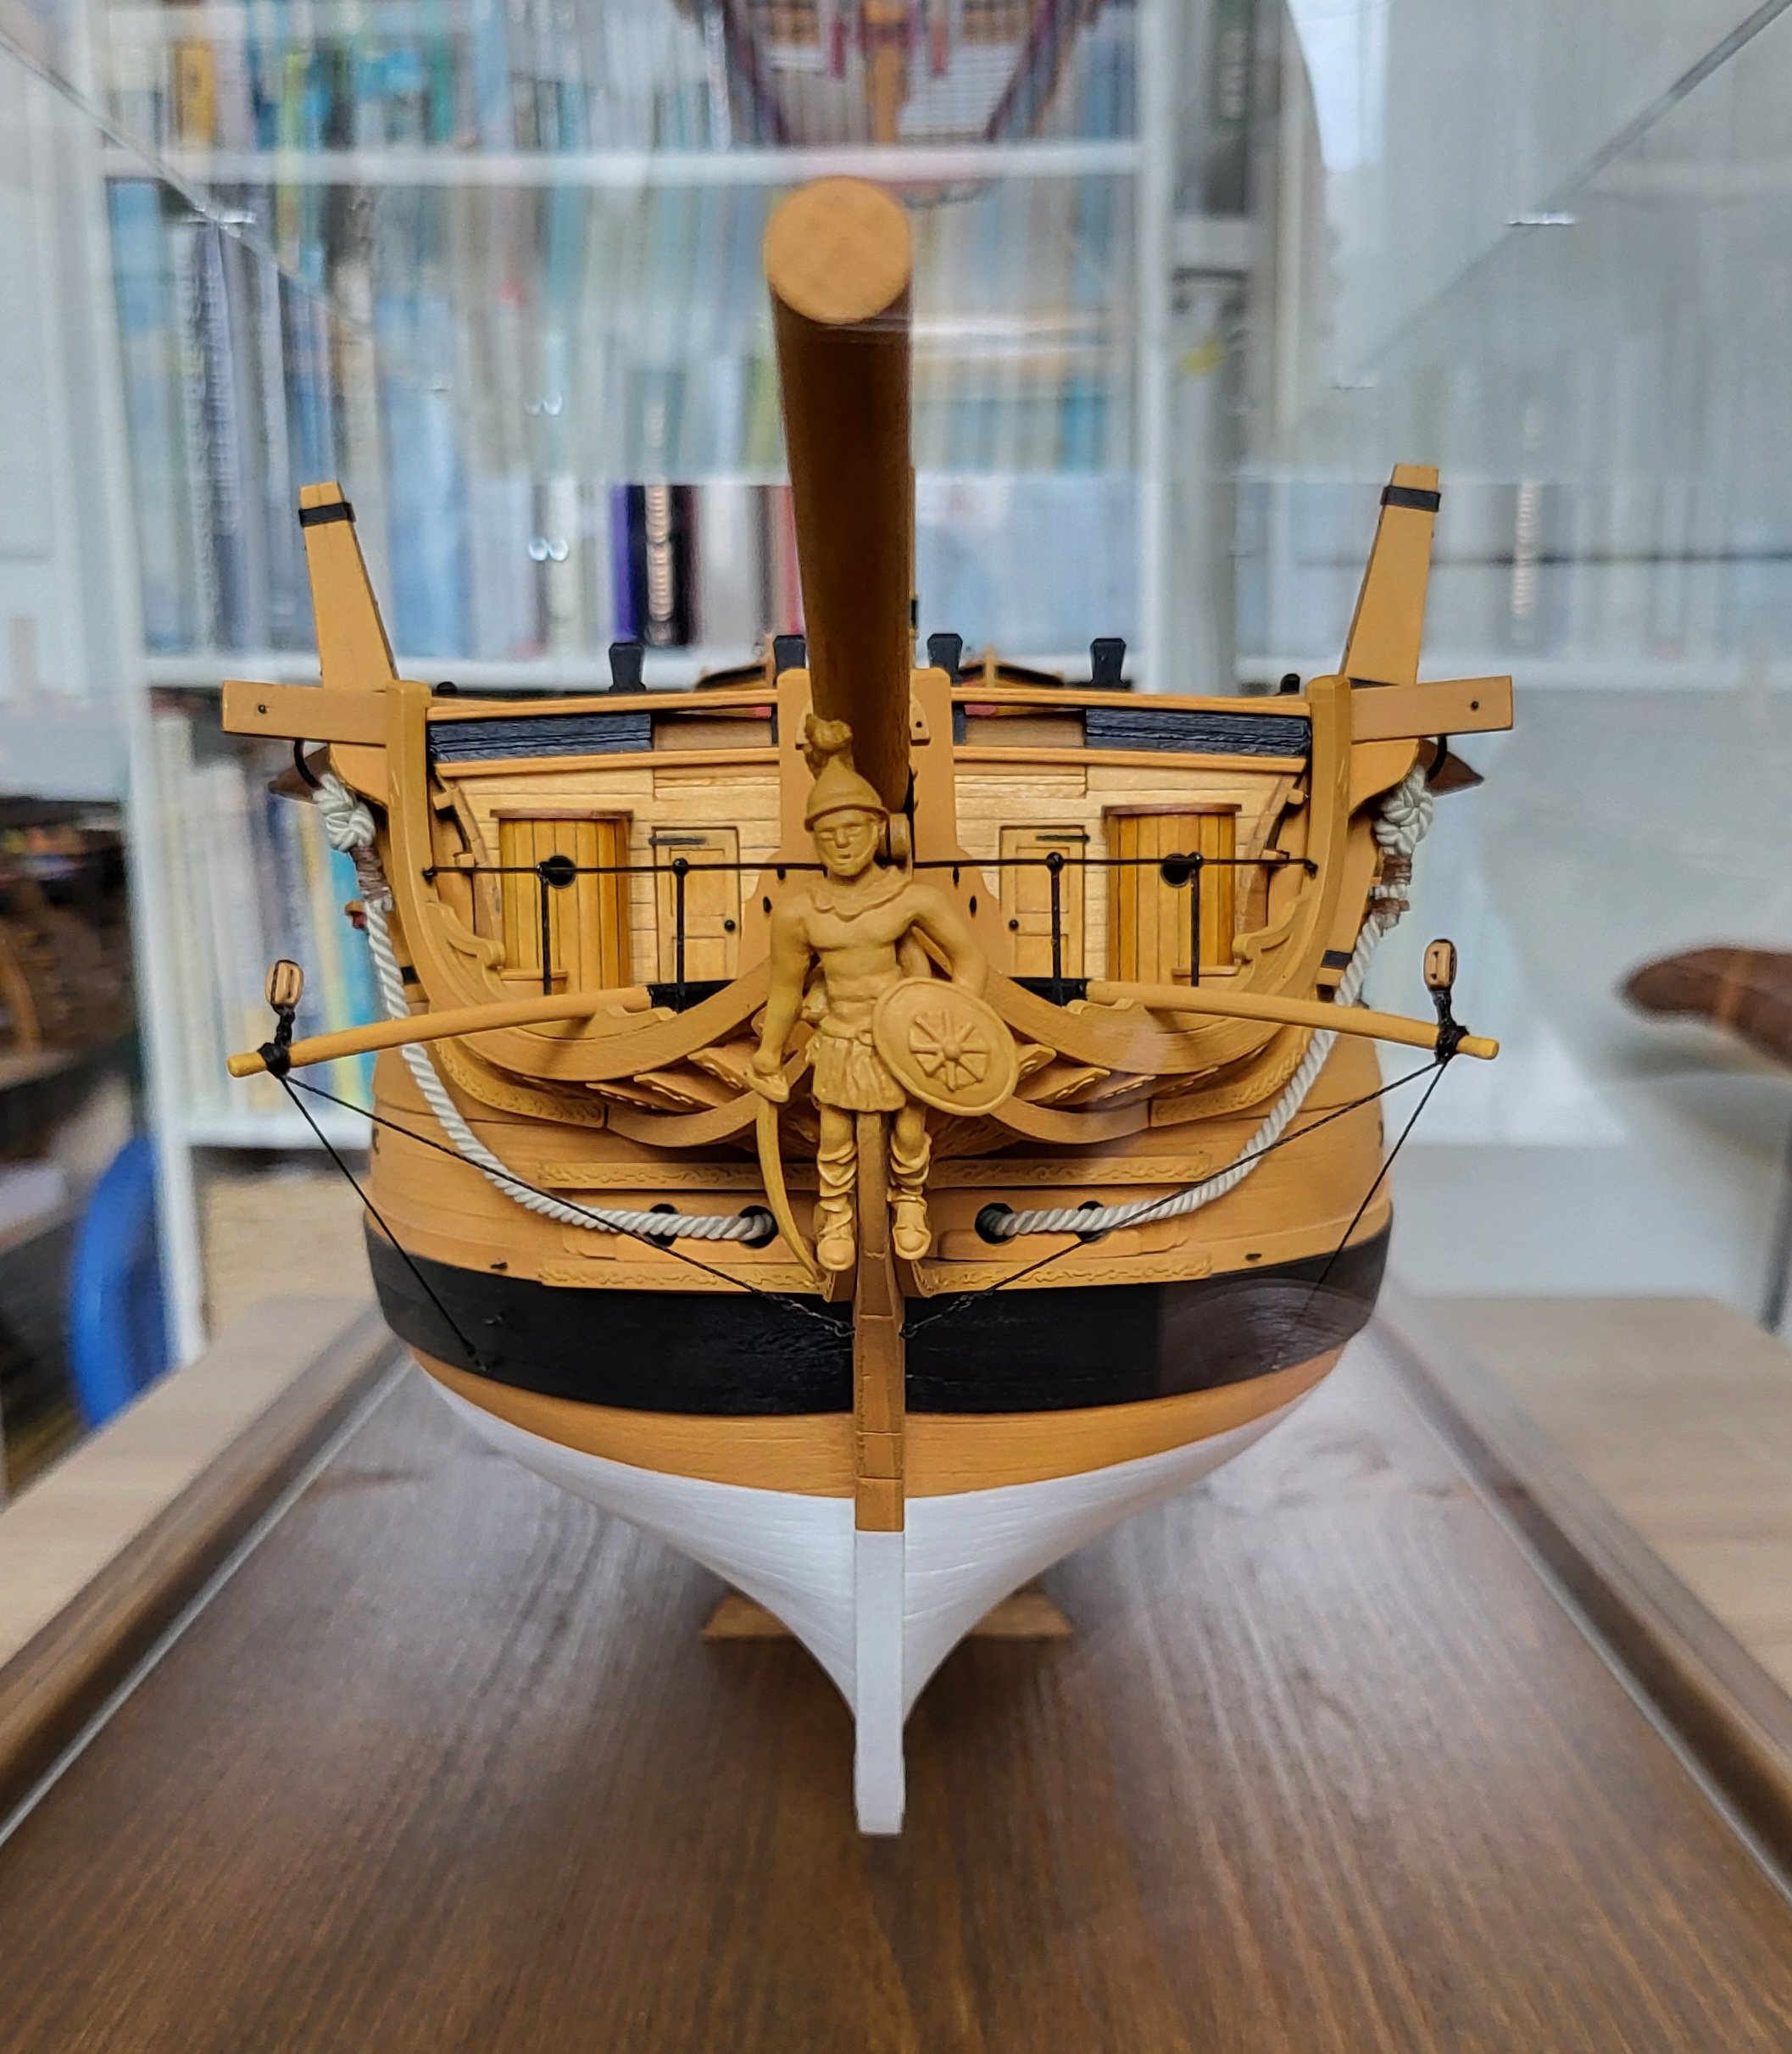
Hi folks,
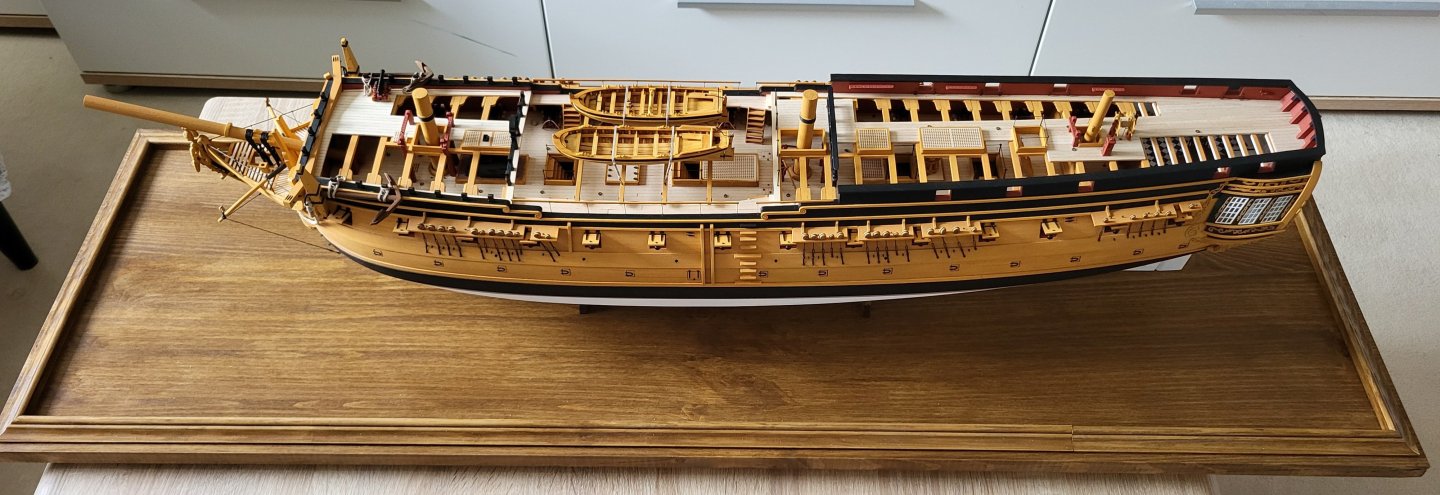
what a birthday present!
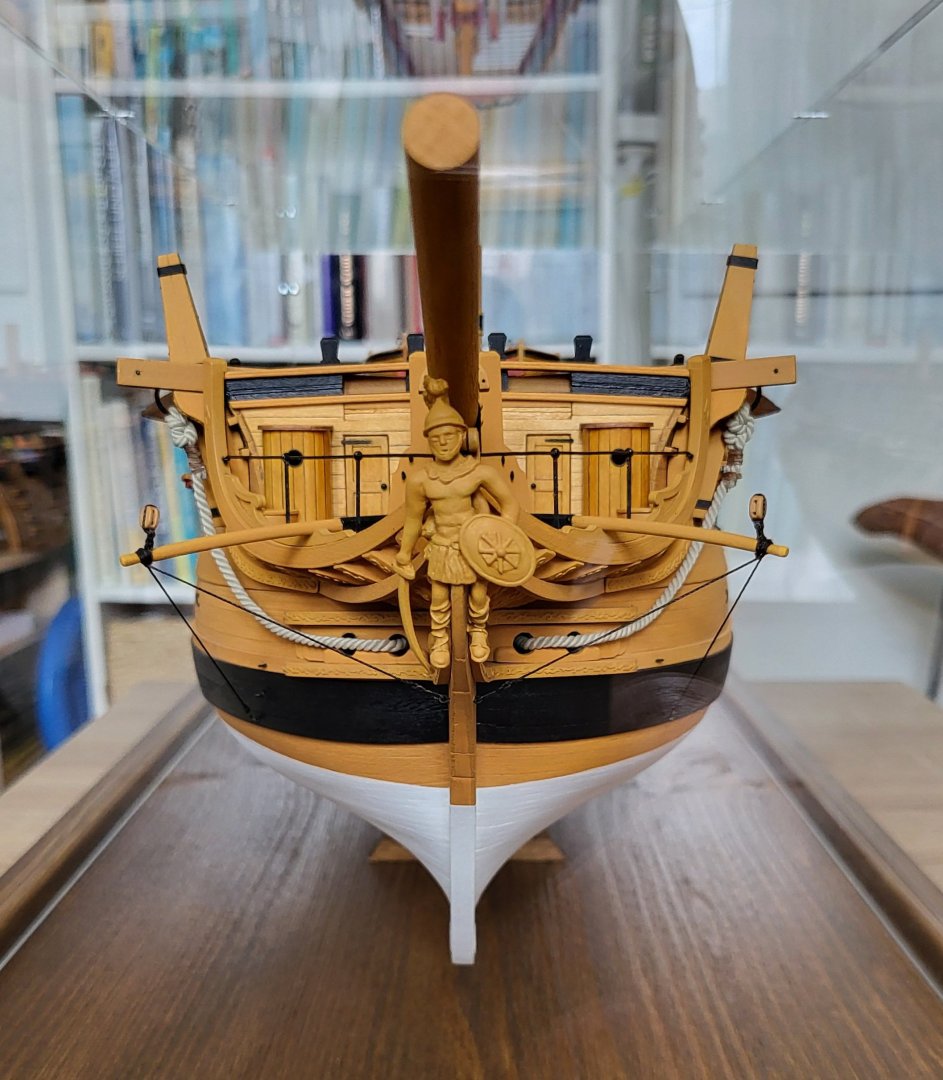
Just yesterday on my 67th birthday I got my Confederacy FINISHED......
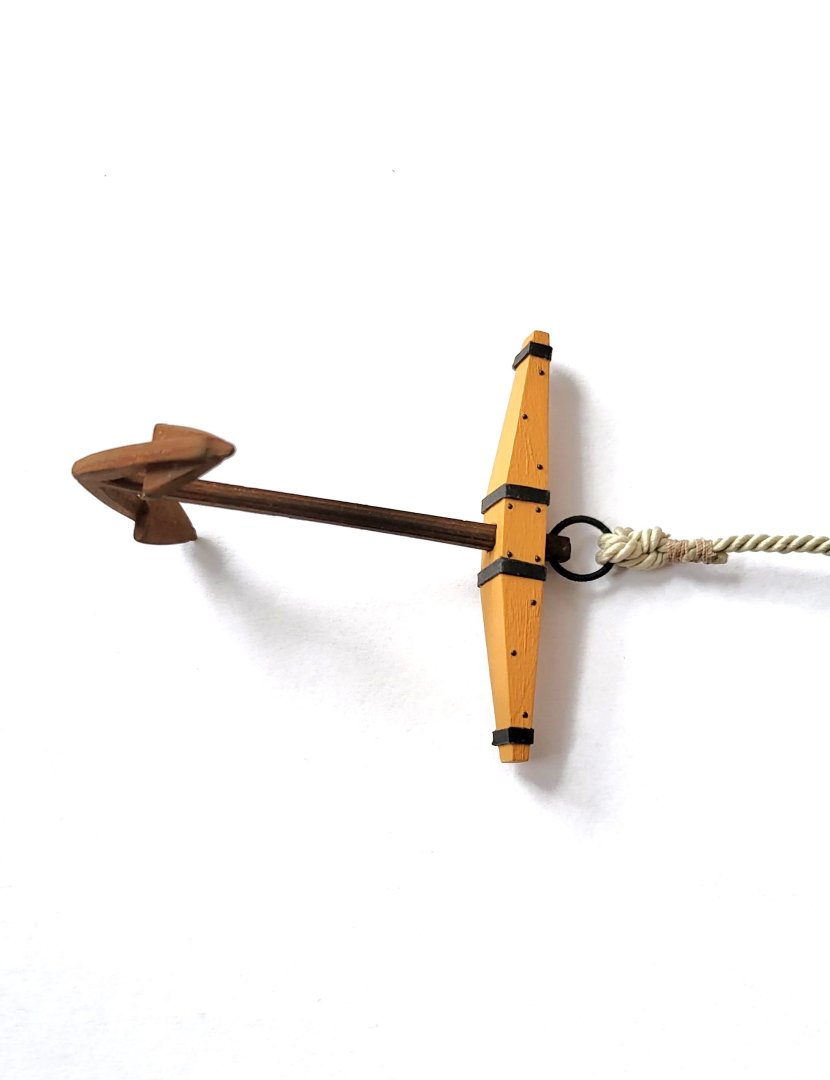
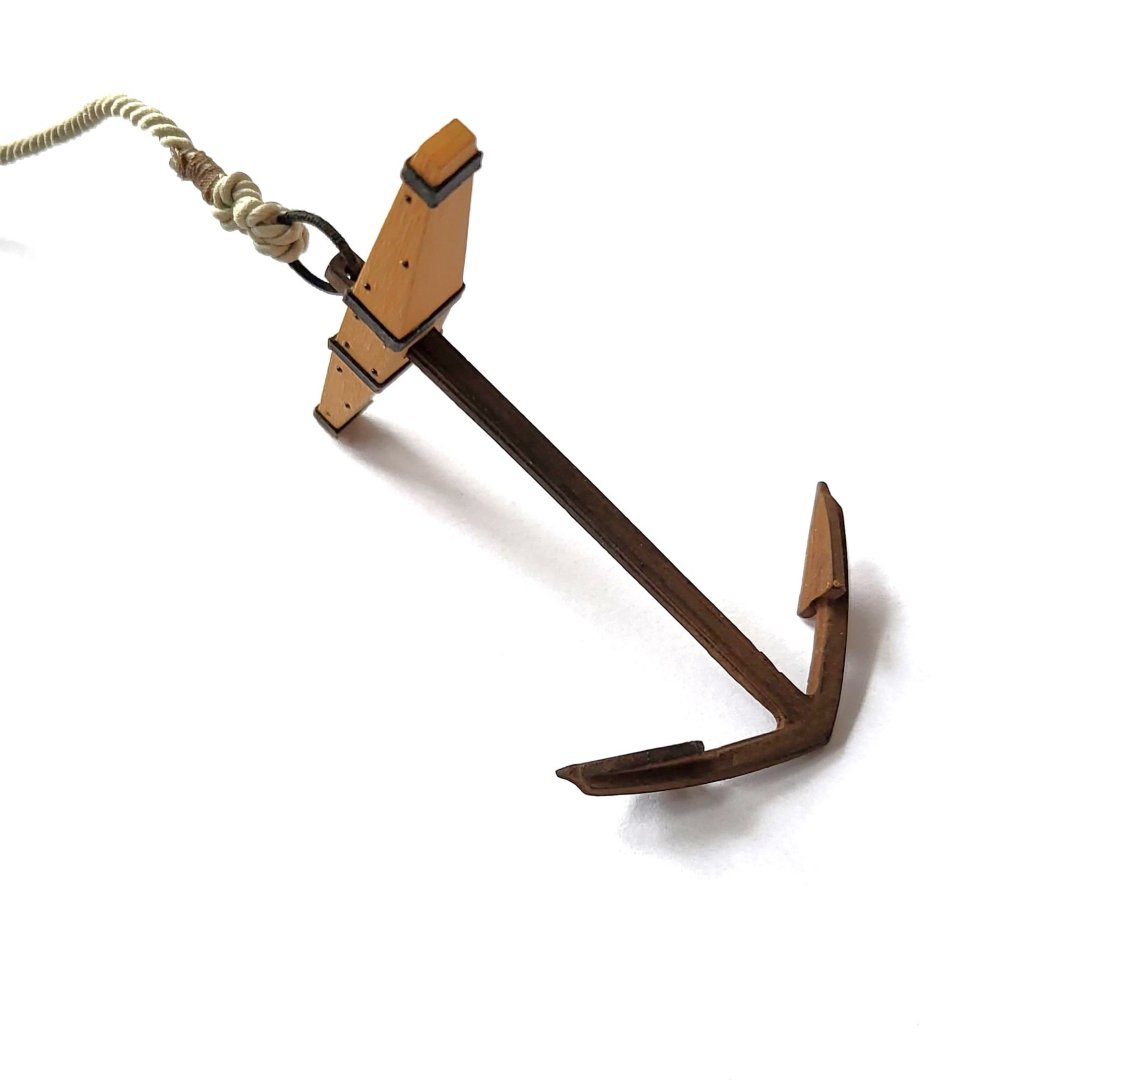
The pictures of the anchor were the last I took from the unfinished model, and in the last days before yesterday there were only some steps left......mounting the rudder, the ship´s boats, the waist rails, the mast stumps, the quarterdeck railings and finally the figurehead as the very last part to be glued in place.
Yesterday, the only remaining work was to make some paint touch-ups on the stern decoration figures and the figurehead.
What I also meanwhile did was to build the showcase.
In the moment I cannot say when I will take the photos for the finished models gallery, but I let you know when it´s done. At least here two pictures as a first impression....
The next model I´m going to build is an AIDA cruiser ship from Revell which was a christmas present from my sons meanwhile a few years ago.....
Always happy modelling.....
Greetings Werner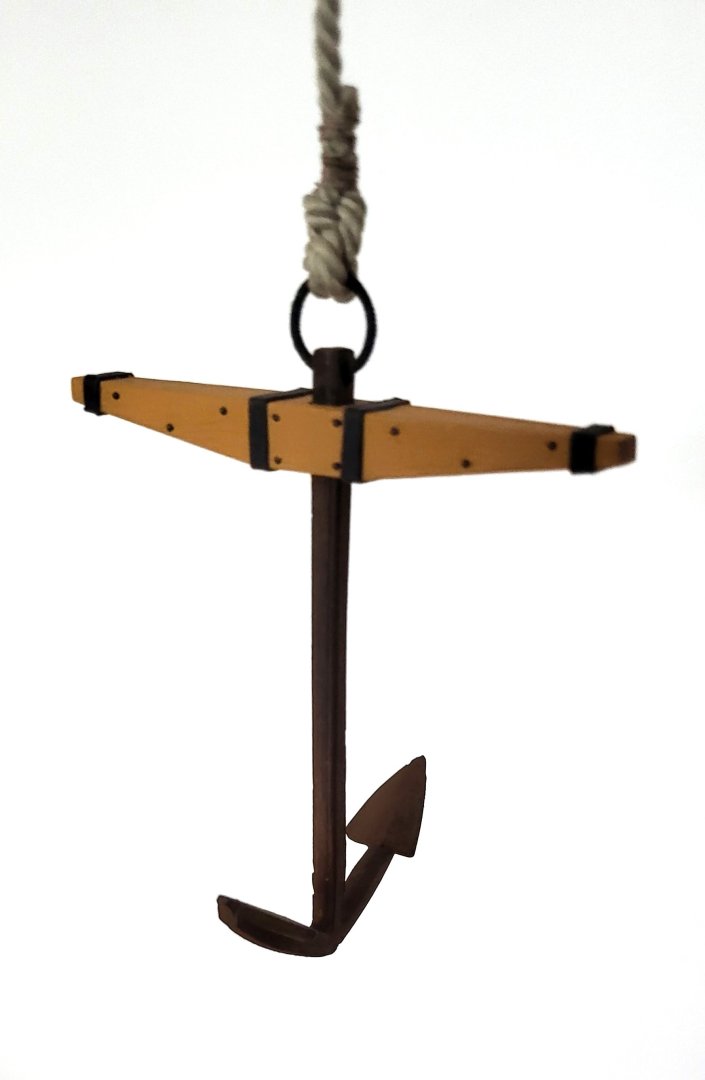
-
49 minutes ago, KennyH78 said:
That was my thinking as well, just not something I’m looking forward to. I have the isopropyl and syringe out now. Hoping everything works out good
I´m convinced it will, take your time .....
- KennyH78, ERS Rich and Ryland Craze
-
 3
3
-
Hello Kenny,
imo there is no alternative to unglue the false deck from the bulkheads and add some spacers.....is it the same on the starboard side? I have had the same problem with some bulkheads, and the opportunity to fix the problem is now, later on no way.....makes the deck planking much easier.
Werner
-
3 hours ago, KennyH78 said:
Hello Werner,
Your model is absolutely stunning and a masterpiece! I can only hope that my attempt at the Confederacy will be half as good as yours.
Hello Kenny,
thank you very much for visiting my build log and your appreciation!
Besides mine there are many other build logs here where you can profit from.
Greetings
Werner
-
Hello Kenny,
Congratulations to your decision from another Confederacy model builder
Greetings
Werner
-
59 minutes ago, rlwhitt said:
Hello Werner,
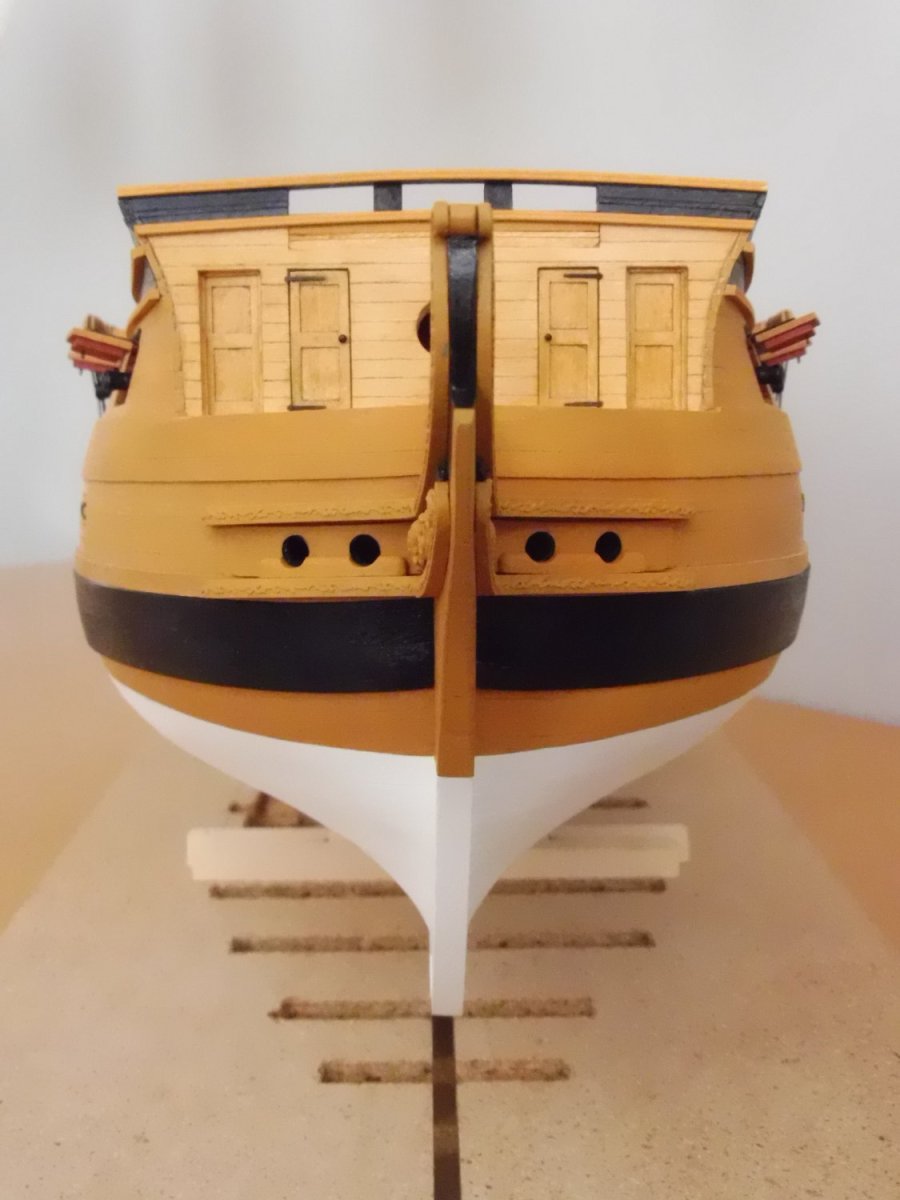
Your build is superb! I have this in my queue and am reading your log with much interest. I like your color scheme and have a couple of questions about what you've done. In most of the pictures the decking looks almost like it's bleached. Did you apply some sort of whitewash? Or perhaps it's the species of wood if you've substituted? I've read some information to the effect that an actual deck would probably look bleached out like this.
Also, the red you use for bulwarks and deck fittings looks to my eye like it would probably be more accurate than the brighter reds that you usually see, as iron oxide paint can be pretty dull. What have you used here?
Thanks and kudos for a masterpiece work!
Hello Rick,
thank you very much for your appreciation!
1. No, I didn´t use any whitewash or special wood at all, I just used the provided 1/8 x 1/16 inch basswood stripes. The only treatment was sanding the deck when finished.
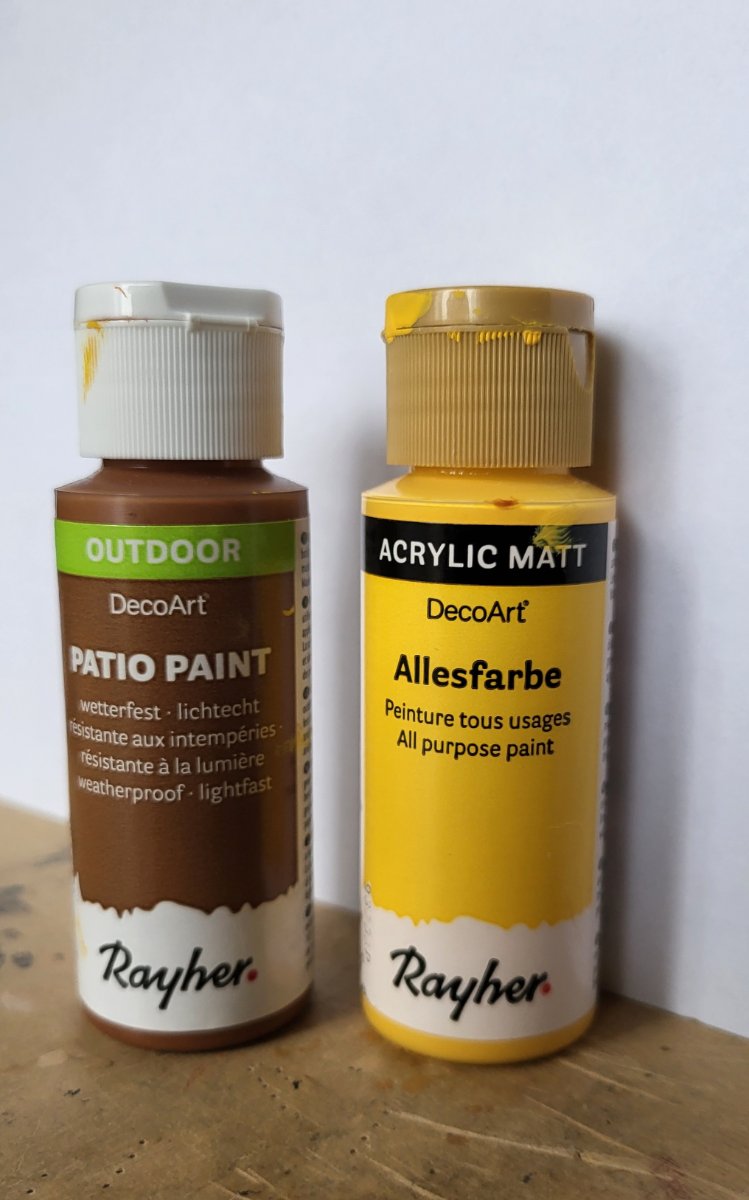
2. As red for the bulwarks (Schanzkleid in german) and deck fittings I used red ochre as recommended by Caldercraft especially for period ships, see the pictures below. It is easy to find when you google....
I hope I could help you
Werner
.thumb.png.0e8e411d435443acc7d4fe030cb0718f.png)
.thumb.png.d940d3597d57080a303994aab90eaddc.png)
-
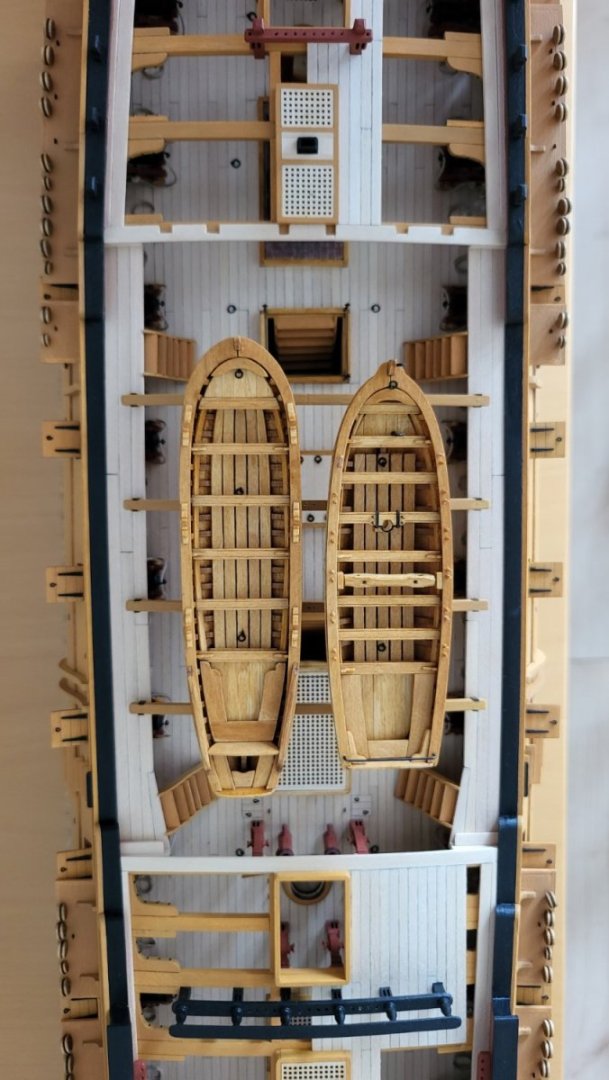
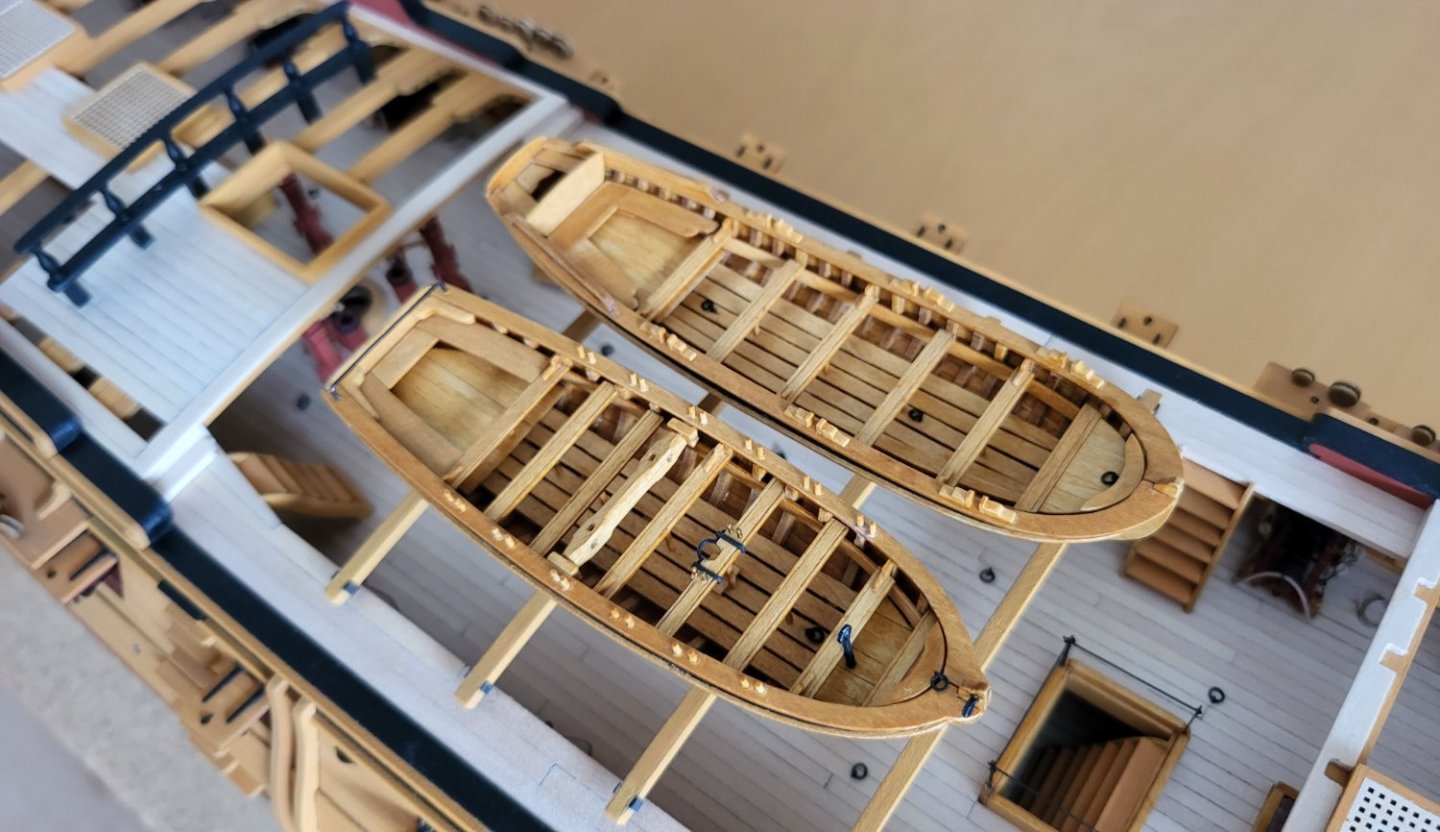
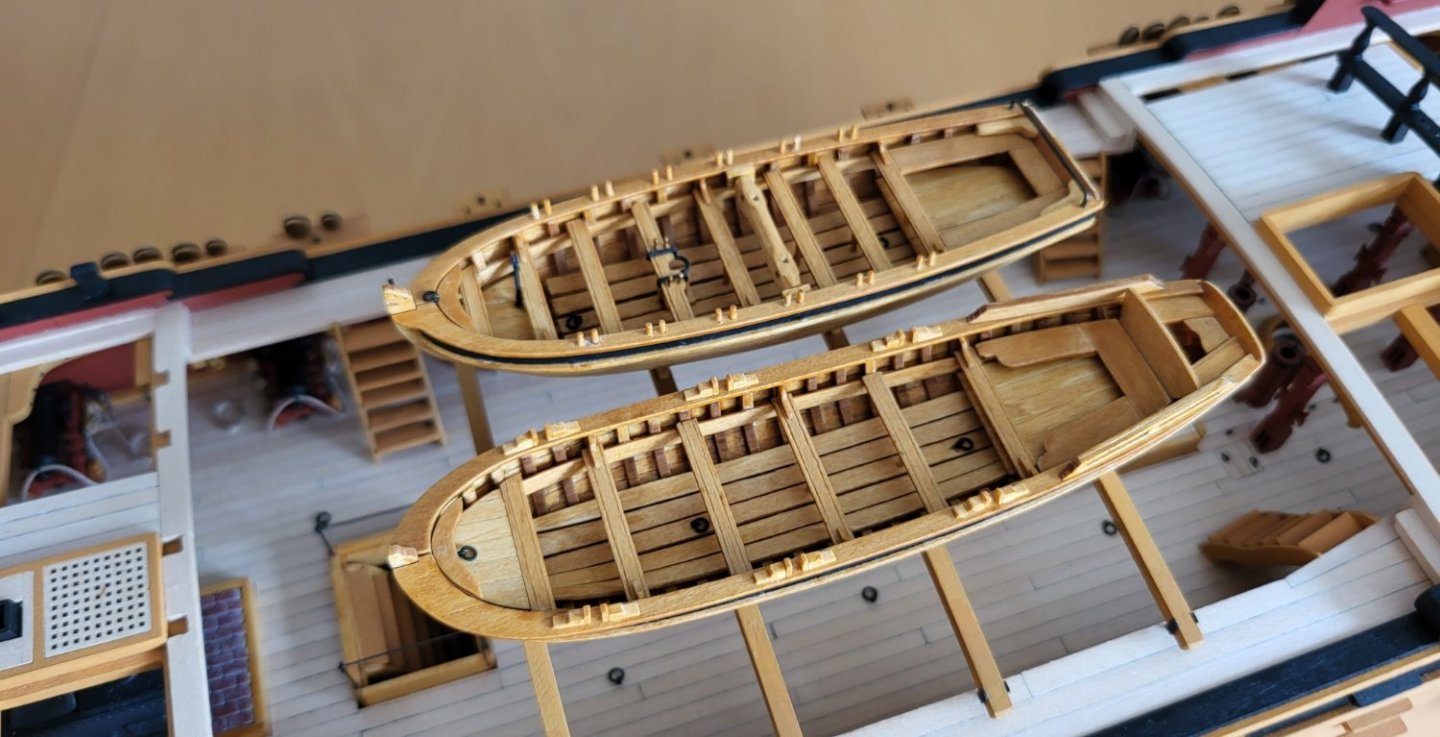
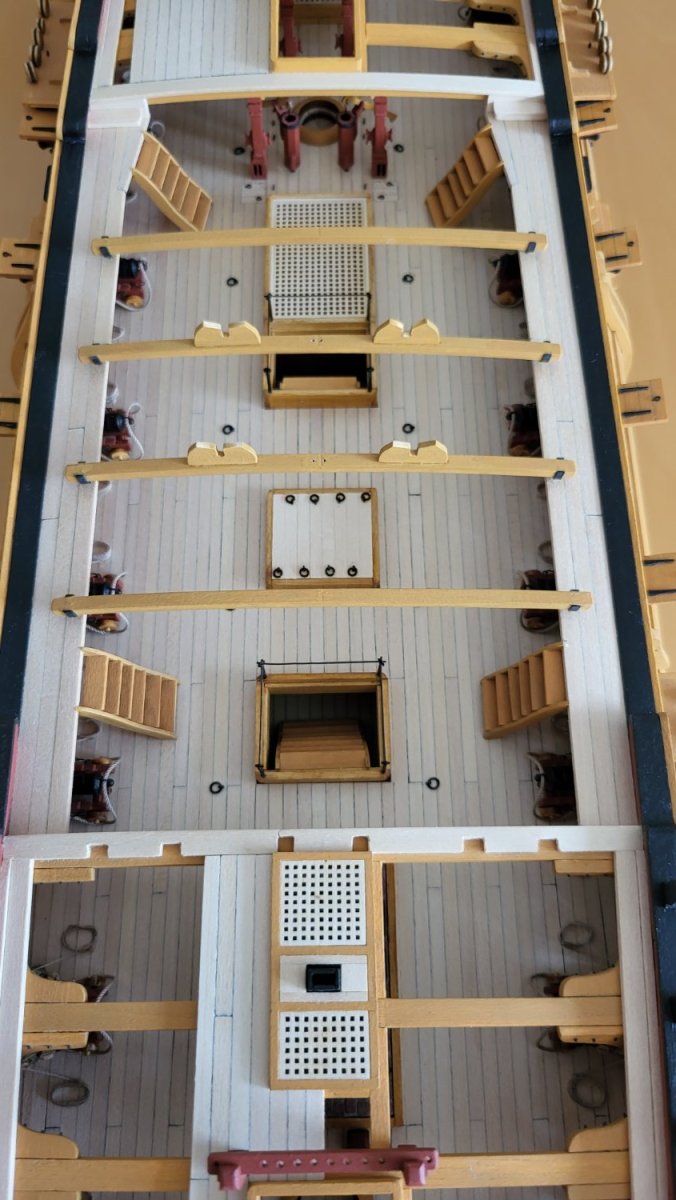
Dear modelers,
tomorrow my last post is exactly four months ago, and there is much progress with the model. The ship´s boats were placed only for the photos and are not yet glued.
I intend to have the model finished soon, because the next model is waiting....
Comments and questions welcome.
Greetings
Werner
.thumb.jpg.6cdd2c13b493fd9e153d86ab07c518a9.jpg)
.thumb.jpg.d6009aee4d43df574d1c65571e38d383.jpg)
.thumb.jpg.bc0410777be5eb1943386fbec9af15b8.jpg)
.thumb.jpg.190de58b740d47f280c765f3802d16c5.jpg)
.thumb.jpg.28fcac646a4a41a4935ecadf7a1532ad.jpg)
.thumb.jpg.9b50facb7970a714e5d99c299995b10f.jpg)
.thumb.jpg.22aa5f15644bac188310d7ebd186e46f.jpg)
.thumb.jpg.25efa8bbd4da0ce67a1c33aafff21073.jpg)
.thumb.jpg.5cb3893f69ecb42478fec215e9c71571.jpg)

.thumb.jpg.e92b7166a23e131558f07a3206f305c3.jpg)
.thumb.jpg.e019791e45198efca183a1a0a38a630e.jpg)
.thumb.jpg.b5cdfa6805c2936d8108ce2047363d56.jpg)
.thumb.jpg.3a6aae1e621edd4e71695637250feae7.jpg)
.thumb.jpg.f5b081adc06a01d54ca458588146ca57.jpg)
.thumb.jpg.9d5ac1ec33a218711bd19bd09ab33475.jpg)
-
-
-
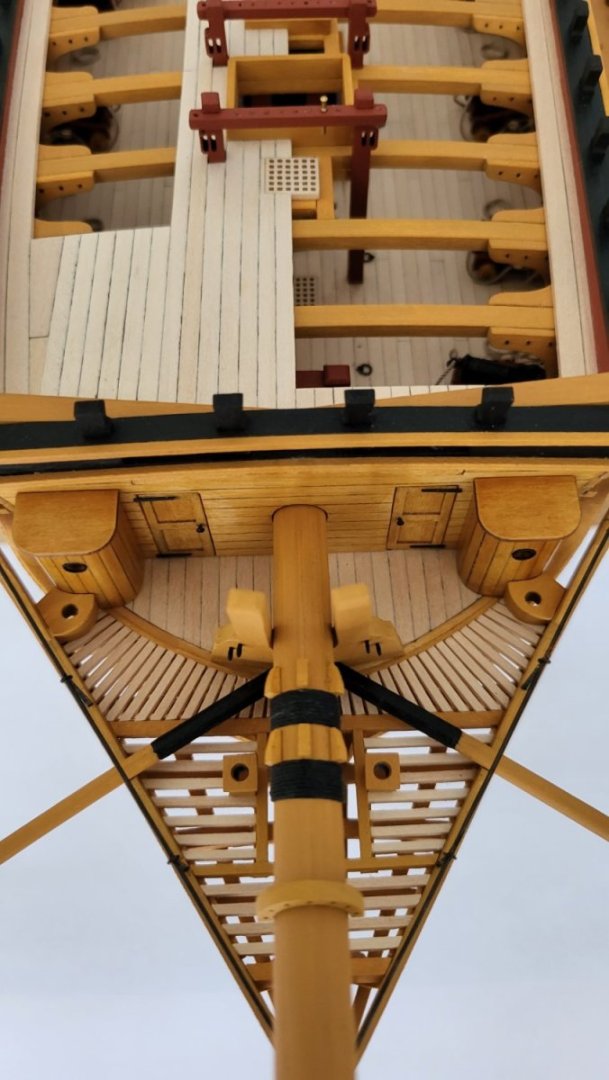
Hi modelers,
here the next steps to be posted.....the middle rails and the cathead support knees are done, the framing for the head grating is done, and I started with the grating timbers.
Note the additional stripes along the framing and the main headrails as a support for the framing timbers.
The cathead support knees were notched instead of removing the hull molding stripes.
Greetings
Werner
.thumb.jpg.78c4692faa881572bc8fccd9b7643703.jpg)
.thumb.jpg.68fd86c7eaac271fc03b0e45fadc4bb9.jpg)
.thumb.jpg.35ec4229fbd3dbcf8ea01ef00277c9d9.jpg)
.thumb.jpg.15382d185ea6f9ecc0ab1d184c749304.jpg)
.thumb.jpg.170277e43d103b577f2f7f266e89a1a6.jpg)
.thumb.jpg.d7d0323607a85a7b089dbfb35ada8ea6.jpg)
.thumb.jpg.40f31f5ab5039c1ebdbb0b8ec5518245.jpg)
.thumb.jpg.1a52cf399d89e6c597730209e9d63c07.jpg)
.thumb.jpg.20c4385c39cf817e437a96e624c16338.jpg)
-
-
12 hours ago, WalrusGuy said:
Hi Werner, the headrails look fantastic! This is probably the most trickiest part of the build.
Hello Harshil, thank you very much!
It is DEFINITELY the most trickiest part, especially the curved sections of the middle rails between the bow sections and the support knees of the catheads. The adjustment to the curve of the hull and the transition to the knees demands patience....actually I'm working on the starboard side.
Regards
Werner
- chris watton and WalrusGuy
-
2
-
Hi folks,
here some pictures showing the progress of the last weeks.....catheads done, main headrails and 10 of 12 head timbers done so far. The middle rails are ready to be glued, and next I´m working on the cathead support knees and their joint segments towards the middle rails.
Regards
Werner
.thumb.jpg.70dd9de8375651b8f43fadc18e237940.jpg)
.thumb.jpg.ddb967c90060011fa6cef5488107c484.jpg)
.thumb.jpg.84e234a208f82acb6470554e52b050c5.jpg)
.thumb.jpg.bb6ee36759647f7ba6da898ecf002acd.jpg)
.thumb.jpg.ec1b8762343aa5e09b1c10bd2a97c02b.jpg)
.thumb.jpg.53cf4221e4a026dd18ede5880ea774ef.jpg)
.thumb.jpg.b2ed78ce032c777b65038f11ed980339.jpg)
.thumb.jpg.16951c8ff3ad9b156f3a763314c310ad.jpg)
.thumb.jpg.020db677408b6e72fb9362ea8d4d3d92.jpg)
-
Hello Ian, you' re on the right way, the plan is quite simple....."just" fill and sand and fill and sand and....until the hull looks like made of plastic without the slightest indication of planks....
My way was as follows: when I was content with filling and sanding, I gave the hull a coat of parquet lacquer. When it was dry, I polished the hull with a polishing disc on a drilling machine
Regards Werner
-
-
Hello Ian,
The sheer from the center towards the bow is right and there should be a sheer toward the stern as well, but this is not as distinctive as the sheer forward. I would say there is no problem if you build a flat deck in the aft section.
I suggest to have a look on the models of Peter Beisheim or Rüdiger Eschker for example....
-
Having just glued the head timbers on my Confederacy I will never fear sanding any more....😄
- mtaylor, Chuck and scrubbyj427
-
3
-
-
Hello Nate,
as one of many builders of the Confederacy kit from Model shipways I look forward to follow your build of the 3D model.
Best regards
Werner
-
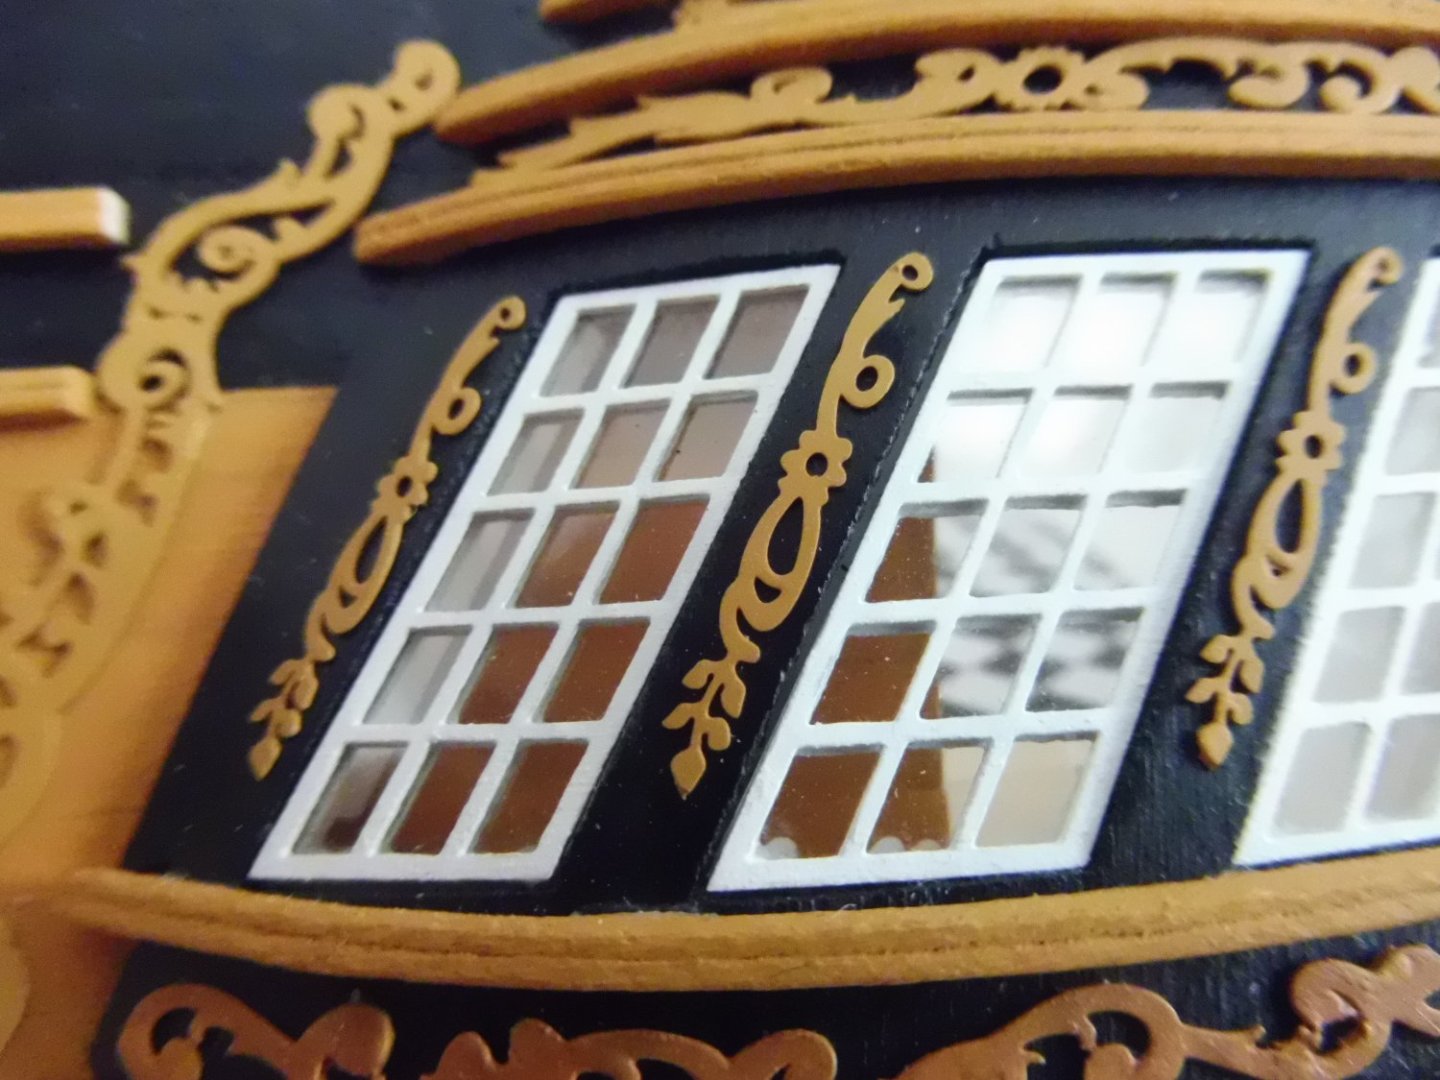
Hello Harshil,
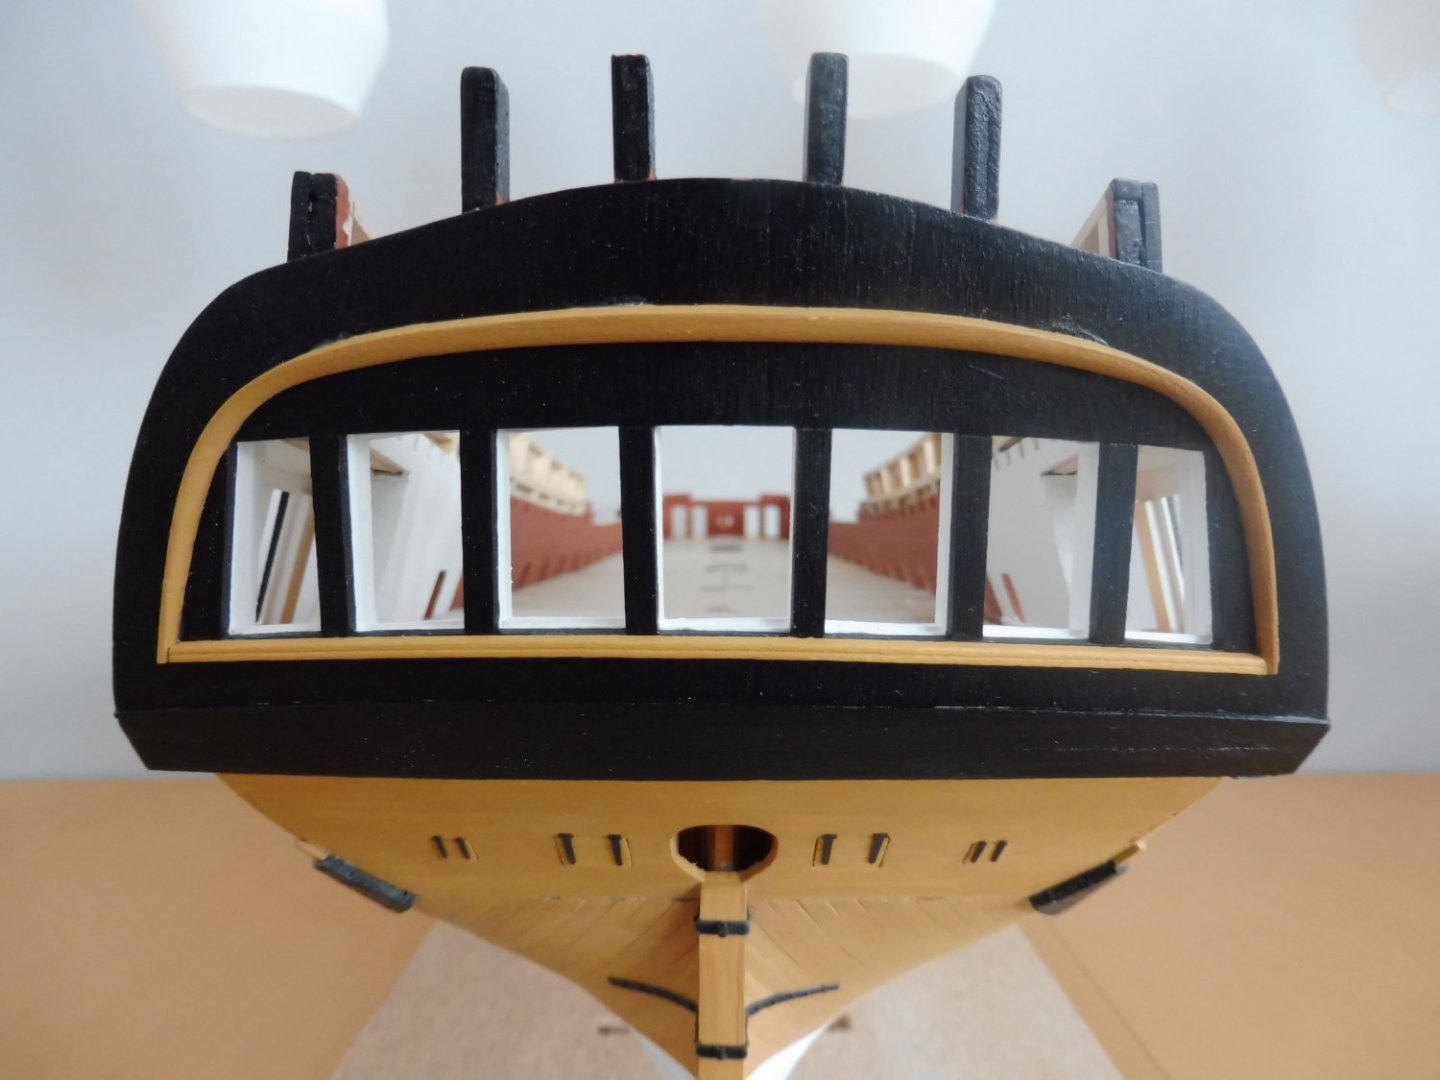
I agree that the window frames provided with the kit are not of the best quality, and I see that scratch-building them ist not at all a problem for you....
I accepted the provided frames as they fitted perfectly into the openings. What I did was to order another set of frames (thanks Model shipways) to double the frames of each stern and gallery light with the acetate inbetween. As you may see in the pictures showing the openings for the stern lights I glued a 0.5 x 0.5 mm stripe on the bottom and top edge (not visible) as a rabbet for the inner frames. They were glued first, then the acetate and last the outer frames.
In other build logs of various models I saw pictures where the builder depicted the window glass with micro crystal clear, and I preferred the acetate.....
Regards
Werner
.png.c6758da8f426fd35c95d2d155fe91c64.png)
-
-
49 minutes ago, Chuck said:
Lovely progress....well done. A pleasure to follow your log on this kit.
Chuck
Hello Chuck,
thank you very much for your personal appreciation! I would never have thought so far when beginning with the build......
Best regards
Werner
-
@all, thank you very much for your comments and your likes!
-
Hello modelers,
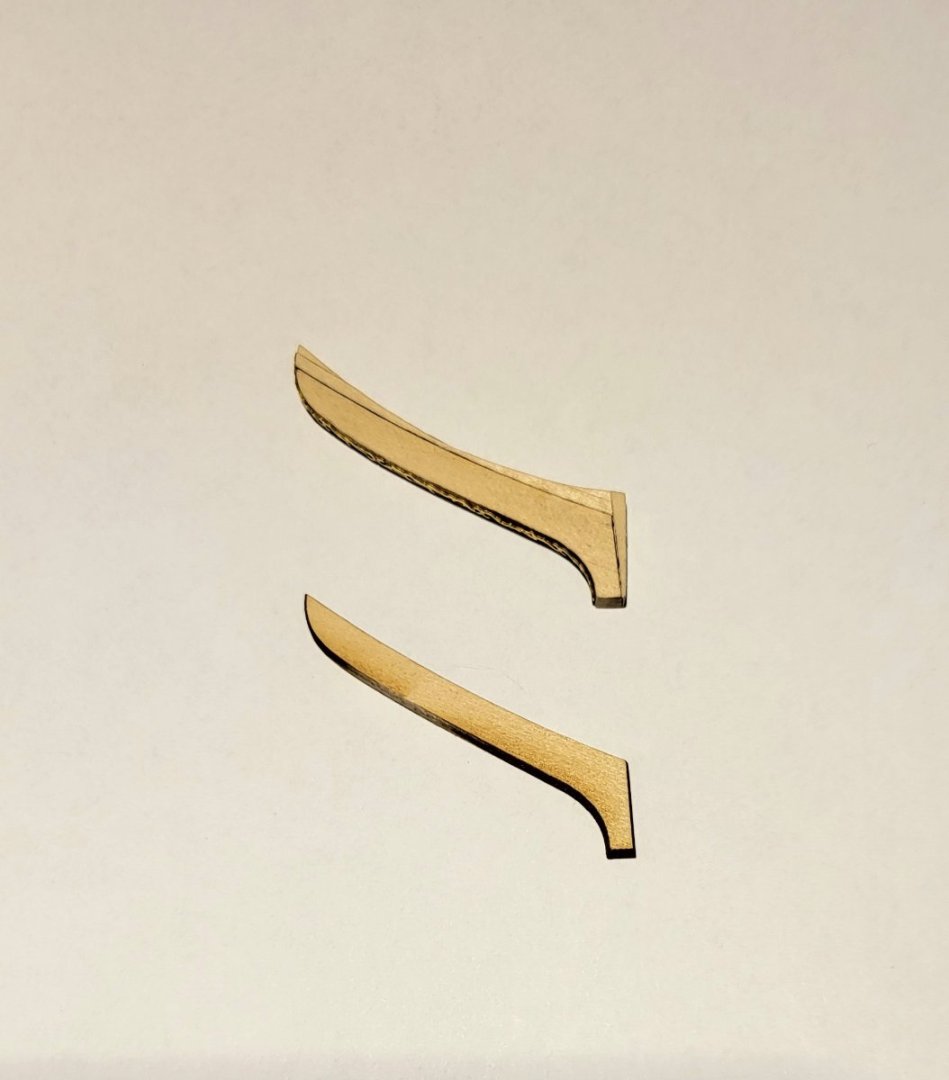
with this post I continue the gallery with the latest pictures, but first some remarks:
-
Even if you build very carefully, for example the bow curve of the finished hull may differ from that of the prototype. Due to the bow curve of my model I had to make the shown adjustments with the cheeks to fit on the bow curve. The laser cut cheeks turned out to be too straight, so I hat to reshape them with a rounder curve to fit to the hull.
-
Regrettably the cast trailboards were not inversely equal. The starboard trailboard was a bit longer, thicker and wider than the port one. This is not what I would call high quality.
-
My next step will be the installation of the main head rails. Between them runs the so-called head beam, and sheet one shows two knees connecting this beam to the main head rails. These knees are not mentioned in the instructions, so I have to decide whether to omit them or not.
-
At the end of chapter 15 on page 134 it is suggested that the catheads are glued in place. I would suggest not to do so at this time. In the next chapter the main head rails are installed and for that purpose an appropriate angle has to be sanded at the corners of the beakhead bulkhead showing towards the stem. This is much easier without the catheads as an obstacle for the sanding tool.
See yourself, questions and remarks welcome.
.thumb.jpg.2a29b19930cecd489e671ac77d4d3b01.jpg)
.thumb.jpg.bf6b6bacc2e3489409f56bfec7a9fecb.jpg)
.thumb.jpg.ad96f02d4b08658484ebebb6943a7054.jpg)
.thumb.jpg.44338953a381d158d847ee402232c92b.jpg)
.thumb.jpg.b0030db5ca5998bea4223703451b0270.jpg)
.thumb.jpg.ea3aef0aab4cda52c7f1ca00e54c7c8c.jpg)
.thumb.jpg.090cff9909b33f096bd43cbd402a2238.jpg)
.thumb.jpg.ecf0ac16a783f47f6d63e148f4613a85.jpg)
.thumb.jpg.03b795e090c7197116f2c08db0d5ec15.jpg)
.thumb.jpg.233134b1bfdffe3e27635bf9303d9ca5.jpg)
.thumb.jpg.b59eb03ae7742c6df8aa2d227273f17b.jpg)
.thumb.jpg.2e2d13a7e5b128bd01e5e4a397bc302e.jpg)

-


.png.2bcf4b925d2b3e9e242f132150be7320.png)
.png.1e2d45ea28b94b127e1b7509dfd2da05.png)
.jpg.2c007d5964874968966e9350f8820e76.jpg)
.jpg.1e76a74b0f2a72cc5389c259fe93eb95.jpg)
.jpg.ad61000b81b9377ba1aa44c03f69384c.jpg)
.jpg.2c4b4e4c5b4969e03125ad59f23caa5d.jpg)
.jpg.1e96294c6301376c1665af7b50fb8e45.jpg)
.jpg.9aa1978c9397c3c5ac5e09f44f622eaf.jpg)
.jpg.06f3114f267b9fe7f33b6e38a08a160e.jpg)
.jpg.f7fb6bcd2f50281a56d25cb8fbbb7e5f.jpg)
.jpg.3c98e575f51edd99cd229b71132aa0ee.jpg)
.jpg.ae5d1dfee2ee3308e9f4143d8b611929.jpg)
.jpg.f451ec8576e130557d70676ec1714801.jpg)


.jpg.f6e3f72d4441dee01faeea5edb187fd8.jpg)

.jpg.23bf35ecd152416f30353c10f5b0e78c.jpg)
.jpg.b7d217237bb5f8f93e8e85afd748d152.jpg)
.jpg.04dcb7a63f97d3858574528d262e060a.jpg)
.jpg.1030682bf72aaa07e47e5dd968da046f.jpg)
.jpg.b0c0317a4c2c50457d03506e35bd39e5.jpg)
.jpg.5f2e8b2045a69ddcab9567ea632ad29d.jpg)
.jpg.b92831101475528f762d2d04a70544e1.jpg)
.jpg.f82e05ecb1af1430237487a36cd35271.jpg)
.jpg.444448c5577e02cb959f03f43b44dd5d.jpg)
.jpg.bd7a9cb2b1cef8d9c63ddcdf69e36dfe.jpg)
.jpg.92112d07a2daf26a0ace8bd662eb3b4e.jpg)

.jpg.c764d56a40eca9ea47c1ac849ce7c6dc.jpg)
.jpg.dd98683729db437aabfa389978180360.jpg)
.jpg.6a528c7ecf34ca281a5e1012a83ae12c.jpg)
.jpg.8a10d601fab62aefa76081e40296320d.jpg)
.jpg.79984aa4310a00d2ae8a9d970bbbb0e0.jpg)
.jpg.67db49df9430013394604173bc44c6be.jpg)
.jpg.00d750baed5bc8a0ef653c8c86c85750.jpg)
.jpg.80ea8a5990b411816f82ab6ed16390f1.jpg)
.jpg.3d1c5c354b7757a2dfa23c1062a926d7.jpg)
.jpg.09d7d4b5907b852a24dde3a888edf382.jpg)


.jpg.4d8cf3f7f25f465f7e7a60e9d2464f91.jpg)

.jpg.ff54c496e92103aa12d30ada13360dc8.jpg)
.jpg.589eca1f57b3d1867d00275511fe5552.jpg)
.jpg.1e7784f4977e041fb0e693e12b616c40.jpg)
.jpg.c245b80af83e8de9d14a6082cc56d016.jpg)
.jpg.eecc33e49b0023ad687703d9812e2e45.jpg)
.jpg.6ab48e771b36315fdba874348de978cf.jpg)
.jpg.9d21e262a00580330fdf879c8ade07c2.jpg)
.jpg.df7412816148d6093e188ea9bd0f470c.jpg)
.jpg.0d35fdb4b77b83cd3e4518d5fad871a3.jpg)
.jpg.9069ded425b611358b3cf2fc61ccd4b9.jpg)
.jpg.fdd4e30088a3a1ec82ab8933ddee859f.jpg)
USF Confederacy 1778 by wernerweiss - Model Shipways - 1:64
in - Kit build logs for subjects built from 1751 - 1800
Posted
Thank you very much!!