russ
-
Posts
3,086 -
Joined
-
Last visited
Content Type
Profiles
Forums
Gallery
Events
Everything posted by russ
-
I use a number 2 pencil rubbed along the edge of the planks before they are installed. I place a penciled edge against a plain edge and the result is a thin line to represent caulking. It is not overdone, and has a decent scale appearance. You can see it in my current project where I just recently completed the deck planking. Russ
-
The Fair American was a real ship. The Annapolis model upon which the Model Shipways kit is based may or may not be that ship. As for the companionway, if you want to make a new one it will need to be up against the cabin bulkhead just like the existing door. The difference might be that the new door could be taller than the cabin bulkhead. On the real ship, the cabin deck was probably a bit lower than the main deck, sort of a half deck aft of the main deck. Thus you open that short door and step down into the cabin. There is not an absolute need for a larger door. Russ
-
So far it looks very good. Nice work. Russ
-
Bob : On sewing sails, I have done most of mine hand sewing instead on the machine. Russ
-
Once you get the height of the bulwarks settled, your idea of planking both inside and outside will work. So long as the planking is not too thick, the width of the rail can cover it all and no one will be the wiser. Just remember that you still have the stanchions to deal with and their upper ends should come under the railing. Russ
-
Using a false deck
russ replied to Poppi's topic in Building, Framing, Planking and plating a ships hull and deck
I used a false deck on my current project and it made planking the deck much easier. Not strictly historically accurate, but easier. The two things you need to consider are 1. the thickness of the deck overall. If your deck is supposed to say 1/16" thick, then your false deck needs to be 1/32" thick and then the deck planking 1/32" thick. You do not want to raise the deck up too high. This will cause problems with the model's appearance. 2. the false deck material. You need something stable that will not crack or split on you. Plywood is a good choice. You can get plywood down to 1/64" thick, so there should not be a problem getting it. You can break the false deck into sections. It does not have to be laid as a single piece. Breaking it into sections will make it easier to fit. The seams do not have to be perfect either since you will plank over them. Hope this helps. Russ -
The sail templates look good. I sew my sails (when I have sails). It is time consuming and tedious, but with some practice, the results are worth the effort. Russ
-
Pat: The new bowsprit looks good to my eye. The rigging line looks good as well. I cannot see any fuzz on the lines in the photos. Nice work. Russ
-
Jay: Thanks. I am looking forward to some time in the shop. Got to grade exams first. Russ
-
Nice metal work. Russ
-
Elia: Thanks. I am not entirely happy with them, but I think they will work once the hull is painted and everything is in place. Russ
-
My plan is to build the large scale model fully framed. I have the drawings nearly completed, but I still need to add a lot of details. I also need to get more done in the shop before I can begin the larger model. Russ
-
Very well done. Congratulations on an excellent model. Russ
- 52 replies
-
- 1
-

-
- swift
- artesania latina
- (and 2 more)
-
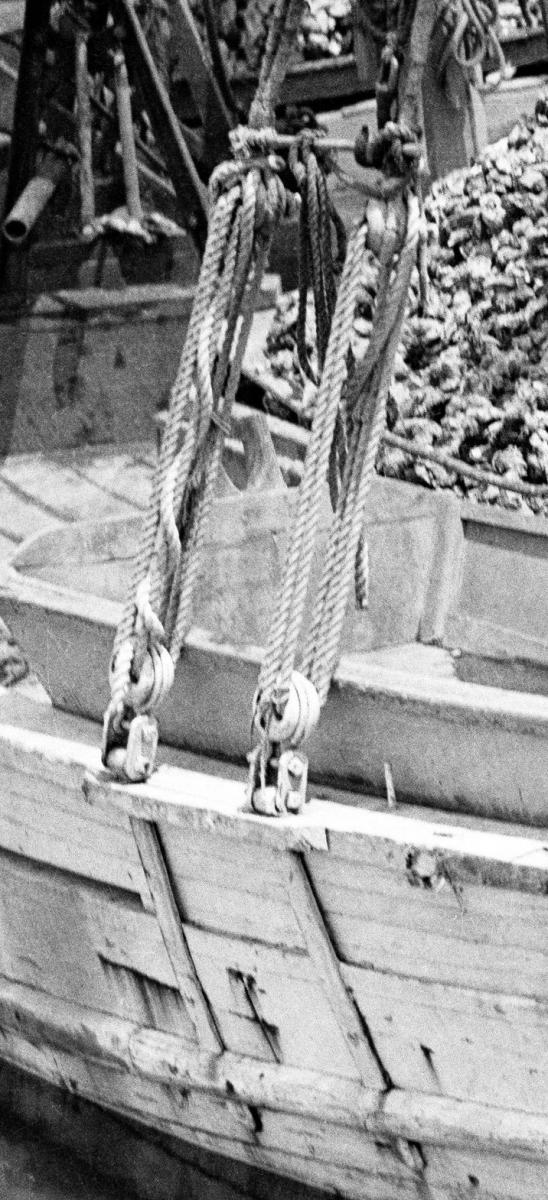
Here is a photograph from the 1920s showing one type of chainplate arrangement for a local schooner. Note the cap over the edge of the rail. My deadeye strap will be greatly simplified for the current model, but in the future I plan to build a plank on frame version at 1/24 scale which will incorporate this kind of deadeye strap. Russ

-
Dave: Thanks very much for the suggestion, but mine have to be cut in from outside of the railing and then have the cap placed over the edge of the railing. That is a well known local method that shows in many old photos. I just need to be more careful in my use of the file. Nice work on your model, by the by. Russ
-
Thanks for the kind words. I really enjoyed planking this hull. Once you plank a hull with properly spiled and tapered planks. it beats doing it any other way. Russ
-
Dave: Thanks. I enjoy making small details, but having said that, I think my next schooner model is going to be a larger scale. Thanks to everyone who clicked "like". Russ
-
James Lees' The Masting and Rigging of English Ships of War 1625-1860 is a good reference for both mast making and rigging diameters. I have used it and Steel's Elements of Mastmaking, Sailmaking and Rigging. Steel has tables for various size ships in the back. Lees has several pages of proportions, all based off of the ship's max breadth.
-
Your capstan assembly looks very good. Very nice work indeed. Russ
-
Pat and John: Thanks. I have since got the deadeye and strap on that chainplate and it does not look that bad. Russ
-
Alfons: Thanks. It is good to be able to get some time in the shop. I am sure you will get yours soon as well. Russ
-
Thanks. Hopefully it will look okay after it is under a coat of paint. Russ
-
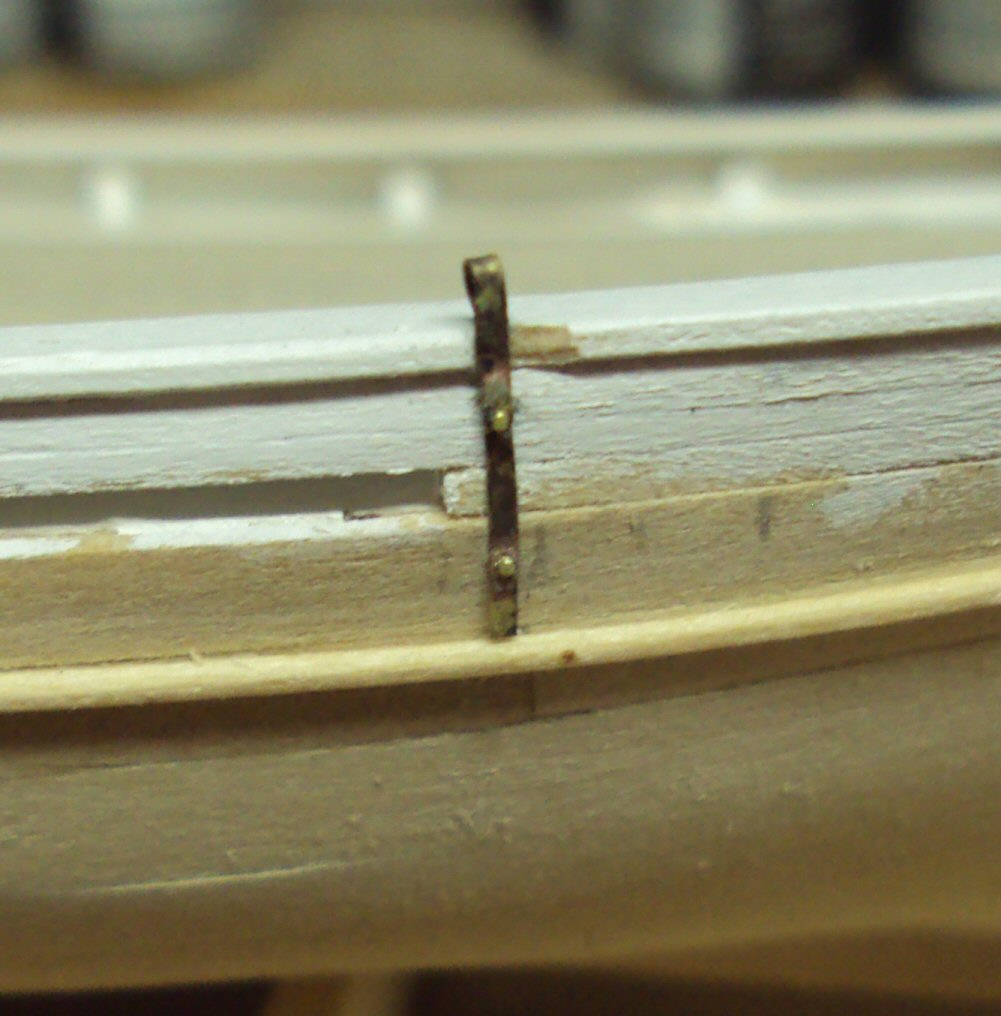
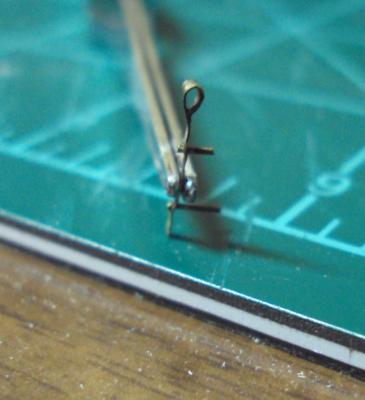
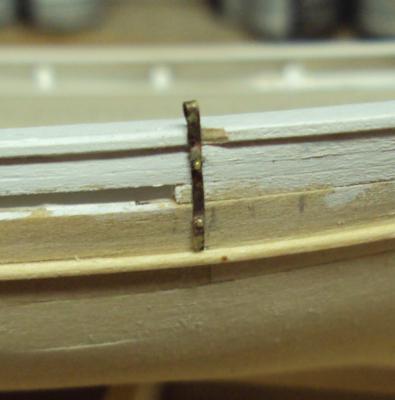
More progress tonight. Now that the deck is planked, the next thing will be the deadeyes and chainplates. My first pass at these was ... bad. Really bad. So, I decided to reengineer the chainplates a bit. Hopefully, this attempt will be better. The important issue is scale. The lower deadeyes and chainplates will all be painted white, but they need to appear in scale. That means everything has to be smaller than what I am used to working with. The chainplate is a simple strap with a loop soldered into its top end. However, there needs to be at least two fastenings for the strap into the hull. At this size and scale, that is a problem. The brass nails I have in stock are too large. So, I have made the strap with its loop and then drilled two holes in the strap into which two pieces of brass wire were soldered. The outer edges of each wire was trimmed and left just proud of the strap to appear like bolt heads. The wires go into the holes in the side of the hull. I will probably add a dab of CA to secure them. Even without glue, they are snug in their holes, but the CA should give some strength as well. Here are some pics. I still need to clean up the shape of the strap, but it should look okay once the hull is painted. There will be a wooden cap over the edge of the rail hiding that tear out along the edge of the rail. The strap is about 1/32" wide and the holes for the wires are .018" diameter. Questions and comments welcomed. Russ
-
That is an interesting way to handle the planking. I have worked that sort of veneer before and it is difficult. It looks like you did very well with it. Nice work. Russ
-
Augie: Thanks. I am glad the mistakes do not show up that much. Russ