russ
-
Posts
3,086 -
Joined
-
Last visited
Content Type
Profiles
Forums
Gallery
Events
Everything posted by russ
-
John: Your build looks good so far. The hard work here will pay off down the line. Russ
- 90 replies
-
- 1
-

-
- syren
- model shipways
- (and 1 more)
-
Bob: I always enjoy watching the careful, tedious work that will eventually make the rest of the model look so good. No one sees these steps in the finished model, but they are there and it is what makes the difference. Good work. Russ
- 359 replies
-
- 6
-
-
- prince de neufchatel
- model shipways
- (and 1 more)
-
Rob: Very nice work. I like the various hull forms, especially the bottom most one in the last photograph. What ship is that, if you do not mind? I have also built small half models and they can be a lot of fun to build. Russ
-
I am sure this has been done a number of different ways even down here and I am still learning about how everything works on these vessels. I am fortunate to have a few people who have been kind enough to talk about it. I am always learning something new on this project and that is never a bad thing. Russ
- 420 replies
-
- 5
-
-
- captain roy
- lugger
- (and 2 more)
-
John: Here they used the boards in the brackets to secure the tarps. It was usually a regular 2x4 board that fit into the brackets on each side of the hatch coaming. Russ
- 420 replies
-
- 3
-
-
- captain roy
- lugger
- (and 2 more)
-
Thanks. The tarp is pulled over the hatch and boards are placed over the tarps along the sides and into to the brackets for a snug fit. When the boards are in place over the tarps and into the brackets on all four sides, the tarp is secure. Russ
- 420 replies
-
- 3
-
-
- captain roy
- lugger
- (and 2 more)
-
Bob: They sell them in 1", 2", and 3". The price does seem dear, but they will always be correct and that is something to think about. It may be that they can gotten elsewhere for less though, so it pays to shop around. Russ
- 359 replies
-
- 7
-
-
- prince de neufchatel
- model shipways
- (and 1 more)
-
Often times, any level of gloss on a model does not look good. The real ship might have had some gloss in it, but gloss tends not to translate well through the smaller scale of the model. Russ
- 204 replies
-
- 3
-
-
- trajta
- marisstella
- (and 1 more)
-
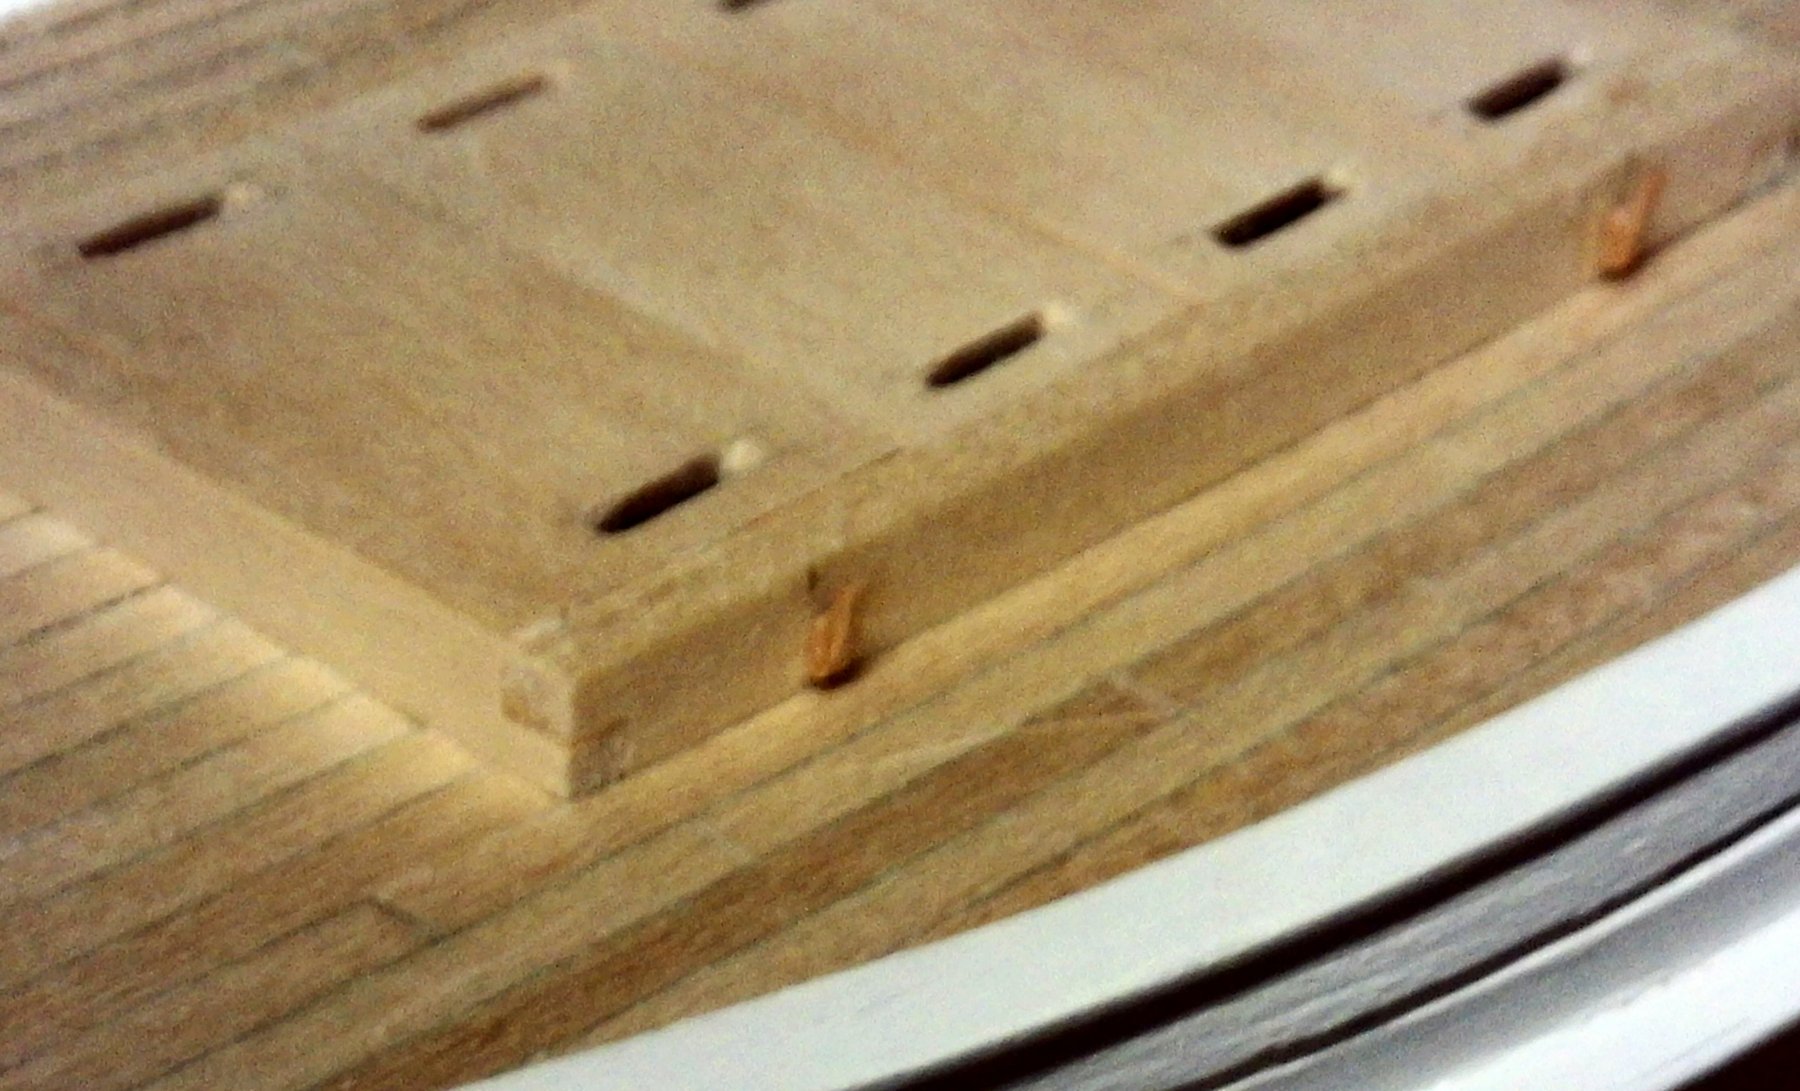
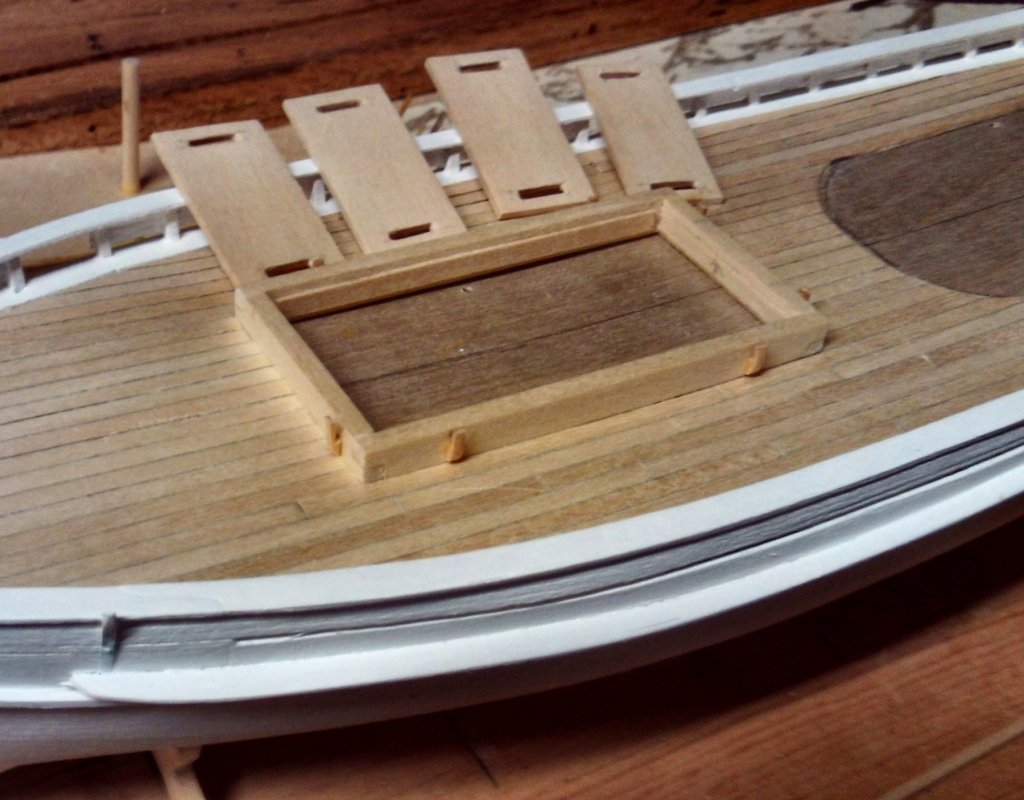
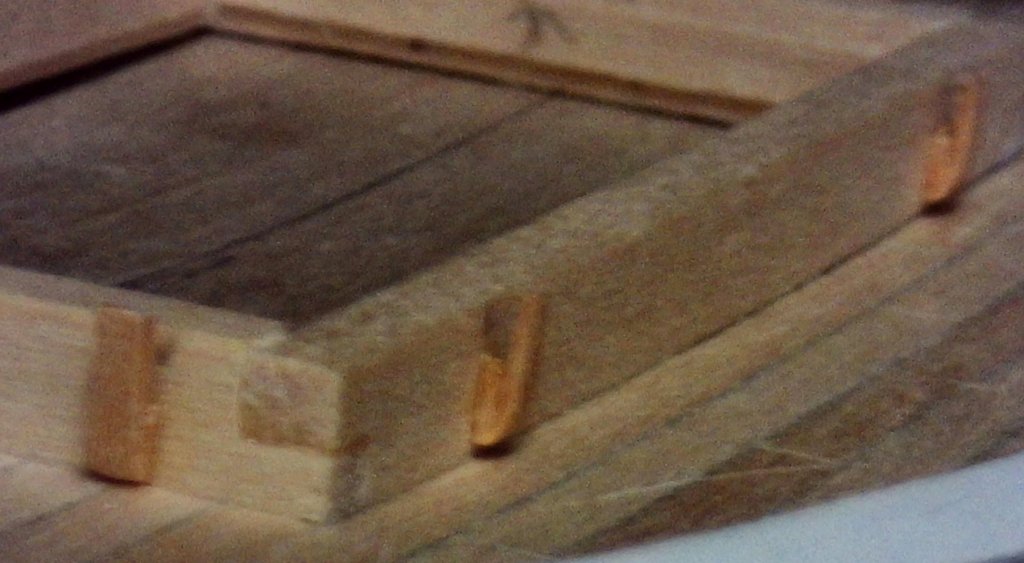
Here are the brackets on the side of the hatch coaming and how they were made. The actual brackets on these lugger hatches is made from two pieces and I have created my own two piece method to get these results. Once they are painted along with the rest of the coaming, it should look okay. I have one more bracket to fit on the forward side of the coaming. Russ
- 420 replies
-
- 9
-
-
- captain roy
- lugger
- (and 2 more)
-
You can get those from Micromark, but probably from a hardware store as well. https://www.micromark.com/2-x-2-x-2-Inch-Angle-Plate Russ
- 359 replies
-
- 8
-
-
- prince de neufchatel
- model shipways
- (and 1 more)
-
John: I see the progress quite clearly. The fairing is coming along. The inside fairing looks very good right now, but I have no doubt that you will work it a bit closer as well. I am looking forward to seeing this hull planked. So far the lines are shaping up nicely. Russ
-
Mark: You are doing very good work. I hope one day to approach this level of skill. Like the others, I have my scrap box, full of fond wishes that did not quite come true. It is indeed a special occasion when I get something right the first time. Most of my models are full of second, third, and fourth tries. Russ
-
This looks very good so far. You did nice job with the deck planking. This is a nice old kit. I had fun building it back in the day. Russ
- 89 replies
-
- 1
-
-
- constitution
- revell
- (and 1 more)
-
Mike: The blue is pleasing enough, but beyond that, I really cannot say anything useful. I am not that familiar with the period colors for that region, but if you are happy with it, then I say go for it. The pastel color is probably appropriate. I have a Hobby Lobby near me where I get my paints and in this case, I would buy a few different variations and then run some tests to see what looked best. Russ
- 204 replies
-
- 1
-
-
- trajta
- marisstella
- (and 1 more)
-
HMCSS Victoria 1855 by BANYAN - 1:72
russ replied to BANYAN's topic in - Build logs for subjects built 1851 - 1900
Pat: Very nice paint work and coppering. This is a beautiful hull form. Great work. Russ- 1,013 replies
-
- 3
-
-
- gun dispatch vessel
- victoria
- (and 2 more)
-
Mike: Your model is coming along wonderfully. Very nice details. You might consider doing a mock up of the side planking using both colors to get a better idea. Just glue up several pieces of scrap planking on a piece of scrap wood and then paint the two colors on to see what you think. Russ
- 204 replies
-
- 2
-
-
- trajta
- marisstella
- (and 1 more)
-
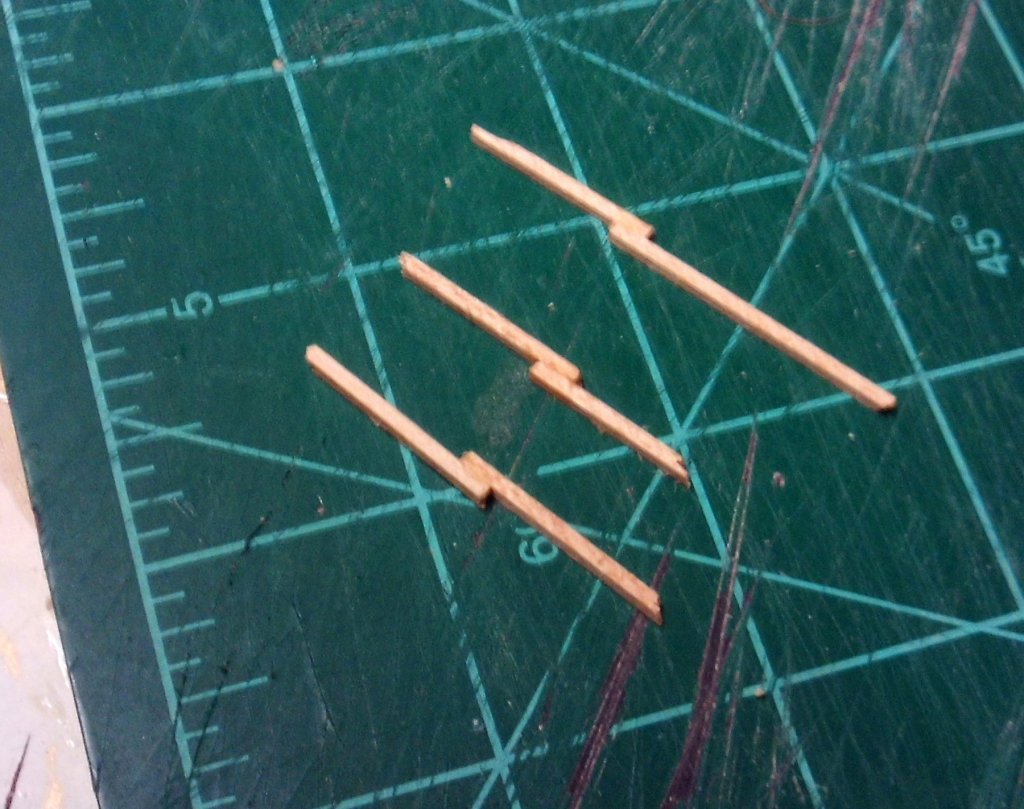
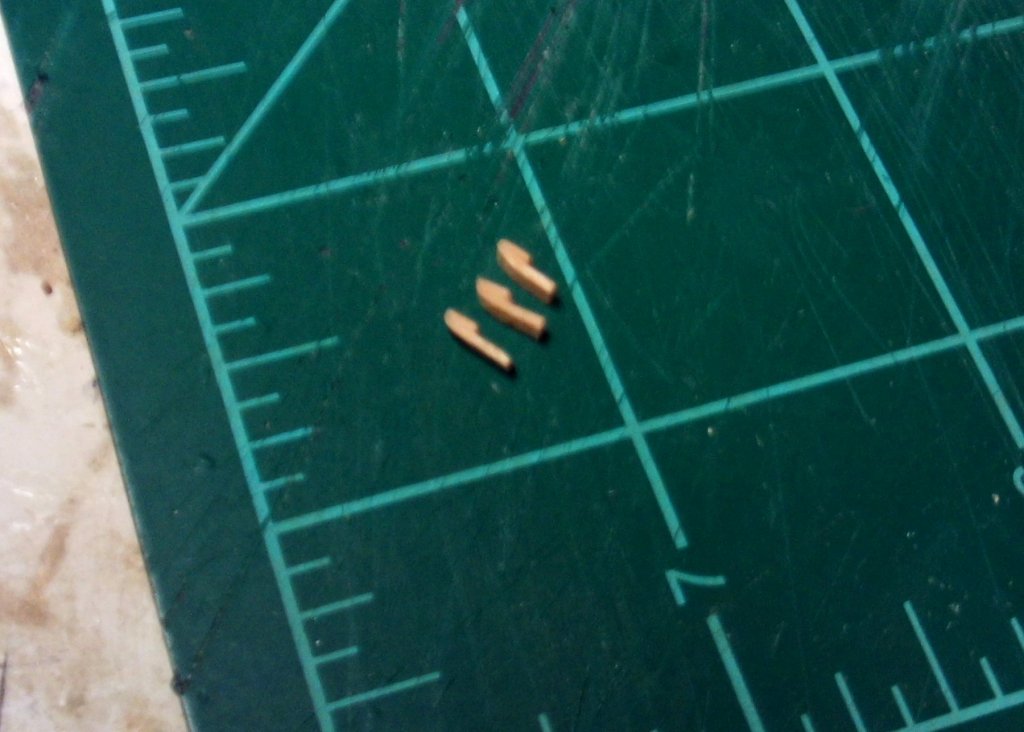
Pat: Thanks. I have actually found a better way to make those small brackets on the side of the coaming. Shockingly, it is better and easier to make them out of two pieces, the way they were actually made. Go figure. Russ
- 420 replies
-
- 4
-
-
- captain roy
- lugger
- (and 2 more)
-
John: Thanks. It is surprising how much research has to go into what seem the smallest details. Carl: Thanks. The width of the first three hatch covers are 33 inches wide and the last one is 30 inches wide. Russ
- 420 replies
-
- 3
-
-
- captain roy
- lugger
- (and 2 more)
-
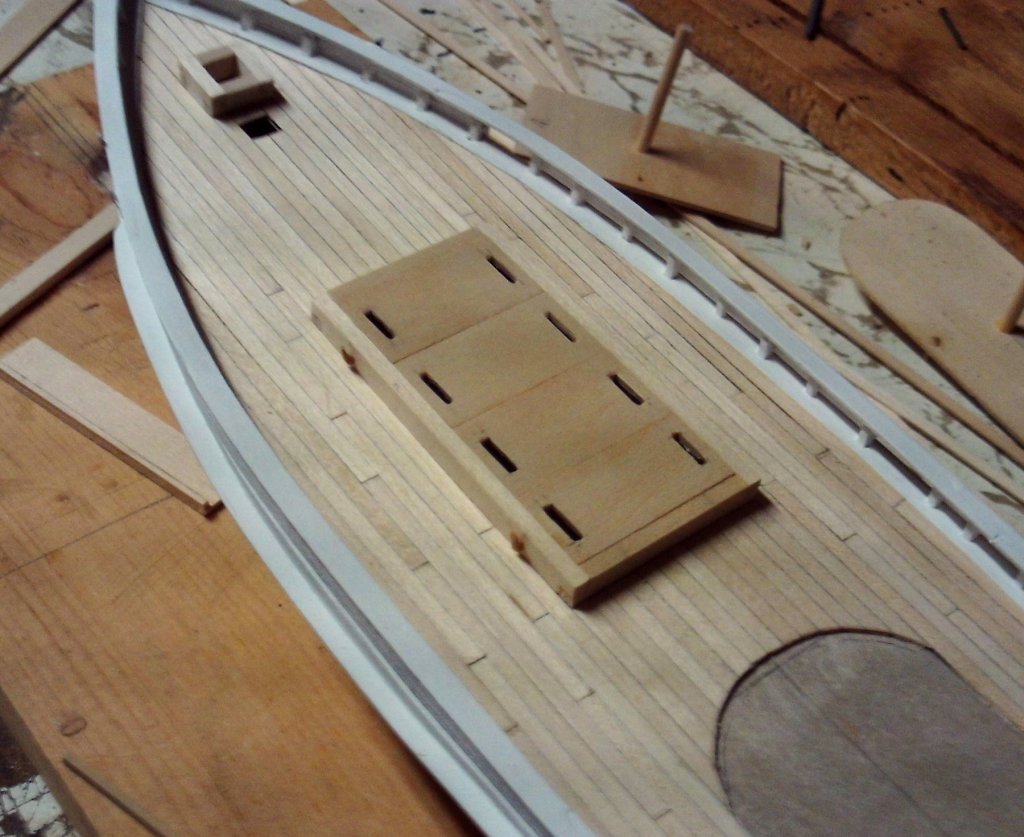
The hatch covers have been completed except for paint. I am also making the brackets for the planks that would hold the tarpaulin cover in place. There are two on each side of the hatch and the ends. I am going to live with these for a few days and see what I think of them. They may be replaced, but we will see. Russ

- 420 replies
-
- 8
-
-
- captain roy
- lugger
- (and 2 more)
-
Pavel: You should really fit the false deck and then plank it. It would be far more difficult to bend the planked deck in both directions if you plank the false deck before fitting it. Russ
-
Sam: The masts, shrouds, and ratlines all look really good. Very nice details on the futtock shrouds. Russ
-
Eric: You should consider bracing the bulkheads to keep them square while the glue sets. Maybe clamp a machinist's square to the former to hold the bulkhead square while the glue dries. You could use a scrap wood block as well. Just something that square that you can clamp to both the bulkhead and the former to keep them square while the glue dries. After the bulkheads are glued in and the glue has dried hard, definitely glue filler blocks in between the bulkheads to help stiffen the hull. I would glue them in closer to the outside of the hull because that is where the most stress will be as you work on the hull. However, you could use blocks that are glued to the former and the bulkheads. The main thing is stiffen the bulkheads. As for beveling the bulkheads, if you can lay out the bevels on the bulkheads accurately then you can do some beveling before gluing them in, but I would not try to do it all. Always take off less than you think you should. It is easier to remove a little more but it is difficult to put it back on. Once the bulkheads are glued in and everything is nice and stiff, then you can do the final beveling. That is why those stiffeners between the bulkheads will come in so handy. Hope this helps. Russ
-
Ken: 1/32 scale actually comes out to 3/8" = 1'. Good luck with the build. THis sounds like a scratch build rather than a kit build. Russ
- 122 replies
-
- 2
-
-
- independence
- privateer
- (and 1 more)