DONATION DRIVE - SUPPORT MSW - DO YOUR PART TO KEEP THIS GREAT FORUM GOING!
×


russ
-
Posts
3,086 -
Joined
-
Last visited
Content Type
Profiles
Forums
Gallery
Events
Everything posted by russ
-
Thanks. Yes, sill, cleat, call it what you will. I actually relieved the underside of the hatch coaming on each end to account for the camber a bit; just enough to get a good fit with no movement. Russ
- 420 replies
-
- 3
-

-
- captain roy
- lugger
- (and 2 more)
-
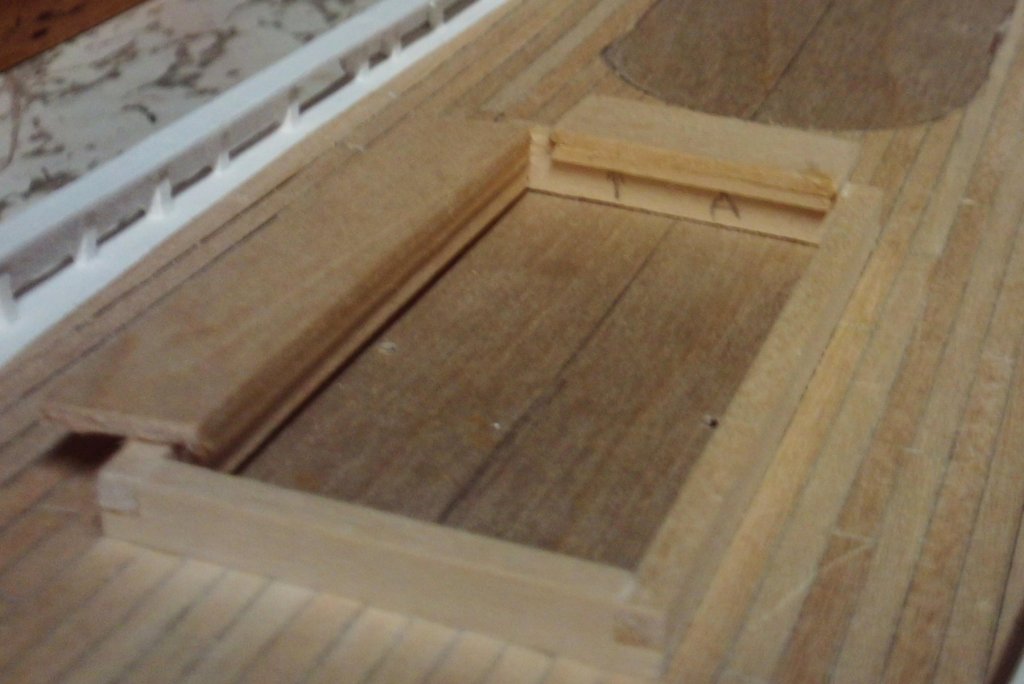
Here is another photograph with the first hatch cover made. Russ
- 420 replies
-
- 7
-
-
- captain roy
- lugger
- (and 2 more)
-
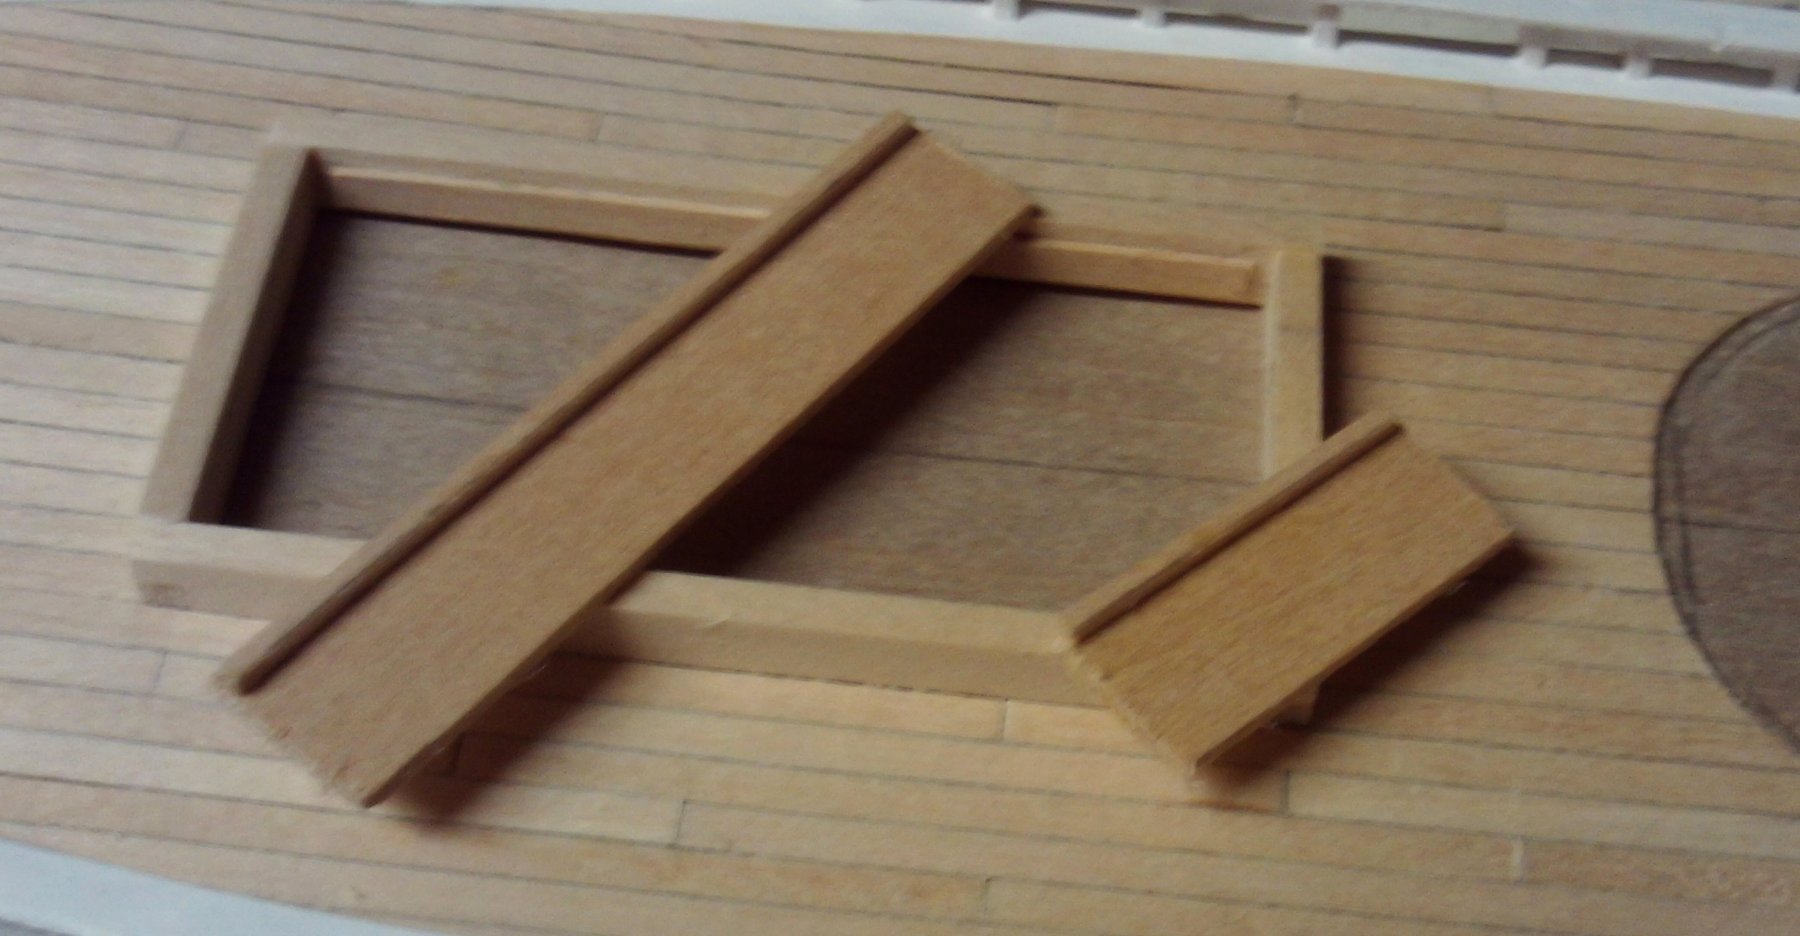
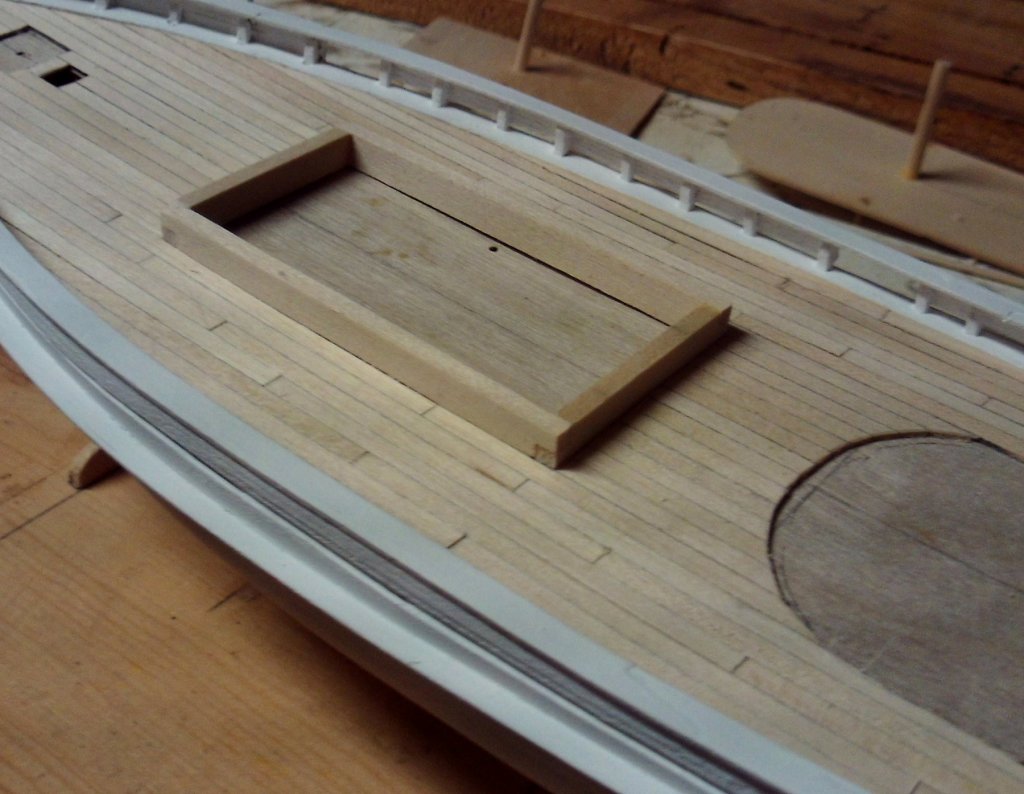
Carl: See that long wooden strip along the inside edge of the coaming in the first photograph? That is what I am talking about. Russ
- 420 replies
-
- 2
-
-
- captain roy
- lugger
- (and 2 more)
-
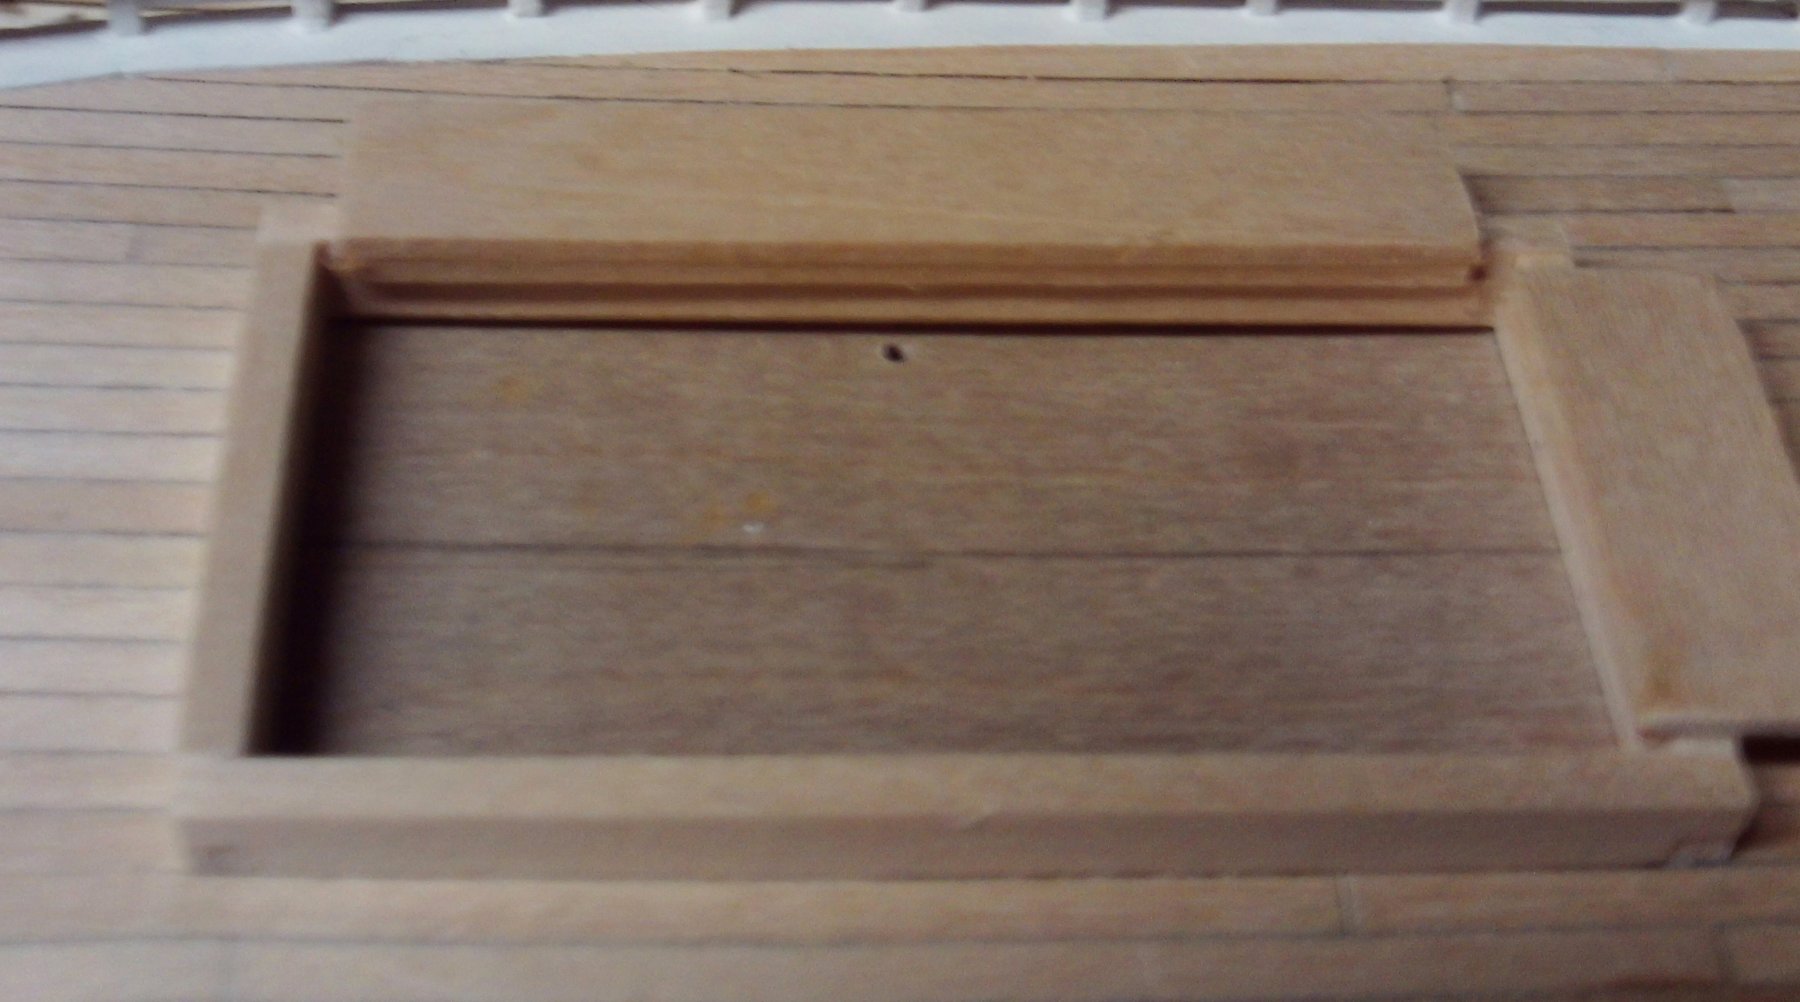
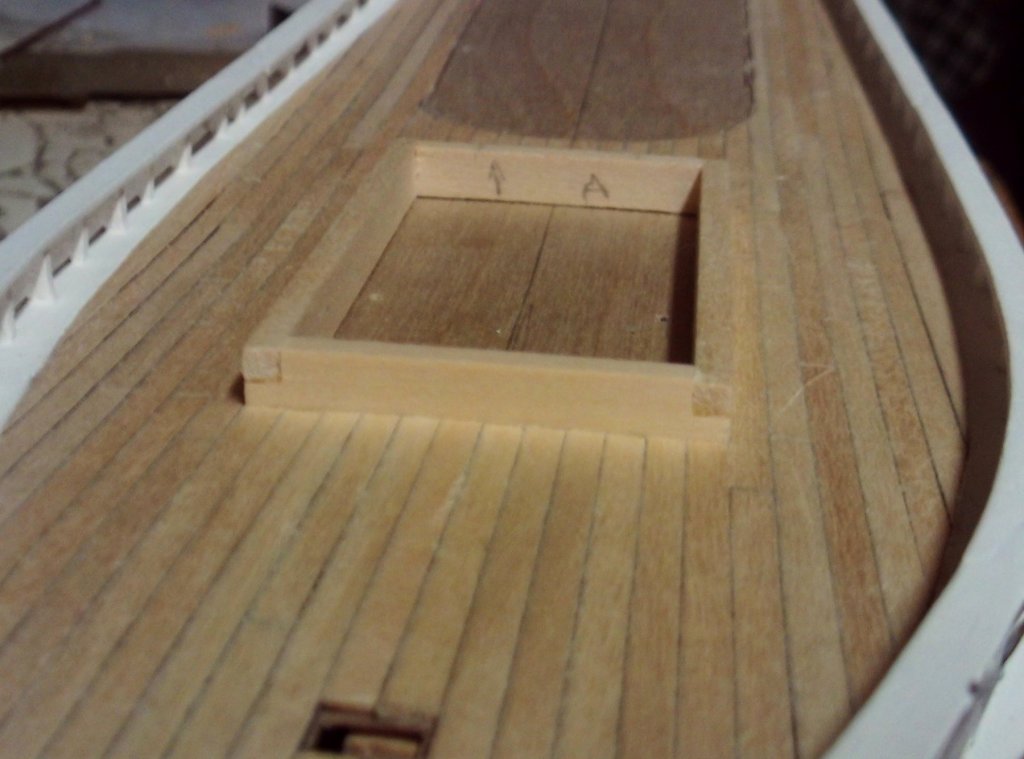
Carl: In the first photograph, look at the inside edge of the hatch coaming and you will see one of the support cleats already installed. On that support cleat will sit the end of the hatch covers. There will be identical support cleats along the entire inside face of the coaming. In the next two photographs, you can see how that jig sits on top of the hatch coaming and establishes the upper edge of that support cleat. Russ
- 420 replies
-
- 1
-
-
- captain roy
- lugger
- (and 2 more)
-
I hope this will be of use to someone. Here is a little jig to help locate support cleats on the inside of the hatchway so that you will know that your hatch covers will sit level with the top of the hatch coaming. The jig is made of two strips of wood, one of which is the thickness of the hatch covers. Glue that strip to the edge of another wider strip and then sit that wider strip on top of the hatch coaming so that the first strip lips over the edge of the coaming. You can strike a pencil line along the bottom edge of the strip to mark the top edge of the cleat on the inside faces of the hatch coaming. Glue the support cleat right on that pencil line and your hatch covers will sit level and flush with the top edge of the coaming. In the photos you can see the jigs and one of the cleats on the side already installed and then the jigs in use. I made one for the side of the hatch coaming and one for the end of the coaming. These are easy to make from scrap material and yield good results. Russ


- 420 replies
-
- 9
-
-
- captain roy
- lugger
- (and 2 more)
-
OC: Your build is coming along really well. I especially like your deck work. The caulking lines look very good. Well done. Russ
- 455 replies
-
- 3
-
-
- slightly modified
- greyhound
- (and 1 more)
-
Pavel: I have never had much luck with mahogany. It tends to be brittle and open grained; not a good choice for scale modeling, generally speaking. I would think a lighter colored wood for the deck would be more appropriate. I have planked decks both ways; using full length planks and leaving open spaces into which hatches and deck structures would fit. Leaving the open spaces is more tedious in laying the plank but it makes it easier to get a nice fit around the bottom edges of deck structures. When laying the full length planked deck, the reverse is true. It is easier laying the planks, but more difficult getting the good fit around the bottom edges of the deck structure. Which you use is based on what you think will work best for you. Russ
-
Pavel: I do not know much about these kits, but I would definitely strip plank the deck and add the grating. The deck planking can be premilled strips. I use basswood regularly and, while it is relatively soft, it can be made to look very good. I shade one edge of the plank with a typical number 2 pencil and get a nice caulking line. You can also shade one end of each plank for a caulking line there as well. Make sure you get an accurate centerline marked on the deck before you begin planking. Once that first plank is laid along the centerline, the rest should line up well. You can also buy premade grating strips that can be put together to form the grating. You may find that you need a light framework around the grating, but you can use some planking material for that. You can get the strips and grating from an online supplier if you do not have a hobby shop nearby. Russ
-
Doug: Your planking looks good so far. The run of the planking appears very nice. The ends of the planking under the stern look very neat. Nice work. Russ
- 79 replies
-
- 1
-
-
- marisstella
- barque
- (and 1 more)
-
Pat: Thanks. It has either been very cold or rainy just about every day lately, so that leaves me with some free time. It looks like there will be some much needed yard work later this week though. Russ
- 420 replies
-
- 3
-
-
- captain roy
- lugger
- (and 2 more)
-
Maury: Great looking model. I have been lurking here and there. Love the subject choice. We do not see this every day. Thanks for sharing. Russ
- 525 replies
-
- 2
-
-
- anchor hoy
- hoy
- (and 1 more)
-
Carl: Thanks. There is work either way. Either you will have to carefully sand the entire underside of the coaming to fit onto the planking, fitting to both the sheer and the camber of the deck, or carefully fit the planking to allow the coaming to sit into the recess. I have tried it both ways, and fitting the planking is easier, especially if you take some time to make carefully cut jigs to layout where the planking ends. It is really just a matter of which option you prefer. Russ
- 420 replies
-
- 5
-
-
- captain roy
- lugger
- (and 2 more)
-
Joe: This is a really nice build. The details are very crisp and well executed. Great coppering and paint work. Russ
- 136 replies
-
- 1
-
-
- caldercraft
- Cruiser
- (and 2 more)
-
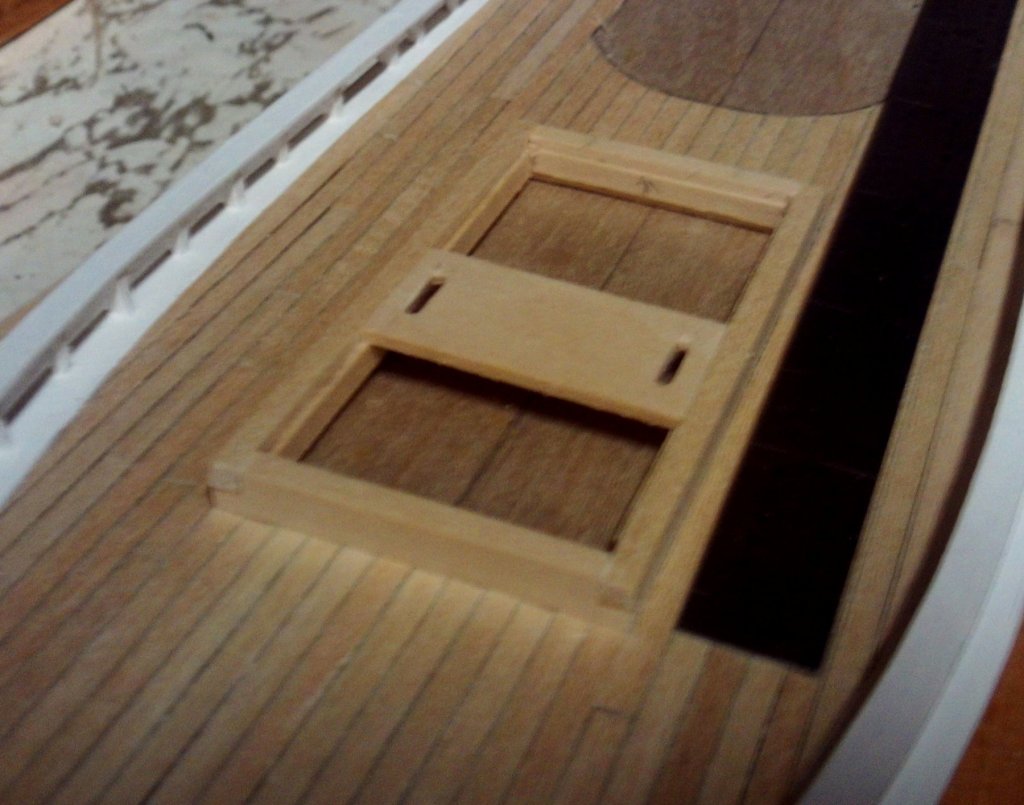
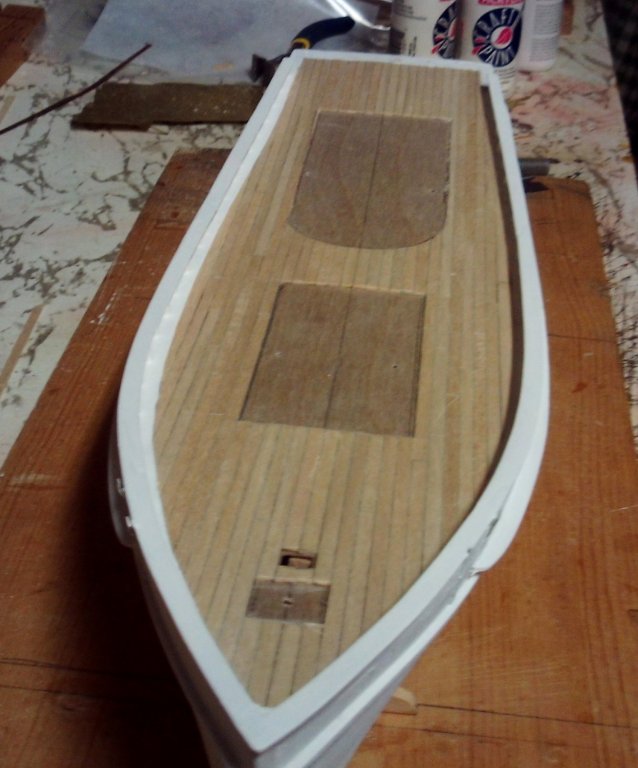
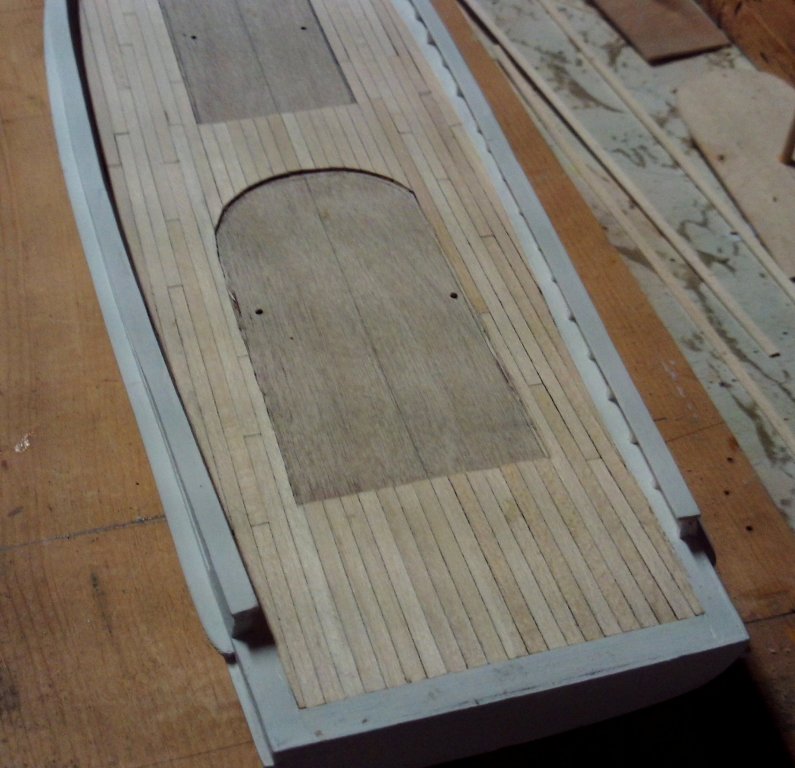
Here is the main hatch coaming. My Model Machines 4 inch table saw was handy in making the half lapped joints at the corners. The coaming sits down into the deck planking so the fit will work out well. This is much better than sitting it on top of the planking. Russ
- 420 replies
-
- 14
-
-
- captain roy
- lugger
- (and 2 more)
-
Per: You are making good progress. Nice work on the railing and the hawse holes. Your deck is looking good. Russ
-
David: Nice work. This is a very attractive vessel and your rigging job looks great. Well done. Russ
-
John: Thanks. I am tolerably pleased with the result. Russ
- 420 replies
-
- 2
-
-
- captain roy
- lugger
- (and 2 more)
-
Deck planking is complete and the deck has been scraped fairly well. I will, look again over the weekend to see if it needs any more scraping. The last deck plank, outboard and aft on the starboard side, has no glue on it. It went in nicely on the last fitting and I could not raise it again to apply glue to the bottom. Oh well, it is in there to stay regardless. Russ
- 420 replies
-
- 15
-
-
- captain roy
- lugger
- (and 2 more)
-
Bob: Just fantastic work. Congratulations on yet another wonderful model. Russ
- 682 replies
-
- 3
-
-
- halifax
- lumberyard
- (and 1 more)
-
Aldo: Glad to hear from you. Thanks for the kind words. I will have the deck finished in the next few days I think. So far so good. Russ
- 420 replies
-
- 3
-
-
- captain roy
- lugger
- (and 2 more)
-
Very nice work on the paint job. Well done. Russ
-
Very nice work so far. This is a good looking schooner and the kit is a bit advanced for a first kit, but you are doing well with it. Look forward to more progress. Russ
-
John: Great work. The frames are looking wonderful. She is beginning to look like a real ship. Russ