HOLIDAY DONATION DRIVE - SUPPORT MSW - DO YOUR PART TO KEEP THIS GREAT FORUM GOING! (Only 69 donations so far out of 49,000 members - Can we at least get 100? C'mon guys!)
×


ca.shipwright
-
Posts
483 -
Joined
-
Last visited
Content Type
Profiles
Forums
Gallery
Events
Everything posted by ca.shipwright
-

Thickness sander
ca.shipwright replied to Kurt Johnson's topic in Modeling tools and Workshop Equipment
Moxis, Both machine will "thickness" a billet of wood. As the photo shows, the Proxxon, as are all thickness planers, are used for pieces that are thicker. As stated, it goes down to 1mm on a sled. The Byrnes' thickness sander has a adjustment increment of .002 inch. Since most of the final thicknessing is going to be of wood strips which are both thin and narrow, the thickness sander will do a much better job. Also there is no danger of snipe of the ends of the pieces due to the out-feed roller of the planer. (Snipe is a concave depression on the top surface of the end of the work piece. It is very difficult to eliminate.) In summary, you can thickness both large and small billets with both machines. The sander will do a much better job on strip wood. -
Thickness sander
ca.shipwright replied to Kurt Johnson's topic in Modeling tools and Workshop Equipment
By flipping, I mean the surfaces that are being sanded. Also, try to identify the grain direction and always sand with the grain. This will help to prevent gouging or catching the sanding paper in the wood and tearing the paper on the drum. -
Thickness sander
ca.shipwright replied to Kurt Johnson's topic in Modeling tools and Workshop Equipment
I have been using Jim's sander for about 12 years or so. Here are some observations: - Each mark on the adjustment wheel is .002 in. Use a micrometer and measure more than one place on the strip. - I use one course and one fine grit on the sanding drum. Sand close to finished thickness with the course paper and sneak up on finished thickness with the fine paper. (I just got the 6 inch hold down bar from Jim and use that with 6 inch paper to mill billets wider than 3 inches.) - +/- .005 in is good enough for almost all applications. You won't see the difference and you will save a lot of wood. - Turn the strip over with each pass. This will help to relieve internal stresses and prevent bowing. - Be careful with boxwood. It's edge will cut you like a razor blade if it slides through your fingers. Don't ask. - Save all your errors. You will always need a thinner piece somewhere down the line. This goes for the saw as well. You will always need a narrower piece somewhere down the line. - Try and estimate how much of each size you will need and mill it all (+ 10%) in one set-up. Makes for good consistency. - USE A DUST COLLECTION SYSTEM OR WEAR A RESPIRATOR. Wood dust can be very toxic. - Mill ebony outside. You will never get ebony dust out of you shop or off the machine and ebony is toxic. Hope this helps -
Literally; "out of the mouth of babes." Beautiful work all the way through. Your deck planking is one of the neatest and crispest I have seen. Regards
- 449 replies
-
- 3
-

-
- sultana
- model shipways
- (and 2 more)
-
Zarkon, I see you are located in Virginia. Apple wood or, for that matter, any orchard wood is good to use for ship modeling. With all the apple orchards in Virginia, you should be able to score some free wood and mill it yourself if you have the proper tools. Cherry is another good wood for modeling.
-
E J I ran up on this while I was perusing the net and thought you might be interested. I was particularly struck by the vibrancy of the French Blue as well as the rest of the ship. http://www.stephensandkenau.com/ship/le-soleil-royal/ Regards
-
R F, There are many ways to do this. But the key is to have a reference point. 1. If there is a base line that is horizontal below the keel and parallel to the water line, all you need to do is measure the distance between them at several stations. Transfer these measurements from the base line to the water line on the hull and connect the dots to give you the water line. 2. If there is no base line, it gets a little more complicated. Place the aft end of the keel on the building board. Raise and block the fore end of the keel until the distance from the waterline to the keel is equal to the distance shown on the plans at any particular station towards the bow. This will give you the forward reference point for the horizontal waterline and the proper amount of drag on the hull. 3. In either 1 or 2, it is imperative that you make sure that the hull is centered, not tilted port or starboard. Laying a level across the bulkworks and keeping the bubble centered should get this done. This will give you the same waterline port and starboard. It all sounds more complicated than it is. Hope this helps
-
E J The drawing on the right is the correct representation. Using this, you will not have to veneer the keel. Remember the garboard strake lies flat on the center keel over the dead wood in front of the rudder post. As you go forward this plank twists to lie flat against the hull and runs flat all the way to the bow. Since you have not cut the rabbet, you can bevel the lower edge of the garboard strake so that it will "tuck" into the keel. Like so end view k | | e | | e | / Outside of hull l | / __ l / | |
-
With regards to sanding. I have found that using the Black and Decker Mouse with very fine sand paper does a very good job with low risk of over-sanding. Gentle pressure is the key. It has a pointed nose for tight spaces. For wider mostly flat or gently curved areas. I use a 1/4 sheet sander, again with very fine grit paper. I find the Dremel way too aggressive for this type of sanding. Hope this helps
-
J P Nicely done. And, you will finish before you know it. A single mast ship model does have it benefits.
- 194 replies
-
- 1
-
-
- armed virginia sloop
- model shipways
- (and 1 more)
-
E J Great job on the planking. I know from experience on my Vicki that scale length planking adds several months to this tedious task. You have extraordinary patience. Drive on! Regards IMO - the French Blue looks much more "royal" than the Ultramarine Blue. A little dulling with a day of gray or black should take the glare off.
-
Beautifully done.
-
Darrell, Your Niagara's deck and rigging is as busy as it can get. Your work is superb. You have raised the bar very high. I only hope that my eyes and fingers will be up to the task of rigging my Endeavour and Victory when the time comes. Regards
- 648 replies
-
- 1
-
-
- niagara
- model shipways
- (and 1 more)
-
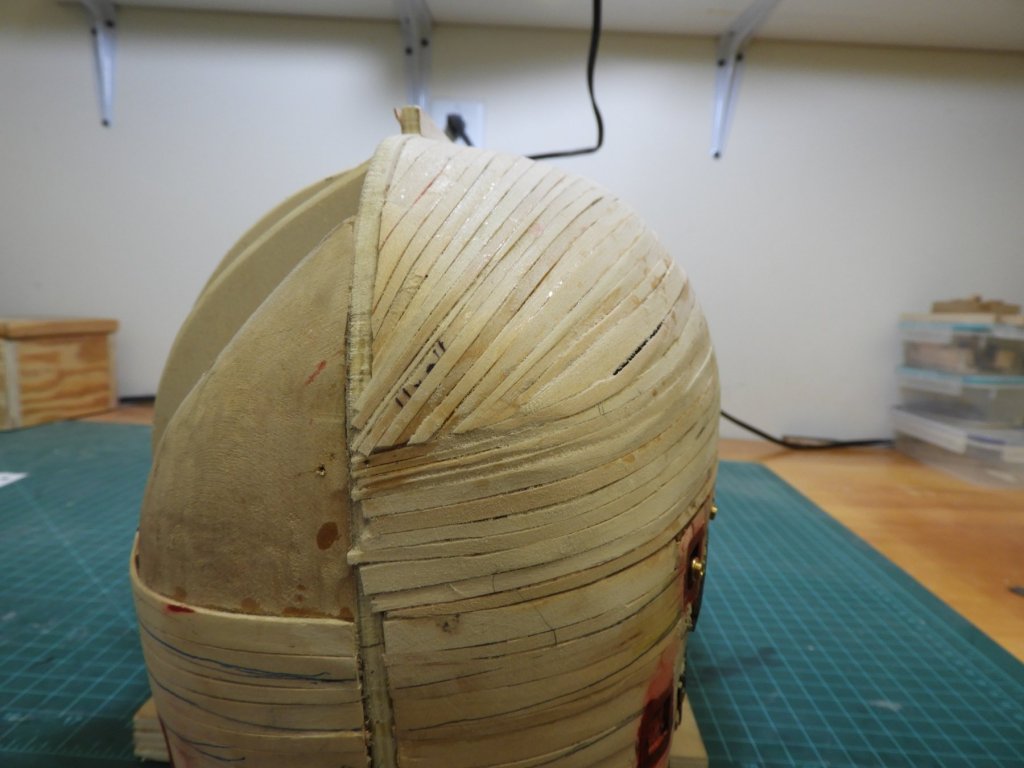
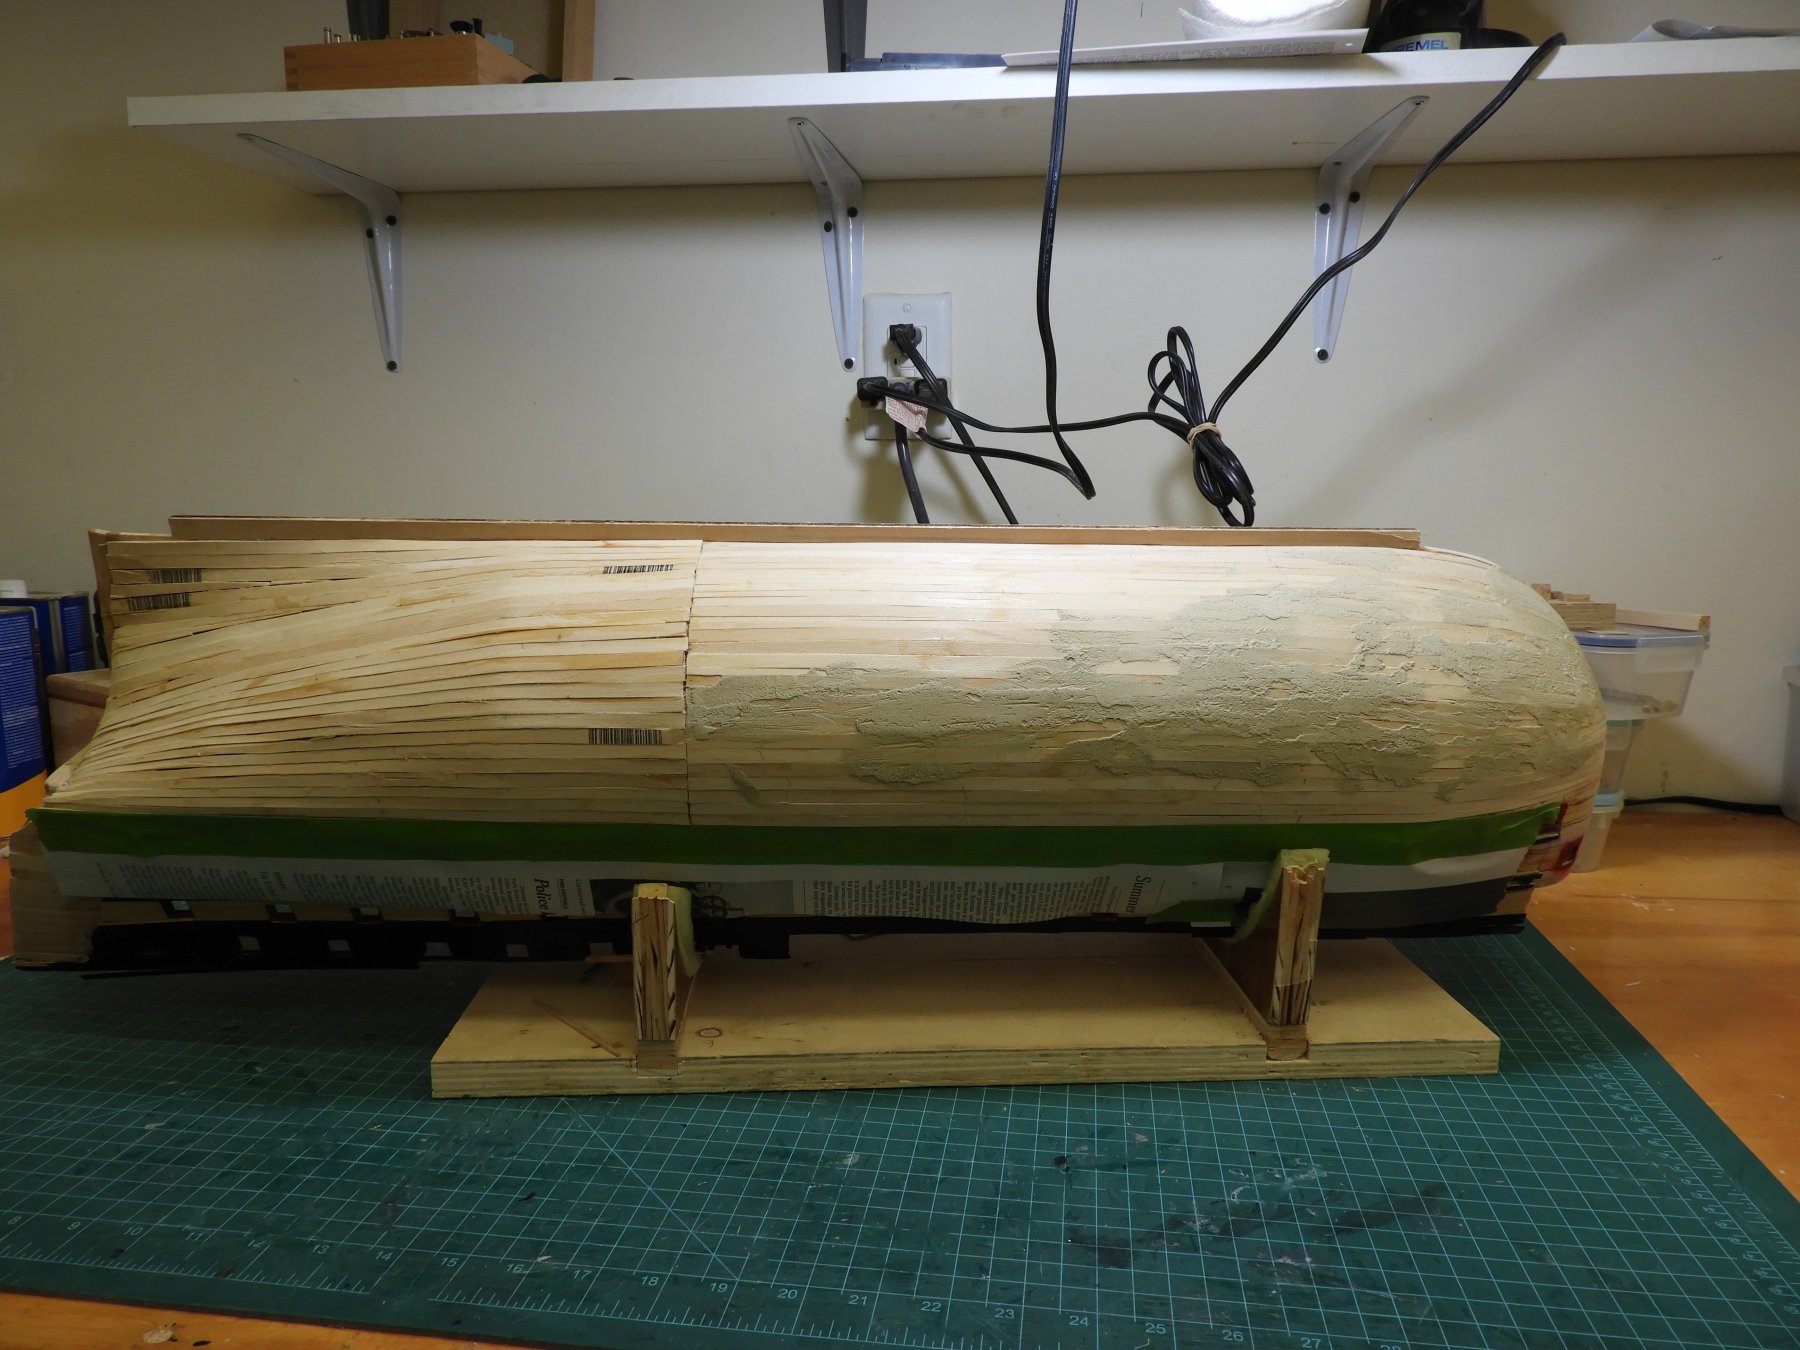
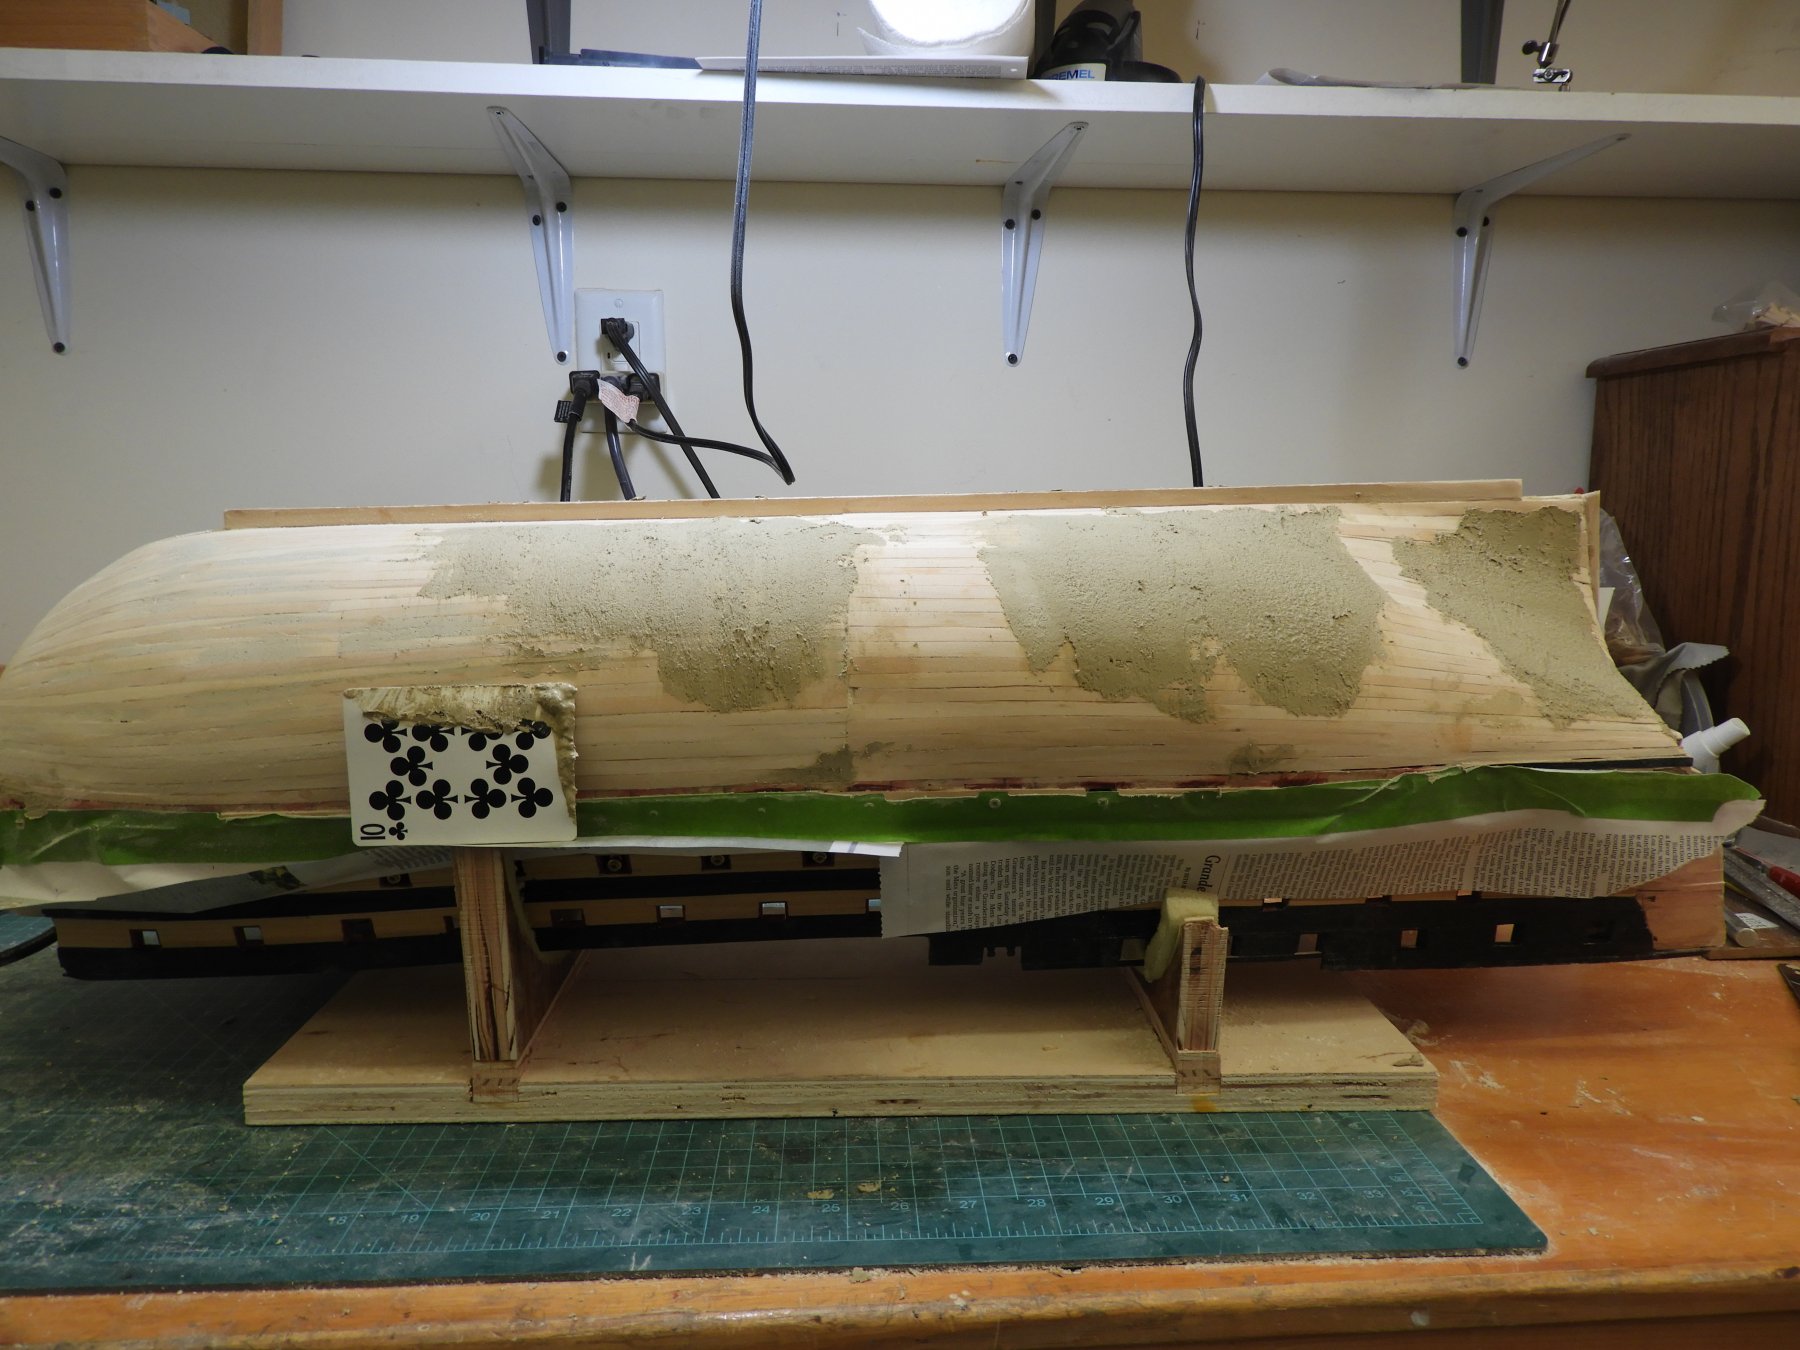
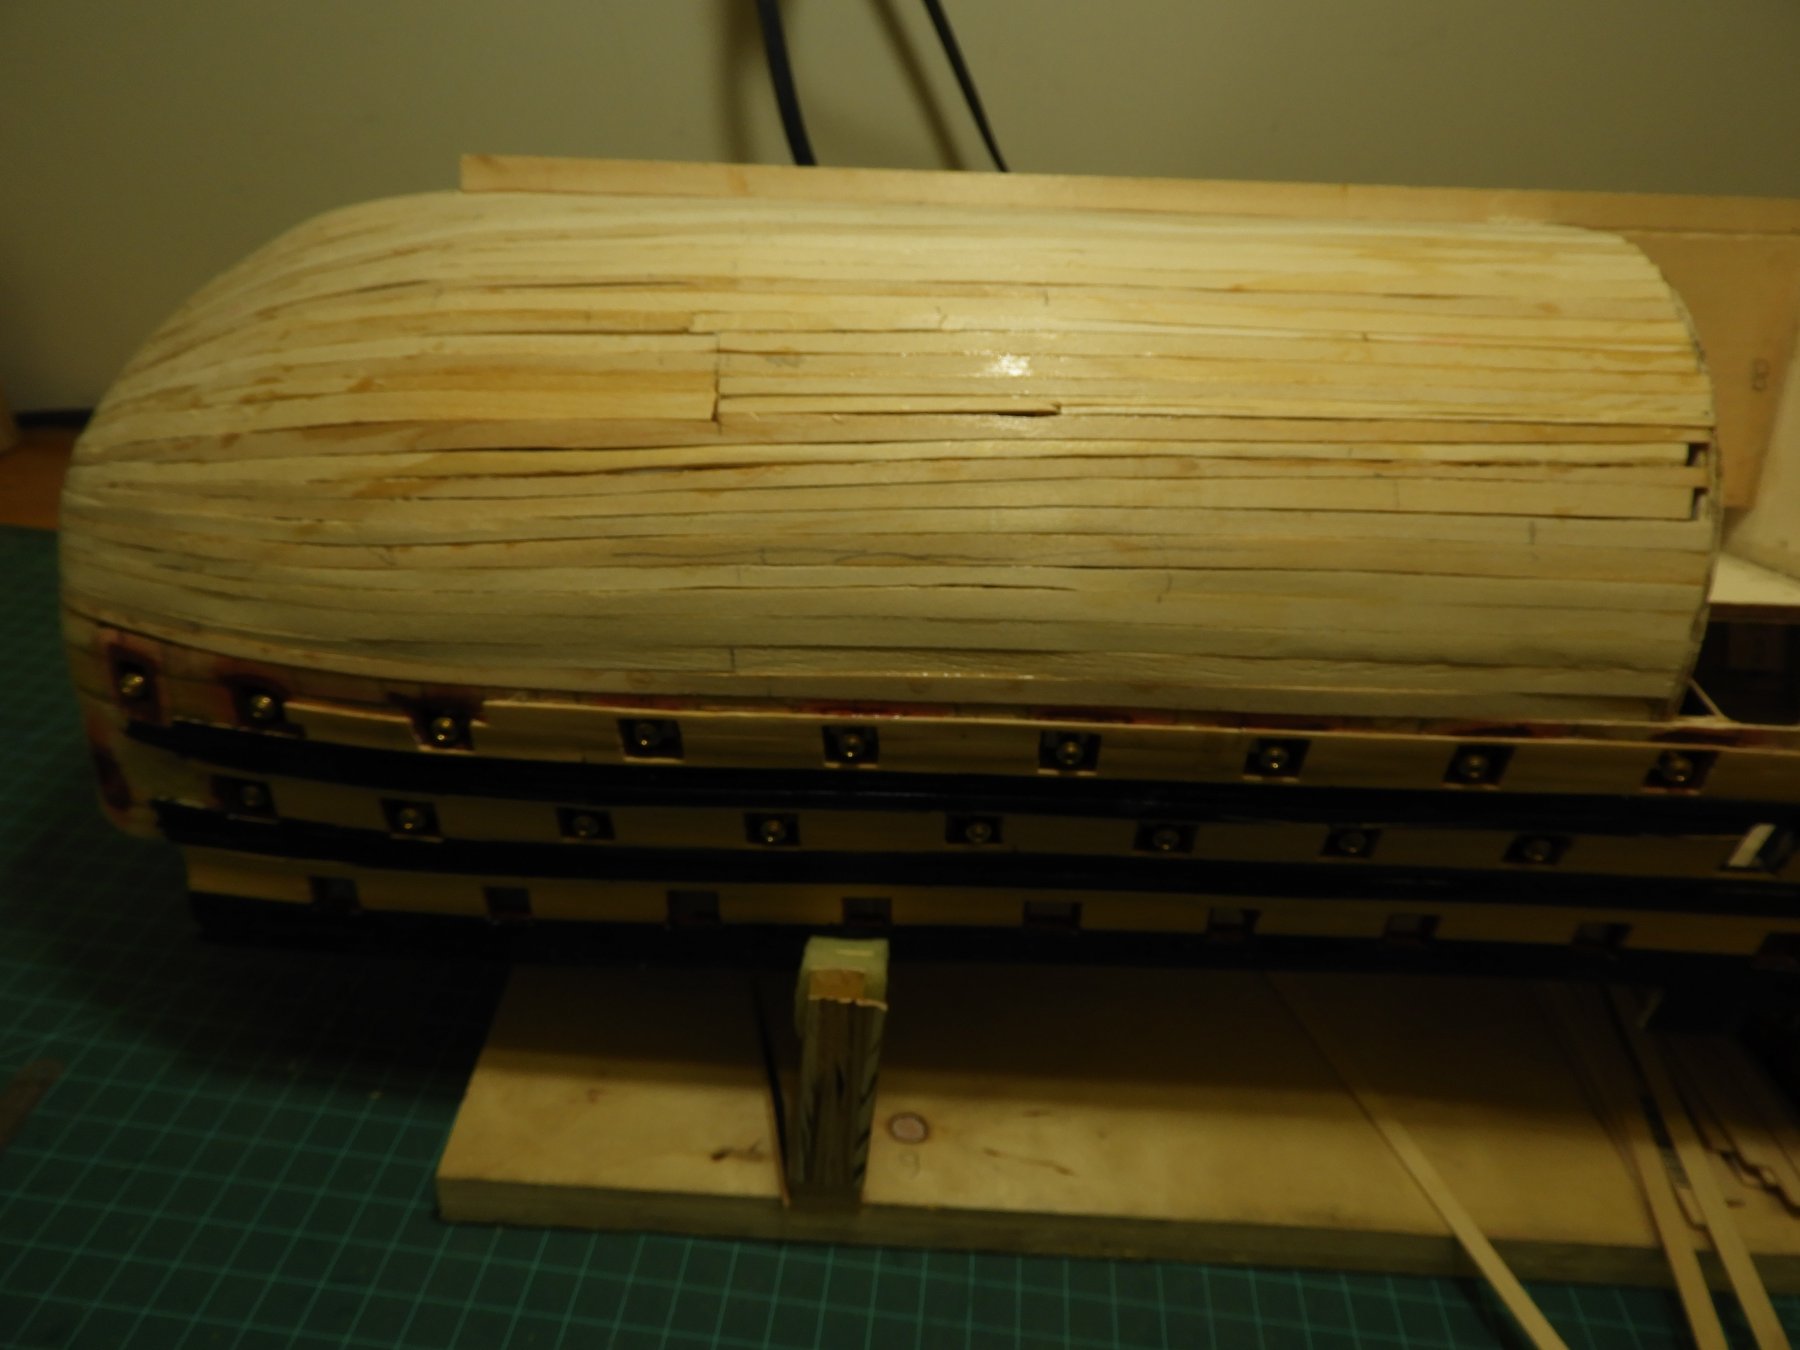
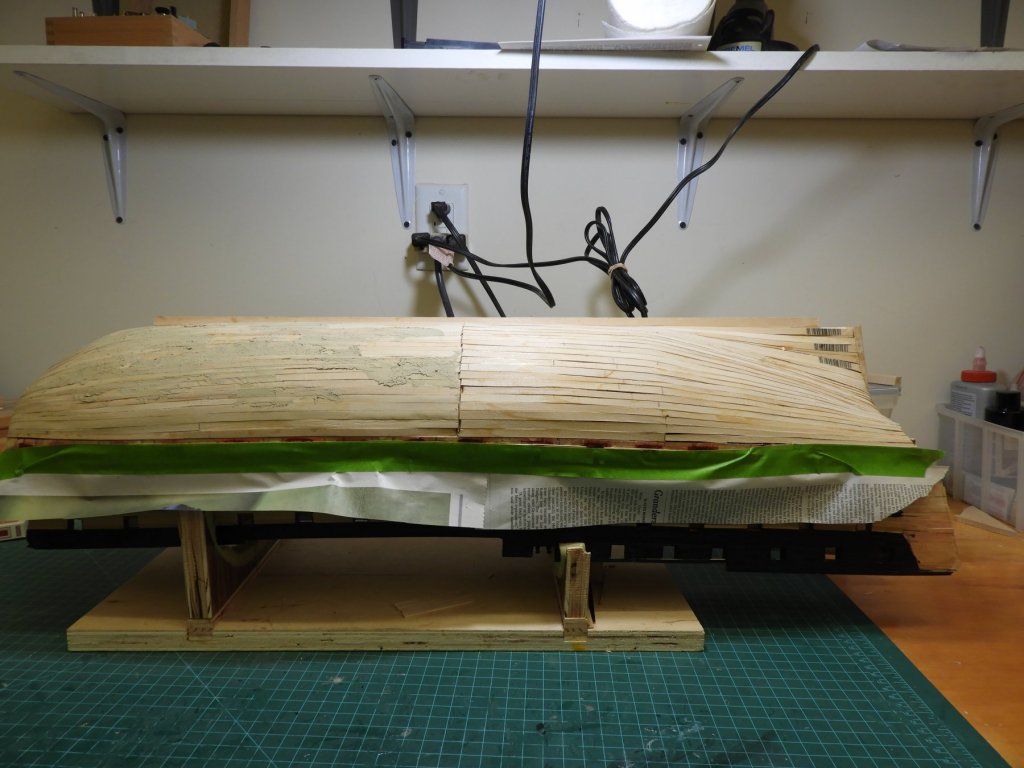
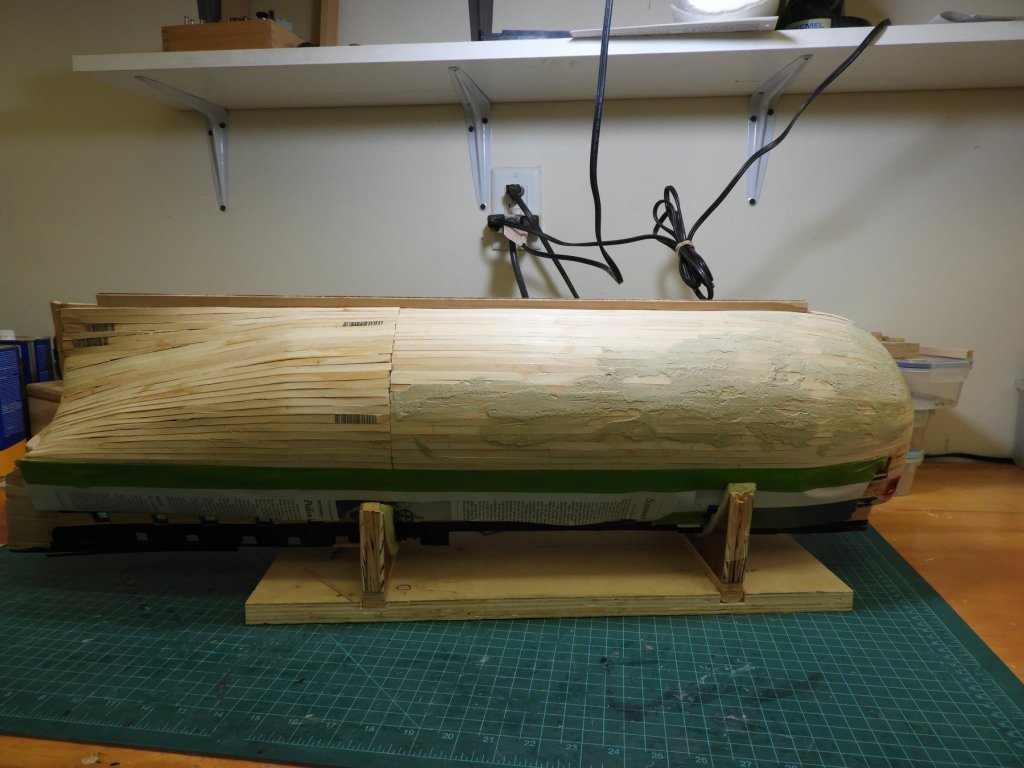
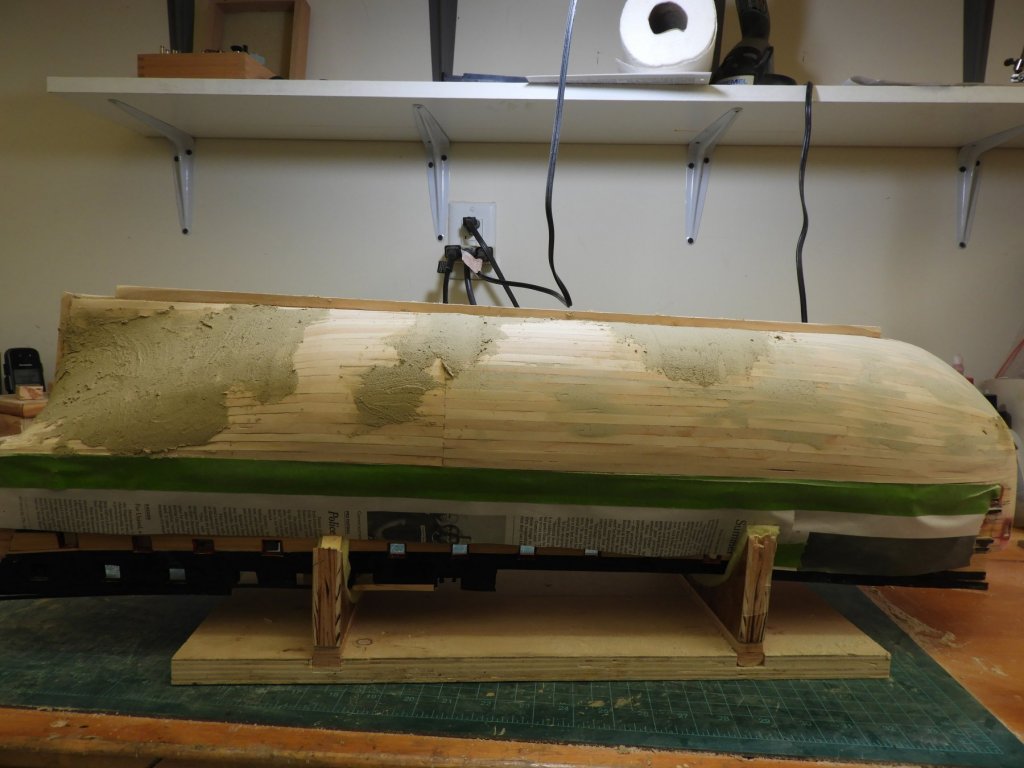
I completed the first layer of planking in all four quadrants. Rough sanded the planning to knock off any high spots. Filled some gaps left from some overzealous trimming of a few planks with Wellbond and sanding dust. I then filled the resulting low spots between the bulkheads carpenters wood filler. I used a playing card as a screed since it was wide enough to span the bulkhead, much like you do with hanging drywall. This worked really well because the card is flexible. Now, we wait for the wood filler to harden, give it a final sanding or, redo if it is not right and then another sanding.

-
Bob Hunt is alive and well at: https://www.lauckstreetshipyard.com/ He is running a special at this time on all his practica. I'm sure he would like to hear from you. No commercial interest etc...................
-
Ken, Thanks for the photo lesson. I will give your tips a try on the next photo op when I finish the Victory under-planking this week. Your rope coils are unbelievable.
-
I think Dusic Models have acquired the intellectual rights to all of the Mamoli line. They might sell you the plans.
-
Nicely done.
-
I mill my own strip wood using an old Delta contractors saw with a 3/32' kerf blade, a Byrnes saw and a Byrnes thickness sander. I would not by any rough lumber larger than 3x6 inches. 3" is about all you can cut on the Delta 10" table saw. I usually cut the billet 1/32-1/16 inch over width and finish it to thickness with the Byrnes thickness sander which has an incremental adjustment of 0.02 in. I usually get within .005" for the final dimension using the micrometer fence adjustment and my digital caliper. To find out what final dimension strip wood you will need. See if there is a parts list for a kit. Then add 10% to the included quantity - for spoilage. This should give you the dimension and quantity of the strips you will need. As a recommendation: once you do the set up for a particular width, cut all the pieces for that width regardless of the height dimension with this one set up. Then you will have total consistency in this dimension across all heights. Hope this helps
-
E J Great job on the planking. It looks like the wood that was supplied is of superior quality. This makes for a beautiful hull in the natural state. Can't wait to see how your SR turns out. Regards
-
Dave, As usual your work is as good as it gets. Enjoy Italy. Tuscany is my favorite place outside the US. I can walk all day in Florence and Sienna and never get tired. Do you need a cook? Regards
-
Ken, Great work. Your build log will be a huge resource for me when I start my Connie. I would love to know how to take such good close-ups with my Nikon B700. I am just not a photograpgher. Regards
-
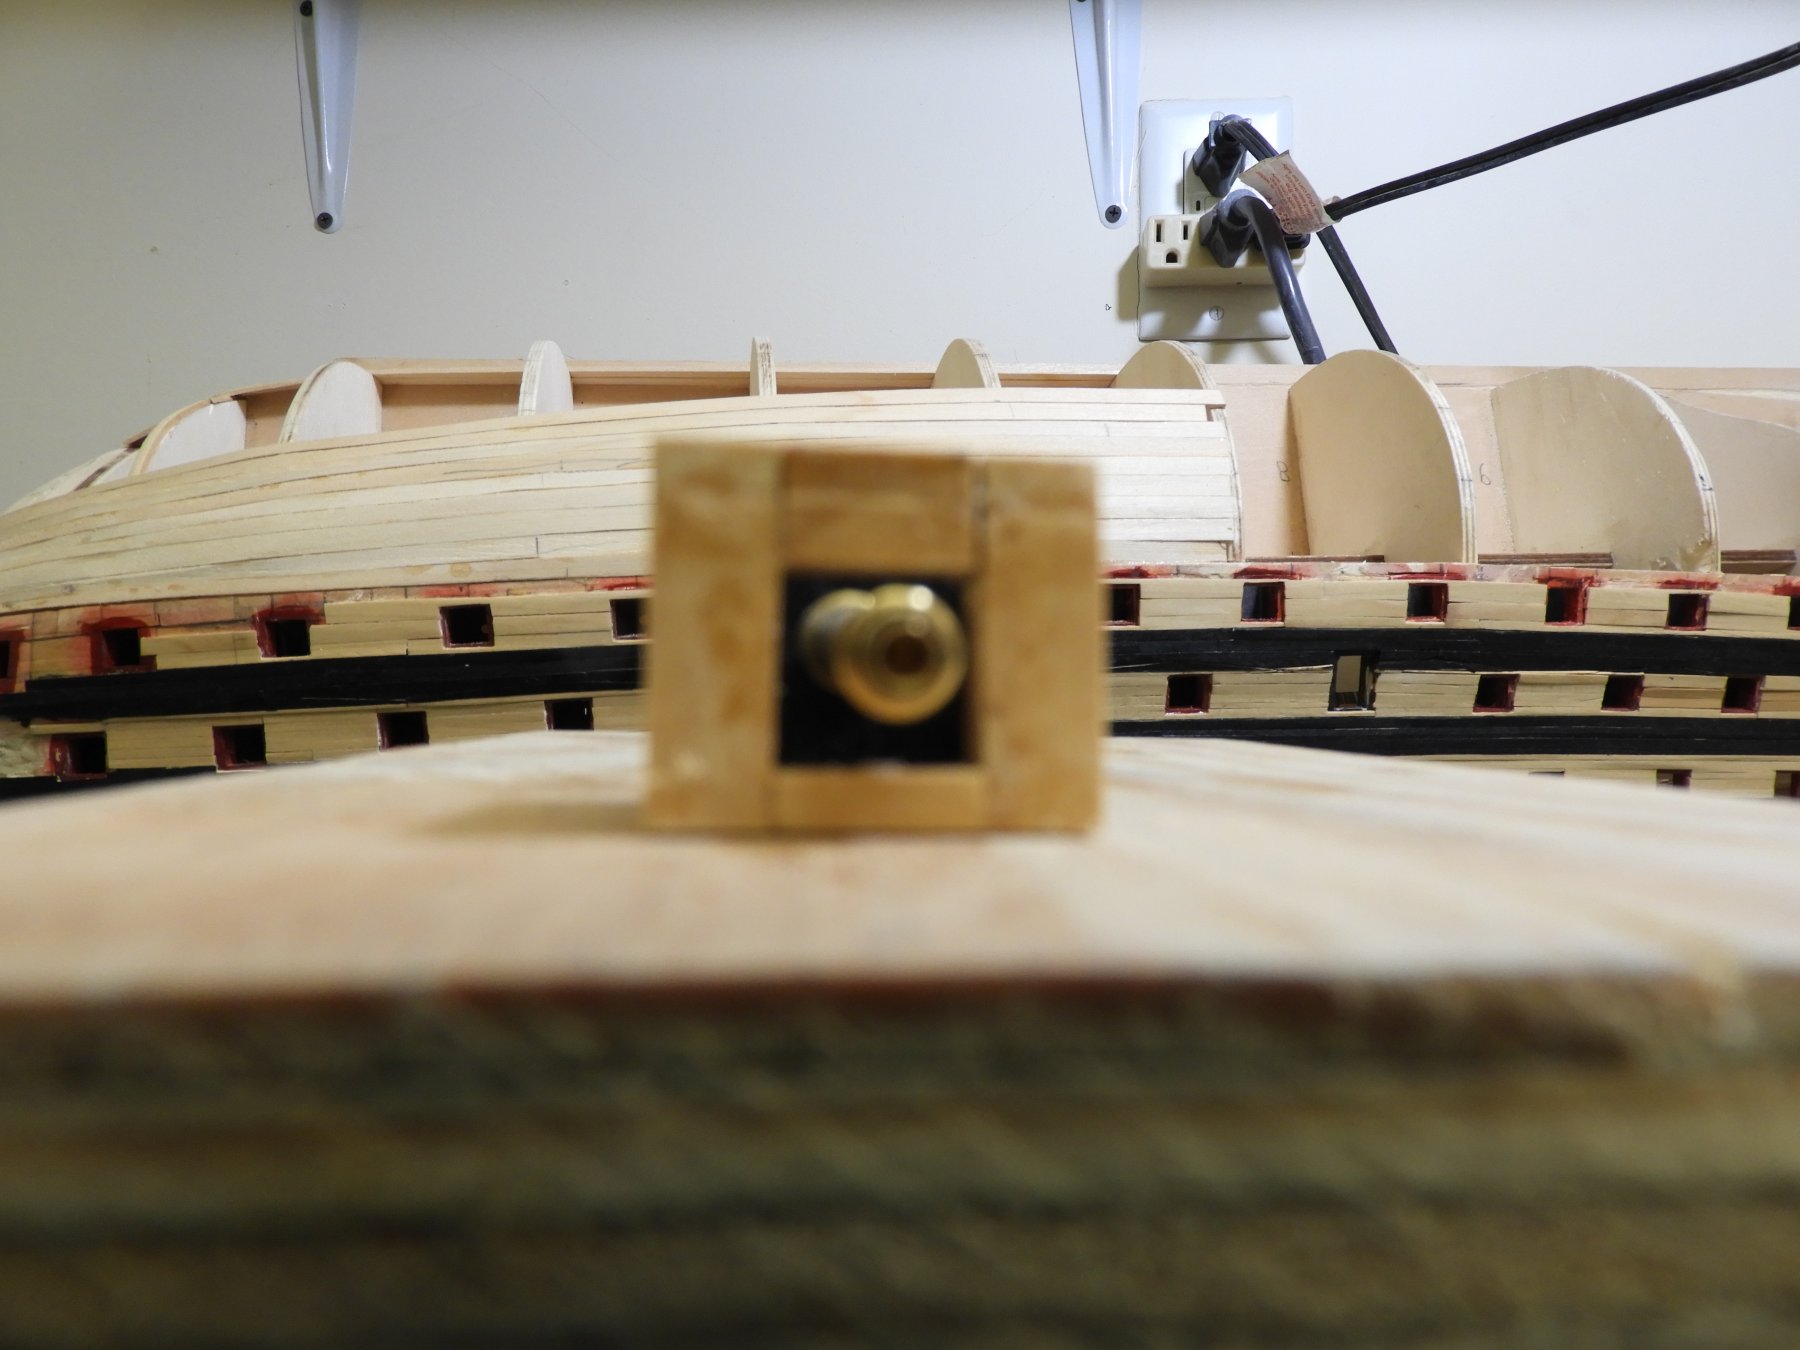
Thanks Dave and Keith I had some bottled epoxy that I couldn't remember when I bought it. I was afraid to use it. So, I gave the CA a try. It did the job rather well. I put some in front of the rear panel of the gun port on the canon peg and some more behind the panel as well. They are in there tight. Now all we have to do is not rip off the rear panel by hooking a canon barrel. Regards
-
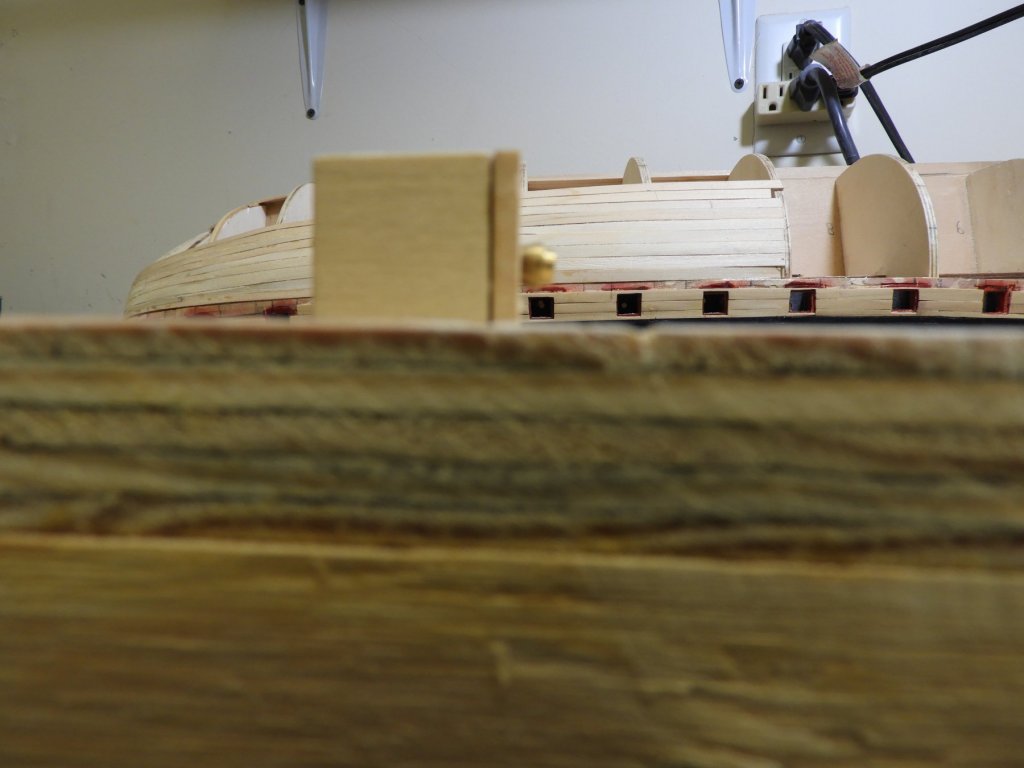
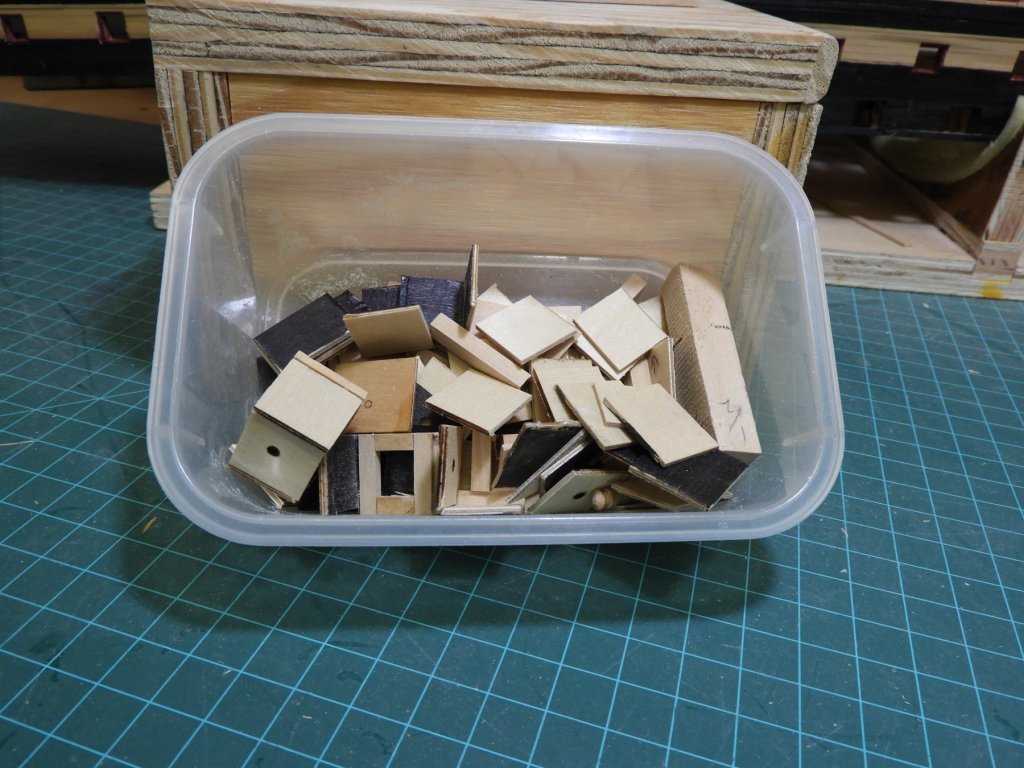
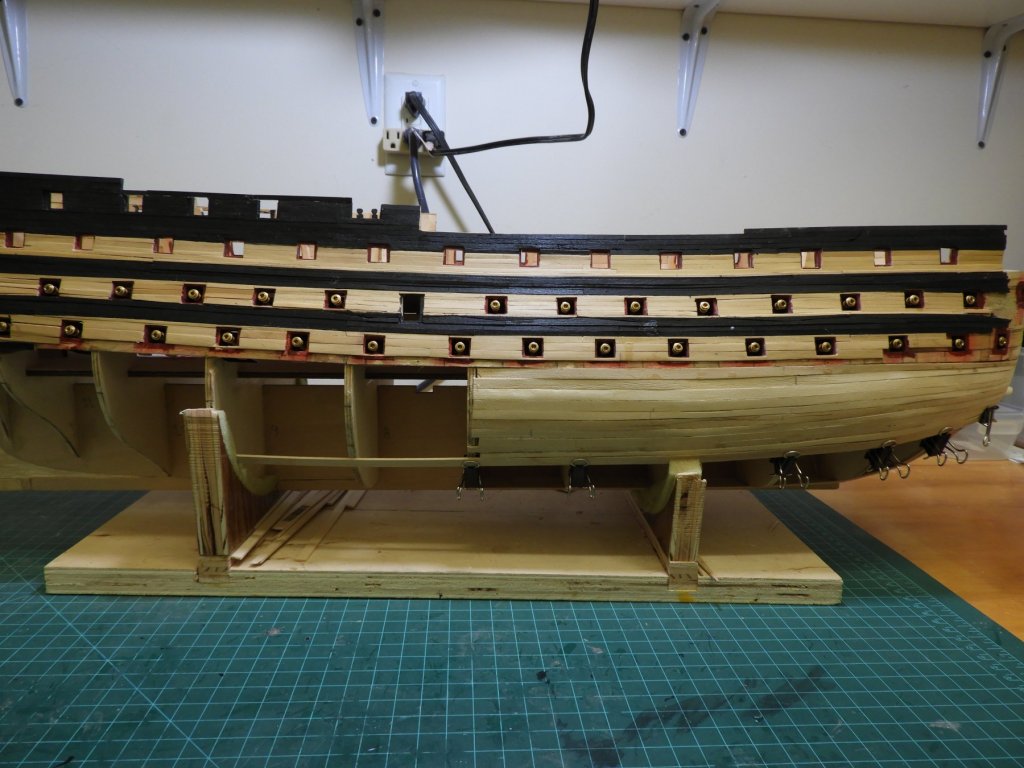
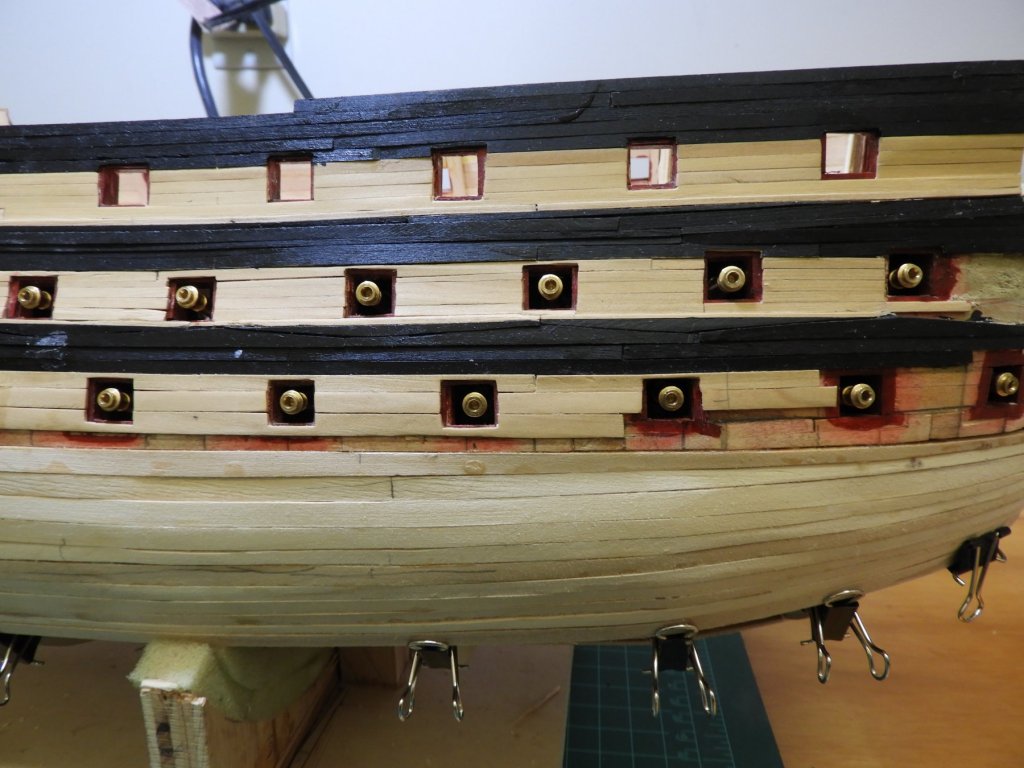
I installed all of the middle and lower gun deck dummy canon. This was a lot easier than I thought it would be. The CA worked perfectly. The alignment came out very nice. She is starting to look like a Victory. When I have a large run of the same parts, I always make many extra- at least 10%. You will break some, loose some, and some just come out wrong. It’s nice to have the extra. The photos show a canon in one of the extra gun port frames to check what the alignment will be and a box of “extras”. I completed the starboard forequarter under planking. I used this as a practice exercise to test my planking skills. I laid some using the proportional method, some splining, some eyeballing it and even jammed one or two into place. It doesn’t seem like there are the dips between the frames that usually appear here. After filling and sanding we will see. Overall, a lot less stressful then the upper hull.