KeithAug
-
Posts
3,986 -
Joined
-
Last visited
Content Type
Profiles
Forums
Gallery
Events
Everything posted by KeithAug
-
 Tom - I had to look up what a bow chock was. Another example of "Two countries separated by a common language".
 -
Nice technique for the blocks Eberhard. The most rewarding part is finding a way of doing the seemingly impossible.
-
Hi Keith - I loved catching up on the block / shackle debate. I recall looking at some very detailed work (through a microscope) in the gold room of the Hermitage Museum in St Peterburg. The very knowledgeable guide pointed out that the work was so fine it could only have been done by children because of the visual capability they posses. I think you need to get younger or recruit some grandchildren.
-
Beautiful detail druxey. Wish I had a good watchmakers lathe.
- 433 replies
-
- 4
-

-
- open boat
- small boat
- (and 1 more)
-
Tom, At a certain age I find it best to avoid photographs and throw out mirrors. I still think I am a teenager and don't want the illusion shattered. Sorry to hear about Uncle Jon but take comfort from the pleasure he will have derived from seeing your workmanship. Best regards Keith
-
Excellent work. The detail makes it look like a much larger model.
-
Coming along very nicely Steven. The hull is a great example of freehand tin bashing and welding.
-
The hull planking turned out very well. Good news that the planking isn't going to be lost under paint. It will be interesting to see how the finishing deliberations turn out.
-
An enjoyable half hour catching up Valeriy, your craftsmanship is always impressive.
-
Justifying the purchase of a mill
KeithAug replied to Captain T's topic in Modeling tools and Workshop Equipment
I agree with many of the comments above but here is my experience. I got my first lathe about 35 yeas ago and found it useful on both kits and scratch builds. On kits it gave me the opportunity to make better and more detailed replacements for those nasty plastic, white metal and to a lesser extent brass parts that kit providers often supply. I dint think I really needed a mill until I got one about 10 years ago. I then found I used it a lot more than the lathe. I now wouldn't be without one. I find that with a bit of imagination it makes many jobs simpler and more accurate. -
Eberhard - She did good. It is finished awaiting mounting - I will take a picture and post it.
-
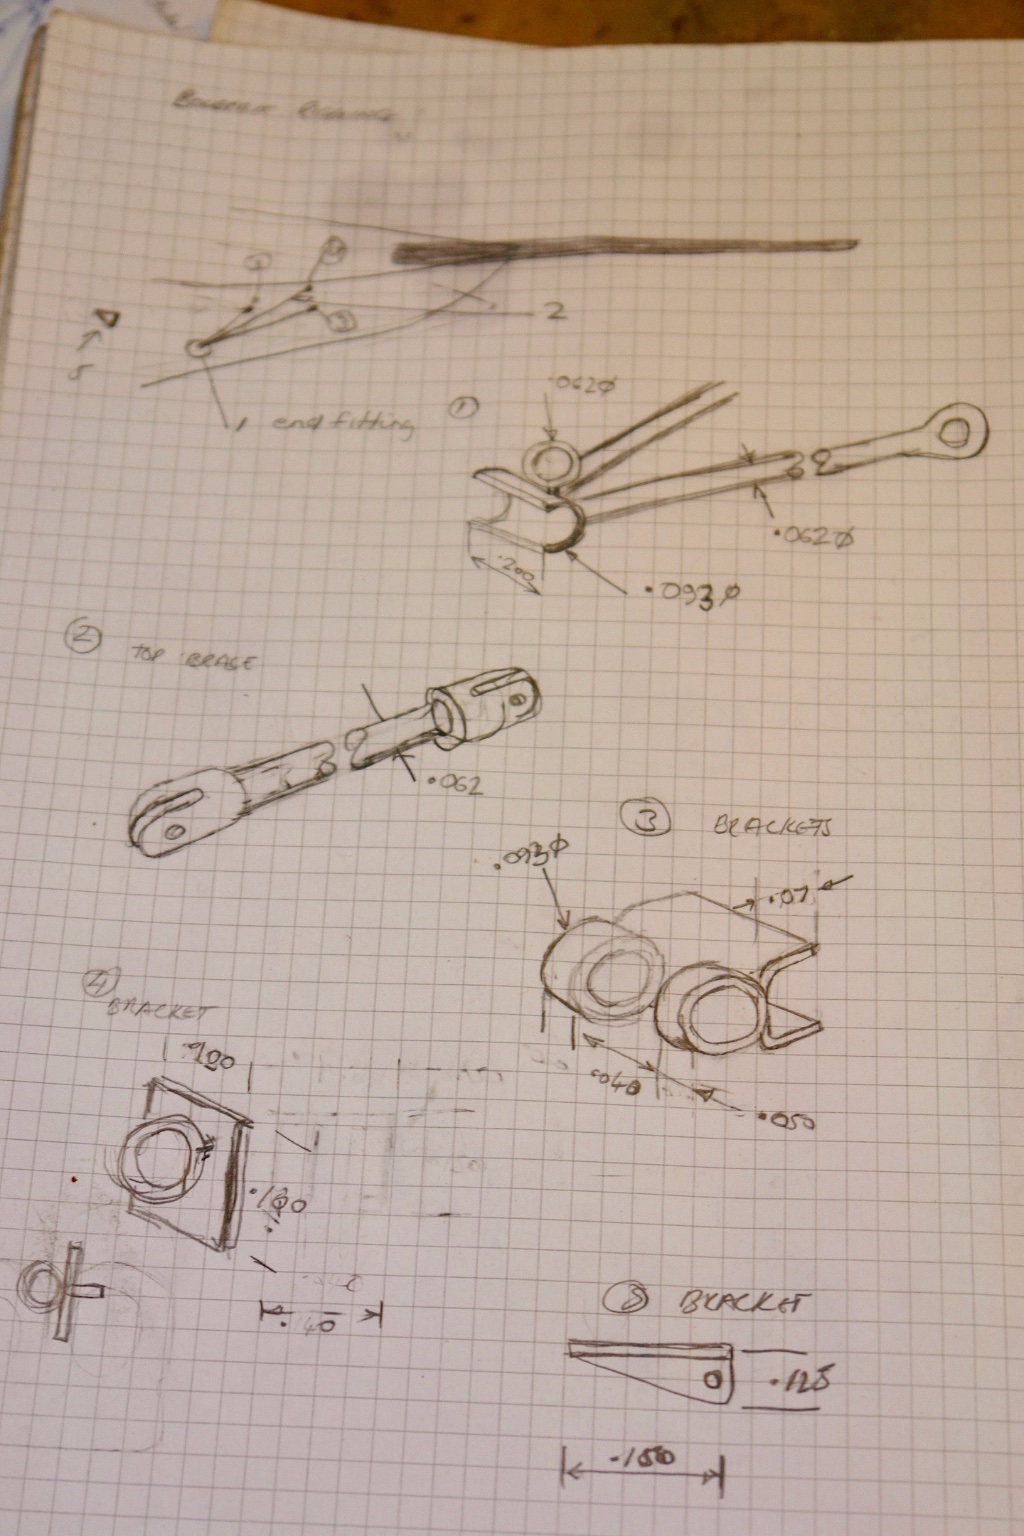
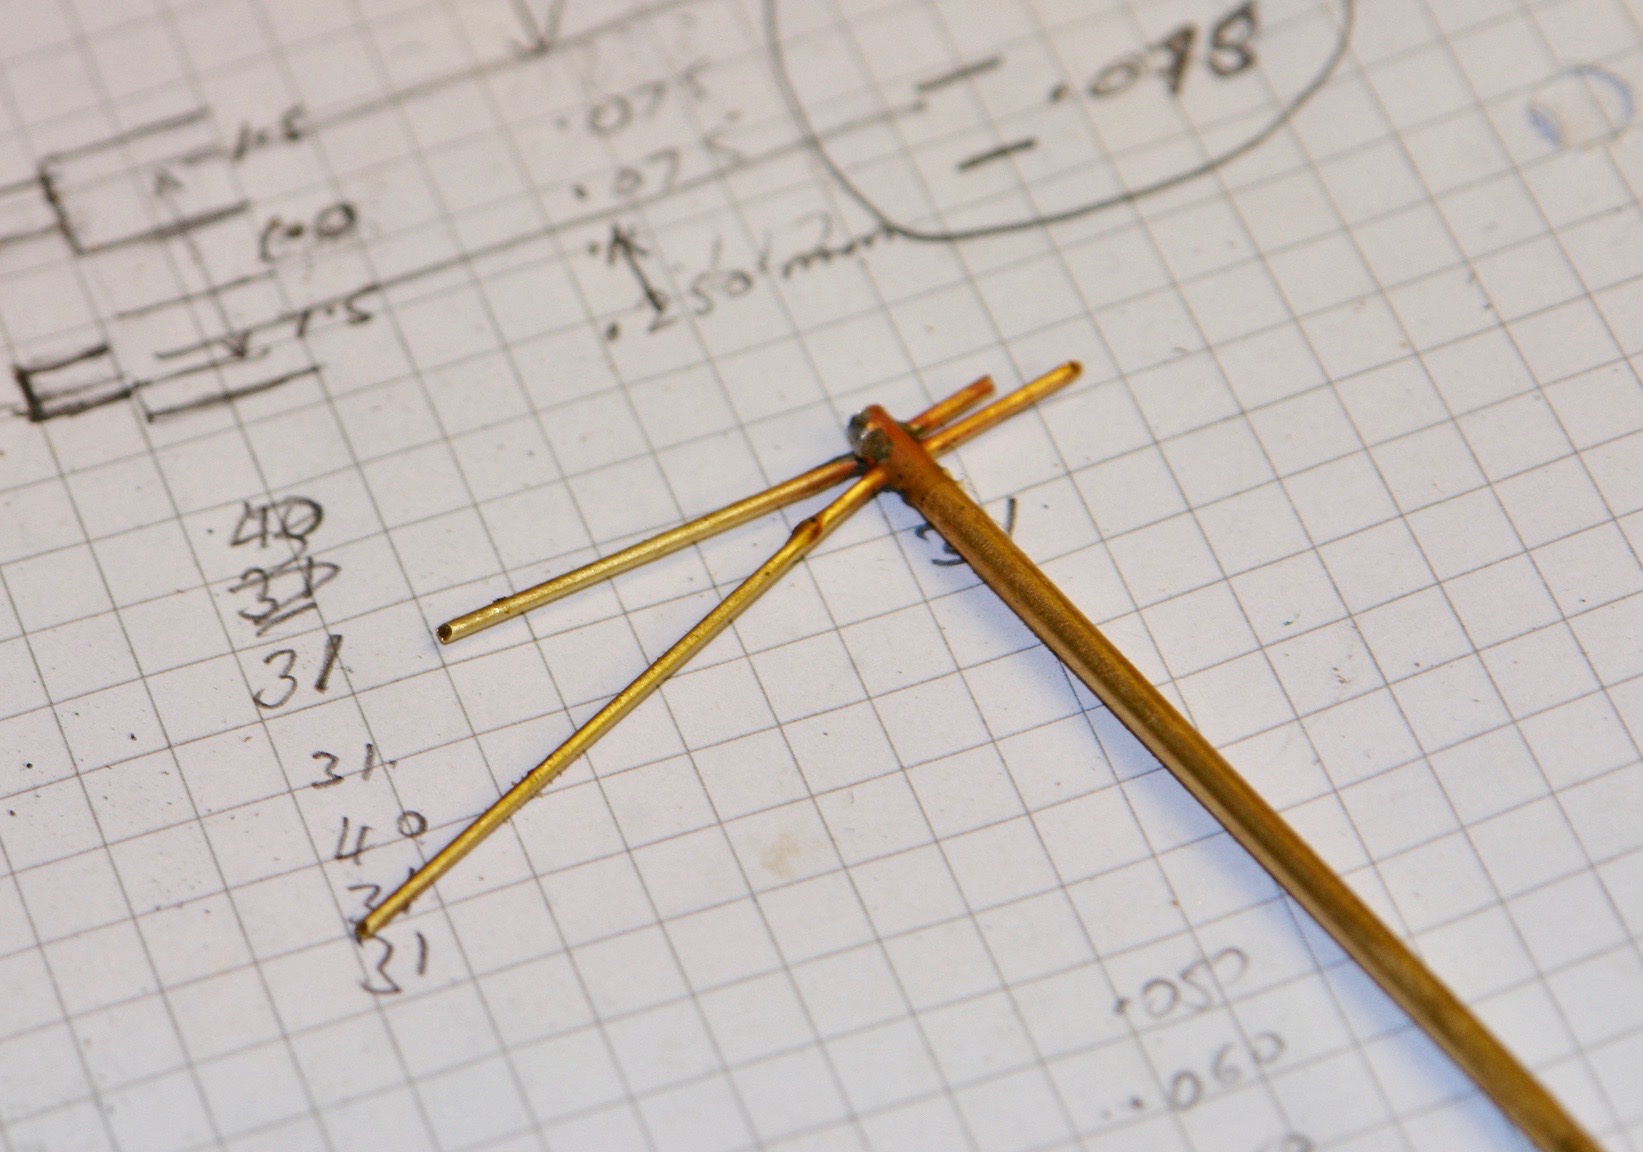
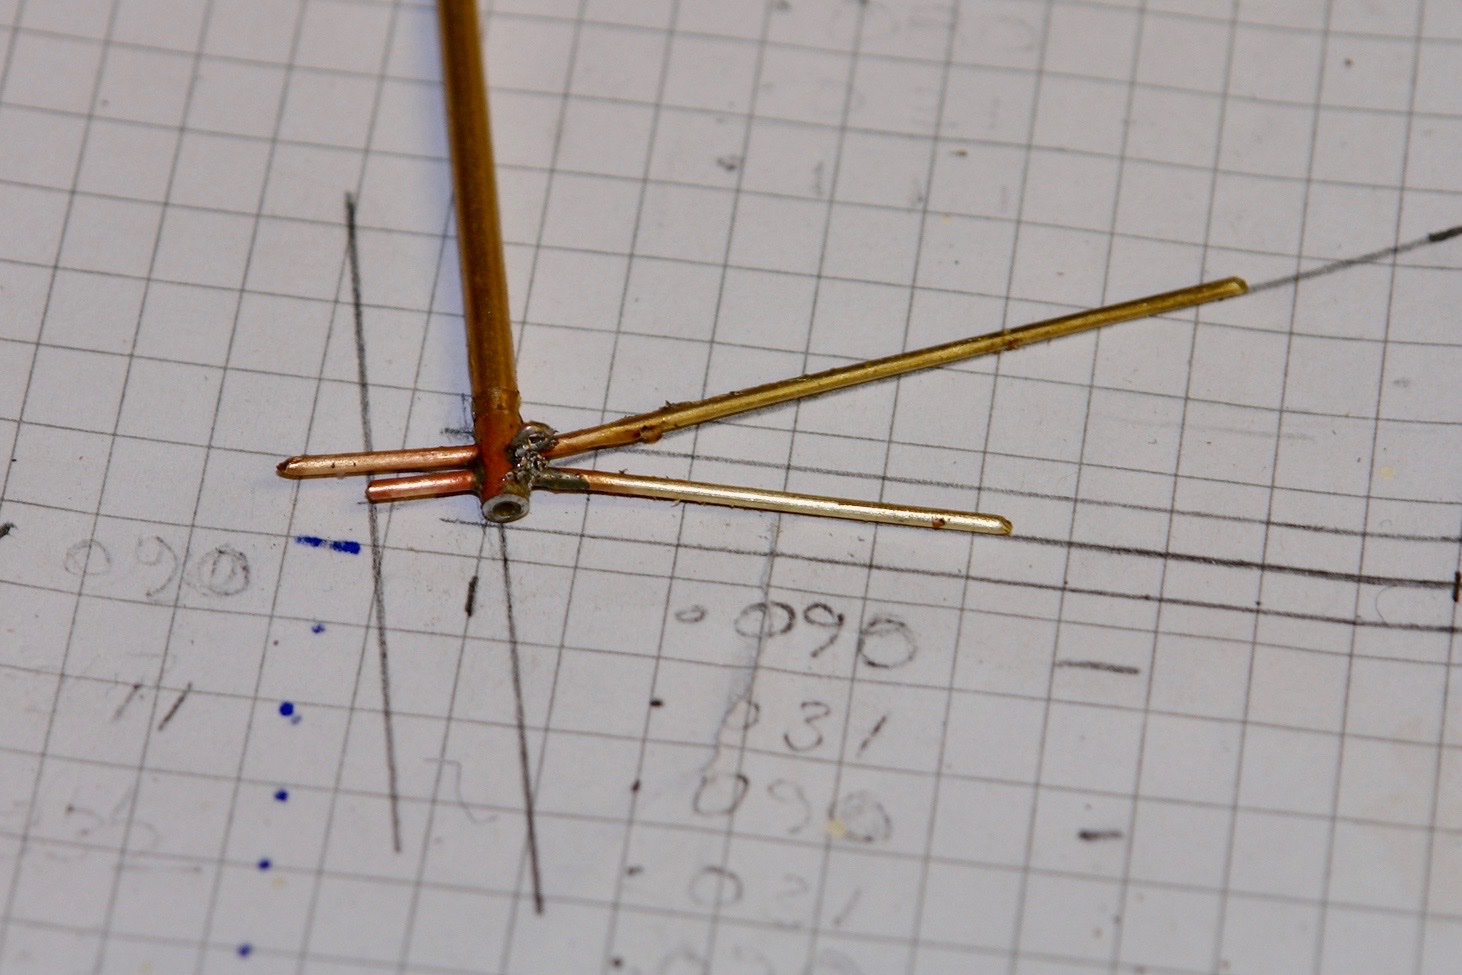
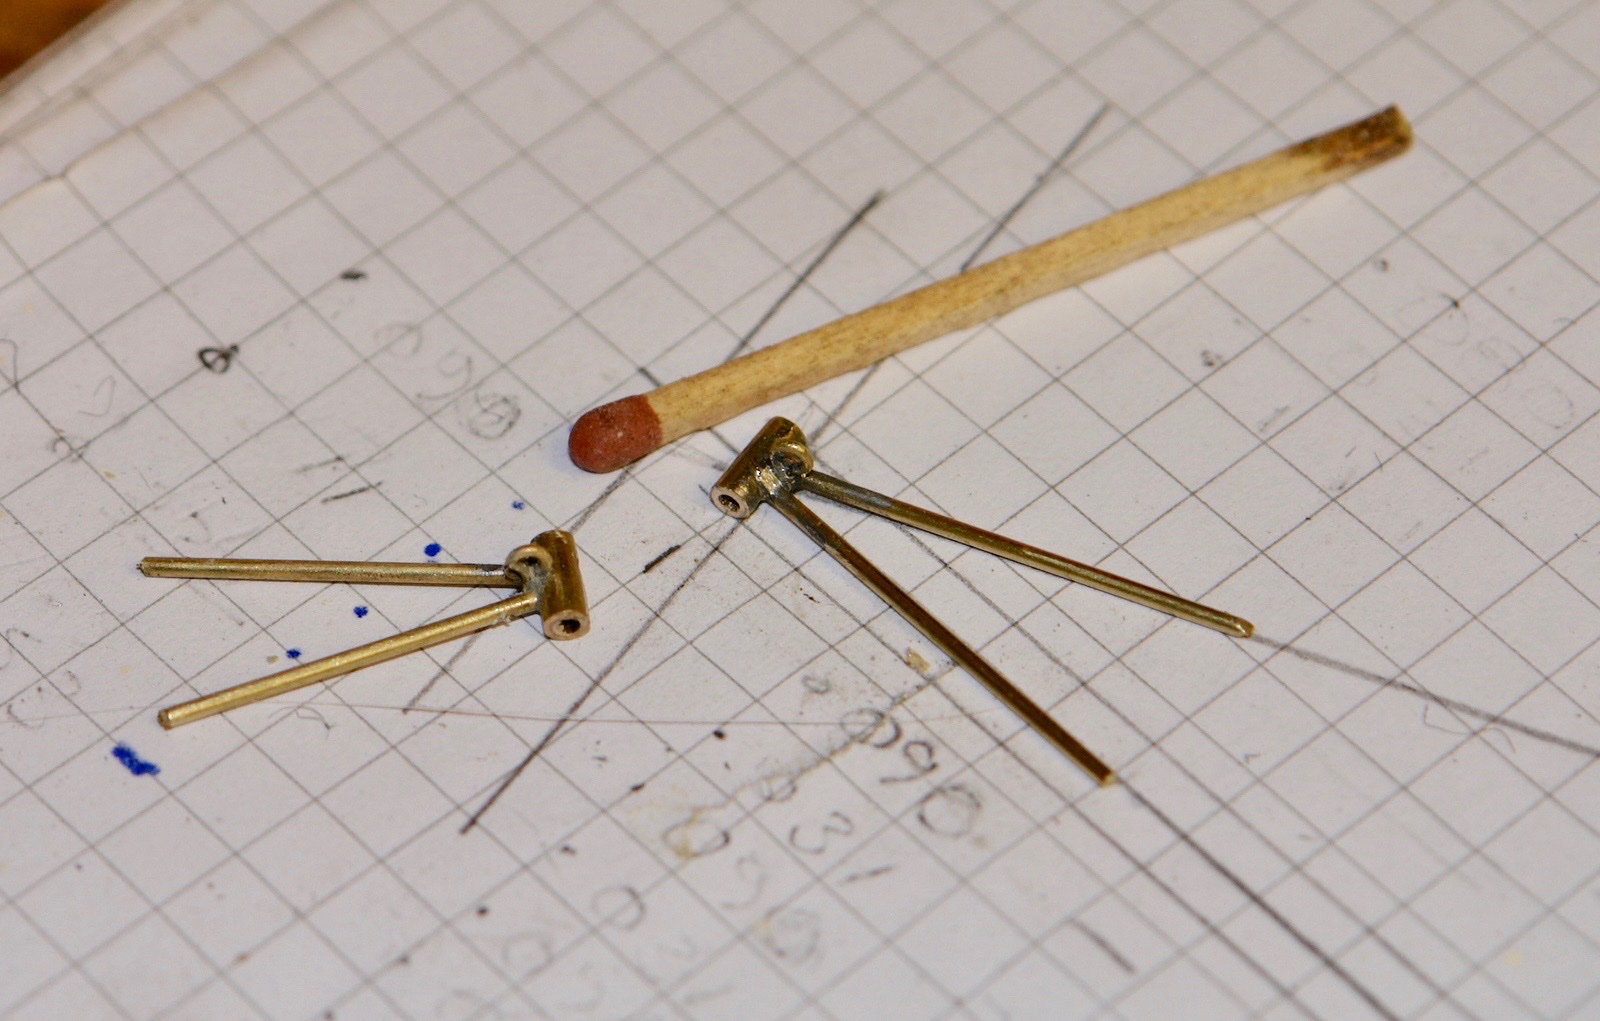
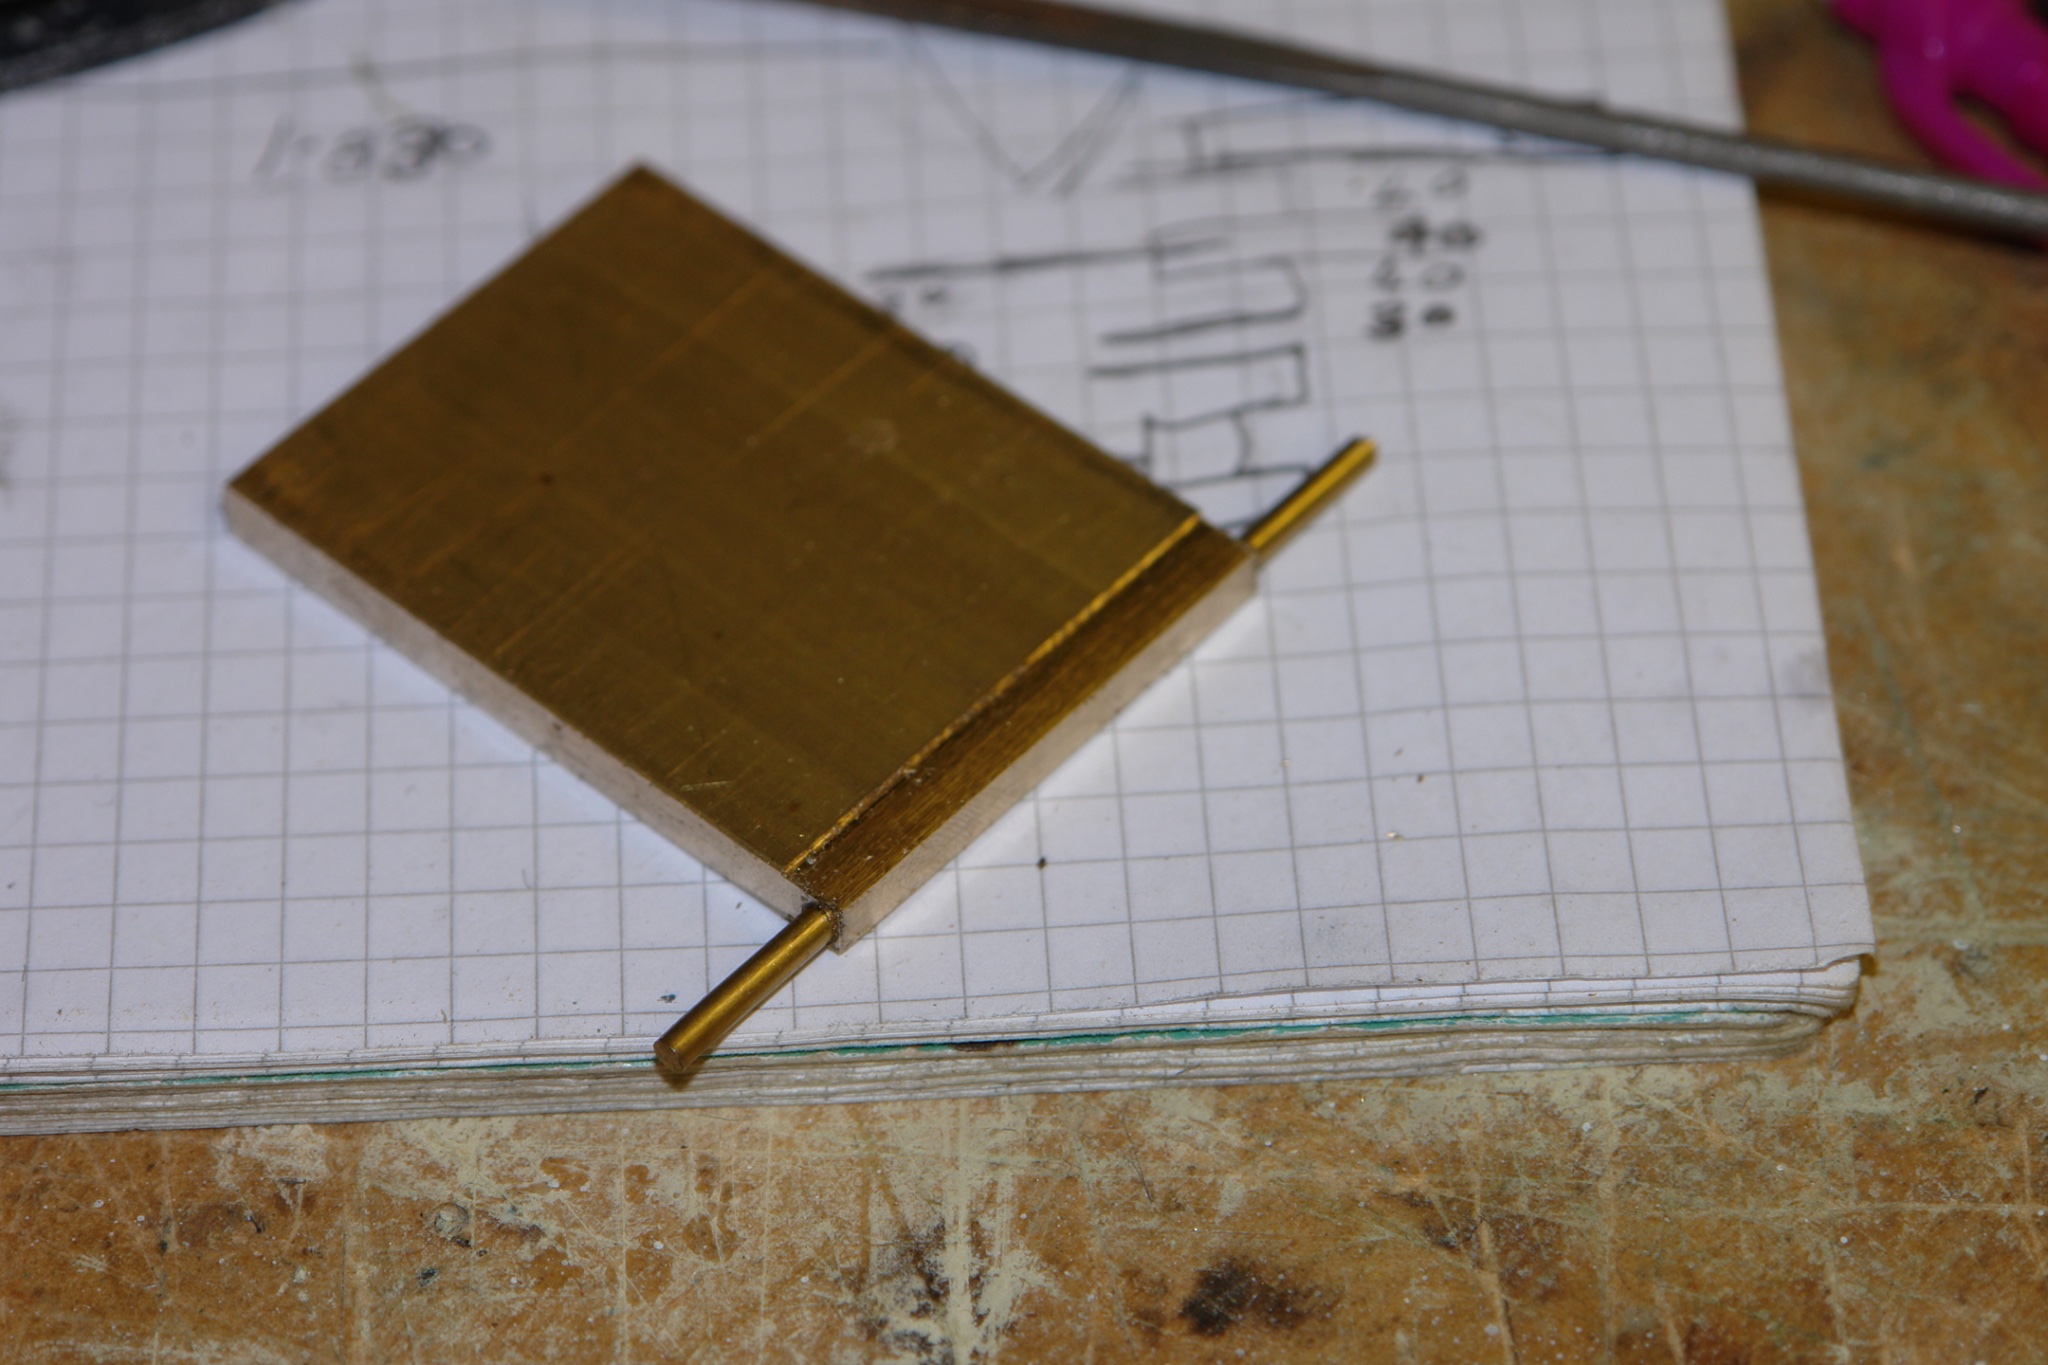
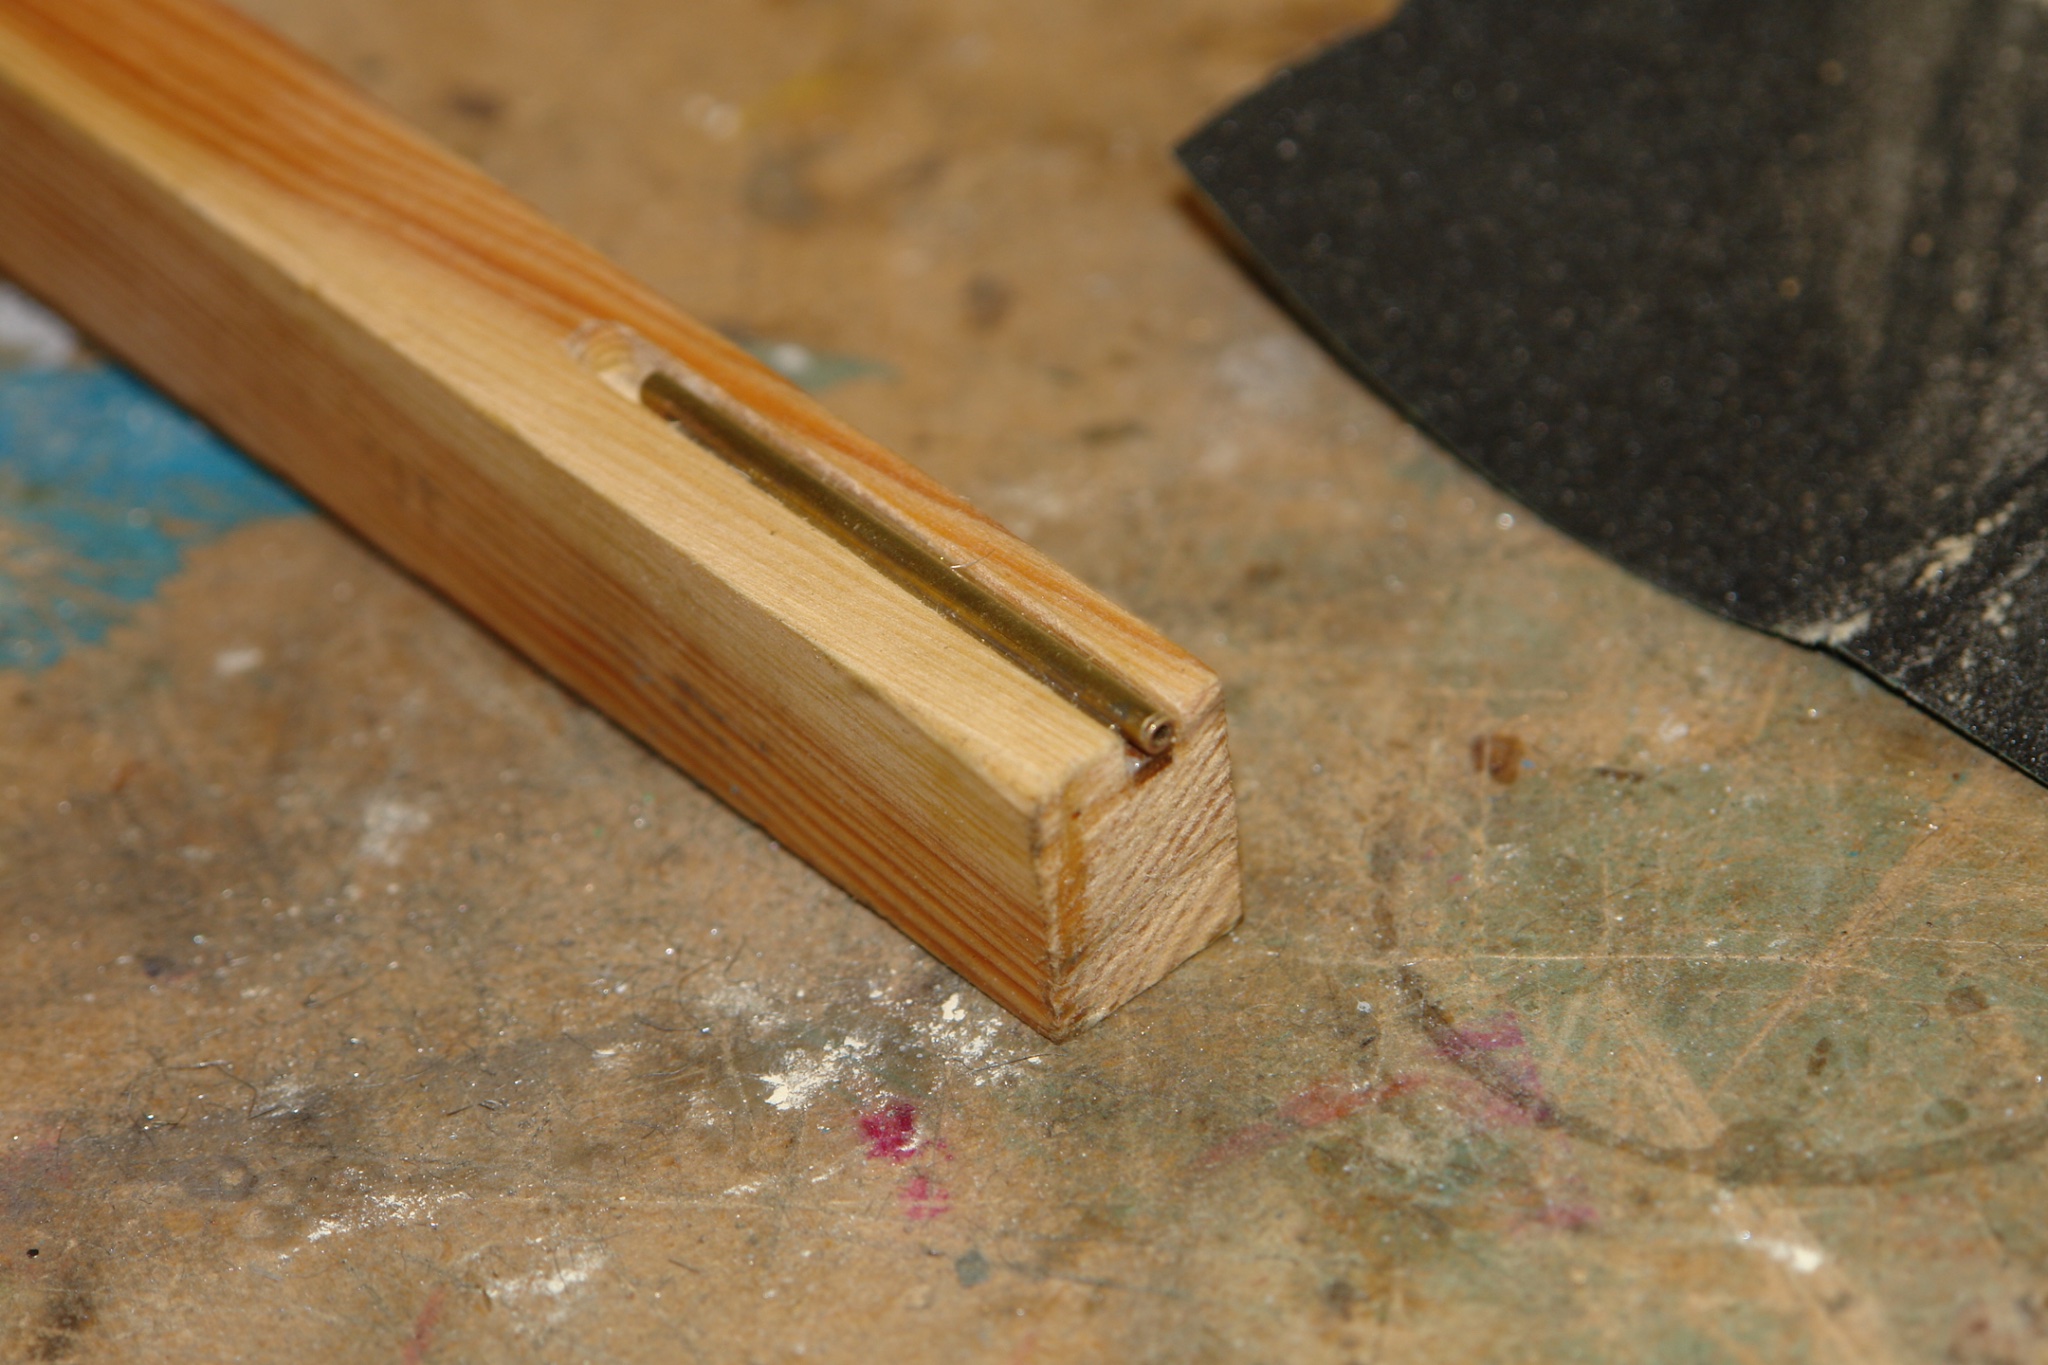
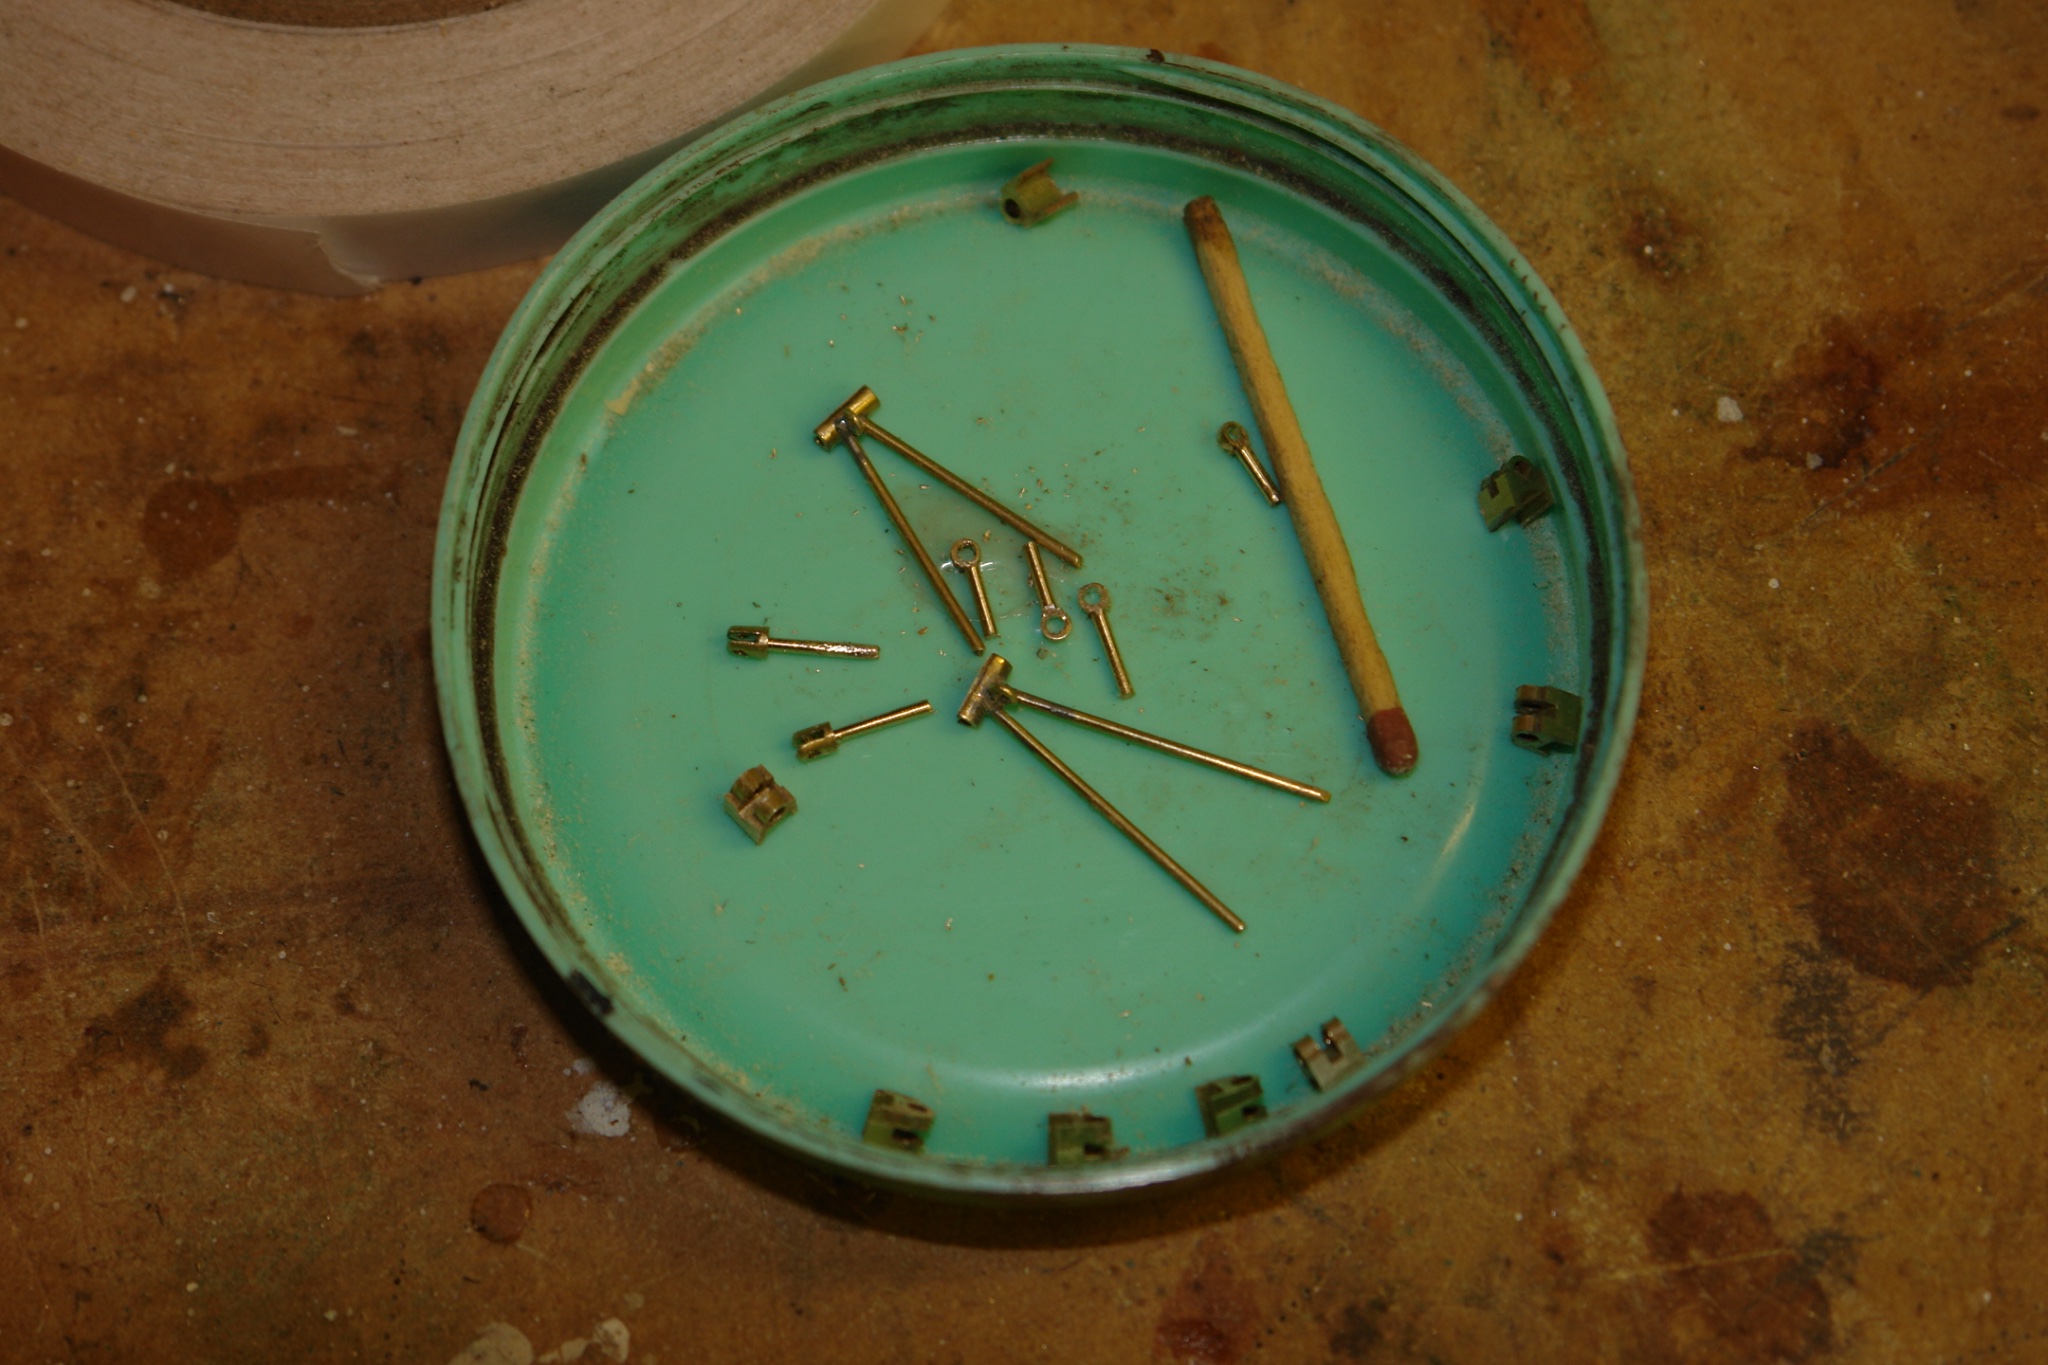
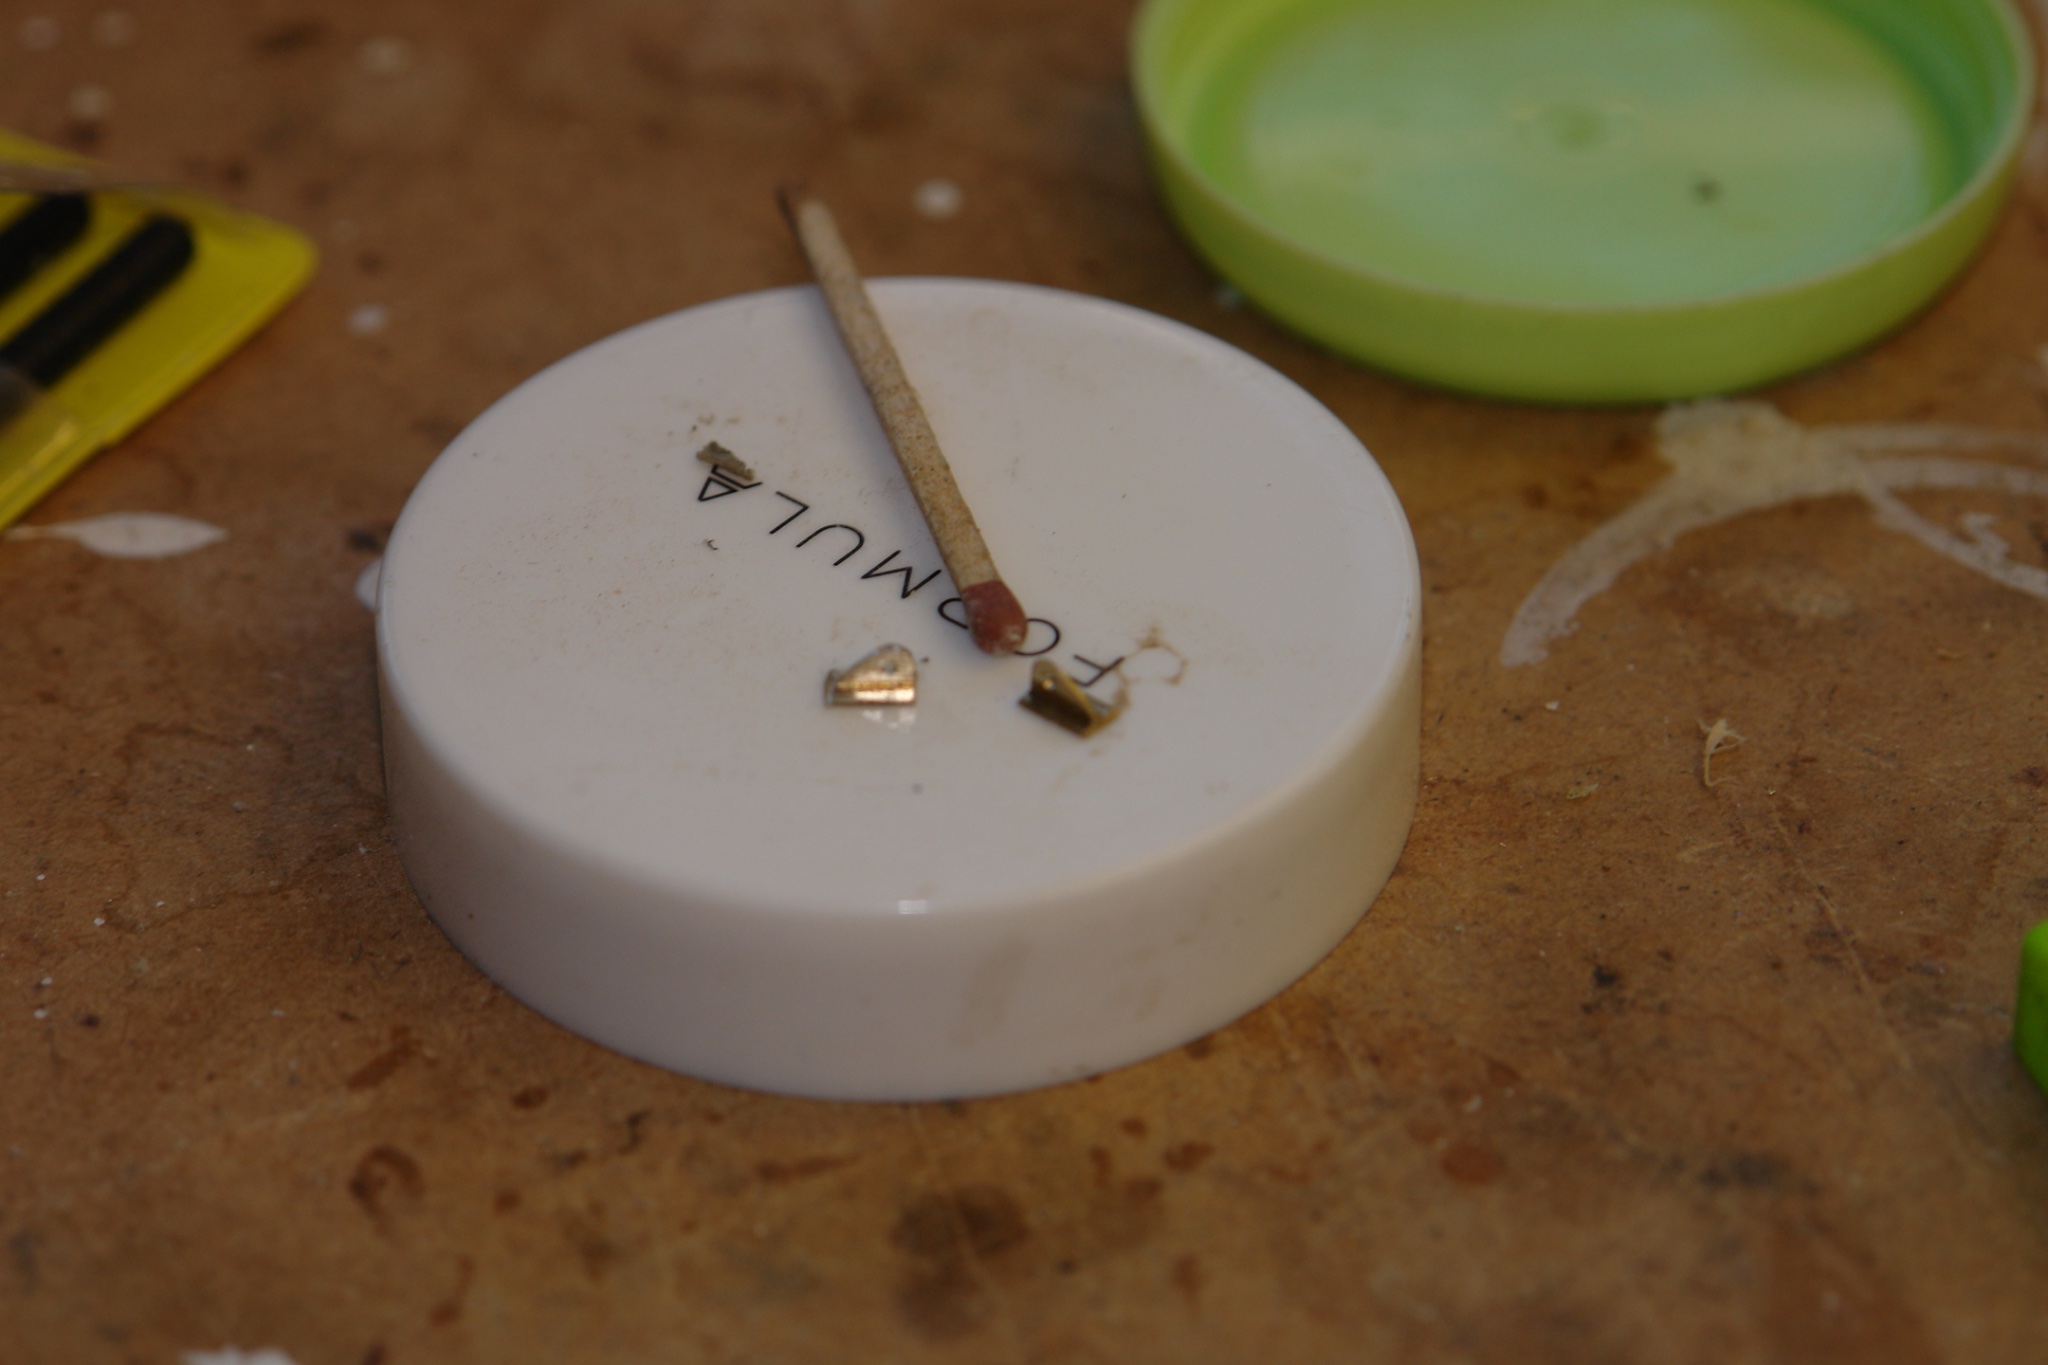
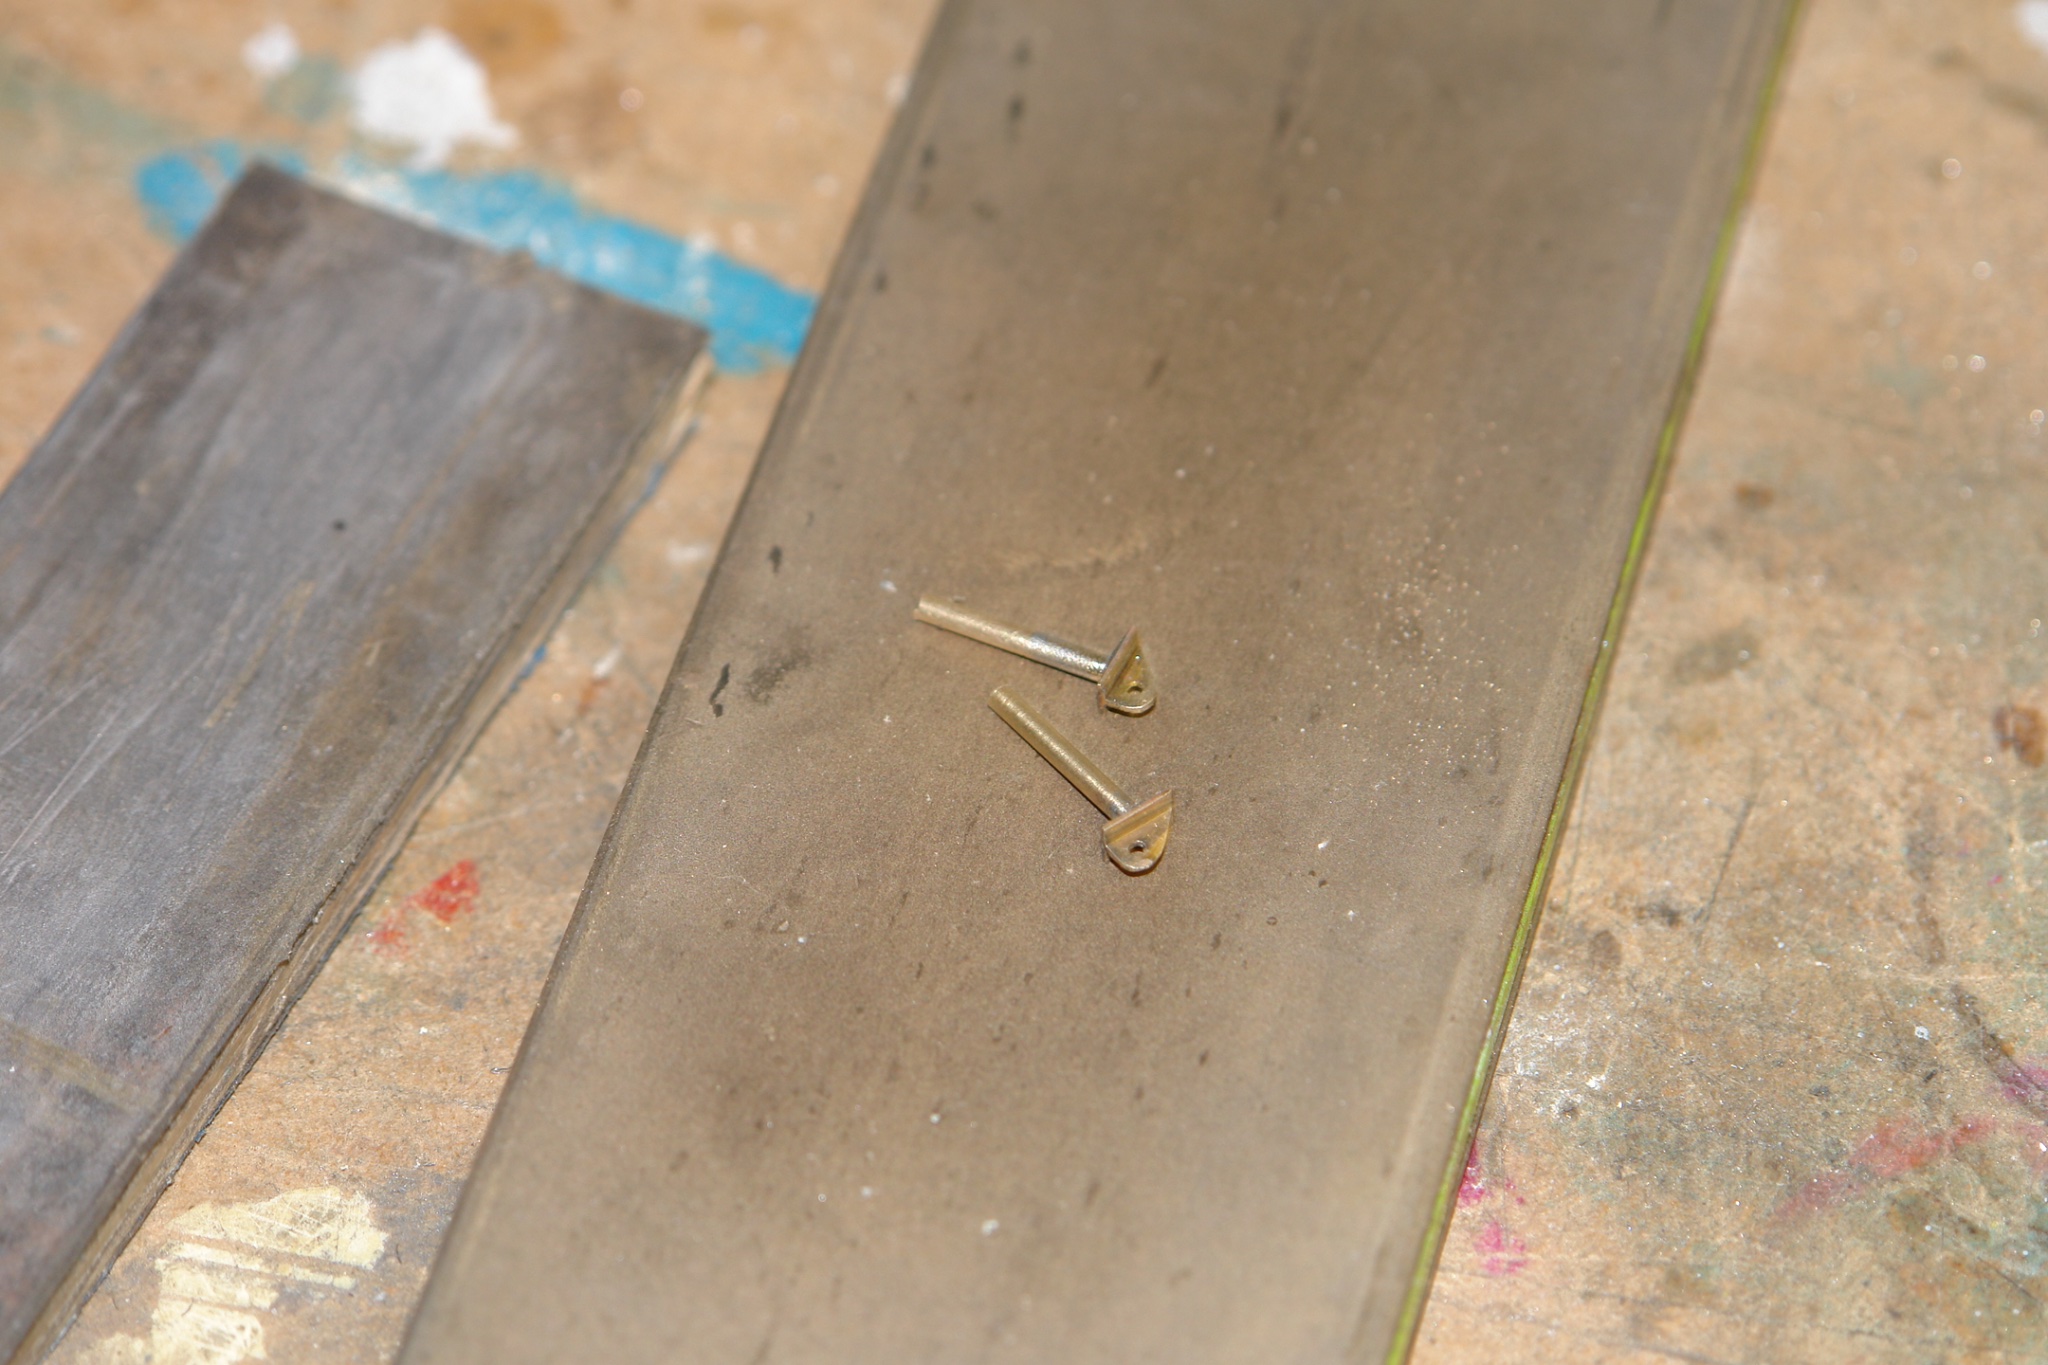
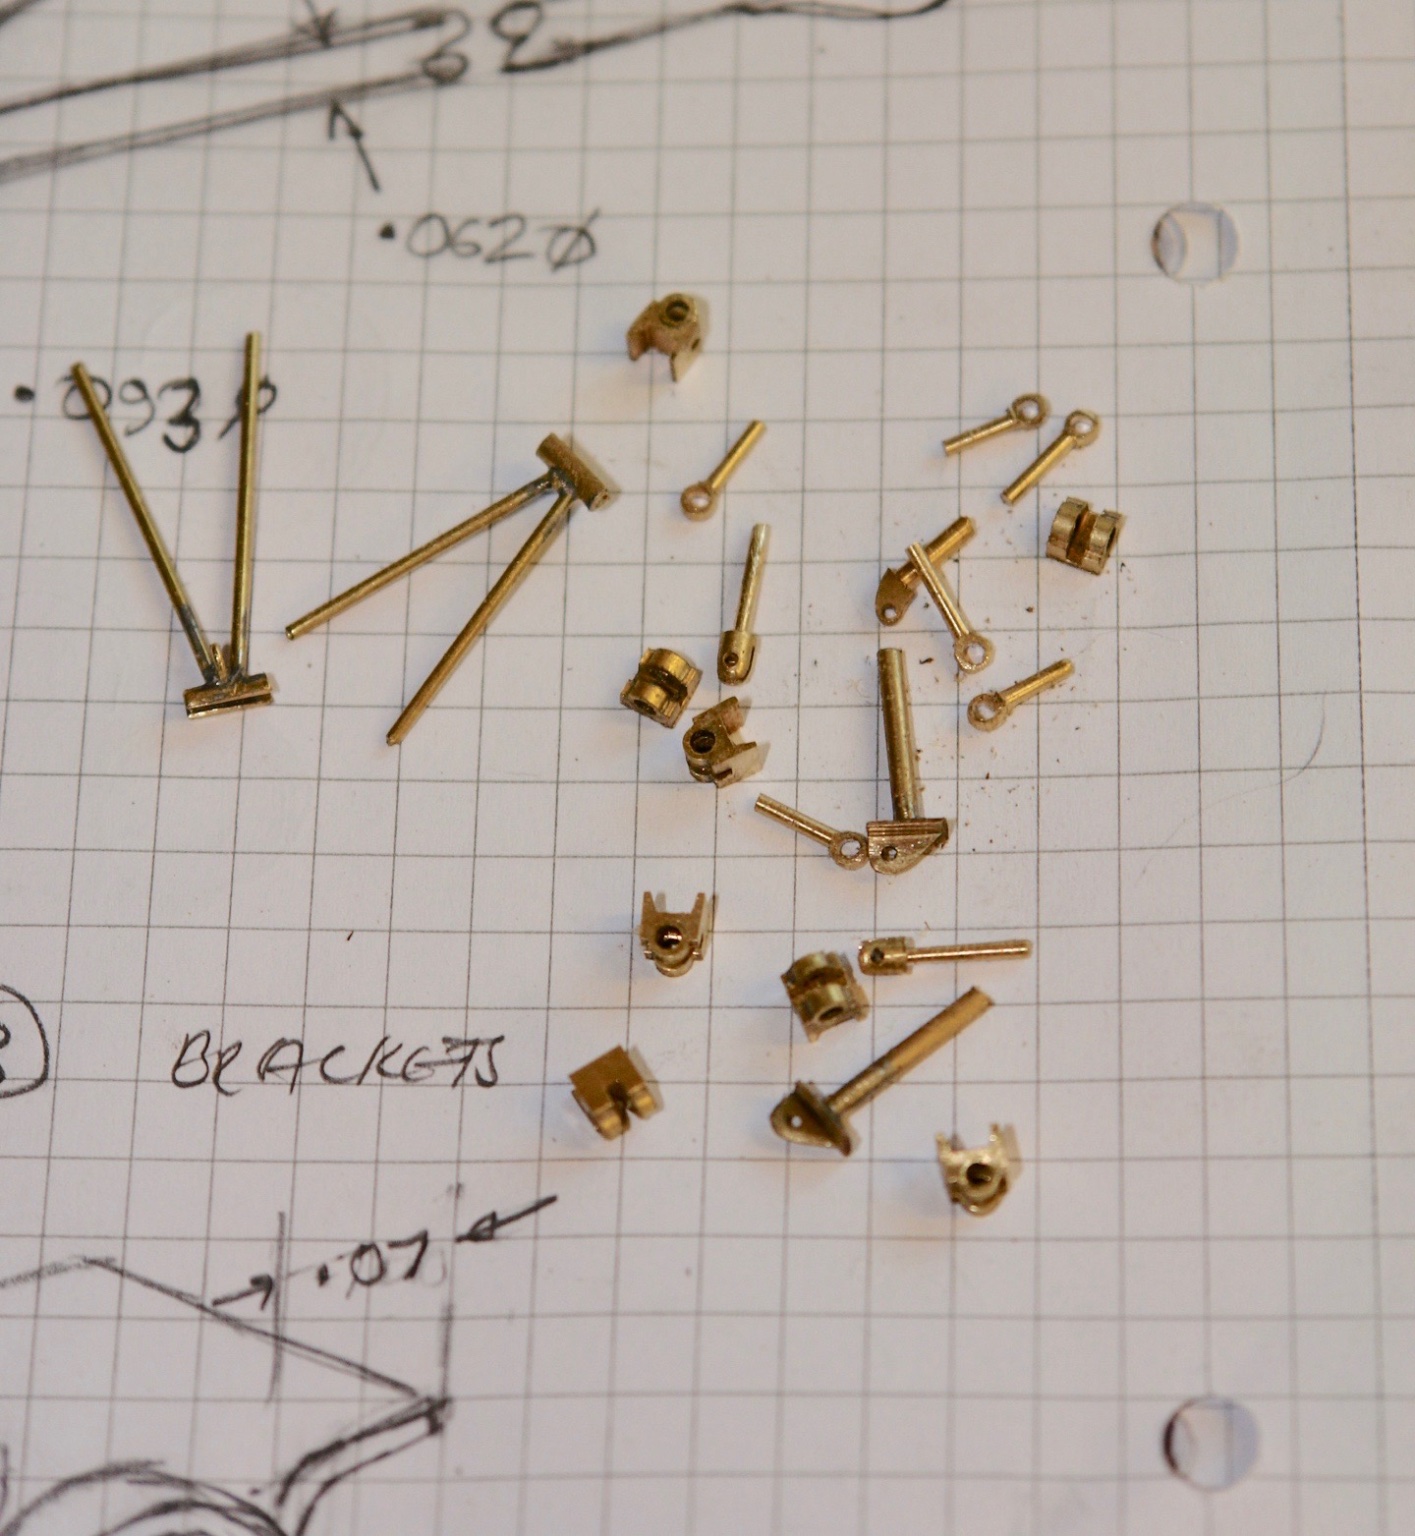
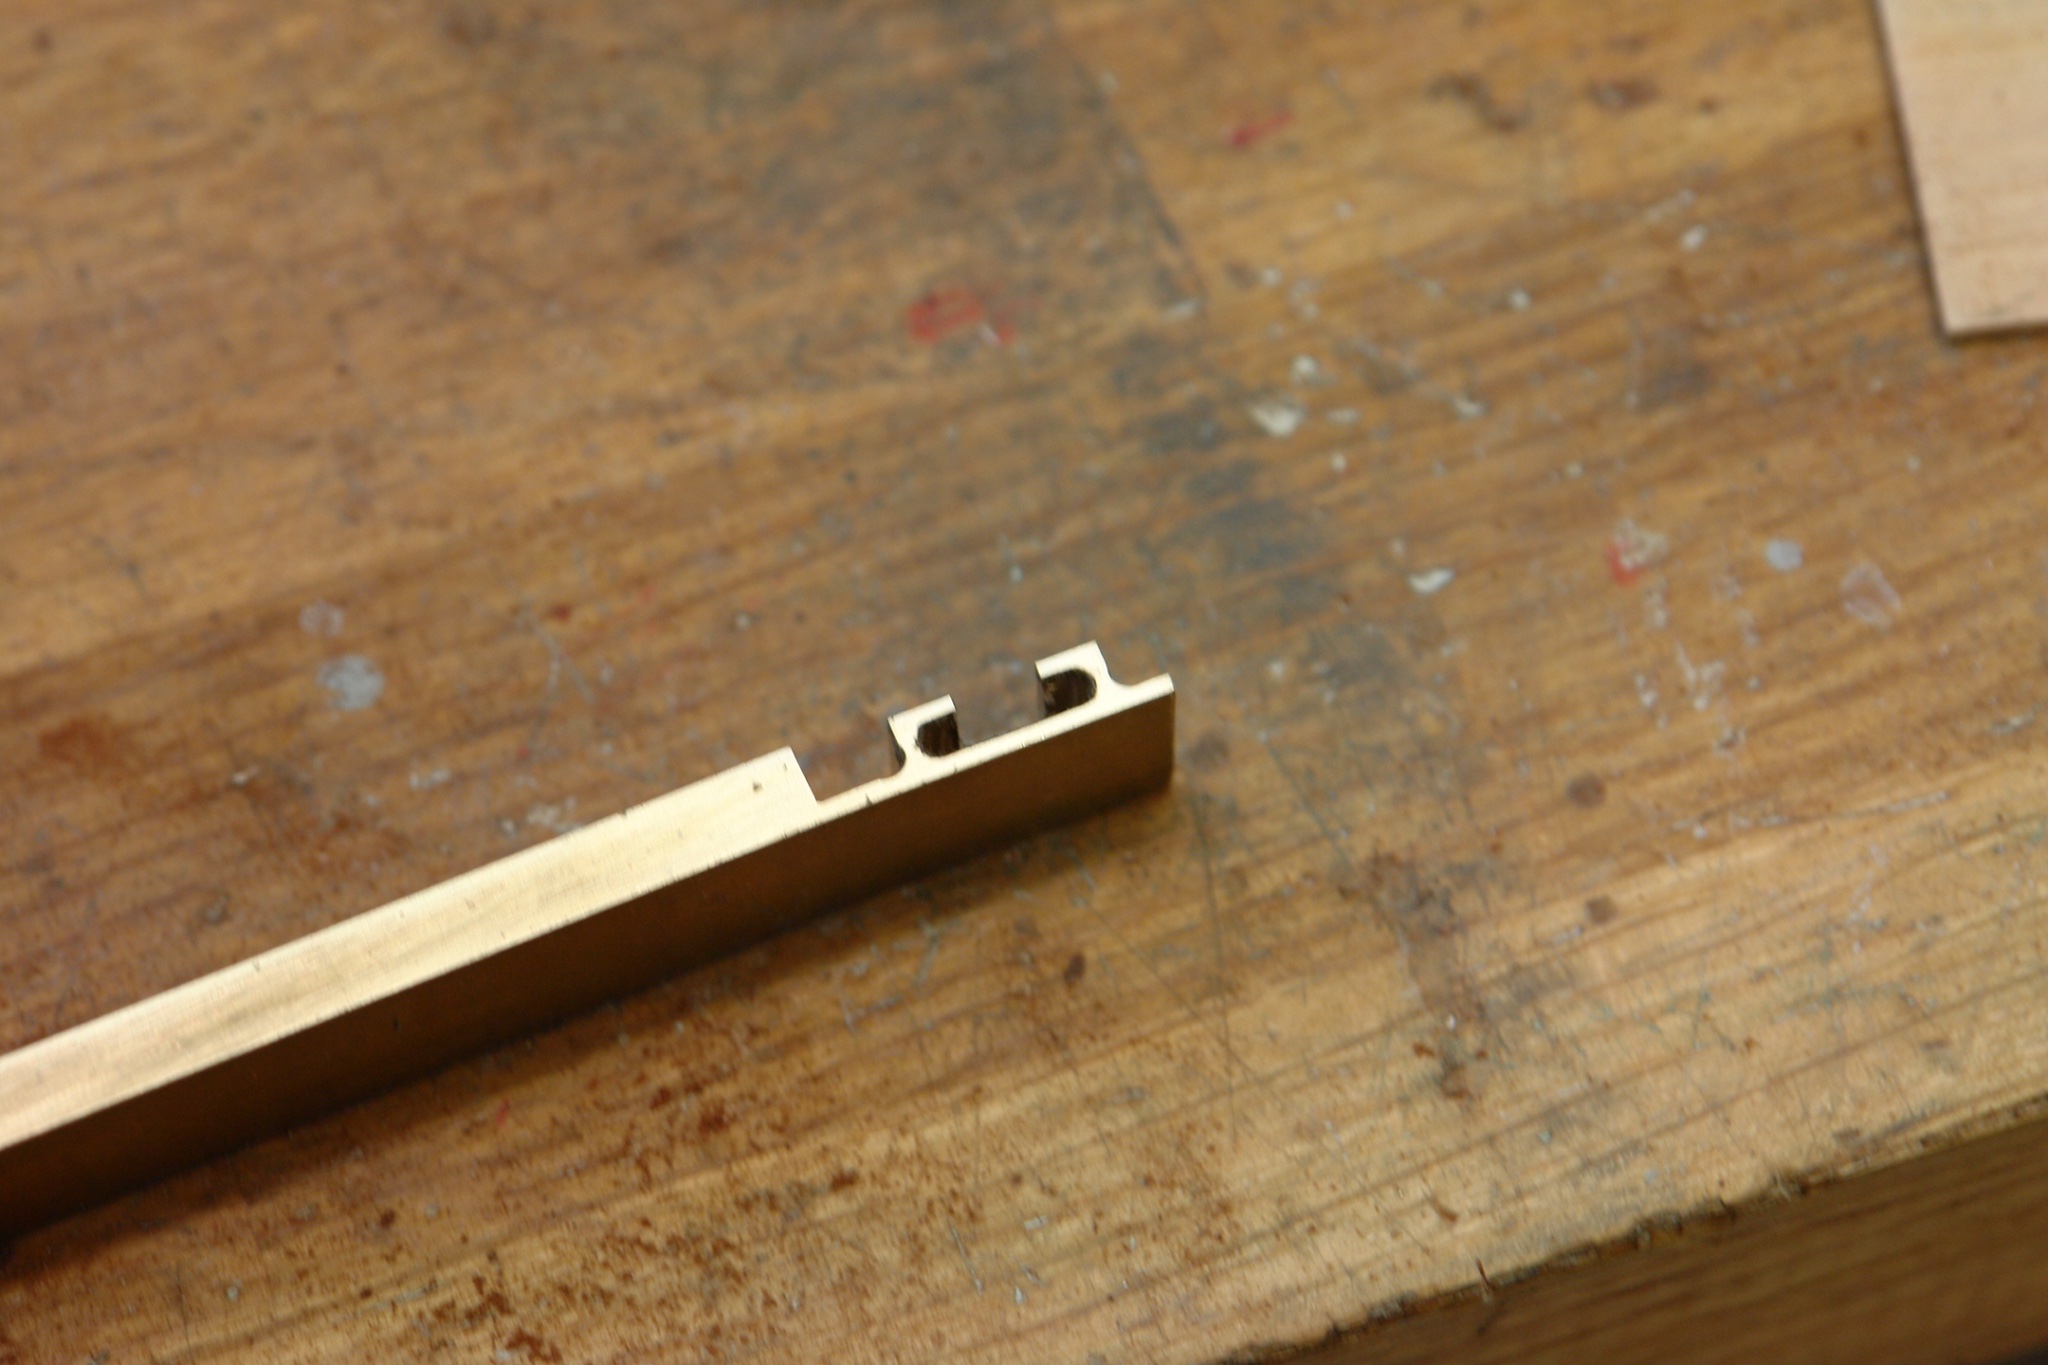
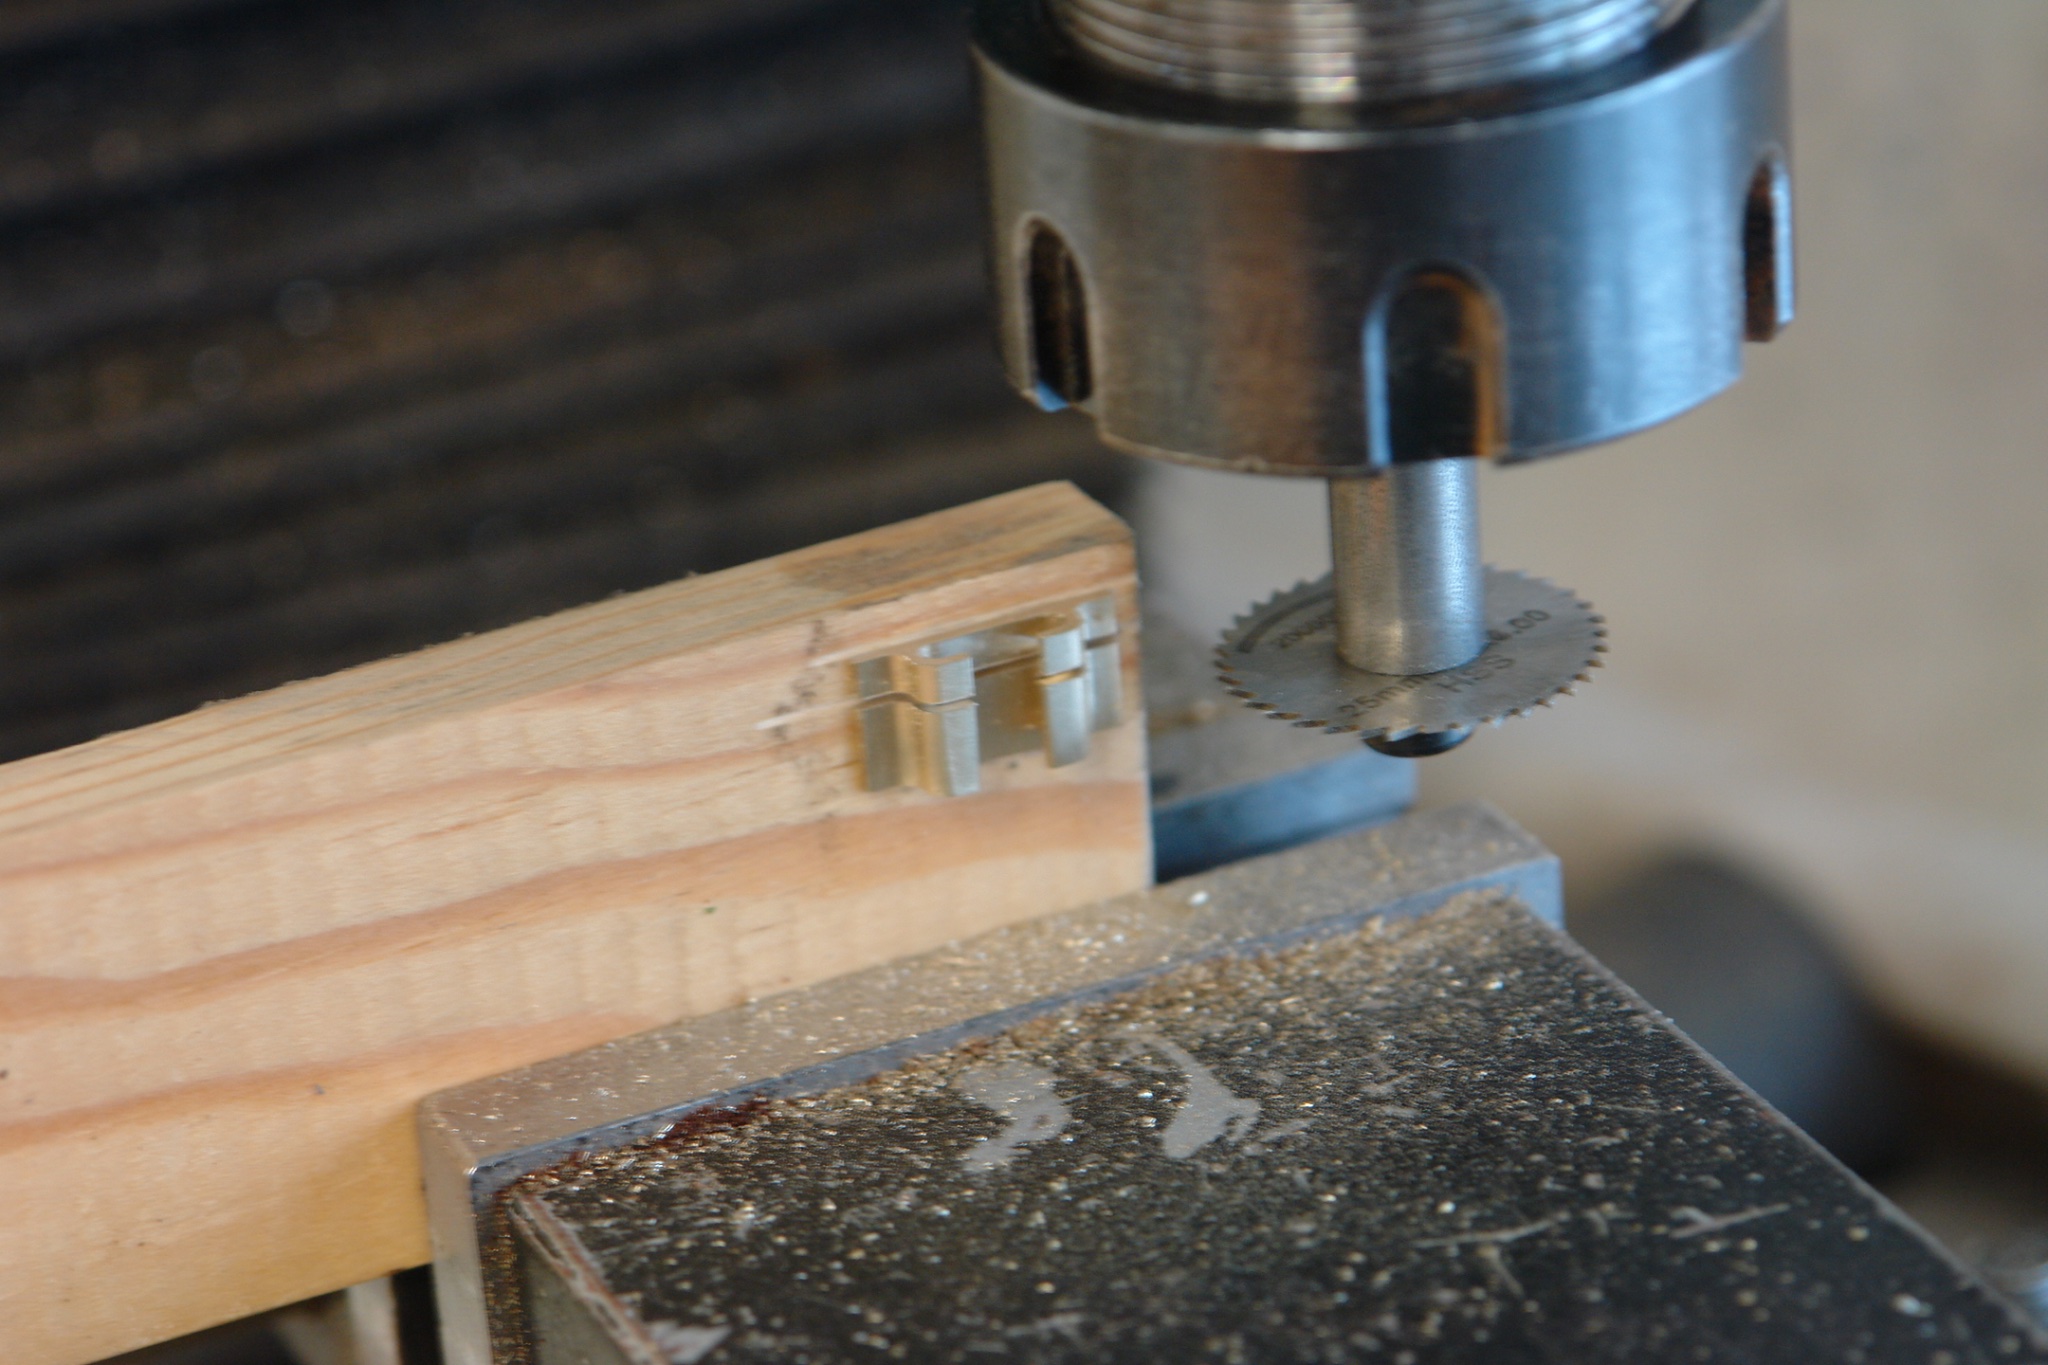
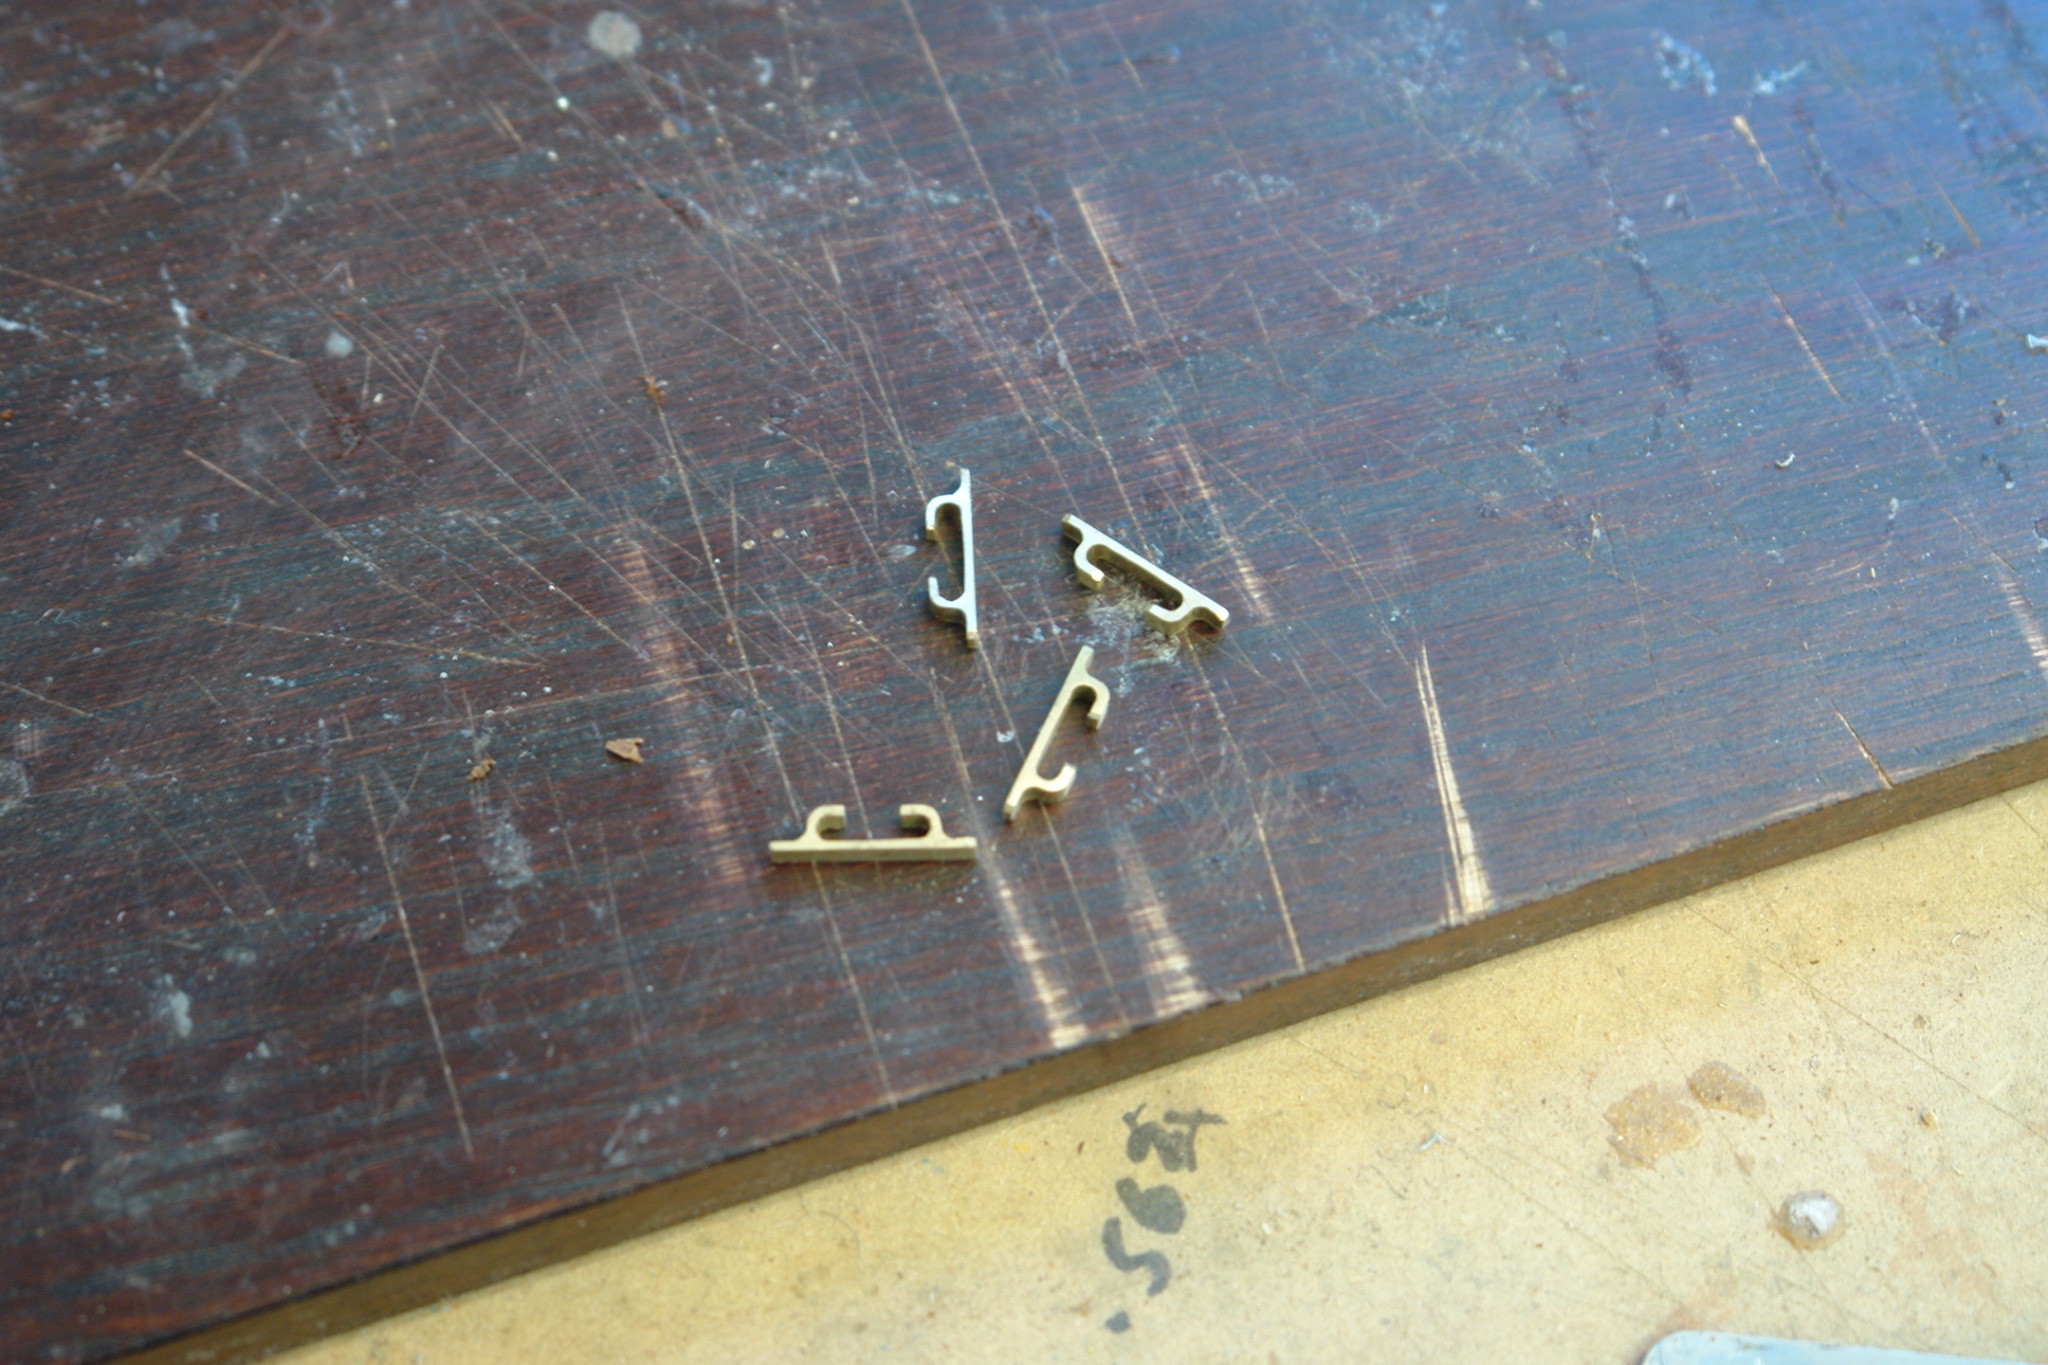
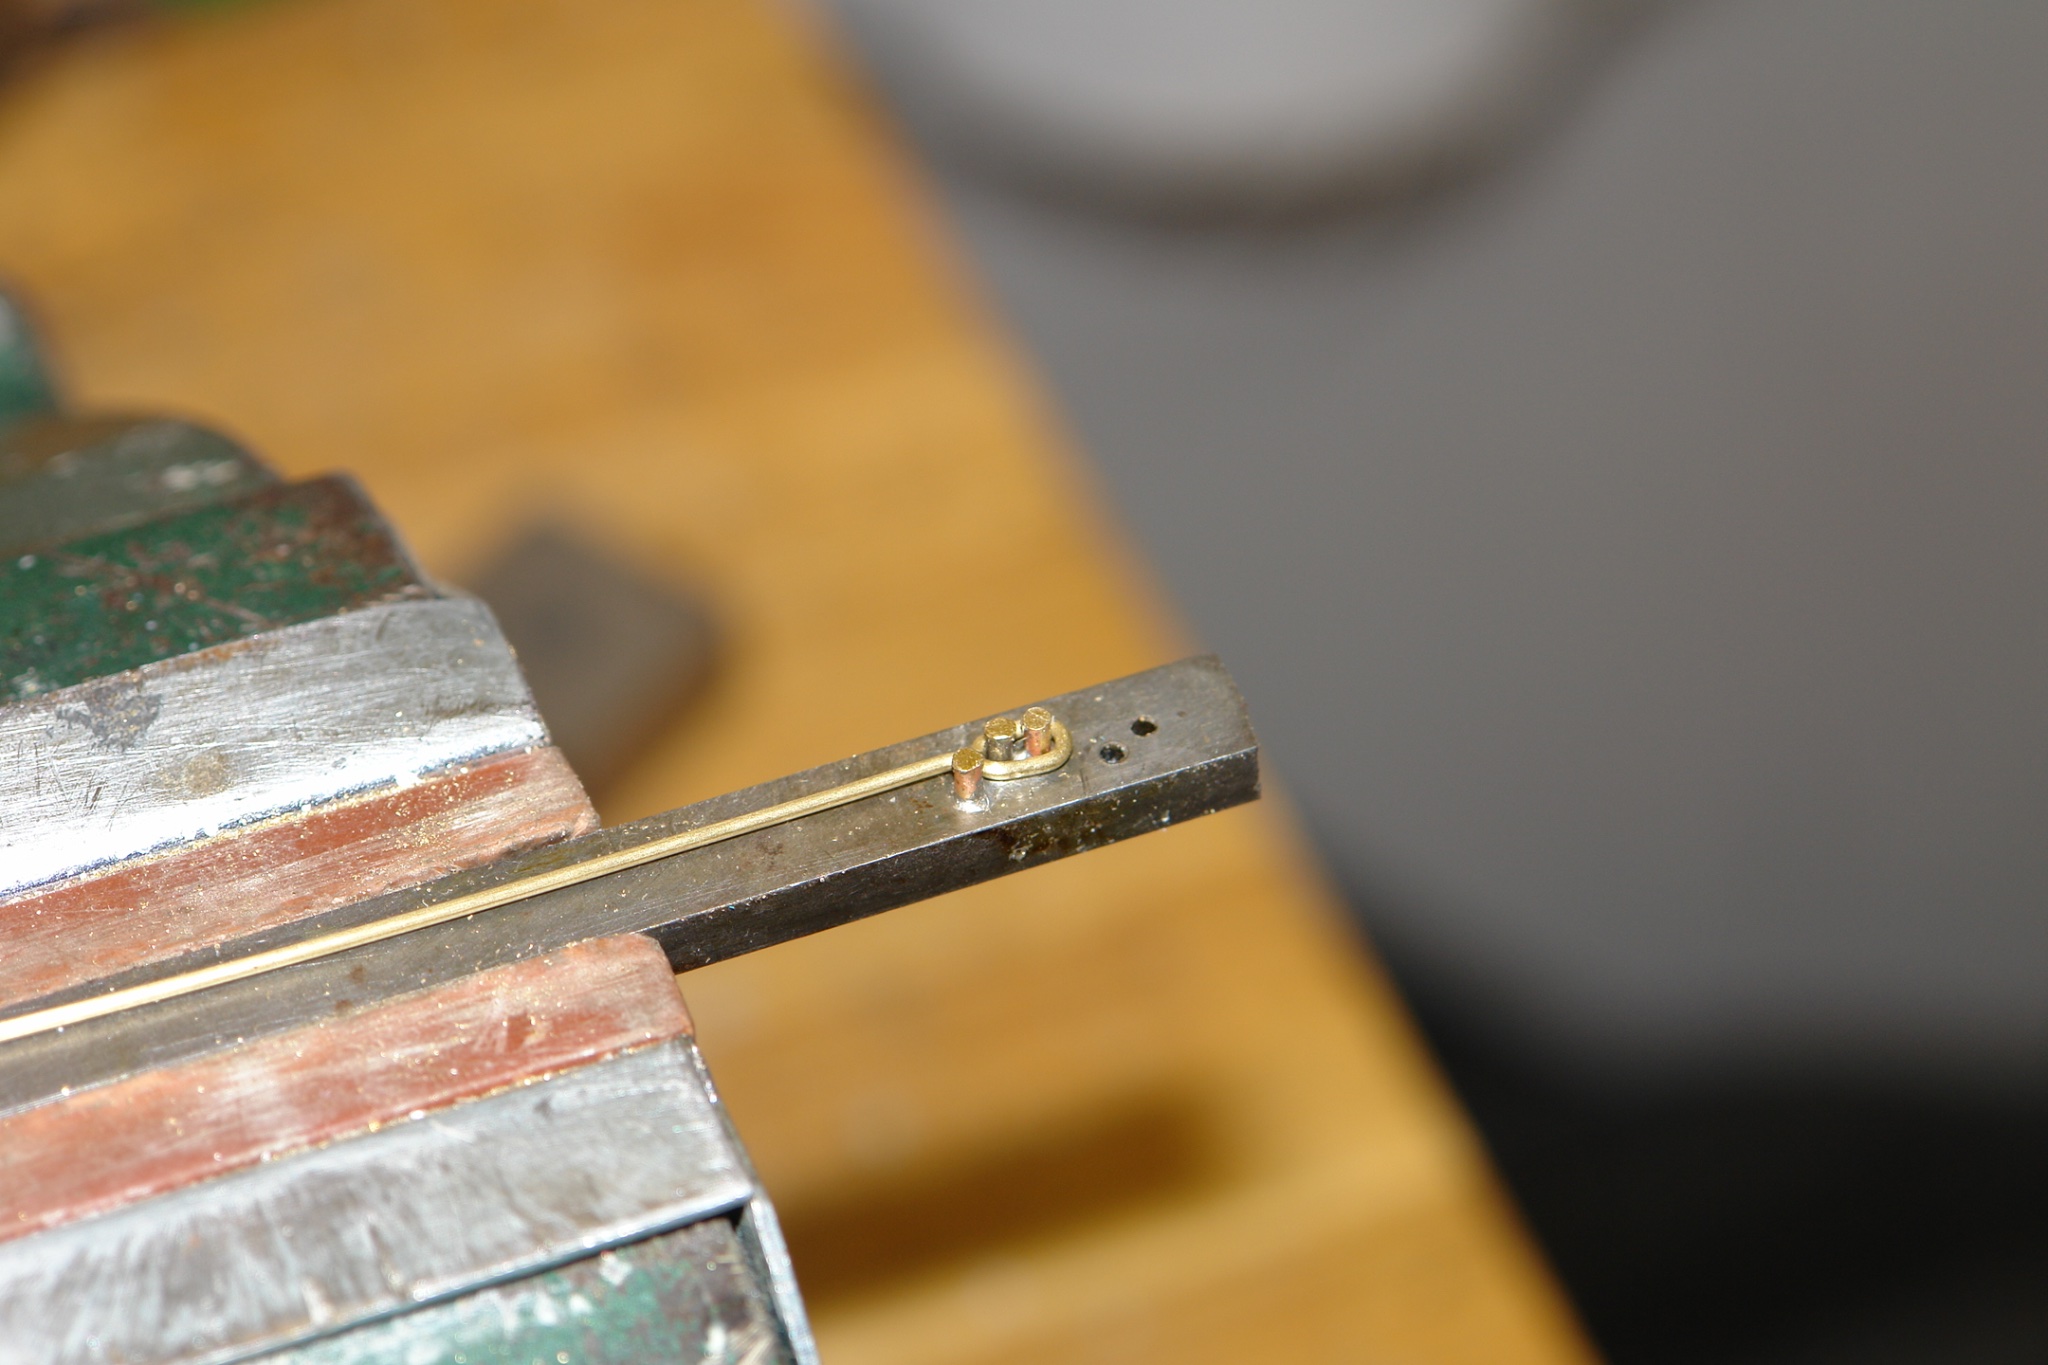
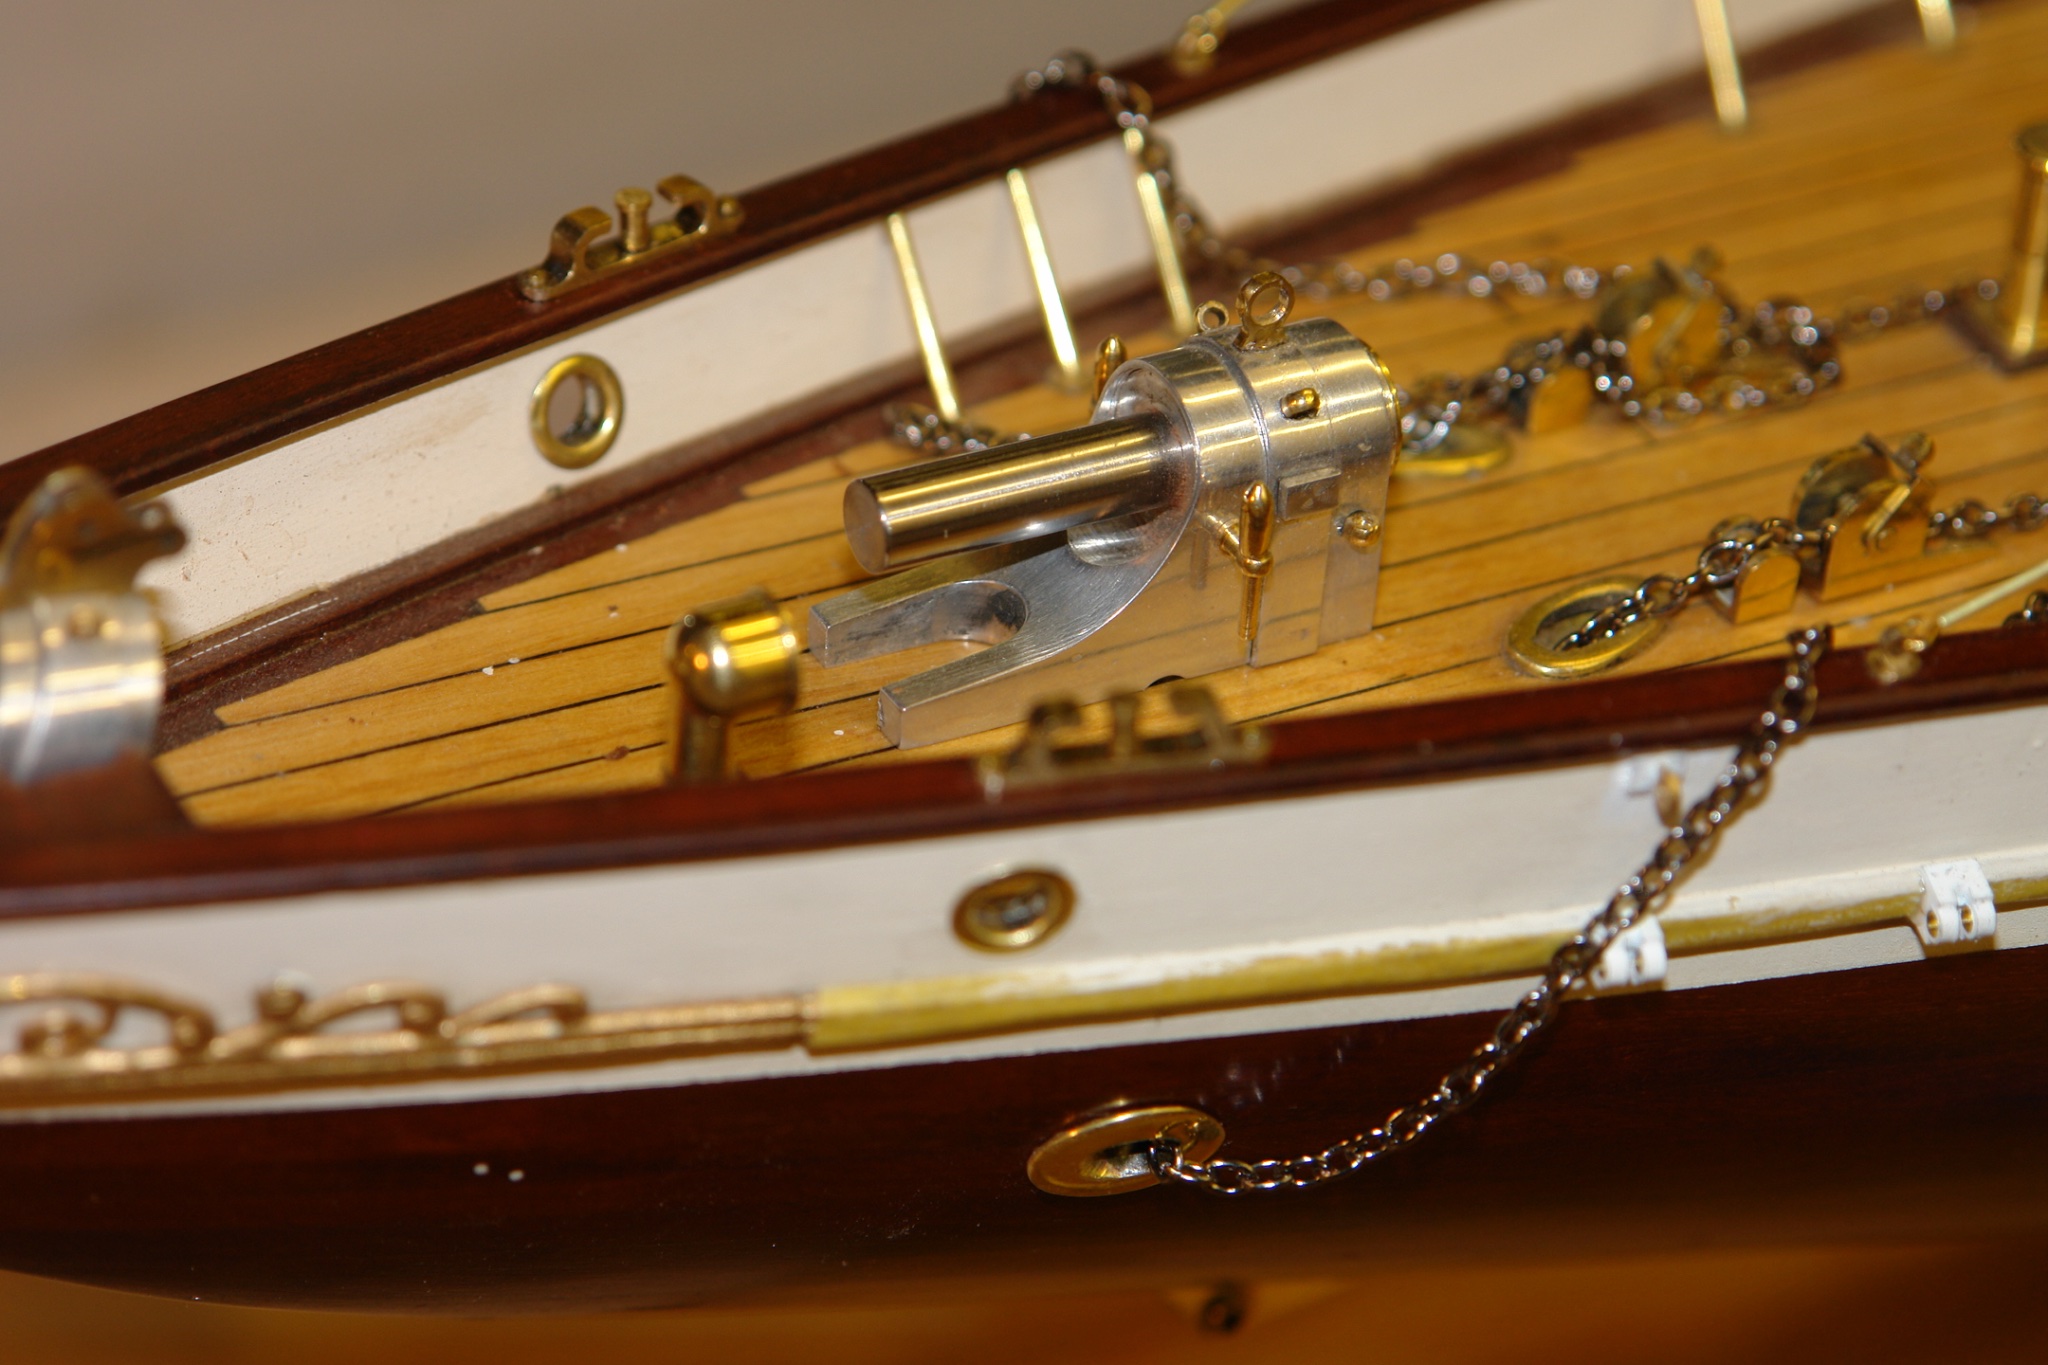
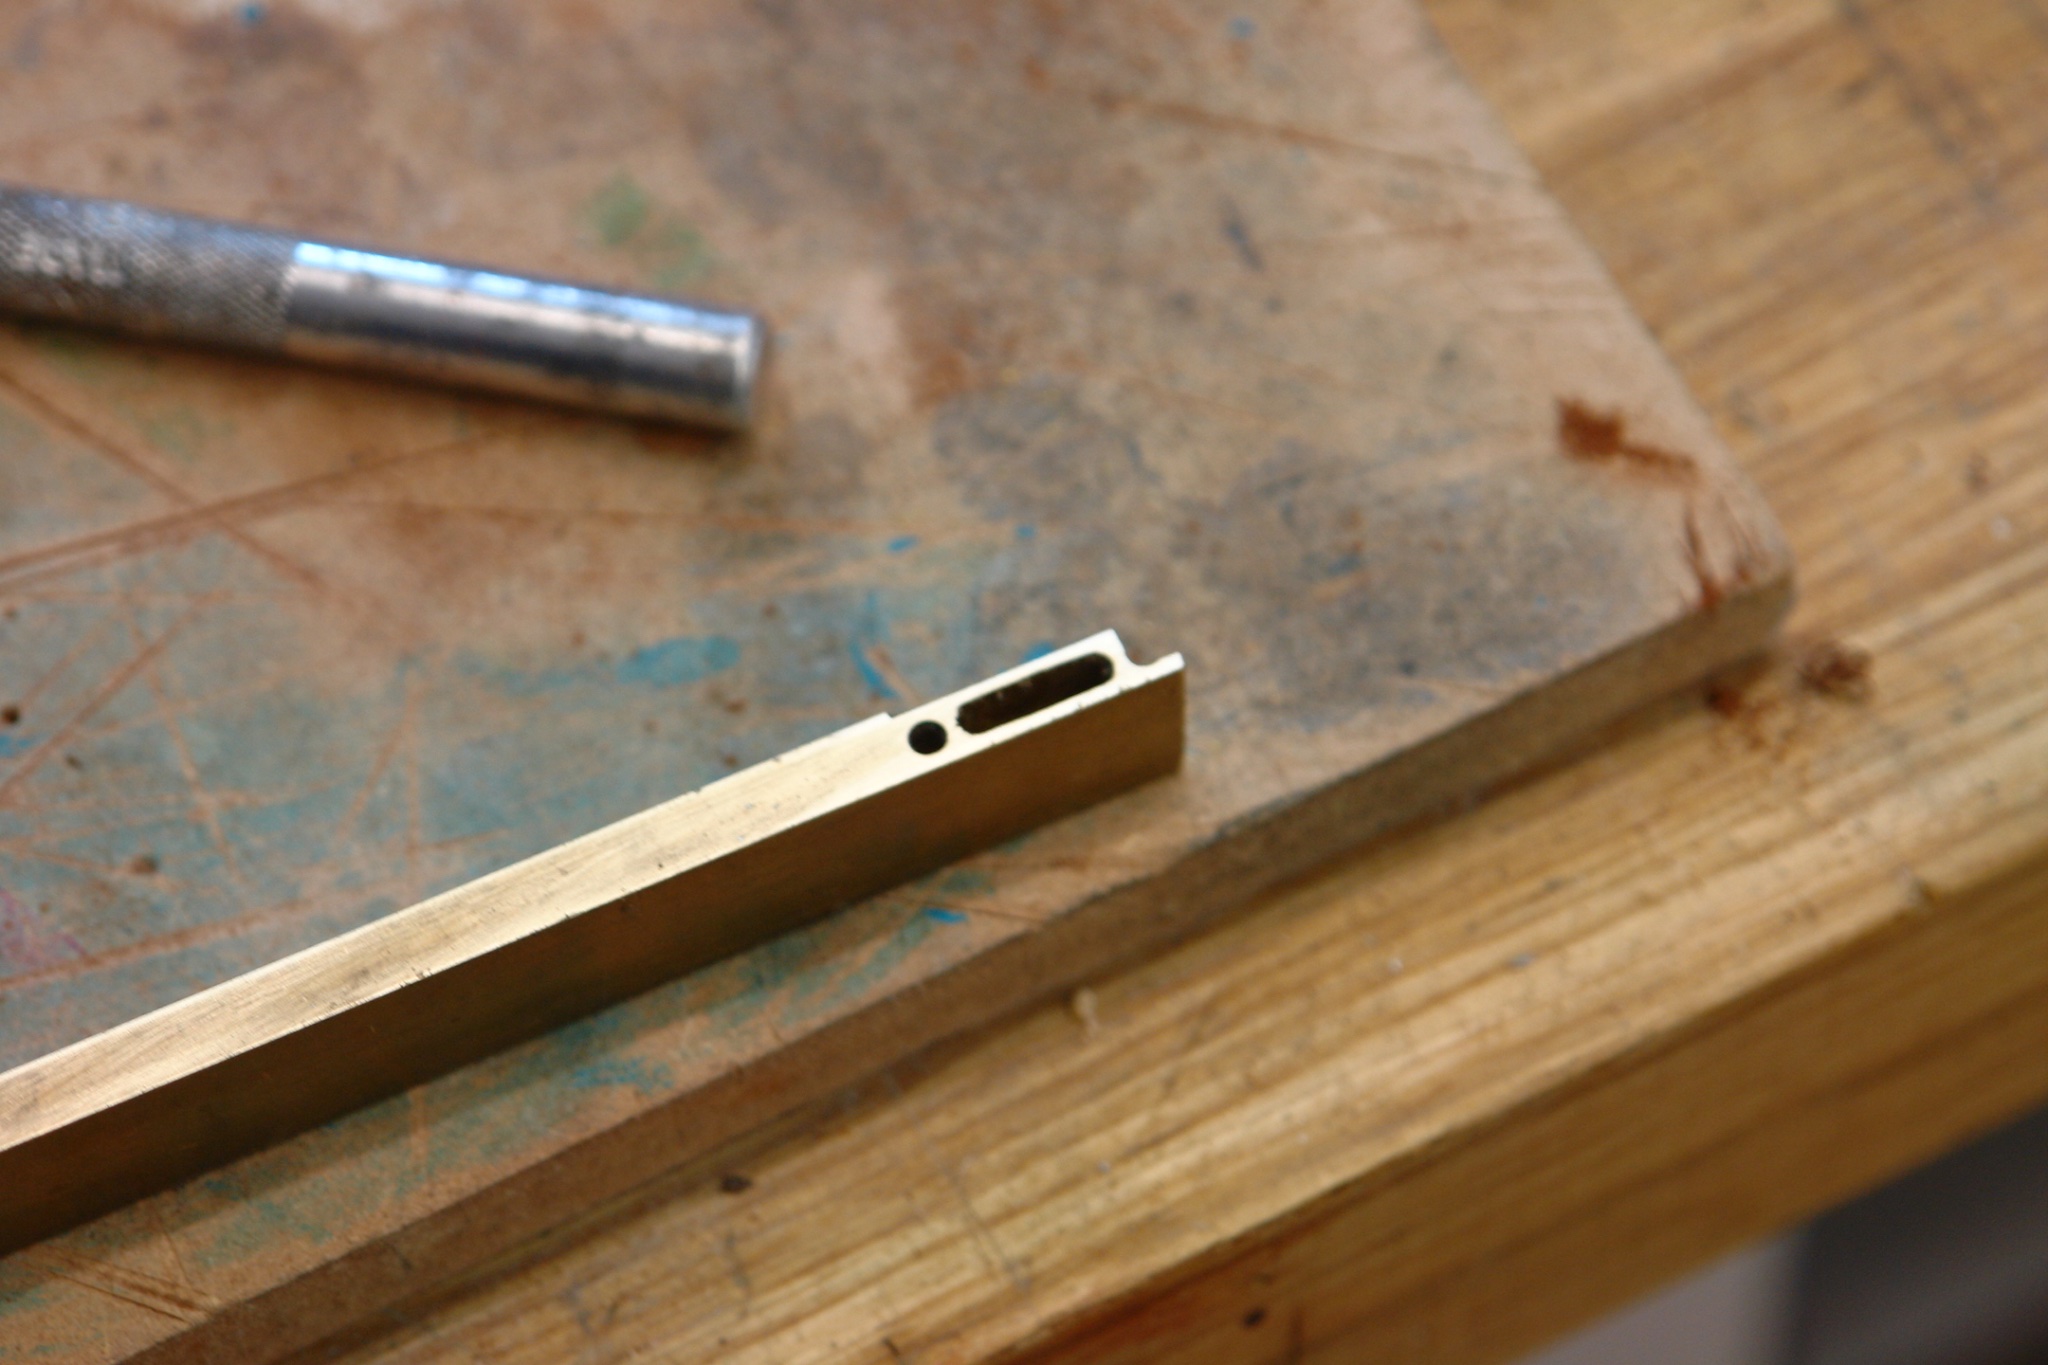
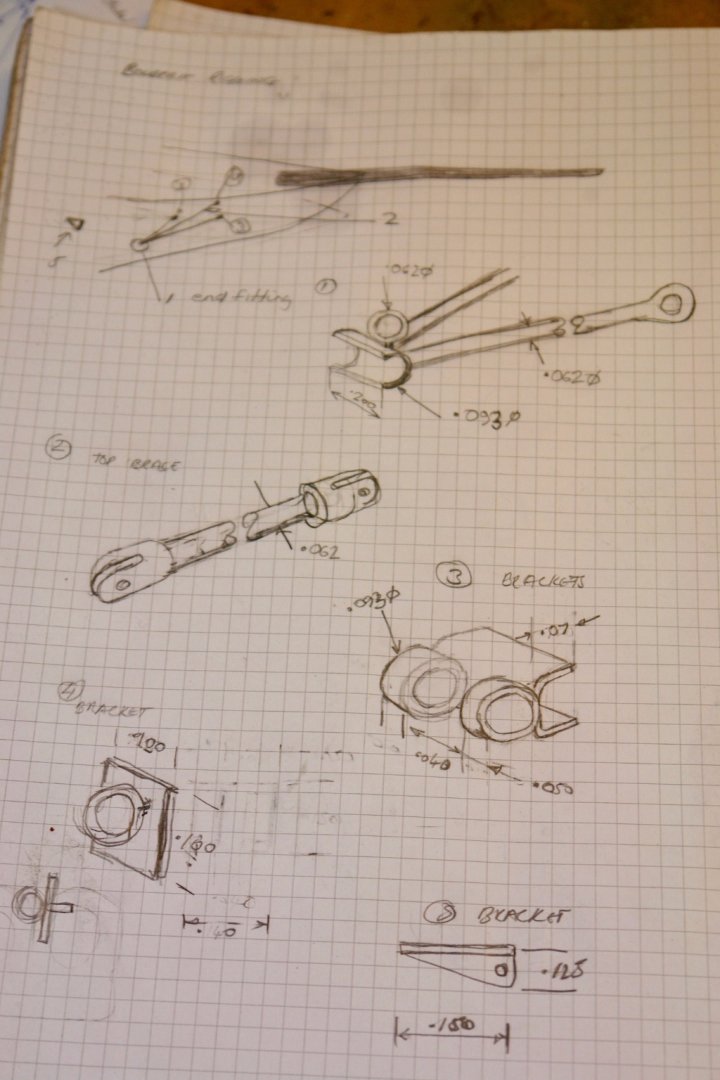
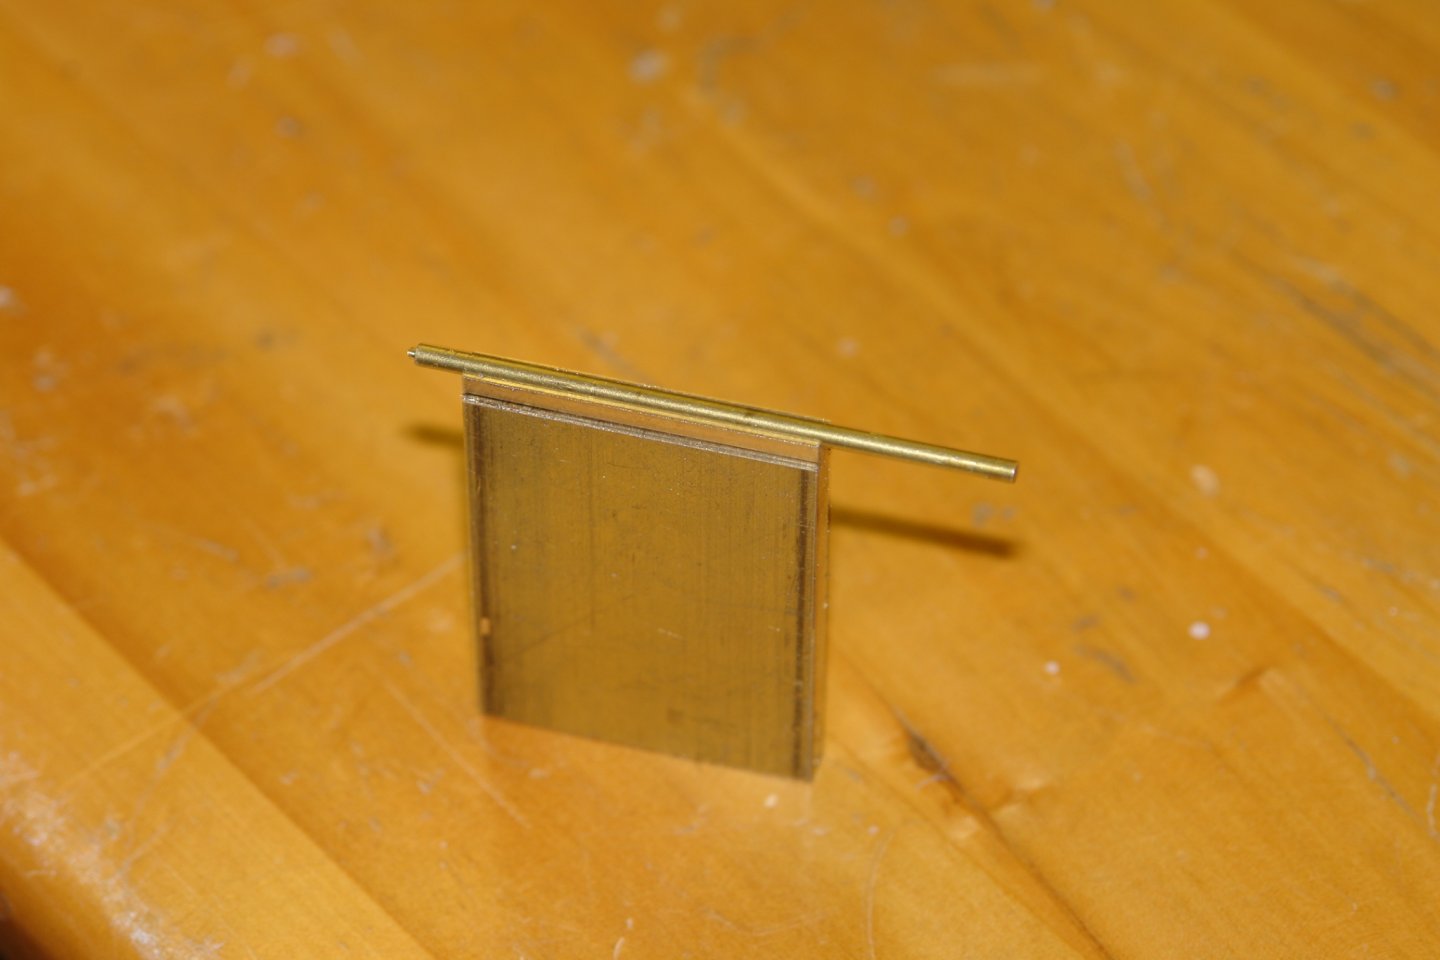
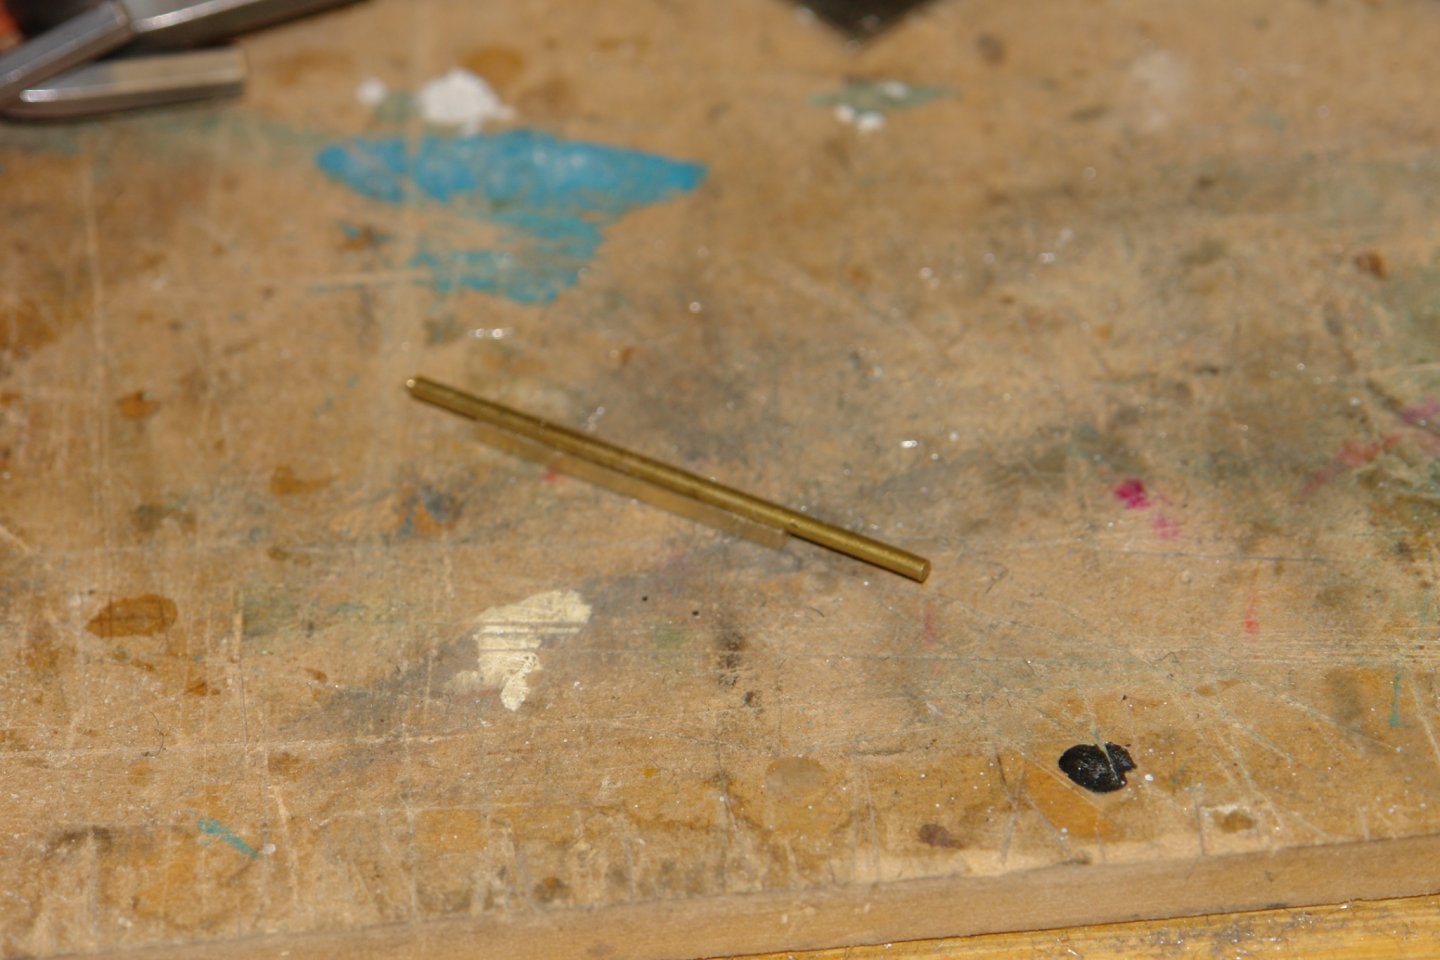
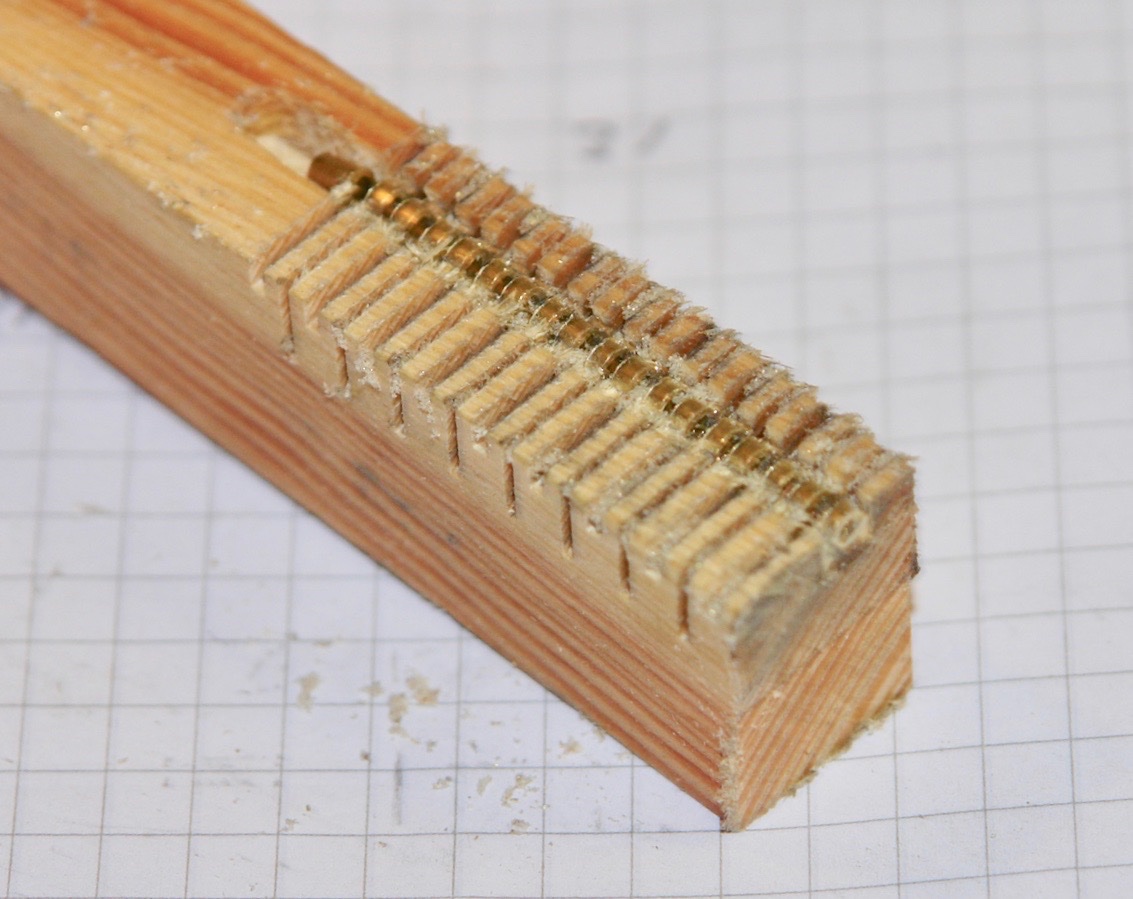
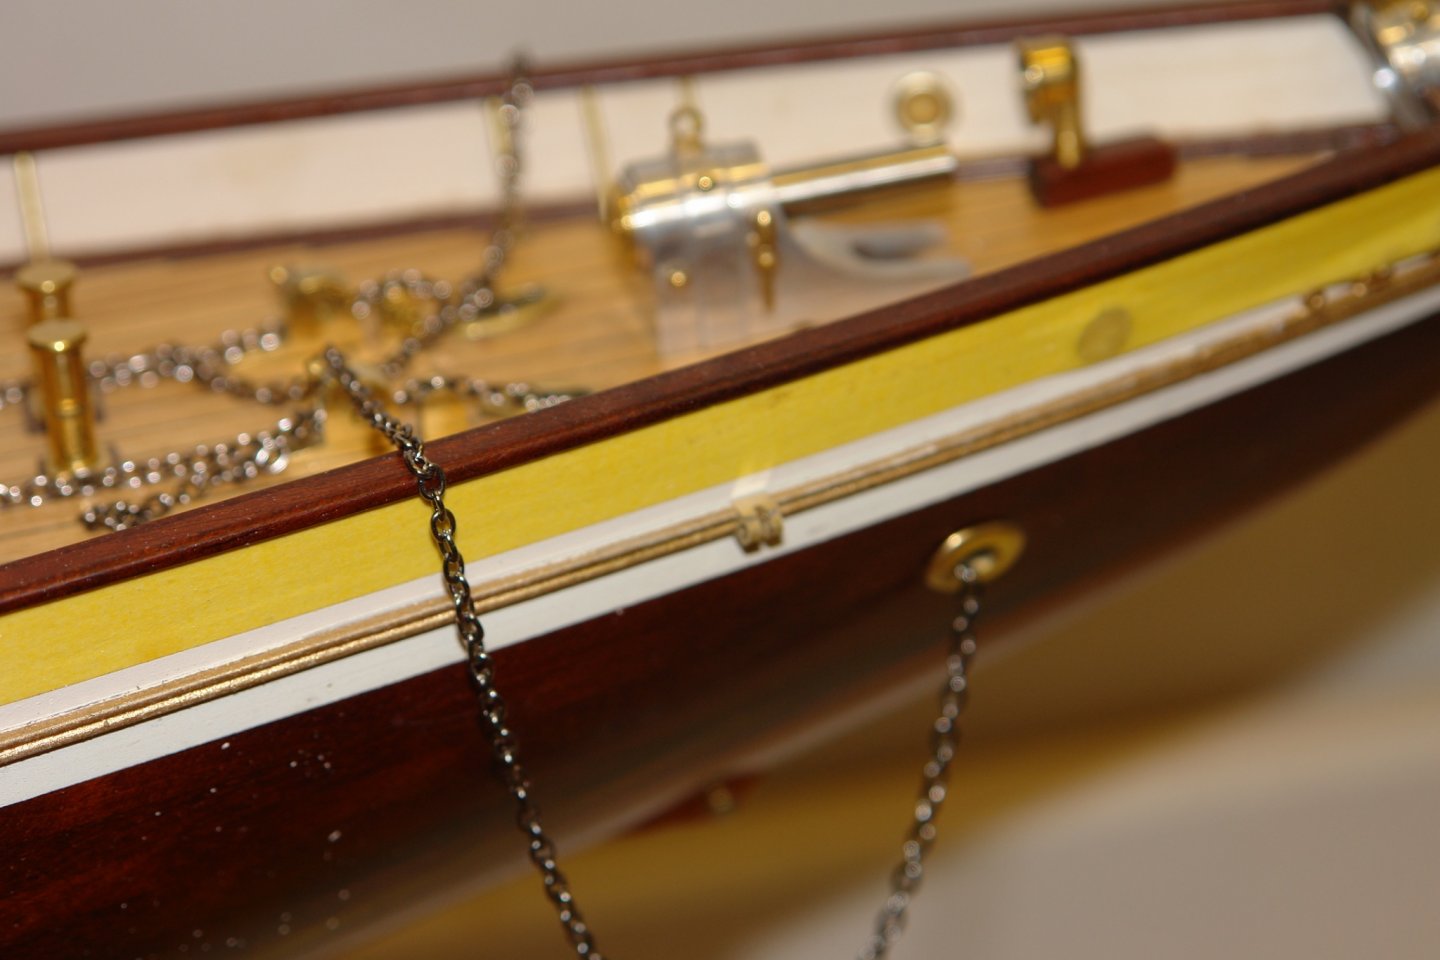
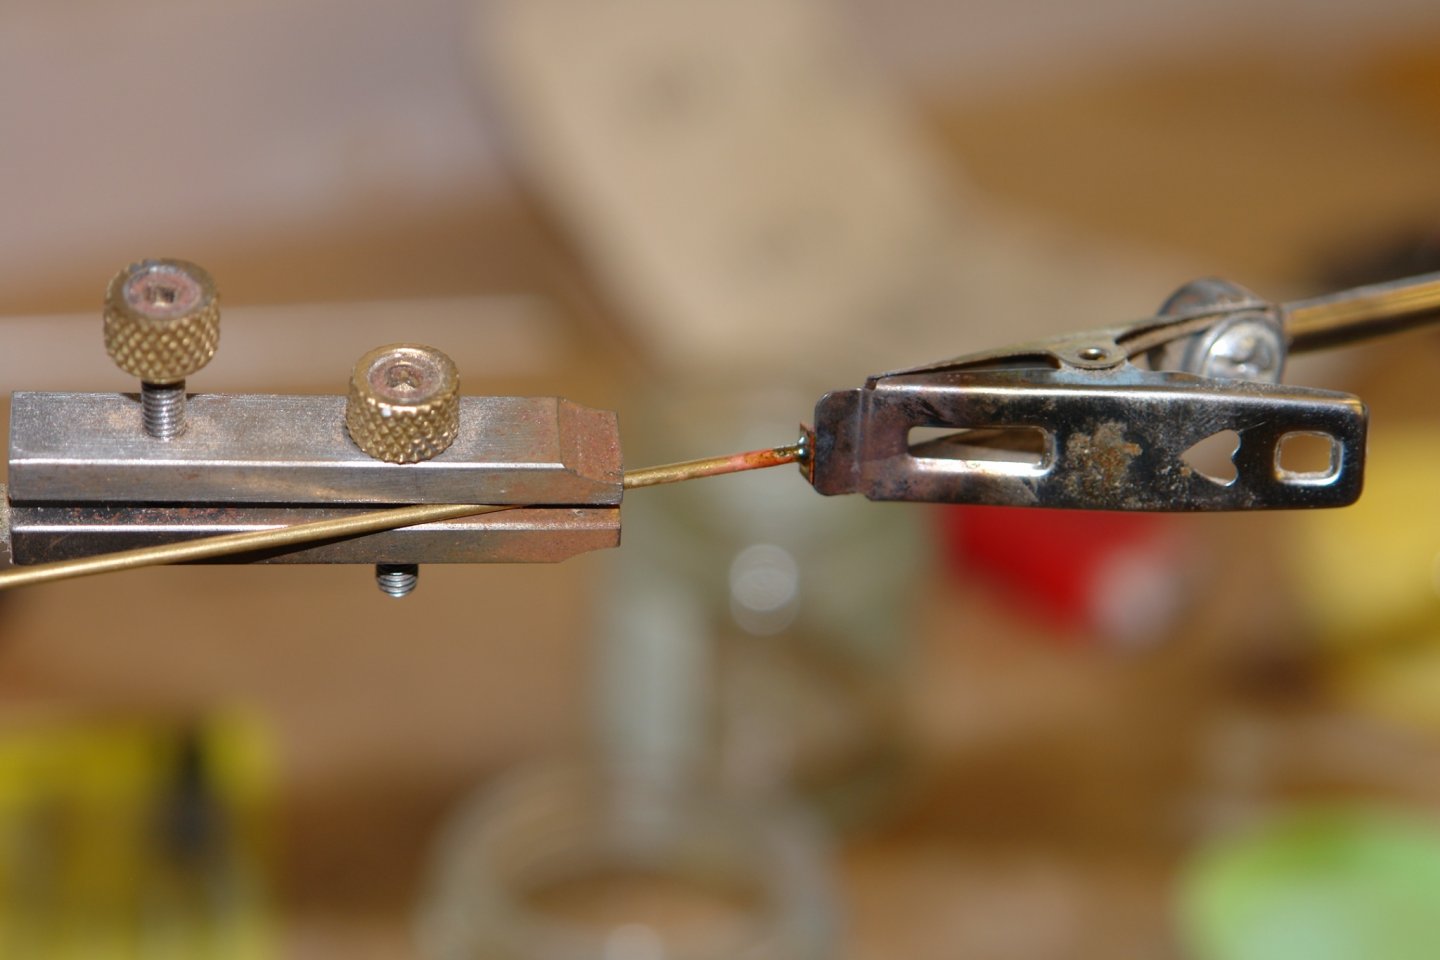
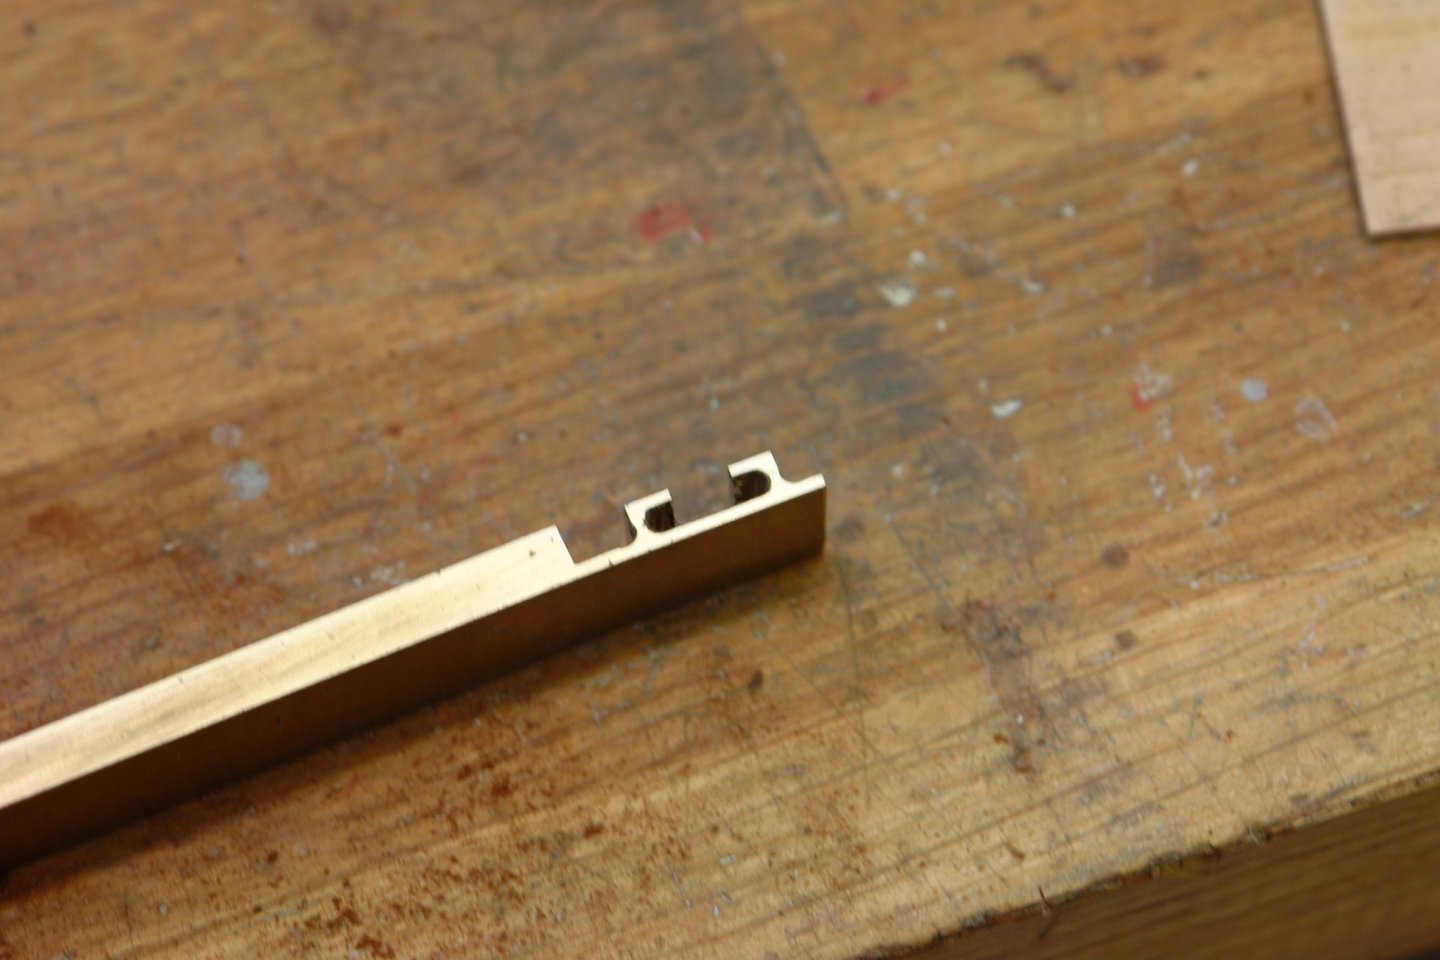
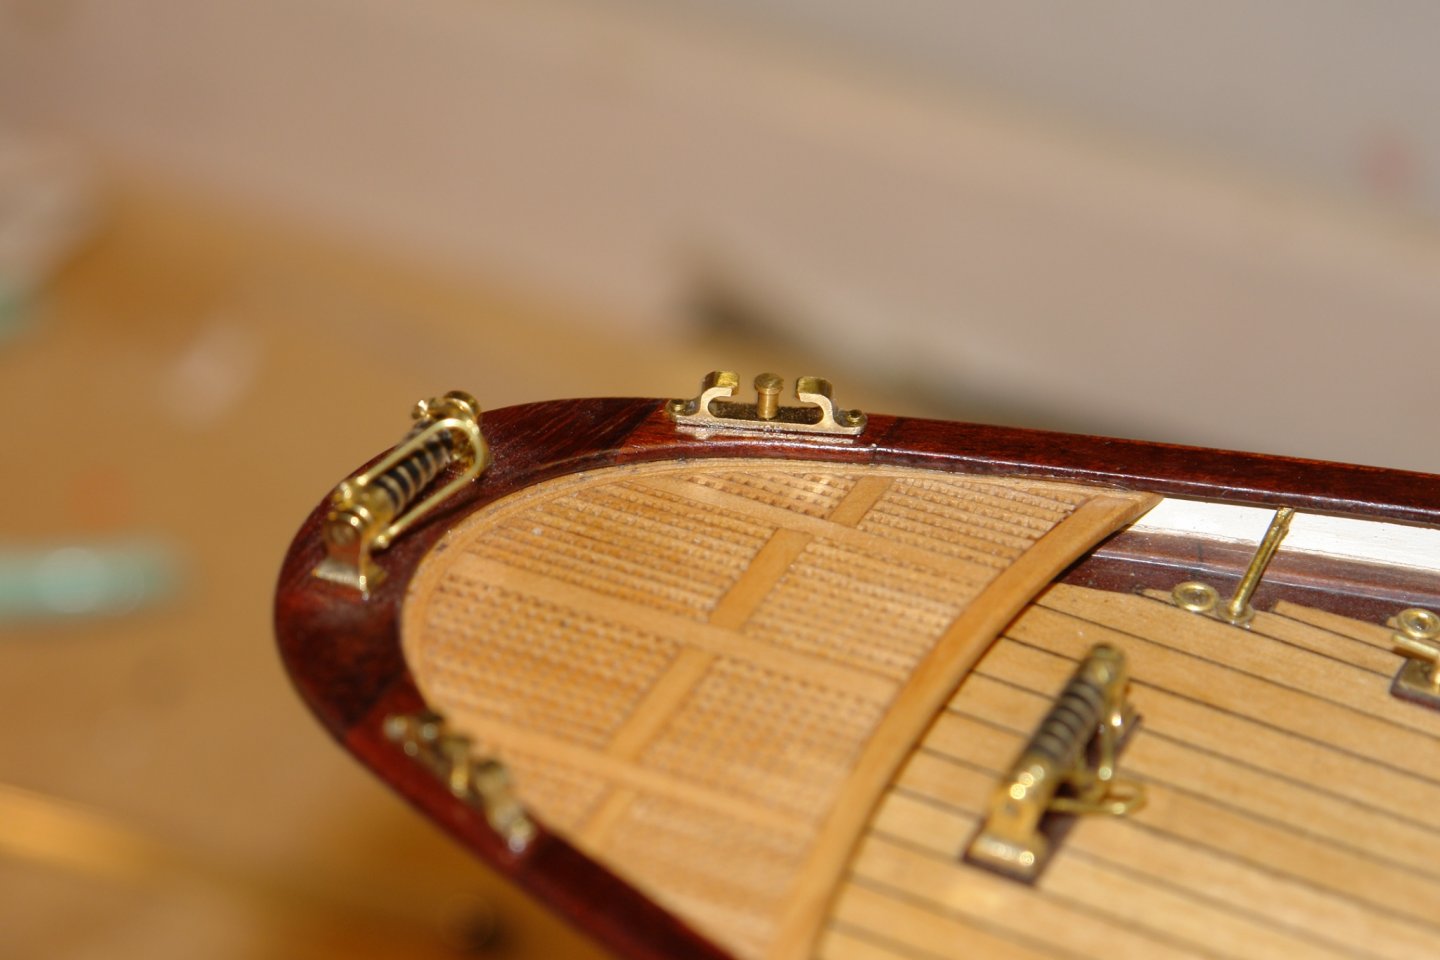
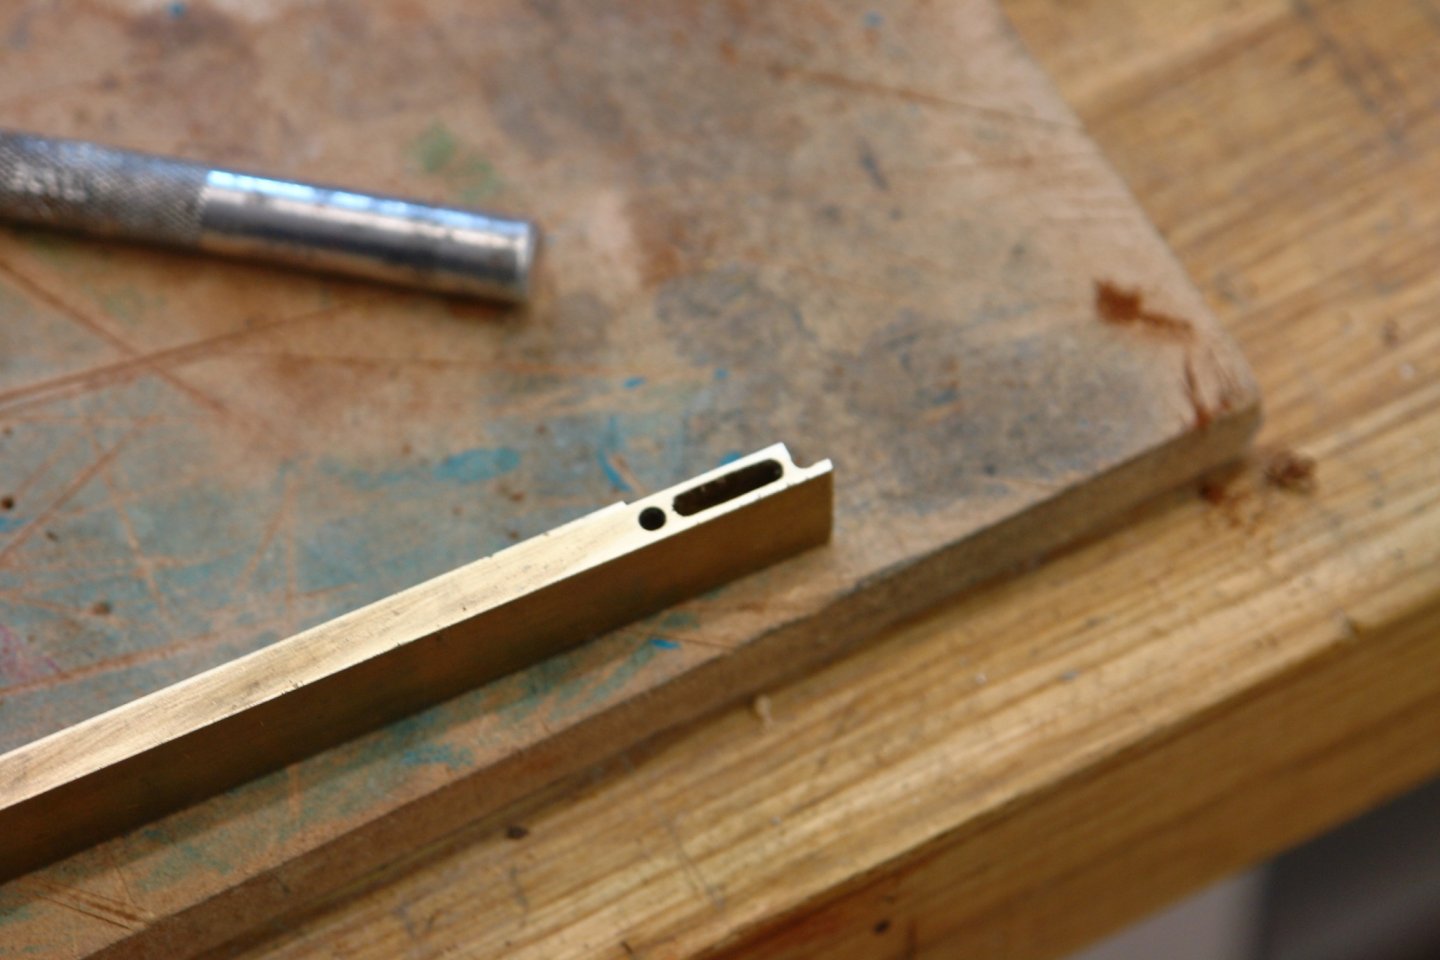
For the past week the weather has been typically British as global warming has taken a few weeks off. The upside is that I ventured into the workshop. Mental note - I must keep a better record of where I am up to. I decided to make a start on the tripod outriggers for the jib stays. These are a complicated little job consisting of small brackets and thin struts. They have to be pretty accurate as dicrepancies easily show in the run of the stays. I decided to include a degree of adjustment to ease setting. A couple of pictures show what I am trying to make. I did a bit of sketching to sort out how I was going to make the various bits. To achieve the adjustment I decided to form the struts out of thin wall tube with wire rod sliding in the bore.The tube was .048" OD x .040" ID. I started with a .093" tube that would ultimately form the "C" shaped outer end and drilled this with 2 .040" cross holes to take the outrigger rods. Into this tube I soldered the .040" rods. I then formed the eye to take the outer end of the upper strut and soldered this on to the tube between the two rods. (Awful soldering, must do better). The brackets started life a piece of brass sheet .125" thick. This was drilled along one edge with .093" hole to take a brass tube. The hole was then cut along the drill centreline to from a half circular channel into which the tube was soldered. This was then cut off to the required height of the bracket before inverting it and cutting a square channel along the base. I then cut the tube down to the length of the channel and glued this into a slot in a piece of wood. The slot depth was equal to the height of the bracket. I then did a series of accurate cross cuts of different depths to form the lugs and to separate off the brackets. The slots were cut on the table saw. I needed 6 brackets so made 8 - I sometimes learn from my mistakes. The brackets were glued to the hull. The reason for the base channel can be seen, as 4 of the brackets fit over the rubbing strip. `The other 2 brackets fit flush to the hull so here the the "wings" were removed. I also manufactured a number of eyebolts by the previously described method, together with other U shaped brackets on mounting spigots. I also needed a couple of off-set brackets for attaching the ends of the stays to the hull. These were also soldered to mounting spigots. Finally I had a kit of parts (excluding the strut tubes). By this stage I had cut off the outer end tube to from the "C". All well and good you might think, but that would be incorrect. The angle of the struts proved to be wrong and the end "C" tube didn't sit properly against the run of the stay. They will have to be remade, but at least I will be able to correct the bad solder job.


-
Its a woman thing, they all seem to think we never grow up........ now where did I leave my clockwork train set?
-
Tom, I have always called them turnbuckles, all my sailing friends call them the same except for those who only sail for the gin and rum. They don't seem to have very much sailing terminology!!!!!! Pat, Keith, FlyingFish, Vaddoc - thank you for the comments - I must find time to catch up with your builds.
-
Hi Steve - sorry about the delayed answer - I have been busy outside and catching up with friends and family - the simple answer is I didn't have a small enough mill. I might have done the cut method anyway as making 4 would have required a long slender mill with the possibility of deflection and breakage.
-
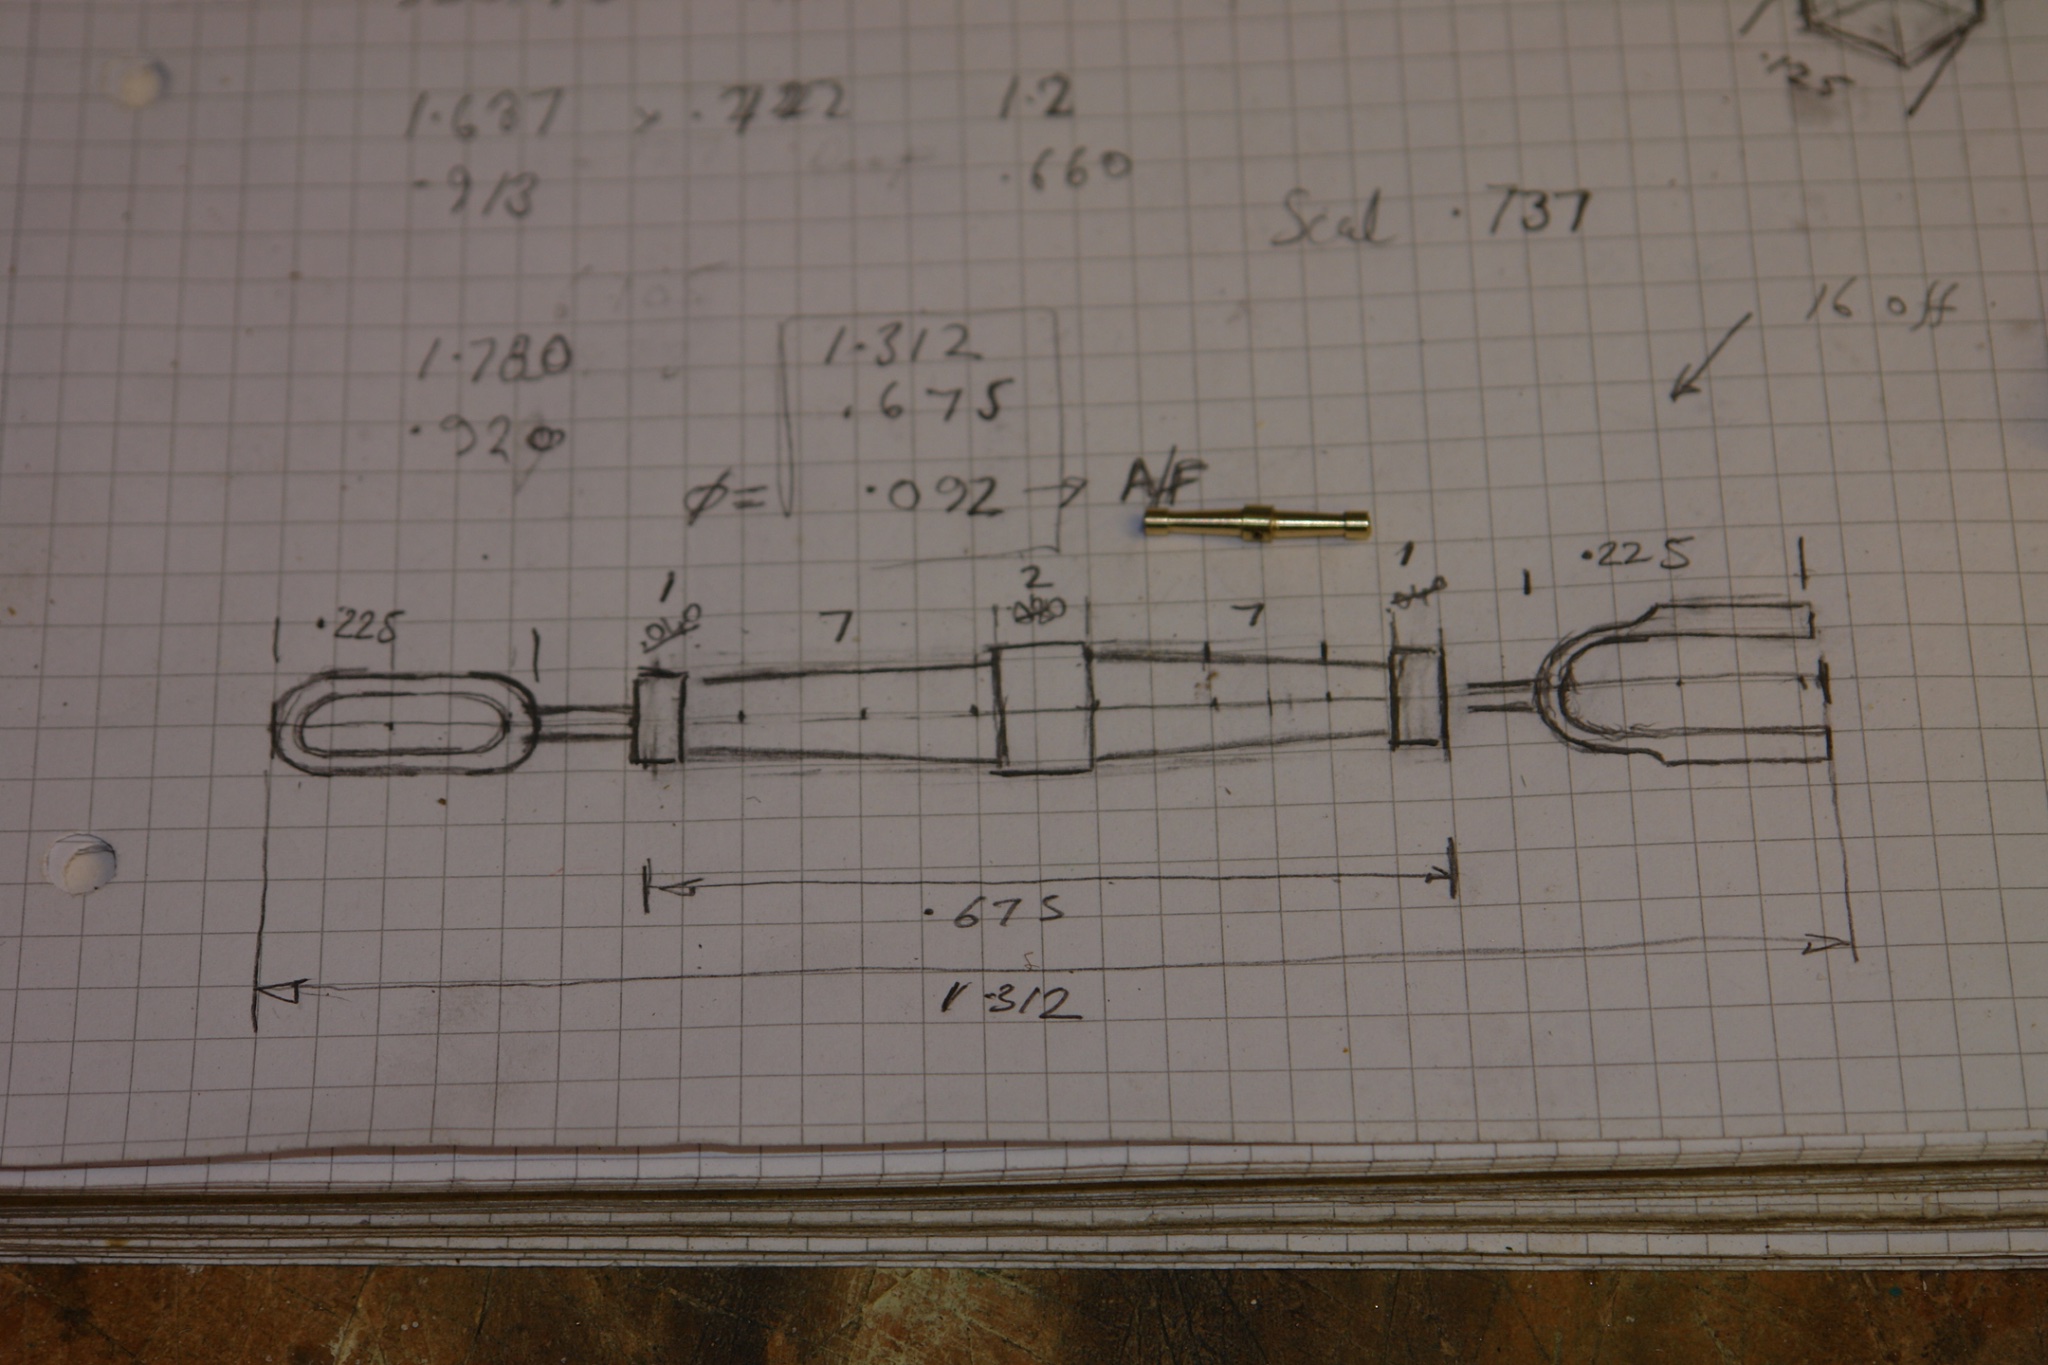
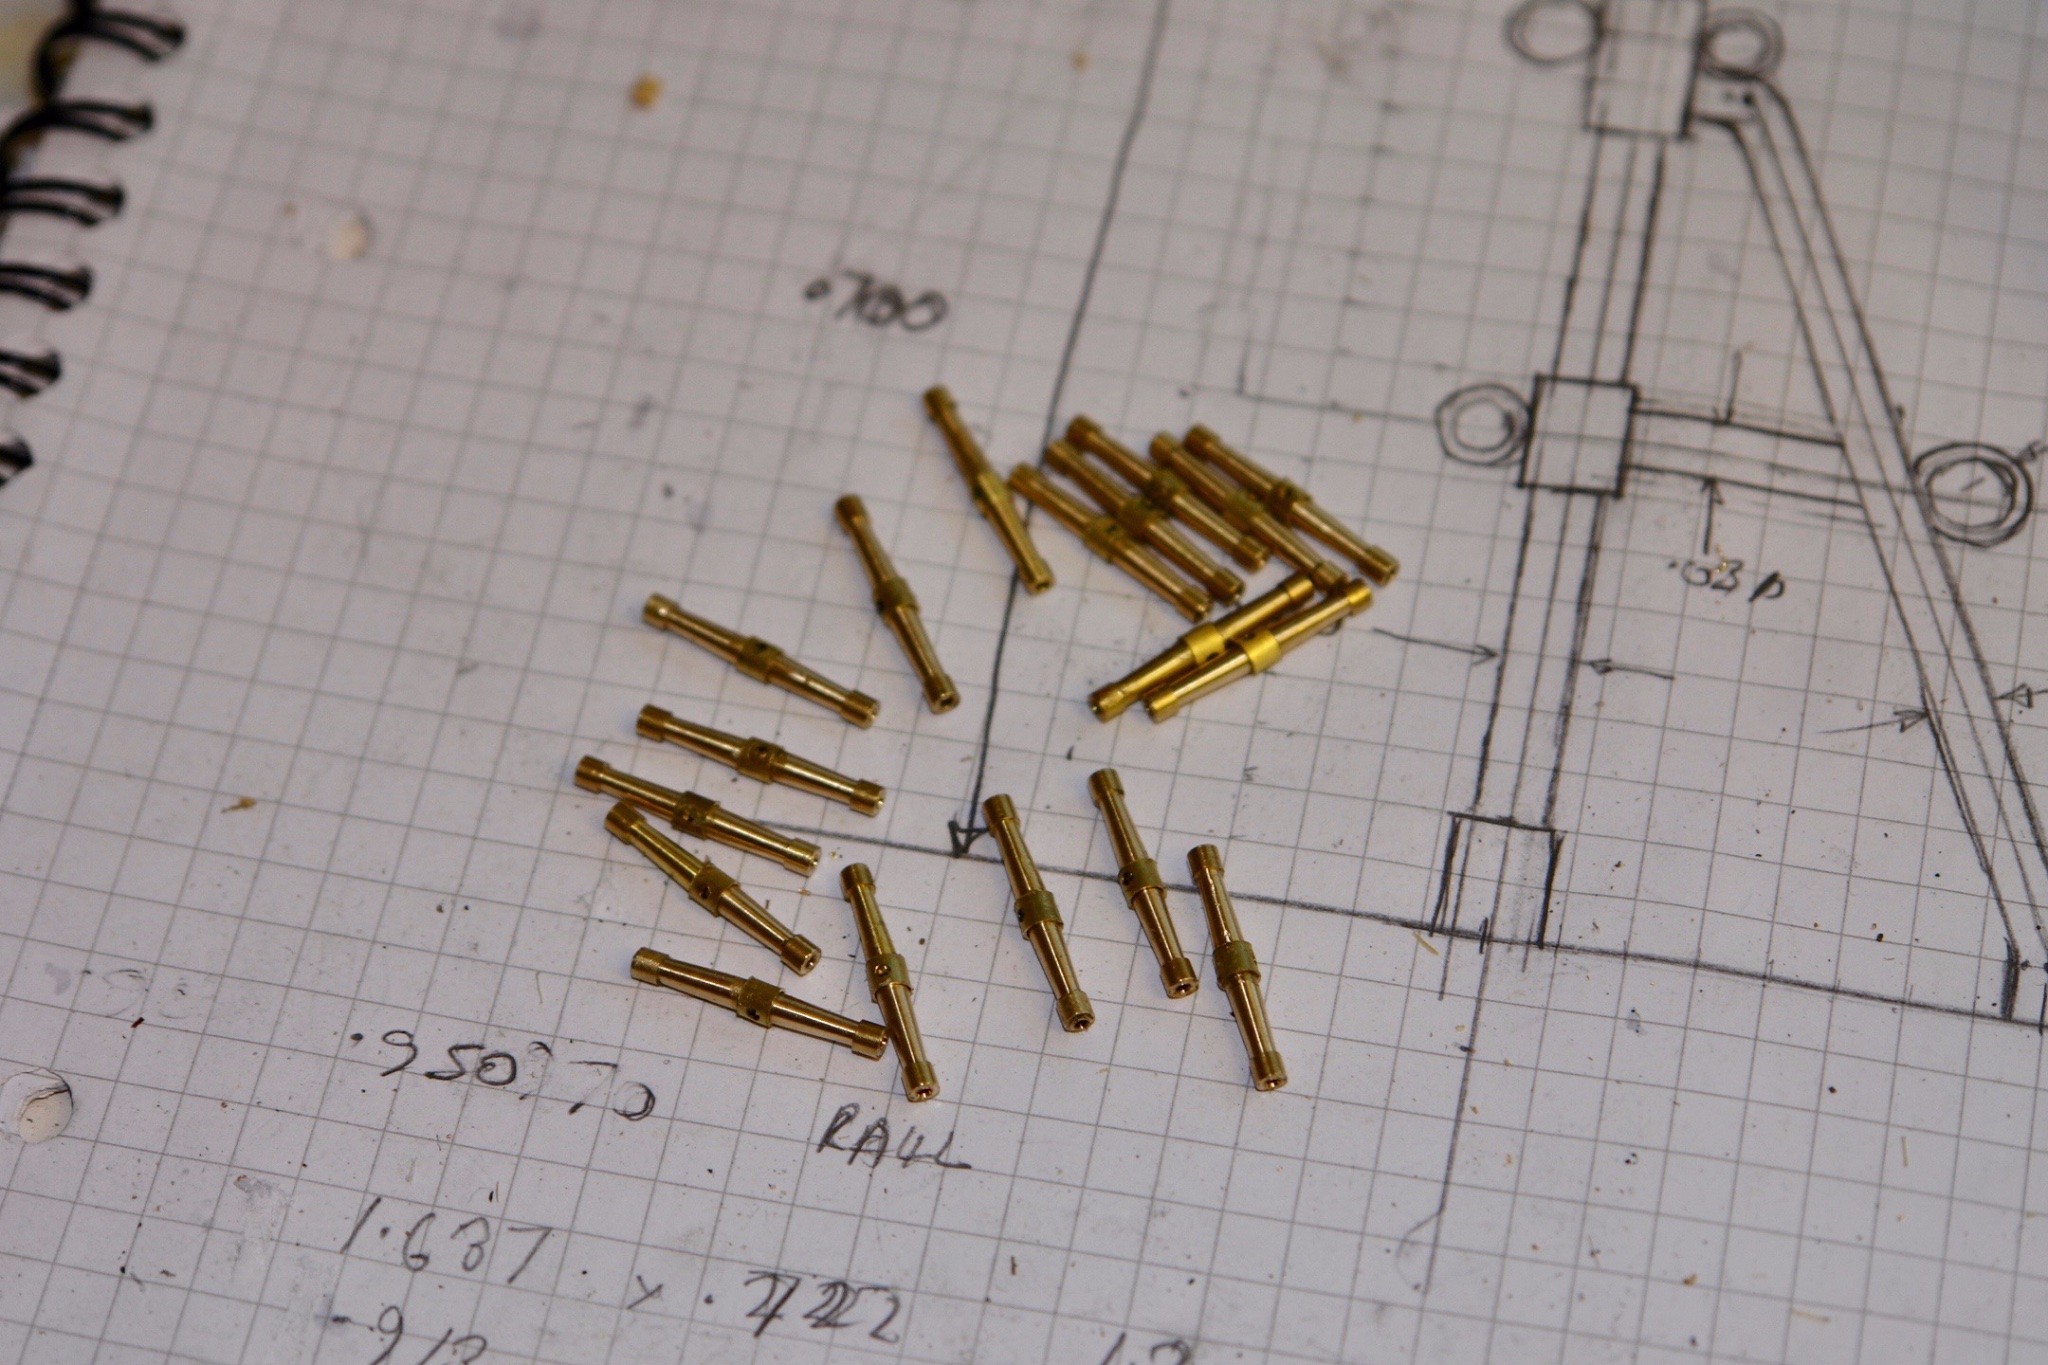
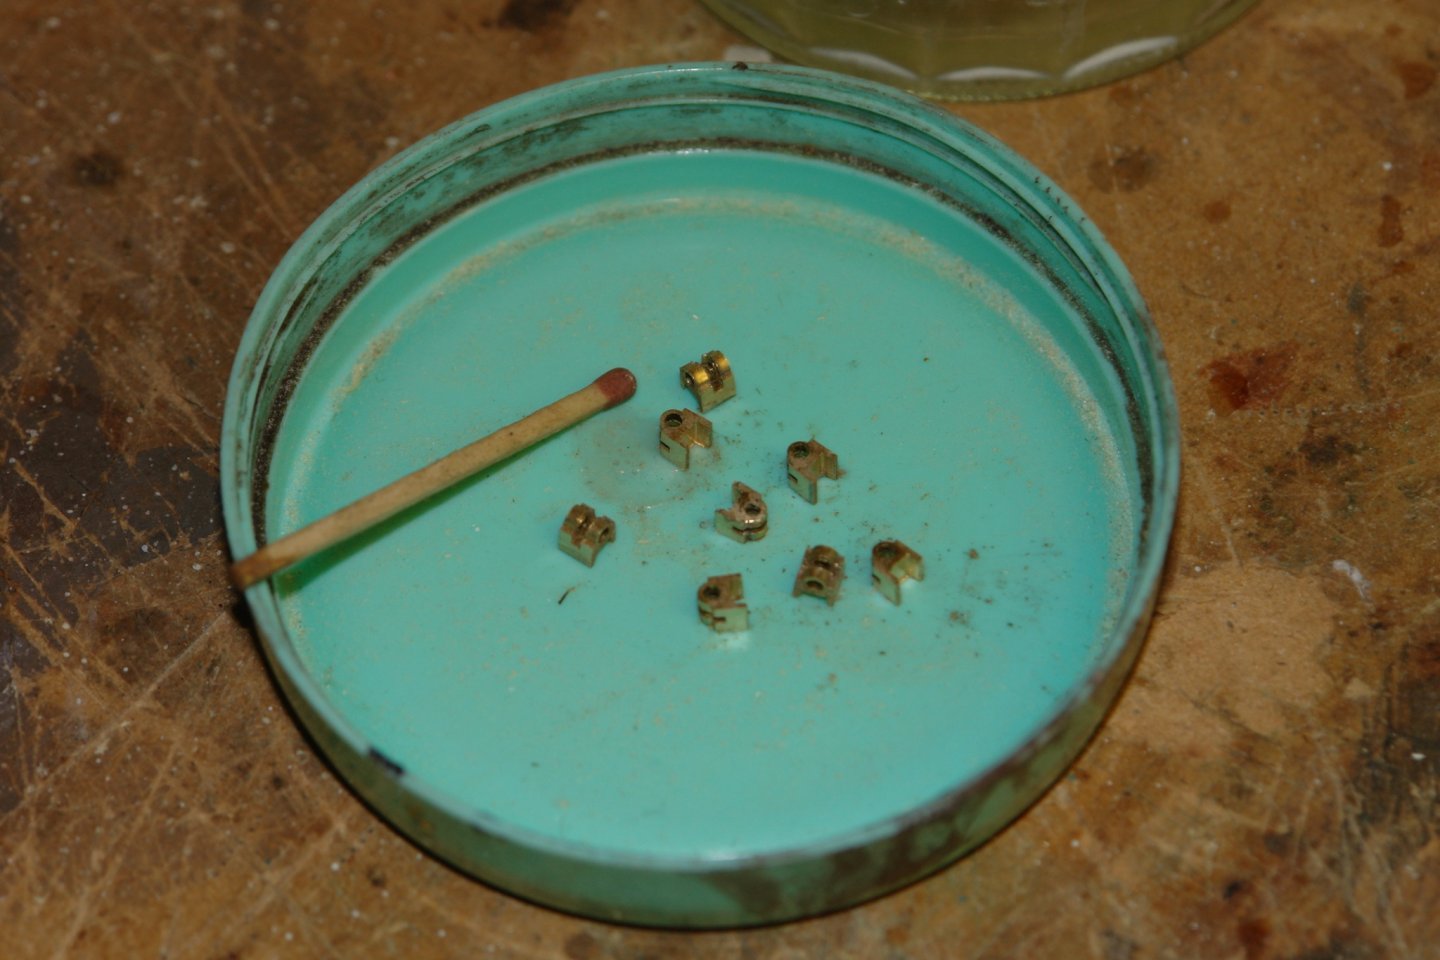
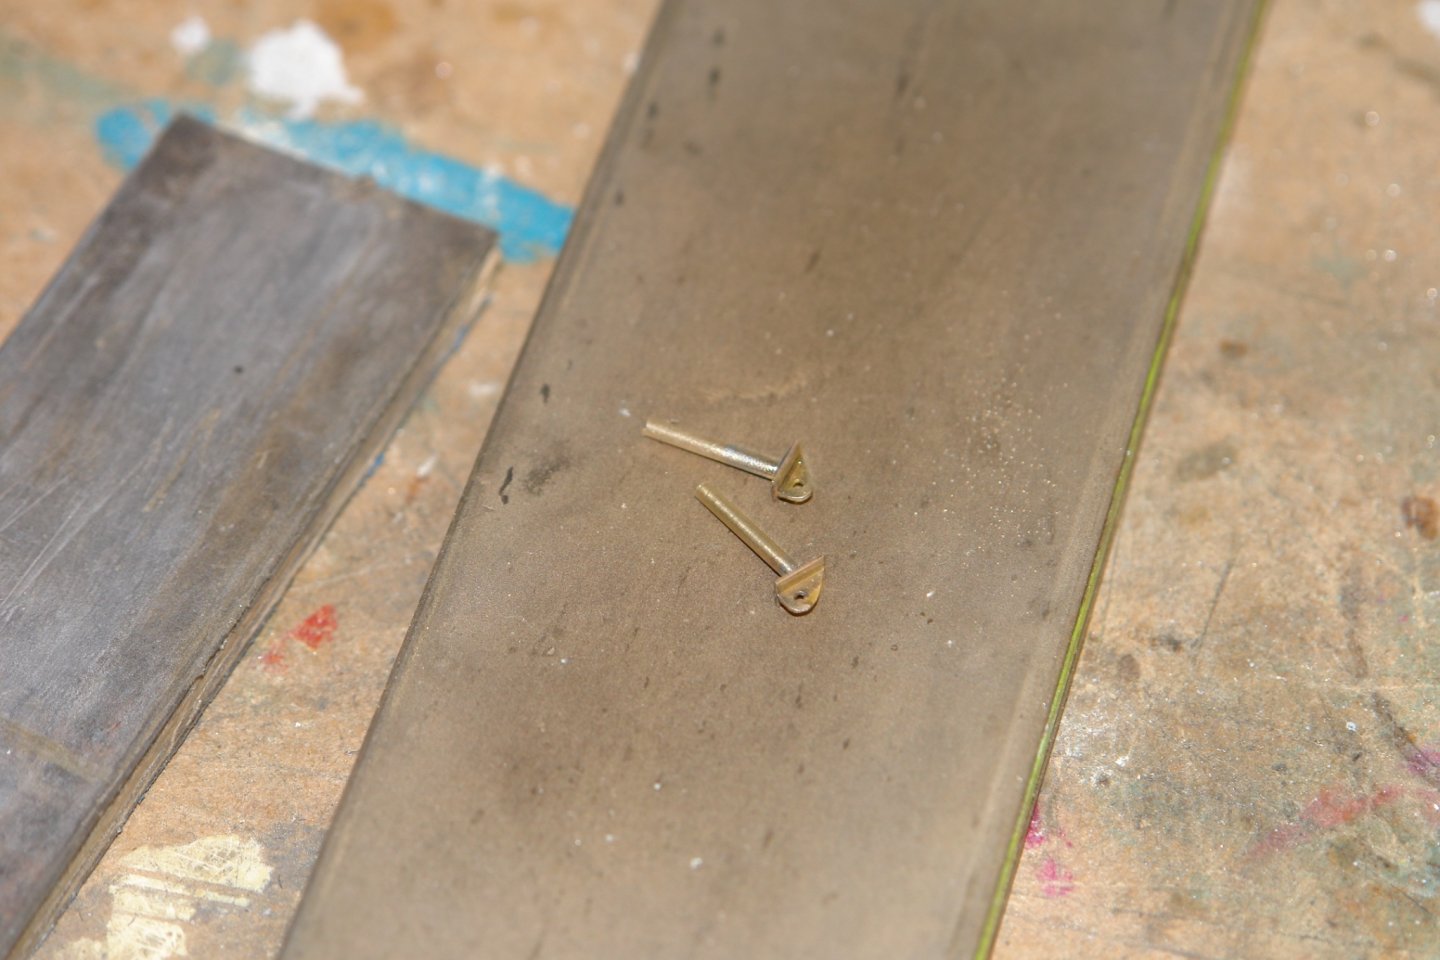
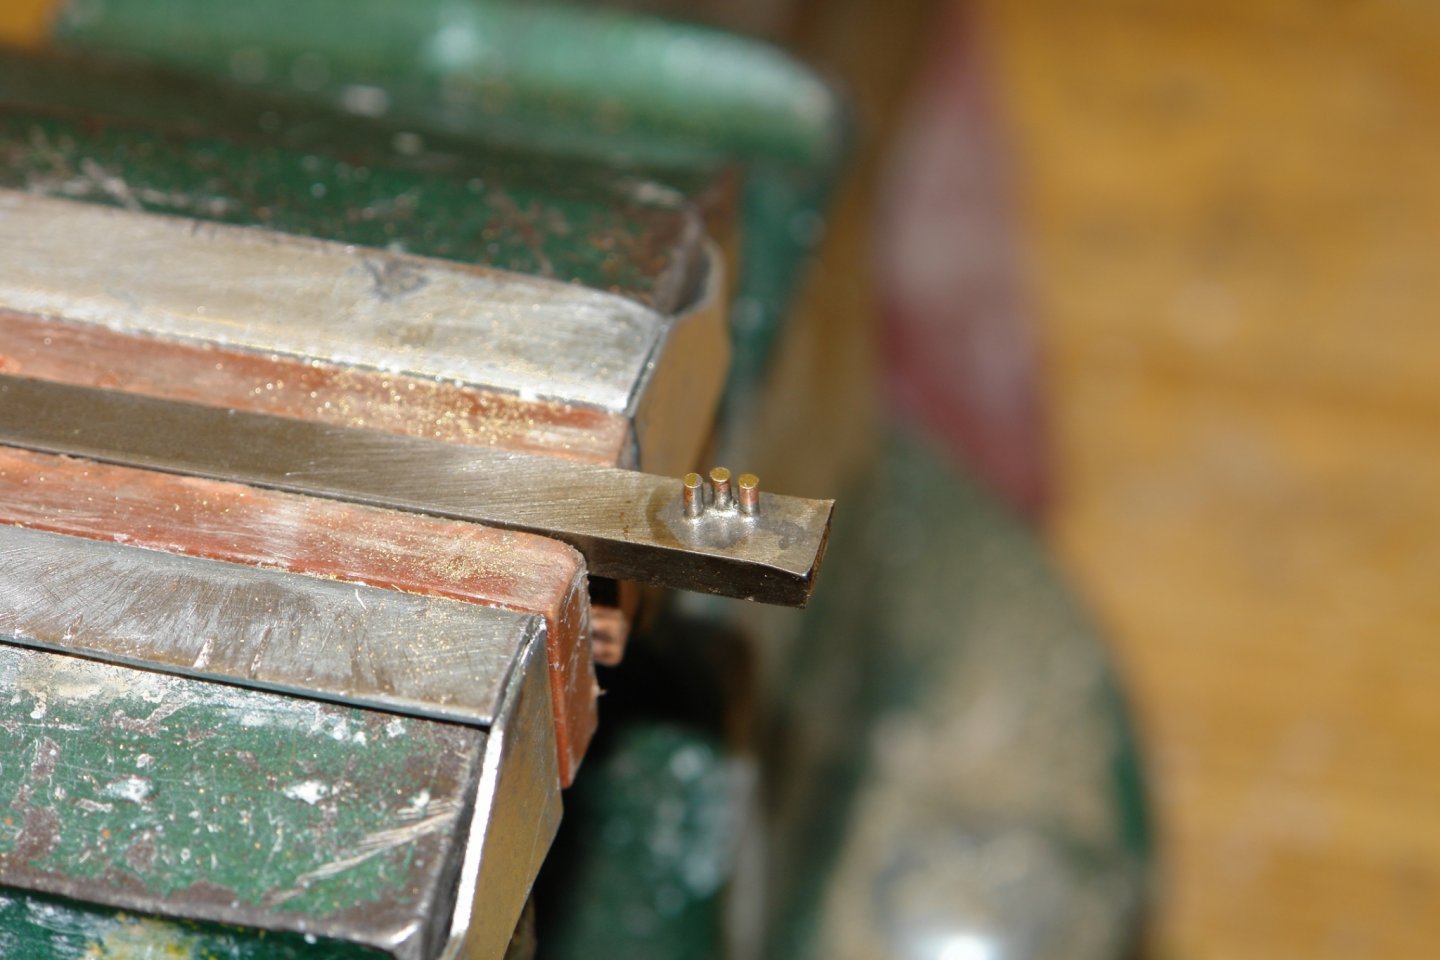
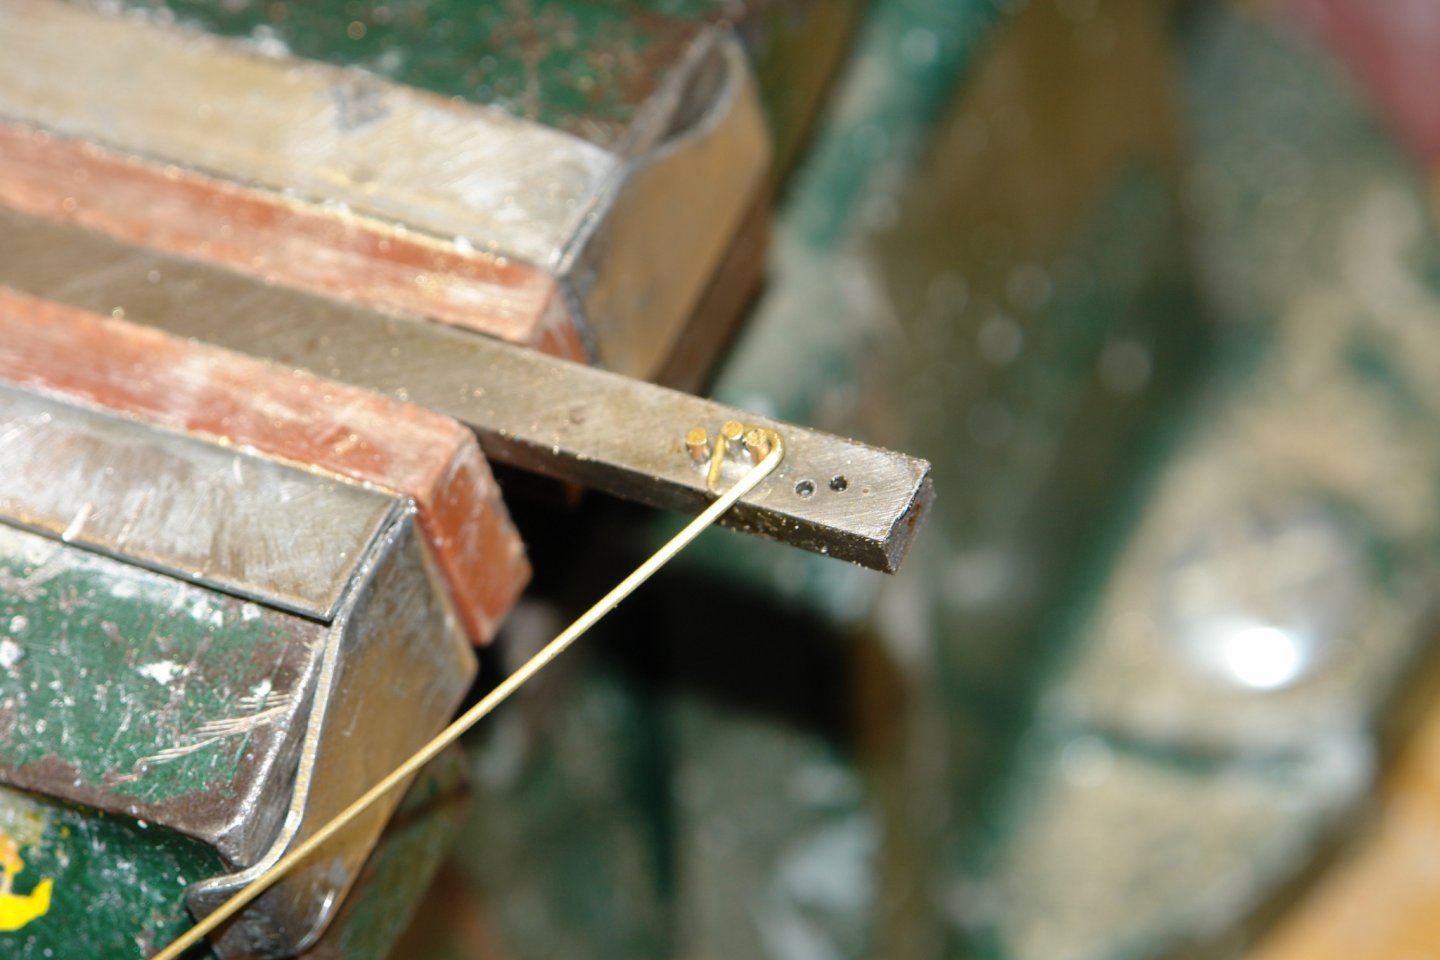
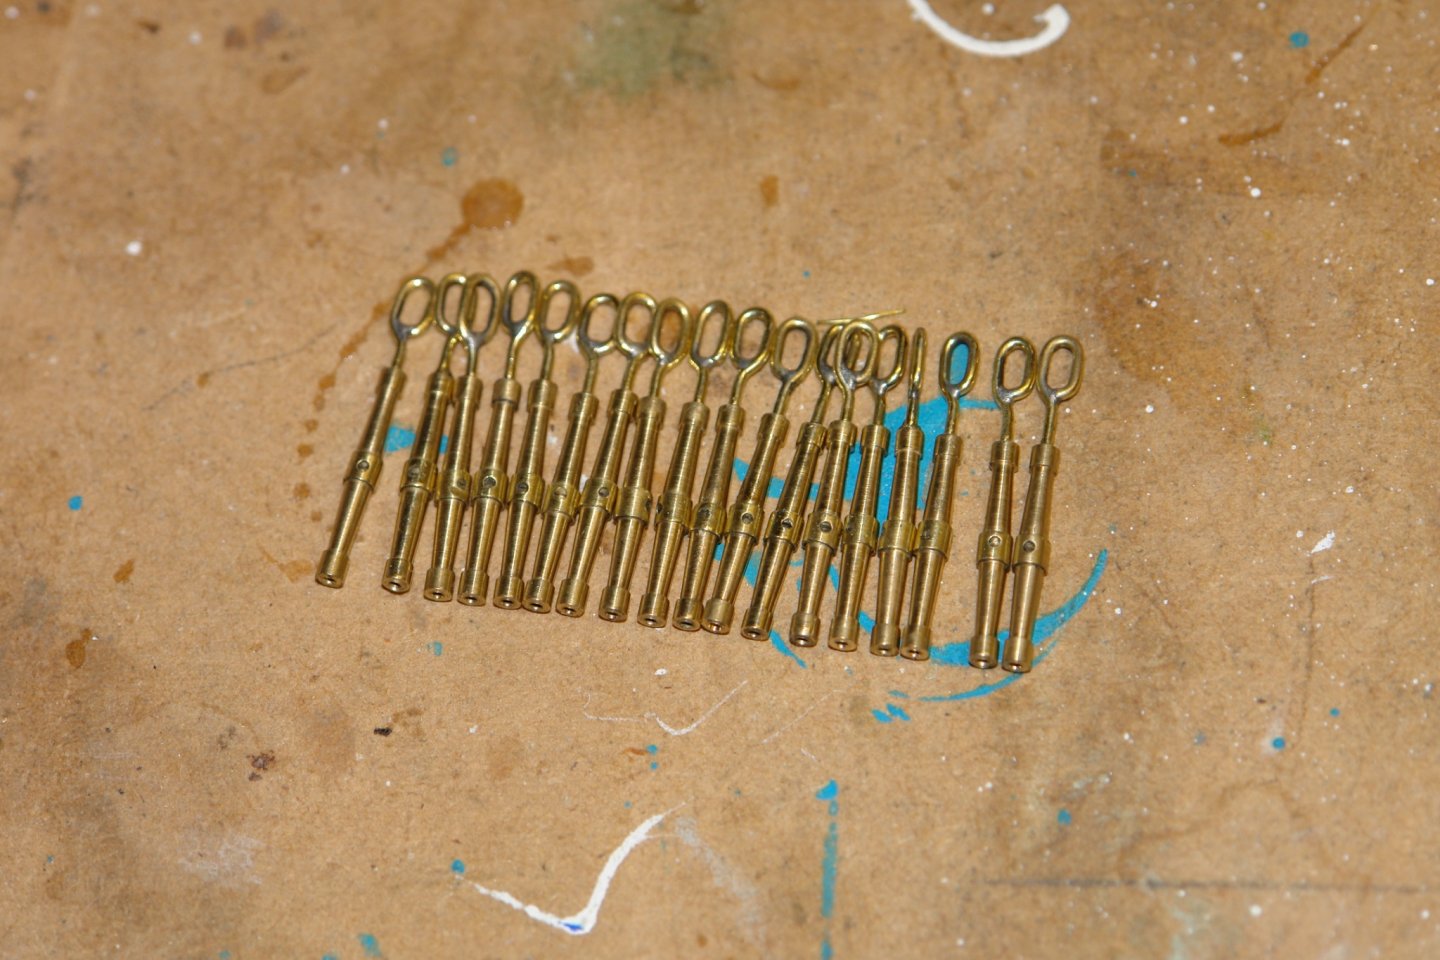
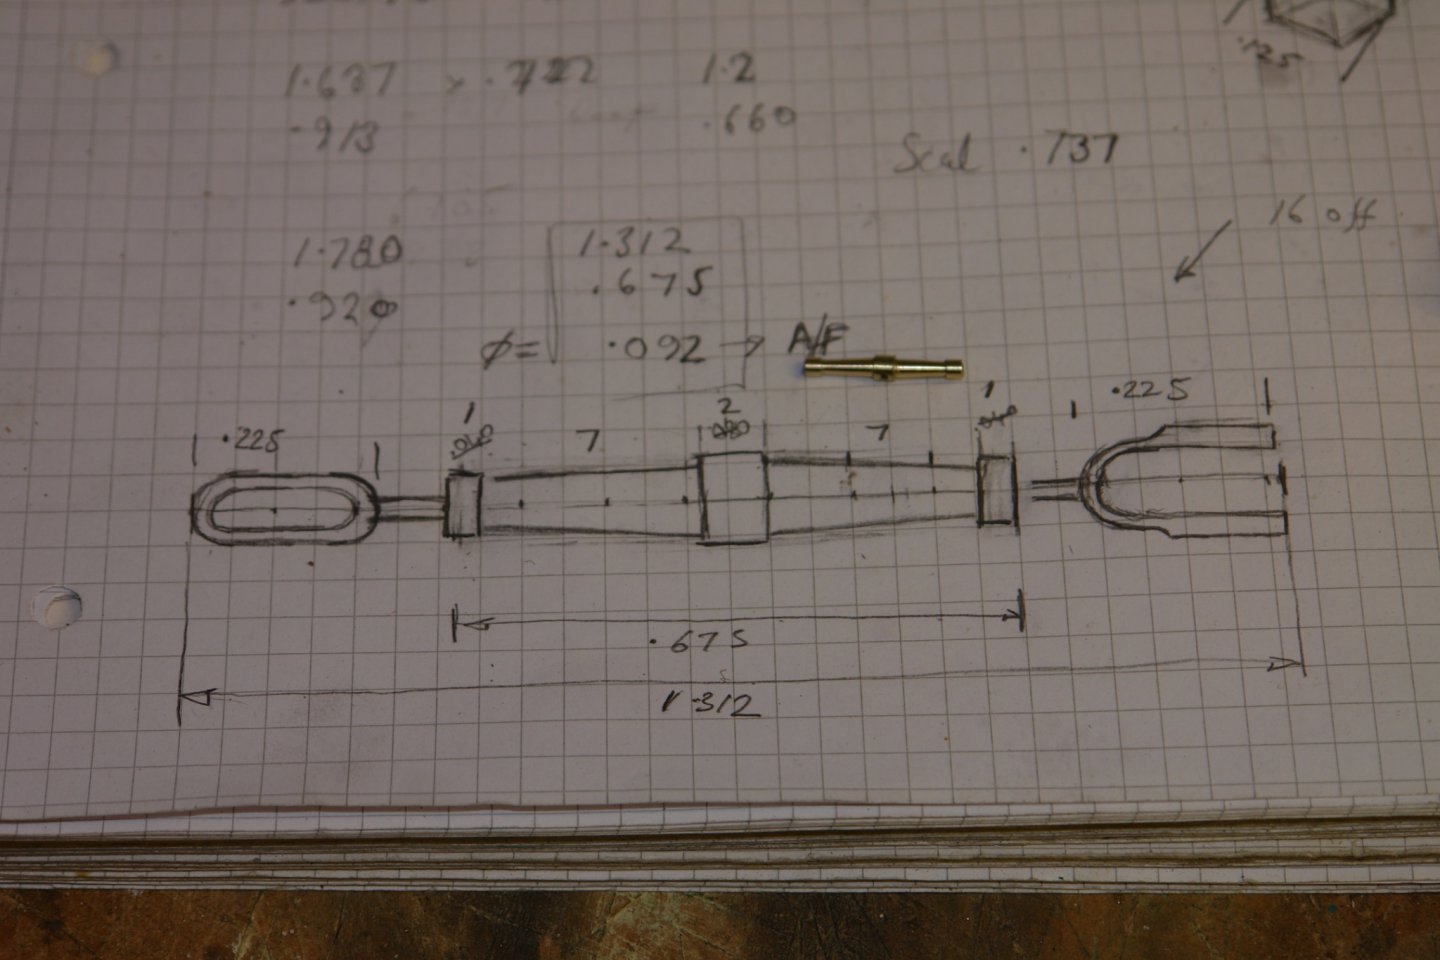
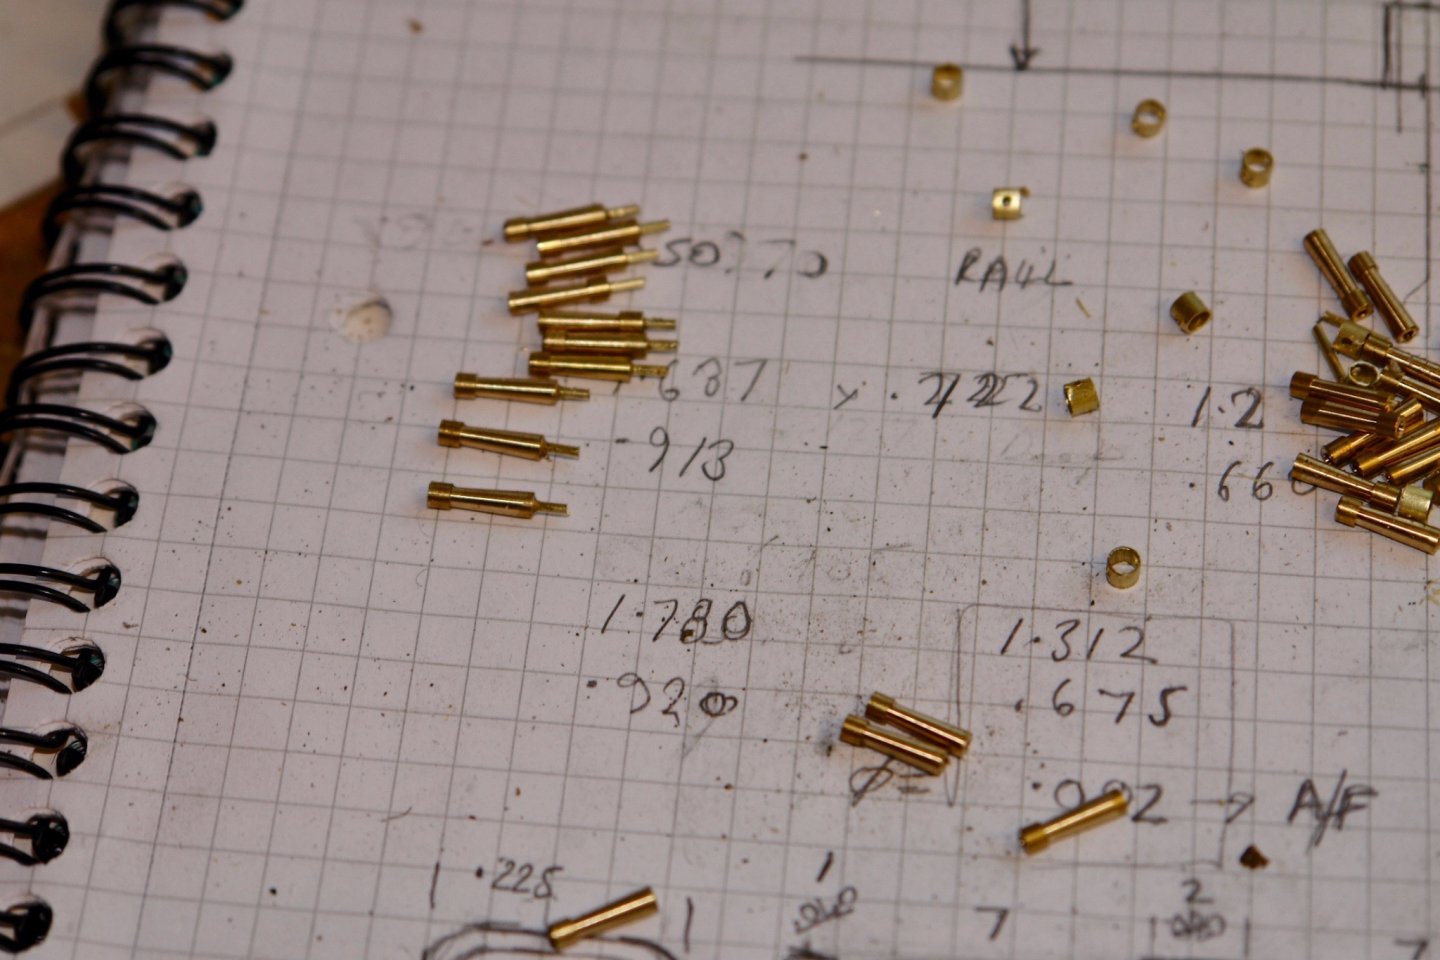
It has been quite a while since I last posted. The easing of lockdown regulations made catching up with family feasible and this plus various garden jobs led to little available time for boat building. What time I did get was quite disjointed and this didn't help progress. Thank you Michael, Patrick and Druxey for you comments and thank you to everyone for the thumbs ups. I made the 4 fairleads from a solid piece of brass bar .500" wide by .125" thick. I drilled a series of .0625" cross holes and then removed the central webs with a jewellers saw and needle file. The square edges were then rounded off and the resultant piece was removed from the bar. I glued this piece to a scrap of wood and slit off 4 fairleads .080" wide. A bit more filing to round the edges and then the base flange was drilled to take the mounting bolts and the roller. The rollers were turned and then the fairleads were mounted on the rails. I then moved on to the turnbuckles of which 21 were required. 16 for the mast shrouds, 3 for the bowsprit braces, 1 for the forestay and 1 for the mainmast brace. I started with a sketch. I proposed to make the body in 3 parts, two identical conical sections each with an integral collar and an axial .04" hole. The 3rd piece was a .080" length of tube to create the central boss. I then made one to check that it looked ok. I then proceeded with the manufacture of the next 20. The elongated eye was bent from .040" wire using a bending jig. The eyes were closed with soft solder. I then moved on to making the Y shaped section for the other end. I am part way through this but I don't like the results so may have to have a rethink.


-
Nice work Druxey --- drawing the planks on the plug is so obvious i am wondering why I didn't think of it!!! When I did my draughting training (50 years ago) at Rolls Royce we had a whole day given over sharpening our pencils to a 0.0125" thick chisel point. Bet that skill isn't taught any more.
- 433 replies
-
- 10
-
-

-
- open boat
- small boat
- (and 1 more)
-
Granddaughter still a pixie but you have given me an idea ------ never too early to start.
-
Love the interior fine dining views but no napkins??????
-
Patrick - i am pleased to see you back. This one looks very boat like - the designer must have been having an off day. Love the detail but hell of a lot to take in. The spiral staircases must have been hard.
-
Coming along very nicely Tom, much more elegant than I expected noting the humble beginnings.
-
A sweet little boat and nicely made. I look forward to seeing how it develops.