HOLIDAY DONATION DRIVE - SUPPORT MSW - DO YOUR PART TO KEEP THIS GREAT FORUM GOING! (Only 13 donations so far - C'mon guys!)
×


jbshan
-
Posts
1,222 -
Joined
-
Last visited
Content Type
Profiles
Forums
Gallery
Events
Everything posted by jbshan
-
Well, just to pick one, if your officer was standing next to a black-painted cannon on your model, the slight difference might show up. In the 1812 time frame, some of the pigments used to dye cloth might fade faster than today's chemicals, so would be perhaps blue jean color more quickly, especially having to be out in all weathers and strong sun.
-
While very, very dark indeed, put on your number one best and go stand next to a mortician. There is a difference. The navy may appear even darker than the black, depending. Or go to the tux rental place and compare a blue tux with a black one.
-
Just to keep perspective, I looked up a van de Veld painting one time. It had sold a couple of years earlier for about $7-$8 million. Of course you would need to build a new room to house it.
-
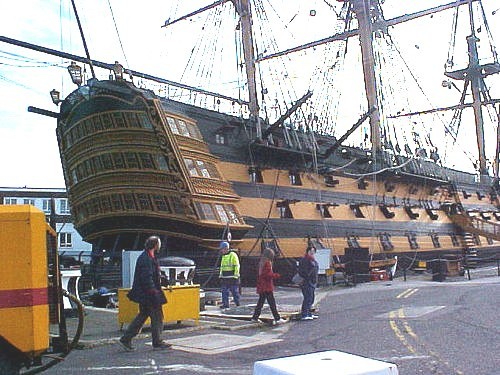
If you look objectively at the painting Shipaholic has posted, the artist has used a 'warm' tone for both the hull stripe and the shadows on the sails. I think the stripe is very close to the pics of Victory's new livery.
-
Go to the Constitution website for some pics. While there probably weren't strict dress regulations such as today, there may have been some uniformity from drawing from the slop chest.
-
If it's the same book, author, publisher, etc. from various sources, such as online booksellers and clearance houses, the prices vary according to collectors' criteria. Untouched still in the wrapper will be much more than a slightly used copy. Also, some of Chapelle's books were reprinted in a smaller format without fold outs. These second editions will be less $$$ than the older versions.
-
I've looked at both video links. I think, while the new colour may be a bit on the red side of things, and lighter in value than most of the older versions, they all could be called 'Naples Yellow' which is a mixture of yellow ochre and white. It's also a matter of the colour sense, the rods and cones and how those stimulations are perceived by the viewer whether this new one is actually 'pink'. I think it's close to the yellow shown in the opening shot of the hull in full sunlight. Keep in mind also that we are seeing this through several filters, the video to TV, to computer, and computer to our particular monitor. A small change in each could make for a large difference.
-

3D printer at Home Depot
jbshan replied to twintrow's topic in CAD and 3D Modelling/Drafting Plans with Software
You maybe might be able to rough out a hull such as you used to get in those old kits, but check the price and decide if it's worth having the ability to do a poor hull of undetermined material once for each ship. The working plastic guns you see on the news are made with a machine with vastly higher resolution than this one is likely to be. -
Try this: http://modelshipworld.com/index.php/topic/9492-how-did-davits-work-on-old-ships/ And here is a pic: You might get away with a pair of cutters for the boats, 25 to 30 ft. range, a jolly boat inside a launch on skids on deck. 'Fouled Anchors' is excellent and definitive.
-
Try letting the wood cool and dry while clamped in place before you try to glue it.
-
Gun locks had a lead sheet cover to protect them from the weather. See pics of HMS Victory guns.
-
1783 is certainly within the time limits for coppering, and they were apparently willing to pay for a lot of modifications for this expedition.
-
You did a pretty good job with those filler blocks. Congrats. If you haven't already discovered, the filler may be a different hardness to the balsa and it can be really easy to sand the balsa down and leave the filler standing proud. If you're past that point, let it be a forewarning for others that may be following along. Sanding dust is insidious. Do you have a shop vac you can rig up for an exhaust at your work area? Otherwise, do you want the top bunk or the bottom?
- 52 replies
-
- 1
-

-
- muscongus bay lobster smack
- Midwest Products
- (and 2 more)
-
Gaw in Sunny Spain mentioned a hinge. Try this for a spectrum of detail by scale: Real life- built in a factory, or forged by a blacksmith, tool marks here and there, bolt or rivet heads with shanks. Large scale- hand made piece of brass, working pin, tool marks gone, bolt heads, may be used to attach the hinge. Medium scale- flat piece of brass, maybe plastic or paper, simulated pin, simulated bolt heads, possibly glued in place. Small scale- brass foil or paper, glued in place. Tiny scale- hinge simulated with paint.
-
Here is mine, along with some links to others. The links are old and might not work. http://uvsmgshipmodelguild.wikispaces.com/A+Ropewalk
-
Some kits come with nylon line for rigging which I find hard to work with, and often only in a few sizes. Cotton or linen works better, for my money. You can try a vendor such as Chuck Passaro, of this list, he is reputed to have some nice stuff. If you can't find the right size, and as you progress you'll learn to tell the difference, or you need some special line, anchor cable for instance, then it may behoove you to begin making your own.
-
Aren't we all going to feel pretty silly when we learn they're part of a laminar flow scheme?
-
My New Found Respect for Table Saws
jbshan replied to AON's topic in Modeling tools and Workshop Equipment
And keep your head in the game until the saw is turned off. My old professor told the story of a young lady who made her cut successfully then turned to talk to a friend, passing her hand across the saw blade. -
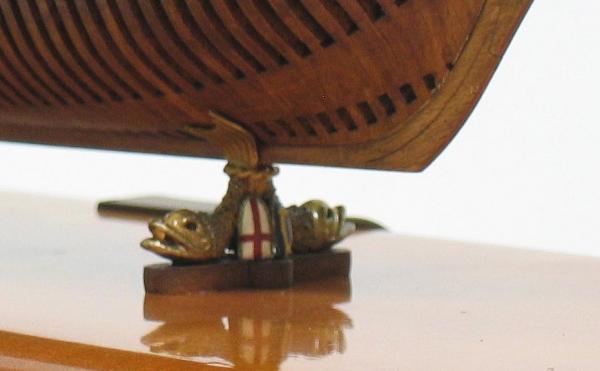
Actually, I was thinking of these little guys. Hard to make an interim mold to make pairs of them, whereas a wax would do it nicely for a one-off.
-
It's an ancient technique. You might inquire if another metal is possible since silver needs polishing. Nickle and chrome stay clear, gold can be put onto a base metal in micron thicknesses so not probably as expensive as you might think. Because the wax and plaster goes away, there's no problem doing 3D objects, just doing more than one. A new wax I think needs to be made for each casting.
-
Michael, look here, page 15. http://modelshipworld.com/index.php/topic/10038-us-brig-niagara-by-xken-model-shipways-scale-164/
-
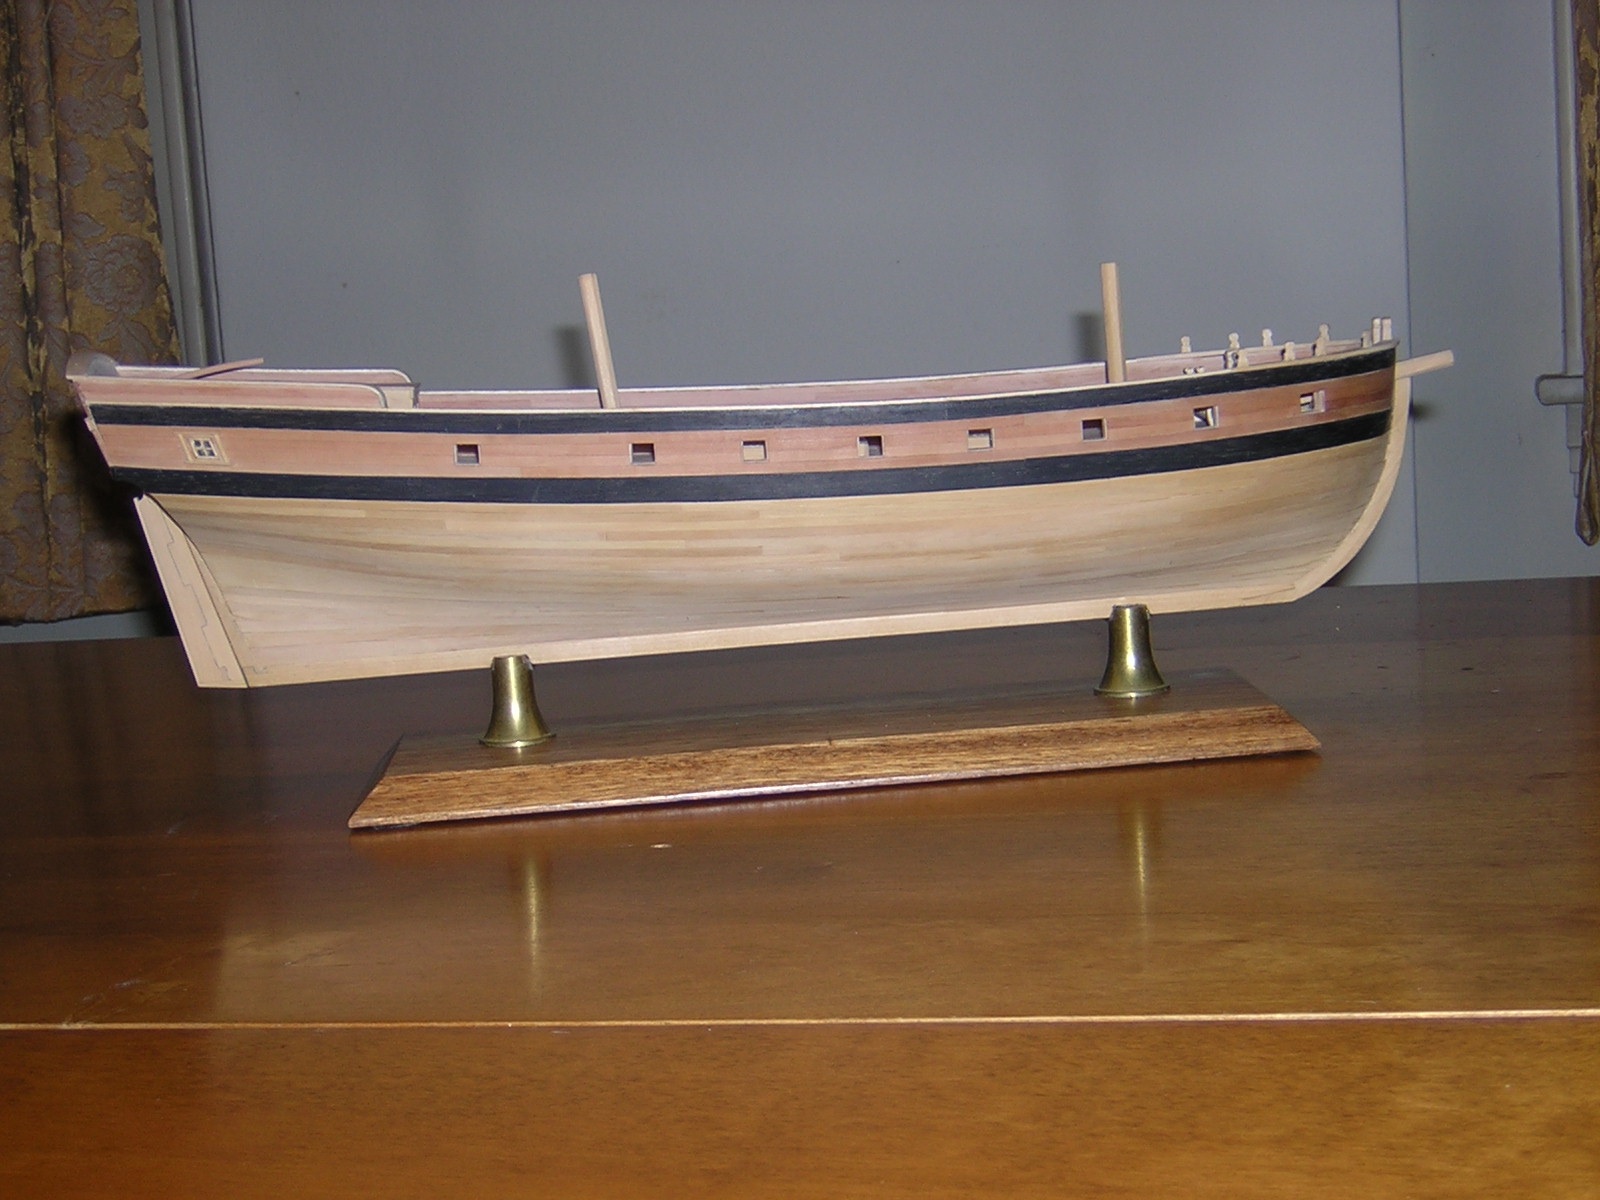
Mike, what works like a dream for one may not for another. I have a pair of crimping pliers and never use them after the first few tries. I prefer to spile and cut the planks, then use enough heat and moisture to get them in to the hull. I think spiling for the up and down bending may ease the in and out bending needed since you only have that to deal with instead of both. Beginners should take druxey's advice and read all the tutorials and practice, practice, practice. Here is my Lexington model, my second planked hull.

-
I believe Constitution has thicker plank running through the line of the hatches, which is left 'proud' of the rest of the deck plank, some of which may be 'let in'. I could check my sources for accuracy on how many planks and where located if needed, but at least she may serve as an example. Constitution and Fair American are near contemporaries, and both American, if the story of the FA model are accurate.
-
The crimping pliers will help bend a plank in and out, but won't help with up and down, so you still will need to learn about cutting a plank so that when you bend it in, it will fit snugly with no to little edge setting. There's no silver bullet or magic wand.
-
Stockholm, yes, the paper, when damp with glue, eases around the several angles on the stock. If you did it with metal you would have a very complex shape to be bent around that needs to match up when the two ends meet.