kurtvd19
-
Posts
3,048 -
Joined
-
Last visited
Content Type
Profiles
Forums
Gallery
Events
Everything posted by kurtvd19
-
 Mark: I just dropped off the kit at the PO. Says it is due for delivery on Saturday. Have fun. Kurt
 -
It is a kit. Start a log in the kit builds. When several are started we can set it up in the group build area.
-
Welcome aboard
-
Can i live without a BYRNES TABLE SAW
kurtvd19 replied to shihawk's topic in Modeling tools and Workshop Equipment
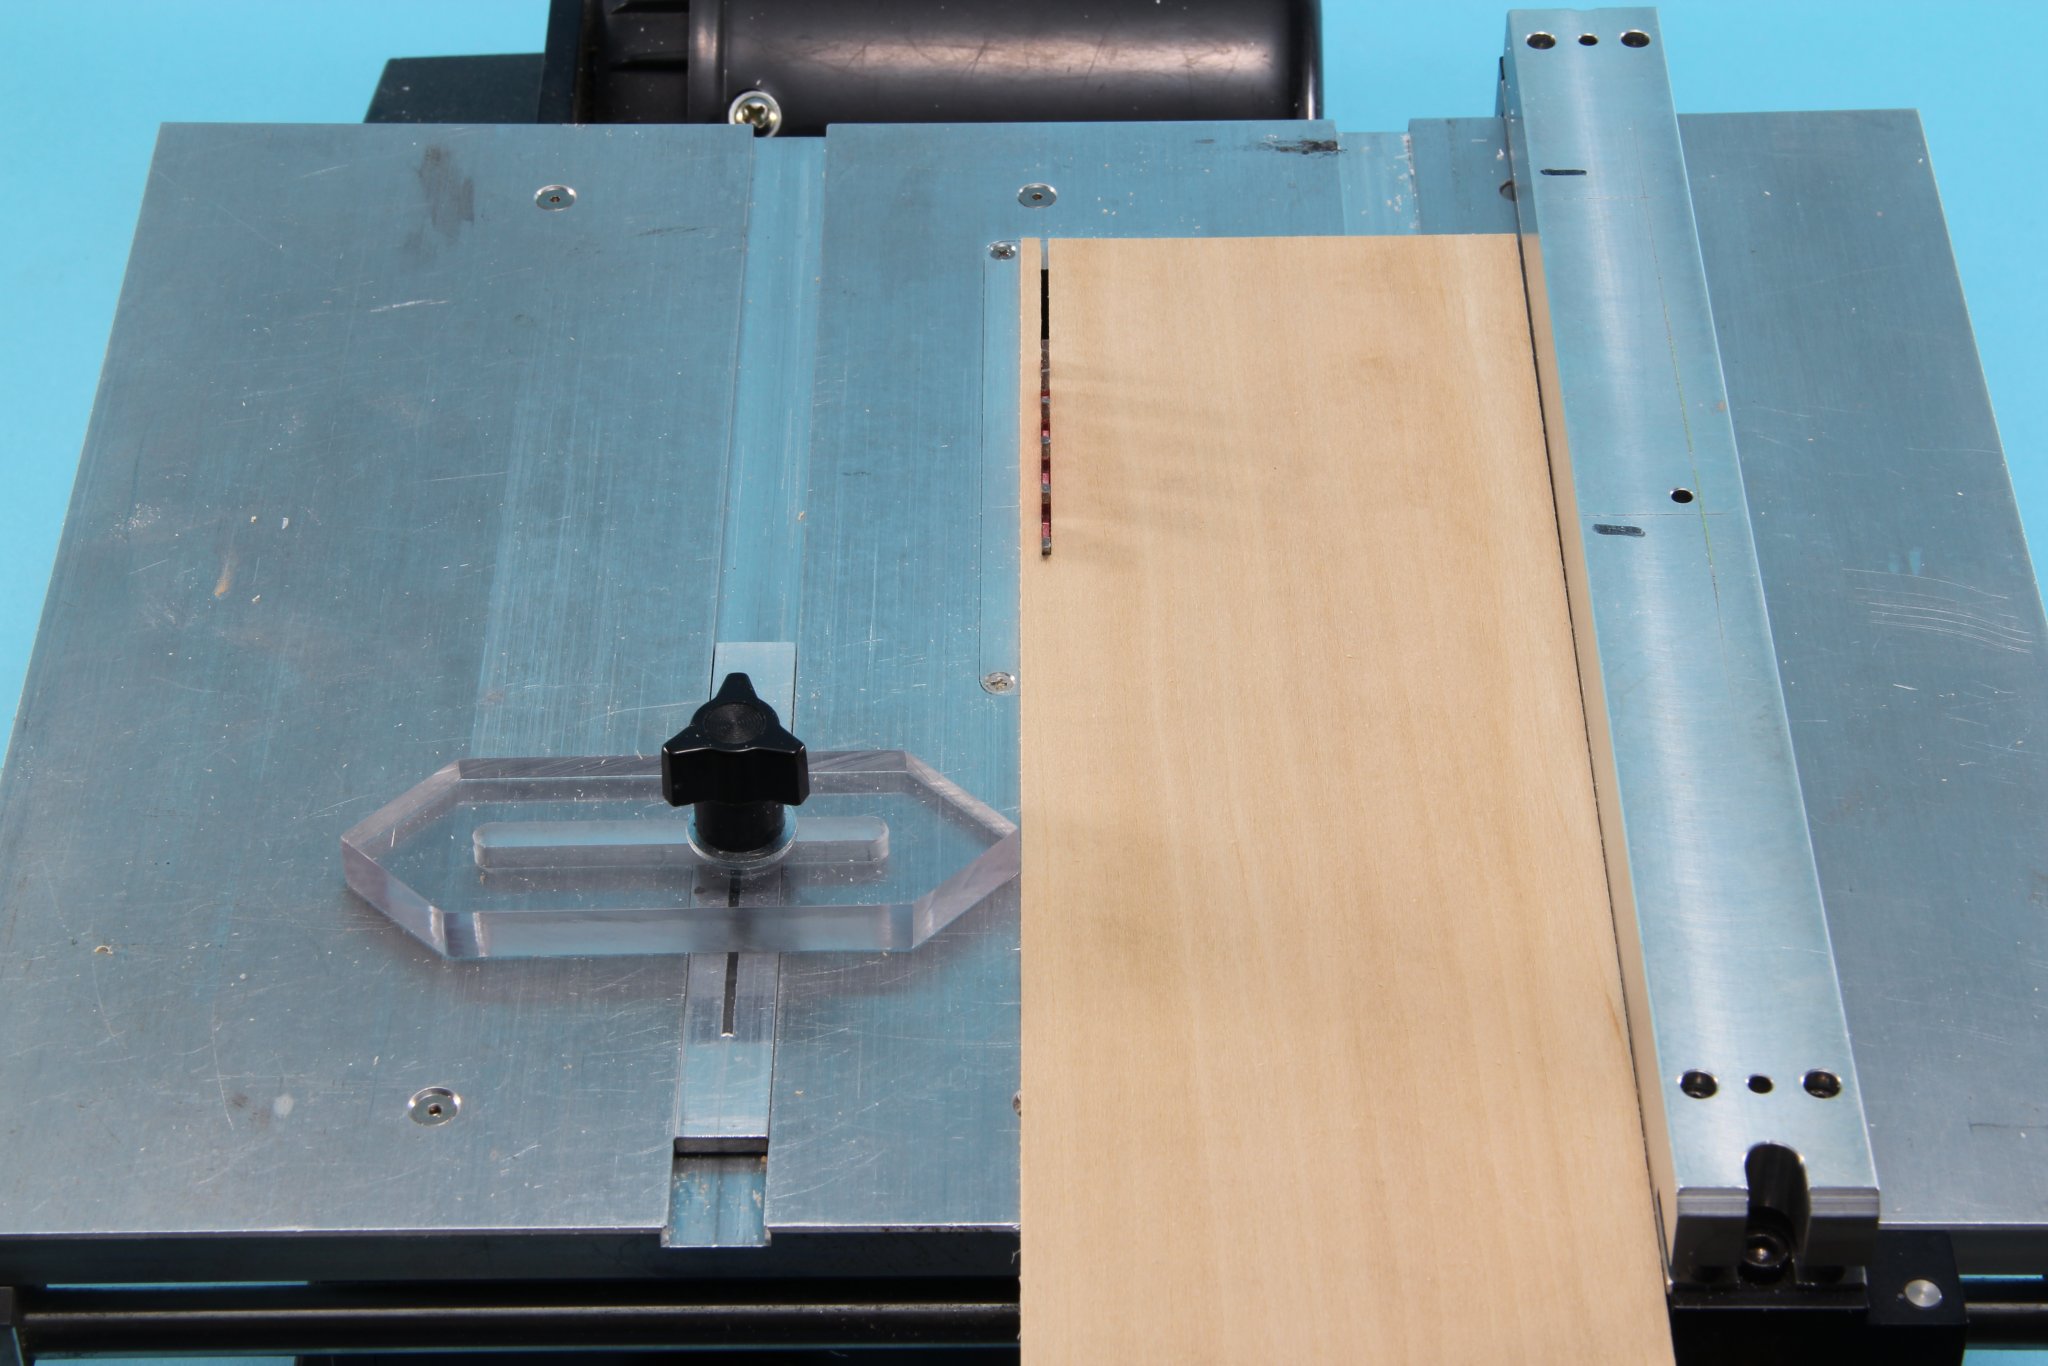
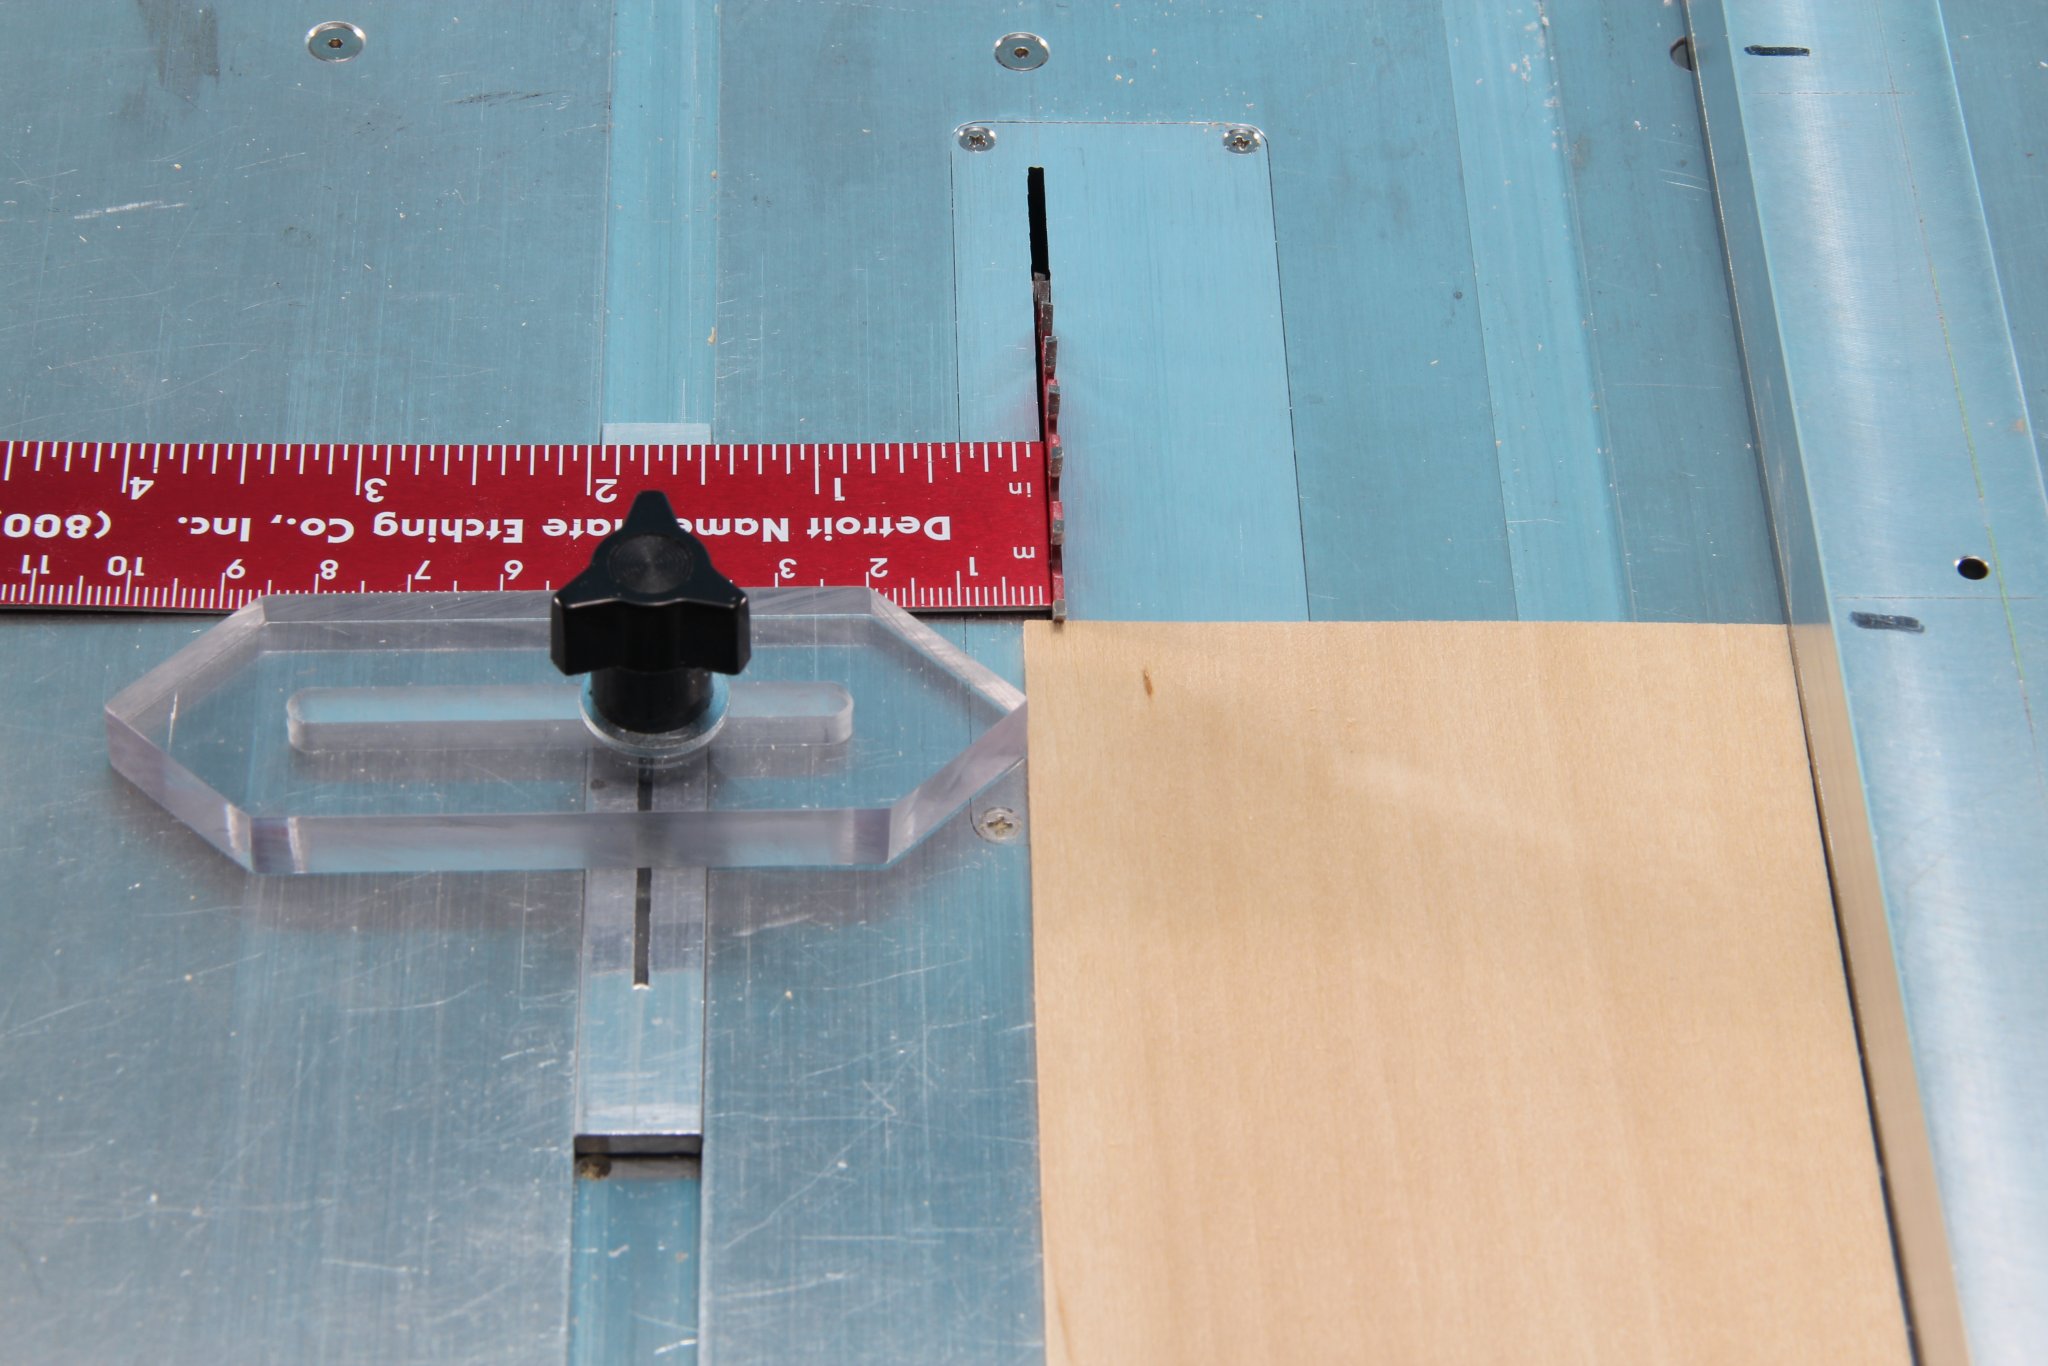
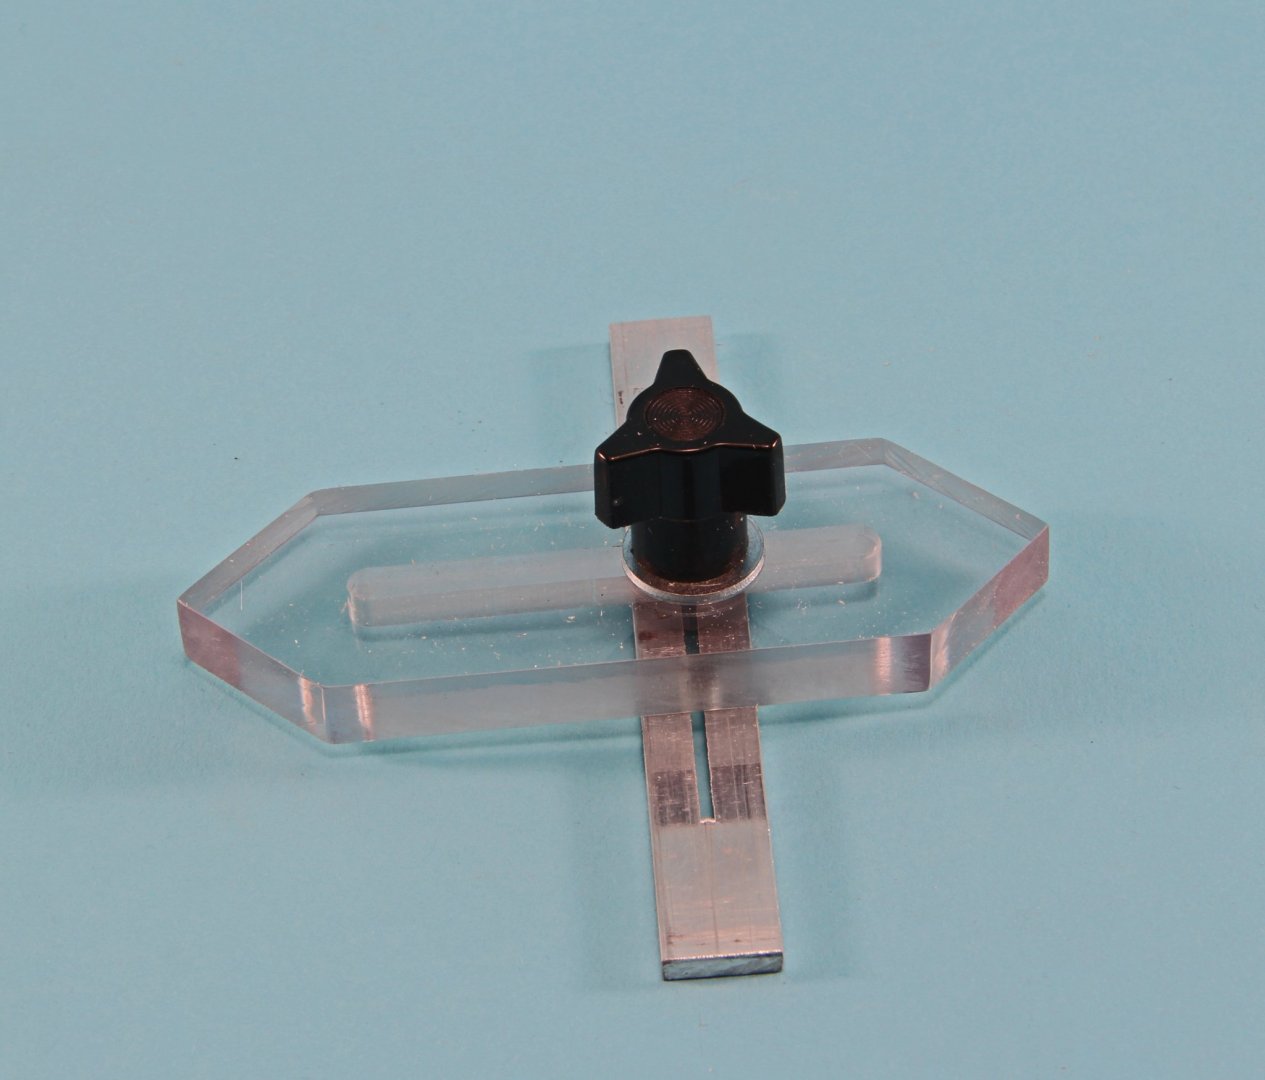
Eric: Sorry. The extended rip fence is $30 and well worth it. The Miter Gauge adjustable extension is $12 and well worth it. I got the prices messed up. The $8 miter bar I mentioned isn't such a good buy when the adjustable extension is only $12. The micrometer stop isn't needed in my opinion. The saw does not have markings for width of cuts. Use a metal scale to measure from the blade to the rip fence. If you are going to be cutting planking make an adjustable tool to set the width like the one I made - photos attached. Absolutely no difference in plank width because the tool isn't moved between planks - the rip fence moves but the tool to the left of the blade sets the width. Kurt


- 367 replies
-
- 10
-

-
Can i live without a BYRNES TABLE SAW
kurtvd19 replied to shihawk's topic in Modeling tools and Workshop Equipment
Eric: You will never regret buying one. I would get the extension bar for the miter gauge. There is a plain one for $8 or the adjustable one for $30. I add a longer piece of hardwood to the $8 bar when I am doing angled cuts - attached with double faced tape. If I have occasion to order something else from Jim I will probably pick up the $30 adjustable one - but I haven't had any issue with just adding another piece with the tape. But you really need one or the other. The extended fence is a very good - must have - addition. I think the std fence is just too thin - but I also use a big Bissemer (sp?) style fence on my 10" saw. A couple of zero clearance inserts so you can have one matched to each blade you use. The other accessories are luxuries. I purchased the tilting table and have used it one time in several years - it paid for itself on that job but it hasn't been used since. Kurt -
Welcome to MSW
-
I will have to check my files - I didn't have the photos I posted, noted as being from a later build. I will check the UofW library. Ralph would have had the right boat noted in their files. The photos in my collection that I am sure are of the correct Chaperon seem to show the same type of boat as in the photos I posted. Kurt
- 133 replies
-
- 3
-
-
- chaperon
- model shipways
- (and 2 more)
-
Bob Friedman, the owner of SeaWatch Books is hospitalized. He is getting better and expects to be home sometime this week. Please be patient if you have placed orders or sent emails to SeaWatch recently. Bob will be able to answer emails and process orders soon. He asks that you be patient and that he will answer emails and process orders ASAP. Thanks, Kurt
- 5 replies
-
- 10
-
-
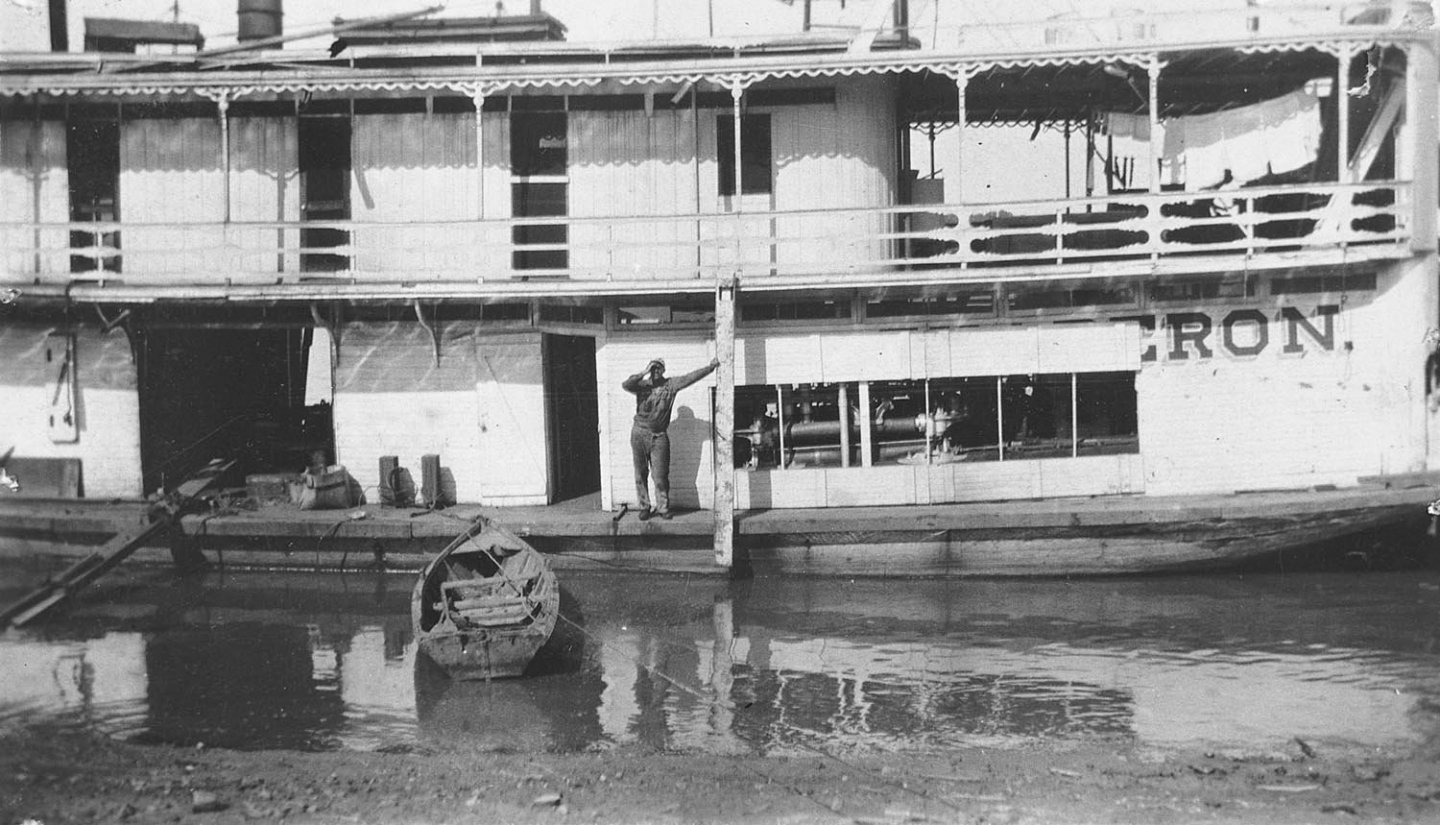
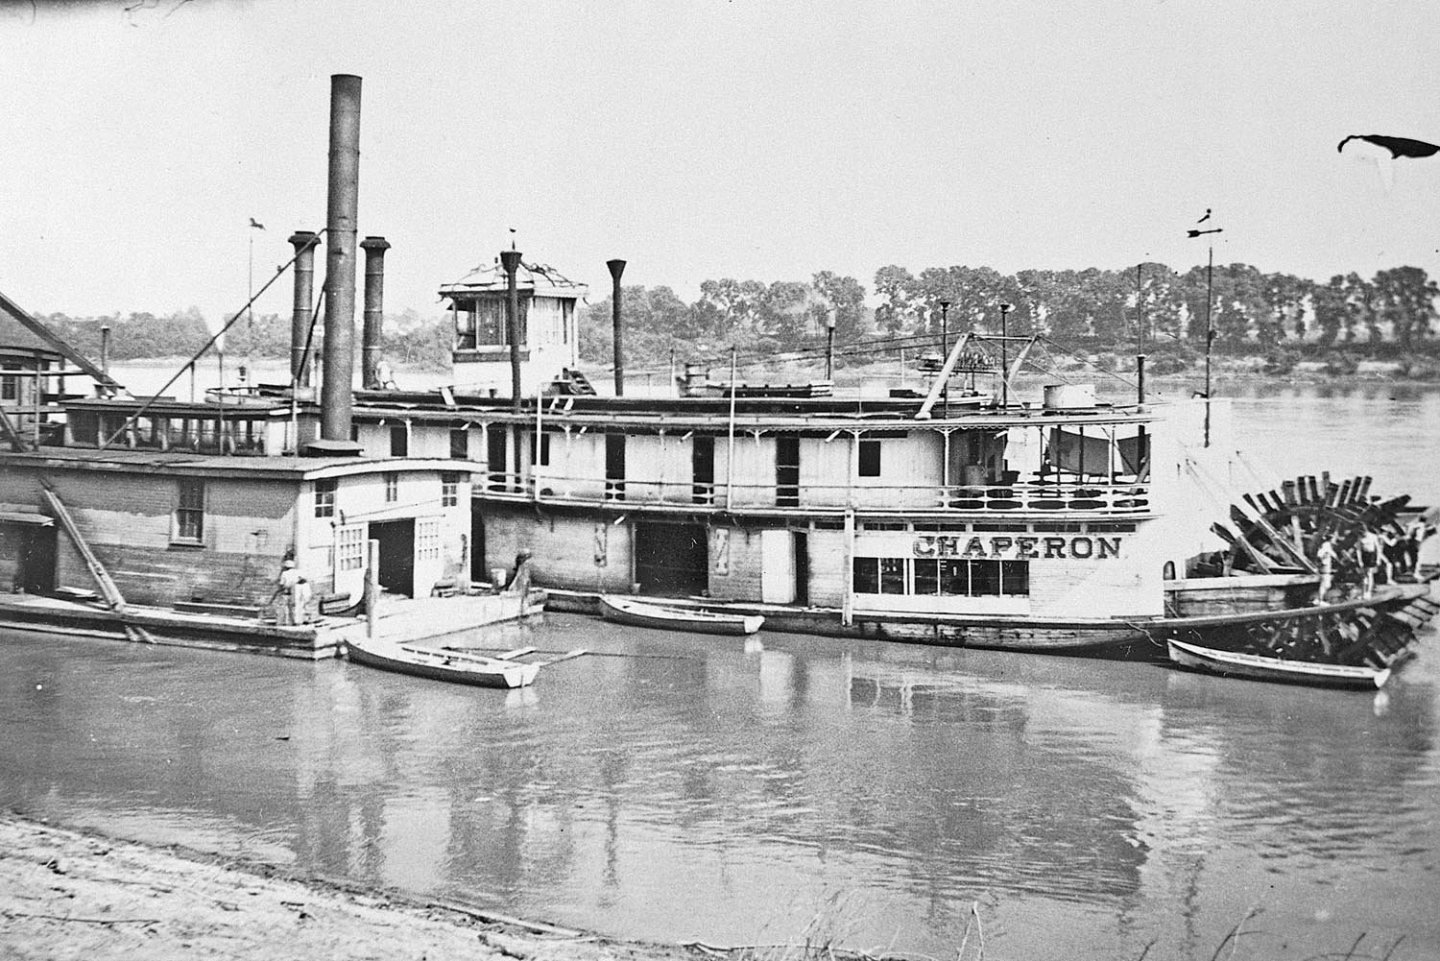
That computer generated Chaperon is neat. The guy seems to have used a lot of sources to put it together but I think there are a lot of presumptions - especially the interior. The interior looks just way too elegant to be accurate from the history I was able to find on the Chaperon. I could be wrong about this and I would sure be interested in seeing more of the documentation he used. I will try to find out more. As to the life boat I have attached two photos from my files that clearly shows it tied off alongside. Other photos I have seem to support this being the same boat are small and unable to be enlarged enough to confirm it's the same boat. There were changes to most steamboats over time and the aft boiler deck cabin structure is different than the kit. I have photos of the Chaperon that show the aft end that agrees with the kit. But there is documentation of several rebuilds of the Chaperon over time and none of the photos have been dated. The photos were taken from various sources - obviously none are copyrighted. As to rudders, I have not sen any photographs that show the rudders and I wouldn't say if it had two or three forward rudders. I have never seen any evidence of monkey rudders behind the wheel. If you like the look of three rudders go for it - there isn't anything that I have seen that would say it had two or three but three was very common.
- 133 replies
-
- 6
-
-
- chaperon
- model shipways
- (and 2 more)
-
Is there a Beginner’s Guide to Metal Work?
kurtvd19 replied to VTHokiEE's topic in Metal Work, Soldering and Metal Fittings
Greg: I have used the paste/flux combo and it works great with a torch. Have not tried it with the resistance soldering but I expect it would work fine. You are so right about warming the piece and that the solder flows to the heat - a very important point that isn't stressed enough. -
Is there a Beginner’s Guide to Metal Work?
kurtvd19 replied to VTHokiEE's topic in Metal Work, Soldering and Metal Fittings
I have used it with resistance soldering as well as a torch. -
No need. Members can see this thread and know their problem will be addressed by Model Expo.
-
With the manner in which the COP was built I can guarantee you that the rails would have been plain black pipe - not brass. I would get out the green paint. Kurt
- 26 replies
-
- 2
-
-
- city of pekin
- model shipways
- (and 1 more)
-
I said earlier that Model Expo always carries through on their replacement parts policy. On an unrelated issue from another customer regarding parts replacements - for a many years old kit - the owner of Model Expo contacted me today to help him contact one of our MSW members that he had a problem contacting. I was able to help him so he could contact the guy rather than waiting for the guy to wait a long time and then try to contact them again. Was able to help him. Just shows they do care and will do everything they can to get the parts to the customer.
- 13 replies
-
- 11
-
-
They usually respond with the appropriate parts but they never seem to acknowledge the requests other than by the delivery of the parts. One would think that with their commitment to providing the parts that they would also figure out that not acknowledging the requests makes people write to this forum thus informing the world that they screwed up and provided bad parts to the customer and then left the customer wondering if they were in fact going to provide the parts.
-
Micro Mark should have on the cover of their catalog - Guaranteed that anyplace you look will be cheaper than here. 😀
- 23 replies
-
- 11
-
-
Weak Joints - Deadeye Strops
kurtvd19 replied to VTHokiEE's topic in Metal Work, Soldering and Metal Fittings
Stay-Brite is a silver bearing solder - not a true silver solder as it melts at a lower temperature. However it plates and blackens like a silver solder. It is strong enough for any rigging application and it is easier to use than a true silver solder. The silver solder pastes work well and are fairly easy to use. But they are not needed for strength in this application. Kurt -
David - thanks for your help in making it a success. Kurt
-
Magnifying headset advice....
kurtvd19 replied to CPDDET's topic in Modeling tools and Workshop Equipment
Glass lenses. Plastic lenses are a BIG compromise. The previous discussions covered the whys. -
Here is the link to Glenn's finished model of Heroine. https://nautarch.tamu.edu/model/report5/reconcomplete.htm
-
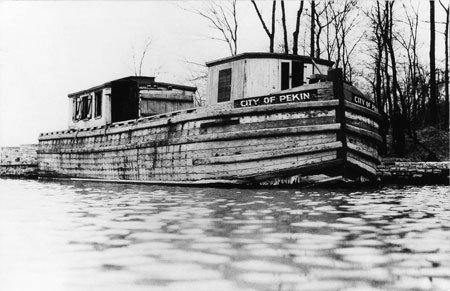
For an idea of what they had to work from when the boat was surveyed in 1937 to draw up the plans that Model Shipways later used to develop the kit, the attached photo is from the 1937 HAMMS survey. The aft 40 ft. of the hull had been removed to use the steam engine on another boat. There were other derelict boats in the area that were documented for details of the stern to come up with a "representative" stern. Kurt
- 26 replies
-
- 5
-
-
- city of pekin
- model shipways
- (and 1 more)
-
You deserve to get a lathe for your 50th. The Sherline is the Cadillac of small lathes - at least until Byrnes makes one. Look at the Taig lathe https://taigtools.com/dealers/ I was completely happy with the one I had for several years until a club member offered me a Sherline for a price I couldn't pass up. I hung onto the Taig for some time before selling it to another club member because I thought that having two lathes might be convenient as multiple small table saws are to me. It wasn't like having the multiple saws so I sold it. I know others who own Taigs and all are very happy with them Not being a machinist by any stretch of the imagination the Taig was completely adequate - but if one is an accomplished machinist the Sherline will do things the Taig just can't do. Kurt 😀
-
Half Hull Planking Project
kurtvd19 replied to tlevine's topic in NAUTICAL RESEARCH GUILD - News & Information
We are mailing the first 6 kits today. A bunch more are ready but pending payment. The office sends tracking numbers when kits are shipped. As the PDF instruction manual isn't yet posted for download it will also be emailed. Kurt
-
Half Hull Planking Project
kurtvd19 replied to tlevine's topic in NAUTICAL RESEARCH GUILD - News & Information
PLEASE HELP US WHEN ORDERING Please help make it easier on the office as we are finishing the conference registration process along with the usual membership renewals, etc. by providing the following information when emailing the office about purchasing a kit. We are getting emails saying “I want to buy the planking kit” without a name or address or how you want to pay. This makes it necessary to send an email asking for this information. Also, the prices are listed here, please don’t email the office asking how much the kit is or how much the shipping is. If you want a PayPal Invoice sent, we need to know your name and PayPal address. We also need your complete name and mailing address in the email – please don’t make Mary send emails asking for this information. If you are using a credit card the best way to order is by calling the office. Or by email, please provide the name on the card, your name and address and the card number and expiration date and security # off the back side. Feel free to send the card details in a separate email. Thanks -
Half Hull Planking Project
kurtvd19 replied to tlevine's topic in NAUTICAL RESEARCH GUILD - News & Information
The final shipping weight was a bit less than earlier calculations so we have been able to reduce the US shipping to $10.00. Unfortunately the weight difference doesn't affect non US shipments. We will refund the $5.00 for those who paid the higher US shipping. The shipping date has been moved up to starting 10-16-19. Kurt